manuals.online logo
Brands
  1. Home
  2. •
  3. Brands
  4. •
  5. Olympus
  6. •
  7. Digital Camera
  8. •
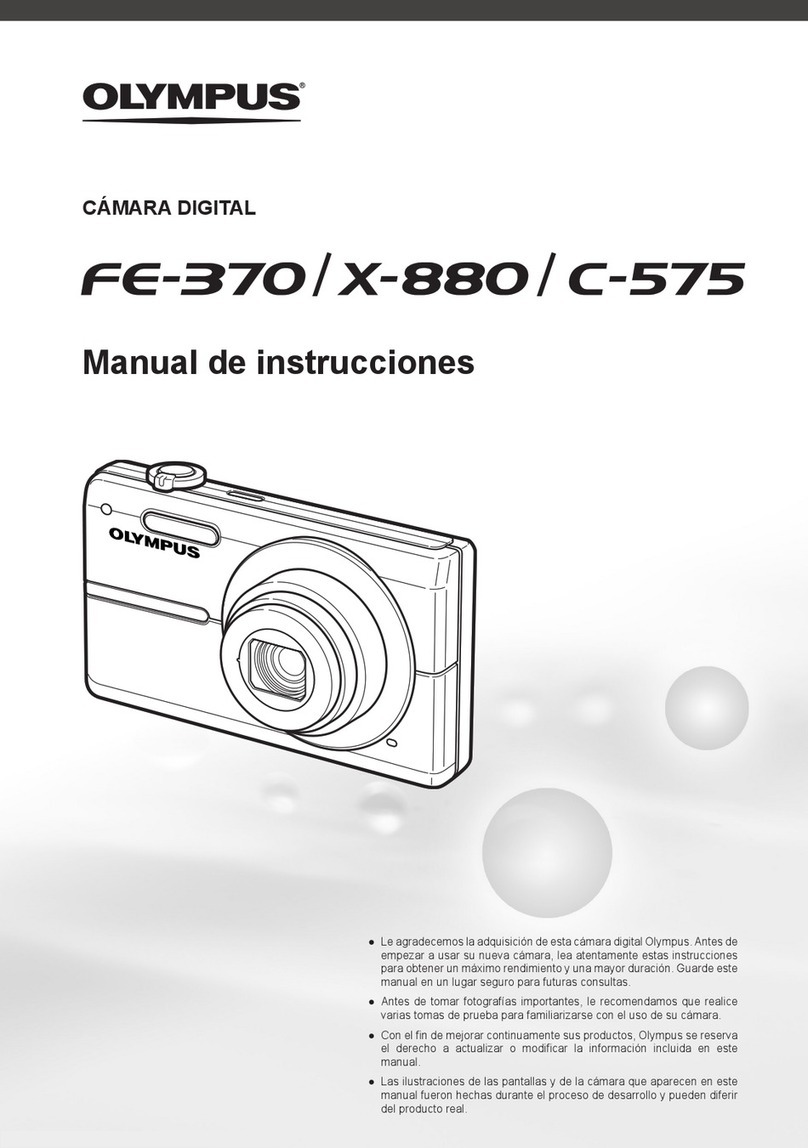
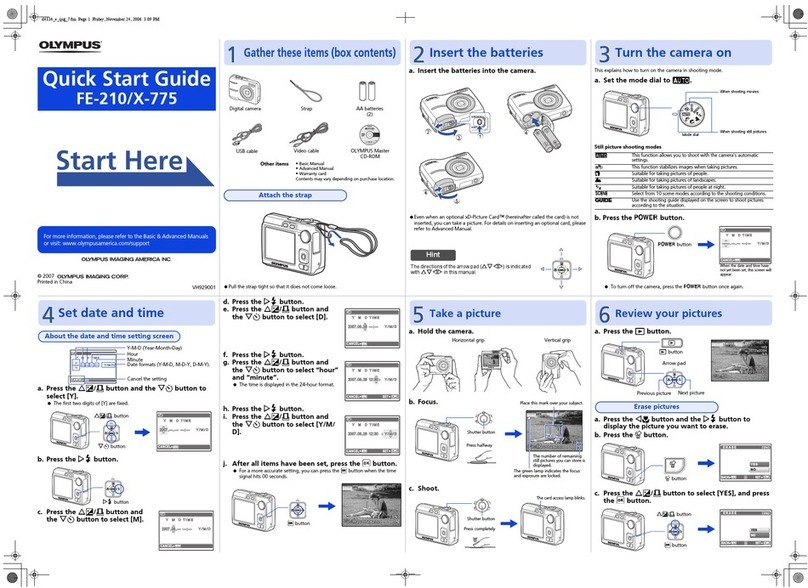
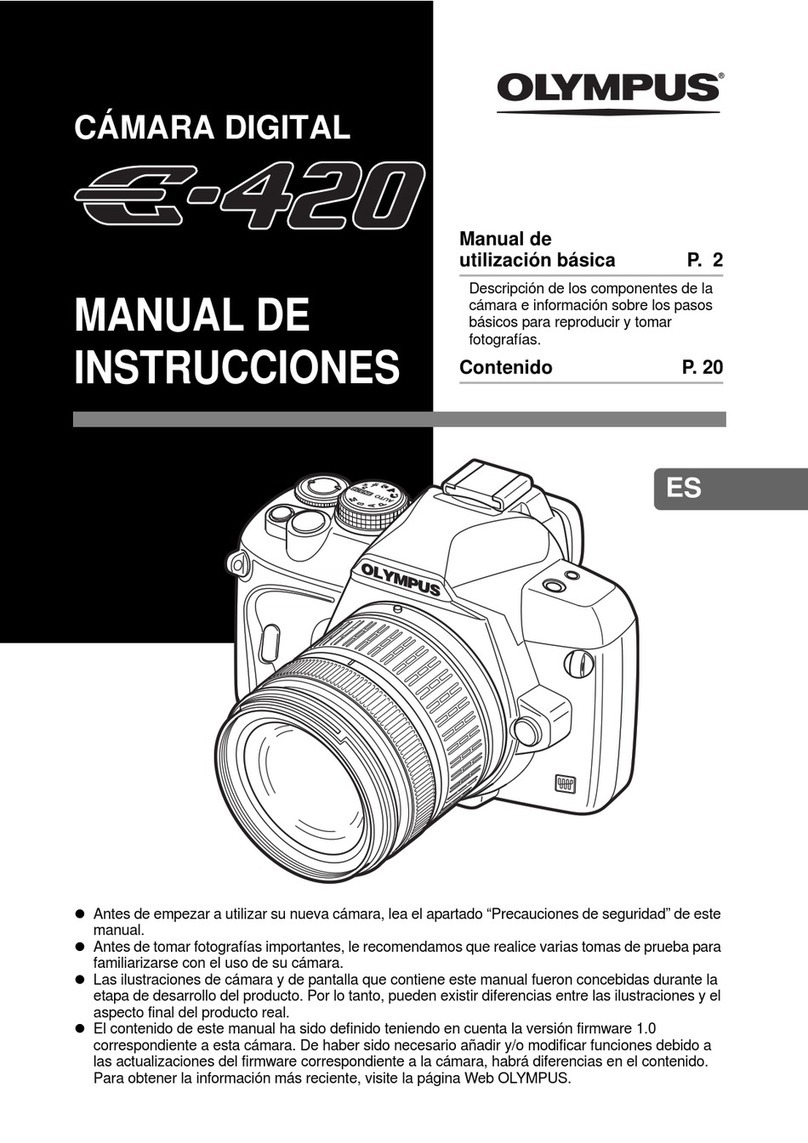
  9. Olympus FE 370 - Digital Camera - Compact User manual
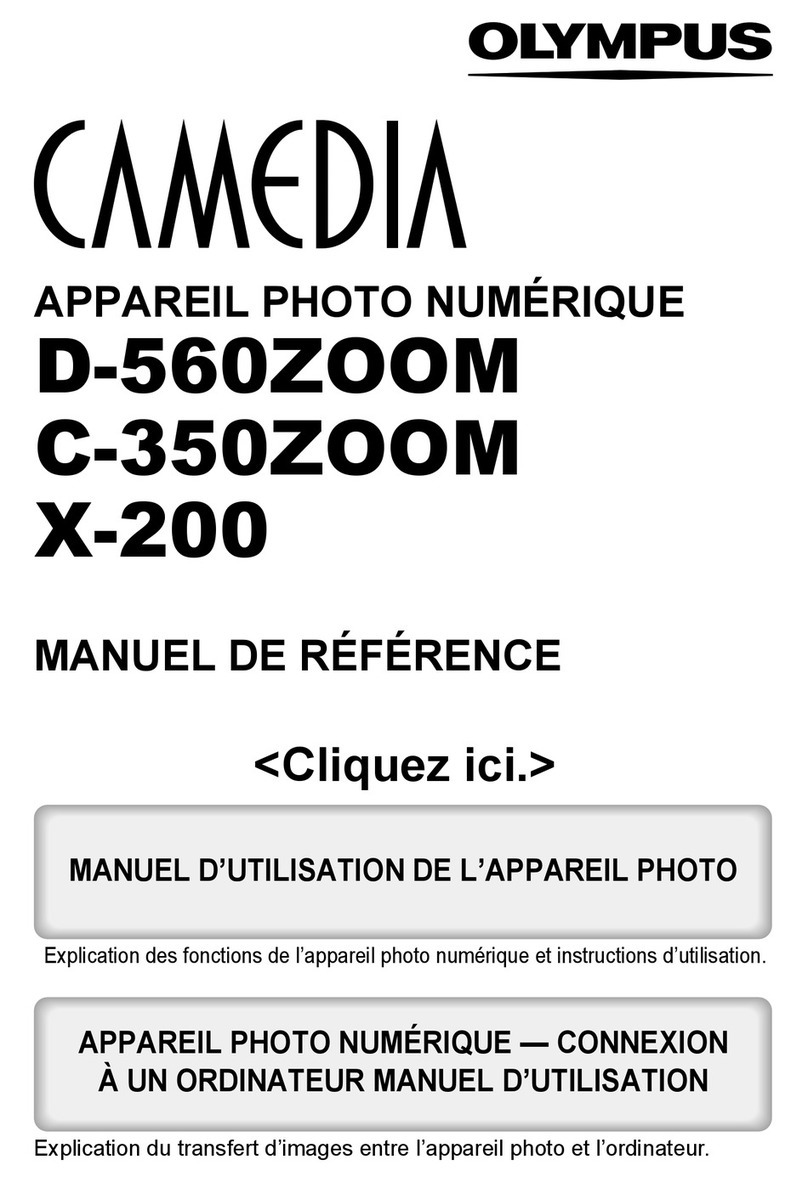
Olympus FE 370 - Digital Camera - Compact User manual

DIGITAL CAMERA
FE-370 / X-880 / C-575
nstruction ManuaJ
Thank you for purchasing an Olympus digital camera. Before you s[art [o
use your new camera, please read these instructions careL y to enjoy
_Dumum performance aria alonger service life. Keep th_s manual - a
_afe place for future reference.
® Me _ecommet_d that jau _a_e _es_ shots _o gei @ccus_omea _o your
camera before fek_ng impor[an_ pno_ograpn_
_nthe intere_ of continual, _prowng products, ©lympus reserves _ne
right to upd_fe or modify information contained in this manuam
® The screen and camera illustrations ShOWn in this manual were _roaucea
_u_lng _ne aeveJopmen_ s[ages an_ may _iffer from the actual _ro_uc_
" e Camera
"Preparing the Camera" (p. 10) "Shooting, Playback, and Erasing" (p. 15)
"Three Types of Setting Operations" (p. 3) "Direct printing (PictBddge)" {p. 38)
"Print Reservations (DPOF)" (p. 41)
>Names of Parts ...................................... 6
Preparing the Camera ......................... 10
, Shooting, Playback, and Erasing ....... 15
Using Shooting Modes ........................ 18
,Using Shooting Functions .................. 20
,Using Playback Features .................... 23
Menus for Shooting Functions ........... 25
Menus for Playback, Editing, and
Printing Funcdons ............................... 30
Menus for Other Camera Settings .....34
Printing ................................................. 38
Using OLYMPUS Master 2................... 44
Usage Tips ........................................... 46
>Appendix .............................................. 51
>Index ..................................................... 65
EN
_ There may be unavailable menus depending on other
related settings or the position of the mode dial
This e1¢arr_ple describes how to use the menus to set the
[POWER SAVE],
_'TSETUP (shooting mode/playback mode top menu)
BQ_R SAVE _(SJab_nu J _ _ ON _Submar_Ja 2,)..............................................
Set the mode dial to a position other than
GUIDE.
_ The C_ symbol in 'Menu
Settings" (p. 25 to 29) _
indicates available shooting
modes.
2 Press the MENU button.
_ Press the M_NU
button to return to
the previo_s screen
in any Step after
Step 2 SET*_
Shooting mode top menu
3Use _[:>_b_) to seFLeectthe desired
menu, and press the _ button.
_ ressing and
holding the _}
button displays
an explanation
_menu guide) of the
selected option. Submenu 1
MENU button : Arrow pad
@ button :
DIS_,
E:)
@ : ..........
4Use @d.C_ to select the desired
submenu 1, and press the _ button.
Page tab Submer_u 2
To quickly move to the desired submenu,
press _ to highlight the page tab, and then
use KCy_b to move the page Press _) to
return to the submenu.
_;_} Some menus include submenus that appear
by pressing the _'_) button
Use <::_2_ to select the submenu 2,
and press the _ button.
• Once a setting is made, the display returns to
the previous screen
_ There may be
additional operations.
'Menu Settings" (p. 25
to 37)
SET*_
Press the MENU button to complete the
setting.
Zoom lever (p. 20)
Shutter button (p. t5)
_i......... _'_i;oi,is_o;t;i:7/'i;'t';i....................
[_ button (exposure compensation) (p. 21)
button (macro) (p. 21)
button (flash) (p. 20)
6_ button (self4imer) (p. 21)
DtSP,/@ button (information display change/
menu guide) (p. t8, 22, 23)
I_ button (print) (p. 38, 40)
= I+.0]/'@ button (backlight boost/erase) (p, 21/p. 17)
iiiiiiiiiiiiiiiiii_!i_!!i!ii!iiiiii!:7_EN
Menu lnde×
Menus for Shooting Functions
When the _ button is pressed and the mode dial is set to
a shooting mode position (_ P *#_ _ ,_ SCENE_)),
settings can be adjusted.
EXIT*_ SET*_
Shooting mode top menu
"_ _- IMAGE QUALITY ........ p. 25 AF MODE ................... p. 28
"2_ _ CAMERA MENU 3: ",_ SCENE......................... p. 28
WB .............................. p 26 _ _) RESET ........................ p. 29
ISO ............................. p. 26 Ls,__T SETUP
FiNE ZOOM ................ p. 26 MEMORY FORMAT/
IMAGE STABILIZER FORMAT ................. p. 34
(Still images)/ BACKUP ..................... p. 34
DIS MOVIE MODE _'_ (Language) ....... p. 34
(Movies) .................. p. 27 PIXEL MAPPING ........ p. 34
(Still images/ _/[_ ........................ p. 34
movies) .................... p. 27 PW ON SETUP .......... p. 35
PANORAMA ............... p. 27 MENU COLOR ........... p. 35
SOUND SETTINGS.... p 35
!.E_,I(Monitor) .............. p. 36
(_ (Date/time) ........... p 36
VIDEO OUT ................ p. 36
POWER SAVE ............ p 37
_ SILENT MODE ............ p. 37
Menus for Playback, Editing, and Printing Functions
When the _ button is pressed, settings can be adjusted.
÷
"1__j SLIDESHOW ............... p 30
"2: D PERFECT FIX ............. p 30
"k MY FAVORITE ............. p. 30
_4 oYbEDIT
[_ (Resize) ............... p 31
4_ (Crop) ................... p 31
EXPRESSION EDIT... p. 31
FACE FOCUS ............. p. 31
INDEX ......................... p. 32
EDIT ........................... p. 32
L$ _ PLAYBACK MENU
(Protect) .............. p. 32
(Rotate) .................. p. 32
(Add sound to still
images) ................... p. 33
_ ERASE ......................... p. 33
Playback mode top menu
(_ E_ PRINT ORDER ............ p. 42
_8 _ SETUP
Same as 'Menus for
shooting functions"
9: ,_ SILENT MODE ............ p. 37
EN
of Parts
........Ca_era unit ..................................................................................................................................................................................................................................................................................................................................
/
/
OLYMPUS
..... G
.............. ,
4
Self-timer Famp............................ p. 21 5 Ftash ........................................... p. 20
2 MuFti-connector ............... p. 36, 38, 44 6 Lens ...................................... p. 5t, 60
_ Strap eyeFet................................. p. 10 7 Microphone ........................... p. 27, 33
4Battery/ 8Tripod socket .............................. p. 27
card compartment cover ............. p. 11 9Speaker ...................................... p. 35
iiiiiiiiiiiiiiiiiiiiiiiiiiiiiiiiiiil;ii_i;!iii!iii!iii!!ilEN
7
......8
2
9
3..............
4
POWER button ............................ p. 13
2 _ button (shooting) ................... p. 16
,_ Card access Famp....................... p. 53
4DISR/_ button
(information disptay change/
menu guide) .................... p. 18, 22, 23
5 Monitor ............................ p. 13, 15, 46
6 MENU button ........................... p. 3, 13
7 Zoom lever ............................ p. 20, 23
8 Shutter button ....................... p. 15, 46
9[_ button (playback) .................. p. 16
10 ModediaF ................................ p. 3, 13
_ _ button ................................ p. 3, 22
_2 Arrowpad ............................... p. 3, 13
FA/_ button
(exposure compensation/
print) ........................ p. 2t/p. 38, 40
button (macro) ................... p. 21
_) button (seFf-timer) .............. p. 21
button (flash) ...................... p. 20
_3 I_U/'_ button (backlight boost/
erase) ..................... p. 21/p. 17, 24, 33
EN
........Menitor .................................................................................................................................................................................................................................................................................................................................................................................................................................................................................................................................................................................................................................................................................................................
Shooting mode display
12345
19-
18-
17-
16-
15 14 13 12 1'1 10
Still image
Shooting mode ............................ p. 15
2 FFashmode ................................. p. 20
,_ Sitent mode ................................. p. 37
4Image stabiFization (still image)/
DigitaF image stabilization (movie)
.................................................... p. 27
5 Macro/super macro ..................... p. 21
6 Battery check .............................. p. 10
7 FFashstandby/
camera shake warning/
flash charge ....................... p. 20/p. 46
8 AF target mark ............................ p. 15
15 12 11 10
Movie
9 Recording with sound ................. p. 27
_0 Number of storable still images/
remaining recording time ...p. 15/p. 19
_ Current memory .......................... p. 52
_2 Self-timer .................................... p. 21
_3 Aperture value ............................ p. 15
_4 Shutter speed ............................. p. 15
_5 Exposure compensation ............. p. 20
_6 Compression/frame rate ............. p. 25
_7 Image size .................................. p. 25
_8 ISO .............................................. p. 26
_9 White balance ............................. p. 26
iiiiiiiiiiiiiiiiiiiiiiiiiiiiiiii'ii_il;i!_ii!i!i!i;iiiiii! EN
Playback mode display
f 2 3 4 5 3 4
16
Silent mode ................................. p. 37
2 Print reservations/
number of prints ................. p. 41/p. 40
_ Adding sound .............................. p. 33
4Protect ........................................ p. 32
5 Battery check .............................. p. 10
6 Aperture value ............................ p. 15
7 Exposure compensation ............. p, 20
8White balance ............................. p. 26
9Image size .................................. p. 25
f3 '12
Movie
_0 File number ....................................... -
_ Frame number/
elapsed time/
total recording time ............ p, 16/p, 17
_2 Current memory .......................... p, 52
_3 Compression/frame rate ............. p, 25
_4 _so..............................................p.26
_5 Date and time ............................. p, 13
_6 Shutter speed ............................. p, 15
EN
paring the Camera
CheGking the contents of the
Lithium ion
Battery charger battery
Digital camera Strap
LF60B Lithium Ion Battery LF60C Battery Charger
S
USE cable AV cable
OLYMPUS Master 2 microSD Attachment
CD-ROM
Other accessories not shown: Instruction Manual (this
manual), warranty card.
Contents may vary depending on purchase location.
...............Attachingthecam_erastra_ .......................................
_:3 Pullthe straptightsothatitdoes notcome
loose.
AC cable
Charging indicator
On: Charging
Off: Charged
_} Battery comes partially charged. Before
use, be sure to charge the batten/until the
charging indicator goes off (for approx
25 hours)
For details on the battery and the charger,
see "Battery and charger" (p. 51).
When to charge the batteries
Charge the battery when the error message
shown below appears.
Flashes in red
Monitor top right Error message
iiiiiiiiiiiiiiiiiiiiiiiiiiiil;:;_ii!i;ii!iiiiii;!;i::EN
Loadingthe battery and
the xD-Picture Card TM (sold
........_ep_rately) in_ the camera ...................................
Do not insert anything other than an
xD-Picture Card or the microSD Attachment
into the camera
3Notch
Contact area
insert the card straight until it clicks into
place
_ Do net touch the contact area directly.
2
Battery lock knob
_} The battery has a front side and a back side.
Insert the battery in the correct direction
as illustrated if the battery is not inserted
correctly, the camera will not operate.
¢_ Insert the battery while sliding the battery
lock knob in the direction of the arrow.
_} Slide the battery lock knob in the direction
of the arrow to unlock, and then remove the
battery.
This camera allows the user to take pictures
using the internal memory even when
no xD-Picture Card (sold separately) is
inserted. "Using an xD-Pieture Card"
(p. 52)
_} "Number of storable pictures (still
pictures)/recording length (movies) in the
irrtemal memory and xD-Picture Card"
{p. 53)
Removing the ×D-Picture Card
12
_',2 Press the card in until itclicks and comes
out slightly, then grab the card and pull it
out
EN
Using the microSD card/
microSDHC card (sold
A microSD card or microSDHC card (hereafter
both will be referred to as microSD card) is also
compatible with this camera using the microSD
Attachment
"Using the microSD Attachment" (p. 54)
mnsertthe microSD card into the
microSD Attachment.
-- Insert the card
entirely into the
attachment
2 mnsert the microSD Attachment into
the camera.
_rrow guide
Thesymbols_<lb, rqr_FIIqdisplayed
on various setting and movie playback screens
indicate that arrow pad be used.
L2_r_l
i_'_,,#__,'\
Arrow pad
Operation guides displayed at the bottom of the
screen indicate that the MENU button, _ button,
zoom lever, or "_ button be used.
To remove the microSD card
Pull the microSD card straight out.
_ Do not touch the contact area of the
microSD Attachment and/or microSD card. Operation guide
iiiiiiiiiiiiiiiiiiiiiiiiiiiil;_i!!iii!ili!iii!!:iEN
.........Setting the date and time
The date and time set here are saved to image
file names, date prints, and other data.
Press the POWER button to turn on
the camera.
e Thedateandtimesettingscreenisdisplayed
whenthedateandthTlearenotset
PowE__ ii_
CANCEL*_
Date and time setting screen
2 Use @_-.t_ to select the year for
[Y],
4As in Steps 2 and 3, use @_
and the @ button to set [M]
]month), [D] (day), and [TIME]
]hours and minutes).
_ Fora precise time setting, press the
@ button as the time signal strikes
O0seconds
_ To change the date and time, adjustthe
setting fromthe menu [(_)] (Date/time)
(p. 36)
.........Chang_ng th_ display languag_
The language for the menu and error messages
displayed on the monitor is selectable.
Set the mode dial to a position other
than GUIDE.
CANCEL*_
Press _) to save the setting for [Y].
Press the MENU button, and press
_) to select It'[ SETUP].
.....
EN:;:;:;:;:;:;:;:;;;
3 Press the _ button.
Use _ to select [@_] and
press the _ button.
5 Use _(_) to select your
language and press the _ button.
Press the MENU button.
EN
,<!_!i!iii!:i!i!i!!_i!;!!!!!!ili'i'ii!i_,,
oting, Playback, and Erasing
Shooting with optimum
aperture value and shutter
mQde)
In this mode, automatic camera shooting cal!
be used while also allowing changes to a wide
range of other shooting menu functions such as
exposure compensation, white balance, and so
forth as needed
Set the mode dial to P.
2Press the POWER button to turn on
the camera.
Number of storable still images (p. 53)
Monitor
(standby mode screen)
Hold the camera and compose the
shot,
Horizontal grip
Vertical grip
4Press the shutter button halfway
down to focus on the subject.
® When the camera focuses on the subject, the
exposure is locked (shutter speed and aperture
value are displayed), and the AF target mark
changes to green.
® The camera was unable to focus if the AF target
mark flashes red Try focusing again.
AF target mark
Press halfway
Shutterspeed Aperturevalue
(_ "Focusing" (p. 48)
EN
5To take the picture, gently press
the shutter button a[[ the way down
while being careful not to shake the
camera.
Press fully
Image review screen
To view images during shooting
Pressing the _ button enables playback of
images. To return to shooting, either press
the _ button or press the shutter button
halfway down.
To shoot movies
"Shooting movies (_ mode)" (p, 19)
When shooting is finished
Press the POWER button to turn off the
camera.
_ All shooting settings except for P mode
return to default settings when the camera is
turned off.
Press the [_ button.
Number of frames
2Use @_J__._ to select an image.
Displays _ t,,,,=J Displays next
!0 frames before ,f_ m image
the current image L.__ J_
Displays pre.vious Displays
image 10 frames after
the current
image
_ The display size of the images can be
changed "index view and closeup view"
(p= 23)
To play back movies
Select a movie, and press the @button
Movie
Playback image
iiiiiiiiiiiiiiiiiiiiiiiiiiiil;i_i!iiiil;il;ilil;iliEN
Operations during movie playback
Vomume= During playback, press @<Z_.
Fast=forward." Press and hold down
Rewind." Press and hold down
Pause; Press the @ button
During playback
Erasing images d#r_ng
#layback (Sin_jle imag@ _ra#e)
Press the _ button when the image
to be erased is displayed.
Elapsed time/
Total recording time
¸7¸?¸:: "_ i_
First (last) frame/frame advance."
During pause, press @ to display the first
frame, and press <_ to display the last
frame.
Press and hold down _ to play a movie, and
press and hold down _ to play a movie in
reverse.
Press the @ button to resume playback.
During pause
2 Press @ to select [YES], and press
the _ button.
["@ERASE] (p. 33)
To stop movie playback
Press the MENU button.
EN
,, ! iiiiUS!ii¸" g Shooting Nodes
Using the best mode for the
shooting scene
_"Selecting a scene mode according to
the shooting situation [*>_$CENE]" (p. 28)
Set the mode dial to *% _, _, or
SCENE.
When *>a,_ or _tL is selected
When SCENEis selected
EXIT _*_ SET*_
e An explanation of the selected mode is displayed
while the @ button is pressed and held
2 When SCENE is selected, use @_._b
to select the best shooting mode for
the scene, and press the _ button.
Icon indicating
the scene mode
that is set
_ To change to another scene mode, use the
menu
"Selecting a scene mode according to
the shooting situation [*_SOENE]" (p. 28)
Shooting with automatic
The best shooting mode is automatically
selected according to the shooting scene.
This is a fully automatic mode that allows the
user to take pictures best suited for the scene by
simply pressing the shutter button.
All shooting settings cannot be changed
Set the mode dial to B_]_.
mode indicator
® The shooting mode automatically selected is
displayed when the DISR button is pressed or the
shutter button is pressed halfway
iiiiiiiiiiiiiiiiiiiiiiiiiiiil;_il;!ii!i!iiii!i!i_!EN
......Shoaling _#vies,(_2 _Qde) .......................
Set the mode dial to _,
mode indicator
Press the shutter button halfway
down to focus on the subject, and
gently press the button aimthe way
down to start recording.
Lights up red when recording
Press halfway
÷÷
Press fully
Remaining recording time (p. 53)
3 Gently press the shutter button aH
the way down to stop recording,
@_ Audio is recorded with the movie
_ During audio recording, only the digital
zoom can be used. To record a movie with
optical zoom, set [k_](movies) {p. 27) to
[OFF].
........Using the zo_m ....................................................................................................Using the fiash
Using the zoom lever adjusts the shooting range. The flash functions can be selected to best
match the shooting conditions.
Turn the zoom lever to Turn the zoom lever to
the W-side. the T-side _ Press the _ button.
Zoom bar
_ Optical zoom: 5x, Digital zoom: 4x
_} Use of [IMAGE STABILIZER] ]p. 27) is
recommended when shooting with the
telephoto zoom.
To take larger images without reducing
image quality
[FINE ZOOM] (p. 26)
_ The zoom bar appearance identifies the
status of the fine zoom/digital zoom.
When using _
optical zoom
and digital
zoom
When using
fine zoom
Optical zoom Digital zoom
range range
!&|J
Fine zoom range
2 Use _) to select the setting option,
and press the _ button to set.
FLASH AUTO
REDEYE
FILLIN
FLASH OFF
The flash fires automatically in
Iowqight or backlight conditions
Pre-fiashes are emitted to reduce
the occurrence of red eye in your
3hotos
The flash fires regardless of the
available light
The flash does not fire.
Adjusting the brightness
(Exp_ure _mp_n_tion)
The standard brightness (appropriate exposure)
set by the camera based on the shooting mode
(except for _) can be adjusted brighter or
darker to obtain a desired shot
iiiiiiiiiiiiiiiiiiii_ii!iiii!!_iiiiiii:il;!iil;_i:EN

Other manuals for FE 370 - Digital Camera - Compact

4

This manual suits for next models

2

Other Olympus Digital Camera manuals

Olympus E-3 User manual

Olympus

Olympus E-3 User manual

Olympus FE-4020 User manual

Olympus

Olympus FE-4020 User manual

Olympus 300 Digital - Stylus 300 3.2 MP Digital... Instruction Manual

Olympus

Olympus 300 Digital - Stylus 300 3.2 MP Digital... Instruction Manual

Olympus T-10 Setup guide

Olympus

Olympus T-10 Setup guide

Olympus SZ-12 Setup guide

Olympus

Olympus SZ-12 Setup guide

Olympus u TOUGH-8000 User manual

Olympus

Olympus u TOUGH-8000 User manual

Olympus AZ-1 ZOOM User manual

Olympus

Olympus AZ-1 ZOOM User manual

Olympus Stylus-7000 User manual

Olympus

Olympus Stylus-7000 User manual

Olympus Stylus 1050SW User manual

Olympus

Olympus Stylus 1050SW User manual

Olympus VG-165 User manual

Olympus

Olympus VG-165 User manual

Olympus STYLUS VERVE S Setup guide

Olympus

Olympus STYLUS VERVE S Setup guide

Olympus SP 100EE User manual

Olympus

Olympus SP 100EE User manual

Olympus E-PM2 User manual

Olympus

Olympus E-PM2 User manual

Olympus Stylus 7000 User manual

Olympus

Olympus Stylus 7000 User manual

Olympus SP-800UZ Setup guide

Olympus

Olympus SP-800UZ Setup guide

Olympus SZ-14, SZ-12 User manual

Olympus

Olympus SZ-14, SZ-12 User manual

Olympus FE210 - 7.1 MP Digital Camera Configuration guide

Olympus

Olympus FE210 - 7.1 MP Digital Camera Configuration guide

Olympus SP-320 Setup guide

Olympus

Olympus SP-320 Setup guide

Olympus SP-510UZ User manual

Olympus

Olympus SP-510UZ User manual

Olympus E420 - Evolt 10MP Digital SLR Camera Training manual

Olympus

Olympus E420 - Evolt 10MP Digital SLR Camera Training manual

Olympus CAMEDIA C-740 Ultra Zoom Installation guide

Olympus

Olympus CAMEDIA C-740 Ultra Zoom Installation guide

Olympus X-560WP - Digital Camera - Compact Mounting instructions

Olympus

Olympus X-560WP - Digital Camera - Compact Mounting instructions

Olympus FE-46 User manual

Olympus

Olympus FE-46 User manual

Olympus IR-500 User manual

Olympus

Olympus IR-500 User manual

Popular Digital Camera manuals by other brands

Vivitar Vivicam 5100 user manual

Vivitar

Vivitar Vivicam 5100 user manual

FujiFilm FINEPIX A303 Specifications

FujiFilm

FujiFilm FINEPIX A303 Specifications

Samcon ExCam IPP1275 user manual

Samcon

Samcon ExCam IPP1275 user manual

Canon POWERSHOT SD770IS user guide

Canon

Canon POWERSHOT SD770IS user guide

Axis W100 installation guide

Axis

Axis W100 installation guide

Speco Intensifier T HTINTT5T instruction manual

Speco

Speco Intensifier T HTINTT5T instruction manual

Casio Exilim EX-Z850 user guide

Casio

Casio Exilim EX-Z850 user guide

Caldwell 1099107 instructions

Caldwell

Caldwell 1099107 instructions

SCA 611148 instruction manual

SCA

SCA 611148 instruction manual

Nikon Df user manual

Nikon

Nikon Df user manual

Canon PowerShot SX130 IS user guide

Canon

Canon PowerShot SX130 IS user guide

Sony DSC-P150/LJ - Cyber-shot Digital Still... specification

Sony

Sony DSC-P150/LJ - Cyber-shot Digital Still... specification

Canon PowerShot SX110 IS user guide

Canon

Canon PowerShot SX110 IS user guide

Jenoptik JDC 3.0S user guide

Jenoptik

Jenoptik JDC 3.0S user guide

Kodak EasyShare DX6440 user guide

Kodak

Kodak EasyShare DX6440 user guide

Samsung AD68-04778A Quick start manual

Samsung

Samsung AD68-04778A Quick start manual

HP Photosmart R930 series user guide

HP

HP Photosmart R930 series user guide

Samsung SL40 user manual

Samsung

Samsung SL40 user manual

manuals.online logo
manuals.online logoBrands
  • About & Mission
  • Contact us
  • Privacy Policy
  • Terms and Conditions

Copyright 2025 Manuals.Online. All Rights Reserved.