Low Battery Indicator
4 short warning beeps sound when battery life is depleting and unable to inflate cuff for
testing. The " " appears simultaneously for approximately 5 seconds prior to shutting
off. No memory loss will occur throughout this process.Replace batteries at this time.
" "displayed
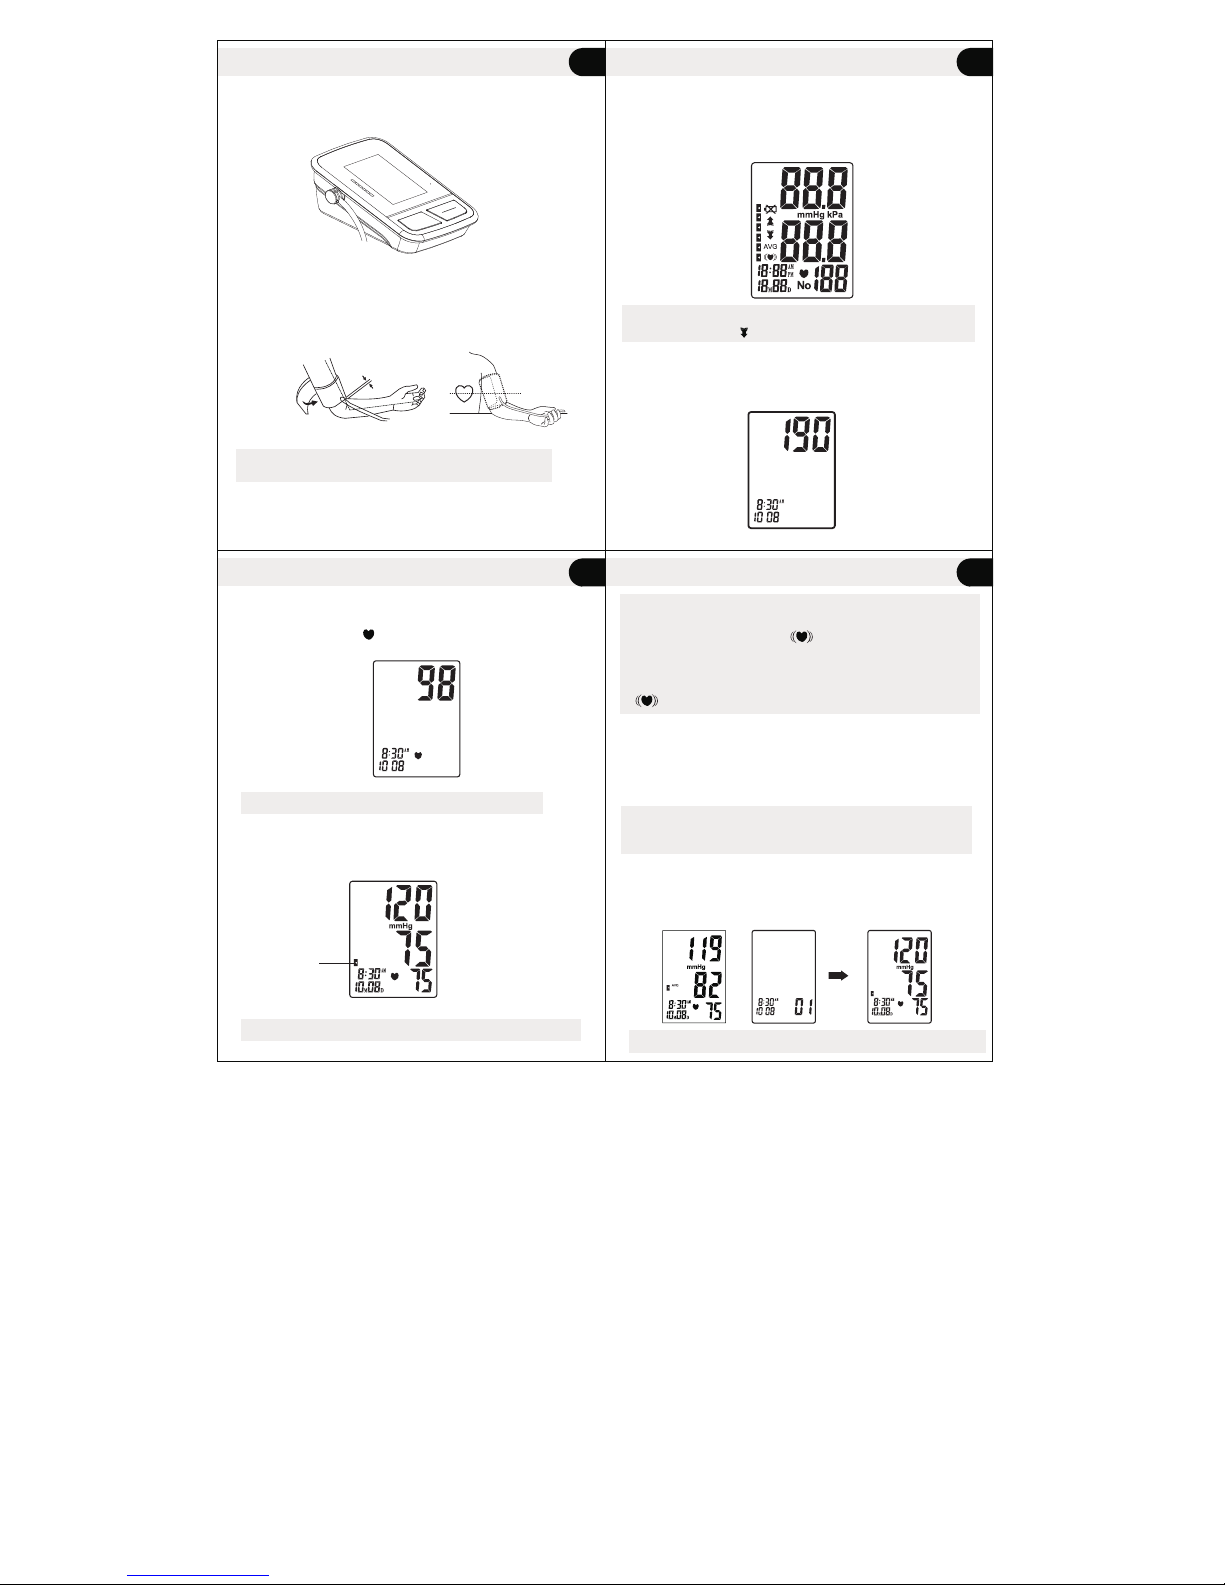
Cuff is too tight or not
properly positioned on
the arm
Firmly reposition cuff
approximately ( )
above the elbow joint
( See Page 11)
1-2cm 1/2"
Inaccurate test results due to
body movement or monitor
movement
Sit in a relaxed position with
arm placed near heart. Avoid
speaking or moving body parts
while testing. Make sure the
monitor unit is placed in a
stationary position throughout
the testing period.
( See Page 8)
Blood pressure
results are not
within typical range
Cuff fails to inflate properly Make sure hose is properly
fastened to cuff and monitor unit
Blood Pressure
Blood pressure is the force of blood pushing against the walls of arteries. It is typically
measured in millimeters of mercury (mmHg.) Systolic blood pressure is the maximum
force exerted against blood vessel walls each time the heart beats. Diastolic blood
pressure is the force exerted on blood vessels when the heart is resting between beats.
An individual's blood pressure frequently changes throughout the course of a day.
Excitement and tension can cause blood pressure to rise, while drinking alcohol and
bathing can lower blood pressure. Certain hormones like adrenaline (which your
body releases under stress) can cause blood vessels to constrict, leading to a rise in
blood pressure.
If these measuring numbers become too high, it means the heart is working harder
than it should.
Pressurization is over
300mmHg Read user manual carefully and
re-test properly.
Improper operation Read user manual carefully and
re-test properly.
200
150
Upper curve : systolic blood pressure
Lower curve: diastolic blood pressure
Note: Memory cannot be recovered once it has been deleted.
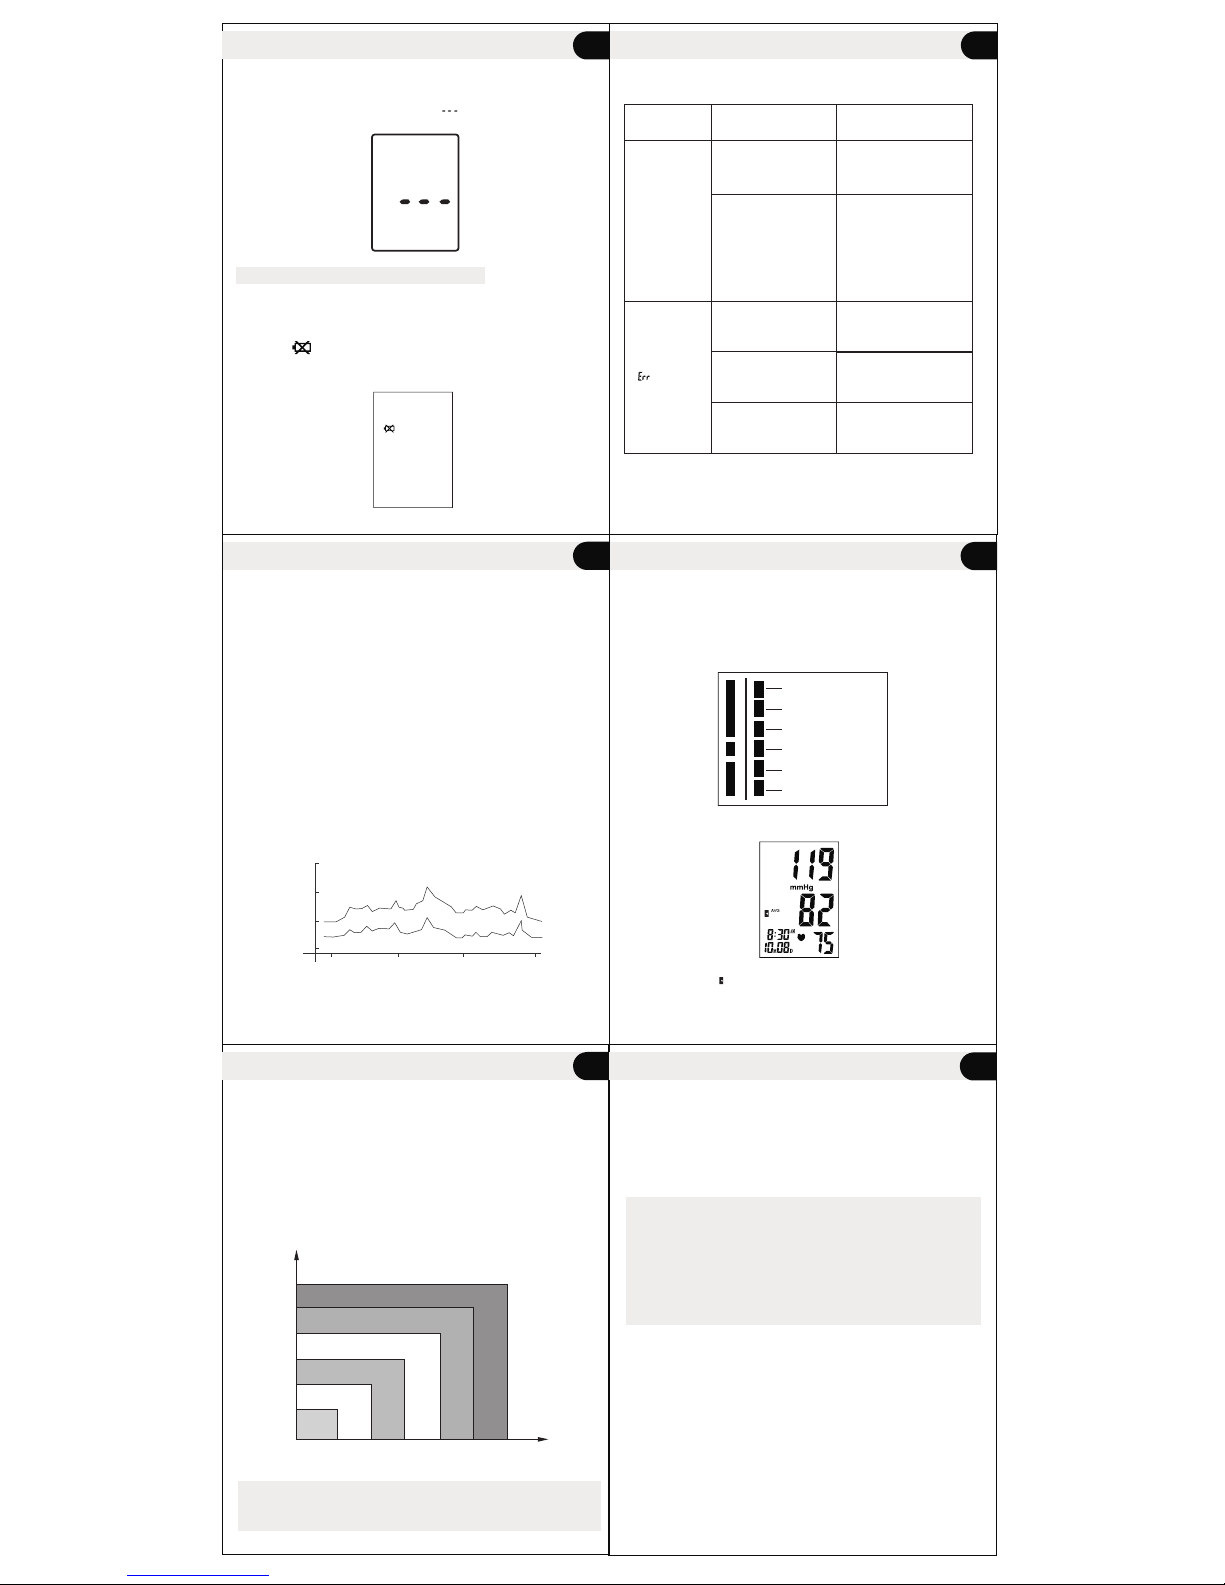
WHO Blood Pressure Classification Indicator
The BSP-11 is equipped with a classification indicator based on established guidelines
from the World Health Organization. The chart below (color coded on monitor unit)
indicates test results.
Severe Hypertension
Mild Hypertension
High-n
Optimal
Moderate Hypertension
ormal
Normal
Troubleshooting
Problem Solution
Possible Cause
Example: fluctuation within a day (male, 35 years old)
mmHg
100
50
6 1 2 18 2 4
Time of day
Memory Deletion
While in memory check mode. Press and hold on for about 3 seconds to
delete all history results and the LCD screen display“ ” with beep sounds. Then press
button to turn off the unit.
" START/ STOP"
" START/ STOP"
: Classification IndicatorBlood Pressure
Mild Hypertension
Hypertension is a dangerous disease that can affect the quality of life. It can lead
to a lot of problems including heart failure, kidney failure, and cerebra
By maintaining a healthy lifestyle and visiting your physician on a regular basis,
hypertension and relative diseases are much easier to control when diagnosed in their
early stages.
Health Reminder
Systolic
Severe Hypertension
Moderate Hypertension
Mild Hypertension
High-normal
Normal
180
160
140
130
120
80 85 90 100 110 Diastolic
( mmHg )
( mmHg )
Optimal
Note: Do not be alarmed if an abnormal reading occurs.
each day over an
extended period of time. Consult your physician if test results remain abnormal.
A better indication of an individual's
blood pressure occurs after 2-3 readings are taken at the same time
Q: What is the difference between measuring blood pressure at home or at a professional
healthcare clinic?
A: Blood pressure readings taken at home are now seen to give a more accurate account as
they better reflect your daily life. Readings can be elevated when taken in a clinical or
medical environment. This is known as White Coat Hypertension and may be caused by
feeling anxious or nervous.
Note: Abnormal test results may be caused by:
1. Improper cuff placement
Make sure cuff is snug-not too tight or too loose.
Make sure bottom of the cuff is approximately 1-2cm (1/2'') above the elbow
joint.
2. Improper body position
Make sure to keep your body in an upright position.
3. Feeling anxious or nervous
Take 2-3 deep breaths, wait a few minutes and resume testing.
Q: What causes different readings?
A: Blood pressure varies throughout the course of a day. Many factors including diet,
stress, cuff placement, etc. may affect an individual's blood pressure.
Q: Should I apply the cuff to the left or right arm? What is the difference?
A: Either arm can be used when testing, however, when comparing results, the same arm
should be used. Testing on your left arm may provide more accurate results as it is
located closer to your heart.
Q: What is the best time of day for testing?
A: Morning time or any time you feel relaxed and stress free.
haemorrhaging
Unit Operation Unit Operation
Unit Operation Blood Pressure Information
15 16
17 18
Blood Pressure Information 19 Blood Pressure Questions & Answers 20