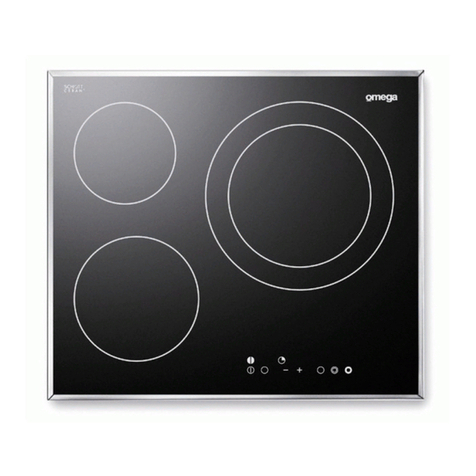
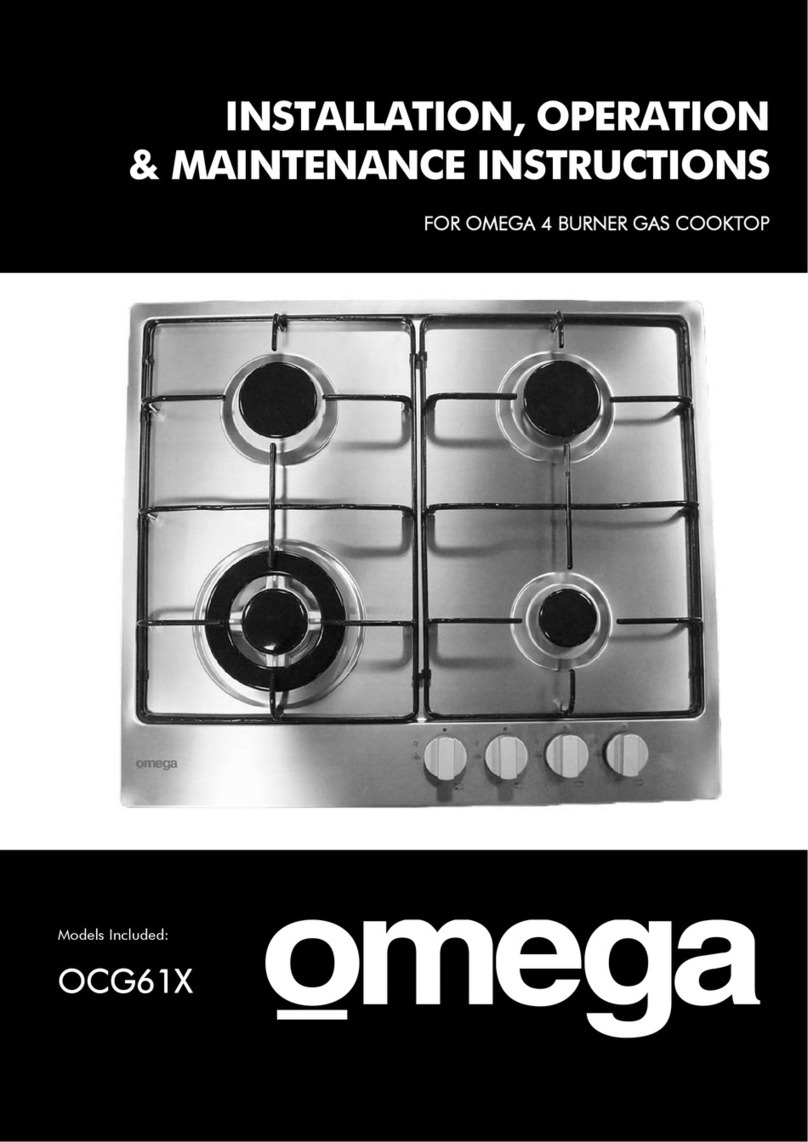
Omega OCC30TZ Manual

INSTALLATION, OPERATION
AND MAINTENANCE INSTRUCTIONS
Ceramic Cooktop
OCC30TZ


1
CONGRATULATIONS
Welcome to the Omega Kitchen Community and thank you for choosing one of our many
fantastic cooking appliances. We are confident that you will now be able to meet your cooking
needs. Before you use the cooktop we strongly recommend that you read though the whole
user manual which provides the description of this product and the proper use of its functions.
To avoid the ever-present risks involved with using an electrical appliance it is vital that the
appliance is installed correctly by an authorised person and that you read the safety
instructions carefully to avoid misuse and hazards.
It is important that you retain these instructions and your proof of purchase along with any
other important documents about this product for future reference. Due to continual product
development, Omega reserves the right to alter specifications or appearances without notice.
CONTENTS
SECTION PAGE NO.
Important Safety Instructions 2
Product Overview 3
Operating Instructions 4-7
Cleaning and Maintenance 8
Troubleshooting 8
Installation 9

2
IMPORTANT SAFETY INSTRUCTIONS
IMPORTANT: Read the assembly instruction section and safety precautions of this booklet carefully before
removing the contents of this carton.
1. This appliance is not intended for use by persons (including children) with reduced physical, sensory or mental
capabilities, or lack of experience or knowledge, unless they have been given supervision or instruction concerning the
use of the appliance by a person responsible for their safety. Children should be supervised to ensure that they do not
play with the appliance.
2. After removing the packaging, make sure to check if there is any damage to the appliance. If there is any damage (including
cracked glass), never attempt to use the appliance and immediately contact your Authorised Service Centre. As packaging
materials can be dangerous to children, they need to be collected immediatelyand putout of reach.
3. In certain circumstances electrical appliances may be a safety hazard. Check the conformity of voltage and power settings,
which are specified on the information plate attached to the appliance and/or packaging.
4. Do notplace heavyobjects in oron these appliances, useforstorage oras a cutting surface. This appliance is designed for
cooking food only. Use flat based, stable cooking potsonly.
5. This appliance is designed for domestic household use only and for the cooking of domestic food products. Use as a
commercialappliancewill void the warranty. Itshould notto be used in a marine environmentoroutdoorsand mustbe fully built
in. Do not use the appliances until fullyinstalled.
6. This appliance is supplied with a 15-amp plug. The plug has a large earth terminal that will not fit into a common
electrical socket. To install the appliance, a special socket is required to be installed by a licensed electrician (if it does
not already exist at the point of installation). If the electrical supply cord is damaged, either when being installed or after
installation, it must be replaced by the manufacturer, its service centre or similarly qualified persons in order to prevent
a hazard.
7. A means fordisconnection must be incorporatedin the fixed wiringin accordancewith the wiringrules.
8. The electrical connection must be accessibleafterinstallation.The appliance mustbe electricallyisolated before any
maintenance can beperformed. Electricalconnectionmust be made as per local wiringrules and regulations.
9. The appliance is notintendedtobe operated bymeans ofanexternal timerorseparateremote-controlsystem.
10. Ensurethatthe kitchen is well ventilatedor mechanical ventilation is in use while cooking on thisappliance.
11. Do notstore or use flammable materials oraerosols near the cooktop. Itemsmade from aluminium,plastic or plastic film should
alsobe keptawayfrom the appliance, as theymayfusetothe surface.
12. WARNING - The appliance will become hotduring anddirectlyafteruse. Do nottouchthe surfaceduring this time,as itmay be
hotand can causeburns. To avoid burns, childrenshouldbekeptaway.
13. Cleaning may onlybe commenced on the appliance once ithas cooleddownand is turned off. Do notuse a steam jetorany
otherhigh-pressurecleaning equipmentto clean the appliance.
14. Whenthe appliance is notbeingused, turn the appliance off.
15. Wherethis applianceis installedin a caravan,itshall NOT be usedasa spaceheater.
16. Do not modify this appliance.
17. Do notuse harsh abrasivecleaners orsharp metal scrapers toclean theglass surface as theycan scratchthe surface, which
may result in the glass shattering. Clean the glass using a warm damp cloth (e.g. dishcloth) and dry it with a soft dry tea towel.
18. All cabinetry and materials used in the installation must be able to withstand a minimum temperature of 100°C above the
ambient temperature of the room it is in, whilst in use. Certain types of vinyl or laminate kitchen furniture are particularlyprone
to heatdamageordiscolourationat temperatures belowthe guidelines given above.Anydamagecaused bytheappliancebeing
installed withoutadheringto the temperaturelimits setoutabove will be the liabilityofthe owner. To avoid anyhazards, limit
accessto the under-bench sectionof the cooktop.
19. The appliance must be installed and put into operation by an authorised technician under the conditions provided by the
manufacturer in this manual. The manufacturer cannot be held responsible for any damage that might occur due to faulty
installation. Do not install near cooling equipment, dishwashers or clothes dryers.
20. Damage can occur to bench tops if pots and pans are allowed to overlap the bench top. This can result in heat being
transferred to the bench top. Ensure that correct sized pots & pans are used. Cast iron and cast aluminium cookware with
damagedbases mayscratch the cooktop surfaceiftheyare draggedacross it. Pans shouldbe liftedon and offthe appliance
surface and not dragged. Cooking zones should not be switched on without cookware placed on it. Cookware should notbe
emptyforanylength of time when being used on the appliance.
21. WARNING: If the surface is cracked, switch off the appliance to avoid the possibility of electrical shock.
22. Do notleave the appliancewhile cooking with solid or liquidoils. There may be flamingup in conditions of extreme heating.
23. Never pour water onto the flames occurring from oil. Immediately turn the aappliance off and cover the pan with a lid or fire
blanket in order to smother the flame.
3
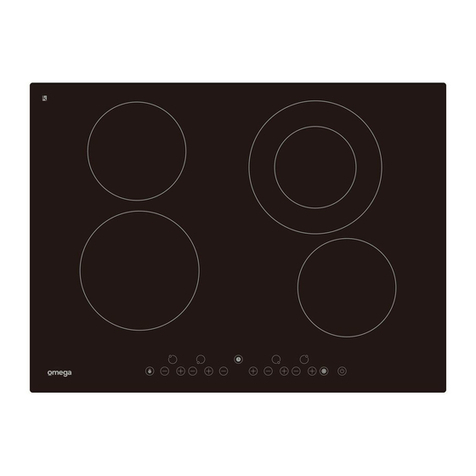
Product Introduction
Top View
ELECTRICAL DETAILS:
RatedVoltage -220-240Vac 50Hz
OCC30TZ – 2700-3300W
COOKTOP – 15A plug.
This information can be found on the rating plate (identification plate) affixed to the underside of the appliance.
Relevant Sizes: WIDTH (mm) LENGTH (mm) HEIGHT (mm)
Cooktop Size 288 520 55
Cut-out Size 268 500
-
1. 1800W Cooking Zone.
2. 1200W Cooking Zone.
3. Glass Plate.
4. ON/OFF Button.
5. Control Panel.
A. On/Off Button.
B. Power/Timer Increase/Decrease Buttons.
C. Cooking Zone Select Buttons.
D. Timer Button.
E. Key Lock Button.

4
Operating Instructions
TOUCH CONTROLS:
•The controls respond to touch, so you don’t need to apply any pressure.
•Use the ball of your finger, not its tip.
•You will hear a beep each time a touch is registered.
•Make sure the controls are always clean, dry, and that there is no object
(e.g. a utensil or a cloth) covering them. Even a thin film of water may
make the controls difficult to operate.
CHOOSING THE CORRECT COOKWARE:
Cookware with rough bases should not be used as they can scratch the glass ceramic surface. The base of
the good cookware should be as thick and flat as possible. Before use, make sure that cookware bases are
clean and dry.
Always place the cookware on the cooking zone before it is switched on. If possible, always place the lids on the
cookware. The base of any cookware used must not be smaller or larger than the cooking zones; they should be
the proper size as indicated below, so as not to waste energy.
OPERATION:
Press the ON/OFF control button. All the displays
show “-”
Place a suitable pan on the cooking zone that you wish to use.
• Make sure the bottom of the pan and the surface of the cooking zone is
clean and dry.
Press the cooking zone button. The current power level will be displayed
(to the right of the button).
Adjust the power setting by pressing the increase/decrease buttons (0-9).
• If you don’t choose a power setting within 1 minute, the ceramic hob will
automatically switch off. You will need to start again.
• You can modify the power setting at any time during cooking.

5
Once cooking has finished, press the cooking zone button for the cooking
zone to be turned off.
Adjust the power setting down to “0” using the decrease button, or by
pressing both the decrease and increase buttons simultaneously.
Turn the whole cooktop off by pressing the ON/OFF control button.
If a cooking zone is hot after the cooking zone has been turned off, the
display will show “H” until the cooking zone cools down.
KEY LOCK:
The key lock is used to disable the control buttons (except the ON/OFF button) to stop accidental changes to
settings.
To lock the appliance, first turn on the power using the ON/OFF control
button, and adjust the cooking zone settings. Press the key lock button.
The timer display will change to “LO”, indicating the key lock is active.
To disable the key lock function, first make sure the cooktop is on. Press
the key lock button for a few seconds and the buttons will become
responsive again.
TIMER FUNCTIONS:
There are two different timer functions. The first is the Minute Minder. This is a timer that can be set up as a
reminder (add extra water, add spices etc) but does not affect the cooking zones in any way. The second is a
cooking zone timer which can be set to turn off a cooking zone after a period of time.
To set up a Minute Minder timer function, first make sure the cooktop has
been turned on (a cooking zone does not need to be active).
Press the timer button and the timer display will flash the current setting.
Adjust the Minute Minder time by pressing the increase & decrease
buttons. The time will be shown on the timer display.
Once the Minute Minder time has been set, it will start to count down (in
minute increments). The timer display will flash for 5 seconds and then will
show the remaining time.
To adjust the time at any point, repeat the steps above. The timer can be
cancelled by reducing the time to “0”, either by pressing the decrease
button, or both the decrease and increase buttons simultaneously.
When the Minute Minder has finished, the buzzer will sound for 30
seconds and the timer display will show “--“.
NOTE: The Minute Minder can be set for a maximum time of 99 minutes.

6
To set up a timer function on a cooking zone, first turn on the cooktop and
select the power level. Press the cooking zone select button for the
cooking zone to have the timer function.
Press the timer button and the timer display will show “10” for a pre-set 10
minute timer.
Adjust the time by pressing the increase & decrease buttons. The time will
be shown on the timer display.
Once the time has been set, it will start to count down (in minute
increments). The timer display will flash for 5 seconds and then will show
the remaining time.
To adjust the time at any point, repeat the steps above. The timer can be
cancelled by reducing the time to “0”, either by pressing the decrease
button, or both the decrease and increase buttons simultaneously.
When the time has finished, the buzzer will sound for 30 seconds and the
timer display will show “--“. The cooking zone will also turn off.
NOTE: When a timer function is allocated to a cooking zone, the decimal point of the
cooking zone display will flash.
To set up a second timer function at the same time, repeat the steps above. The
remaining time for either cooktop can be checked by selecting the cooking zone and
then pressing the timer button. The decimal point of the cooking zone with the shortest time left will flash while all
other cooking zones with timers set will have their decimal point lit. When one timer finishes and the cooking zone
turns off, the decimal point on the cooking zone with the next shortest timer will begin to flash.
Safety Features
There are a number of safety features built into the cooktop.
OVER-TEMP PROTECTION:
The cooking zones are equipped with sensors to monitor the temperatures at the cooking zone. If the temperature
becomes excessive the cooker will turn off.
RESIDUAL HEAT WARNING:
When a cooking zone has run for a period of time, there will be some residual heat left once the cooking zone is
turned off. If the temperature is too high, a “H” will be shown on the cooking zone display until the temperature
decreases to a safe level.
DEFAULT COOKING ZONE WORKING TIMES:
In case of a cooking zone being left on accidentally, each cooking zone has a maximum working time dependant
on the power setting. If the time is exceeded the cooktop will turn off.
Power Level
1
2
3
4
5
6
7
8
9
Default Time (hr)
8
8
8
4
4
4
2
2
2

7
Power Settings
The settings below are guidelines only. The exact setting will depend on several factors, including your cookware
and the amount you are cooking. Experiment with the cooktop to find the settings that best suit you.
Power setting
Suitability
1 - 2
• delicate warming for small amounts of food
• melting butter, and foods that burn quickly
• gentle simmering
• slow warming
3 - 4
• reheating
• rapid simmering
• cooking rice
5 - 6
• pancakes
7 - 8
• sautéing
• cooking pasta
9
• stir-frying
• searing
• bringing soup to the boil
• boiling water
COOKING TIPS:
•When food comes to the boil, reduce the temperature setting.
•Using a lid will reduce cooking times and save energy by retaining the heat.
•Minimise the amount of liquid or fat to reduce cooking times.
•Start cooking on a high setting and reduce the setting when the food has heated through.
SIMMERING, COOKING RICE:
•Simmering occurs below boiling point, at around 85˚C, when bubbles are just rising occasionally to the
surface of the cooking liquid. It is the key to delicious soups and tender stews because the flavours develop
without overcooking the food. You should also cook egg-based and flour-thickened sauces below boiling
point.
•Some tasks, including cooking rice by the absorption method, may require a setting higher than the lowest
setting to ensure the food is cooked properly in the time recommended.
SEARING STEAK:
1. Stand the meat at room temperature for about 20 minutes before cooking.
2. Heat up a heavy-based frying pan.
3. Brush both sides of the steak with oil. Drizzle a small amount of oil into the hot pan and then lower the
meat onto the hot pan.
4. Turn the steak only once during cooking. The exact cooking time will depend on the thickness of the steak
and how cooked you want it. Times may vary from about 2 – 8 minutes per side. Press the steak to gauge
how cooked it is – the firmer it feels the more ‘well done’ it will be.
5. Leave the steak to rest on a warm plate for a few minutes to allow it to relax and become tender before
serving.
STIR-FRYING:
1. Choose a ceramic compatible flat-based wok or a large frying pan.
2. Have all the ingredients and equipment ready. Stir-frying should be quick. If cooking large quantities, cook
the food in several smaller batches.
3. Preheat the pan briefly and add two tablespoons of oil.
4. Cook any meat first, put it aside and keep warm.
5. Stir-fry the vegetables. When they are hot but still crisp, turn the cooking zone to a lower setting, return
the meat to the pan and add your sauce.
6. Stir the ingredients gently to make sure they are heated through.
7. Serve immediately.

8
Cleaning and Maintenance
NOTE:Cleaningandmaintenanceoperationsmustonlybecarriedoutwhenthecooktop iscool(allresidualheatindicatorsare
off).
Theapplianceshouldbedisconnectedfromthepoweroutletorturnedoffatyourisolation switchbeforecommencingany
cleaningprocess.
Do not use plastic, plastic coated or aluminium cooking equipment on this appliance.
CLEANING THE COOKTOP
Before cleaning the cooktop, first isolate the cooktop from the power. Once done, ensure that there is no residual heat
stored in the appliance. Vitroceramic glass is very resistant to high temperature and overheating. If there is residual heat
stored in the appliance, the related residual heat icon will be on. To avoid burns, let the appliance cool down.
Remove all spilt food and fat with a clean damp, warm, slightly soapy, dishcloth. Rinse cloth and wipe cooktop again
until clean, then wipe the cooktop dry with a clean tea towel or dry soft cloth.
If aluminium foil or plastic items are accidentally melted on the vitroceramic surface, they should be immediately
removed from the hot cooking area with a scraper specifically for vitroceramic glass. This will avoid any possible
damage to the surface. This also applies to sugar or food containing sugar that may be spilled on the cooktop.
In the event of other food melted on the cooktop surface, remove the dirt when the appliance has cooled down. Use
cleaner for glass ceramic or stainless steel when cleaning the surface.
Do not use abrasive sponges to clean the vitroceramic surface. These materials may damage the surface. Do not
use chemical detergents, sprays or spot removers on the vitroceramic surface. These materials may cause fire or
the vitroceramic colour to fade. Clean with a damp, warm, slightly soapy, dishcloth.
WARNING: Using cookware that is too large can cause discolouration or damage to the cooktop surface around the heat
zones, which is NOT covered under warranty.
Troubleshooting
Problem
Possible causes
What to do
The cooktop cannot
Be turned on.
No power.
Make sure the cooktop is connected to the
power supply and that it is switched on.
Check whether there is a power outage in
your home or area. If you’ve checked
everything and the problem persists, call a
qualified technician.
The touch controls
are unresponsive.
The controls are locked.
Unlock the controls. See section ‘Operating
Instructions’ for direction.
The touch controls
are difficult to
operate.
There may be a slight film of water over
the controls or you may be using the tip
of your finger when touching the
controls.
Make sure the touch control area is dry and
use the ball of your finger when pressing the
controls.
The glass is being
scratched.
Rough-edged cookware.
Use cookware with flat and smooth bases.
Unsuitable, abrasive scourer or
cleaning products being used.
Use only recommended cleaners.
Some pans make
crackling or clicking
noises.
This may be caused by the
construction of your cookware
(layers of different metals
vibrating differently).
This is normal for cookware and
does not indicate a fault.

9
Installation
Cut out the work surface according to the
sizes shown below.
A minimum of 50mm must be left between
the edge of the hole and any edge of the
work surface. The work surface must be at
least 30mm thick. Take care that the
material of the work surface is heat resistant
to at least 100ºC to avoid any damage to the
work surface.
A – 268 to 272mm.
B – 500 to 504mm.
C, D, E, F – 50mm minimum.
Make sure the ceramic cooker hob is well
ventilated and the air inlet and outlet are not
blocked. Follow the following dimensions:
Note: The safety distance between the
cooktop and the cupboard above the
cooktop should be at least 760mm, and
between the cooktop and rangehood must
be a minimum of 650mm.
A – 760mm minimum to overhead cupboard,
650mm minimum to range hood.
B – 50mm minimum.
C – 30mm minimum.
D – Air intake.
E – 10mm x length of cooktop air exit.
Place the cooktop on a flat clean surface (for example part of
the carton). Loosely fit the rear 2 mounting brackets. Slide the
cooktop into the hole and fit the front 2 mounting brackets.
Adjust the position of the cooktop so it is central within the hole
and tighten all brackets.
ELECTRICAL CONNECTION:
Installation is only permitted by a licensed electrician, and
carried out according to instructions provided by the
manufacturer. Incorrect installation might cause harm and
damage, for which the manufacturer accepts no responsibility.
Before carrying out the connection to the power supply, the voltage rating of the appliance (stamped on the
appliance identification plate) must be checked for correspondence to the available mains supply voltage, and the
mains electric wiring should be capable of handling the oven’s power rating (also indicated on the identification
plate). After having installed the appliance, the switched outlet must always be in an accessible position.
The cooktops are to be connected to a single phase 220-240Vac 50 Hz supply and earthed via the 15A plug. The
mains terminal is on the underside of the cooktop (this should be fully closed after installation).
During installation, an all pole disconnector should be included inside they supply circuit with a contact opening of
at least 3mm. The power supply cord must not touch against any hot surfaces and must be placed so that its
temperature does not exceed 75 °C at any point along its length. The electrical safety of this appliance can only be
guaranteed if the oven is correctly and efficiently earthed. The manufacturer declines all responsibility for damage
resulting from an installation which has not been earthed correctly.

Table of contents
Other Omega Cooktop manuals

Omega
Omega OG63XA User manual

Omega
Omega OC64BA User manual

Omega
Omega OG60XA User manual

Omega
Omega OC74TXA User manual

Omega
Omega OC90TZ Specification sheet

Omega
Omega OG67XA User manual

Omega
Omega OCC64KZCOM User manual

Omega
Omega OC64TB User manual

Omega
Omega OCI64Z User manual

Omega
Omega OC64KB User manual
Popular Cooktop manuals by other brands

Miele
Miele MasterChef KM452 installation instructions

Kuppersbusch
Kuppersbusch EKWI 3740.0 W Instructions for use

Thermador
Thermador HMT75M421B installation instructions

KitchenAid
KitchenAid KGCP483KSS03 parts manual

Whirlpool
Whirlpool GLS3074 Use & care guide

Fisher & Paykel
Fisher & Paykel CG365CWACX1 Product dimensions