Reproduction of part or all of the contents of this document in any form is expressly prohibited other than for individual use only.
All text, images and labels are property of Nimax Gmbh.
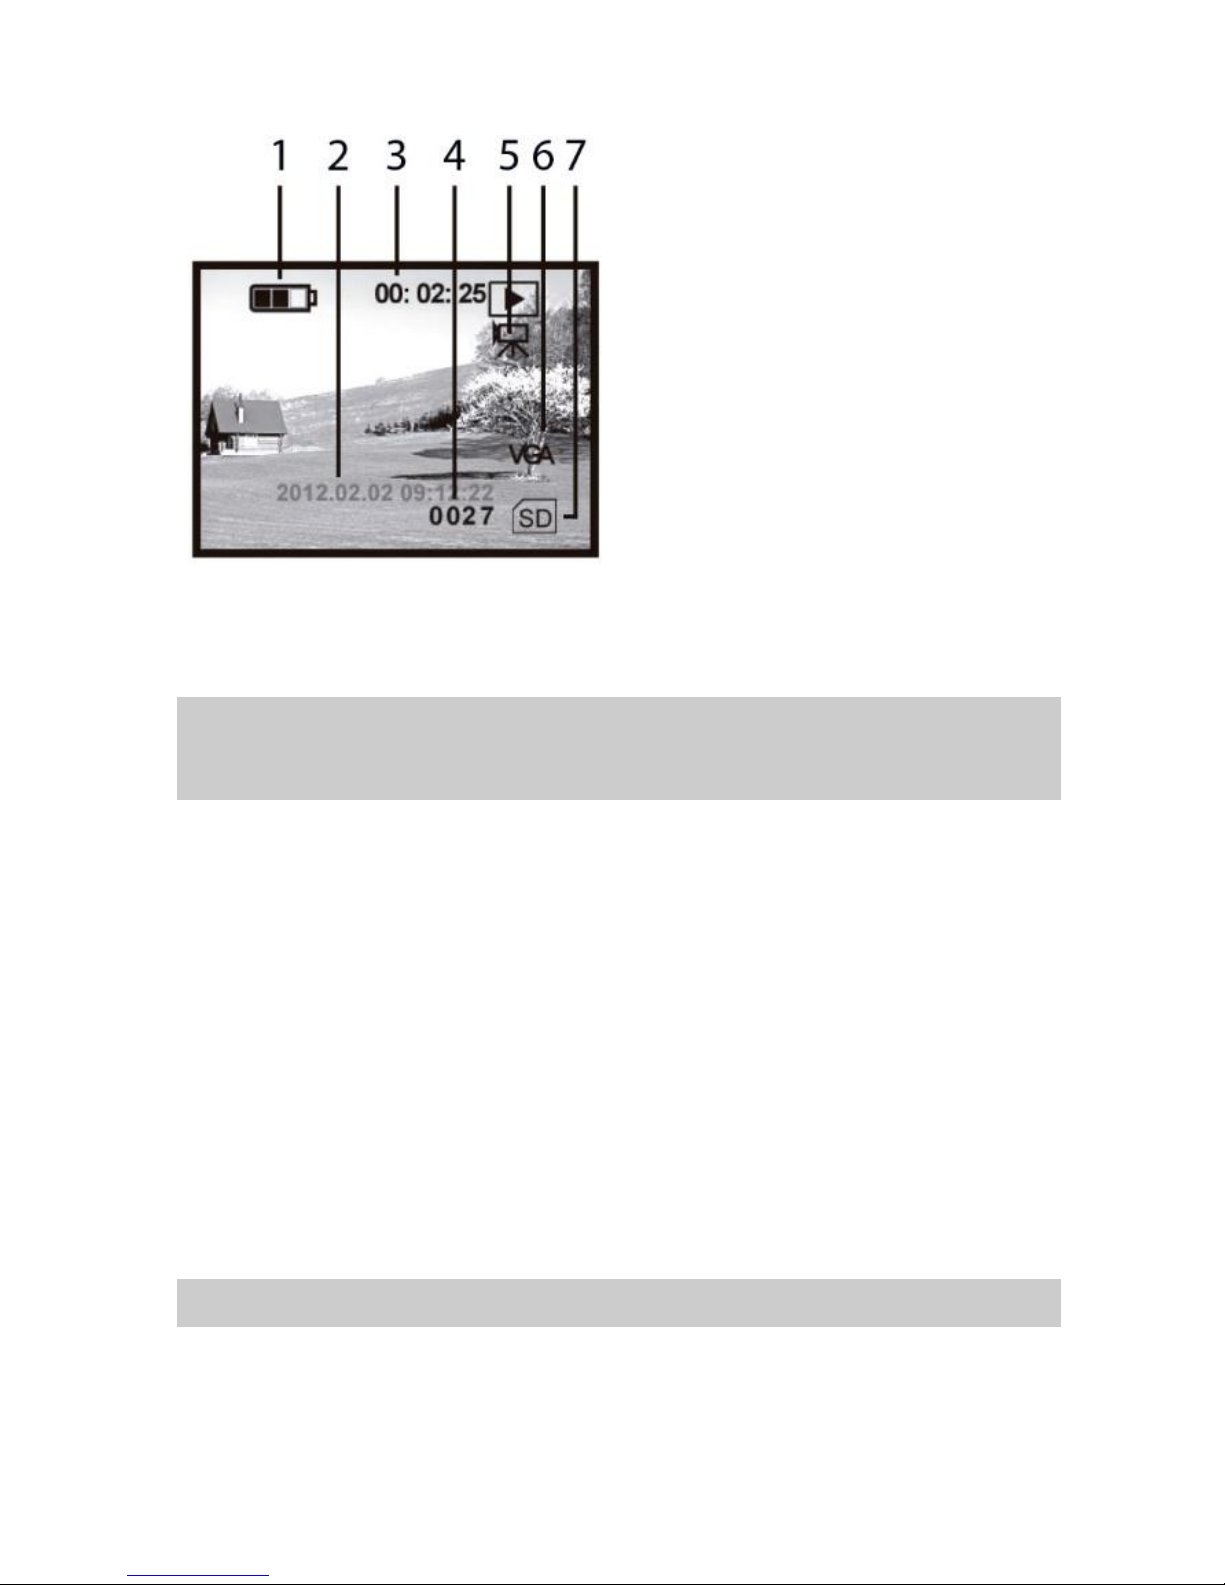
Video Play (figure 10)
While in video mode press MODE button to change
to Play mode. This will allow to review and play the
captured videos.
1. Battery charge status
2. Date/Time
3. Video recording time
4. Video serial number
5. Video play mode
6. Video VGA format
7. Record media
Date and time
To set date and time please connect the device to a
computer using the supplied USB cable. Look for the
device from the list of available devices. Locate the
folder that contain the time.txt and change the time accordingly. Save and close the file. Copy it to the
device’s root folder. Remove the USB cable from the socket.
Video OUT
You can connect the device to a TV or a video capture device. Simply use the supplied video cable.
Connect it to the video socket. Hold the POWER button for three seconds so that the device outputs
video signal.
USB connection/Computer connection
Connecting the device to a computer will allow the batteries to charge. It will also allow to copy or erase
some of the captured videos or photos. Simply look for the recorded files in the SD card.
Auto power OFF
The device turns OFF if not used for 3 minutes expect for play modes (Photo and Video).
Features
Batteries: 2x RCR123A (650mAh, 3.7V) –charge for at least 12 hours before first use. Connect the power
cable to the DC IN 5V socket to charge the batteries. A red LED –next to the socket - will light while
charging. The batteries are fully charged when the LED turns off.
Weight: 420g Magnification: 5x Aperture lens: 40mm
FOV: 3.75 to 5 degrees Range: low light 200m
Time format should be of this type: yyyy.mm.dd hh.mm.ss for example 2015.07.12 23:12
The date and time will be erased from the device if the batteries are removed or empty or if
the device is not used for long periods of time.