4
Any form of reproduction of the entire contents of this document or parts thereof beyond the private use is strictly prohibited.
Subject to alterations and errors. All texts, illustrations and symbols are the property of nimax GmbH.
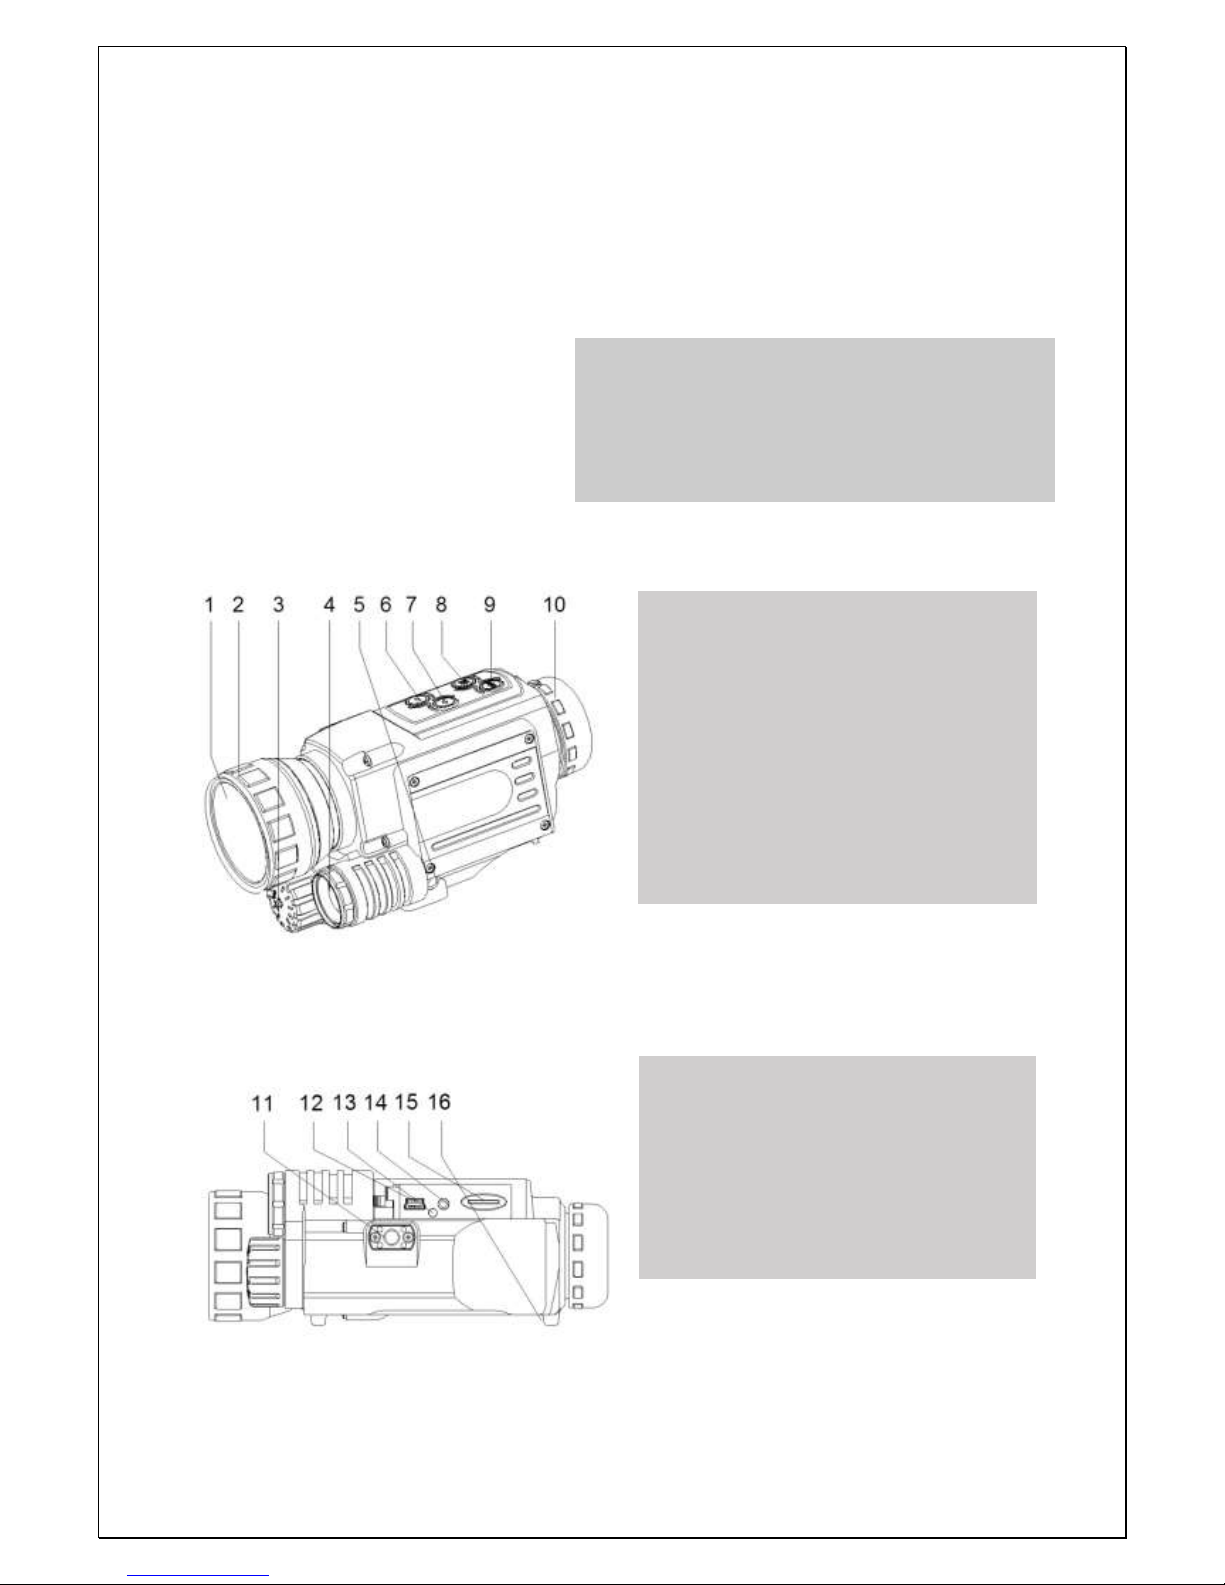
Infra-red lighting
When in observation mode (photo mode), press the selection
button, #8, for 2 seconds to go to the lighting menu. If there is
insufficient light, you can switch on the infra-red lighting. Infra-
red (IR) lighting improves the visible range and the brightness of
the image. To switch on IR lighting, press the selection button
twice (#8 –Fig. 1). “*LAMP:” will be displayed on the monitor.
Press left and right to adjust the lighting (in the example: “5”).
There are 9 levels of IR lighting (1-9). The left button increases
lighting intensity, and the right button reduces it. To exit, press
the selection button again. “NV5” will be displayed briefly to
show the brightness or lighting level.
Please note: In each operating mod, the menu will go off
after 5 seconds if no buttons are pressed
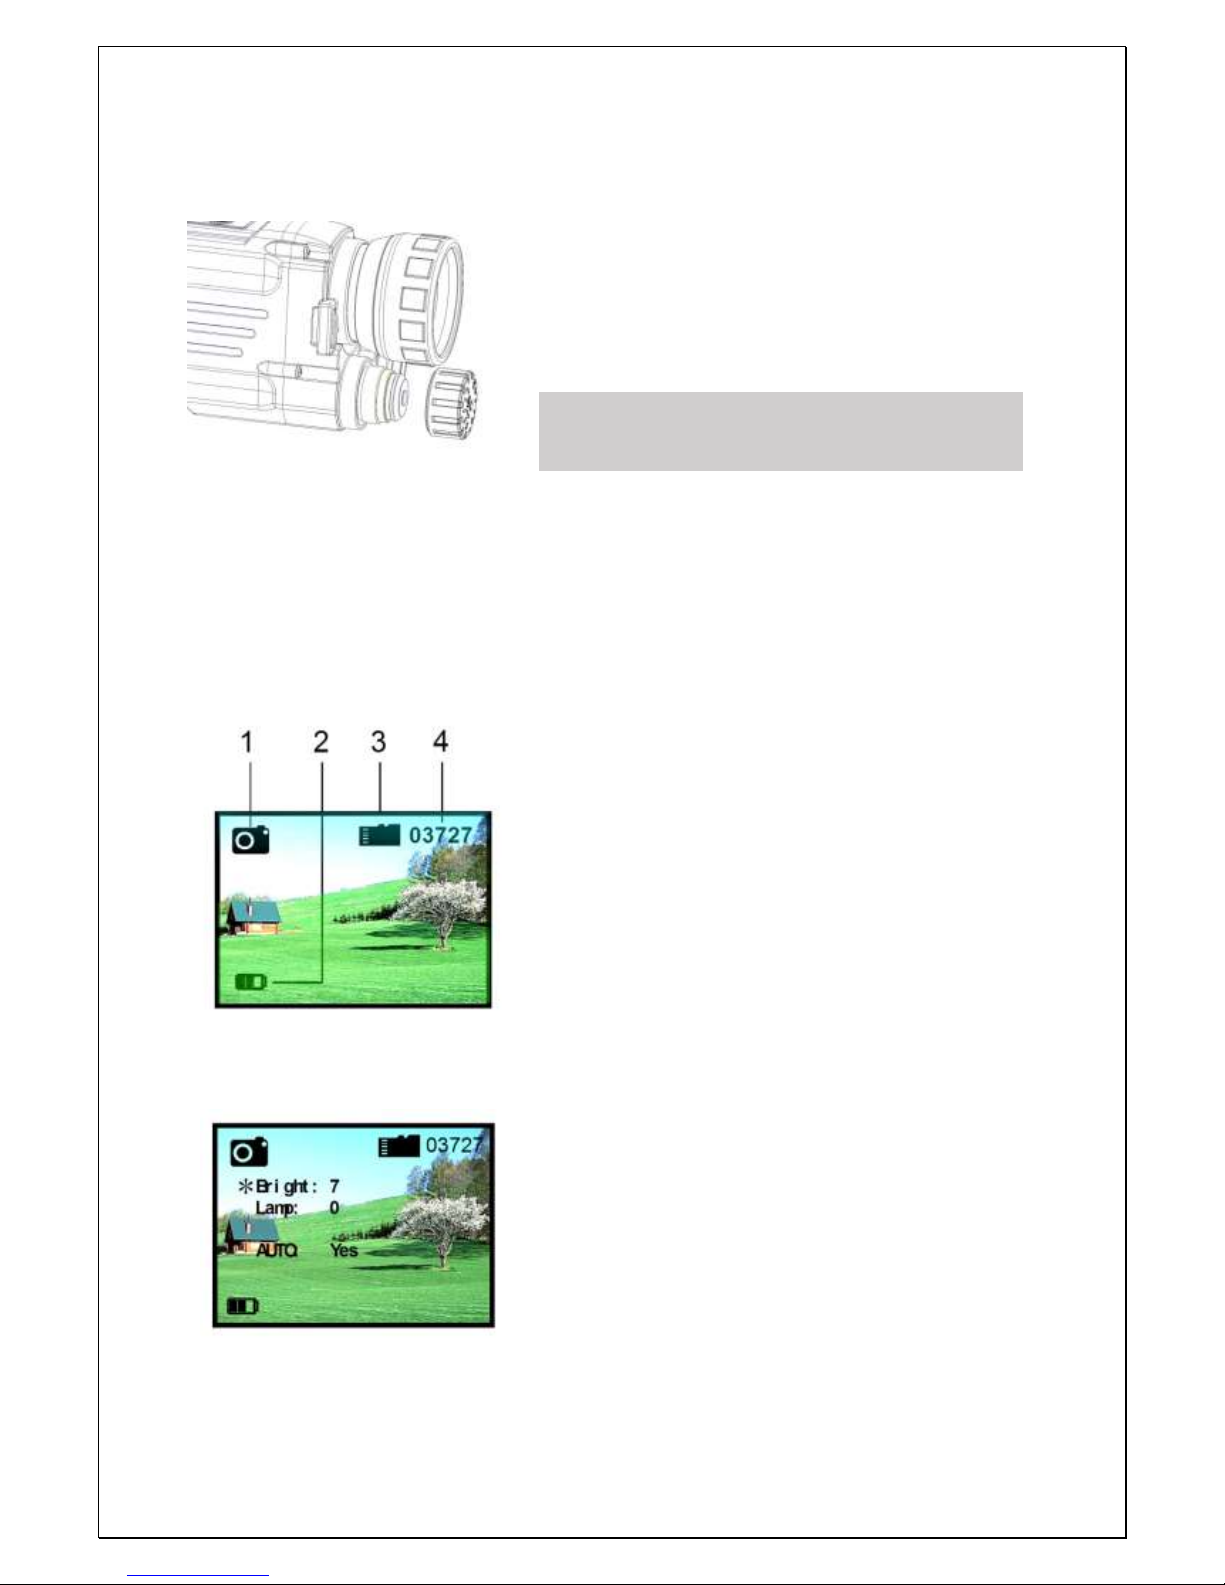
Photo mode
Taking photos
When the device is switched “ON”, it will automatically be in
photo mode. Press the confirmation button (no. 9) to take a
picture. This image will be saved automatically.
1. Photo mode
2. Battery charge status
3. Memory card inserted
4. Image memory space remaining
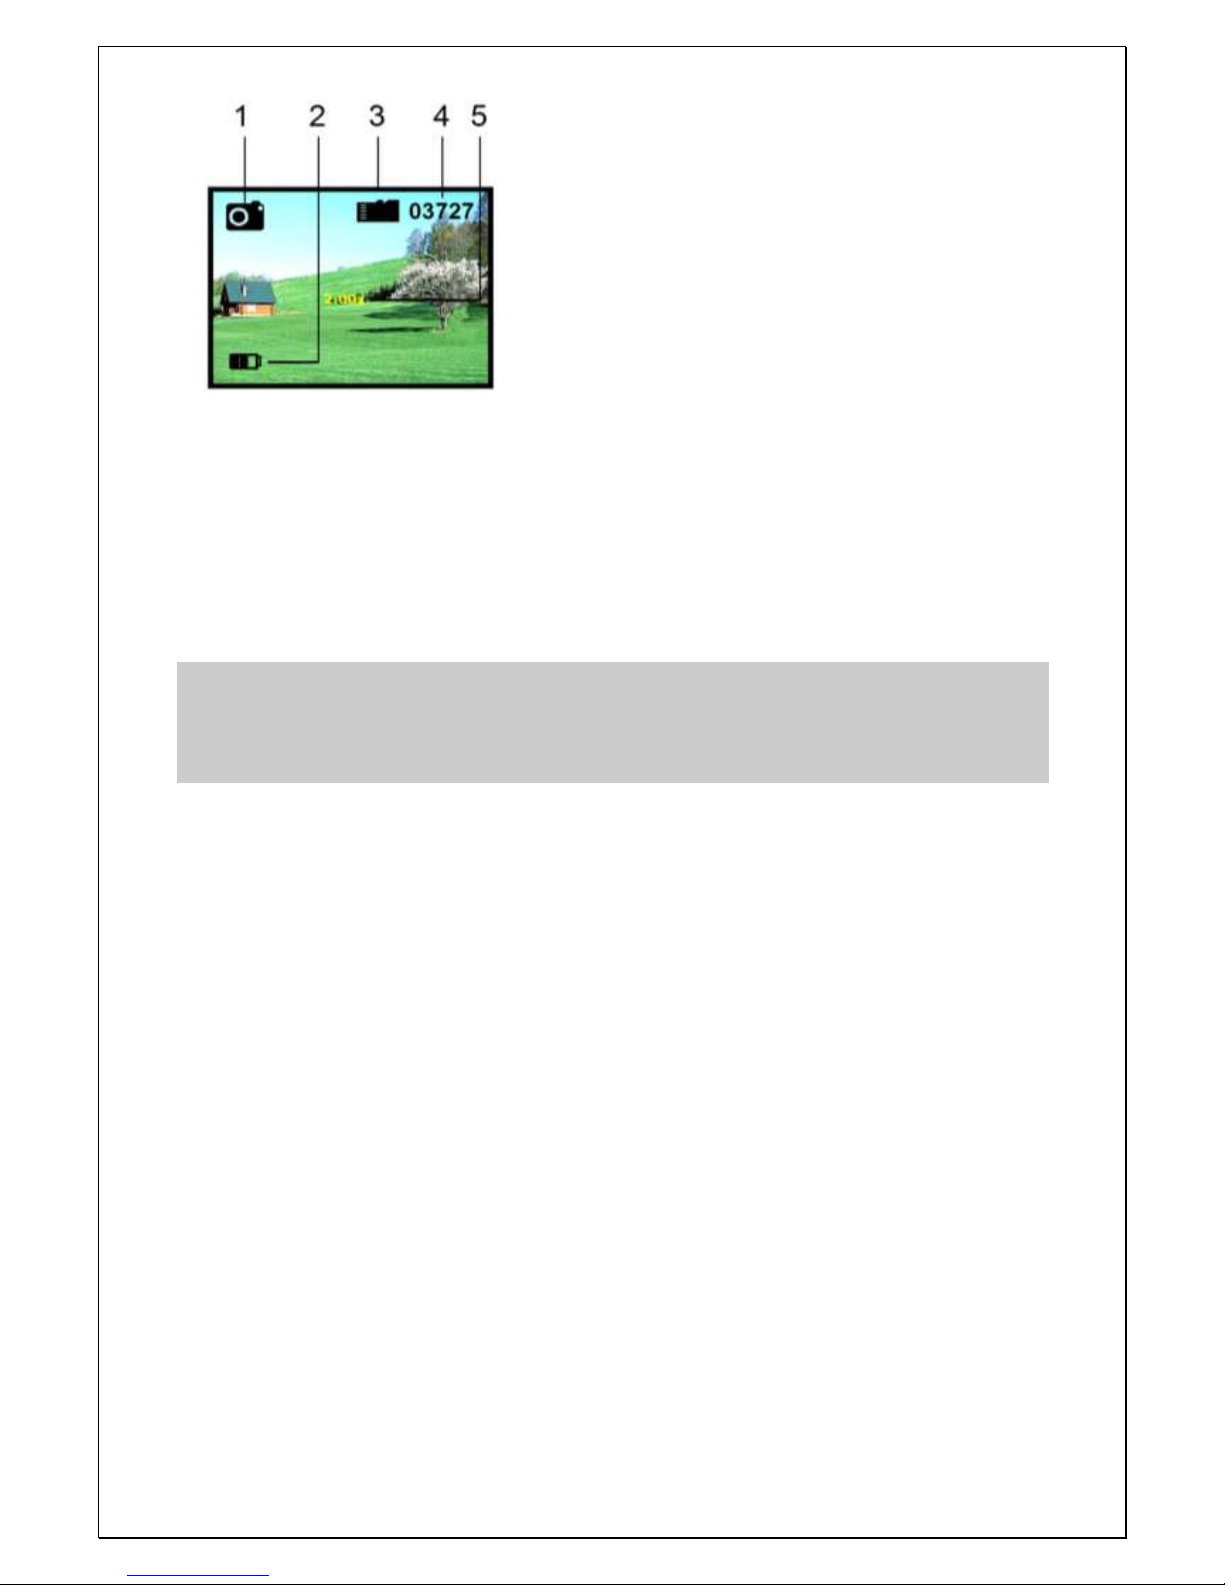
View photos
When in photo mode, press the selection button (no. 8) to go to
video mode. When in video mode, select the “Playback” option
with the selection button. If you press and hold down the
confirmation button, you can delete the photo.
1. Battery status
2. Number of photos/videos
3. Playback mode
4. Memory card inserted