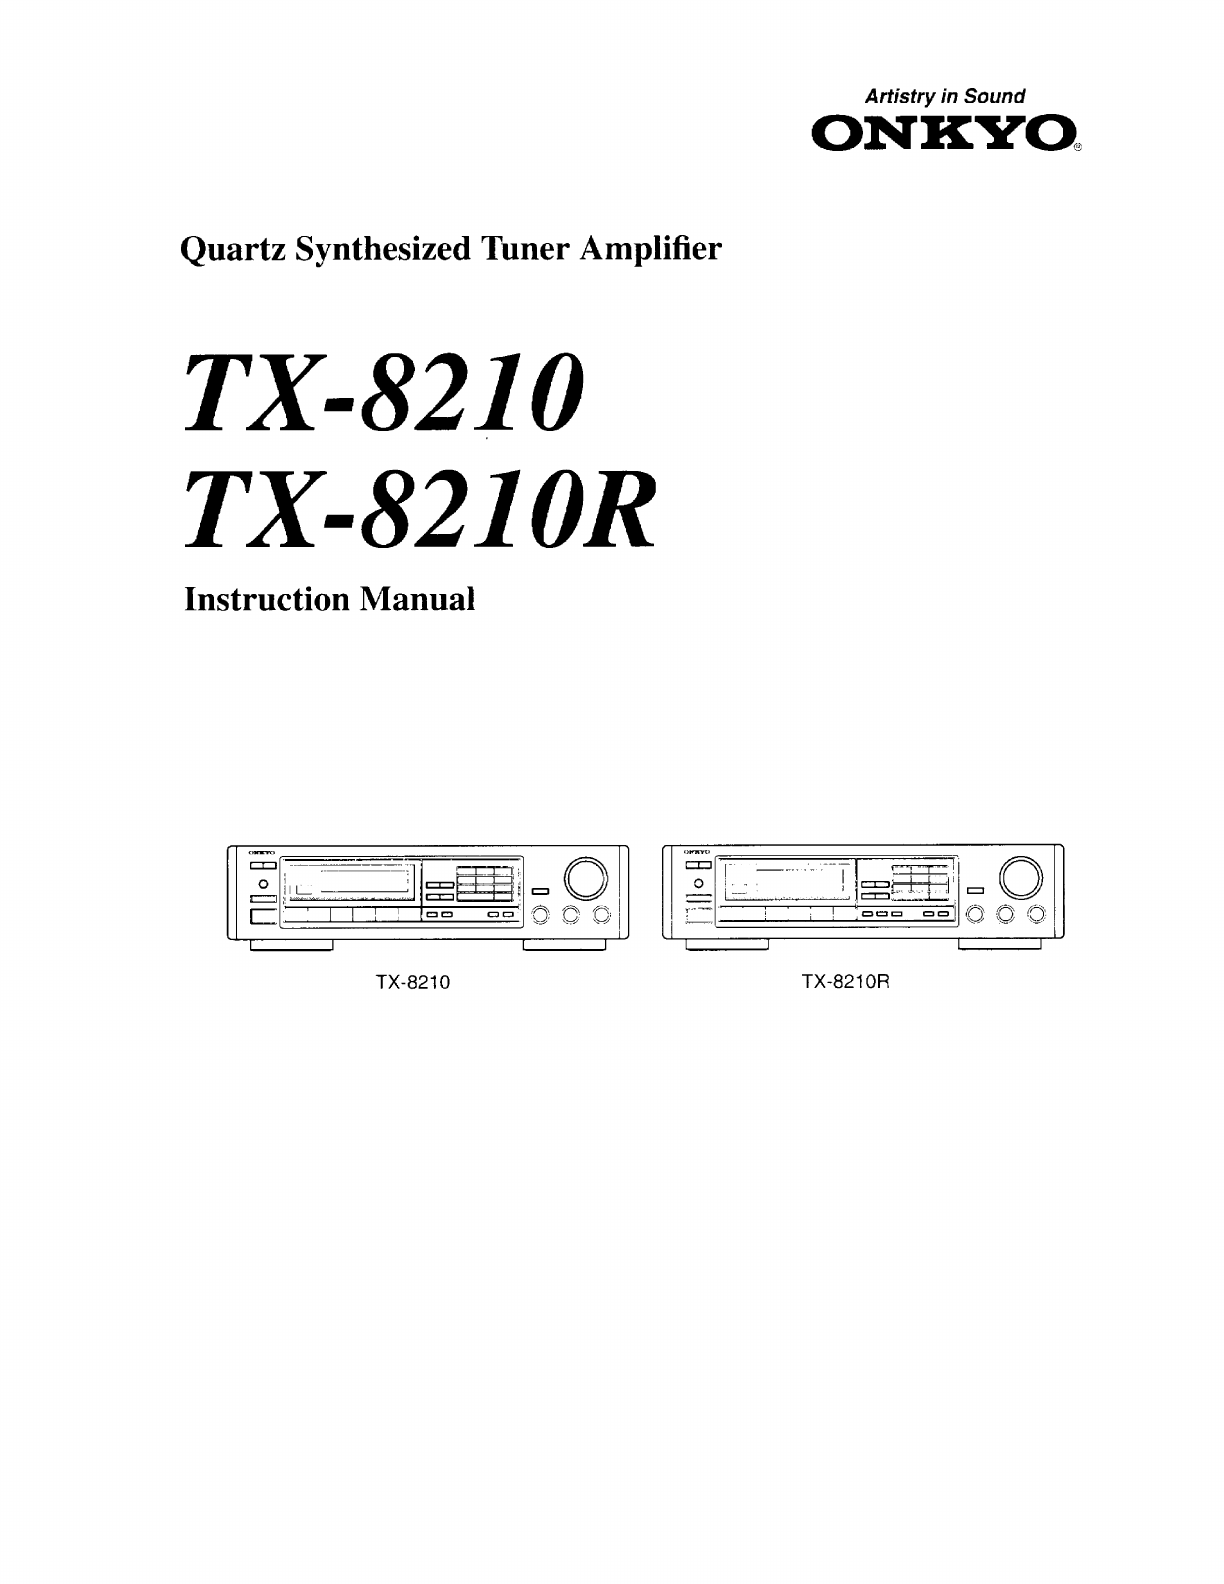
Onkyo TX-8210 User manual

Artistry
in
Sound
Quartz
Synthesized
Tuner
Amplifier
TX-8210
TX-S210R
Instruction
Manual
TX-8210
TX-8210R

Thank
you
for
your
purchase
of
the
Onkyo
Tuner
Amplifier.
Please
read
this
manual
thoroughly
before
making
connections
and
turning
on
the
power.
Following
the
instructions
in
this
manual
will
enable
you
to
obtain
optimum
performance
and
listening
enjoyment
from
your
new
Tuner
Amplifier.
Please
retain
this
manual
for
future
reference.
Features
Main
Features
M@
Ample
Power
to
Drive
Even
Large
Speakers
Concentrating
on
sonic
performance,
Onkyo
made
sure
the
TX-8210
had
enough
continuous,
low-distortion
power
—
even
to
drive
low-impedance
loads.
This
receiver
also
boast
plenty
of
reserve
dynamic
power
for
the
sudden
transient
peaks
common
with
today’s
digital
sources.
M@
Discrete
Output
Stage
Amplifiers
For
impeccable
sonic
accuracy
Onkyo’s
engineers
called
for
discrete
amplifiers
in
the
output
stage,
rather
than
the
less
expensive
“package
ICs”.
The
result
is
enhanced
cooling,
proven
reliability
and
superior
sonics.
@
30
Random
FM/AM
presets
and
3-group
classifica-
tion
Lets
you
store
your
30
preset
stations
into
three
groups
and
name
the
groups.
B
RI
Compatible
Remote
Control
System
Supplied
The
supplied
remote
control
operates
all
major
functions.
It
also
lets
the
user
control
the
major
functions
of
any
Onkyo
cas-
sette
deck
or
CD
player
bearing
the
FRI
mark.
BM
RDS
(TX-8210R
only)
For
Radio
Data
System
reception
(PS,
PTY,
RT,
TP)
Other
Features
M@
Six
Inputs
(including
Tape-1/Video)
M@
2-Pair
Speaker
Output
Terminals
@
Loudness
Control
@
Two-Mode
APR
(Automatic
Precision
Reception)
@
Tape-1
to
Tape-2
Dubbing
M@
Battery-free
Backup
M@
Separate
A
&
B
Speaker
Selector
M@
Motor
Driven
Volume
Control
@
Direct
Access
Tuning
B®
Automatic
FM
scanning
@
front
Panel
Headphone
Jack
@
Built-in
AM
Loop
Antenna
M@
Enhanced
FL
Display
M@
Extra
large
feet
with
tri-point
configuration
for
max-
imum
vibration
damping
M@
Brushed
Aluminum
Front
Panel
@
Audio
Muting
&
Sleep
Timer
“WARNING”
“TO
REDUCE
THE
RISK
OF
FIRE
OR
ELECTRIC
SHOCK,
DO
NOT
EXPOSE
THIS
APPLIANCE
TO
RAIN
OR
MOIS-
TURE.”
CAUTION:
“TO
REDUCE
THE
RISK
OF
ELECTRIC
SHOCK,
DO
NOT
REMOVE
COVER
(OR
BACK).
NO
USER-SERVICEABLE
PARTS
INSIDE.
REFER
SERVICING
TO
QUALIFIED
SER-
VICE
PERSONNEL.”
Note
to
CATV
system
installer:
e
This
reminder
is
provided
to
call
the
CATV
system
installer’s
attention
to
Section
820-40
of
the
NEC,
which
provides
guide-
lines
for
proper
grounding
and.
in
particular,
specifies
that
the
cable
ground
shal]
be
connected
to
the
grounding
system
of
the
building,
as
close
to
the
point
of
cable
entry
as
practical.
e
For
models
having
a
power
cord
with
a
polarized
plug.
|
CAUTION:
TO
PREVENT
ELECTRIC
SHOCK.
MATCH
WIDE
BLADE
OF
PLUG
TO
WIDE
SLOT,
FULLY
INSERT.
e
Sur
les
modeéles
dont
la
fiche
est
polarisée.
ATTENTION:
POUR
EVITER
LES
CHOCS
ELEC-
TRIQUES,
INTRODUIRE
LA
LAME
LA
PLUS
LARGE
DE
LA
FICHE
DANS
LA
BORNE
CORRESPONDANTE
DE LA
PRISE
ET
POUSSER
JUSQU’AU
FOND.
e@
This
apparatus
complies
with
requirements
of
EC
directive
87/
308/EEC.
@
Replacement
and
mounting
of
an
AC
plug
on
the
power
supply
cord
of
this
unit
should
be
performed
only
by
qualified
service
personnel.
@
IMPORTANT:
The
wires
in
the
mains
lead
are
coloured
in
accordance
with
the
following
code:
Blue:
Neutral
Brown:
Live
As
the
colours
of
the
wires
in
the
mains
lead
of
thts
apparatus
may
not
correspond
with
the
coloured
markings
identifying
the
termi-
nals
in
your
plug,
proceed
as
follows:
The
wire
which
is
coloured
blue
must
be
connected
to
the
terminal
which
is
marked
with
the
letter
N
or
coloured
black.
The
wire
which
is
coloured
brown
must
be
connected
to
the
termi-
nal
which
is
marked
with
the
letter
L
or
coloured
red.
CAUTION
RISK
OF
ELECTRIC
SHOCK
DO
NOT
OPEN
@
The
lightning
flash
with
arrowhead
symbol,
within
an
equilateral
triangle,
is
intended
to
alert
the
user
to
the
presence
of
uninsulated
“danger-
ous
voltage”
within
the
product’s
enclosure
that
may
be
of
sufficient
magnitude
to
constitute
a
risk
of
electric
shock
to
persons.
The
exclamation
point
within
an
equilateral
trian-
gle
is
intended
to
alert
the
user
to
the
presence
of
important
operating
and
maintenance
(servicing)
instructions
in
the
literature
accompanying
the
product.

Important
Safeguards
PLEASE
READ
CAREFULLY
ALL
THE
FOLLOWING
IMPORTANT
SAFEGUARDS
THAT
ARE
APPLICABLE
TO
YOUR
EQUIPMENT.
i]
10.
lf.
Read
Instructions
—
All
the
safety
and
operating
instructions
should
be
read
before
the
product
is
operated.
Retain
Instructions
—
The
safety
and
operating
instructions
should
be
retained
for
future
reference.
Heed
Warnings
—
Ail
warnings
on
the
product
and
in
the
operating
instructions
should
be
adhered
to.
.
Follow
Instructions
—
All
operating
and
use
instructions
should
be
followed.
Cleaning
—
Unplug
this
product
from
the
wall
outlet
before
cleaning.
Do
not
use
liquid
cleaners
or
aerosol
cleaners.
Use
a
damp
cloth
for
cleaning.
Attachments
—
Do
not
use
attachments
not
recommended
by
the
product
manufacturer
as
they
may
cause
hazards.
.
Water
and
Moisture
—
Do
not
use
this
product
near
water
-
for
example,
near
a
bath
tub,
wash
bowl,
kitchen
sink.
or
laundry
tub;
in
a
wet
basement:
or
near
a
swimming
pool:
and
the
like.
.
Accessories
—
Do
not
place
this
product
on
an
unstable
cart,
stand,
tripod,
bracket,
or
table.
The
product
may
fall,
causing
serious
injury
to
a
child
of
adult,
and
serious
damage
to
the
product.
Use
only
with
a
cart,
@
stand,
tripod,
bracket,
or
table
rec-
ommended
by
the
manufacturer,
or
sold
with
the
product.
Any
mount-
ww,
ing
of
the
product
should
follow
=
the
manufacturer's
instructions,
and
should
use
a
mounting
accessory
recommended
by
the
manufacturer.
A
product
and
cart
combination
should
be
moved
with
care.
Quick
stops,
excessive
force,
and
uneven
surfaces
may
cause
the
product
and
carl
combination
to
overturn.
Ventilation
—
Slots
and
openings
tn
the
cabinet
are
provided
tor
ven-
tilation
and
to
ensure
reliable
operation
of
the
product
and
to
protect
it
from
overheating,
and
these
openings
must
not
be
blocked
or
covered.
The
openings
should
never
be
blocked
by
placing
the
product
on
a
bed,
sofa,
rug,
or
other
similar
surface.
This
product
should
not
be
placed
in
a
built-in
installaion
such
as
a
bookcase
or
rack
unless
proper
ventilation
is
provided
or
the
manufacturer's
instructions
have
been
adhered
to.
Power
Sources
—
This
product
should
be
operated
only
from
the
type
of
power
source
indicated
on
the
marking
label.
If
you
are
not
sure
of
the
type
of
power
supply
to
your
home,
consult
your
product
dealer
or
local
power
company.
For
products
intended
to
operate
from
battery
power,
or
other
sources.
refer
to
the
operating
instructions.
521254
.
Grounding
or
Polarization
—
This
product
may
be
equipped
with
a
polarized
alternaung-current
line
plug
(a
plug
having
one
blade
wider
than
the
other).
This
plug
will
fit
into
the
power
outlet
only
one
way.
This
is
a
safety
feature.
[f
you
are
unable
to
insert
the
plug
fully
into
the
outlet.
try
reversing
the
plug.
If
the
plug
should
still
fail
to
fit.
contact
your
electrician
to
replace
your
obsolete
outlet.
Do
not
defeat
the
safely
purpose
of
the
polarized
plug.
.
Power-Cord
Protection
—
Power-supply
cords
should
be
routed
so
that
they
are
not
likely
to
be
walked
on
or
pinched
by
items
placed
upon
or
against
them,
paying
particular
allention
to
cords
at
plugs,
con-
venience
receptacles,
and
the
point
where
they
exit
from
the
product.
.
Outdoor
Antenna
Grounding
—
If
an
outside
antenna
or
cable
system
is
connected
to
the
product,
be
sure
the
antenna
or
cable
sys-
tem
is
grounded
so
as
to
provide
some
protection
against
voltage
surges
and
built-up
static
charges.
Article
810
of
the
National
Electri-
cal
Code,
ANSI/NFPA
70,
provides
information
with
regard
to
proper
grounding
of
the
mast
and
supporting
structure,
grounding
of
the
lead-
in
wire
to
an
antenna-discharge
unit.
size
of
grounding
conductors,
location
of
antenna-discharge
unit.
connection
to
grounding
elee-
trodes,
and
requirements
for the
grounding
electrode.
See
Figure
1.
.
Lightning
—
For
added
protection
tor
this
product
during
a
lightning
storm,
or
when
it
is
left
unattended
and
unused
for
long
periods
of
time,
unplug
it
from
the
wall
outlet
and
disconnect
the
antenna
or
cable
system.
This
will
prevent
damage
to
the
product
due
to
lightning
and
power-line
surges.
.
Power
Lines
—
An
outside
antenna
system
should
not
be
located
in
the
vicinity
of
overhead
power
lines
or
other
electric
light
or
power
circuits,
or
where
tt
can
fall
into
such
power
lines
or
circuits.
When
installing
an
outside
antenna
system,
extreme
care
should
be
taken
to
keep
from
touching
such
power
lines
or
circuits
as
contact
with
them
might
be
fatal.
19,
i)
—
Overloading
—
Do
not
overload
wall
outlets,
extension
cords,
or
integral
convenience
receptacles
as
this
can
result
in
a
risk
of
fire
or
electric
shock.
.
Object
and
Liquid
Entry
—
Never
push
objects
of
any
kind
into
this
product
through
openings
as
they
may
touch
dangerous
voltage
points
of
short-out
parts
that
could
result
in
a
fire
or
electric
shock.
Never
spill
liquid
of
any
kind
on
the
product.
Servicing
—
Do
not
attempt
to
service
this
product
yourself
as
open-
ing
or
removing
covers
may
expose
you
to
dangerous
voltage
or
other
hazards.
Refer
all
servicing
to
qualified
service
personnel.
.
Damage
Requiring
Service
—
Unplug
this
product
from
the
wall
outlet
and
refer
servicing
to
qualified
service
personnel
under
the
fol-
lowing
conditions:
a)
When
the
power-supply
cord
or
plug
is
damaged.
b)
If
liquid
has
been
spilled,
or
objects
have
fallen
into
the
product.
c)
If
the
product
has
been
exposed
to
rain
or
water.
d)
If
the
product
does
not
operate
normally
by
following
the
operat-
ing
instructions.
Adjust
only
those
controls
that
are
covered
by
the
operating
instructions
as
an
improper
adjustment
of
other
controls
may
result
in
damage
and
will
often
require
extensive
work
by
a
qualified
technician
to
restore
the
product
to
its
normal
operation.
e)
Ifthe
product
has
been
dropped
or
damaged
in
any
way.
f)
When
the
product
exhibits
a
distinct
change
in
performance
—
this
indicates
a
need
for
service.
.
Replacement
Parts
—
When
replacement
parts
are
required,
be
sure
the
service
technician
has
used
replacement
parts
specified
by
the
manufacturer
or
have
the
same
characteristics
as
the
original
part.
Unauthorized
substituuions
may
result
in
fire,
electric
shock,
or
other
hazards.
.
Safety
Check
—
Upon
completion
of
any
service
or
repairs
to
this
product,
ask
the
service
technician
to
perform
safety
checks
to
deter-
mine
that
the
product
is
in
proper
operating
condition.
.
Wall
or
Ceiling
Mounting
-
The
product
should
be
mounted
to
a
wall
or
ceiling
only
as
recommended
by
the
manufacturer.
.
Heat
—
The
product
should
be
situated
away
from
heat
sources
such
as
radiators.
heal
registers.
stoves.
or
other
products
(neluding
ampli-
fiers)
that
produce
heat.
FIGURE
1:
EXAMPLE
OF
ANTENNA
GROUNDING
AS
PER
NATIONAL
ELECTRICAL
CODE,
ANSI/NFPA
70
___-
ANTENNA
LEAD
iN
WIRE
ANTENNA
DISCHARGE
UNIT
(NEC
SECTION
810-20)
ELECTRIC
SERVICE
EQUIPMENT
-—_
eee,
GROUNDING
CONDUCTORS
(NEC
SECTION
810-21}
GROUND
CLAMPS
POWER
SERVICE
GROUNDING
ELECTRODE
SYSTEM
(NEC
ART
250.
PART
H)
NEC
—
NATIONAL
ELECTRICAL
CODE
S2898A

Precautions
1.
Warranty
Card
The
serial
number
is
written
on
the
rear
panel
of
this
unit.
Copy
the
serial
number
and
model
number
onto
your
warranty
card
and
keep
it
in
a
safe
place.
2.
Recording
Copyright
Recording
of
copyrighted
material
for
other
than
personal
use
is
illegal
without
permission
of
the
copyright
holder.
3.
AC
Fuse
The
fuse
is
located
inside
the
chassis
and
is
not
user-serviceable.
If
power
does
not
come
on,
contact
your
Onkyo
authorized
service
Station.
4.
Care
|
From
time
to
time
you
should
wipe
the
front
and
rear
panels
and
the
cabinet
with
a
soft
cloth,
For
heavier
dirt.
dampen
a
soft
cloth
in
a
weak
solution
of
mild
detergent
and
water,
wring
it
out
dry,
and
wipe
off
the
dirt.
Following
this,
dry
immediately
with
a
clean
cloth.
Do
not
use
rough
material,
thinners,
alcohol
or
other
chemi-
cal
solvents
or
cloths
since
these
could
damage
the
finish
or
remove
the
panel
lettering.
5.
Power
WARNING
BEFORE
PLUGGING
IN
THE
UNIT
FOR
THE
FIRST
TIME,
READ
THE
FOLLOWING
SECTION
CAREFULLY.
@
Some
models
are
designed
for
use
only
with
the
power
supply
voltage
of
the
region
where
they
are
sold.
AC
230V,
50Hz
AC
120V,
60Hz
AC
220V/120V
switchable,
50/60Hz
European
model
(except
U.K.):
U.S.A.
and
Canadian
models:
Worldwide
model:
e
Voltage
Selector
(Rear
Panel)
Worldwide
models
are
equipped
with
a
voltage
selector
to
con-
form
to
local
power
supplies.
Be
sure
to
set
this
switch
to
match
the
voltage
of
the
power
supply
in
your
area
before
plugging
in
the
unit.
(See
page
5.)
Models
without
a
voltage
selector can
only
be
used
in
areas
where
the
power
supply
is
the
same
as
that
of
the
unit.
Memory
Preservation
This
unit
does
not
require
memory
preservation
batteries.
A
built-in
memory
power
back-up
system
preserves
the
contents
of
the
mem-
ory
during
power
failures
and
even
when
the
unit
is
unplugged.
The
unit
must
be
plugged
in
order
to
charge
the
back-up
system.
The
memory
preservation
period
after
the
unit
has
been
unplugged
varies
depending
on
climate
and
placement
of
the
unit.
On
the
aver-
age,
memory
contents
are
protected
over
a
period
of
a
few
weeks
after
the
last
time
the
unit
has
been
unplugged.
This
period
is
shorter
when
the
untt
is
exposed
to
a
highly
humid
climate.
Supplied
accessories
+
Remote
control
1
Remote
control
cable
2
Battery
(size
AA,
R6,
or
UM-3)
1
AM
loop
antenna
1
T-shaped
FM
antenna
(Worldwide
models
only)
1
75/300
ohm
1
CV
plug
(Shape
may
vary
according
to
the
area
where
purchased.)
antenna
adaptor

Before
using
this
unit
(Worldwide
models
only)
(Bottom)
Remote
contro!
sensor
sae
VOLTAGE
SELECTOR
ot
J
Tuning
step
frequency
switch
TX-8210/R
approx.
5m
Bocca
See
UE
SRE
Worldwide
models
are
equipped
with
a
voltage
selector
on
the
rear
panel.
i.
tr
Determine
the
proper
voltage
for
your
area:
220V
or
120V.
If
the
preset
voltage
is
not
correct
for
your
area,
insert
a
screwdriver
into
the
groove
in
the
switch.
Slide
the
switch
all
the
way
to
the
right
(120V)
or
to
the
left
(220V),
whichever
is
appropriate.
Worldwide
models
are
equipped
with
a
switch
that
controls
the
AM
band
tuning
steps.
Please
set
this
switch
to
match
the
AM
band
tuning
step
frequency
in
your
area.
U.S.A.
and
Canada
:
|0kHz
Other
areas
:
9kHz
Average
battery
life
is
about
one
year,
depending
upon
the
frequency
of
use
and
the
environment
(temperature
and
humid-
ity)
in
which
the
remote
control
is
used.
Only
use
batteries
of
the
kind
specified
in
the
table
below.
Warning
Do
not
leave
an
expired
battery
in
the
case
—
it
may
leak
or
damage
the
remote
control.
Do
not
use
nickel
cadmium
(recharge-
able)
batteries.
Replace
both
batteries
at
once:
do
not
use
one
old
battery
and
one
new
battery.
The
following
information
will
help
you
get
optimal
use
from
the
remote
control.
@
Place
this
unit
away
from
direct
bright
light,
which
can
prevent
proper
opera-
tion
of
the
remote
control.
Make
sure
audio
rack
doors
do
not
have
tinted
glass.
If
this
unit
is
placed
behind
such
a
door.
this
may
prevent
proper
remote
control
operation.
Using
other
remote
controls
in
the
same
room
as
this
unit’s
remote
control
may
cause
Interference.

Control
positions
and
names
nee
For
more
imformation
about
buttons
or
knobs,
turn
to
the
page
number
listed
in
[
].
Front
Panel
1.
Stand-by/On
button
[12]
1
STAND-BY/ON
5
<DOWN
TUNING
UP
>
2.
Headphone
jack
[13]
2
PHONES
6
FM
MUTE/MODE
3.
Speaker
buttons
[12]
3
SPEAKERS
A,B
7
1
ABC~,
O10
_
*
/
4.
Stand-by
Received
Indicator
[12]
4
STAND-BY
/
RECEIVED
8
LOUDNESS
5.
Tuning
Up/Down
buttons
[14]
9
VOLUME
6.
FM
Mute/Mode
button
[15,
16]
7.
Number/Character
buttons
[14,
15,
17]
8.
Loudness
button
[12]
9.
Volume
knob
[12]
10.
Input
Selector
buttons
[12]
11.
Power
switch
[12]
12.
Remote
sensor
[5]
13.
Memory
button
[15,
16]
14.
Character
button
[17]
11
POWER
20
BASS
12
REMOTE
SENSOR
21
TREBLE
15.
Display
button
[19]
13
MEMORY
:
22
BALANCE
16.
PT
Y/TP
button
[19]
14
CHARACTER
19
GROUP
(Only
for
TX-8210R)
17.
Direct
Tuning/Delete
button
[14,
15
DISPLAY
18
SCAN
17
:
16
PTY/TP
17
DIRECT
TUNING/DELETE
18.
Scan
button
[16,
19]
(TX-8210R)
Preset
scan
button
[16]
(TX-8210)
19.
Group
button
[15,
16]
20.
Bass
control
knob
[12]
21.
Treble
control
knob
[12]
22.
Balance
control
knob
[12]
If
there
is
a
protective
film
on
the
surface
of
the
display,
which
is
making
it
difficult
to
read
the
display,
remove
it.
.
APR
indicators
[15]
.
Audio
Muting
indicator
Display
.
Tape-2
Monitor
indicator
.
FM
Mute
On/Off
indicator
.
Tuned
indicators
AP
STEREO
MUTE
[LZ
MONITOR]
ON
OFF
STEREO.
MODE
MODE
NAIL
IALBIZL
AR
IE
INAEINZD
Mmmm)
AN]
FANT JANE PINE
JANE:
JANE
TANT
ANT
SL
.
Stereo
Indicator
.
Sleep
indicator
-
TF
=—-
Fo
©
&
DB
.
Memory
indicator
.
Group
Indicators
famed
&
.
Multi
function
Display
fms
.
Preset
station/Sleep
Timer
Display
io
cei
kee
dea
ceea
rer
unin
ei
baie
nant
Fa
Ce
a
Cn
ee
ee

Control
positions
and
names
Rear
panel
1.
Phono
input
jacks
and
GND
terminal
[8]
2.
CD
input jacks
[8]
3.
Tape-1/Video
Input/Output
terminals
[8]
4
TAPE-2
5
RIREMOTE
CONTROL
4.
Tape-2
Input/Output
terminals
3
TAPE-1/VIDEO
6
SPEAKERS
[3]
2
CD
7
AC
OUTLET
5.
RI
remote
control
jack
[21]
6.
Speaker
terminals
[9]
1
PHONO,
GND
7.
AC
Outlets
[9]
8.
Power
supply
cord
[12]
9,
Antenna
terminals
[11]
10.
Tuning
step
frequency
switch
(Bottom)
[5]
(Worldwide
models
only)
11.
Voltage
selector
[5]
(Worldwide
models
only)
(bottom)
9
ANTENNA
11
VOLTAGE
SELECTOR
10
FREQ.
SEL
Remote
Controi
RC-296S
1.
Power
Button
[12]
2.
Input
selector
buttons
[12]
3.
Tape
deck
operation
buttons
[21]
4.
Tuner
operation
buttons
[16]
5.
CD
operation
buttons
[21]
6.
Sleep
button
[13]
7.
Muting
button
[13]
8.
Volume
Up/Down
buttons
[12]
1.
POWER
6.
SLEEP
2.
INPUT
SELECTOR
3.
DECK-A/
DECK-B
4.
TUNER
~
=
7.
MUTING
9.
CD
8.
VOLUME
ONKYO
REMOTE
CONTROL
Ac-2068
FRE

Making
system
connections
e
Do
not
plug
in
the
power
cord
until
all
connections
have
been
made.
@
On
each
pair
of
input
jacks,
the
lower
jack
(marked
R)
corresponds
to
the
right
channel,
and
the
upper
jack
(marked
L)
to
the
left
channel.
e
Please
refer
to
the
instruction
manual
of
each
component
when
making
any
connections.
C.J
coo
&
Connect
the
output
leads
of
the
turntable
to
the
PHONO
jacks.
Be
sure
to
connect
the
ground
(earth)
lead
wire
from
the
turntable
to
the
ground
ter-
minal
(GND).
Turntables
not
provided
with
GND
wires
do
not
need
to
be
con-
nected
in
this
way.
Place
the
turntable
on
a
firm
shelf
or
deck
free
from
vibrations
(especially
those
gen-
erated
by
the
speaker
system).
If
the
turnta-
ble
can
pick
up
such
unwanted
vibrations,
not
only
will
the
performance
of
the
unit
drop,
but
distortion
in
the
bass
frequencies
and
howling
in
the
speakers
may
also
occur.
Connect
a
compact
dise
player
to
the
CD
input
jacks.
Two
tape
decks
can
be
connected
to
this
unit.
If
you
are
using
only
one
tape
deck,
con-
nect
it
to
the
TAPE-1/VIDEO
jacks.
If
you
have
two
tape
decks,
connect
one
to
the
TAPE-1/VIDEO
jacks
and
the
other
to
the
TAPE-?
jacks.
If
you
wish
to
use
a
graphic
equalizer
as
well
as
two
tape
decks;
1.
Connect
the
graphic
equalizer
to
the
TAPE-2
jacks.
2.
Connect
the
second
tape
deck
to
the
tape
jacks
on
the
graphic
equalizer.
3.
Press
the
TAPE-2
MONITOR
button
on
this
unit's
front
panel.
To
record
an
equalized
signal,
use
tape
deck
2
(con-
nected
to
the
equalizer)
for
recording.
For
the
audio
signal
of
a
VDP,
VCR,
etc.,
make
the
connections
using
the
TAPE-1/VIDEO
“PLAY”
jacks.
For
details,
refer
to
the
operating
tnstruc-
tions
of
the
graphic
equalizer
and
video
equipment
concerned.

Making
system
connections
Cc
C3
USA
and
Canadian
models
Capacity
is
total
120
watts
SPEAKER
A
R
European
and
worldwide
models
Capacity
is
100
watts
SPEAKER
A
SPEAKER
B
SPEAKERB
L
R
L
Sr
ees
Pur
ra
The
SWITCHED
outlet
is
switched
on
and
off
by
the
power
buttons
on
the
front
panel
and
remote
control.
The
shape,
number
and
total
capacity
of
the
AC
outlets
may
differ
according
to
the
model
and
the
area
where
the
unit
is
pur-
chased.
Be
careful
that
other
components
connected
to
this
unit
do
not
exceed
the
capacity
that
is
printed
on
the
rear
panel
above
the
AC
outlets.
1.
Press
down
the
lever.
2.
Insert
wire.
3.
Return
the
lever.
You
can
connect
two
separate
pairs
of
speaker
systems.
Please
connect
each
speaker
according
to
the
illustration,
observing
the
correct
con-
nections
for
R,
L,
+
and
-.
@e
Do
not
use
unnecessarily
long
=
or
extremely
thin
speaker
leads.
If
the
DC
resistance
of
the
speaker
leads
is
too
high,
the
damping
factor
will
decrease,
adversely
affecting
the
sound
quality.
e@
When
using
only
one
speaker
or
when
you
wish
to
listen
to
monaural
(mono),
the
single
speaker
should
never
be
con-
nected
in
parallel
to
both
the
right
and
left
channel!
terminals
at
once.

10
Making
antenna
connections
1.
Press
down
the
lever.
2.
Insert
wire.
3.
Return
the
lever.
(USA
and
Canadian
models)
The
T-shaped
FM
antenna
is
for
indoor
use
only.
Extend
the
antenna
and
move
it
in
(Worldwide
various
directions
until
the
clearest
signal
models)
is
received.
Fix
it
with
push
pins
or
similar
—
in
the
position
giving
the
least
amount
of
distortion.
a
If
the
reception
is
not
very
clear
with
the
attached
T-shaped
FM
antenna,
the
use
of
an
external
antenna
1s
recommended.
Please
make
sure
that
you
comply
with
the
ee
.
following
considerations
regarding
the
location.
Keep
the
antenna
away
from
noise
sources
(neon
signs,
busy
roads
etc.)
It
is
dangerous
to
put
it
close
to
power
lines,
so
keep
it
well
away
from
power
lines,
etc.
300
ohms
ribbon
wire
75/300
ohms
coaxial
cable
ANTENNA
Do
not
use
the
same
antenna
for
both
FM
and
TV
(or
VCR)
reception
since
the
FM
and
TV
(or
VCR)
signals
can
interfere
with
each
other.
If
you
must
use
a
common
FM/
TV
(or
VCR)
antenna,
use
a
directional
linkage
type
splitter,
Directional
linkage
type
splitter
To
receiver
To
TV
(or
VCR)

Making
antenna
connections
Assemble
the
loop
antenna
as
shown
in
the
illustration,
Insert
into
the
hole.
(USA
and
Canadian
models)
(European
and
Worldwide
models)
The
AM
loop
antenna
is
for
indoor
use
only.
Set
it
in
the
direction
and
position
where
you
receive
the
clearest
sound.
Put
tt
as
far
as
possible
away
from
the
main
unit,
TV
set,
speaker
cords
and
power
cord.
When
reception
is
not
satisfactory
using
the
attached
AM
loop
antenna
alone,
con-
nection
of
an
external
antenna
is
recom-
mended.
(Do
not
remove
the
AM
loop
antenna)
The
external
antenna
will
be
more
effective
if
you
stretch
it
horizontally
in
a
high
place
above
a
window
or
outside.
Outdoor
antenna
Outdoor
antenna
mA
es
The
antenna
adaptor
is
only
included
with
worldwide
modeis.
Outdoor
Indoor
Connecting
the
FM
T-shaped
antenna
or
Antenna
T-shaped
300
ohm
ribbon
wire
antenna
XE
Loosen
the
screws
and
wrap
the
wire
around
these
screws.
Then
tighten
the
300
ohms
tha
¢
dri
ribbon
wire
screws
with
a
screwdriver.
Connecting
the
coaxial
cable
1.
With
your
fingernail
or
a
smal]
screw-
driver,
press
the
stoppers
outwards
and
remove
the
cover.
2.
Remove
the
transformer
wire
A
from
slit
B
and
insert
it
into
slit
C.
Prepare
the
coaxial
cable
as
shown
in
the
diagram.
Connect
the
75/300
ohm
antenna
adapter
to
the
coaxial
cable
(1)
Insert
the
end
of
the
cable.
‘2)
Clamp
it
in
place
with
pliers.
aw
11

Basic
operations
Before
plugging
in
the
unit.
confirm
that
all
connections
have
been
made
properly.
1.
Insert
the
AC
power
supply
cord
into
the
wall
outlet.
2.
Press
the
POWER
switch.
The
STAND-BY/RECEIVED
indica-
tor
lights
up.
3.
Press
the
STAND-BY/ON
button.
Alternatively,
press
the
POWER
button
on
the
remote
control.
The
display
lights
up.
Select
the
speakers.
Select
and
press
the
button
for
the
speakers
that
you
want
to
listen
to
(SPEAKERS
A
and/or
SPEAKERS
B).
You
will
hear
from
the
speakers
any
siiamiiaaae
te
seen
ON
see
sound
going
through
this
unit.
If
both
SPEAKERS
{A
and
B)
are
set
to
OFF,
no
sound
will
come
from
the
speakers.
San
By
.
Select
the
source
you
wish
to
listen
to
using
the
input
selector
(e.g.
PHONO).
Confirm
that
the
TAPE-2
MONITOR
indicator
ts
off
when
a
source
other
than
the
TAPE-2)
MONITOR
has
been
selected.
_ee
Also
check
the
audio
muting
is
off.
Lo]
Start
play
the
selected
input
source.
Follow
the
operating
instructions
for
that
unit.
If
FM
or
AM
is
selected.
please
refer
to
the
section
“Receiving
stations”.
Adjust
the
level.
Turn
the
VOLUME
knob
clockwise
or
press
the
UP
button
on
the
remote
con-
trol
to
increase
the
volume
level.
Turn
counterclockwise
or
press
the
DOWN
button
on
the
remote
control
to
decrease
5
the
volume
level.
;
Adjust
to
your
desired
tone.
BASS:
Turn
right
to
boost
or
left
to
=
attenuate
the
bass.
TREBLE:
Turn
right
to
boost
or
left
to
attenuate
the
treble.
LOUDNESS:
By
pressing
the
LOUD-
NESS
button,
both
treble
and
bass
are
reinforced
even
when
the
volume
is
turned
down
iow.
Use
this
button
according
to
the
music
source,
the
lis-
tening
area
and
the
listening
level.
The
BALANCE
knob
is
used
to
con-
trol
the
relative
volume
level
of
the
left
and
right
speaker
systems
or
headphones.
CERES
SSS
SS
eee
eae
TREBLE
When
a
compact
disc
player,
and
tape
deck
with
the
FRI
mark
are
connected
together,
you
can
use
the
direct
function
feature.
Simply
by
directly
operating
the
desired
component
(compact
disc
player
or
tape
deck),
this
unit's
Input
Selector
automati-
cally
switches
to
that
component.
It
is
not
necessary
to
switch
this
unit's
Input
Selector
when
changing
listening
sources.
BALANCE

Basic
operations
90
—*
80
—*
70]
Cancel
~—-10
«-
20~
Press
the
MUTING
button
on
the
remote
control.
This
button
temporarily
switches
off the
sound
from
the
speakers
or
headphones.
The
AUDIO
MUTE
indicator
will
flash.
The
muting
function
will
be
cancelled
if
you:
@
press
the
MUTING
button
again,
or
@
turn
the
power
off
then
on.
Stereo
headphones
with
a
standard
binaural
(stereo)
plug
can
be
connected
here.
When
the
headphone
plug
is
inserted,
the
speakers
are
not
automatically
muted
but
can
be
controlled
with
the
SPEAKERS
A/
B
buttons.
The
sleep
timer
can
power
off
the
system
after
a
specified
time
period.
To
operate
this
function,
use
the
remote
control
supplied
with
your
amplifier.
1.
Start
the
source
playing
that
you
would
like
to
listen
to.
(CD,
Tape
or
radio
broadcast)
2.
Set the
amount
of
time
after
which
you
want
the
system
to
turn
off.
The
sleep
timer
works
for
up
to
90
minutes.
You
can
shorten
the
timer
by
10
minutes
increments
by
pressing
the
SLEEP
button
until
the
desired
time
has
been
reached.
When
the
set
time
comes,
the
power
wil!
be
switched
off
automatically
Press
the
SLEEP
button
until
it
changes
to
the
source
display
you
are
listening
to.
or
The
timer
can
also
be
cancelled
while
it
is
in
operation,
by
turning
off
the
power
13

Receiving
stations
Please
make
sure
that
the
TAPE-2
MONI-
TOR
indicator
is
off
and
audio
muting
is
off.
When
the
frequency
is
not
known
-Man-
ual
tuning
1.
Press
the
FM
or
AM
button.
2.
Use
the
<
DOWN
TUNING
UP
>
buttons
to
change
the
frequency.
UP
we.
the
frequency
increases.
DOWN
....
the
frequency
decreases.
@
The
frequency
is
changed
in
100
kHz
(or
50
kHz)
steps
in
FM
and
10
kHz
(or
9kHz)
in
AM
when
the
tuning
selector
button
is
pressed
in
single
steps.
Se
tne
@
If
this
button
is
held
continuously
for
bA
LAL
PE?
more
than
0.5
seconds,
the
frequencies
pe
I
are
scanned
automatically.
(FM
auto
tuning
mode)
When
a
broadcast
is
received,
scanning
stops.
t
“
COWN
TUNING
UP
»
When
the
frequency
is
known
-Direct
tuning
1.
Press
the
FM
or
AM
button.
2.
Press
the
DIRECT
TUNING/DELETE
button.
The
“--
--
will
flash
16
seconds
in
the
frequency
display.
3.
Enter
the
frequency
with
the
number
buttons
while
the
cursor
are
flashing.
Example:
88.10
MHz
838-1
0/10
@
When
receiving
AM
broadcasts
with
a
9
kHz
step
(this
depending
on
your
region),
you
can
enter
the
frequency
directly.
With
10
kHz
steps,
entering
a
number
for
the
10
kHz
digit
will
set
the
|
kHz
digit
automatically
to
0.
e
if
you
enter
a
frequency
that
does
not
have
a
station,
this
unit
will
automati-
cally
tune
to
the
next
station
immedi-
ately
below
that
station.
e
[f
you
enter
a
frequency
that
is
out
of
range,
this
unit
will
return
to
the
previ-
ous
frequency.
If
this
happens,
repeat
the
procedure.
TM
MUTE
FTUNES
a
oN
STESED
FM
MULTE
bTUNED
ON
STERE!
=
7
8TU
|
8
VWX
9¥Z—
FM
MUTE
TUNED
4
O10
¥:
ON
STERED
L_
hA
oe
PoP
Eee
FLL
14

Receiving
stations
If
you
tune
in
a
stereo
FM
station,
the
STEREO
display
will
be
illumi-
nated
if
the
signal
is
sufficiently
strong.
If
the
signal
is
weak,
it
may
be
impossible
to
tune
into
your
desired
sta-
tion.
In
this
case,
tune
in
as
follows.
Press
the
FM
MUTE/MODE
button
and
FM
MUTE
“OFF”
lights.
At
this
time,
the
station
will
be
in
mono
and
interstation
noise
will
be
heard.
Select
the
station
you
want
to
listen
to.
MEMORY
FM
MUTE-MODE
\_
CLEAR
This
unit
is
equipped
with
an
APR
system
to
help
tune
in
FM
stations.
When
receiving
an
FM
station
using
manual
or
direct
tuning,
RF
MODE
LOCAL/DX
and
STEREO
MODE
AUTO/MONO
settings
are
RF
STEREO
made
automatically,
according
to
the
station
being
received.
APR
MODE
MODE
Be
Ee
The
APR
system
automatically
sets
the
gain
of
the
RF
section
to
DX
or
LOCAL
according
to
the
quality
of
the
signal
being
received.
The
RF
MODE
will
indicate
LOCAL
when
sufficient
signal
is
received.
If
the
MONO
indicator
lights
up
while
a
station
is
tuned
in,
the
station
will
be
received
in
mono
even
if
it
is
a
stereo
station.
The
STEREO
MODE
AUTO/MONO
settings
that
the
APR
system
makes
can
be
changed
by
pressing
the
FM
MUTE/MODE
button.
Since
ten
AM
ar
FM
stations
can
be
stored
in
each
group
(A,
B
or
C),
a
total
of
30
sta-
tions
can
be
stored
in
the
memory.
Programming
radio
station
1.
Select
the
frequency
that
you
want
to
store
in
the
memory.
(See
page
14
Tuning
the
radio)
2.
Press
the
MEMORY
button.
The
MEMORY
indicator
will
light
for
=
ieee
au
Sree"
8
seconds.
“ODE
MOCE
7
.
Lt
pe
|
.
3.
While
the
MEMORY
_
indicator
lights,
press
the
GROUP
button
to
choose
the
desired
group.
The
group
shown
on
the
display
changes
in
the
following
order
each
MEMORY
FM
MUTEMODE
ow
"Sreneo"
S
venom’
time
the
button
is
pressed:
A~>BOC
a
Co
>A.
—
CLEAR
PEI
4.
Select
the
desired
memory
number
using
the
number
buttons.
Press
button
0/10
when
choosing
mem-
ory
number
10.
EM
MUG
RTLAEC
iy
on
S7EREO
MEMGHY
ia
ay
NOTE
(TX-8210R):
If
the
FM
station
received
is
an
RDS
sta-
tion
with
a
PS
(Program
Service
Name),
the
frequency
display
will
change
to
the
PS
display.
If
there
is
no
PS,
the
frequency
display
will
not
change.
(Refer
to
page
18
—
19
for
the
RDS
func-
ion
FM
MUTE
TUNED
@
Para
rary
eT
Pe
ian
*
o
15

Receiving
stations
Main
unit
1.
Press
the
GROUP
button
to
select
the
desired
group.
2.
Input
the
memory
number
you
wish
to
receive
by
using
the
number
but-
tons.
or
Press
the
SCAN
(or
PRESET
SCAN)
button.
Each
station
stored
in
the
group
chosen
in
step
|
will
be
received
for
5
seconds
(for
each
station).
When
the
station
that
you
want
is
found,
press
the
SCAN
(or
PRESET
fraso
[2ber
[acu
|
Ss
“)
button
again
and
scanning
will
fee_
ewe
fer]
(TX-€210)
_
a)
=
(TX-8210R)
Remote
control
1,
Press
the
GROUP
button
and
choose
the
group.
2.
Press
the
PRESET
(<
or
»
)
button.
After
the
last
number
of
GROUP
C
is
reached,
scanning
will
restart
at
GROUP
A.
“a
PRESET
&
1.
Select
the
station
that
you
want
to
cancel
as
explained
in
the
previous
section.
2.
Press
the
FM
MUTE/MODE
button
while
holding
down
the
MEMORY
button.
*--
will
be
shown
on
the
display.
TMEAUTF
ORTONED
@
—
GAOL
ay
STEARS:
APR
AF
S7€800
MODF
MODE
7
.
f
Pik
r
iit
pad
de
|
MEMORY
FM
MUTE
MODE

Entering
station
names
Characters
can
be
entered
during
reception
of
an
FM
or
AM
broadcast
station.
This
function
enables
you
to
memorize
a
maximum
of
8
characters
consisting
of
alphabetics,
some
symbols
and
numbers,
for
instance,
rep-
resenting
broadcasting
names,
for
cach
preset
station.
If
you
attempt
to
enter
characters
while
recetving
an
FM
broadcast
RDS
station,
“RDS...PS”
is
displayed
and
characters
cannot
be
entered.
Characters
which
can
be
input
ABCDEFGHIJKLMNOPQRSTUVW
XY¥Z1234567890-_x/
Note:
indicates
a
space.
To
name
ICH
of
GROUP
B
as
“ONKYO”,
for
example,
operate
as
follows.
(Example:
FM
broadcast
at
98.00
MHz
has
been
mem-
orzed
into
1CH
of
GROUP
B).
————
1.
Press
the
GROUP
button
until
B
is
displayed,
then
press
oo
|
the
[ABC
button
to
select
1
CH.
Paty
ar?
file
id
idLL
ce
.
The
memorized
broadcast
station
is
received.
2.
Press
the
CHARACTER
button.
The
frequency
in
the
display
goes
off
and
“_”
flashes.
3.
To
enter
O
from
“ONKYQO”,
press
the
SMNO
button.
Pressing
the
button
each
time
changes
the
character
from
5
to
M,N,
and
O,
one
at
atime.
Select
O.
e
~_”
will
move
to
the
next
character.
Uf
you
do
not
press
the
number
button
for
one
second,
~_”
will
automatically
move
to
the
next
position.
)
@
When
you
want
to
delete
a
character,
press
the
DIRECT
TUN-
ING/DELETE
button.
The
character
is
deleted,
and
the
charac-
ters
on
the
right
move
to
the
left
by
one
space.
4.
Repeat
step
3.
To
enter
N
from
“"ONK
YO”,
press
the
SMNO
button
and
select
‘ifr
dt
N.
Vis
f
Liss
To
enter
K
from
“ONKYO”
press
the
4JKL
button
and
select
K.
5.
Press
the
CHARACTER
button.
e
If
you
have
not
pressed
a
button
for
16
seconds,
the
operation
PER
Ihe
7
FI
will
complete
automatically.
Ltinths
ot
74
Press
the
CHARACTER
button.
While
pressing
the
MEMORY
button,
press
the
FM
MUTE/
THe
eae
MODE
button.
All
the
characters
entered
for
this
station
will
be
cleared.
PRM
CTL
mL
SED
Oh
SOPREID
v4
_
Press
the
GROUP
and
number
buttons
to
recall
the
desired
LiiMik
did
preset
number.
Press
the
CHARACTER
button.
The
first
character
and
“_”
flashes
alternately.
Shwe
oe
ae
:.
Press
the
<
DOWN
TUNING
UP
>
button
and
move
“*_”’
to
DOWN
TUNING
UP
4
i
_IL_J
Mth
ite
TP
the
character
you
want
to
change.
i
“y
Ltives
tL
oo
*~_*
moves
to
the
right
when
pressing
the
UP
»
button
and
moves
to
the
left
when
pressing
the
<
DOWN
button.
Enter
the
desired
character.
on
Monee
The
previous
character
is
replaced
with
a
new
character.
».
Press
the
CHARACTER
button.
MME
BTN
@
mM
STEAE
Pah
the
se
FY
Pfisvis
dt
hi
17

18
Receiving
RDS
(Only
for
TxX-8210R)
RDS
reception
is
only
available
on
the
TX-8210R
model,
and
only
in
areas
Where
RDS
broadcasts
are
available.
What
is
RDS?
Many
FM
stations
now
transmit
RDS
signals
which
give
additional
information.
RDS
provides
you
with
various
services
so
that
(for
example)
you
can
choose
a
station
broadcasting
your
favorite
cate-
gories
of
music,
or
other
information.
The
information
on
the
right
side
1s
available
on
this
unit.
NOTE:
In
some
cases,
the
characters
displayed
on
the
display
of
the
TX-
8210R
may
not
be
exactly
the
same
as
the
ones
broadcast
by
the
radio
station.
[If
strange
characters
appear
in
the
display,
it
is
because
characters
are
being
received
that
cannot
be
correctly
dis-
played
by
the
TX-8210R.
They
do
not
indicate
a
malfunction
of
the
unit.
PTY
Classifications
in
Europe
hi
Pp
het
0
PY
LA
IM
ET
None
PS:
Program
Service
Name
When
an
RDS.
station
broadcasting
PS
information
is
received,
the
name
of
the
station
will
be
displayed
instead
of
the
frequency.
PTY:
Program
Type
When
an
RDS
station
broadcasting
PTY
information
is
received,
the
type
(category)
of
the
broadcast
will
be
displayed.
Traffic
Program
When
an
RDS
station
broadcasting
TP
information
is
received,
the
traffic
information
will
be
displayed.
Radio
Text
When
an
RDS
station
broadcasting
RT
information
is
received,
the
information
received
from
the
station
will
be
shown
on
the
display.
TP:
RT:
No
program
type
or
undefined.
News
reports
Current
affairs
Information
Sport
Education
Drama
Culture
Science
and
technology
Varied
Pop
music
Rock
music
Light
classics
Serious
classics
Other
music
Middle
of
the
road
music
Reports
on
current
events
and
happenings.
Topical
reporting
of
current
affairs,
often
with
a
wider
range
of
topics
than
news
reports.
General
information
such
as
weather
forecasts,
consumer
affairs
.
medical
help
etc.
Live
sports
action,
sports
news
and
interviews.
Formal
educational
programs.
Radio
plays
and
serials
Cultural
programs
(including
religious
affairs)
Programs
about
the
natural
sciences
and
technology.
Speech
based
programs
not
covered
by
the
above
categories
eg.
quizzes,
panel
games,
comedy,
etc.
Popular
commercial
music,
usually
included
in
past
or
present
sales
charts.
Popular
music
with
a
more
specialist
appeal,
often
not
included
in
sales
charts.
Easy
listening
music
as
opposed
to
Pop,
Rock
or
Classical.
Classical
music
for
general
rather
than
specialist
appreciation.
Performances
of
major
orchestral
works,
symphonies,
chamber
music
etc.
and
including
Grand
Opera.
Music
styles
not
covered
by
the
above
categories,
eg.
Jazz,
Rhythm
&
Blues,
Folk,
Country,
Reggae.

Receiving
RDS
(Only
for
TX-8210R)
Press
the
PT
Y/TP
button,
to
select
“PTY”.
If
the
station
you
are
receiving
is
not
broadcasting
RDS,
“Not
RDS”
(this
is
not
an
RDS
station)
will
be
shown
on
the
display.
Use
the
<
DOWN
TUNING
UP
>
buttons
to
select
the
pro-
gram
type
(PTY)
(for
example,
“ROCK
M”’’).
See
the
PTY
description
on
the
previous
page.
Press
the
SCAN
button
to
start
searching
for the
chosen
PTY
station.
When
a
station
is
received
with
the
desired
PTY,
the
scanning
stops
for
approximately
5
seconds,
before
the
unit
starts
scanning
again.
When
the
desired
station
is
reached,
press
SCAN
button
again
to
stop
scanning.
1,
Press
the
PTY/TP
button
to
select
“TP”.
If
*
7%
is
shown
on
the
display,
it
indicates
that
the
current
Station
1s
broadcasting
traffic
information.
2.
Press
the
SCAN
button
to
start
searching
for
a
TP
station.
When
the
unit
receives
a
TP
station,
it
stops
scanning.
If
the
unit
cannot
receive
any
TP
station,
“Not
find”
(cannot
find
the
station)
is
shown
on
the
display.
If
the
station
you
are
listening
to
is
not
an
RDS
station,
this
func-
tion
cannot
be
used.
1.
Each
time
you
press
the
DISPLAY
button,
the
display
changes
as
follows.
Frequency
,
Character
or
Program
Service
Name
Radio
Text
——__]
If
the
current
station
you
are
listening
to
is
not
an
RDS
station,
only
the
frequency
of
the
station
and
the
characters
(see
pages
17)
appears.
(If
there
have
been
no
characters
entered,
only
the
fre-
quency
is
shown.)
When
RT
is
received,
it
can
sometimes
take
up
to
15
seconds
(more
or
less)
to
show
RT
on
the
display.
Sometimes
the
following
messages
will
be
shown
on
the
display.
Wait:
When
the
information
is
received,
the
characters
will
scroll
across
the
display.
No
text:
this
appears
for
3
seconds
and
indicates
that
even
though
an
RDS
station
is
being
received,
there
is
no
RT
information
included,
|
9

20
Recording
a
source
Please
read
the
instruction
manuals
con-
cerning
the
operation
of
each
unit.
1.
Insert
a
blank
tape
into
the
tape
deck.
2.
Press
the
button
of
the
source
from
which
you
want
to
record.
@
When
FM
or
AM
is
selected.
set
the
tuner
to
the
station
you
want
to
record
from.
@
When
TAPE-!/VIDEO
is
selected.
it
will
record
to
the
TAPE-2
REC
jacks.
@
When
either
FM,
AM,
PHONO
or
CD
is
selected,
you
are
able
to
record
to
both
the
TAPE-I|
and
TAPE-2
REC
jacks.
3.
Put
the
tape
deck
in
the
recording
|
mode.
Begin
playing
the
source.
Signal
Flow
TX-8210/R
_
Set
the
proper
recording
level
using
the
_
controls
on
the
tape
deck
used
for
record-
ing.
Also,
during
recording
and
dubbing
operations,
if
any
controls
(bass,
treble
etc.)
on
this
unit
are
changed
during
recording
and
dubbing
operations,
the
tone
effects
will
not
change.
Recording
Playback
1.
Load
the
original
tape
in
deck
1
and
the
blank
tape
in
deck
2.
2.
Press
the
TAPE-I/VIDEO
button.
3.
Put
tape
deck
1
in
the
playback
mode
and
tape
deck
2
in
recording
mode.
The
source
signal
can
be
monitored
through
the
speakers
or
headphones
when
TAPE-2
MONITOR
is
turned
off.
If
tape
deck
2
has
three
heads,
the
just-
recorded
signal
can
be
monitored
(when
the
TAPE-2
MONITOR
is
turned
on).
Refer
to
the
tape
deck
instruction
manual
for
more
details.
Signal
Fiow
TX-8210/R
Playback
Recording
Tape
deck
TAPE-1/VIDEO
Tape
deck
(TAPE-2)
Other manuals for TX-8210
2
This manual suits for next models
1
Table of contents
Other Onkyo Amplifier manuals

Onkyo
Onkyo TX-SV525 User manual

Onkyo
Onkyo A-8800 User manual

Onkyo
Onkyo DAC-HA200 User manual

Onkyo
Onkyo P-3060R User manual

Onkyo
Onkyo A-44 User manual

Onkyo
Onkyo TX-7530 User manual

Onkyo
Onkyo PTS-303 User manual

Onkyo
Onkyo TX-SV515SPRO User manual

Onkyo
Onkyo A-8190 User manual

Onkyo
Onkyo A-7022 User manual