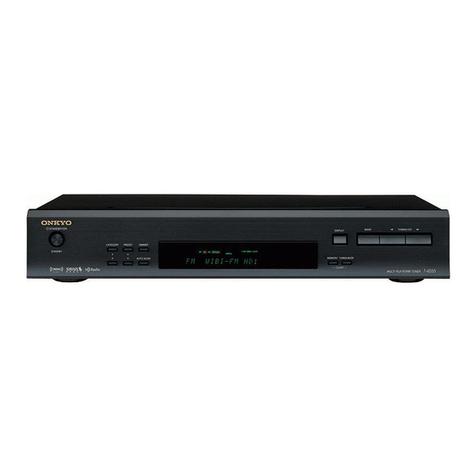
Onkyo T-407 User manual

T-4OT
Quarlz Synthesized FM Stereo/AM Tuner

o Congratulations on your purchase of the ONKYO T-407 Tuner. . Please read this manual
thoroughly before making connections and turning power on. . Following the instructions
in this manual will enable you to obtain optimum performance and listening enjoyment from
your new T-407, o Please retain this manual for future reference.
CONTENTS
lmportant safeguards
Features..
Supplied accessories
System connect¡ons .................
Front panel facilities
Operations
Trouble-shooting 9uide...........
Specif ications
Features
a lsohex Power Supply
ONKYO's exclusive lsohex Power Supply arranges the six ma¡n tuner circuits like the spokes of a wheel around a central power supply
hub. lndependentsupplyandgroundlinesrunfromthepowersupplytoeachofthetunercircuits:tothedisplay,tothequartzsynthesizer,
to the front end, to the lF, to the FM PLL demodulator. and to the stereo MPX. By minimizing the distance between the power supply
and each circuit, this arrangement improves power supply control. By isolating the routes to the circuits, it also avoids interference.
. Outstanding Sensitivity and Tuning Precision
One ma.jor reason for the T-407's excellent sensitivity and tuning precision is its RF section which uses five varactor diodes "ganged"
through the single tun¡ng voltage sorrc". ihis uncompromising design, coupled with MOS FETs and a dual local oscillator buffer, gives
the T-407 the sharp, precise reception listeners expect from an ONKYO tuner.
. O-Station FM/AM Random Preset Tuning
. Classified Memory Preset
On the T-407 the memory presets are organized into eight classes designated A-H. Each class can be assigned to a different type of
program material or a different member of the family. You can preview the stat¡ons in any particular class at the touch of a button.
o Direct Access Tuning
lnstead of using the UP or DOWN tuning keys to scan through the available frequencies until the desired station is located, Direct Access
Tuning lets you punch in the broadcast frequency directly using the 10 numeric keys. For example, to select 103.5 MHz the user simply
presses the 1, 0, 3, 5 and 0 keys.
. APR (Automatic Precision Reception) System
a Naming stat¡ons using 5 characters, 40 stations in total
o Front End Designed to Minimize lntermodulation Distortion
o 25 kHz FM Tuning Steps
o 10-Segment Sígnal Strength lndicator
. l:ll Remote Control System Compatible
I
1
1
2
2
2
4
5
7
7
CAUTIO N:
"TO REDUCE THE RISK OF ELECTRIC SHOCK, DO NOT REMOVE
COVER (OR BACK). NO USER.SERVICEABLE PARTS INSIDE.
REFER SERVICING TO OUALIFIED SERVICE PERSONNEL."
o The líghtning flash with arrowhead symbol, w¡thin
an equilateral triangle, ¡s intended to alert the user
to the presence of un¡nsulated "dangerous voltage"
within the product's enclosure thât may be of suffi-
c¡ent magnitude to cçnstitute a risk of electric shock
to persons.
o The exclamation point within an equilateral triangle
is intended to alert the user to the presence of im-
portant operal¡ng and maintenance (servicing) in-
structions in the literature accompany¡ng the appli-
ance.'
"WARN ¡NG"
"TO REDUCE THE RISK OF FIRE OR ELECTRIC SHOCK, DO NOT
EXPOSE THIS APPLIANCE TO BAIN OR MOISTURE."
a For models having power cord wlth a polarized plug.
CAUTIO N:
TO PREVENT ELECTRIC SHOCK,MATCH WIDE BLADE OF PLUG
TO WIDE SLOT, FULLY INSERT.
o Sur les modèles dont la fiche est polarisée.
ATTENTI O N:
POUR EVITER LESCHOCS ELECTRIOUES, INTRODUIRE LALAME
LA PLUS LA.BGE DÊ LA FICHE DANS LA BORNE CORRESPONDANTE
DE LA PRISE ET POUSSER JUSOU' AU FOND.
CAUTION
w

lmportant uards
1. Read lnótructions - All the safety and operat¡ng ¡nstructions
should. be read before the appliance is operated.
2. Retain tnstruct¡ons - The safety and operating instruct¡ons
should be retained for future reference.
3. Heed Warníngs - All warnings on the appliance and in the op-
erating instructions should be adhered to.
4. Follow lnstruct¡ons - All operating and use instructions should
be followed. .
5. Water and Moisture - The appliance should not be used near
water - for example, near a bathtub, washbowl, kitchen sink, laundry
tub, in a wet basement, or near a swimming pool, and the like.
6. Carts and Stands - The appliance should be used only with a
can or stand that ¡s recommended by the manufacturer.
64. An appliance and cart combination
should be moved wilh care. Ouick stops,
excessive force, and uneven surfaces
may cause the appliance and cart
combination to overturn.
PORTABLE CABT WARNING
s31 25A
7. Wall or Ceiling Mounting - The appliance should be mounted
to a wall or ceiling only as recommended by the manufacturer.
8. Ventilation - The appliance should be situated so that its location
or position does not interfere with its proper vent¡lation. For example,
the appl¡ance should not be situated on a bed. sofa, rug, or sim¡lar
suÌface that may block the ventilation openings; or, placed ¡n a bu¡lt-¡n
installation, such as a bookcase or cabinet that may ¡mpede the flow
of air through the ventilation openings.
9. Heat - The applianceshould besituated awayfrom heatsourcessuch
as radiators, heat registers, stoves, or othér appl¡ances (including
amplifiers) that produce heat.
10. Power Sources - The appliance should be connected to a power
supply only of the type described ¡n the operating instructions or as
marked on the appliance.
11. Polarization - lf the appliance is provided a polarized plug having
on blade wider than the other, please read the follow¡ng information;
' The polarization of the plug is a safety feature. The polarized plug w¡ll
only fit the outlet one way. lf the plug does not fit fully ¡nto the outlet,
try reversing it. lf there is still trouble, the user should seek the sery¡ces
of a qualified electrician. Under no circumstances should the user at-
tempt to defeat the polar¡zation of the plug.
12. Power-Cord Protection - Power-supply cords should be routed
so that they are not l¡kely to be walked on or p¡nched by items placed
upon or against them, paying particular attent¡on fo cords at plugs,
convenience receptacles, and the point where they exit from the ap-
pliance.
Precautíons
Warranty Card
The serial number is written on the rear panel of th¡s unit. Copy
the serial number and model number onto your warranty card
and keep it in a safe place.
Supplied Accessories
13. Cleaning - The appliance should be cleaned only as recommended
by the manufacturer.
14. Power Lines - An outdooor antenna should be located away from
power lines.
15. Nonuse Periods - The power cord of the appliance should be
unplugged from the outlet when left unused for a long period of time.
1 6. Object and Liquid Entry - Care should be taken so that obiects
do not fall and liquids are not spilled ¡nto the enclosure through
openings.
17. Damage Requiring Service - The appliance should be serviced
by qualified service personnel when:
A. The power-supply cord or the plug has been damaged; or
B. Ob¡ects have fallen, or liquid has been spilled into the appliance;
or
C. The appliance has been exposed to ra¡n; or
D. The appliance does not appear to operate normally or exhibits a
marked change in performance; or
E. The appliance has been dropped, or the enclosure damaged.
18. Servicíng - The user should not attempt to serv¡ce the appliance
beyond that described ¡n the operat¡ng instructions. All other servicing
should be referred to qualified service personnel.
19. Outdoor Antenna Grounding - lf an outside antenna is conneded
to lhe receiver, be sure the antenna system is g rounded so as to prov¡de
some protection against voltage sufges and builþup stat¡c chãrges. Article
810 of the National Electrical Code, ANSI/NFPA 70, prov¡des inlormation
w¡lh regard to proper ground¡ng of the mast and support¡ng structure,
grounding of the lead-in wire to an antenna discherge un¡t, size of ground-
ing conductors, location of the antenna.discharg( unit, connection to
ground¡ng electrodes, and requ¡rements for lhe ground¡ng electrode. See
Figure 73.1.
FIGURE 73.1 :
EXAMPLE OF ANTENNA GROUNDING AS PER NATIONAL
ELECTRICAL CODE
ANTENNA
OISCHARGE UNIT
(NEC SECTTON 810-2O)
ANTENNA
LEAD IN
WIRE
GROUNDING CONDUCTOBS
(NEC SECTTON 810-21)
GBOUND CLAMPS
POWER SERVICE GROUNDING
ELECTRODE SYSTEM
(NEC ART 250, PART H)
NEC - NATIONAL ELÊCTRICAL CODE
s2898A
2. Care
From time to time you should wipe off the front and rear panels
and the cabinet with a soft cloth. For heavier dirt, dampen a soft
cloth in a weak solution of mild detergent and water, wring it
out dry, and wipe off the dirt. Following this, dry immediately
with a clean cloth. Do not use rough material, thinners, ¿lcohol
or other chem¡cal solvents or cloths since these could damage
the finish or remove the panel lettering.
AM loop T-shaped FM
anlenna x 1
Antenna
adapter x 1
GROUND
CLAMP
ELECIRIC
SERVICE
EOUI PM ENT
fi|l remote control cable x 1 Output signal cord x 1
antenna x 1

o
@
o[öl
LAJ
9,e
Sysitem connectÍons
a Do not connecl the power cord until all other connections have
been made.
Outdoor
FM antenna
FM Antenna Connections
Depending on the strength and quality of FM signals in your area,
the accessory T-shaped antenna may give satisfactory reception
or you may need an exlernal FM antenna. To use the T-shaped
antenna, òpread rhe antenna on a wall, preferably outside or on the
ceiling, and try several positions to determine which gives the best
reception. lf reception with the T-shaped antenna is unsatisfactory,
install a mulli-element external FM antenna. Consult your ONKYO
Service Center about the right type for your area.
NOTES:
1. Do not use the same antenna for both FM and TV (or VCR)
reception since the FM and TV (or VCR) signals can interfere
with each other. lf you must use a common FMiTV (or VCR)
antenna, use a directional linkage type splitter.
2. Follow the direct¡ons below 10 connect an antenna adapter
to a 75 Ohm cable.
3. Do not connect both the indoor T-shaped antenna and an
outdoor FM antenna. lf you decide to install an outdoor
antenna, be sure to d¡sconnect the indoor T-shaped antenna'
Direct¡onal l¡nkage
type splitter
To ¡uner To TV (or VCR)
AM Antenna Connections
An AM loop antenna is included in the installation inslructions bag'
Take out the connection line and connect it to the AM antenna
terminals. This loop antenna can be used placed on top of the luner
or attached to a wall or other surface. Try several positions to
determine which gives the best recept¡on. Be. sure the antenna is
not near a speaker, power cord, television set, VCR. or molorized
appliances. When using an external AM antenna, do not remove
the loop antenna; connect both antennas to the AM antenna ter-
minals.
Indoor T-shaped
anlenna
300 Ohm FM feeder or Outdoor
AM antennâ
75 Ohm
(3C-2V,
Connecl only one
To Amplifier
When connscting tuner output to the âmpl¡f¡er
be åbsolulely sure to connect the R (right)
and L (left) channels correctly.
AM Loop antenna
. tothe Rl remolecontroljack
Do nol connecl any producl 1o
th¡s jack that does nol have the
ONKYO Rl mark.
. The upper and lower fil I re-
mote control jacks have ths
same function.
AC Power
Supply
FM antenna at
one t¡me
Note to CATV system installer:
This reminder is provided to call the CATV system installer's atten-
tion to Arlicle 820-40 of the NEC, which provides gu¡delines tor
proper grounding and, in particular, specifies that the cable ground
shall be connected to the grounding system of the building' as close
to the point of cable entry as practical.
How to connect a75l?OO Ohm antenna adapter
(included)
I Connecting coaxial cable
(1)With your fingernail or a small screwdriver. press the
stopper inwards and remove the cover.
(2)Prepare the coaxial cable as shown below.
(3)Connect the 75/300 Ohm antenna adapter to the coaxial
cable
tRG-6
(3) @lnssn lh6 end of the cable.
@ Remove rhe red cord.
75l300 Ohm
antenna
adapter
(included)
Clamp in place wirh Pl¡e6.
I Connecting T-shaped FM antenna or 300 Ohm FM
outdoor antenna
(2\
+
-,/
-./-- -æ
é,.- É,ll FM/rv
ll Outdoor
J[ "nr"nn"
300 Ohm
foedar
AM loop antenna assembly
Connecl to rhe AM
antenna term¡nals.
o@@
Remove the v¡nyl tie and
tâke oul th€ connecl¡on
line. Bend in the reverse
direction.
@
a. Wirh rhe antenna on
top of any stable surlaca +
Mount
b. With the antenna
attached to a wall &*A-,q,
lnstallation hol€
Mount on a wall, elc.
EE

l:lt Remote Control jack ( Rl : Remote lnteractiv-e)
For remote control opeiation, connect th¡s jack and any ONKYO
amplifier bearing the " |lll " mark using the remotecontrol cable
includêd with th¡s unit.(Station Up/Down buttons can be controlled
via remote control.) For more details, see the user's manual for the
amplifier.
Power Switch (POWER)
Depress once to turn power on and once
again to turn power off. Band Selector Buttons (FM, AM)
t51
Memory Preservation
This unit does not require memory prese¡vat¡on batteries. A
built-in memory power back-up system preserves the contents
of the memory during power failures and even when the unit
is unplugged. The unit must be plugged in and the power switch
turned on and off once in order to charge the back-up system,
Note that since this is not a permanent memory, the power switch
must be turned on and off a few times each month to keep the
back-up system operative.
The memory preservation period after power has been turned
off varies depending on climate and placement of the unit. On
the average, memory contents are protected over a period of a
few weeks after the last time power has been turned off. This
period is shorter when the un¡t is exposed to a highly humid
climate.
Number buttons
(1-9. 0)
Direct Tuníng Button
(DTRECT) [5] Preset Scan Button
(scAN) t6l
NOTE
The Rl mark is ONKYO's own mark. Audio equipment with
this mark can be controlled through the amplifier with the
Rl mark. using remote control transmitter. Do not çonnect
any product to this jack that does not have the ONKYO |:ll
mark. Doing so can damage your equipment.
Front panel facÍlíties
Front panel
For more information about buttons or controls, turn to the page number listed in the [ ]
Tuning Selector/Character Search Buttons
(<DOWN UP>) [5,6]
APR ON Button
(APR OPERATION)
I6I
lF Bandw¡dth Selector Button
(rF BAND) [6]
Tuning Level Selector Button
(TUNTNG rEVEL) [5] Character Memory Button
(cHARACTER) [6]
Display Button (DISPLAY) [6]
Memory Button
(MEMORY) t5l
FM Tuning Step/Muting Button
(cABLE/MUTE) [5]
RF Mode Selector Button
(RF MODE) t5I
Hi-Blend Selector Button
(Hr-BLEND) t6l
Auto Stereo/Mono Selector Button
(MODE) 16l
Display and indicators
APR system indicators
Classified memory buttons
(CLASS A - CLASS H) t5l
Frequency and Character Display Classified Memory
Display
Signal Strength lndicator
Stereo lndicator Memory lnd¡cator
FM Tuning Step/Muting lndicator
îi I tiÑt
æfæEEf@fr€
t:@æt:::@c6:
I
It-tl
tNt MH¿ trt
UóB
CH
Classified Preset Station/Tuning Level Display

Operations
. Before tutning the power on, confirm that all connections have been made properly.
o All buttons on this.un¡t (except the power sw¡tch) are soft-touch buttons. When the power is turned on, all settings return to the same
ones set when power was last turned off. I RF mode, DX or LOCAL (FM only)
DX mode should be used when receiving a weak signal from a
FM, AM DIRECT TUNING farawaystation.
TUNING LEVEL - DOWN, UP-
While LOCAL mode should be used when receiving a strong
signal from a nearby stat¡on.
When tuning, using either the tuning buttons or the number
burtons, w¡th the APR button engaged, the RF mode will change
automat¡cally to DX mode.
lf LOCAL mode is required, press the RF mode button to switch
from DX mode.
I FM Stereo lndicator
This indicator lights when an FM broadcast is being received.
It does not light when a weak FM stereo broadcast ¡s being
received,
lf you want to listen to an FM broadcast in MONO mode, press
the MODE button to turn the Stereo lndicator off.
I To achieve more precise tuning of a cable broadcasting
station when receiving a cable FM (TV) broadcast
Use the UP or DOWN button to approximately locate the
broadcastin.g. frequency in 50 kHz sleps, then use the
CABLE/MUTE button to turn off FM muting and set the tuning
step to 25 kHz. The IEABLEIindicator will light up so that manual
tuning of the broadcasting frequency can be performed using
the tun¡ng seleclor button. During 25 kH.z tuning step mode,
automatic tuning is disabled. The conditions picked up during
this Tuning Step Mode can be placed in memory.
NOTE:
When the CABLE mode is cancelled, the tun¡ng frequency re-
turns to 50 kHz step mode.
Examples: 100.125 + 100.100 MHz
100.t75 + 100.150
100.100 + 100.100
I Tuning w¡th the tuning buttons
To tune in an FM or AM station not stored in the memory, press
the Tuning selector buttons. lf you press UP, RF mode'changes
to DX and the frequency is increased. Pressing DOWN decreases
the frequency. Note that the frequency is changed in 50kHz steps
in FM and 9/1OkHz steps in AM when the Tuning selector
buttons is pressed in single steps. lf this button is pressed
continuously for more than 0.5 second, aulo tuning mode is
entered, and frequencies are scanned automatically. When a
broadcast signal is rèceived, scanning stops. lf a differenl fre-
quency is desired, press the button once again.
a Scann¡ng will not stop for broadcasts weak enough to be
suppressed by the muting circuit. To receive a weak FM
broadcast, set the CABLE/MUTE button to the position the
CABLE indicator is on, and select the frequency of the desired
' broadcast stat¡on in single steps.
I Using the TUNING LEVEL button (FM only)
Each time this button is pressed, the auto tuning level is alter-
nately set to 20 dB or 35 dB. Use the 35 dB setting if there are
a lot of strong FM broadcasts in your area, and the 20 dB setting
if there are a lot of weak FM broadcasts in your area. The current
setting is shown in the multi function display for about two
seconds each time this selector is pressed. To receive broadcasts
below the level of 20 dB, set the CABLE/MUTE button to light
up CABLE indicator and tune. The displayed tuning level unit
of 'dB' is an abbreviation for dBf.
I Signal Strength lndicator
Optimum tuning points are indicated by the number of lighted
segments. i
SIGNAL STRENGTH
10 .5p.
ililililililil 100
I Receiving a stat¡on by inputting the frequency for the
stat¡on d¡rectly (Direct Tuning)
lf the frequency for the desired station is known, input the fre-
quency number directly.
@ Press the AM or FM button.
@ Press the DIRECT TUNING button.
. "-" will flash for 16 seconds in the Frequency Display.
@ tnput the desired frequency number by using the Number
Buttons while the cursors are flashing. For instance, if you
wish to receive the station of 88.10MH2, press the Number
Buttons, 8, 8, 1 and 0.
o ln areas where AM frequencies are set in 1 okHz steps,
inputting a number to the 10kHz digit sets 0 1o the l kHz
cligit automatically.
a lf the desired frequency set in fhis operation does not exist,
the frequency which is the nearest and lower than the desired
frequency will be received. lf the frequency set is not ¡n the
receive frequency range, the frequency flashes for two sec-
onds and then the previous frequency will be displayed.
. lf awrong frequencyhas been set, pressthe DIRECTTUNING
button and start aga¡n.
I How to classify and memorize stat¡ons
The memory can be divided (classified) for different users or
programs of stations.
W¡th this model, eight classes (CLASS A to H) are available
and stations can be memorized in any class. Atotal of 40stations
can be memorized in classes from A to H. Although the same
station can be memorized in different classes, the memory
number for the3tation will differ depending on the order in which
the station is memorized in the classes.
@ Tune in the desired station (see previous section on the
tuning operations).
@ Press the MEMORY button.
o The MEMORY ind¡cator will flash for 8 seconds.
@ Press the desired Classified Memory button (one of buttons
A to H).
a The stat¡on is memorized in the selected class with the
memory number which is the smallest of the unoccupièd
numbers in the class.
By repeating the operations above, up to 40 stations can be
memorized. lf an attempt is nrade to memorize 41 stations,
"FULL" will be displayed in the Frequency Display, indicating
that no more stât¡ons can be memorized.

I How to cancel memorized stat¡ons
Retrieve the class number you want to cancel (see "How to
retrieve.memorized stations") and then press the Dl RECT button
while holding down the MEMORY button. Another station can
be memorized with the memory number which has beén can-
celled.
I How to retrieve memorized stat¡ons
@ Press the Classified Memory button for the desired class.
o The memory number (station) which was last used in the
class will be received.
@ There are sovoral methods to proceed after the above opor-
ations are carried out. Use any of the following methods.
a. Pressing the same Classified Memory button again per-
mits the next preset memory number (station) lo be re-
ceived.
b. lnput the memoiy number you wish to receive by using
the Number buttons.
o lf the memory number consists of 2 digits, input two
numbers, immediately one after the other. For instance,
when inputting "15", "15" will not be registered if
you wa¡t more than one second before inputting "5",
resulting in only "1" being registered.
a lf a number other than a number from 1 to 40, or a
number which has not been memorized is input, the
number flashes for 2 seconds and then the number
which was displayed before will be displayed.
. lf a number between 1 and 4 is pressed, the display
and station are changed 1 second later.
c. Press the SCAN button
o Stat¡ons memorized in the present class will be
scanned in a order and the corresponding memory
number will flash in the Preset station display at each
scan. After the last memory number of the class is
reached, scanning starts again from the first memory
number of the class. Pressing the SCAN button again
stops scanning.
. Pressing the SCAN button after pressing the MEM-
ORY button, enables you to scan through the memory
numbers in all the classes one by one.
I APR (Automat¡c Precision Reception) System (FM only)
This unit is equipped with ONKYO's unique APR system that
automatically controls the Auto stereo/Mono reception modes,
lF bandwidth wide/narrow setting and FM auto hi-blend circuit
according to the quality (signal strength, distortion, etc.) of the
signal currently being received. Consequently, optimum re-
ception (the lowest distortion and highest S/N ratio) is assured
at all times. Note that the APR system functions only during
FM reception. An Auto Stereo/Mono Selector, lF bandwidth
selector and auto hi-blend selector are provided to allow man-
ually overriding these three APR controlled reception modes.
lf the station is retuned, or the APR button is pressed again
however, the or¡ginal APR selected modes will be restored.
The APR system functions automatically when using the UP
or DOWN .buttons, or direct tuning.
The APR settings are memorized when the station is memorized.
I How to name preset stat¡ons
(Character memory function)
This function enables you to memorize a maximum of 5 char-
acters consisting of alphabetics, some symbols and numbers,
for instance, representing broadcasting station names, for each
preset station. . DOWN /UP -
CLASS I\ ø@DISPLAY
CHARACTER
The display shows an FM broadcast at 105.11 MHz has been
memorized in 1 CH of the CLASS A, and hat been named
"oNKYO".
@ Call up the stat¡on to be named, using the CLASS A Button.
a lf the bröadcast has not yet been memorized in the preset
station, see Page 5.
@ Press the DISPLAY button.
a The frequency in the display goes off and the cursor
flashes at the first character.
n 1'; IIE F E l-1 I ,-l i-( l- l'l l"l Ü
t-t nt-t TTttt/tt\/t/-7 l-t t_-l:_t
f-LlfiJ ttt!/ l/\l /\ t / U ll:J
,l',a E -ii7 ri ,' )K -f I tl / \!)
@ Select a character using the UP > or DOWN < button
while thè cursor is flashing (approx. 5 seconds).
o The characrer changes lrom " f-f " to " -_il ", " | " ana
so on when pressing the UP I buttonland changes in
reverse order when pressing the DOWN I button.
@ Press the CHARACTER button once more when the desired
character is displayed. The character will be memorized and
the cursor moves to the next character.
o Select 5 characters by repeating steps @ and @ . lf you
want to include a space, press the CHARACTER button.
@ Press the CHARACTER button after selecting 5 characters.
ä,,iääirifräi"""'-1" llt',i t( \' tl..:". l? t""
o Flashing stops, and the naming operation is complete.
I How to change the character
Press the CHARACTER button to flash the character and select
the desired character using the UP > and DOWN < buttons.
I How to delete all characters at once
Press the DISPLAY button, while holding down the CHAR-
ACTER button.
I How to use the DISPLAY button
When characters are memorized for a preset slation, pressing
the CLASS Button does not display the frequency, but the
characters.
Press the DISPLAY button if you wanï to display the frequency.
NOTE:
lf you press DISPLAY once, and the wrong characters appear,
press the button twice more: once to display the frequency, then
once more to display the correct character sequence.
o Press the DISPLAY button once more if the cursor stops
f lashing.
EÞE
I
I
Troub,le-shaotÍng guide
The tuning steps by which the tuned frequency increases/decreases have been set at the factory to the proper value for the area where each
unit is to be sold. lf you use the unit in a country where a different tuning step is required or if the broadcast frequencies in your country
change so that you can not tune in radio stations precisely, contact your ONKYO authorized service center.
SpecÍfications
FM:
Tuning Range:
Usable Sensitivily:
50dB Ouieting Sensitivity:
Capture Ratio:
lmage Rejecrion Ratio:
lF Bejection Ratio:
Signal-to- Noise Ratio:
Alternate Channel
Attenuation:
AM Suppression Ratio:
Total Harmonic Distortion
Frequency Response:
Stereo Separation:
Output Voltage:
Muting Level:
87.50 - 108.00 MHz
(50/25 kHz steps)
Mono: 10.8 dBf,0.95 pV,75 Ohms IHF
(75 Ohms IHF)
Stereo: 17.2 dBf , 2.0 ¡tV,
(75 Ohms IHF)
Mono: 16.1 dBf, 1.7 pV (75 Ohms)
Stereo: 36.1 dBf, 17 pV (75 Ohms)
1.3 dB (Wide)
90 dB
90 dB
Mono: 85 dB, IHF
Stereo: 80 dB, IHF
50 dB IHF (*400 lHz) (Narrow)
50 dB
Mono: 0.1% (Wide)
Stereo: O,2o/o (\trtlide)
30 - I5,000 Hz +0.5 -1.0 dB
45 dB at 1 kHz (Wide)
30 dB at 70 - 10,000H2 (Wide),
0.5 v
17.2 dBf , 2.0 pV (75 Ohms)
AM:
Tuning Range:
Usable Sensitivity:
lmage Rejection Ratio:
lF Rejection Ratio:
Signal-to- Noise Ratio:
Total Harmonic Distortion;
Output Voltage:
General
Power Supply:
Dimensions(W x H x D)
Weight:
Supplied accessories:
530 - 1710 kHz (10 kHz steps)
25 ¡tV
40 dB
40 dB
40 dB
o.70/o
150 mV
AC12OV,60 HZ
455 x 90 x 364 mm
(17-15/16" x3-5/8" x 14-5l16")
4.8 ks 10.6 lbs.
AM loop antenna x 1
FM T-shaped antenna x 1
Connecting cable x 1
Rl remote control cable x 1
75/300 Ohm antenna adapter x 1
Specifications and features are subject to change without notice.
Troubte Cause Remedy
No power o Power cord is disconnected. o Connect power cord
Buzzing noise on AM, usually conspicu-
ous at night or with a weak station. a Noise from electrical apparatus such
as fluorescent lamps. o Move set to d¡fferent location.
a Change the position or direction of the loop an-
tenna.
Hiqh pitch noise. o Noise from TV o Keep unit away from TV set.
Crackling noise on AM and FM. o Noise caused by turning fluorescent
lamp on and off.
. Noise from automobile ignition.
o Move the antenna as far away as possible from
the fluorescent lamp.
a lnstall an outdoor FM antenna as far away as
possible from the road.
AM stations cannot be received o AM loop antenna is not attached a Connect the included AM loop antenna to the
AM antenna terminals.
FM signal strength indicators and stereo
indicalor light but sound is d¡storted and
seDarat¡on is bad.
o Stat¡on is too strong.
a Multiple reflection of the radio waves
because of tall buildinss or mounta¡ns.
a Change to T-shaped antenna.
o Use antenna which has better directivity and se-
lect a point where the distortion is.least.
FM signal strength indicators and stereo
indicalor flicker and hiss is heard on FM. a Station is too weak.
a Stereo FM broadcasts cover only about
half the distance of an ordinary
broadcast.
a lnstall an outdoor FM antenna.
o Change the position or direction of the outdoor
antenna.
No station or undesired stat¡on ¡s recalled
when a Preset button is pressed. o The Power switch has not been turned
on for a long time, or the power cord
has been unplugged for a long time.
a The memory contents are lost if the power is not
turned on and off a few times each month. Store
. .all stations in the memory again and remember
to turn power on and off a few times each month.
ONITYO CORPORATION
lnternational Division: Onarimon Yusen Bldg., 23-5, Nishi-Shimbashi 3-chome, Minato'ku,
TOKYO 105, JAPAN Tel: 03-3432-6987 Fax: 03-3436-6979
ONKYO U.S.A CORPORATION
200 Williams Drive, Ramsey, N.J.07446, U.S.A.
Tel: 201-825-7950 Fax: 20'l-825-8150
l¡ -=r
Table of contents
Other Onkyo Car Receiver manuals

Onkyo
Onkyo CS-345 User manual

Onkyo
Onkyo C-701A User manual

Onkyo
Onkyo CR-515 CR-315 User manual

Onkyo
Onkyo CR-305X User manual

Onkyo
Onkyo CR-N1 User manual

Onkyo
Onkyo CR-B8 User manual

Onkyo
Onkyo CR-305TX User manual

Onkyo
Onkyo CS-375D User manual

Onkyo
Onkyo CR-505DA User manual

Onkyo
Onkyo CS-255 User manual