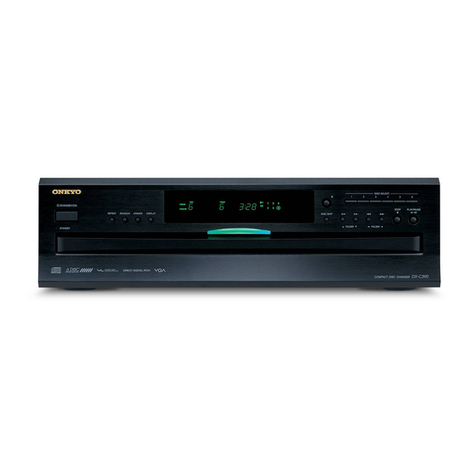
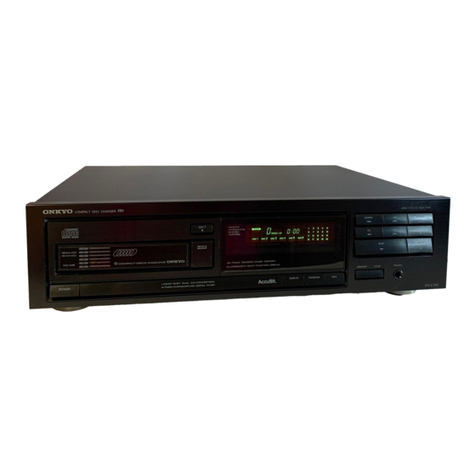
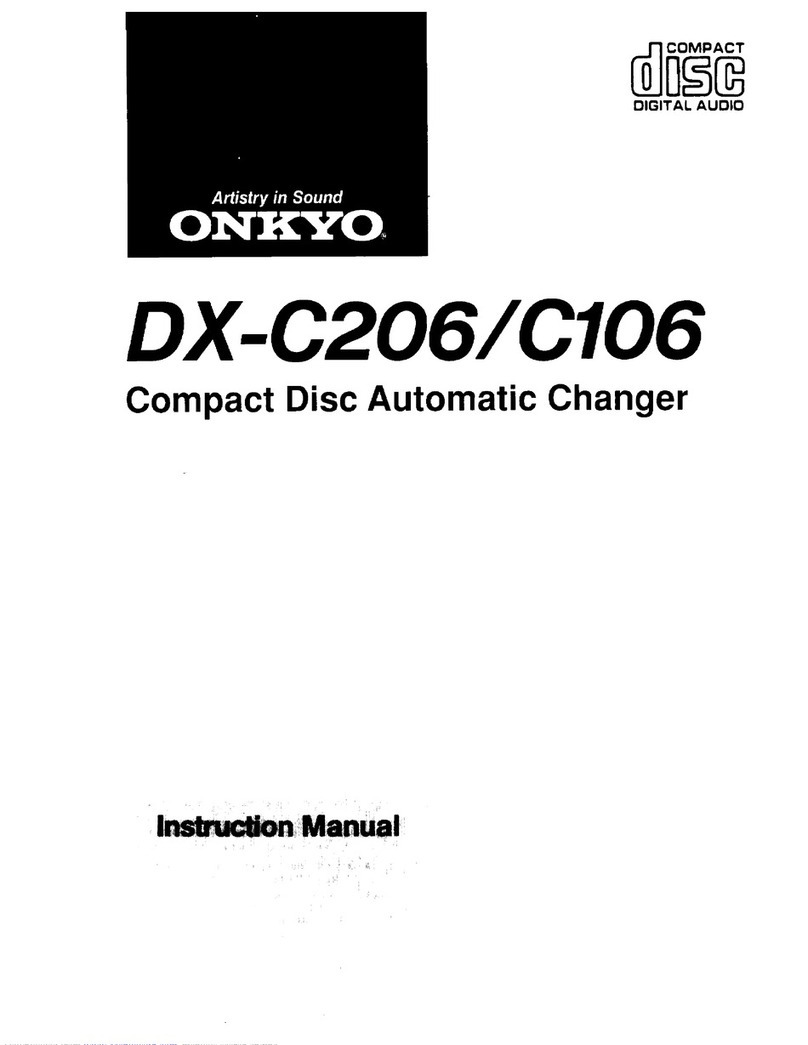
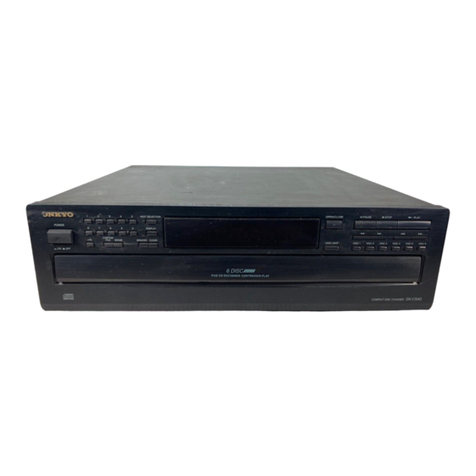
Onkyo DX-C206 User manual

COMPACT
DIGITAL
AUDIO
DX-C206/C106
Compact
Disc
Automatic
Changer

e
Congratulations
on
your
purchase
of
the
ONKYO
DX-C206/C106
CD
Player.
@
Please
read
this
manual
thoroughly
before
making
connections
and
turning
power
on.
@
Following
the
instructions
in
this
manual
will
enable
you
to
obtain
optimum
performance
and
listening
enjoyment
from
your
new
DX-C206/C
106.
@
Please
retain
this
manual
for
future
reference.
CONTENTS
FOATUIOS
o.oo.
ee
ees
eceeessssesecenessacssavevessseenssssesansnencssssasssacaescesesasasassssssusesssseavaaasasasasansss
sessussssscissubibabasssasesesseeseeeeeeeccceseseec
ccc
1
Important
SAFEQUAIAS
00...
cece
essessssesecceesesssessssssssescessussuscsesssueusuuatarsnessusesasessssssasasanessstsssbabsbesssssapisessueecececeseeececeesecec
cc.
2
PFECAUTIONS
«0.
.eee
es
sscseeccesnenecsssesscsesessatstsnesssesssesssesssssessssesssausuasavasacaseveuessssusesssasssasassuss
vesesssasesersisisusacegatacececesseeeececececec
cc.
3
SYSTEM
CONNECTIONS...
cecesessecssssessessseseessseuessssesssessnessessuesscsavaversssnseuavassusarssesasasasasssessasess
sastasapapsssisasstaceeseeeeeeecececeeecee
cL.
4
Control
positions
ANd
NAMES
......
cece
cssecesesesssesencsssnssuaveseessessssasausuavauacaasasssesssassssseseststssststapabasssevaveuesessesssseesesesseecesccee.
5
Operations
oo...
eececceesssseesssssssessssssessvsossssssesasasssssassesesssessvssusssssssavegsussssaeeerssacseeussssesssrasssasasesapabasebssuesessesecseceseeeeecccecccese.
7
TrOUDIESHOOTING
GUIDE
oo...
cess
eeecessetsesesesssessscscscsesssessscussesasavasevavasasssassvscsusuassasesususaasassbabipustsbessasessesesebeeececececeseecccc
11
SPOCHICALIONS
.......ecsseescesssetsssscessssssessesssessasasscscsessansesssssscesesaevavavapasasasasavassenesssasadasasassvasusapssasisacieesseeeeeeeceeesesese
ccc.
11
Features
a
®
Six-Disc
Carousel
The
six-disc
carousel
makes
CDs
more
enjoyable
and
listening
to
them
easier
then
ever.
Simply
place
six
CDs
of
your
choice
(CD
singles
are
okay
too)
on
the
circular
carousel
platter
and
press
the
play
button.
The
new
format
provides
faster
switching
between
CDs
than
magazine
type
changers.
Anc
it
gives
you
the
freedom
to
change
your
mind.
You
can
replace
inactive
CDs
while
one
is
still
piaying.
Changing
the
sequence
of
the
not-in-play
CDs
is
just
as
easy.
®
40-step
random
access
programing
You
can
program
the
CD
player
to
play
tracks
from
any
disc.
First.
switch
the
unit
to
the
“program
mode’.
Then
select
your
discs
and
tracks.
The
tracks
will
be
played
in
the
order
in
which
they're
selected.
If
you
program
only
the
disc
number.
then
only
the
songs
from
that
disc
will
be
played.
It's
also
possible
to
skip
tracks
and
discs
within
a
programmed
sequence,
®
Direct
disc
access
Press
up
and
down
buttons
to
go
directly
to
a
particular
disc.
It's
that
easy
to
pick
and
choose.
Play
starts
autamatically.
Single-Bit
D/A
Converter
and
ACCUPULSE
Quartz
System
Eight
Times
Oversampling
Digital
Filter
©
Three
Play
Modes:
Normal,
Memory
and
Random
Neen
rere
eee
e
reer
“WARNING”
@®
For
models
having
power
cord
with
a
polarized
plug.
“TO
REDUCE
THE
RISK
OF
FIRE
OR
ELECTRIC
SHOCK.
DO
NOT
CAUTION:
EXPOSE
THIS
APPLIANCE
TO
RAIN
OR
MOISTURE.’
TO
PREVENT
ELECTRIC
SHOCK.
MATCH
WIDE
BLADE
OF
PLUG
TO
WIDE
SLOT,
FULLY
INSERT.
CAUTION
®@
Sur
les
modéles
dont
la
fiche
est
polarisée.
“TO
REDUCE
THE
RISK
OF
ELECTRIC
SHOCK.
DO
NOT
REMOVE
ATTENTION:
COVER
(OR
BACK).
NO
USER-SERVICEABLE
PARTS
INSIDE.
REFER
SERVICING
TO
QUALIFIED
SERVICE
PERSONNEL.’
CAUTION
RISK
OF
ELECTRIC
SHOCK
DO
NOT
OPEN
@
The
Jightring
flash
with
arrowhead
symbol
within
an
equilateral
trangle.
is
intended
to
alert
the
user
to
the
presence
of
uninsulated
“dangerous
voltage”
within
the
product's
enclosure
that
may
be
of
sufficient
magnitude
to
constitute
a
risk
of
electric
shack
to
persons.
POUR
EVITER
LES
CHOCS
ELECTRIQUES.
INTRODUIRE
LA
LAME
LA
PLUS
LARGE
DE
LA
FICHE
DANS
LA
BORNE
COR-
RESPONDANTE
DE
LA
PRISE
ET
POUSSER
JUSQ
AU
FOND.
@
The
exclamation
point
within
an
equilateral
triangle
is
intended
to
alert
the
user
to
the
presence
of
important
operating
and
maintenance
(servicing)
instructions
in
the
literature
accomparying
the
appliance.
Important
safeguards
ee
1.
6A.
An
appliance
and
cart
combination
should
13.
Read
instructions
—
All
the
satety
and
operating
instructions
should
be
read
before
the
appliance
is
operated.
Retain
Instructions
—
The
safety
and
operating
instructions
should
be
retained
for
future
reference.”
Heed
Warnings
—
All
warnings
on
the
appliance
and
in
the
operating
instructians
should
be
adhered
to.
Follow
Instructions
—
All
operating
and
use
instructions
should
be
followed.
Water
and
Moisture
—
The
appliance
should
not
be
used
near
water
-
tor
example,
near
a
bathtub,
washbowl.
kitchen
sink,
laundry
tub,
in
a
wet
basement,
or
near
a
swimming
pool.
and
the
like.
Carts
and
Stands
—
The
appliance
should
be
used
only
with
a
cart
or
stand
that
is
recommended
by
the
manufacturer.
;
.
PORTABLE
CART
WARNING
be
moved
with
care.
Quick
stops.
exces-
sive
farce,
and
uneven
surfaces
may
cause
the
appliance
and
cart
combination
to
over-
turn,
wa
Wall
or
Ceiling
Mounting
—
The
appliance
should
be
mounted
to
a
wall
or
ceiling
only
as
recommended
by
the
manufacturer.
Ventilation
—
The
appliance
should
be
situated
so
that
its
location
or
position
does
not
interfere
with
its
proper
ventilation.
For
example.
the
appliance
should
not
be
situated
on
a
bed.
sofa.
rug,
or
similar
surface
that
may
biock
the
ventilation
openings
or.
placed
in
a
built-in
installation,
such
aS
a
bookcase
or
cabinet
that
may
impede
the
flow
of
air
through
the
ventilation
openings.
Heat
—
The
appliance
should
be
situated
away
trom
heat
sources
such
as
radiators.
heat
registers.
stoves.
or
other
appliances
(including
amplitiers)
that
produce
heat.
.Power
Sources
—
The
appliance
should
be
connected
to
a
power
supply
only
of
the
type
described
in
the
operating
instructions
or
as
marked
on
the
appliance.
Polarization
—
ifthe
appliace
is
provided
with
a
polarized
plug
having
one
blade
wider
than
tne
other.
please
read
the
following
information:
The
polarization
of
the
plug
is
a
safety
feature.
The
polarized
plug
will
only
fit
the
outlet
one
way.
If
the
plug
does
not
fit
fully
into
the
outlet.
try
reversing
it.
If
there
is
still
trouble.
the
user
should
seek
the
services
of
a
qualified
electrician.
Under
no
circumstances
should
the
user
attempt
to
defeat
the
polarization
of
the
plug.
.Power-Cord
Protection
—
Power-suoply
cords
should
be
routed
so
that
they
are
not
likely
to
be
walked
on
or
pinched
by
ites
placed
upon
or
against
them.
paying
particular
attention
to
cords
at
plugs,
convenience
receptacles.
and
the
paint
where
they
exit
from
the
appliance.
Cleaning
—
The
appliance
should
be
cleaned
only
as
recommended
by
the
manufacturer.
14.
Nonuse
Periods
—
The
power
cord
of
the
appliance
should
be
unplugged
15.
from
the
outlet
when
left
unused
for
a
long
pericd
of
time.
Object
and
Liquid
Entry
—
Care
should
be
taken
so
that
objects
do
not
fall
and
liquids
are
not
spilled
into
the
enclosure
through
openings.
16.
Damage
Requiring
Service
—
The
appliance
should
be
serviced
by
quaiified
service
personnel
when:
A.
The
power-supply
cord
or
the
plug
has
been
damaged
or
B.
Objects
have
fallen,
or
liquid
has
been
spilled
into
the
appliance
or
C.
The
appliance
has
been
exposed
to
rain
or
D.
The
appliance
does
not
appear
to
operate
normaliy
or
exhibits
a
marked
change
in
performance
or
E.
The
appiiance
has
been
dropped
or
the
enclosure
damaged.
17.
Servicing
—
The
user
shouid
not
attempt
to
service
the
appliance
beyond
that
described
in
the
operating
instructions.
All
other
servicing
should
be
referred
to
qualified
service
personnel.
—~?-
—
SPECIAL
CAUTIONS
FOR
COMPACT
DISC
PLAYER
®
This
Compact
Disc
Player
contains
a
semiconductor
laser
system
and
isclassifiedasa“CLASS
1LASER
PRODUCT’.
So,
to
use
this
model
properly,
read
this
Owner's
Manua!
carefully.
In
case
of
any
trouble,
please
contact
the
store
where
you
purchased
the
unit.
To
prevent
being
exposed
to
the
laser
beam,
do
not
try
to
open
the
enclosure.
The
laser
is
covered
by
a
housing
which
prevents
exposure
during
operation
or
maintenance.
However,
this
product
is
classified
as
a
Laser
Product
by
CDRH
(Genter
for
Devices
and
Radiological
Health)
which
is
a
department
of
the
Food
and
Drug
Administration.
According
to
their
regulations
21
CFR
section
1002.30,
all
manu-
facturers
who
sell
Laser
Products
must
maintain
records
of
written
communications
between
the
manufacturer.
dealers
and
custom-
ers
concerning
radiation
safety.
If
you
have
any
complaints
about
instructions
or
explanations
affecting
the
use
of
this
product.
please
feel
free
to
write
to
the
address
on
the
back
page
of
this
manual.
When
you
write
us,
please
include
the
model
number
and
serial
number
of
your
Compact
Disc
Player.
In
compliance
with
Federal
Requiations,
the
certification,
identifi-
cation
and
the
period
of
manufacture
are
indicated
on
the
rear
panel.
DANGER:
INVISIBLE
LASER
RADIATION
WHEN
OPEN
AND
INTERLOCK
FAILED
OR
DEFEATED.
AVOID
DIRECT
EXPOSURE
TO
BEAM.
CAUTION:
THIS
PRODUCT
UTILIZES
A
LASER.
USE
OF
CONTROLS
OR
ADJUSTMENTS
OR
PERFORMANCE
OF
PROCEDURES
OTHER
THAN
THOSE
SPECIFIED
HEREIN
MAY
RESULT
IN
HAZARDOUS
RADIATION
EXPOSURE.
@®
FCC
INFORMATION
FOR
USER
CAUTION:
The
user
that
changes
or
modifications
not
expressly
approved
by
the
party
responsible
for
compliance
could
void
the
user's
authority
to
operate
the
equipment.
NOTE:
This
equipment
has
been
tested
and
found
to
comply
with
the
limits
tor
a
Class
B
digita!
device
pursuant
to
Part
15
of
the
FCC
Rules.
These
limits
are
designed
to
provide
reasonable
protection
against
harmful
interference
in
a
residential
installation.
This
equipment
generates
uses
and
can
radiate
radio
frequency
energy
and
if
not
instailed
and
used
in
accordance
with
the
instructions
may
cause
harmful
interference
to
radio
communications.
However
there
is
no
guarantee
that
interference
will
not
occur
in
a
particular
installation.
If
this
equipment
does
cause
harmful
interference
to
radio
or
television
reception
which
can
be
determined
by
turning
the
equipment
off
and
on
the
user
is
encouraged
to
try
to
correct
the
interference
by
one
or
mare
of
the
following
measures:
®
Reorient
or
relocate
the
receiving
antenna.
@
Increase
the
separation
between
the
equipment
and
receiver.
®
Connect
the
equipment
into
an
outlet
on
a
circu't
different
from
that
to
which
the
receiver
is
connected.
®
Consult
the
dealer
or
an
experienced
radio/TV
technician
for
help.
THIS
DIGITAL
APPARATUS
DOES
NOT
EXCEED
THE
CLASS
B
LIMITS
FOR
RADIO
NOISE
EMISSION
FROM
DIGITAL
APPA-
RATUS
SET
OUT
IN
THE
RADIO
INTERFERENCE
REGULA-
TIONS
OF
THE
CANADIAN
DEPARTMENT
OF
COMMUNICA-
TIONS.
L’
INTERFERENCE,
RADIO
ELECTRIQUE
GENEREE
PAR
CET
APPAREIL
NUMERIQUE
DE
TYPE
B
NE
DEPASSE
PAS
LES
LIMITES
ENONCEES
DANS
LE
REGLEMENT
SUL
LES
PER-
TURBATIONS
RADIO
ELECTRIQUES,
SECTION
APPAREIL
NUMERIQUE,
DU
MINISTERE
DES
COMMUNICATIONS.

Precautions
a
1.
Warranty
Card
The
seriai
number
is
written
on
the
rear
panel
of
this
unit.
Copy
the
serial
number
and
mode!
number
onto
your
warranty
card
and
keep
it
in
a
safe
place.
Do
Not
Touch
the
Player
with
Wet
Hands
Do
not
handle
the
player
or
power
cord
when
your
hands
are
wet
or
damp.
If
water
or
any
ather
liquid
enters
the
player
cabinet,
take
the
player
to
an
authorized
service
station
for
inspection.
Location
of
the
Player
®
Place
the
Player
in
a
Well-Ventilated
Location.
Take
special
care
to
provide
plenty
of
ventilation
on
all
sides
of
the
player
especially
when
it
is
placed
in
an
audio
rack.
If
ventilation
is
blocked,
the
player
may
overheat
and
malfunction.
Do
not
expose
the
player
to
direct
sunlight
or
heating
units
as
the
player's
internal
temperature
may
rise
and
shorten
the
life
of
the
pickup.
Avoid
damp
and
dusty
places
and
places
directly
affected
by
vibrations
from
the
speakers.
In
particular,
avoid
placing
the
unit
on
or
above
one
of
the
speakers.
Be
sure
the
player
is
placed
in
a
horizontal
position.
Never
place
it
on
its
side
or
on
a
slanted
surface
as
it
may
malfunction.
Do
Not
Place
Near
Tuners
and
TV
Sets.
If
placed
next
to
a
TV
or
other
tuner.
it
may
cause
reception
interference
resulting
in
some
noise
in
the
TV
or
tuner
output.
4.
Care
From
time
to
time
you
should
wipe
off
the
front
and
rear
panels
and
the
cabinet
with
a
soft
cloth.
For
heavier
dirt.
dampen
a
soft
cloth
in
a
weak
solution
of
mild
detergent
and
water.
wring
it
out
dry,
and
wipe
away
the
dirt.
Following
this,
dry
immediately
with
a
clean
cloth.
Do
not
use
rough
material,
thinners,
alcohol
or
other
chemical
solvents
or
cioths
since
these
may
damage
the
finish
or
remove
the
panel
iettering.
5.
Points
to
Remember
®
Ifthe
player
is
brought
from
a
cold
environment
to
a
warm
one
orisinacold
room
that
ts
quickly
heated,
dew
may
form
on
the
pickup,
preventing
proper
operation.
In
this
case,
remove
the
disc
and
leave
the
power
ON
for
about
one
hour
to
remove
the
dew.
Always
close
the
disc
tray
when
not
loading
or
unloading
discs
to
protect
delicate
internal
parts
from
dust.
@
When
transporting
the
player.
be
careful
not
to
bump
it.
Transmitter
Battery
insertion
4)
a
{
x
|
ow
1.
Push
the
battery
cover
on
the
rear
of
the
transmitter
in
the
direction
of
the
arrow
and
lift
it
up.
2
Load
the
two
batteries
that
came
with
the
transmitter
or
two
batteries
listed
in
the
table.
Load
them
with
the
+
and—
ends
facing
_
as
shown
in
the
diagram.
3
Put
the
battery
cover
back
in
place.
Use
of
Batteries
@
The
remote
control
transmitter
is
powered
by
two
batteries.
Before
using
this
unit
for
the
first
time.
insert
the
two
batteries
(included)
as
shown
tn
the
diagram.
Average
battery
life
is
about
one
year.
This
period
may
be
shorter
depending
on
the
frequency
of
use
and
environment
(temperature
and
humidity)
in
which
the
remote
contro!
transmitter
is
used.
lf
the
remote
control
transmitter
does
not
operate
even
though
front
panel
controls function
normally.
the
batteries
should
be
replaced.
Use
only
batteries
listed
in
tne
following
chart.
3
Type
!
Voltage
Size
t
!
|
AA
|
Manga
|
is5y
RE
j;
nese
UM-3
|
NOTES:
1.
Do
not
leave
an
expired
battery
in
the
case
as
it
may
leak
or
damage
the
battery
case.
When
inserting
the
batteries.
be
sure
the
(—)
and
{-)
ends
are
,
properly
aligned.
-
3.
Do
not
use
nickel-cadmium
(rechargeable)
batteries.
_
4.
Do
not
use
one
specifiec
(manganese)
battery
and
one
alkaline
|
battery
at
the
same
time.
|
5.
Replace
ooth
batteries
at
once:
do
not
use
one
old
and
one
new
battery
togetner.

System
connections
®
Do
not
plug
in
the
power
cord
until
all
connections
have
been
made.
FL
REMOTE
~~
Q4Tei-
—_
SONTAG.
F
L|
|
fo,
CEN!
ONKYO,
SOMA
SACT
CHRD
Fe,
avo
|
MODEL
NO.
DX-C206
‘maria
'
AC
Pate
Boer
Ww
'
ONE
YO
CORPORATION
I
WAALIL
he
FATA
Ty
Remote
control
cable
Output
signal
cord
*To
FRI
remote
control
jack
of
the
ONKYO
receivers.
amplifiers
or
cassette
tape
gecks.
Speaker
Integrated
Amplifier
Connecting
to
the
analog
OUTPUT
jacks
®
Connect
the
OUTPUT
jacks
of
this
unit
to
the
AUX
or
CD
input
jacks
of
an
amplifier.
When
making
connections,
be
sure
that
the
left
and
right
channel
connections
are
not
crossed.
How
to
open
a
disc
case
and
remove
a
disc.
Speaker
Handling
Compact
Discs
—--
Supplied
accessories
!
Output
signal
cord
=
1
fRi
remote
control
cable
=
1
AC
POWER
SUPPLY
CORD
Remote
contro!
transmitter
RC-227C
(DX-C206)
Battery
x
2
Remote
Control
jack
The
remote
control
jack
is
used
to
connect
ONKYO
products
bearing
the
“
QI”
mark
via
the
accessory
remote
control
cable.
The
cassette
deck
withthe”
fQI
"mark
canbe
operated
using
the
RC-
227C
remote
control
transmitter
provided
as an
accessory
with
the
DX-C206.
When
this
unit
is
connected
with
ONKYO
receivers
or
amplifiers
bearing
the
“
fA)"
mark,
it
can
also
be
controlled
by
the
remote
contro!
transmitter
of
that
unit.
(Refer
to
the
operating
instruc-
tions
of
your
stereo
receiver
or
amplifier
for
details.)
NOTE:
De
not
connect
the
(RI
remote
control
jack
to
any
unit
that
does
not
bear
the
ONKYO"
QI"
mark.
Doing
so
may
damage
the
unit.
Aiways
handle
compact
discs
with
care
so
that
they
are
not
scratched,
soiled
or
damaged.
A
dry
soft
cloth
may
be
used
to
wipe
dust,
fingerprints,
etc
off
the
surface.
Make
absolutely
sure
not
to
use
any
type
of
volatile
agent,
such
as
thinner
or
benzine.
Also
avoid
using
a
conventional
record
cleaner
or
antistatic
agent.
Avoid
placing
a
disc
in
direct
sunlight,
and
locations
subject
to
|
extremely
high
humidity
or
low
temperature.
When
a
disc
is
going
to
be
left
unused
for
a
long
period
of
time.
be
sure
not
to
leave
it
in
the
player
but
store
it
in
the
case.

Control
positions
and
names
Front
panel
For
more
information
about
buttons
or
controls,
turn
to
the
page
number
listed
in
the
[
]
‘
Random
Button
(RANDOM)
[10]
|
Repeat
Button
(REPEAT)
[10]
|
Display
Button
(DISPLAY)
[7]
|
|
Memory
Button
(MEMORY)
[9]
|
Clear
Button
(CLEAR)
[9]
y
—
(_—
Next
Selection
Button
(NEXT
SELECTION)
[8]
Open/Close
Button
(OPEN/CLOSE
4
)
[7]
,-—
Power
Switch
(POWER)
[7]
|
Remote
Control
Sensor
[6]
Disc
Skip
Button
|
Display
(DISC
SKIP)
[7,
8,
9]
Fast
Reverse
Button
(
«<«
)
[8,
9]
Fast
Forward
Button
(
»»
)
[8,
9]
Down
Buiton
(!~<<)
[8,
9]
Up
Button
(
»P.)
[8,
9]
Loading
drawer
[7]
Stop
Button
(STOP
@
)
[7]
Pause
Button
(PAUSE
11
)
[7]
Play
Button
(PLAY
pm
)
[7]
Disc
tray(s)
(1~6)
Carousel
Display
Track
Number
Display
Function
Display
(REPEAT,
RANDOM,
MEMORY,
PAUSE)
top
EE
—
—\
|
|
JEOh
;
|=]
ARE
—
ii
f
SINGLE
ELAPSED
fF
4p?
TT
ia
te)
33
—
7
i
NGLE
=
Cok
fof
ft
fos
ie
ro)
|
i}
Tj
if
TOTAL
SENMAIN
Ld
tf bf
li
al
ng]
[19
Disc
Number
Display
Music
Calendar
Display
Track
Time
Display

Remote
control
transmitter
RC-227C
(DX-C206)
@
Buttons
not
described
below
are
operated
in
the
same
way
as
the
buttons
on
the
main
unit.
Repeat
Button
(REPEAT)
[10]
Open/Close
Button
(
4
)
[7]
CD/Tape
Operation
Buttons
When
the
CD/TAPE
selector
switch
is
on
Cb.
[7,
8,
9]
WM
=
Stop
Button
m
-Play
Button
Display
Button
(DISPLAY)
[7]
CD/TAPE
Selector
Switch
This
switch
should
normaily
be
set
to
the
CD
side.
When
a
cassette
deck
bearing
the
ONKYO
"
FRI"
mark
is
connected
to
the
remote
control
jacks
of
the
DX-C206
model,
the
deck
can
be
contrailed
by
this
remote
control
transmitter.
Set
the
CD/
TAPE
selector
switch
to
TAPE.
At
this
li
:
Pause
Button
setting,
the
6
functions
(from
§
to
m
)
~@<@
-
Fast
Reverse
Button
listed
at
left
can
be
operated
by
remote
mr
Fast
Forward
Buttan
control.
|<
-
Down
Button
mp}
Up
Button
When
the
CD/TAPE
selector
switch
is
on
Tape
Random
Button
(RANDOM)
[10]
Memory
Button
(MEMORY)
[9]
@
=
Stop
Button
/i:
Rec/Pause
Button
~@<q
=
Fast
Rewind
Button
me
Fast
Forward
Button
<4
>
:
Reverse
Play
Button
:
Forward
Play
Button
7
Number
Buttons
and
Plus
Ten
Button
[8]
®
These
buttons
are
available
only
on
the
remote
control.
Clear
Button
(CLEAR)
[9]
Disc
Skip
Button
(DISC
SKIP
-,
+)
[7,
8,
9]
Using
the
remote
control
transmitter
1.
2.
Remove
the
batteries
if
the
remote
control
transmitter
is
not
going
to
be
used
for
a
tong
time.
The
batteries
of
the
remote
contro!
transmitter
must
be
replaced
periodically.
This
unit
uses
infrared
rays.
Therefore,
commands
may
not
be
received
properly
if
the
front
panel
of
this
unit
is
exposed
to
bright
light.
To
prevent
this
from
occurring,
place
this
unit
so
that
it
is
not
directly
exposed
to
bright
light.
If
this
unit
is
placed
inside
an
audio
rack
behind
a
glass
door.
the
door
should
not
have
colored
glass
or
have
any
decorations
on
it,
since
this
could
shorten
the
range
or
prevent
commands
from
being
received.
Use
of
other
infrared
remote
control
devices
in
the
same
room
may
Cause
interference.
The
transmitter
operates
up
to
a
distance
of
about
five
meters
(16
feet).
The
transmitting
window
must
always
be
pointed
at
the
reception
window
when
a
command
is
sent
to
the
CD
player.
.
lfthis
remote
control
transmitter
does
not
operate
properly,
confirm
that
the
batteries
are
not
dead.
If
the
problem
persists,
contact
your
ONKYO
Service
Center.
L
Lo
:
approx
5m
—
DX-C206
Remote
sensor
°°
30
(16
feet)
A
Remote
control
transmitter
RC-227C

Operations
To
Load
and
Play
a
Disc
(Normal
Play)
qd)
POWER
DISPLAY
(3)
DISC SKIP
()(4)
OPEN/CLOSE
&
(6)
PLAY
‘D
Press
the
POWER
switch
to
turn
on
the
power,
When
the
power
is
turned
on,
the
carousel
rotates
to
find
the
position
of
a
disc
and
stops
automatically
if
there
is
adisc
onthe
disc
tray.
If
the
OPEN/CLOSE
&
button
is
pressed
immediately
after
the
power
has
been
turned
on
the
carousel
does
not
rotate.
=.
\¢’
Press
the
OPEN/CLOSE
&
button
to
open
the
loading
drawer.
\
fo
7
‘y
f
i
\
ai
!
:
-
oa
i
i
!
ee
i
PON
Cp
ae
a
=
i
|
Esa
oa
oe
a
|
—
|
‘3
Put
the
disc(s}
in
the
Disc
Tray(s}
with
labels
facing
up.
@
Pressing
the
DISC
SKIP
(-.
+}
button
rotates
the
carousel
so
that
you
can
load
discs
in
the
other
disk
trays.
Frort
pasit-on
4
Press
the
OPEN/CLOSE
button
again
to
close
the
loading
drawer.
®
The
disc
in
the
front
position
is
ready
to
play.
If
there
is
no
disc
in
the
front
oasition
of
the
carousel,
the
unit
rotates
to
the
next
Disc
Tray
until
it
finds
a
disc
to
play.
The
Disc
Tray
number
with
no
disc
in
its
tray
disappears
from
the
display.
The
total
number
of
tracks
on
the
disc.
Ali
of
the
track
numbers
on
the
disc
light.
I
The
total
playing
time
of
the
disc.
(6)
PAUSE
II
(7)
STOP
&
&
Press
the
PLAY
®
button
@
The
Disc
No.
and
the
track
number
on
the
Music
Calender
display
are
surrounded
by
squares
and
start
playing.
be
_—
1
__.
a
The
elapsed
time
of
the
current
track
in
play.
The
display
can
be
changed
by
DISPALY
button.
®
If
you
put
the
discs
in
the
disc
trays
and
press
the
PLAY
button
instead
of
the
OPEN
CLOSE
&
button.
the
carousel
turns
and
the
disc
which
you
put
in
front
position
while
the
drawer
was
opened
starts
to
play.
®
After
alithe
discs
on
the
carouse!
have
been
played.
the
display
resets
to
its
inital
condition
when
the
discs
were
loaded.
Press
the
PAUSE
Wi
button
to
stop
the
performance
temporarily.
@
The
PAUSE
indicator
lights
and
the
playing
stops
temporarily.
®
Toresume
playing.
pressthe
PLAY
™
button.
The
playing
starts
up
again
from
exactly
where
it
left
off.
To
stop
playing.
press
the
STOP
I
button.
@®
When
the
loading
drawer
is
open.
the
disc
which
has
been
played
cames
into
the
front
position.
Changing
the
display
Press
the
DISPLAY
button
during
playing
to
switch
the
display
shown
in
the
Time
Display
among
the
following
three
types:
@
SINGLE
ELAPSED
shows
how
long
the
current
track
has
been
playing.
SINGLE
REMAIN
Shows
how
much
time
is
left
for
the
track
currently
playing.
TOTAL
REMAIN
Shows
how
much
playing
time
is
left
for
the
entire
disc.
During
memory
play.
this
display
shows
the
playing
time
re-
maining
for
the
entire
sequence
of
tracks
programmed
into
memory.
NOTE:
-——
—,
For
a
track
beyond
the
20th.
the
remaining
time
(SINGLE
REMAIN)
|
|
of
the
Time
display
snows
"—
-:
-
—”.
|
Le

To
start
from
a
specific
track
DISC
SKIP
NEXT
SELECTION
OM
HRW
[
During
stop:
‘Ui
Please
make
sure
that
the
MEMORY
indicator
is
not
lit.
@
When
the
MEMORY
indicator
is
on,
press
the
MEMORY
button
to
turn
the
indicator
off.
2)
Select
the
desired
disc
with
the
DISC
SKIP
(-.
+)
button.
@
When
you
press
the
PLAY
™
button,
playback
will
start
with
the
first
track
on
the
selected
disc.
‘3’
Use
the
mt
button
or
the
<<
button
to
select
the
desired
track.
and
press
the
PLAY
™
button.
@
For
the
DX-C206.
the
Number
buttons
on
the
remote
control
can
be
used
to
select
the
desired
track,
Use
+10
button
to
select
a
track
with
a
track
number
of
10
or
higner.
For
example.
to
select
Track
Number
30.
press
this
button
three
times.
and
then
press
0.
—
~
“/
To
select
the
next
desired
track
during
the
playback
(L
Press
the
NEXT
SELECTION
button.
@
If
you
do
not
operate
within
approximately
8
seconds,
it
will
be
cancelled.
!n
such
a
case.
press
the
button
again.
To
move
forward
or
backward
quickly
during
playing
To
return
to
the
beginning
of
the
track
during
playing
or
to
skip
to
the
next
track
co
WUNHYE)
<<
>
PI
To
skip
to
the
next
track.
press
the
ms)
button.
@
The
playing
of
the
current
track
is
interrupted
and
the
pickup
moves
to
the
beginning
of
the
next
track.
During
memory
play
the
pickup
moves
to
the
beginning
of
the
next
track
in
memory.
«+
NEXT
|
“lights
+"—":
flashes
‘2:
Select
the
desired
disc with
the
DISC
SKIP
(-.
+)
button
.
®@
If
you
select
a
track
of
a
disc
being
played.
this
operation
is
not
necessary.
3)
Use
the
ppe|
button
or
the
|«q<q
button
to
select
the
desired
track.
@®
Forthe
DX-C206
the
Number
buttons
on
the
remote
control
can
be
used
to
select
the
desired
track.
Next
track
nur
ber
The
next
selected
D'SC
No.
@
When
the
track
which
has
been
playing
Is
finished.
the
track
of
the
disc
selected
using
the
NEXT
SELECTION
button
will
then
be
played.
The
other
functions
are
the
same
as
normal
play.
When
playback
of
the
last
track
has
finished.
the
unit
stops.
®
To
play
the
next
selected
disc
normaily.
from
the
beginning
to
the
end,
you
must
do
one
of
the
following
after
operation
2”
>
Press
number
°0"
button
on
the
remote
control.
>
Press
NEXT
SELECTION
button
again.
*
Nothing
will
operate
for
ihe
next
8
seconds.
NOTE:
lf
the
disc
which
has
been
selected
is
notin
the
Disc
Tray.
the
next
disc
is
played
in
the
normal
way.
starting
from
the
beginning.
If
a
track
which
is
not
on
the
disc
is
selected.
the
disc
which
was
|
designated
is
played
inthe
normal
way.
starting
from
the
beginning.
Press
the
i
button
to
fast
forward.
Press
the
<#@
button
to
fast
backward,
®
The
pickup
continues
to
move
rapidly
forward
or
backward
as
long
as
you
hold
down
the
™®
button
or
~#
button.
@
|f
you
fast
forward
all
the
way
to
the
end
of
the
disc.
the
next
disc
iS
played.
®
During
memory
play.
when
the
pickup
is
forwarded
to
the
end
of
the
current
track
by
pressing
the
™®
button.
the
pickup
comes
to
the
next
programmed
track
and
norma
playback
begins.
When
the
~<d
button
ts
pressed.
the
pickup
comes
to
the
beginning
of
the
current
track
and
nermai
playback
begins
from
this
position.
@
During
random
play.
when
the
pickup
is
forwarded
to
the
end
of
the
current
track
by
pressing
the
i
button.
the
random
play
starts
again.
@
The
pickup
moves
ahead
one
track
each
time
you
press
the
>|
button,
@
During
random
play.
the
pickup
skips
to
the
beginning
of
next
randomly
selected
track
of
a
random
disc.
To
return
to
the
beginning
of
the
track
during
playing.
press
the
|<<
button.
@
The
playing
is
interrupted
and
the
pickup
moves
back
to
the
beginning
of
the
current
track.
@
(if
you
press
the
|<
button
again
before
the
pickup
reaches
the
beginning
of
tne
current
track
or
you
press
the
|
button
twice
in
arow.
the
pickup
goes
to
the
beginning
of
the
previous
track.
During
memory
play
the
pickup
goes
to
the
beginning
of
the
preceding
track
in
memory.
@
During
random
play.
the
pickup
skips
to
the
beginning
of
the
current
track.

To
program
and
play
the
memory
MEMORY
DISC
SKIP
1
Press
the
MEMORY
button.
Ligris
(
|
MEMORY:
}
TRACK
|
Lights
®
|f
the
memory
bution
is
pressed
during
play,
the
track
being
played
is
stored
into
memory
and
further
tracks
can
be
stored
into
memory
with
the
operation
in
2
below.
@®
When
the
DX-C106
is
used.
you
cannot
add
the
further
tracks
inta
the
memory
during
play.
—_——
2
Press
the
DISC
SKIP
(—,
+}
button
to
select
the
desired
cisc.
‘3
Select
the
track
you
want,
using
the
|<
button
or
me)
Button.
®
You
can
store
all
the
tracks
into
the
memory
by
keep
pressing
the
|<
button
until
“AL”
appears
on
the
TRACK
Number
display.
(For
the
DX-C206.
if
“O"
of
the
number
buttons
on
the
remote
control
is
stored
in
memory.
ail
the
tracks
on
that
disc
will
be
Stored
in
memory.
The
display
“AL”
wil
be
displayed
on
the
.
TRACK
Number
display.)
4
Press
the
MEMORY
button.
@
Tocontinue
programming
the
memory.
enter
the
number
of
the
next
track
to
be
programmed.
When
you
wish
to
continue
storing
other
discs
in
memory.
repeat
steps
<2’
and
‘4°.
Up
to
40
tracks
can
be
programmed
in
the
memory
by
repeating
this
Step.
When
more
than
40
tracks
are
programmed.
“FULL”
will
light
for
a
few
seconds
on
the
TRACK
Number
display
to
indicate
that
memory
Js
full.
(am
:
it
|
@
The
above
display
is
shown
when
the
fourth
track
of
the
DISC
No.
2is
stored
into
the
memory
as
the
first
track
to
be
played
(P-
Q1).
@
For
the
DX-C206.
the
Number
Buttons
on
the
remote
control
can
be
used
to
store
the
desired
track.
8)
To
listen
to
the
disc
from
in
memory
in
the
programmed
order,
press
the
PLAY
™
button.
®
Play
begins
in
the
programmed
order,
i.e.
beginning
with
the
first
track
programmed
in
the
Music
Calendar.
NOTES:
@
Ifthe
total
remaining
time
is
more
than
99
minutes
59
seconds
or
when
the
contents
stored
in
memory
extend
over
2
or
more
discs.
"—
—:
——”
is
displayed.
If
non-existing
selections
of
disc(s)
or
track(s)
are
entered,
the
corresponding
indicator
{dise
or
track)
will
illuminate
and
the
selectionis
includedin
the
program
count.
During
play,
the
non-
existing
selection(s)
will
be
cancelled
and
the
subsequent
programmed
disc
or
track
will
be
played.
|
To
check
the
contents
of
the
memory
>
if
in
memory
play.
press
the
STOP
I
button
so
that
the
play
comes
to
a
memory
stop.
@
The
last
memory
channel
and
its
track
number
will
appear
on
-
the
Track
Time
display
and
the
Track
Number
display.
2
Press
the
<4
or
®
button.
The
display
changes
each
time
when
you
press
the
buttons.
LSS
NO.
Se
TAACK
|
|
@
The
above
display
is
shown
when
the
sixth
track
of
the
DISC
No.
5
is
stored
into
the
memory
as
the
second
track
to
be
played
(P-
02).
To
cancel
the
contents
of
the
memory
Press
the
CLEAR
button.
@
The
last
track
in
memory
will
be
cancelled.
®
During
memory
piay.
the
current
track
in
play
and
tracks
previously
programmed
cannot
be
cancelled.
®
Press
the
MEMORY
button
when
the
contents
have
been
com-
pletely
erased
at
one
time.
During
memory
play,
however.
normal
play
takes
place.
playing
the
current
through
the
last
tracks.
NOTE:
Although
more
than
20
tracks
can
be
stored.
the
Music
Calendar
cannot
display
numbers
greater
than
20.
The
DISC
No.
and
-
|
TRACK
Number
displays
are
always
correct.
:

To
listen
to
the
discs
over
and
over
Press
the
REPEAT
button.
(You
can
press
this
button
before
palying
begins
or
in
the
middle
of
playing.)
®
The
REPEAT
indicator
lights,
and
all
disc(s)
inserted
in
the
tray(s)
is
played
repeatedly.
(Full
Repeat).
®
During
memory
when
the
disc
player
reaches
the
end
of
the
sequence
of
tracks
programmed
into
memory
it
repeats
that
sequence.
®
Inrandom
play,
the
contents
of
a
disc
are
rearranged
after
the
last
track
is
played,
and
then
the
play
resumes.
In
the
case
of
memory
random
play.
ail
the
tracks
programmed
into
memory
are
rear-
ranged,
and
then
the
playing
resumes.
REPEAT
@
To
cancel
repeat
play,
press
this
button
again.
To
playback
in
random
order
(Random
Play)
Press
the
RANDOM
button.
Use
this
button
when
you
want
the
contents
of
all
discs
inserted
in
the
@
Ifthe
order
of
the
tracks
of
all
the
six
discs
are
changed
at
random
tray(s}
to
be
rearranged
for
play
in
random
order.
and
played
ail
the
way
through,
it
stops.
®
To
stop
the
random
play.
press
the
STOP
MH
button.
@
To
cancel
the
random
play.
press
the
RANDOM
button,
®
Discs
can
be
exchanged
during
the
random
play.
However,
ifadisk
with
a
different
number
of
tracks
is
added
all
the
tracks
are
played.
A
disc with
the
same
No.
of
tracks
does
not
play
the
track
numbers
which
have
been
already
piayed.
@
fa
disk
whose
tracks
have
been
all
played
is
exchanged.
the
new
disc
is
not
played.
This
function
can
be
usedin
memory
mode.
inthis
case.
the
programmed
RANDOM
tracks
are
played
at
random.
@
Ifthe
whole
disc
is
stored
into
memory
with
the
Number
Buttons
on
the
remote
control
set
to
“0”.
and
the
disc
is
selected.
other
songs
are
not
played
until
the
random
play
of
the
tracks
of
this
disk
are
'
.completed.
-
]0—

Troubleshooting
guide
Trouble
:
Cause
|
Remedy
Power
switch
is
pressed
but
power
does
|
@
Power
cord
plug
is
not
properly
con-
|
@
Insert
plug
firmly.
not
come
on.
nected
to
AC
outlet.
|
|
Disc
loaded
but
play
does
not
begin.
|
@
Disc
is
loaded
upside-down.
|
©
Load
disc with
the
label
side
facing
upward.
|
®
Disc
is
dirty.
|
@
Clean
the
disc.
|
@
Dew
on
PICKUP.
|
@
Place
unit
in
warm
place
for
about
one
hour.
—-
~~
ee
-
ee
——.
-
--———
-
—
.-
we
ee
a
t
No
sound,
—
®@
Incomplete
connections.
_
©
Insert
all
plugs
firmly
in
jacks.
®
‘mproper
input
selector
switch
setting
|
®
Set
switch
to
proper
position.
on
amplifier.
Skipping.
|
®
Disc
is
dirty.
|
®
Clean
the
disc.
|
@
Disc
's
scratched.
|
@
Use
another
disc.
|
@
Unit
has
been
exposed
to
a
strong
|
@
Place
the
unit
in
a
more
stable
location.
:
bump
:
Search
time
iwhen
moving
to
a
specific
.
®@
Disc
's
dirty.
|
@
Clean
the
disc.
track)
1s
extremely
long.
_
©
Disc
is
scratched.
@
Use
another
disc
--
woe
-
.
—
ne
we
Track
numbers
cannot
be
stored
in
the
|
®
No
disc
is
in
the
tray.
@
[oad
a
disc.
memory.
|
®
Atracknumbernotonthe
discisbeing
|
@
Use
only
track
numbers
on
the
disc.
|
|
used.
Specifications
Seen
eee
Model
DX-C206
Compact
Disc
Player
with
optical
pickup
Signal
readout
system:
Optical
non-contact
Power
consumption:
12
watts
Reading
rotation:
About
506
-
200
r.p.m.
Power
supply
rating
AC
120V.
60Hz
iconstant
linear
velocity)
Dimensions
Linear
velocity:
12-14
7s
Wx
Hx
D):
455
x
120
x
426
mm
Error
correction
system:
Cross
Interleave
Reed-Solomon
code
(17-15
16"
x
4-34"
x
16-13
16")
D
A
converter:
1
bit
PWM
ACCUPULSE
Weight:
?.7kg.
17.0lbs.
D
A
CONVERTER
Supplied
accessories:
®
Output
signal
cord
Sampling
frequency:
352.8
kHz
(8
times
oversampling)
®
(RI
remote
contro!
cable
Number
of
channels:
2
(stereo)
®
Remote
contro!
transmitter
Frequency
response:
2HzZ
—
20kKHz2
RC
227C
(DX
C206}
Total
harmonic
distortion:
0.004%.
iat
1KHz?
@®
UM-3
R6
AA
iDX-C206;
Dynamic
range:
96dB
Signal
to
noise
ratio:
96dB
Channel
separation:
S0dB
iat
1«Hz)
Wow
and
Flutter:
Below
threshold
of
measurability
Output
level:
2
volts
1.7.8.
Spec
ficatiors
and
externa’
appearance
are
subject
to
change
without
1o‘lce
because
of
product
improvements.
ONKYO
CORPORATION
international
Division:
Onarimon
Yusen
Bldg..
23-5.
Nish:-Shimbashi
3-chome.
Minato-ku.
TOKYO
105.
JAPAN
Te’:
03-3432-6987
Fax:
03-3436-6979
ONKYO
U.S.A.
CORPORATION
200
Willlams
Drive.
Ramsey.
N.J.
07446.
US
A.
Tel
201-825-7950
Fax
201-825-8150
SN29341
725
01-21-1K-ASA
Printed
in
Japan
E]
Other manuals for DX-C206
2
This manual suits for next models
1
Table of contents
Other Onkyo CD Player manuals

Onkyo
Onkyo DX DX-7555 User manual

Onkyo
Onkyo DV-C500 User manual

Onkyo
Onkyo DX-5500 User manual

Onkyo
Onkyo DV-C501 User manual

Onkyo
Onkyo DX-C311 User manual

Onkyo
Onkyo DX-C600 User manual

Onkyo
Onkyo DV-C503 User manual

Onkyo
Onkyo DX-C120 User manual

Onkyo
Onkyo DX-G10 User manual

Onkyo
Onkyo DX-7222 User manual

Onkyo
Onkyo DV-C600 User manual

Onkyo
Onkyo C-722 User manual

Onkyo
Onkyo DV CP704 User manual

Onkyo
Onkyo DX-C210 User manual

Onkyo
Onkyo DXC390 - CD Changer User manual

Onkyo
Onkyo DX-6930 User manual

Onkyo
Onkyo DX-M505 User manual

Onkyo
Onkyo C-S5VL User manual

Onkyo
Onkyo C-705TX User manual

Onkyo
Onkyo DV-C600 User manual