1Visually inspect the engine joint faces,
gaskets and seals for any signs of water or oil
leaks. Pay particular attention to the areas
around the camshaft cover, cylinder head, oil
filter and sump joint faces. Bear in mind that,
over a period of time, some very slight
seepage from these areas is to be expected;
what you are really looking for is any
indication of a serious leak. Should a leak be
found, renew the offending gasket or oil seal
by referring to the appropriate Chapters in this
manual.
2Also check the security and condition of all
the engine-related pipes and hoses. Ensure
that all cable-ties or securing clips are in
place, and in good condition. Clips which are
broken or missing can lead to chafing of the
hoses pipes or wiring, which could cause
more serious problems in the future.
3Carefully check the radiator hoses and
heater hoses along their entire length. Renew
any hose which is cracked, swollen or
deteriorated. Cracks will show up better if the
hose is squeezed. Pay close attention to the
hose clips that secure the hoses to the
cooling system components. Hose clips can
pinch and puncture hoses, resulting in cooling
system leaks. If wire-type hose clips are used,
it may be a good idea to replace them with
screw-type clips.
4Inspect all the cooling system components
(hoses, joint faces etc.) for leaks. Where any
problems of this nature are found on system
components, renew the component or gasket
with reference to Chapter 3.
5Where applicable, inspect the automatic
transmission fluid cooler hoses for leaks or
deterioration.
6With the vehicle raised, inspect the petrol
tank and filler neck for punctures, cracks and
other damage. The connection between the
filler neck and tank is especially critical.
Sometimes, a rubber filler neck or connecting
hose will leak due to loose retaining clamps or
deteriorated rubber.
7Carefully check all rubber hoses and metal
fuel lines leading away from the petrol tank.
Check for loose connections, deteriorated
hoses, crimped lines and other damage. Pay
particular attention to the vent pipes and
hoses, which often loop up around the filler
neck and can become blocked or crimped.
Follow the lines to the front of the vehicle,
carefully inspecting them all the way. Renew
damaged sections as necessary.
8From within the engine compartment,
check the security of all fuel hose attachments
and pipe unions, and inspect the fuel hoses
and vacuum hoses for kinks, chafing and
deterioration.
9Where applicable, check the condition of
the power steering fluid hoses and pipes.
Alternator drivebelt
Checking and adjustment
1Correct tensioning of the auxiliary drivebelt
will ensure that it has a long life. Beware,
however, of overtightening, as this can cause
excessive wear in the alternator.
2The belt should be inspected along its
entire length, and if it is found to be worn,
frayed or cracked, it should be renewed as a
precaution against breakage in service. It is
advisable to carry a spare drivebelt of the
correct type in the vehicle at all times.
3Although special tools are available for
measuring the belt tension, a good
approximation can be achieved if the belt is
tensioned so that there is approximately 13 mm
of free movement under firm thumb pressure at
the mid-point of the longest run between
pulleys. If in doubt, err on the slack side, as an
excessively-tight belt may cause damage to
the alternator or other components.
4If adjustment is required, loosen the
alternator upper mounting nut and bolt - use
two spanners, one to counterhold the bolt.
Lever the alternator away from the engine
using a wooden lever at the mounting bracket
until the correct tension is achieved, then
tighten the bolt securing the adjuster bracket,
and the alternator mounting nuts and bolts.
On no account lever at the free end of the
alternator, as serious internal damage could
be caused to the alternator.
Removal, renewal and refitting
5To remove the belt, simply loosen the
mounting nuts and bolts, and the bolt
securing the adjuster bracket, as described
previously, and slacken the belt sufficiently to
slip it from the pulleys. On models with power
steering it will first be necessary to remove the
power steering pump drivebelt as described
below.
6Refit the belt, and tension it as described
previously. Note that when a new belt has
been fitted it will probably stretch slightly to
start with and the tension should be
rechecked, and if necessary adjusted, after
about 5 minutes running.
Power steering pump drivebelt
Checking and adjustment
7Refer to the information given in paragraphs 1
to 3, noting that there should be
approximately 8 mm of free movement in the
belt.
8If adjustment is required, slacken the
adjuster bolt locknut (situated on the base of
the pump) and rotate the adjuster nut as
necessary to tension the belt. Once the belt
tension is correct, securely tighten the
locknut.
Removal, renewal and refitting
9To remove the belt, simply loosen the
locknut and fully slacken the adjuster nut
sufficiently to slip the drivebelt from the
pulleys.
10 Refit the belt, and tension it as described
previously. Note that when a new belt has
been fitted it will probably stretch slightly to
start with and the tension should be
rechecked, and if necessary adjusted, after
about 5 minutes running.
Alternator/power steering pump
drivebelt - later 1.6 litre models
Checking and adjustment
11 From March 1987 onwards, a single
drivebelt is used for the alternator and power
steering pump on 1.6 litre engines. The
drivebelt is of the ribbed type and runs at a
higher tension than the previous (V) belt.
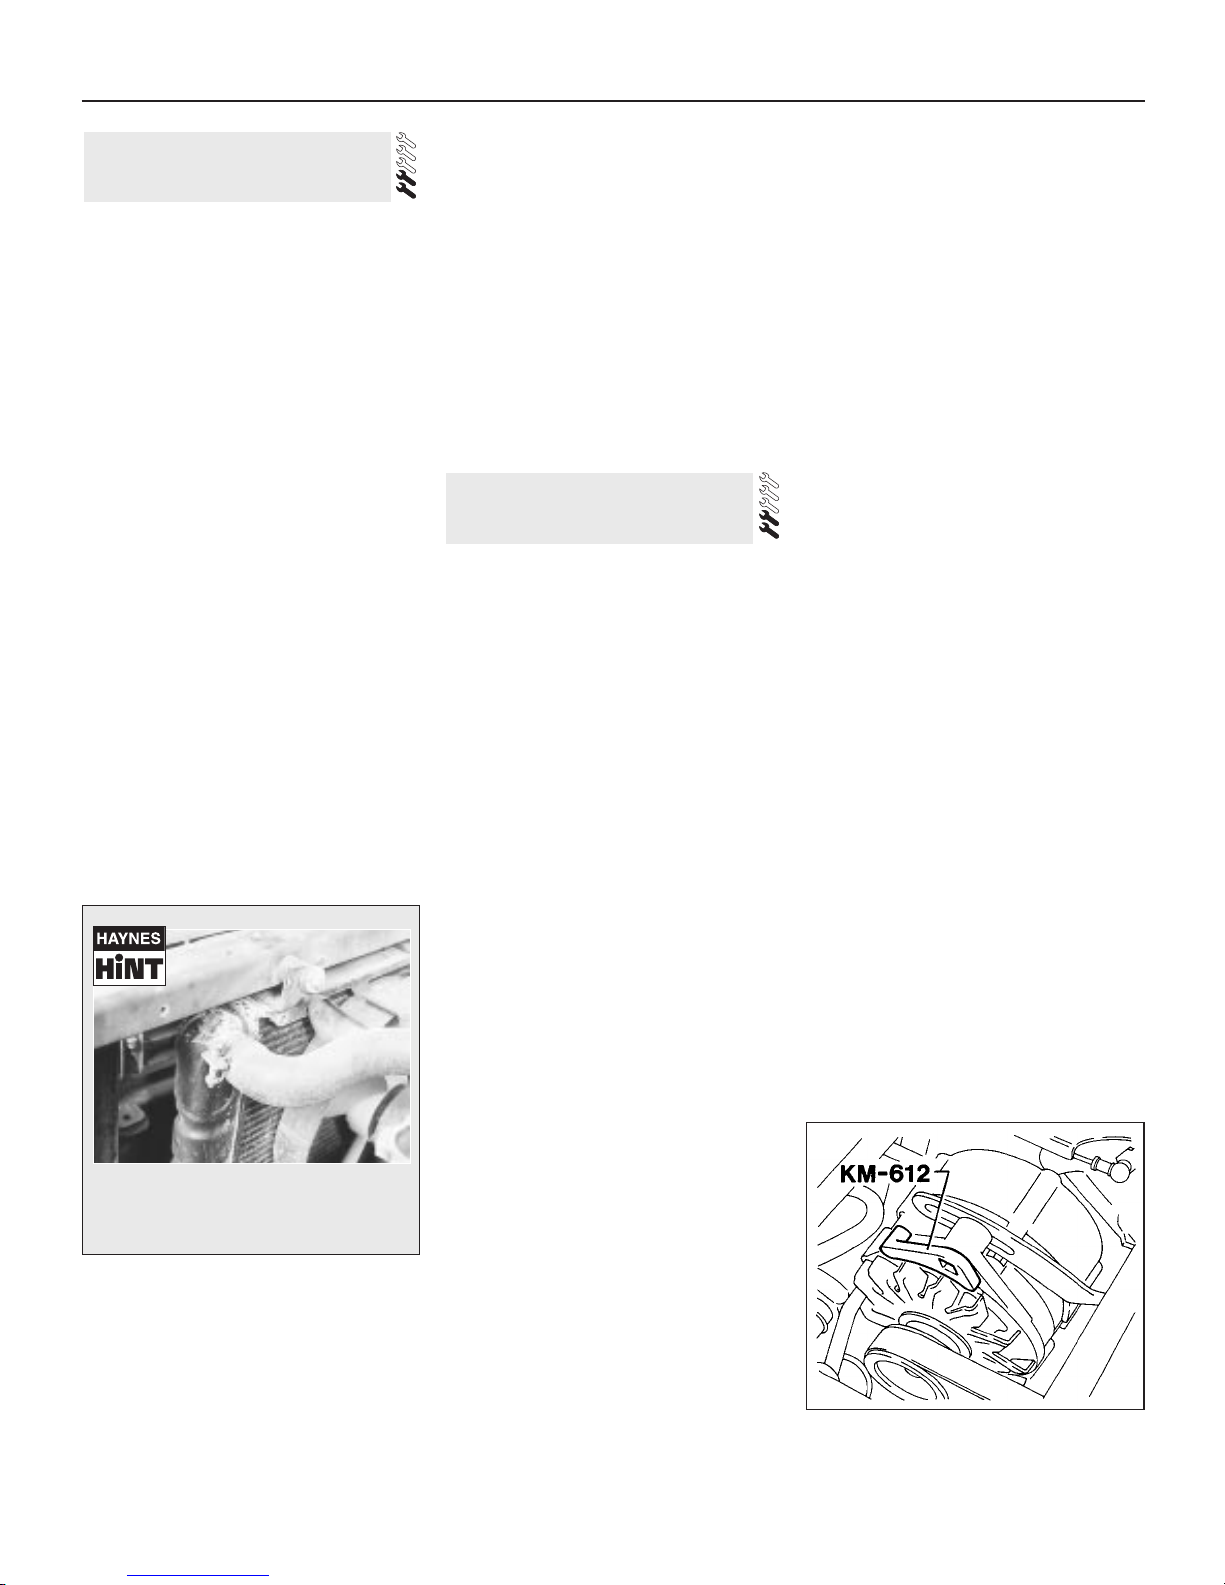
12 To set the tension accurately, make up or
obtain an adapter as shown (see illustration).
13 Slacken the alternator pivot and adjusting
strap bolts and fit the adapter. Using a torque
wrench apply a load of 55 Nm (40 lbf ft) for a
new belt, or 50 Nm (37 lbf ft) for an old belt.
Keep the tension applied and securely tighten
the alternator bolts.
Removal, renewal and refitting
14 To remove the belt, simply loosen the
alternator pivot and strap bolts and slip the
drivebelt from the pulleys.
9 Auxiliary drivebelt check and
renewal
8 Hose and fluid leak check
1•10 Every 9000 miles
9.12 Adapter KM-612 used for setting
drivebelt tension on later 1.6 litre models
A leak in the cooling system will usually
show up as white- or rust-coloured
deposits on the area adjoining the leak.