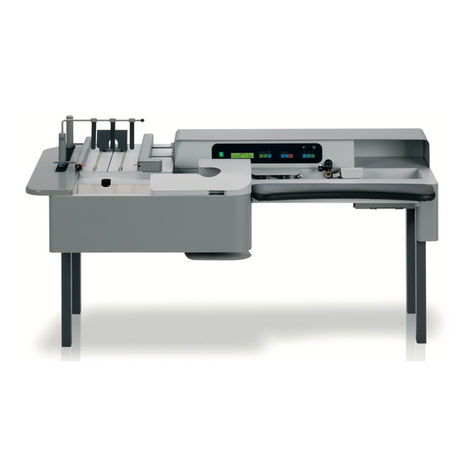
Opex 72 User manual

© 2015 OPEX®Corporation
All rights reserved. This publication is made available solely for use by the OPEX Service Organization. The infor-
mation contained herein is proprietary, confidential and copyrighted by OPEX®Corporation. Copying, duplicating,
selling, or otherwise distributing any part of this publication or the information contained herein without the express
written consent of OPEX®Corporation is strictly forbidden.
August 14, 2015
Document Revision 15-01
Model 72 User Manual

2
Model 72 User Manual - OPEX Corporation
Document History
If you find errors, inaccuracies, or any other issues or concerns with this
document, please contact the OPEX Technical Writers via email at:
Doc
Rev Date Changes (click blue text to go to that page)
12-01 August 2012 Initial Release. The Model 72 Service Manual was
completely restructured for better viewing on a Tablet-
style reader.
15-01 August 14,
2015
Page 1 - Updated look of title page, adding document
revision
Page 2 - Added new Document History table, added
functional link for contacting tech writers
Page 5 - fixed the incomplete note from the president
Page 7 - The Caution icon has been updated to current
standards
Page 8 and 59 - The Warning icons have been updated
to current standards
Page 14 - color has been removed from table
background for clarity
Page 16 - changed the font for keypad descriptions, for
uniformity within the document.
Page 66 - specifications for Japanese machines have
been added
All pages - The text in the footers has changed since
user manuals are not confidential

3
Model 72 User Manual - OPEX Corporation
Table of Contents
Document History ................................................................................................ 2
Introduction .......................................................................................................... 6
Safety .................................................................................................................. 7
Functional Description ......................................................................................... 9
Desktop height operator adjustable .............................................................. 11
Software options ........................................................................................... 12
Overview of Model 72 Operation ....................................................................... 13
Machine controls ............................................................................................... 14
Navigation .......................................................................................................... 16
Enhanced Scrolling ....................................................................................... 16
Operating Instructions ....................................................................................... 18
Operating the Model 72 ................................................................................ 19
Adjust LCD Contrast ..................................................................................... 23
Setting and Viewing Operator Passwords .................................................... 24
Supervisor Operations ....................................................................................... 26
Change Operator List .................................................................................... 26
Change Job List ............................................................................................ 31
Job Parameters ................................................................................................. 34
Job Parameter Descriptions .......................................................................... 35
Print All Jobs or Individual Job Parameters .................................................. 42
Password Options ......................................................................................... 43
Statistics ............................................................................................................ 45
Operator Statistics ........................................................................................ 45
Supervisor Statistics ..................................................................................... 46
Troubleshooting ................................................................................................. 51
Routine Maintenance ......................................................................................... 59
Emptying the Cutter Trash ............................................................................ 60
Changing the Feed belts ............................................................................... 61
Changing the retard tire ................................................................................ 64
Specifications .................................................................................................... 65
Electrical Specifications ................................................................................ 65

4
Model 72 User Manual - OPEX Corporation

From the President of OPEX Corporation
Thank you for choosing OPEX equipment to manage your mail
extraction needs. For over three decades, OPEX Corporation
has been the leader in mailroom automation technology. Our
Rapid Extraction Desks have been recognized as the industry
standard for high volume rapid extraction of incoming mail.
The Model 72 is our latest advance in processing both clean
singles and outsorted mail. The Model 72 provides opening and
extraction options to match your mail processing needs, while
providing you an efficient and comfortable content extraction
method.
Whatever the application, the key to this process is YOU, the
Model 72 operator. We’ve gone to great lengths to design our
equipment to be user friendly, and I believe that you will be
pleased with the final result.
Thank you for taking the time to familiarize yourself with the
contents of this manual. Welcome to the OPEX family! We trust
that you will enjoy using the Model 72, and wish you much
success in your mail operation.
Sincerely,
OPEX Corporation
Mark Stevens
President

6
Model 72 User Manual - OPEX Corporation
Introduction
The OPEX Model 72 is a Rapid Extraction Desk (RED) mail handler for
incoming mail. It is designed to provide improved performance and value in the
scanner integrated market. The Model 72 is an automated workstation that
requires the operator to load envelopes on the conveyor and to extract the
contents from the opened mail.
The OPEX Model 72 is designed to allow you to increase your productivity
while reducing much of the physical stress normally associated with your job.
Ergonomic considerations will contribute to your comfort as an OPEX operator.
These include the following improvements:
• A larger wrap-around work surface which gives you room to spread out
• The envelope extract heads open the envelope wide for easy access.
• The backlit LCD screen provides easier viewing.
• The optional lift system adjustment allows you to choose the most
comfortable setting.
• An operator-adjustable rack system simplifies large document sorting and
placement.

7
Model 72 User Manual - OPEX Corporation
Safety
As in any occupation which requires you to perform the same motion
repeatedly during the course of your work, it is important to consider how you
perform your task. Always use proper operating procedures when working at
your Model 72 Rapid Extraction Desk. Follow the directions for using and
adjusting your chair and desk. Using improper procedures can result in a
potentially serious injury.
• Maintain an upright body posture.Avoid the tendency to slump in your chair.
The angle between your torso and thighs should always be 90 degrees.
• Adjust the seat position on your chair so that your elbow, when held at a 90-
degree angle at your side, is approximately 1½ inches below the top of the
Model 72 work surface. For your comfort, we recommend use of a specially-
designed OPEX ergonomic desk chair to ensure proper posture and seat
position.
• Occasionally change the angle of your posture for greater comfort.
• If possible, avoid operating the machine for longer than a single 8-hour shift.
• If your Model 72 is equipped with the optional height adjustment, adjust the
height of the desk so that you are able to work comfortably in a position
which maintains good posture. If your Model 72 is not equipped with the
height adjustment, adjust the leveling feet on the desk to provide greater
comfort while operating the machine.
While no suggestions can guarantee completely against work-related injuries,
you will certainly increase your comfort and safety while operating the
Model 72 if you put these suggestions into practice. The Model 72 has been
designed with you in mind. If it is operated correctly, you should find your work
experience comfortable and enjoyable.
Safety while operating the machine:
• If your desk has the optional lift system, care must be taken to not create a
pinch point between the desk and your body as the height adjustment is
activated in the down travel mode.
• Keep hands, hair, loose clothing and jewelry away from moving parts.
CAUTION
Caution: To reduce possible risks, we strongly urge you to follow these
suggestions:

8
Model 72 User Manual - OPEX Corporation
• Do not place fingers in the cutter areas. The cutter blades are sharp and may
cause cuts should you inadvertently come in contact with them whether the
machine is running or not.
• Do not operate this equipment with the cover doors removed.
• Do not set liquids on the desk which could spill into the machine.
• Do not use high pressure “canned air” that is marked flammable to clean
paper scraps and dust from the machine.
• Do not place fingers in the feed area while running the machine.
Avoid creating pinch points
with adjustable work surface.
(Optional lift system only)
Transport is adjustable by job.
When selecting a job, keep hands
out from under the machine.
Keep hands, hair, loose clothing
and jewelry away from moving parts
Warning: Unplug the machine from the power source to remove power
from the machine for servicing or when moving the machine.

9
Model 72 User Manual - OPEX Corporation
Functional Description
The OPEX Model 72 is a semi-automatic workstation. Its function is to improve
productivity in mail extraction by allowing an operator to open envelopes and
extract the contents in a rapid fashion.
After an extraction is complete, the Model 72 can check the envelope to make
sure that all contents have been removed. The Model 72 records and displays
job and operator information. It compiles and retains statistics for management
purposes. The Model 72 is typically equipped with adjustable sort bins and a
moveable content “sawtooth” sort tray. Several optional enhancements are
available:
• Internal Printer: The printer provides a hard copy of job and operator
statistical information.
• Lift System: Allows the operator to find his/her optimum desk level for
increased comfort and productivity. Accommodates wheelchair access.
Clear sort bins
Trash bin
Verifier
Extractor
Trash bin
Control keypad
Cutter adjustments
LCD Screen Side cutter (under cover)
Sawtooth
Top cutter
(under cover)
Pusher
Conveyor
(inside cabinet)
Feeder section
Optional printer
(under desktop)
Feed tray

10
Model 72 User Manual - OPEX Corporation
Envelope specifications
• Envelope Height: 3.5” to 6.375”
• Envelope Length: 5” to 11.5”
• Envelope Thickness: up to 3/8” (0.375”)
Conveyor capacity
• Approximate Capacity: 22 ½”
Button keypad controls
• Used for navigating the menus and starting/
stopping the machine
• Keypad controls are easy on the fingers
Optional Printer
• Paper loads easily - the printer features an easy
access door, allowing convenient drop-in loading
of paper rolls
Removing envelope contents
• The envelope opening width is adjustable under
the individual job parameters
Depth of cutters are operator adjustable:
• Side cut has 4 options
• Top cut has 5 options
Sort bins operator adjustable
• Flexible rack system minimizes reach, and can
be adjusted to various heights.

11
Model 72 User Manual - OPEX Corporation
Desktop height operator adjustable
The Model 72 desk assembly has an optional electric lift
system, which allows you to adjust the height of the
desktop work surface for convenience and comfort. It is
enabled by a machine parameter. The ability to adjust the
height is disabled if the machine is running or if the
interlocks are tripped.
Note: Machines without the optional electric lift system will have heavy duty
wheels on the right side, and regular feet on the left side.
To raise or lower the desk
This feature is only available on a machine with the option lift system installed
and enabled.
1 When the LIFT SYSTEM machine parameter is enabled, the arrows on the
Login, Run and Pre-Run screens alert you that it is possible to raise or
lower the desktop work surface (see Figure 1).
Figure 1: Lift system enabled
Note: If the LIFT SYSTEM machine parameter is not enabled, you will not see
the arrows on the Login, Run and Pre-Run screens.
2 When the arrows appear on the LCD screen, you can use the Up and Down
buttons on the keypad to adjust the table height. Press and hold the Up or
Integral mailrack option
• Holds mail tray. Pushes in to fit flush below
conveyor when not in use.
Accommodates
wheelchair access
Tuesday, February 23, 2010 11:14 A.M.
MODEL 72
OPEX CORPORATION
Press ENTER to log in.
Arrows appear
when lift system
is enabled

12
Model 72 User Manual - OPEX Corporation
Down button. Both arrows will momentarily flash and you will hear a
warning beep. This momentary delay and audible warning will help prevent
the table height from changing if you should accidentally bump the buttons.
Note: If an interlock is tripped, the lift system will not function. The login
screen function monitors and reports open interlocks to the user who is
attempting to use the lift system.
3 After the momentary delay, the individual on-screen Up or Down arrow will
highlight when the table is in motion (see Figure 2).
Figure 2: Lift system in motion (moving up)
Operation of the lift system is locked out while the machine is running. The
table will continue to move until the Up/Down button is released, the table
has reached the travel limit, or travel time has surpassed a non-adjustable
time limit (timed out).
Software options
The following purchasable software options are activated via a software key:
Printer - enables printer functionality (as described above).
ONS - Model 72 machines may be attached to a network and integrated using
OPEX Network Solution (ONS) software. This allows machine parameters, job
parameters, and operator information to be read from or written to the
Model 72 by a central PC. In addition, vital statistical information for multiple
Model 72s may be viewed on the ONS PC.
Diagnostics - allow an authorized OPEX Service Technician to troubleshoot
errors, calibrate components, and run tests on all input and outputs (motors
and sensors).
Tuesday, February 23, 2010 11:14 A.M.
MODEL 72
OPEX CORPORATION
Press ENTER to log in.

13
Model 72 User Manual - OPEX Corporation
Overview of Model 72 Operation
These steps provide a quick overview of the Model 72 Operation. For details
on operating the Model 72, refer to “Operating Instructions” on page 18.
1 The operator loads mail onto the conveyor
2 The operator starts the Model 72 by pressing the Start button (Main power
switch on back of machine must be turned on).
3 The operator uses the keypad to log in.
The operator may also have to enter a password.
4 The operator uses the keypad to select a job.
5 After selecting a job, the screen may instruct the operator to set the top and
side cutter levers to a particular position.
6 The run screen appears.
7 The operator presses the green Cycle button to begin operation.
8 Envelope is fed from the conveyor to the friction feeder.
9 The friction feeder separates the envelopes and sends them one at a time
to the feed tray.
10 Envelopes hit the side of the feed tray and contents are justified to the left
side.
11 The envelope moves to the fence.
12 The fence drops and the envelope moves through the side cutter.
13 Right side of envelope is cut; envelope is dropped into the shuttle.
14 The shuttle adjusts the envelope up or down for consistent top-justification.
15 The envelope moves to the left of operator, from the shuttle through the top
cutter and into the main transport.
16 The main transport moves the envelope from the top cutter to the extractor,
where it remains until extraction.
17 When extraction is completed, the envelope moves to the verifier, where it
is checked for contents.
18 The empty envelope moves into the trash bin when the next extraction
occurs.

14
Model 72 User Manual - OPEX Corporation
Machine controls
Make sure that the machine is plugged in and turned on. The main power
switch is located at the back of the Model 72 on the main panel beneath the
feed conveyor.
The Model 72 controls are located on the keypad to the right of the operator as
indicated in Figure 3. Refer to “Navigation” on page 16 for more information on
using the keypad buttons.
Back Panel Component/Function
Main Power On/Off Switch
Allows building-supplied AC to enter the machine. The
switch should be off whenever troubleshooting AC or
changing machine components. The main power has a 10
Amp circuit breaker.
Accessory Outlet
Used with low current items, 1A or less, such as a stapler or
a CD/MP3 player.
Note: This is a North American option only.
Accessory Outlet Circuit Breaker
Protects the Model 72 from an overdrawn current by the
Accessory Outlet. This a 1A fuse.
ONS Connector
Connects the OPEX Network Solutions (ONS) system to a
Host PC. The connector will be different depending on the
ONS system (blank/RS232/RS422).
AC Connector
Connects building-supplied AC power to the Model 72.

15
Model 72 User Manual - OPEX Corporation
Figure 3: Model 72 keypad button names
The Cycle button, located to the left of the seated operator, is mounted flush in
the desktop (see Figure 4). The green lens is illuminated when the machine
has been turned on.
The red lens immediately to the left of the Cycle button is the Verifier warning
light.
Figure 4: Cycle button and verifier light
The verifier detects the presence of contents mistakenly left in the envelope. If
the Verifier is enabled, and contents are detected, the red light will flash, and
the machine will not advance the envelope into the trash. Pick up the envelope,
check for contents, and continue by pressing the Cycle button.
The Model 72 verifier uses a magnetic (hall effect) sensor to measure the
thickness of the envelope to determine if the envelope is empty of contents.
Enter
Cancel
Start Stop
Up Arrow
Down Arrow
Left Arrow Right Arrow
Verifier light Cycle button
A thickness sensor verifies that the envelope is empty
Thickness wheel

16
Model 72 User Manual - OPEX Corporation
Navigation
Enhanced Scrolling
When a list or table has more information than can be displayed on the screen,
a scroll bar will be displayed on the right side of the screen. The scroll bar gives
you a relative idea were the cursor is in relation to the top and bottom of the list.
Figure 5: Typical enhanced scrolling screen
Keypad button functionality
The Keypad is used to select options and move from menu to menu on the
LCD Display. The keys and their functions are:
Enter - Pressed to enter a parameter highlighted by the LCD Display cursor.
Cancel - Pressed to cancel a selection.
Start - Pressed to wake up the unit.
Stop - Pressed to put the unit on a sleep or standby mode. This button also
results in a system reset.
Up Arrow Press - will allow you to navigate up through a column of data. When
the upper item within the column is highlighted and you press the up key, the
list of data is shifted down by a row and the previous line of data is displayed. If
the up arrow is pressed while on the first row of data, then the cursor will move
left to the first item in the table. If the first item is selected, then the cursor will
move to the last item in the list.
Up Arrow Hold - Pressing and holding the up arrow will display the previous full
page of data. The screen will wrap to the last page of data when you hold the
up arrow while the first page of data is displayed. When the screen wraps to
the last page, the last item in the list will be highlighted.
SELECT JOB
AMEX001
AMEX004
CITI003
PNC001
TD002
WACH003
AMEX003
CITI002
GMAC002
TD001
WACH002
WACH005
AMEX002
CITI001
GMAC001
PNC002
WACH001
WACH004
Scrollbar denotes
position in list

17
Model 72 User Manual - OPEX Corporation
Down Arrow Press - will allow you to navigate down through a column of data.
When the lower item within the column is highlighted and you press the down
arrow, the list of data is shifted up by a row and the next line of data is
displayed. If the down arrow is pressed while on the last row, the cursor will
move left to the last item in the table. The screen will wrap to the first item in
the list if you press the down arrow when the last item in the list is highlighted.
Down Arrow Hold - Pressing and holding the down arrow will display the next
full page of data. The screen will wrap to the first full page of data when you
hold the down arrow while the last page of data is displayed. The first item in
the list will be selected when the screen wraps to the first page.
Left Arrow Press - will shift the highlighted selection one column to the left. If
the selected item is in the first row and the left arrow is pressed, then the last
item in the previous row will be selected. In addition, if the first item on the page
is highlighted and the left arrow is pressed, the list is shifted down and the
previous line of data is displayed. Pressing the left arrow while the first item on
first page is highlighted will cause the screen to wrap to the last item in the list.
Left Arrow Hold - Left arrow hold will continuously shift the selection one item
to the left until the key is released. It will work the same as the left arrow press.
Right Arrow Press - will shift the highlighted selection one column to the right. If
the selected item is in the last row and the right arrow is pressed, then the first
item in the next row will be selected. In addition, if the last item on the page is
highlighted and the left arrow is pressed, the list is shifted up and the next line
of data is displayed. Pressing the right arrow while the last item on the last
page is highlighted will cause the screen to wrap to the first item in the list.
Right Arrow Hold - will continuously shift the selection one item to the right until
the key is released. It will work the same as the right arrow press.

18
Model 72 User Manual - OPEX Corporation
Operating Instructions
Load mail on the Model 72 as shown in Figure 6.
Figure 6: Feeder section
Procedure to load envelopes:
1 Align the envelopes so that they all face the same direction, right side up.
The Model 72 does not require the mail to be justified to the left edge when
loading. This is especially helpful when running white mail. It is still
important to load the mail so that the bottom of the envelope touches the
conveyor.
2 Slide the Mail Pusher to its most forward position. Load a handful of mail
behind the pusher, using the side of the pusher as your guide. Loading in
this manner will ensure that each envelope will feed smoothly into the
machine.
3 Lift the Mail Pusher, slide it back and lower it into place behind the last
envelope. The first envelope should be right in front of the feeder belts.
4 Continue to load the mail, placing each handful behind the pusher until the
conveyor is full.
5 Lift the Pusher, slide it back, and place it behind the last envelope. You will
find that it is easier to load in this manner than to try to load all of the mail in
front of the Pusher.
Conveyor - Capacity is about 22½ inches.
Feed Belts (behind cover)
Mail Pusher - Supports and advances
envelopes. Lifts and slides back to allow
envelopes to be loaded.
Feed Sensors (not shown) - Detect if mail
is present. Controls advance movement of
the unopened envelopes

19
Model 72 User Manual - OPEX Corporation
Operating the Model 72
1 To begin, make sure the main power switch (located on the back of the
machine) is turned on.
2 Press the Start button on the keypad.
The welcome screen is displayed on start up for a few seconds.
Figure 7: Welcome screen
The welcome screen can be bypassed by pressing the Cancel button instead
of the Start button. The LCD will then display the Login screen (Figure 8).
Figure 8: Login screen
3 Press the Enter button on the keypad to display the SELECT OPERATOR
screen.
Figure 9: Select Operator screen
(C)2010 OPEX CORP ALL RIGHTS RESERVED
MODEL 72 - CONTROL CENTER
OPEX
R
Wednesday, March 3, 2010 10:34 A.M.
MODEL 72
OPEX CORPORATION
Press ENTER to log in.
SELECT OPERATOR
PAT NEW SUPERVISOR

20
Model 72 User Manual - OPEX Corporation
4 Use the Arrow keys to highlight an operator and press the Enter button to
select the operator. If a password is required for the selected operator, the
ENTER PASSWORD screen will be displayed next (see Figure 10).
Figure 10: Enter Password screen
5 Use the Arrow keys and the Enter button to enter a password. An asterisk
(*) will be displayed in the password field for each character entered.
Entering SAV will force the software to check to see if the entered password
matches the saved password. If the correct password was entered, it is
valid until the Stop button is pressed (LCD off).
If you entered an incorrect password, the INCORRECT PASSWORD warning
message is displayed.
Figure 11: Incorrect Password screen
Pressing any button on the keypad will return you to the login screen
(Figure 8).
6 If the password was entered correctly, or if the Operator does not have a
password, the Operator Main Menu screen is displayed.
ENTER PASSWORD
AB C D E F G H I J K L M
N O P Q R S T U V W X Y Z
0 1 2 3 4 5 6 7 8 9 ( SAV
INCORRECT PASSWORD
Press any key to continue
Table of contents
Other Opex Digital Mailing System manuals
Popular Digital Mailing System manuals by other brands

Neopost
Neopost IS-460 quick start guide

FP Mailing Solutions
FP Mailing Solutions Postbase Addendum to the Operator Manual

Neopost
Neopost IN-600 Series user guide

Mail Boss
Mail Boss Mail Manager manual

quadient
quadient iX-5 Series Replacement guide

FP Mailing Solutions
FP Mailing Solutions Postbase user guide