Opt Lasers ooznest WorkBee User manual

WorkBee Laser Upgrade Setup Gui de
2 / 25
WorkBee Laser Upgrade Setup Guide
Contact and Shipping: Company Information:
Tomorrow's System Sp. z o.o. Tomorrow's System Sp. z o.o.
Okulickiego 7/9 hala G39 Pułaskiego 125/35
05-500 Piaseczno 15-337 Białystok
Poland Poland
tel.: +48 515 180 752 NIP: PL5423238556
e-mail:
contact@optlasers.com
REGON: 200866868

WorkBee Laser Upgrade Setup Gui de
3 / 25
Introduction
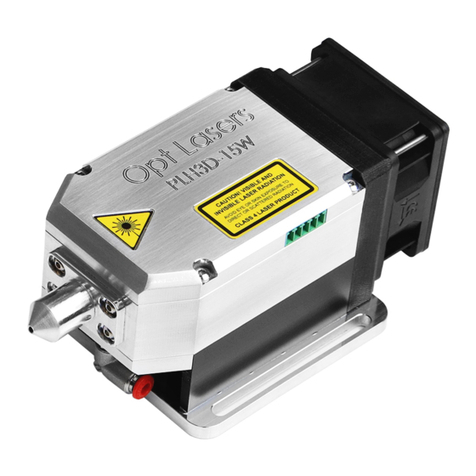
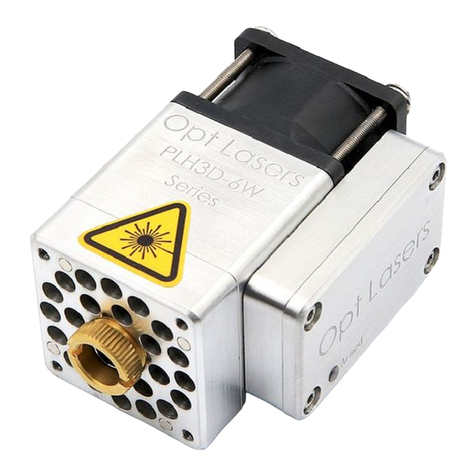
This sub-assembly laser upgrade kit includes a high-power engraving laser head equipped with
thermal protection and a professional high-speed driver. Its design ensures that the laser head
nozzle, protecting the lens from dirt and cooling the laser head. Attaching the Magnetic Nozzle makes
it even more efficient and significantly reduces reflections from the laser. Air flow from the fan is
designed to keep the lens clean during operation.
This laser head, combined with a WorkBee CNC machine and Duet 2 controller, allows you to cut or
engrave materials such as rubber, wood, paper, leather, plastic, cardstock and many others. Thanks to
its compatibility with TTL PWM power modulation,
change the output power during turns. High speed modulation (the PLH3D-6W-XF laser head can
handle frequencies up to 100 kHz) allows for high movement speeds during engraving, even when
engraving complicated patterns. This speed is more than enough to take advantage of the Duet 3D
Using the PLH3D-CNC Adapter guarantees reliable and safe work via overcurrent protection, an
independent power supply, a key switch, an arm button, LED indicators, and the possibility of
connecting an additional emergency laser-stop switch and a limit switch. It also makes connecting a
Duet 2 controller and laser head very simple.
Using the Magnetic Docking station to mount the laser head to the WorkBee CNC machine reduces
the time needed to mount/dismount and secure the laser to just a few seconds (while requiring no
tools). It also makes it possible to not disassemble the spindle before laser work.
This module uses a brand new NUBM44 450nm diode (capable of 6W), which is the strongest
available blue laser diode on the market.
The lifetime of the laser diode is 10,000 hours according to the manufacturer.

WorkBee Laser Upgrade Setup Gui de
4 / 25
General Laser Safety Warnings and Cautions
Only person with specialized training and appropriate laser safety knowledge
can use and maintain the laser head. The laser head operator must be aware of
laser radiation hazard.
While laser head is operating protection Laser Glasses designed for 190 – 540 nm
(OD 7+) should be used. Make sure that all personnel in the same room worn
protection glasses.
Eye exposure to the direct or diffusely reflected laser beam is a hazard. The laser
head beam may cause permanent eye damage.
Skin exposure to the laser beam is a hazard. The laser beam may cause serious
skin burns. Laser beam may easily burn cloth.
It is possible to get serious injury while using this product or being in the vicinity of
an individual using it. Improper use of the laser head can result in injury or death.
Flammable substances exposure to the laser beam may pose fire hazard. The
laser head operation in an explosive atmosphere may be dangerous. The
working area must be well ventilated. During the operation laser beam may
ignite gases or flammable liquids.
Before making any adjustments, changing accessories or performing
maintenance, the laser should be pow ered off and disconnected from the
pow er supply and CNC main board.
The laser head must be properly mounted to a rigid body such that it cannot be
mov ed unintentionally. Unintentional mov e of the laser head is dangerous.
The unauthorized personnel must have no access to the system into which the
laser head is integrated. The laser head must be stored out of the reach of
children. Untrained persons are not allowed to operate, maintain and observe
operation of the laser head.
Specular reflection materials should not be placed in front of operating lasers
head. Remember, diffused reflection of the laser beam is uncontrolled and may
pose hazard to eye.
Appropriate shielding should be used around the system into w hich the laser
head is integrated. The system in w hich laser head is used must be equipped
w ith key sw itch and safety interlock.
Responsibility of use or misuse belongs to the end user. Tomorrow 's System and its
affiliates accept no responsibility for use or misuse by the user. If you may not be able
to use this product properly, w e recommend that you do not begin use or cease use
immediately.
Included Parts
Parts included in the Opt Lasers Ooznest Workbee Laser Upgrade kit. All needed screws are also
included in the kit.

WorkBee Laser Upgrade Setup Gui de
5 / 25
Mounting Setup
Setup Hardware
To mount the PLH3D-6W Series laser head, the following tools are required:
·Small flathead screwdriver
·Hex Key H2.5
·Hex Key H3
·A few zip ties (potentially)
Mounting Setup
1.Unpack the WorkBee PLH3D Mount. All necessary screws have been included.

WorkBee Laser Upgrade Setup Gui de
6 / 25
2.Unpack the LaserDock Magnetic Docking Station.
3.Screw one part of the docking station into the WorkBee mount and the second one into the laser
head.

WorkBee Laser Upgrade Setup Gui de
7 / 25
4.Install the WorkBee mount (with part of docking station) onto the left side of spindle holder.
Wiring Setup
1.Connect one end of the PLH3D-CNC Adapter-to-Laser Head Cable to the docking station on WorkBee
mount. Attach the cable to the mount with a zip tie.

WorkBee Laser Upgrade Setup Gui de
8 / 25
2.More zip ties can be used to wrap the cable at the top of the Z-axis and on the other side of the X-
axis.
3.Attach the cable to the X-axis drag chain or put it through it.

WorkBee Laser Upgrade Setup Gui de
9 / 25
4.Drag the cable behind the Duet mount.
5.Put it under the X-axis motor and through the Y-axis drag chain.

WorkBee Laser Upgrade Setup Gui de
10 / 25
6.Pull the cable from the other side of the Y-axis drag chain.
7.Connect the cable to the output of the PLH3D-CNC Adapter.

WorkBee Laser Upgrade Setup Gui de
11 / 25
8.Put the WorkBee Signal Cable into the Y-axis drag chain.
9.Use a zip tie to attach the cable to the other wires.

WorkBee Laser Upgrade Setup Gui de
12 / 25
10.Put the signal wires through the hole in the Y-plate (the one where the X-axis motor is mounted)
and the hole in Duet mount.
11.Secure the wires with a zip tie.

WorkBee Laser Upgrade Setup Gui de
13 / 25
12.Connect the wires to the Duet controller.
13.Connect the WorkBee Signal Cable to the input of the PLH3D-CNC Adapter.

WorkBee Laser Upgrade Setup Gui de
14 / 25
13.Connect the 19V 2.5A Desktop Power Supply to the PLH3D-CNC Adapter.
Software Setup
Firmware Configuration

WorkBee Laser Upgrade Setup Gui de
15 / 25
Using the WorkBee PLH3D Mount and Magnetic Docking Station makes connecting the laser head
effortless, but also decreases the available workspace slightly. To prevent damage to the laser head
mount, it is necessary to set the X-axis minimum to 25mm.
1.Start WorkBee Control. In File Management/System open config.g.
2.Copy the G-code line that sets the axis minimum.
3.Close config.g without saving and open customconfig.g.

WorkBee Laser Upgrade Setup Gui de
16 / 25
4.Paste the copied command and change the X value to 25. Save changes.
Now, your X-axis minimum is limited to 25 mm (in machine coordinates). Remember this when the
laser is not in use. Set working coordinates only when the machine position in the X-axis is equal or
higher than 25.
When a PLH3D-6W laser head is mounted, an additional 50mm in the X-axis has to be added. So the
minimum limit in this axis will be 75mm.
Generating G-code
To cut or engrave, it is necessary to generate the appropriate G-code using the following commands:
M307 H3 A-1 C-1 D-1 Disable Heater output on pin #8 (HEATER3)
M452 P3 R255 F1000 Enable Laser mode, on output 3 (HEATER3), with max PWM value 255, and a
PWM frequency 1000
M3 Laser ON
M5 Laser OFF
SXXX PWM duty where XXX is number between 0 and 255 (e.g.: 0 = 0% and 255 =

WorkBee Laser Upgrade Setup Gui de
17 / 25
100%)
The first three commands should be placed at the beginning of the G-code file (in the header). The
fourth command should be at the end of file (in the footer).
every G1 in order to set the laser power. To see a G-code example, please refer to Appendix 1.
First Job
First Job
1.Connect the PLH3D laser head. Put a piece of plywood on the table of your WorkBee CNC machine.
Move the X- and Y-axis to have the laser head above the bottom left corner of the plywood.
2.Using the PLH3D-6W Height Reference Tool, set the laser head 60

WorkBee Laser Upgrade Setup Gui de
18 / 25
3.Disconnect the docking station and attach the nozzle.

WorkBee Laser Upgrade Setup Gui de
19 / 25
4.Mount the laser head with the nozzle on and set the length of the nozzle. Distance between the
nozzle and the surface of the engraving material should be 5-8 mm.
5.Click the SET WORK XYZ button. After this operation, the XYZ coordinates of the work position
should be equal to zero.
6.Open G-CODE generator, which can be downloaded for free from optlasersgrav.com. In the
DXF/Setti ngs tab, set parameters like in the picture below.

WorkBee Laser Upgrade Setup Gui de
20 / 25
7.In the G-CODE Setti ngs tab, choose the Duet 2 profile.

WorkBee Laser Upgrade Setup Gui de
21 / 25
8.In the DXF/G-CODE tab, click the Generate G-code button.
Table of contents
Other Opt Lasers Measuring Instrument manuals
Popular Measuring Instrument manuals by other brands

Morita
Morita ROOT ZX RCM-1 Operation instructions

Endress+Hauser
Endress+Hauser Deltapilot M FMB50 Brief operating instructions

PCB Piezotronics
PCB Piezotronics IMI SENSORS Spindler 607A60 Installation and operating manual

pts Diagnostics
pts Diagnostics CardioChek user guide

TEMC DE-OX
TEMC DE-OX EASY Quick reference guide

SUTO
SUTO S606 Instruction and operation manual