2) Movement and fixation of the base: By loosening Handle(As is shown in picture 1) of the
base clockwise, the table can move, on the contrary, it can be stabilized.
Attention : Do not loosen or tighten a handle, otherwise, the phenomenon that the base is
not stable may happen.
3) Bed Top’s Reversed and Side Trendelenburg
Reversed trendelenburg, you should move the bed top to the middle position, otherwise the
force adjust will be big while rotating.
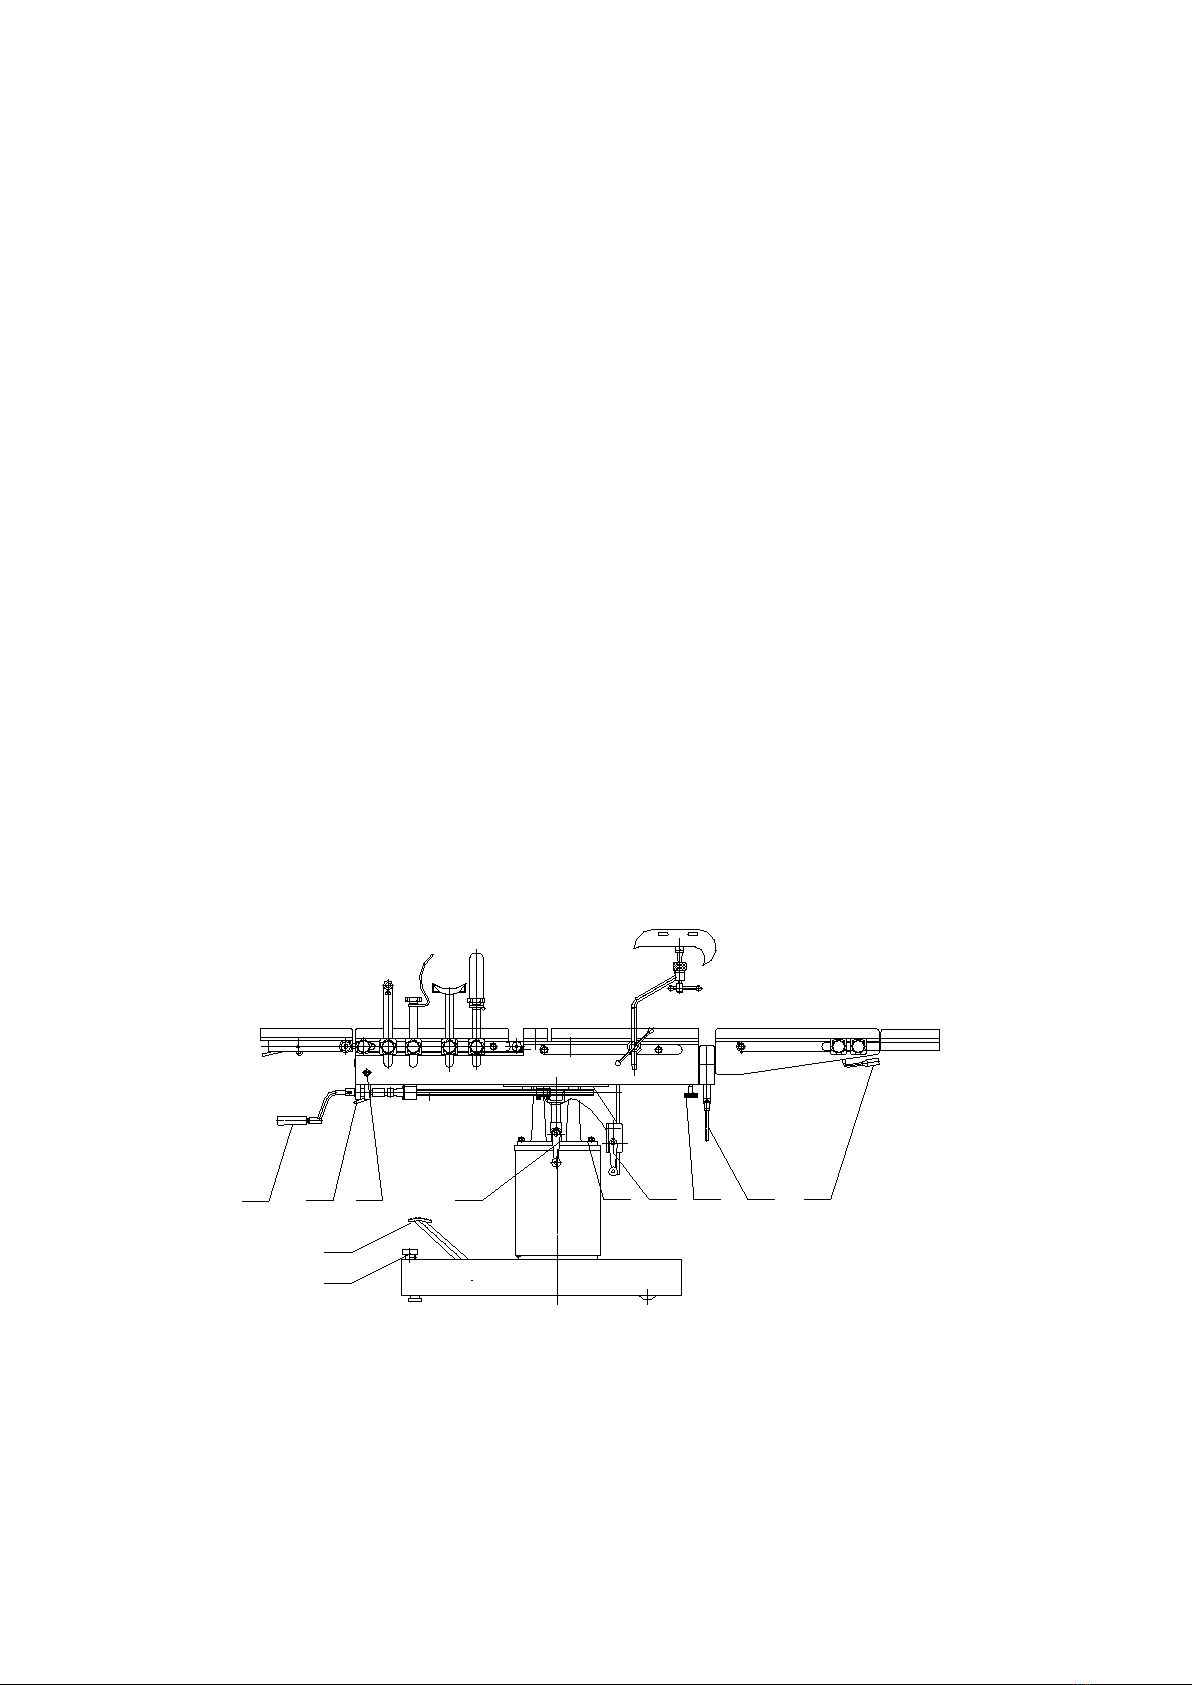
Crank Handle (8, 6) located on the both side of the table, is used to control Trendelenburg,
reversed Trendelenburg and lateral positions.
4) Folds upward of back section are controlled by pressure springs and can be adjusted within
adjusting range at any location. If you want to raise the back section, kidney bridge must be first
rotated to the minimum height. Then pull the spanner with one hand and hold the spanner near the
head tightly with the other hand to control the angel of the back section’s rising. When the back
section folds upward automatically to the needed location, loosen the spanner ,the back section will
be fixed there. If you want to lower the back section, pull the spanner with one hand and hold the
spanner near the head tightly and rotating it to the wanted location. Loosen the spanner and the
back section will just be fixed there. ( As is shown in picture 4)
5) Insert the handle into the hole down right the head section. Wind the handle and the table
top will move forward and backward. ( As is shown in picture 3)
6) Kidney Bridge Elevation and Lowing from the Horizontal
Insert the handle into the hole at the end of the bedside . Wind the handle and the kidney
bridge will rise or fall.(As is shown in picture 5)
7 ) Legs section Operation and assembly and disassemble
Outreaching Leg section:
Loose the handle(10), turn the leg plate to desired position then lock the handle(10) tight.
1Leg section Downward
2Folded downward movement of leg section is controlled by pueumatic spring. Pinch the
handle (Figure 11) inward tightly, turn down the leg section to the desired position, then release the
handle (11), the leg section is fixed in this position.
3Dismount Leg section:
Release the locking handle of leg section(Figure 9) and push out the leg section backward.
When installed, pull in the leg section and fasten the handle(9).