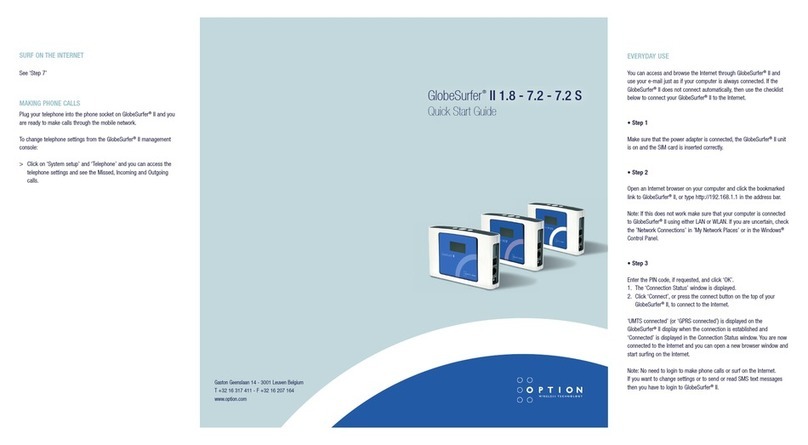
Option Wireless Technology GlobeSurfer III User manual

GlobeSurfer
®III
Quick Start Guide

2
GlobeSurfer®III User guide
WELCOME TO GLOBESURFER®III
Welcome to the GlobeSurfer®III, your 3G wireless gateway router that connects you to the internet, allows you to make and receive telephone calls,
text messages and enables you to connect USB printers and external hard drives for a truly collaborative life.
Within minutes of connecting your GlobeSurfer®III, you can connect to your mobile network and use a wireless connection to the Internet through
the 2G or 3G cellular network.
GlobeSurfer III is compatible with GSM and 3G mobile networks and supports GPRS, EDGE, UMTS, HSDPA and HSUPA technologies. With ‘Receive
Diversity’ on all the high as well as low bands, the signal strength and overall 3G reception is unparalleled.
Tip: To achieve the best possible reception, check the signal strength on the display of the unit (the more bars the better the reception). You may find
that placing the unit near a window provides the best reception.
Simple set-up
GlobeSurfer®III provides you with a quick installation and set-up that gets you easily and quickly connected to the Internet. You can use an Internet
browser (e.g. Microsoft®Internet Explorer, Safari®or Firefox® *) and most personal computers, including Windows®, Mac OS®and Linux® *. The ‘Quick
Setup Wizard’ introduces you to the basic settings that need to be configured for use with the mobile network. Once you have these configured, you
can review and enable customised wireless security settings.
Instant protection
Your GlobeSurfer®III supports Network Address Translation (NAT). This network service hides the computers in your network so they cannot be found
or directly
accessed from outside your network. A firewall is also included which, by default, blocks incoming traffic and allows outgoing traffic.
Additional security
GlobeSurfer®III supports both Wired Equivalent Privacy (WEP) and Wi-Fi Protected Access (WPA and WPA2) to protect your network data. Security
logs keep you aware of potential security risks and intrusion attempts. You can view logs online or via email.
Stay in touch
You can use GlobeSurfer®III to send and receive SMS text messages. The display on the front of the unit lets you know when a new SMS arrives.
“Notifier” Software
If you have installed the “Notifier” software application, then you will also receive a desktop alert indicating the receipt of text messages or telephone
calls.
The “Notifier” software will also allow you to connect directly to the browser page that handles SMS text messages and telephone calls.
When you get a phone call the display shows the caller’s number and indicates missed calls. If you have installed the “Notifier” software application,
then you will also receive a desktop alert indicating the receipt of telephone calls, as well as missed calls. The “Notifier” software will also allow you
to connect directly to the browser page that handles telephone calls.
Important note
To protect your network from unauthorised access, and to make it more difficult for hackers to analyse your data, please configure the WLAN secu-
rity settings and enable WEP, WPA or WPA2 encryption on your GlobeSurfer®III Copyright
Important note
To protect your network from unauthorised access, and to make it more difficult for hackers to analyse your data, please configure the WLAN secu-
rity settings and enable WEP, WPA or WPA2 encryption on your GlobeSurfer®III Copyright
Copyright © 2008, Option Version 1
Information about Option GlobeSurfer®III may change without prior notice. Information published in this user guide is accurate at the time of publica-
tion. Although all security precautions are taken during the creation of this user guide Option is not liable toward persons or organisations for losses
or damages caused either directly or indirectly due to instructions contained in this user guide.
All brands and registered brands are property of their respective owners. Services may be changed, added or deleted. For the newest firmware ver-
sion for your GlobeSurfer®III visit http://www.option.com
Copyright ©2008 OPTION. All rights reserved. Option, GlobeSurfer, and the Option logo are registered trademarks of OPTION.
*All third-party trademarks are the property of their respective owners.

3
WARNING
•TheGlobeSurfer®III is intended for use only when powered by the external power supply shipped together with the equipment or via a replacement
power supply available from Option. The use of any other power supply may invalidate regulatory approval of this equipment. Refer to the table
below for applicable power supplies.
•GlobeSurfer®III is intended for indoor use only and its interconnection points shall not be connected outside of any premises (i.e. outside of any
buildings). Refer to the table below for each interconnection point found in this user instruction.
•GlobeSurfer®III is regarded a class III equipment where protection against electric shock is provided by means of power supplied from SELV circuit
i.e. external power supply and does not generate hazardous voltages within itself.
•TheGlobeSurfer®III is intended to be used with a POTS (phone) and LAN cable with maximum length of 3 m. If a longer LAN cable is used it must
be shielded in order not to invalidate regulatory approval.
Applicable power supplies
Power supply Manufacturer Model
GS2 AC/DC adapter PHIHONG PSA15R-050P
Equipment interconnection points
Interconnection Category Type
DC input connector SELV 5.5/1.2mm DC jack
SIM card connector SELV SIM type (ISO7816)
External antenna
connector SELV MC-CARD type
LAN connector SELV RJ45
Telephone connector TNV2 RJ11
Rated Input Voltage
Maximum Input Voltage 5 VDC
SELV interconnections must only be connected to other equipment that complies with requirements of SELV-circuits as defined in EN60950 directive.
TNV2 interconnections must only be connected to other equipment that complies with requirements of TNV2-circuits as defined in EN60950 directive.

GETTING STARTED
Guidelines for safe and efficient use
GlobeSurfer®III contains sensitive electronic components as used in mobile phones and wireless routers. For safe and efficient use, please follow these
guidelines:
•Handletheunitcarefullyandstoreitinacleananddust-freeplace.
•Donotexposetheunittoliquid,moistureorhumidity.
•Donotexposetheunittoextremetemperatures,eitherhighorlow.
•Donotexposetheunittoopenamesorlittobaccoproducts.
•Donotdrop,throwortrytoopentheunit.
•Donotpaintorplacestickersontheunit.
•Donotoperatetheunitnearmedicalequipmentwithoutpriorpermission.
•Donotusetheunitinareaswhereradioequipmentormobilephonesareprohibited.
GlobeSurfer® III.
Position GlobeSurfer®III to ensure the following:
•Agoodmobilesignal:youmayndthatplacingtheunitnearawindowprovidesthebestreception,howeverDONOTplace(orleave)the
GlobeSurfer®III in direct sunlight as the heat build up due to the sun will damage the device.
•Agoodwirelesssignal:centrallylocatedandquitehighup,orclosetoawindowtooptimisewirelessconnectionstocomputersinbothhorizontal
and vertical directions, allowing wider coverage. Again, DO NOT place (or leave) the GlobeSurfer®III in direct sunlight as the heat build up due to
the sun will damage the device
•Apoweroutletiswithineasyreach.
•EnsurethattheGlobeSurfer®III is at least 20 cm away from your person.
•KeeptheGlobeSurfer®IIIoutofdirectsunlightandawayfromheatsources,powerlines,uorescentlightingxtures,andelectricalnoisesuchas
radios, transmitters and broadband amplifiers.
•Waterormoisturemustnotenterthecaseoftheunit.
Connect your telephone
You can use a typical corded or cordless home telephone.
Plug your phone into the phone socket on GlobeSurfer®III and you are ready to make calls using your mobile subscription.
To connect a DECT or wireless telephone you must plug the base unit into GlobeSurfer®III.
Note: You cannot connect a mobile phone to GlobeSurfer®III
4
GlobeSurfer®III

First time use
You need a SIM card from your mobile operator to use GlobeSurfer®III. Please insert the SIM card before you plug in the power adapter.
Step 1: Insert the SIM card.
Insert the SIM card into the slot beneath the GlobeSurfer®III. Press carefully until it
‘clicks’ into place.
Tip: The orientation notch must face downward to the left with the gold plated
contacts facing away from you.
Step 2: Connect the power adapter.
Caution: Use the power adapter supplied with the GlobeSurfer®III. Using a different
power adapter can damage the GlobeSurfer®III
Plug the power adapter into the 230 Volt AC mains and plug the DC cable firmly into
the 5V DC input of the GlobeSurfer®III
The unit powers-up within about 30 seconds.
Step 3: Connect your computer
Note: If your SIM card has a PIN code lock enabled, and you are requested by the
GlobeSurfer®III to enter your PIN Code, DO NOT enter the PIN code (yet).
The PIN Code should be entered during ‘Step 6’. If no PIN Code lock has been
enabled on your SIM card, you will not be requested to enter it.
Connect your computer to GlobeSurfer®III using the supplied LAN cable.
Note: If you want to use a wireless (WLAN) connection to perform the initial set-up, WLAN must be installed and activated on your computer.
For information on how to set up WLAN on your computer, please see ‘WLAN connection’ on page 13.
Step 4: Log in to GlobeSurfer®III
Start your web browser.
Enable cookies or allow them for this address.
Type: http://192.168.1.1 in the browser address bar, and press ‘Enter’ or click ‘Go’:
The GlobeSurfer®III Management Console opens up with the Login page.
Tip: Save the link (URL) to this page as a bookmark in your Browser (follow the instructions in your web browser). Then you can easily access
the GlobeSurfer®III Management Console in future by using the bookmark.
5

Select the language you want to use.
The ‘User name’ for the default account is ‘admin’, the Password for the default account is also ‘admin’ (or depending on your configuration,
the password field should be left blank). Changing the Password, and adding new Users can be achieved in the Quick Start section of the GUI
interface. Once the User Name and Passwords are changed, use these next time you are asked to login.
Click‘OK’toproceedtotheInstallationWizard(ifconnectingtotheGlobeSurfer®III for the very first time) or to the ‘Basic’ GUI layout page.
Step 5: Use the ‘Installation Wizard’.
The ‘Installation Wizard’ guides you through the main settings for your GlobeSurfer®III and, most importantly, gets you connected straight away.
Read the instructions on each page and fill in the requested
details and click ‘Next’ to carry on.
When you get to the ‘Finish’ page, read the summary of the
settings you have chosen.
Click‘Finish’toacceptsettingsandconrmwith‘OK’.
Note: Finish the ‘Installation Wizard’ before going on to
‘Step 6’.
Step 6: Enter the PIN code.
The PIN code is specific to your SIM card.
You are now asked to key-in the PIN code: enter the PIN
code.
Tick the ‘Save PIN’ checkbox: then you will not be asked to
enter the PIN again.
Click‘OK’.
Whenyougetthe‘PINOK’responsethenclick‘OK’.
The Connection page is displayed.
Step 7: Making your first call
As soon as the operator name shows on the GlobeSurfer®III display, you can make your first call from your home telephone using your mobile
subscription.
Tip: You can adjust the position of the GlobeSurfer®III to achieve the best possible reception by checking the signal strength on the display of
the unit: the more bars the better the reception.
6
GlobeSurfer®III

Step 8: Connect to the Internet.
From the Browser “Home Overview” screen, click ‘Connect’.
Tip: Press the Connect button (right button on front panel)
on GlobeSurfer®III as an alternative.
The status shows ‘Connecting’ and then ‘Connected’.
Open a new browser window and go to a page on the
Internet.
Step 9: Set the Date and time
This information is configured within the Installation Guide, but should you want or need to change it, follow these instructions:
1. Enter the “Advanced Mode” in the GlobeSurfer®III Graphi-
cal User Interface.
2. Select the ‘System’ tab from the navigation buttons
3. Select ‘Settings’ from the sub-menu, and ‘Date and Time’
from the right hand side sub-menu
4. Select your time zone from the pull-down menu.
GlobeSurfer®III will automatically detect the daylight sav-
ing times for the time zone.
5. 12/24 hour mode: Select 12 or 24 hours.
6.Click‘Apply’or‘OK’tosavethesesettingsto
GlobeSurfer®III
Note: GlobeSurfer®III is configured to synchronise the time automatically using the Network Time Protocol (NTP) and will do so as soon as it
connects to the Internet.
See the On-line help if you want to know about more ‘Date and time’ settings.
7

CONFIGURE YOUR COMPUTERS
Using Ethernet LAN
Once GlobeSurfer®III is configured as above, it is ready to be used. If you are only using the Ethernet LAN connection with GlobeSurfer®III,
no further configuration is needed. Simply open a new browser window and use your computer to ‘surf’ the Internet with GlobeSurfer®III.
If you want to use the wireless connection (WLAN), additional settings are required on each computer that is connected to GlobeSurfer®III
via the WLAN.
WLAN connection
YYour computer must have a WLAN adapter that supports IEEE 802.11 b/g to set up a wireless connection. If encryption is used, make sure
that each computer uses the same type of encryption as configured in the ‘Quick Setup Wizard’.
For other operating systems, or if your specific WLAN adapter uses any other connection alternatives, refer to the documentation from the
WLAN adapter manufacturer.
Use the following instructions to connect your computer to GlobeSurfer®III if you are using Windows®XP.
1. Turn on your computer and enable the WLAN adapter, if necessary.
2. From the Windows®‘Start’ menu, select ‘Control Panel’.
3. Click ‘Network Connections’.
4. Click ‘Wireless Network Connection’ and then ‘Show Wireless Networks’. A list of
available wireless networks is displayed.
5. Select the device with the SSID that you entered in the ‘Installation Wizard’, and
click ‘Connect’.
If encryption is set on your GlobeSurfer®III a dialog box is displayed that requests a ‘Network key’. Type in the same password or encryption
key that was entered in the ‘Installation Wizard’
6. Enter the enter the password or encryption key in both fields and click ‘Connect’.
After a short time the message ‘Connected’ is displayed in the dialog box and an icon
is displayed in the Windows®XP notification area.
In future, your computer will automatically connect to GlobeSurfer®III.
8
GlobeSurfer®III

GlobeSurfer®III. Questions and answers can be found on our Support web-site:
http://support.option.com/support/faq.php
To register please go to:
http://support.option.com/support/register.php
To post technical questions after you have registered please use the online support at: http://support.option.com/support/newticket.php
9
Other manuals for GlobeSurfer III
2
Table of contents
Other Option Wireless Technology Network Router manuals
Popular Network Router manuals by other brands

NetComm Wireless
NetComm Wireless NB16DG Remote administration setup

Planet
Planet G.SHDSL.bis Bridge Router GRT-504 Quick installation guide

TP-Link
TP-Link TL-WR850N user guide

Strix Systems
Strix Systems EWS-150g quick start guide

Planet
Planet 85M Powerline Ethernet PL-201-KIT Specifications

NetComm
NetComm NTC-6200 user guide