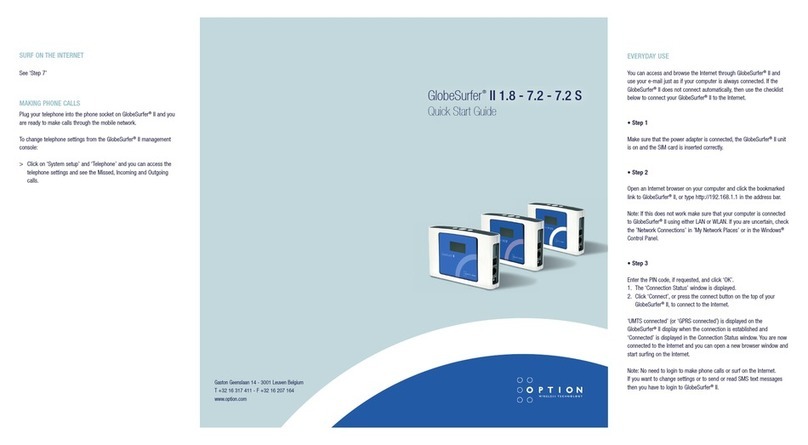
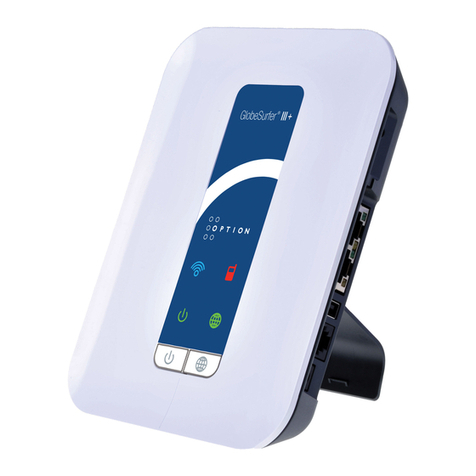
Option Wireless Technology GlobeSurfer III User manual

Gaston Geenslaan 14 - 3001 Leuven Belgique - T +32 16 317 411 - F +32 16 207 164 -
www.option.com
Z08.209_UG_GSIII_V4.indd 1 14-08-2008 13:55:56

GlobeSurfer
®III
User guide
Z08.209_UG_GSIII_V4.indd 2 14-08-2008 13:55:57

1
Z08.209_UG_GSIII_V4.indd 1 14-08-2008 13:55:57

2
GlobeSurfer®III User guide
WELCOME TO GLOBESURFER®III
Welcome to the GlobeSurfer®III, your 3G wireless gateway router that connects
you to the internet, allows you to make and receive telephone calls, text mes-
sages and enables you to connect USB printers and external hard drives for a
truly collaborative life.
Within minutes of connecting your GlobeSurfer®III, you can connect to your
mobile network and use a wireless connection to the Internet through the 2G or
3G cellular network.
GlobeSurfer®III is compatible with GSM and 3G mobile networks and supports
GPRS, EDGE, UMTS, HSDPA and HSUPA technologies. With ‘Receive Diversity’ on
all the high as well as low bands, the signal strength and overall 3G reception is
unparalleled.
Tip: To achieve the best possible reception, check the signal strength on the dis-
play of the unit (the more bars the better the reception). You may find that placing
the unit near a window provides the best reception.
Simple set-up
GlobeSurfer®III provides you with a quick installation and set-up that gets you
easily and quickly connected to the Internet. You can use an Internet browser (e.g.
Microsoft®Internet Explorer, Safari®or Firefox® ) and most personal computers,
including Windows®, Mac OS®and Linux ®. The ‘Quick Setup Wizard’ introduces
you to the basic settings that need to be configured for use with the mobile
network. Once you have these configured, you can review and enable customised
wireless security settings.
Instant protection
Your GlobeSurfer®III supports Network Address Translation (NAT). This network
service hides the computers in your network so they cannot be found or directly
Z08.209_UG_GSIII_V4.indd 2 14-08-2008 13:55:58

3
accessed from outside your network. A firewall is also included which, by default,
blocks incoming traffic and allows outgoing traffic.
Additional security
GlobeSurfer®III supports both Wired Equivalent Privacy (WEP) and Wi-Fi Protected
Access (WPA and WPA2) to protect your network data. Security logs keep you
aware of potential security risks and intrusion attempts. You can view logs online
or via email.
Stay in touch
You can use GlobeSurfer®III to send and receive SMS text messages. The display
on the front of the unit lets you know when a new SMS arrives.
“Notifier” Software
If you have installed the “Notifier” software application, then you will also receive
a desktop alert indicating the receipt of text messages or telephone calls. The
“Notifier” software will also allow you to connect directly to the browser page that
handles SMS text messages and telephone calls.
When you get a phone call the display shows the caller’s number and indicates
missed calls. If you have installed the “Notifier” software application, then you will
also receive a desktop alert indicating the receipt of telephone calls, as well as
missed calls. The “Notifier” software will also allow you to connect directly to the
browser page that handles telephone calls.
Important note
To protect your network from unauthorised access, and to make it more difficult
for hackers to analyse your data, please configure the WLAN security settings and
enable WEP, WPA or WPA2 encryption on your GlobeSurfer®III Copyright
Z08.209_UG_GSIII_V4.indd 3 14-08-2008 13:55:58

4
GlobeSurfer®III User guide
Copyright © 2008, Option Version 1
Information about Option GlobeSurfer®III may change without prior notice.
Information published in this user guide is accurate at the time of publication.
Although all security precautions are taken during the creation of this user guide
Option is not liable toward persons or organisations for losses or damages caused
either directly or indirectly due to instructions contained in this user guide.
All brands and registered brands are property of their respective owners. Services
may be changed, added or deleted. For the newest firmware version for your
GlobeSurfer®III visit http://www.option.com
Copyright © 2008 OPTION. All rights reserved. Option, GlobeSurfer, and the Option
logo are registered trademarks of OPTION.
*All third-party trademarks are the property of their respective owners.
Z08.209_UG_GSIII_V4.indd 4 14-08-2008 13:55:58

5
WARNING
•TheGlobeSurfer®III is intended for use only when powered by the external
power supply shipped together with the equipment or via a replacement power
supply available from Option. The use of any other power supply may invalidate
regulatory approval of this equipment. Refer to the table below for applicable
power supplies.
•GlobeSurfer®III is intended for indoor use only and its interconnection points
shall not be connected outside of any premises (i.e. outside of any buildings).
Refer to the table below for each interconnection point found in this user
instruction.
•GlobeSurfer®III is regarded a class III equipment where protection against
electric shock is provided by means of power supplied from SELV circuit i.e.
external power supply and does not generate hazardous voltages within itself.
•TheGlobeSurfer®III is intended to be used with a POTS (phone) and LAN cable
with maximum length of 3 m. If a longer LAN cable is used it must be shielded
in order not to invalidate regulatory approval.
Applicable power supplies
Power supply Manufacturer Model
GS2 AC/DC adapter PHIHONG PSA15R-050P
Equipment interconnection points
Interconnection Category Type
DC input connector SELV 5.5/1.2mm DC jack
SIM card connector SELV SIM type (ISO7816)
Z08.209_UG_GSIII_V4.indd 5 14-08-2008 13:55:58

6
GlobeSurfer®III User guide
External antenna
connector SELV MC-CARD type
LAN connector SELV RJ45
Telephone connector TNV2 RJ11
Rated Input Voltage
Maximum Input Voltage 5 VDC
SELV interconnections must only be connected to other equipment that complies
with requirements of SELV-circuits as defined in EN60950 directive.
TNV2 interconnections must only be connected to other equipment that complies
with requirements of TNV2-circuits as defined in EN60950 directive.
Z08.209_UG_GSIII_V4.indd 6 14-08-2008 13:55:58

7
CONTENTS
YOUR GLOBESURFER®III 11
Buttons and connections 11
Incoming calls 14
Missed calls 14
The display screen saver 15
GETTING STARTED 16
Guidelines for safe and efficient use 16
Positioning GlobeSurfer®III 16
Connect your phone 17
First time use 18
Step 1: Insert the SIM card. 18
Step 2: Connect the power adapter. 18
Step 3: Connect your computer 19
Step 4: Log in to GlobeSurfer®III 19
Step 5: Use the ‘Quick Setup Wizard’. 21
Step 6: Enter the PIN code. 22
Step 7: Making your first call 22
Step 8: Connect to the Internet. 23
Step 9: Set the Date and time 24
Configure your computers 25
Using Ethernet LAN 25
WLAN connection 25
Z08.209_UG_GSIII_V4.indd 7 14-08-2008 13:55:58

8
GlobeSurfer®III User guide
EVERYDAY USE 27
Staying connected. 27
Making phone calls 28
Using the Graphical User Interface 28
Checking the connection status 28
Login to the Graphical User Interface 28
Changing telephone settings 32
Adding a new user 33
Changing your user name and password 34
Restoring the factory default settings 35
Firmware Upgrade 36
Upgrading From a Local Computer 36
Managing SMS text messages 38
Reading a message 38
Writing and sending a text message 39
Sent SMS text messages 40
Saving a message 41
SMS Templates 41
SMS Settings 41
Text Messages on the SIM Card 42
Administration Basics 43
Quick Setup 44
Language 44
Telephony 44
UMTS Setup 44
Wireless Setup 45
Z08.209_UG_GSIII_V4.indd 8 14-08-2008 13:55:58

9
Wireless Encryption 46
Firewall Setup 48
Save the Setup configuration 48
SECURITY BASICS 49
Review the basics 49
Network Address Translation 49
Determine the wireless exposure 49
Firewall 50
Control the traffic 50
IP- Hostname (URL) Filtering 51
Adding a new Web site 52
Modify a Web site address currently in the table 53
Ensuring that all IP addresses to Web-sites in the table are blocked 53
MAC Address Filtering 54
Adding wireless computers to MAC filtering 55
SHARED PRINTERS 57
FILE SERVER (ATTACHED STORAGE) 58
THE GLOBESURFER®III NOTIFIER SOFTWARE 64
Text message receipt 65
Tool-tip 65
Telephone call 65
GLOSSARY 66
SPECIFICATIONS 69
Z08.209_UG_GSIII_V4.indd 9 14-08-2008 13:55:58

10
GlobeSurfer®III User guide
Z08.209_UG_GSIII_V4.indd 10 14-08-2008 13:55:59

11
YOUR GLOBESURFER®III
Buttons and Connections
1. Left button. Toggles between the features of the device (Signal Strength, Text
Messages (SMS), Telephone Calls, Connected Users and USB connectivity).
2. Right button. “On / Off” and “Connect / Disconnect”. Press to connect/discon-
nect from the 3G network, or hold for 2 seconds to turn the unit off. A single
press while the GlobeSurfer®III is in screensaver mode will refresh the screen.
Z08.209_UG_GSIII_V4.indd 11 14-08-2008 13:56:00

12
GlobeSurfer®III User guide
3. SIM Card slot and Restore button
a. SIM card slot. Insert or remove the SIM card: press carefully until it ‘clicks’ in
or releases.
b. Restore defaults. This button is next to the SIM slot. Press it with a pointed
object, like a paper clip, to restore the unit to its factory default settings. This
may be required when you want to build a new network configuration, or
when the administrator password has been lost.
i. Note: All web-based management settings and parameters, not only those in
the Advanced section, are restored to their default values. The administrator
password is no longer valid. All other user names are deleted. All personal
configuration settings are deleted, including all SMS messages in the
GlobeSurfer®III memory. Messages on the SIM card remain unchanged.
4. External Antenna connector. Enables the connection of an MMX style external
Antenna.
5. Local Area Network (LAN). Ports for LAN Ethernet cables to be connected
directly into the unit. The LAN connection handles 10/100 Mbit/s.
6. USB Port. Connecting an external hard disk drive (File Server) or USB printer
(Printer Server) to this port extends the functionality of the GlobeSurfer®III.
a. Please note: This port is only configured for File Server and Print Server
functionality – any other USB device connected to the GlobeSurfer®III may
not work, and is not supported. Please also note, any external hard disk
drive must be formatted in FAT32 or FAT16 file format – NTFS file format is
only supported in ‘read only’ mode.
7. Telephone. Plug your home telephone into the unit. Base station telephones
with remote handsets are supported.
8. DC 5V Input socket: plug in the power adapter DC cable.
Tip: Leave the unit on so that you can connect to the Internet at the push of a
button, or automatically if that option is selected. The unit is connected when
“Connected” shows on the main screen of the GlobeSurfer®III display.
Z08.209_UG_GSIII_V4.indd 12 14-08-2008 13:56:00

13
THE GLOBESURFER®III FRONT PANEL DISPLAY
1. The five bars indicate the mobile signal strength.
2. New SMS received. If a blinking red exclamation mark appears next to it, the
SMS memory is full. Selecting this icon will display the SMS messages on
screen. For multiple SMS messages, continued pressing of the left button will
cycle through the messages until all have been displayed.
Tip: delete a few messages to leave space to receive more.
3. Phone icon indicates missed calls. For multiple missed calls, continued
pressing of the left button will cycle through the missed calls (with telephone
numbers if CLI was sent) until all have been displayed.
4. Number of connected computers associated with GlobeSurfer®III via the
WLAN. Selecting this option will display the names and IP addresses of the
users currently connected.
Z08.209_UG_GSIII_V4.indd 13 14-08-2008 13:56:01

14
GlobeSurfer®III User guide
5. USB Device. The icon will be ‘Grey’ for no device connected; ‘Red’ for an error
or incompatible device connected, and ‘Green’ for active compatible device
connected (FAT32 based File Server or Printer Server).
6. The name (or identifier) of your Mobile operator.
7. Connection status. ‘Connecting’, ‘Connected’, ‘Disconnected’.
8. Padlock. Displays whether the WiFi/LAN/WAN encryption security is enabled
(padlock ‘locked) or disabled (padlock ‘unlocked’).
9. Mobile connection type: GPRS, EDGE, UMTS or HSDPA.
Incoming Calls
When you get an incoming call the phone number is displayed:
See ‘Making Phone calls’ on page 28
Missed Calls
When you scroll across to the ‘Calls’ button, missed calls are displayed. See ‘Buttons
and connections’ on page 11.
Z08.209_UG_GSIII_V4.indd 14 14-08-2008 13:56:02

15
1. Missed Calls
2. Phone number of missed call.
3. Date and time of last missed call from that phone number.
4. Call sequence number and total number of missed calls.
Press the left ‘toggle’ button repeatedly to step through all missed calls until you
move on to the next display icon (connected users).
The Display Screen Saver
A screen saver feature is included to preserve the quality of the display on the
unit. When the display is inactive for a short time, the screen saver activates
showing a moving image of the current time.
Z08.209_UG_GSIII_V4.indd 15 14-08-2008 13:56:03

16
GlobeSurfer®III User guide
GETTING STARTED
Guidelines for safe and efficient use
GlobeSurfer®III contains sensitive electronic components as used in mobile phones
and wireless routers. For safe and efficient use, please follow these guidelines:
•Handletheunitcarefullyandstoreitinacleananddust-freeplace.
•Donotexposetheunittoliquid,moistureorhumidity.
•Donotexposetheunittoextremetemperatures,eitherhighorlow.
•Donotexposetheunittoopenamesorlittobaccoproducts.
•Donotdrop,throwortrytoopentheunit.
•Donotpaintorplacestickersontheunit.
•Donotoperatetheunitnearmedicalequipmentwithoutpriorpermission.
•Donotusetheunitinareaswhereradioequipmentormobilephonesare
prohibited.
Positioning Globesurfer®III
Insert GlobeSurfer®III to ensure the following:
•Agoodmobilesignal:youmayndthatplacingtheunitnearawindowpro-
vides the best reception, however DO NOT place (or leave) the GlobeSurfer®III
in direct sunlight as the heat build up due to the sun will damage the device.
•Agoodwirelesssignal:centrallylocatedandquitehighup,orclosetoa
window to optimise wireless connections to computers in both horizontal and
vertical directions, allowing wider coverage. Again, DO NOT place (or leave) the
GlobeSurfer®III in direct sunlight as the heat build up due to the sun will dam-
age the device
•Apoweroutletiswithineasyreach.
•EnsurethattheGlobeSurfer®III is at least 20 cm away from your person.
•KeeptheGlobeSurfer®III out of direct sunlight and away from heat sources,
Z08.209_UG_GSIII_V4.indd 16 14-08-2008 13:56:04

17
powerlines,uorescentlightingxtures,andelectricalnoisesuchasradios,
transmitters and broadband amplifiers.
•Waterormoisturemustnotenterthecaseoftheunit.
Connect your telephone
You can use a typical corded or cordless home telephone.
Plug your phone into the phone socket on GlobeSurfer®III and you are ready to
make calls using your mobile subscription.
To connect a DECT or wireless telephone you must plug the base unit into
GlobeSurfer®III.
Note: You cannot connect a mobile phone to GlobeSurfer®III.
Z08.209_UG_GSIII_V4.indd 17 14-08-2008 13:56:05

18
GlobeSurfer®III User guide
First time use
You need a SIM card from your mobile operator to use GlobeSurfer®III. Please
insert the SIM card before you plug in the power adapter.
Step 1: Insert the SIM card.
Insert the SIM card into the slot beneath the GlobeSurfer®III. Press carefully
until it ‘clicks’ into place.
Tip: The orientation notch must face downward to the left with the gold
plated contacts facing away from you.
Step 2: Connect the power adapter.
Caution: Use the power adapter supplied with the GlobeSurfer®III. Using a
different power adapter can damage the GlobeSurfer®III
Plug the power adapter into the 230 Volt AC mains and plug the DC cable
firmly into the 5V DC input of the GlobeSurfer®III
The unit powers-up within about 30 seconds.
Z08.209_UG_GSIII_V4.indd 18 14-08-2008 13:56:05
Other manuals for GlobeSurfer III
2
Table of contents
Other Option Wireless Technology Network Router manuals
Popular Network Router manuals by other brands

Mercu
Mercu MW155R Quick installation guide

Yongnuo
Yongnuo YN622C-TX E-TTL user manual

Teldat
Teldat bintec elmeg Regesta PRO PLC installation manual

Ruijie
Ruijie Reyee RG-EG105GWT Hardware installation and reference guide

TP-Link
TP-Link TL-WR841HP Quick installation guide

Ascent Communication Technology
Ascent Communication Technology ACT AP300 XG-PON ONT Quick reference guide