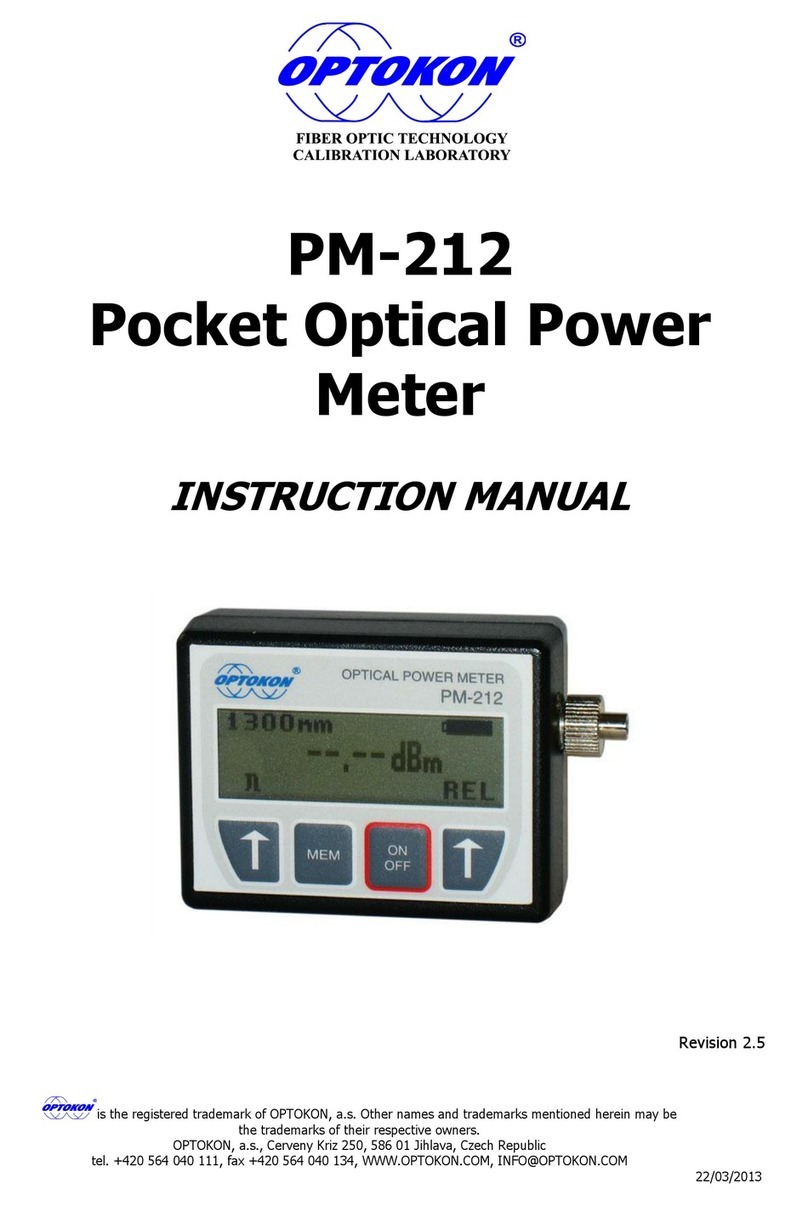
OPTOKON PM-240-MTP User manual

is registered trademark of OPTOKON, a.s. Other names and trademarks mentioned herein may be the
trademarks of their respective owners.
OPTOKON, a.s., Cerveny Kriz 250, 586 01 Jihlava, Czech Republic
tel. +420 564 040 111, fax +420 564 040 134, WWW.OPTOKON.COM, INFO@OPTOKON.CZ
s/w: 1.2 19/01/2017
PM-240-MTP
Multifiber Optical Power
Meter
INSTRUCTION MANUAL
Revision:1.0

is registered trademark of OPTOKON, a.s. Other names and trademarks mentioned herein may be the
trademarks of their respective owners.
OPTOKON, a.s., Cerveny Kriz 250, 586 01 Jihlava, Czech Republic
tel. +420 564 040 111, fax +420 564 040 134, WWW.OPTOKON.COM, INFO@OPTOKON.CZ
s/w: 1.2 19/01/2017

2
is the registered trademark of OPTOKON, a.s. Other names and trademarks mentioned
herein may be the trademarks of their respective owners
All rights reserved. No parts of this work may be reproduced in any form or by any means - graphic, electronic,
or mechanical, including photocopying, recording, taping or information storage and retrieval systems - without
the written permission of the publisher.
Products that are referred to in this document may be either trademarks and/or registered trademarks of the
respective owners. The publisher and the author make no claim to these trademarks.
While every precaution has been taken in the preparation of this document, the publisher and the author
assume no responsibility for errors or omissions, or for damages resulting from the use of information
contained in this document or from the use of programs and source code that may accompany it. In no event
shall the publisher and the author be liable for any loss of profit or any other commercial damage caused or
alleged to have been caused directly or indirectly by this document.
OPTOKON, a.s.
Cerveny Kriz 250
586 01 Jihlava
Czech Republic
tel. +420 564 040 111
fax +420 564 040 134
WWW.OPTOKON.COM

PM-240-MTP INSTRUCTION MANUAL
3
Contents
1Introduction.................................................................................................4
2Features ......................................................................................................4
3Application...................................................................................................4
4Accessories ..................................................................................................5
4.1 Standard......................................................................................................................5
4.2 Optional......................................................................................................................5
5Specifications ...............................................................................................5
6Safety information ........................................................................................6
7Maintenance ................................................................................................ 7
7.1 Battery care ................................................................................................................7
7.2 Instrument care...........................................................................................................7
7.3 Recommended cleaning and mating instructions Chyba! Záložka není definována.
8Instrument and button function description ....................................................8
8.1 Menu #1 – Absolute power measurement mode........................................................9
8.2 Menu #2 – Relative power measurement mode.......................................................10
8.3 Menu #3 – Working with the internal memory........................................................10
8.3.1 SAVE RESULT ...............................................................................................12
8.3.2 BROWSE RESULTS.......................................................................................13
8.3.3 UPLOAD MEMORY.......................................................................................13
8.3.4 ERASE MEMORY..........................................................................................14
8.3.5 HOME..............................................................................................................14
9Measurement loss....................................................................................... 15
9.1 Basic theory..............................................................................................................15
9.2 Method 6 ..................................................................................................................16
9.2.1 Setting the reference.........................................................................................16
9.2.2 Measurement Loss............................................................................................17
9.3 Method 7 ..................................................................................................................18
9.3.1 Setting the reference.........................................................................................18
9.3.2 Measurement Loss............................................................................................19
9.4 High power measurement.........................................................................................20
10 Setting up data transfer........................................................................... 21
11 Power loss and decibels........................................................................... 24
12 Notes ..................................................................................................... 25
13 Calibration, service center........................................................................ 26

PM-240-MTP INSTRUCTION MANUAL
4
1Introduction
The PM-240-MTP optical power meter is designed to measure absolute or
relative optical power in optical networks terminated with 12 – 24 multifiber
MTP/MPO connectors. The tester can measure simultanously optical power level in all
up to 24 fibers of MTP/MPO connectors, it can recognize “live” and “dark” fibers. This
eliminates the need of fan-out from multi to single fiber connectors. The memory
capacity allows storage and uploading of up to 3000 measurements including
memory position or fiber number, wavelength, absolute value or relative value and
insertion loss.
The rechargeable battery ensures long term working with a minimum service life
of 2 years. Batteries can be charged via a USB port or external AC/DC adaptor. The
microprocessor controlled charging process ensures optimal battery status and
extended operation time.
2Features
Easy measurement of multifiber
connectors
MTP/MPO input interface
Absolute and Relative optical power
measurement
Displayed units: dBm, dB, mW
Two functions:
Portable power meter
USB probe – accessory of Testing
Workplace
InGaAs or Si photodetector
Detection of modulation 1 kHz
Display backlight
Firmware upgrade via USB
Two levels high capacity memory:
Cable No., Fiber No.
SmartProtocol PC software
memory download, reporting solution
Battery charging via USB port
Battery status indicator
Powered by Li-Pol rechargeable
battery
3Application
Absolute or relative optical power measurement
Optical network measurements
Measurement output power of optical transmitters
Measurement input power of optical receivers
Measurement attenuation in fibre cabling, in conjunction with the LS-240-MTP
Optical light source
Measurement loss in connectors, splices, adaptors, switches and other
components
Easy and rapid identification of failure points in fiber networks
Suitable for SM and MM applications

PM-240-MTP INSTRUCTION MANUAL
5
4Accessories
4.1 Standard
Hard carrying case
SmartProtocol PC software
Data Exporter PC software
Power charging adaptor
Traceable calibration certificate
USB connection cable
5Optional
Master MTP/MPO connector patchcord
6Specifications
Parameter: Note:
Photodetector InGaAs
Working wavelengths 850, 1300, 1310, 1490, 1550, 1625 nm can be customized
Dynamic range: -65 dBm to +10 dBm
-57 dBm to +17 dBm
1300, 1310, 1490, 1550, 1625 nm
850 nm
Photodetector Si
Working wavelengths 850 nm
Dynamic range -40 dBm to +10 dBm 850 nm
Uncertainty ± 5% 1310, 1550 nm @ -20 dBm
Resolution 0.01
AWD/Modulation Detection -50 dBm
-45 dBm
1300 – 1625 nm
850 nm
Dimensions 170 x 90 x 45 mm W x H x D
Weight 0.5 kg
Temperature operating
storage
Humidity (non condensing)
-10 to +50 °C
-40 to +70 °C
0 – 95%
Battery working time > 300 hrs
Battery life time > 2 years 3000 mAh Li-Pol
Compliant with RoHS-requirements (2002/95/EG, 27.01.2003)

PM-240-MTP INSTRUCTION MANUAL
6
7Safety information
The PM-240-MTPP instrument emits no optical power itself and does not create any
hazards to the user. To ensure a high level of operator safety during installation,
commissioning and operating the equipment, as well as ensuring that the equipment
remains undamaged, it is necessary to consider the following general warnings and
recommendations.
Installation, commissioning, operation and service of equipments with high power
level are only allowed to be carried out by an authorised person.
Use only the equivalent connector types to those built into the instrument in
order to avoid damage to the instrument components.
Optical connectors must be clean, in case the connectors are not perfectly clean –
please clean them according to the procedure described in the technical
specification for the relevant connectors.
Never use magnifying devices to inspect optical fiber ends unless you are sure
that no optical power is being emitted.
Use only magnifying devices with a built-in infra-red filter to ensure safety.
During operation, testing or maintenance of a fiber optic system, never look into
an active fiber optic cable. Infrared radiation may be present and permanent eye
damage can result.
Avoid direct exposure to the beam.
Do not activate the laser when there is no fiber attached to the optical output
connector.
Under no circumstances should you look into the end of an optical cable attached to
the optical output when the device is operational. The laser radiation can seriously
damage your eyesight.

PM-240-MTP INSTRUCTION MANUAL
7
8Maintenance
8.1 Battery care
The PM-240-MTP comes equipped with a built-in charger and is powered by Li-Pol
rechargeable batteries (standard accessories).
Charging – via USB port (PC) or by an external USB power charging adaptor
(standard accessories)
Only use the supplied USB power charging adapter.
Charge the batteries for 75% before storing the LS-215 for long periods (100
% is not recommended). The batteries will lose the charge during storage.
The batteries are consumable. Repeated charging and discharging decreases
the lifetime of the batteries.
-48.95 dBm
LOSS MEM
1310nm
19 nW
-48.95 dBm
LOSS MEM
1310nm
19 nW
8.2 Instrument care
During storage and transport keep the instrument in its carry case to protect
against crushing, vibration, dust and moisture.
Where possible keep the instrument away from strong sunlight.
Clean the instrument housing using alcohol or other cleaning agents. Acetone or
other active solvents may damage the case.
The instrument is resistant to normal dust and moisture, however it is not
waterproof. If moisture does get into instrument, dry it out carefully before
using it again.
battery status
indicator
charging

PM-240-MTP INSTRUCTION MANUAL
8
9Instrument and button function description
[ON/OFF]
Press to turn the unit on.
Hold ON/OFF (about 4 sec) to turn the unit on in backlight mode.
Press to turn the unit off.
After switching on, the type of device, serial number and firmware version will be
displayed.
[ ]
Meaning of these keys depends on current menu.
ON/OFF
USB adapter
MTP/MPO adapter
Operation buttons
LCD display
Battery status

PM-240-MTP INSTRUCTION MANUAL
9
9.1 Absolute power measurement mode
In the absolute power measurement mode the absolute value of the optical signal in
dBm units is shown on the display.
This screen will appear after the instrument is switched on and information regarding
the type of device, serial number and firmware version will appear.
Reading the display:
[]
Selects 850, 1300, 1310, 1490, 1550, 1625 nm
[REF]
Activates the relative power measurement mode (unit dB).
Recalls the last set reference for a selected wavelength.
Goes to menu #1.
[MEM]
Goes to Memory menu #2.
Starts working with the internal memory.
Selected wavelength Number of channel Measured optical
power level
Battery indicator
Diagram of measured
optical power level
Pointer
Timer line
End of timer
line

PM-240-MTP INSTRUCTION MANUAL
10
9.2 Menu #1 – Relative power measurement mode
In the relative power measurement mode is on the value of optical insertion loss in
dB units which corresponds to performed reference is shown on the display.
Reading the display:
[ABS]
Returns unit into absolute power measurement mode (unit dBm).
[REF]
Sets and stores the new reference for the selected wavelength.
[MEM]
Goes to Memory menu #2
Starts working with the internal memory.
9.3 Menu #2 – Working with the internal memory
The memory of PM-800 has a structured, two-level organization. The results are
stored in memory positions (FIBER) in folders called Cable (CABLE). See table below:
Selected wavelength Number of channel Measured optical
loss/gain
Battery indicator

PM-240-MTP INSTRUCTION MANUAL
11
CABLE001 FIBER001
FIBER002
FIBER003
FIBER004
FIBER005
FIBER006
..................
FIBERXXX
CABLE002 FIBER001
FIBER002
FIBER003
FIBER004
FIBER005
FIBER006
..................
FIBERXXX
CABLEXXX FIBER001
FIBER002
FIBER003
FIBER004
FIBER005
FIBER006
..................
FIBERXXX
....................
This screen will appear after pressing [MEM] key from Menu#1 or Menu#2
UP DOWN OK
SAVE RESULT
BROWSE RESULTS
UPLOAD MEMORY
ERASE MEMORY
HOME
[UP], [DOWN], [OK]
Use these buttons for selection appropriate submenu.

PM-240-MTP INSTRUCTION MANUAL
12
9.3.1 SAVE RESULT
1. By using [UP] [DOWN] select “SAVE RESULT” and press [OK].
- CABLE + FIBER
CABLE 001
FIBER 004
STORED : 003
2. Select the cable (folder) using [- CABLE +], the unit will display the number of
saved results under the selected cable, then press [FIBER].
- FIBER + SAVE
CABLE 001
FIBER 004
STORED : 003
3. The unit will suggest the FIBER position under the selected CABLE.
Accept the suggested FIBER position and save the result by pressing [SAVE] or
change the memory position using [- FIBER +], than press [SAVE] to save the
result.
NOTE: If the selected memory position is already occupied, the “!” mark will appear
on the display.
- FIBER + SAVE
CABLE 001
FIBER 001
!
STORED : 003
By pressing [SAVE], the new result will OVERWRITE the selected FIBER position and
the old result will be discarded.

PM-240-MTP INSTRUCTION MANUAL
13
9.3.2 BROWSE RESULTS
1. By using [UP] [DOWN] select “BROWSE RESULTS” and press [OK]
- CABLE + FIBER
CABLE 001
STORED : 003
2. Select the cable (folder) using [- CABLE +], the unit will display the number of
saved results under the selected cable, then press [FIBER].
- FIBER + HOME
CABLE 001
FIBER 004
1310nm
-5.05dB
-9.10dBm
- FIBER + HOME
CABLE 001
FIBER 005
EMPTY
3. Use [- FIBER +] to browse through the results.
9.3.3 UPLOAD MEMORY
1. By using [UP] [DOWN] select “UPLOAD MEMORY”.
2. Press [OK]. All memory content will be sent to the USB port. More information is
contained in the chapter “setting up data transfer”.
UPLOADING ..

PM-240-MTP INSTRUCTION MANUAL
14
9.3.4 ERASE MEMORY
1. By using [UP] [DOWN] select “ERASE MEMORY” and press [OK].
CONFIRM NO
ERASE MEMORY
CONFIRM NO
ERASE MEMORY
2. Press [CONFIRM] to erase memory or [NO] for return to main screen.
9.3.5 HOME
1. By using [UP] [DOWN] select “HOME”.
2. Press [OK] for return to main screen.

PM-240-MTP INSTRUCTION MANUAL
15
10 Measurement loss
10.1 Basic theory
Loss measures the signal degradation in a fiber optic cable. A light source injects an
optical signal of the appropriate wavelength into the fiber and a power meter
measures the received signal at the same wavelength.
There are two different measurement methods:
Method 6
Method 7
according to IEC 874-1 4.4.7.4.
Power measurement is the basis of optical testing and determines the power budget
of the fiber optic link by comparing the power of the transmitter and the sensitivity of
the receiver. This difference is the maximum acceptable loss. Power loss is caused by
different phenomena such as attenuation of the fiber, dirty connector mating faces,
connector misalignment, loss of splices and other issues such as sharp fiber bends.
The "end to end" loss test is the most commonly used acceptance test of power loss
in fiber optic links. The test is based on measurement the power difference at the
input and output of the link.
The PM-800 and LS-800 are used for this test, where the light source (LS-800) acts
as a transmitter and the optical power meter (PM-800) as a receiver.
The "end to end" test has two steps:
1. Setting the reference
2. Measurement the loss
Important
All connectors and fiber end faces should be cleaned prior to testing (see
chapter 7.3).
The master cord used to set the reference should be the same type as the
patchcords (cables) to be tested (MM:50/125, 62.5/125 or SM).
It is very important that the connections are not disturbed after the reference
value is established.

PM-240-MTP INSTRUCTION MANUAL
16
10.2 Method 6
For method 6 two master cords are used to set the reference. Method 6 cancels the
effects of the master cords and one adaptor for all subsequent measurements.
10.2.1 Setting the reference
1. Connect the first master cord to the power meter (PM-800).
2. Connect the second master cord to light source (LS-800).
3. Use the master adaptor to connect the two fiber ends (pic.1).
4. Power on the light source and by pushing [] select the appropriate wavelength.
5. Power on the power meter and by pushing [] select the appropriate wavelength
range.
6. On the power meter activate the relative power measurement mode - by pushing
[LOSS].
7. Set and store the new reference for the selected wavelength - by pushing [REF]
and than [CONFIRM].
master patchcord
master adaptor
master patchcord
PM-800 LS-800
Do not disconnec
t
after referencing
Do not disconnect
after referencing
(pic.1)

PM-240-MTP INSTRUCTION MANUAL
17
10.2.2 Measurement Loss
1. Do not disconnect the master cords from the light source and power meter.
2. Disconnect second master cord from the adaptor.
3. Connect the trace to be measured between the master cords. An extra master
adaptor is required (pic.2).
4. The power meter display will simultaneously report the value with the message
“LOSS” or ”GAIN“ in dB.
5. This value represents a difference between the reference and the performed
measurement.
6. If the value will be displayed with the “LOSS” message, the trace to be measured
has just this loss.
7. If the value will be displayed with the “GAIN” message, this means that the trace
to be measured has been compared with the reference for this gain.
8. Value of loss (or gain) can be stored in the internal memory
(see ”SAVE RESULT" chapter).
master adaptors
master patchcord master patchcord
Fiber under test
PM-800 LS-800
(pic.2)

PM-240-MTP INSTRUCTION MANUAL
18
10.3 Method 7
For method 7, one master cord is used to set the reference. The master cord will be
cancelled for all subsequent measurements.
10.3.1 Setting the reference
1. Connect the master cord to the power meter (PM-800).
2. Connect the second end of the master cord to the light source (LS-800, pic.3).
3. Power on the light source and select the appropriate wavelength - by pushing
[].
4. Power on the power meter and select the appropriate wavelength range - by
pushing [].
5. On the power meter activate the relative power measurement mode - by pushing
[LOSS].
6. Set and store the new reference for the selected wavelength - by pushing [REF]
and than [CONFIRM].
master patchcord Do not disconnect
after referencing
PM-800 LS-800
(pic.3)

PM-240-MTP INSTRUCTION MANUAL
19
10.3.2 Measurement Loss
1. Do not disconnect the master cord from the light source.
2. Disconnect the master cord from the power meter port.
3. Connect the trace to be measured between the power meter port and the master
cord that is attached to the light source. An extra master adaptor is required
(pic.4)
4. The power meter display will report the value simultaneously with the message
“LOSS” or ”GAIN” in dB.
5. This value represents the difference between the reference and the performed
measurement.
6. If the value will be displayed with the message “LOSS”, the trace to be measured
has just this loss.
7. If the value will be displayed with the message ”GAIN“, this means that the trace
to be measured has been compared with the reference for this gain.
8. The value of the loss can be stored in the internal memory
(see “SAVE RESULT” chapter).
master adaptor master patchcord
Fiber under test
PM-800 LS-800
(pic.4)
Table of contents
Other OPTOKON Measuring Instrument manuals
Popular Measuring Instrument manuals by other brands

PCB Piezotronics
PCB Piezotronics IMI SENSORS 645B01 Installation and operating manual

Nellcor
Nellcor OxiMax N-550 Operator's manual

Teletek electronics
Teletek electronics SR-300B Operation manual

Eurotops
Eurotops M320 manual

Shinyei
Shinyei OMX-ADM Operation manual

Kobold
Kobold MAN-SD series operating instructions