Orbea OC ANT+ LEV DISPLAY User manual

OC ANT+ LEV
DISPLAY
TECHNICAL MANUAL ES | EN

OC ANT+ LEV DISPLAY2 | ORBEA ORBEA | 3TECHNICAL MANUAL
ÍNDICE
1. INTRODUCCIÓN 4
2. AVISO DE COMPATIBILIDADES
CON VERSIONES DEL SISTEMA X35 5
3. ELEMENTOS INCLUÍDOS 7
4. ESPECIFICACIONES TÉCNICAS 8
5. ADVERTENCIAS DE USO 8
6. GARANTÍA 8
7. INSTALACIÓN 9
8. FUNCIONAMIENTO 10
8.1. ENCENDIDO
8.2. APAGADO
8.3. CAMBIAR LA BATERÍA
8.4. EMPAREJAR CON SENSORES ANT+
-EMPAREJAR UNA BICICLETA CON SISTEMA X35
-EMPAREJAR OTROS SENSORES ANT+
8.5. NAVEGACIÓN ENTRE CAMPOS DE DATOS
8.6. CAMBIAR NIVELES DE ASISTENCIA DEL SISTEMA X35
8.7. MODIFICAR DATOS. CIRCUNFERENCIA,
UNIDADES DE MEDIDA Y DISTANCIA RECORRIDA.
8.8. VISUALIZACIÓN DE ERRORES DEL SISTEMA X35

OC ANT+ LEV DISPLAY4 | ORBEA ORBEA | 5TECHNICAL MANUAL
1. INTRODUCCIÓN 2. AVISO DE COMPATIBILIDADES
CON VERSIONES DEL SISTEMA X35
El ciclocomputador OC (Orbea Components) ANT+ LEV ha
sido diseñado para su uso en bicicletas eléctricas Orbea
con el sistema X35 de MAHLE Ebikemotion®. La unidad se
conecta con el sistema eléctrico mediante conexión ANT+
LEV para la visualización de parámetros del sistema, a la
vez que permite el cambio de modo de asistencia desde el
ciclocomputador, posibilitando el acceso a todos los datos
relevantes de la actividad y el sistema X35 sin necesidad
de la aplicación para móviles de MAHLE Ebikemotion®.
Aún así, el uso de la aplicación para móviles para el re-
gistro de la actividad y el display OC ANT+LEV de manera
conjunta durante una actividad es posible. La conexión del
sistema X35 mediante Bluetooth® 4.0 a la aplicación para
El ciclocomputador OC ANT+ LEV sólo puede ser conec-
tado a versiones del sistema X35 dotados de conectividad
ANT+ LEV.
Sólo las bicicletas Orbea con sistema X35 partir de la
gama 2020 están dotadas de conectividad ANT+ LEV des-
de su montaje. Si tu bicicleta pertenece a dicha gama o
posterior, podrás conectar el display OC ANT+ LEV direc-
tamente. Consulta con Orbea o con tu distribuidor para
saber a que gama pertenece tu bicicleta Orbea.
COMPATIBILIDAD CON VERSIONES
ANTERIORES A LA GAMA 2020
Ciertas versiones anteriores del sistema X35 de MAHLE
Ebikemotion® pueden ser dotadas de conectividad ANT+
mediante la instalación de un dispositivo emisor de ANT+
LEV. Dependiendo de la conguración de tu bicicleta, el
dispositivo necesario puede variar:
DONGLE ANT+ LEV
Para su instalación en bicicletas que no utilicen el remoto
de manillar Iwoc Trio.
El dongle ANT+ LEV debe ser instalado en el interior del
tubo superior de la bicicleta mediante su conexión al Iwoc
One y a la batería X35.
Las bicicletas Orbea compatibles con este dispositivo son
Gain M y Gain D (con manillar de carretera).
móviles MAHLE Ebikemotion® y la conexión con el display
OC mediante ANT+ LEV no son excluyentes, pudiendo así
disfrutar de todas las funcionalidades y visualización de
datos que ambas conexiones permiten sin la necesidad
de instalar tu teléfono en el manillar de tu bicicleta Orbea
durante la actividad.
Otros sensores ANT+ también pueden ser conectados a la
unidad para la visualización de datos durante la actividad
(cadencia, velocidad, frecuencia cardiaca, etc).
El display OC ANT+ LEV también se puede usar en bicicle-
tas con el sistema X35 de MAHLE Ebikemotion® de otros
fabricantes que dispongan de conectividad ANT+ LEV.
— Iwoc Trio+ — Dongle ANT+ LEV
REMOTO IWOC TRIO+
Para su instalación en bicicletas que utilizan el remoto de
manillar Iwoc Trio.
El remoto Iwoc Trio original debe ser sustituído por el nue-
vo remoto Iwoc Trio+. El nuevo remoto dota al sistema de
conectividad ANT+ LEV (Light Electric Vehicles).
Las bicicletas Orbea compatibles con este dispositivo son
Gain F (Urban), Optima E y EMX24.
— Batería X35 con conectividad ANT+ LEV.

OC ANT+ LEV DISPLAY6 | ORBEA ORBEA | 7TECHNICAL MANUAL
— Conectores Hirose DF63 y Cusmade C1206.
Para averiguar qué tipo de conectores utiliza el sistema X35 en tu bicicleta Orbea, retira
la tapa de plástico de la zona inferior del pedalier y localiza el cable que conecta la batería
con el puerto de carga. Si el conector entre estos dos cables es de tipo redondo Cusmade
C1206, el sistema es compatible con la instalación del Dongle ANT+ LEV o Iwoc Trio+. Si
el conector es del tipo cuadrado Hirose DF63, la bicicleta no puede ser dotada de conec-
tividad ANT+ LEV sin reemplazar completamente el sistema eléctrico (batería, punto de
carga, sensor PASS y remotos).
Si tienes dudas sobre qué versión del sistema X35 está instalado en tu bicicleta, contacta
con Orbea o con tu distribuidor.
Consulta el proceso de instalación del Dongle ANT+ LEV y el Iwoc Trio+ en sus respectivos
manuales.
No todas las versiones del sistema X35 pueden ser actualizadas para obtener conectivi-
dad ANT+ mediante el uso del Dongle ANT+ LEV o el Iwoc Trio+.
Sólo versiones del sistema que utilicen conectores redondos Cusmade C1206 pueden
ser actualizadas mediante la instalación de estos dispositivos. Versiones del sistema X35
que utilicen conectores cuadrados Hirose DF63 no son compatibles con el Dongle ANT+
LEV o el Iwoc Trio+.
3. ELEMENTOS INCLUÍDOS EN LA CAJA
- Ciclocomputador OC ANT+ LEV
- Soporte con base de goma.
- Banda de jación de goma.
- Pila CR2032
- Guía rápida de uso

OC ANT+ LEV DISPLAY8 | ORBEA ORBEA | 9TECHNICAL MANUAL
4. ESPECIFICACIONES
TÉCNICAS
- Medidas de la unidad: 60 x 38 x 15 mm
- Medidas de la pantalla: 26 x 33 mm (1,65”)
- Peso: 24 g (con pila CR2032)
- Resistencia al agua: 1 m.
- Conectividad: ANT+
- Frecuencia ANT+: 2.4 GHz ANT+®
- Alcance de conexión: 3 m.
- Temperatura de uso: -10ºC a 60ºC
- Tipo de pila: CR2032 (contiene perclorato). Pila incluída
- Duración de la batería: Hasta 100 horas aprox.
- Conformidad: Este artículo cumple con la directiva 1999/5/CE
5. ADVERTENCIAS
DE USO
6. GARANTÍA
7. INSTALACIÓN
-No sumergir ni lavar con agua a presión para evitar dañar los componentes electrónicos.
-Evitar caídas y golpes directos a la unidad y la pantalla.
-No exponer a altas temperaturas.
El ciclocomputador OC ANT+ LEV está cubierto contra defectos de fabricación y de con-
formidad de los materiales por un periodo de 2 años desde el momento de su compra o
de la bicicleta Orbea en la que estuviera incluído.
Daños derivados de su uso o instalación incorrectos, caídas y la no observación de sus
indicaciones de utilización no están cubiertos por la garantía.
En caso de reclamación, contacta con tu distribuidor Orbea. Puedes encontrar la lista
completa de nuestros distribuidores en www.orbea.com.
La unidad puede ser instalada tanto en el manillar como en la potencia de la bicicleta
(siempre que la longitud de la potencia lo permita). Posiciona el soporte incluído en el
manillar o la potencia y jalo con las gomas incluidas de tal manera que las muescas
queden hacia el frente y hacia atrás de la bicicleta.
Para instalar la unidad en el soporte, haz coincidir las pestañas de la parte posterior de la
unidad con las muescas del soporte y gira la unidad 90º hasta que quede jada de manera
segura en posición vertical.
El ciclocomputador OC ANT+ LEV es compatible con soportes para unidades Garmin®.
— Montaje en manillar y potencia.
A
B

OC ANT+ LEV DISPLAY10 | ORBEA ORBEA | 11TECHNICAL MANUAL
8. FUNCIONAMIENTO
OPE N
8.1. ENCENDIDO DE LA UNIDAD
Para encender el ciclocomputador, presiona el botón central (B). Si deseas conectar la
unidad a una bicicleta o a otros dispositivos ANT+, asegúrate de que éstos estén encen-
didos y activos antes de encender el ciclocomputador. Si la bicicleta u otros sensores
estaban apagados y la unidad no ha reconocido la conexión, asegúrate de encenderlos y
presiona el botón de la parte posterior del display (D) para reiniciar el display.
8.2. APAGADO DE LA UNIDAD
El ciclocomputador permanecerá encendido mientras esté activa la conexión ANT+ con la
bicicleta u otros sensores ANT+ y se apagará de manera automática tras 2 minutos desde
que la conexión se interrumpa (Sleep).
Simplemente apaga la bicicleta y display se apagará automáticamente a los 2 minutos.
8.3. CAMBIAR LA BATERÍA
Cuando la pila CR2032 se agote (puedes visualizar el estado de la pila en la esquina
superior izquierda de la pantalla), retira la tapa de la batería de la parte posterior de la
unidad tirando hacia arriba de la pestaña de la parte inferior de la tapa. Retira la batería e
instala una nueva. La cara plana de la batería que muestra las características de la misma
(+) debe quedar posicionada hacia arriba.
Vuelve a colocar la tapa de la pila alineando la pestaña de la tapa con la muesca inferior
y presiona rmemente hasta que la tapa quede jada de manera segura. Enciende el
ciclocomputador y comprueba que el nivel de la pila es correcto.
AB
D
C
AC/Reset
CR 2032

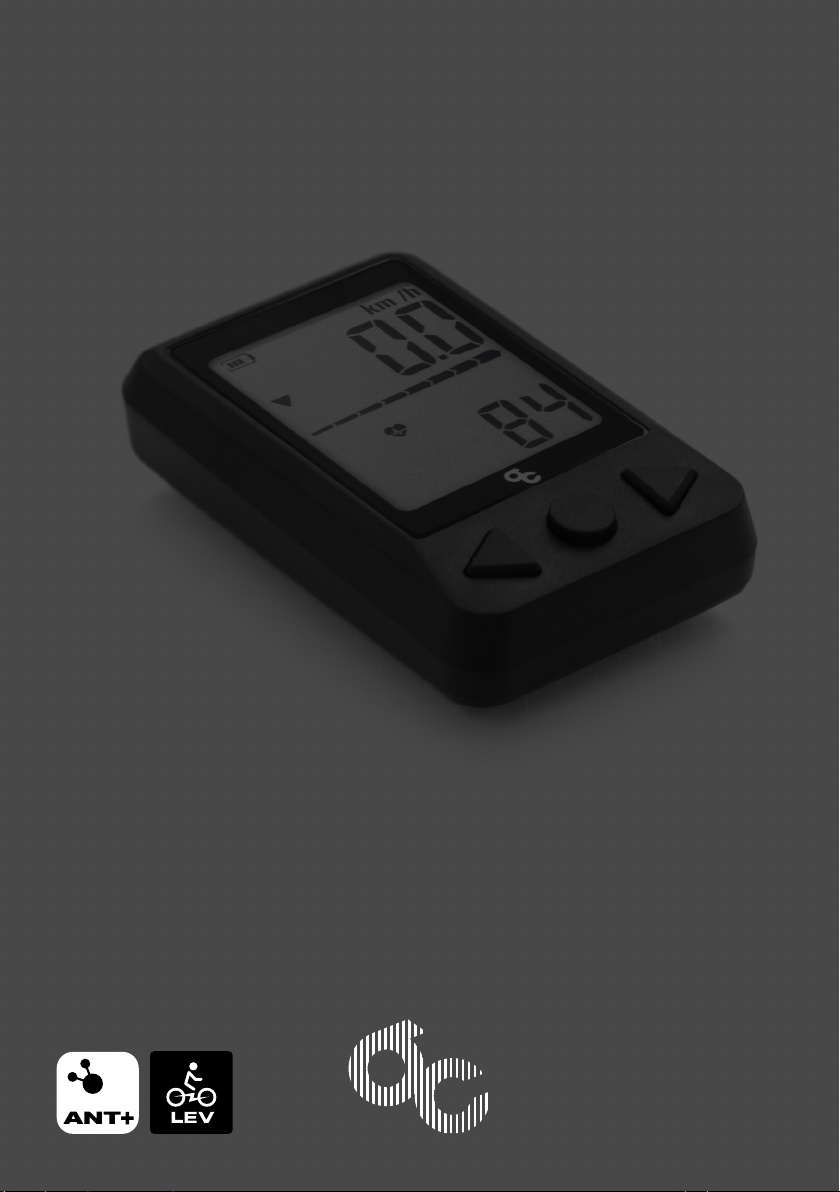
OC ANT+ LEV DISPLAY12 | ORBEA ORBEA | 13TECHNICAL MANUAL
8.4. EMPAREJAR CON SENSORES ANT+
EMPAREJAR UNA BICICLETA CON SISTEMA X35
DE MAHLE EBIKEMOTION®
Para el ciclocomputador OC ANT+ LEV, el sistema eléctrico X35 es un sensor ANT+ para el
que los campos de visualización de datos de la unidad han sido optimizados.
Para emparejar la bicicleta y el display, enciende primero la bicicleta pulsando los remo-
tos Iwoc One o Iwoc Trio. Cuando la bicicleta esté encendida, pulsa el botón central (B)
del ciclocomputador para encenderlo. La pantalla mostrará el texto “E-bi” al comenzar
a buscar la conexión con una bicicleta. A continuación mostrará el texto “Pair” mientras
intenta establecer la conexión. Si el emparejamiento ha funcionado, la barra de nivel de
batería de la bicicleta será visible en la pantalla. El campo de velocidad mostrará la velo-
cidad actual y se indicará con un símbolo el nivel de asistencia actual.
EMPAREJAR OTROS SENSORES ANT+
El ciclocomputador OC ANT+ LEV permite emparejar otros
sensores ANT+ además de tu bicicleta para la visualización
de datos en la pantalla.
Para emparejar otros sensores, comprueba que éstos es-
tán activos (al igual que la bicicleta) antes de pulsar el
botón central (B) del display para encenderlo:
- Sensor de frecuencia cardiaca: Coloca el sensor de
frecuencia cardiaca ANT+ en la posición deseada en tu
cuerpo. Humedece si fuese necesario la zona de contacto
del sensor con la piel para una mejor lectura.
- Sensor de velocidad: Gira la rueda en la que esté ins-
talado el sensor de velocidad ANT+ para activar el sensor.
- Sensor de cadencia: Gira a mano las bielas para activar
el sensor de cadencia ANT+.
Enciende el ciclocomputador y espera unos segundos has-
ta que se complete el emparejamiento con la bicicleta y
los sensores. La conexión de sensores ANT+ puede tardar
hasta 20 segundos.
El display reconocerá cuántos sensores ANT+ están em-
parejados y mostrará el mensaje “Ant (n)”, donde “n” es
el número de sensores que están conectados a la unidad:
Ant 1: Un sensor conectado. Normalmente la bicicleta.
Ant 2: Dos sensores conectados.Normalmente la bicicleta
y otro sensor ANT+.
Ant3: Tres sensores conectados. Normalmente la bicicleta
y dos sensores ANT+.
Si no se ha conseguido emparejar la bicicleta con el dis-
play, comprueba que la bicicleta está encendida y pulsa
el botón trasero del display (D) para resetear la unidad.
Si no se ha conseguido emparejar la bicicleta con el display, comprueba que la bicicleta
está encendida y pulsa el botón trasero del display (D) para resetear la unidad.
— E-bi — Pair — Bicicleta conectada
— Bicicleta y dos sensores conectados.
AVISO. CONEXIÓN DE SENSORES CON LA APLICACIÓN
PARA MÓVILES DE MAHLE EBIKEMOTION®
La conexión de sensores ANT+ con el ciclocomputador
no implica que los datos sean transmitidos a la aplicación
para móviles de Mahle Ebikemotion® si ésta se encuentra
conectada a la bicicleta a través de Bluetooth®. El único
canal de comunicación desde el display a la bicicleta es
el cambio de modo de asistencia mediante los botones
de la pantalla (A) (C). Los datos de otros sensores, como
cadencia, frecuencia cardiaca, etc, no se registran en la
aplicación ni se graban como parte de una actividad me-
diante la misma.
La aplicación para móviles de Mahle Ebikemotion® se co-
necta con el sistema X35 a través de una conexión Blue-
tooth® 4.0, que es independiente de la conexión ANT+ con
el display y los sensores ANT+.
Si se desea, por ejemplo, conectar un sensor de frecuen-
cia cardiaca con la aplicación para móviles para el registro
de datos y control del sistema, dicha conexión se debe-
rá realizar con la aplicación de manera independiente al
emparejamiento entre el sensor y el display ANT+ LEV. El
sensor de frecuencia cardiaca que se desea conectar a
la aplicación para móviles debe transmitir en Bluetooth ®
4.0. Existen varios modelos de sensor de frecuencia car-
diaca que emiten en Bluetooth® y ANT+ en el mercado.

OC ANT+ LEV DISPLAY14 | ORBEA ORBEA | 15TECHNICAL MANUAL
Una vez emparejado con la bicicleta u otros sensores,
puedes navegar entre los diferentes campos de datos del
display pulsando repetidamente el botón central (B) del
display en el siguiente orden:
1. TIEMPO TRANSCURRIDO EN LA ACTIVIDAD
El ciclocomputador comenzará a contar el tiempo de la
actividad de manera automática en cuanto reciba una
lectura de velocidad del sistema X35 o de un sensor de
velocidad ANT+. El tiempo de actividad se detendrá siem-
pre que la lectura de velocidad sea 0 km/h, y se reanudará
de manera automática cuando vuelva a haber lectura de
velocidad.
Puedes resetear a cero el contador de tiempo de la acti-
vidad manteniendo pulsado durante 3 segundos el botón
izquierdo (A) mientras el display esté mostrando el tiempo
transcurrido de la actividad. Este método no resetea la dis-
tancia recorrida en la actividad.
2. FRECUENCIA CARDIACA
Si has emparejado un sensor de frecuencia cardiaca ANT+
a la unidad, podrás ver la lectura del sensor en este cam-
po.
Este campo sólo será visible si hay un sensor conectado.
— Pulsa el botón B para navegar entre campos.
1. Tiempo actividad 2. Frec. cardiaca 3. Cadencia 4. Nivel batería 5. Distancia/Odometría
1. Tiempo de la actividad.
2. Frecuencia cardiaca (si se ha emparejado un sensor)
3. Cadencia (si se ha emparejado un sensor)
4. Nivel de carga de la batería del sistema X35 (en %)
5. Distancia recorrida durante la actividad / Odometría
total de la bicicleta.
3. CADENCIA
Si has emparejado un sensor de cadencia ANT+ a la uni-
dad, podrás ver la lectura del sensor en este campo.
Este campo sólo será visible si hay un sensor conectado.
4. NIVEL DE CARGA DE LA BATERÍA DE LA BICICLETA
(%)
Además de la barra de estado de carga de la batería, que
permanece siempre visible en la mitad de la pantalla, en
este campo tendrás una lectura más precisa en formato de
porcentaje del nivel de la batería del sistema X35.
5. DISTANCIA RECORRIDA EN LA ACTIVIDAD/ODOME-
TRÍA DEL SISTEMA
En esta pantalla el ciclocomputador mostrará de manera
alterna la distancia recorrida desde que se ha empezado
a registrar la actividad y, si has conectado una bicicleta
con el sistema X35 de Mahle Ebikemotion®, la odometría
total del sistema.
Puedes resetear a cero la distancia recorrida en la activi-
dad (junto con el tiempo transcurrido). Consulta la sección
Modicar Datos.
8.5. NAVEGACIÓN ENTRE CAMPOS DE DATOS
Si has conectado la unidad a una bicicleta eléctrica con el sistema X35, puedes cambiar
entre los niveles de asistencia mediantes los botones laterales del display (A) (C). Pulsa
el botón derecho (C) para subir de nivel de asistencia de uno en uno hasta el nivel 3
(L3). Pulsa el botón izquierdo (A) para bajar el nivel de asistencia de uno en uno hasta el
nivel de no asistencia (L0). Los niveles de asistencia disponibles, y su visualización en el
ciclocomputador son.
Nivel 0. Sin asistencia (L0)
Nivel 1. Eco (L1)
Nivel 2. Medium (L2)
Nivel 3. Turbo (L3)
Tras dos segundos sin pulsar los botones de cambio de nivel de asistencia, el sistema
permanecerá en el último nivel seleccionado y la pantalla volverá a mostrar la velocidad
actual.
El nivel de asistencia seleccionado será visible mediante un símbolo en la parte izquierda
de la pantalla:
Nivel 0. Sin símbolo
Nivel 1. Flecha hacia abajo
Nivel 2. Línea horizontal
Nivel 3. Flecha hacia arriba
— Niveles de asistencia
8.6. CAMBIAR NIVELES DE ASISTENCIA
DEL SISTEMA X35 DE MAHLE EBIKEMOTION®

16 | ORBEA TECHNICAL MANUAL
1. MODIFICAR LA CIRCUNFERENCIA DE LA RUEDA.
AVISO. Este dato sólo afectará a la lectura de velocidad si se empareja un sensor de
velocidad ANT+ a la unidad. Si hay un sensor conectado, la lectura de velocidad vendrá
dada por el sensor en base a la señal del mismo y el dato de circunferencia seleccionado.
Si no hay un sensor de velocidad conectado, la lectura de velocidad vendrá dada por
defecto por el sistema X35 de la bicicleta conectada y el dato de circunferencia será
irrelevante.
PASOS:
1. Pulsa el botón central (B) hasta llegar a la pantalla de distancia recorrida/odo-
metría del sistema.
2. Vuelve a pulsar durante 2 segundos el botón central (B) hasta que se muestre la pan-
talla Clear Distance (Clr dist).
3. Pulsa una vez el botón central (B) hasta que se muestre la pantalla de modicación de
circunferencia de la rueda (Len).
4. Vuelve a pulsar durante dos segundos el botón central (B) hasta que “Set” sea visible
en la pantalla.
5. Utiliza los botones laterales (A y C) para ajustar la circunferencia de la rueda a la
deseada.
6. Espera a que la unidad vuelva a la pantalla principal de manera automática.
2. RESETEAR A CERO LA DISTANCIA RECORRI-
DA EN LA ACTIVIDAD
1. Pulsa el botón central (B) hasta llegar a la pantalla
de distancia recorrida/odometría del sistema.
2. Vuelve a pulsar durante 2 segundos el botón central (B)
hasta que se muestre la pantalla Clear Distance (Clr dist).
1. Pulsa el botón central (B) hasta llegar a la pantalla
de distancia recorrida/odometría del sistema.
2. Vuelve a pulsar durante 2 segundos el botón central (B)
hasta que se muestre la pantalla Clear Distance (Clr dist).
3. Pulsa dos veces el botón central (B) hasta que se mues-
tre la pantalla de modicación de las unidades de medida
(Unit).
8.7. MODIFICAR DATOS. CIRCUNFERENCIA,
UNIDADES DE MEDIDA Y DISTANCIA RECORRIDA
— Modicar la circunferencia de la rueda.
— Resetear la distancia recorrida.
— Modicar las unidades de medida.
2 seg. 2 seg.
2 seg. 2 seg.
4. Pulsa durante dos segundos el botón central (B) hasta
que “Set” sea visible en la pantalla.
5. Pulsa el botón central (B) para cambiar entre metros
(m) y pulgadas (in).
6. Una vez seleccionada la unidad deseada, no toques
ningún botón. Tras dos segundos la unidad volverá a la
pantalla principal de manera automática y verás los cam-
bios realizados en la parte superior derecha de la pantalla.
3. Vuelve a pulsar durante 2 segundos el botón central (B)
hasta que el la lectura de distancia recorrida muestre cero.
Este método también resetea el valor de tiempo transcu-
rrido en la actividad
4. Espera a que la unidad vuelva a la pantalla principal de
manera automática.
2 seg. 2 seg.x2
3. MODIFICAR LAS UNIDADES DE MEDIA (Km/h>Mi/h)

18 | ORBEA TECHNICAL MANUAL
Mediante la conexión ANT+ LEV, el sistema X35 de MAHLE Ebikemotion es capaz de
transmitir a los ciclocomputadores compatibles si el sistema ha entrado en error, así
como cuando el sistema se ha recuperado de un error, para su visualización en el display.
- Errores en el sistema X35: Cuando el sistema ha entrado en error, éste se visualizará
en el display con el código genérico E255. Todos los códigos de error (independientemen-
te del código de error especíco del sistema) serán mostrados con el código E255 en el
ciclocomputador. Para conocer el código de error especíco del sistema y poder realizar
el diagnóstico y reparación, conecta el sistema X35 a la aplicación para móviles de usua-
rio y/o distribuidores de MAHLE Ebikemotion®.
- Recuperación de errores: Cuando el sistema se ha recuperado de un error, se visuali-
zará en los displays compatibles el código E000 en el momento de encender la bicicleta y
emparejarla con el display. El código E000 desaparecerá a los pocos segundos. El sistema
no tiene errores.
8.8. VISUALIZACIÓN DE ERRORES
DEL SISTEMA X35
— Código de error E255. — Código de recuperación de error E000.
ORBEA participa activamente en Facebook y Twitter con
su fantástica comunidad global de ciclistas. ¿Busca algún
lugar para andar en bici o pasar sus vacaciones? Seguro
que alguien le ofrece ideas interesantes:
FACEBOOK
www.facebook.com/OrbeaBicycles
TWITTER
www.twitter.com/Orbea/
YOUTUBE
Visite el canal de Orbea en YouTube; en él encontrará di-
versos vídeos técnicos y de conguración de gran utilidad:
www.youtube.com/user/OrbeaBicycles
INSTAGRAM
www.instagram.com/orbeabicycles
ORBEA CONTENT
Vea y descargue fotos, vídeos y documentos.
content.orbea.com/us-en/
INFORMACIÓN ADICIONAL
BLOG ORBEA
www.orbea.com/es-es/blog/
DISTRIBUIDORES ORBEA
Nuestros distribuidores poseen una elevada especialización,
por lo que le ayudarán a congurar y mantener su bicicleta
Orbea. Puede encontrar una relación completa de distribui-
dores Orbea en nuestro sitio web:
www.orbea.com/us-en/dealers/?country=INT
CONTACTO
www.orbea.com
Orbea S. Coop. 2020. All rights reserved.

OC ANT+ LEV DISPLAY20 | ORBEA ORBEA | 21TECHNICAL MANUAL
INDEX
1. OVERVIEW 22
2. X35 SYSTEM COMPATIBILITY INFORMATION
- COMPATIBILITY WITH RANGES PREVIOUS TO MY2020 23
3. COMPONENTS INCLUDED 25
4. TECHNICAL SPECIFICATIONS 26
5. WARNINGS 26
6. WARRANTY 26
7. INSTALLATION 27
8. USING THE OC ANT+ LEV DISPLAY 28
8.1. TURNING THE DISPLAY ON
8.2. SWITCHING THE DISPLAY OFF
8.3. REPLACING THE BATTERY
8.4. EMPAREJAR CON SENSORES ANT+
- PAIRING TO A X35 SYSTEM EQUIPPED BICYCLE
- PAIRING TO OTHER ANT+ SENSORS
8.5. NAVIGATION BETWEEN DATA FIELDS
8.6. CHANGING BETWEEN ASSIST LEVELS
8.7. SETTINGS. CHANGING THE WHEEL CIRCUMFERENCE,
MEASURING UNITS AND DISTANCE.
8.8. X35 SYSTEM ERRORS VISUALIZATION

OC ANT+ LEV DISPLAY22 | ORBEA ORBEA | 23TECHNICAL MANUAL
1. OVERVIEW
The OC (Orbea Components) ANT+ LEV display is de-
signed to be used with Orbea ebikes equipped with the
MAHLE Ebikemotion® X35 system. The head unit pairs to
the system via ANT+ LEV and allows for the visualization
of the system´s information, while also enabling the rider
to change between assist levels from the unit itself. The
system´s most relevant information can thus be accessed
without using the MAHLE Ebikemotion® mobile app.
The use of the MAHLE Ebikemotion® mobile app to record
an activity, navigation and other functions is still possible
while the system is connected via ANT+ to the OC display.
Both connections may be used at the same time, allowing
the rider to enjoy all the functionalities and data visua-
lization without having to mount the smartphone on the
handlebar during the activity.
Other ANT+ sensors can also be connected to the OC
ANT+ head unit for data visualization while riding (caden-
ce, speed, heart rate, etc).
The OC ANT+ LEV display can be used on ebikes from
other brands equipped with an ANT+ ready MAHLE Ebike-
motion® X35 system.
2. X35 SYSTEM
COMPATIBILITY INFORMATION
The OC ANT+ LEV display can only be paired to Orbea
ebikes that are equipped with an ANT+ version of the X35
system.
All X35 equipped Orbea ebikes from MY2020 onwards
have ANT+ LEV connectivity from the factory. If your bicy-
cle belongs to the 2020 or following ranges, the OC ANT+
LEV display can be connected without any updates to your
system. If in doubt of what range your ebike belongs to,
consult with us or with your Orbea distributor.
COMPATIBILITY WITH RANGES
PREVIOUS TO MY2020
Some iterations of the MAHLE Ebikemotion® X35 system
can be updated to gain ANT+ LEV connectivity with the use
of an ANT+ LEV device. Depending on the specic model,
and thus on the system´s conguration on a given bicycle,
the device needed can vary:
ANT+ LEV DONGLE
For Orbea ebikes that do not use the Iwoc Trio handlebar
remote.
The ANT+ LEV dongle is installed within the bicycle´s top
tube, and connected to the Iwoc One remote and the in-
ternal battery.
— Iwoc Trio+ — Dongle ANT+ LEV
The compatible models with this device are Orbea Gain M
and Gain D with drop road handlebars.
IWOC TRIO+ REMOTE
For Orbea ebikes that use the Iwoc Trio handlebar remote.
The Iwoc Trio handlebar remote must be replaced with the
new Iwoc Trio+. The Trio+ provides the system with ANT+
LEv connectivity.
The compatible models with this device are Orbea Gain F
(Urban), Optima E and EMX24.
— ANT+ LEV ready X35 battery.

OC ANT+ LEV DISPLAY24 | ORBEA ORBEA | 25TECHNICAL MANUAL
— Hirose DF63 and Cusmade C1206 connectors.
To nd out what type of connectors the X35 system on your Orbea ebike uses, remove
the plastic cover on the underside of the bottom bracket area and locate the cable that
connects the internal battery to the charging point. If the connector between these two
cables is a round Cusmade C1206, the system is compatible with the installation of the
ANT+ LEV dongle or the Iwoc Trio+ remote. If the connector is a square Hirose DF63, the
system cannot be updated to gain ANT+ LEV connectivity without replacing the complete
electric system (internal battery, PASS sensor, charging point and remotes).
If in doubt about what version of the X35 system is installed on your bicycle, contact
Orbea or your distributor.
Consult the ANT+ LEV dongle and Iwoc Trio+ installation and user manual from our web-
site .
Not all versions of the MAHLE Ebikemotion® X35 system can be updated to gain ANT+
LEV connectivity by using the ANT+ LEV dongle or the Iwoc Trio+ remote.
Only versions of the system that use Cusmade C1206 round connectors can be updated
by installing these components. Versions of the X35 system which use Hirose DF63 squa-
re connectors are not compatible with the ANT+ LEV dongle or the Iwoc Trio+ remote.
3. COMPONENTS INCLUDED
- OC ANT+ LEV head unit.
- Mounting bracket with rubber base.
- Rubber xing band.
- CR2032 battery
- Quick guide.

OC ANT+ LEV DISPLAY26 | ORBEA ORBEA | 27TECHNICAL MANUAL
4. TECHNICAL
SPECIFICATIONS
Head unit measurements: 60 x 38 x 15mm
Screen measurements: 26 x 33 mm (1,65”)
Weight: 24 gr. (CR2032 battery)
Water resistance: 1 m.
Connectivity: ANT+
ANT+ frequency: 2.4 GHz ANT+®
Connection range: 3 m.
Temperature of use: -10ºC to 60ºC
Battery type: CR2032 (contains perchlorate). Battery included
Battery life: Up to 100 hours aprox.
Conformity: This item complies with standard 1999/5/CE
5. WARNINGS
6. WARRANTY
- Do not submerge or high pressure wash to avoid damage to the electronic components.
- Avoid falls or direct impacts to the components.
- Do not expose to high temperatures.
The OC ANT+ LEV display is covered against manufacturing defects and non-conformity
of the materials for a 2 year period after the purchase of the device or the Orbea bicycle
it was originally purchased with.
Damages derived from incorrect use or installation, impacts and/or not following the
recommendations of use are not covered by the warranty.
In case of a problem with your device, contact your Orbea distributor. You can nd a
complete list of our distributors at www.orbea.com
7. INSTALLATION
The display can be installed either on the handlebar or the stem (if the length of the stem
allows for it). Place the mounting bracket on the stem or handlebar and secure it in place
with the rubber band included so the recess face to the front and the rear of the bicycle
To install the head unit onto the bracket, align the tabs on the back of the display with the
recess on the bracket and turn the unit 90º until it is securely xed in place.
The OC ANT+ LEv display is compatible with Garmin® head units brackets.
— Installation on handlebar and stem.
A
B

OC ANT+ LEV DISPLAY28 | ORBEA ORBEA | 29TECHNICAL MANUAL
8. USING THE OC ANT+ LEV DISPLAY
OPE N
AB
D
C
AC/Reset
CR 2032
8.1. TURNING THE DISPLAY ON
To turn the display on, press the center button (B). To pair the unit to a bicycle or other
ANT+ sensors, make sure they are on and active before turning on the display. If the
bicycle or other sensors are off and the head unit has not found them, turn them on and
press the reset button on the back of the display (D).
8.2. SWITCHING THE DISPLAY OFF
The head unit will remain on while there is an active ANT+ connection with the bicycle or
other sensors, and will automatically switch itself off after 2 minutes from the moment the
connection is lost (Sleep).
Simply switch the bicycle off and the display will switch itself off after 2 minutes.
8.3. REPLACING THE BATTERY
When the CR2032 battery is depleted (the battery level is displayed on the top left hand
corner of the screen), remove the battery cover from the back of the head unit pulling
upwards from the tab on the lower part of the battery cover. Remove the old battery and
install a new one. The face of the battery with the lettering indicating the battery´s charac-
teristics (+) must be facing upwards.
Replace the battery cover aligning the tab on the cover with the lower recess and press
rmly until the cover is securely xed in place. Turn the display on and check that the
battery level is correct.

OC ANT+ LEV DISPLAY30 | ORBEA ORBEA | 31TECHNICAL MANUAL
8.4. PAIRING ANT+ SENSORS
PAIRING AN EBIKE EQUIPPED WITH
THE MAHLE EBIKEMOTION® X35 SYSTEM.
For the OC ANT+ LEV display, the X35 system is an ANT+ sensor, for which the data
visualization elds on the head unit have been optimized.
To pair with the display, rst turn the ebike on by pressing on the Iwoc One or Iwoc Trio
remotes. Once the bicycle is on, press the center button (B) on the display to switch it
on. The screen will show the message “E-bi” when it starts searching for an ebike. Next
it will show the message “Pair” while it tries to make the connection. If the connection
is successful, the X35 internal battery level bar will be visible across the center of the
screen, the speed data eld will show the current speed and the current assist level will
be displayed with a symbol.
If the pairing was not successful, make sure the bicycle is on and press the reset button
(D) on the back of the display to start the process over.
— E-bi — Pair — Bicycle connected
PAIRING TO OTHER ANT+ SENSORS.
The OC ANT+ LEV head unit can be paired to other ANT+
sensors besides the ebike for the visualization of riding
data on the screen.
To pair other sensors, check that these are active before
pressing the center button (B) on the display:
- Heart rate sensor: Put the heart rate sensor on in the
appropriate position on your body. Lightly wet if necessary
the contact point between the sensor and your skin for a
better reading.
- Speed sensor: Turn by hand the wheel the speed sensor
is installed on to activate the ANT+ sensor.
- Cadence sensor: Turn by hand the cranks to activate the
ANT+ cadence sensor.
Turn the head unit on and wait a few seconds until the
display recognizes the sensors. The pairing can take up
to 20 seconds.
The display with recognize how many ANT+ sensors are
connected and show the message “Ant(n), where “n” is the
number of sensors paired to the head unit:
Ant 1: One sensor connected. Normally the ebike.
Ant 2: Two sensors connected. Normally de ebike and one
more ANT+ sensor.
Ant3: Three sensors connected. Normally the ebike and
two more ANT+ sensors.
— Bicycle and two other sensors connected.
WARNING. MAHLE EBIKEMOTION® X35 MOBILE APP
AND ANT+ SENSORS.
The connection of ANT+ sensors to the OC ANT+ LEV dis-
play does not mean that the data from these sensors is
being recorded by the MAHLE Ebikemotion® X35 mobile
app if it is being used while riding via Bluetooth®. The only
data transmitted back from the display to the X35 system
is the assist level change using the arrow buttons on the
head unit (A) (C). The data from other sensors (cadence,
heart rate, etc) is not visible or recorded on the app as
part of an activity.
The mobile app connects to the X35 system via Bluetooth®
4.0, independently of the ANT+ LEV connection between
the OC display and the system.
If you wish, for example, to connect a heart rate sensor to
the mobile app to control the system and data recording,
the heart rate sensor must use a Bluetooth® 4.0 connec-
tion. There are several dual connection (ANT+ and Blue-
tooth®) heart rate sensors in the market.

OC ANT+ LEV DISPLAY32 | ORBEA ORBEA | 33TECHNICAL MANUAL
Once the bicycle and/or other sensors are paired, you can
navigate between data elds in the display by pressing re-
peatedly the center button (B). The data is shown in the
following order:
1. TIME IN MOTION DURING THE ACTIVITY
The display starts counting the activity time automatically
as soon as it receives a speed reading from the X35 system
or an ANT+ speed sensor. The time will pause when the
speed is 0 km/h, and will automatically resume when there
is a speed reading again.
The activity time can be reset by pressing and holding the
left button (A) for 3 seconds while the display is showing
the activity time eld. This method does not reset the dis-
tance travelled in the activity.
2. HEART RATE
If an ANT+ heart rate sensor has been connected, the data
from that sensor will be visible in this eld.
This eld will only be visible if there is a sensor connected.
— Press button B to navigate between elds.
1. Activity time 2. Heart rate 3. Cadence 4. Battery level 5. Distance/Odometry
1. Time in motion during the activity.
2. Heart rate (if a sensor has been paired)
3. Cadence (if a sensor has been paired)
4. X35 battery charge level (in %)
5. Distance travelled in the activity / Total odometry of the
bicycle..
3. CADENCE
If an ANT+ cadence sensor has been connected, the data
from that sensor will be visible in this eld.
This eld will only be visible if there is a sensor connected.
4. X35 BATTERY CHARGE LEVEL (%)
Besides the battery charge level bar, that will be always
visible across the center of the screen, in this eld a more
accurate reading of the battery level will be shown as a
percentage.
5. DISTANCE TRAVELLED IN THE ACTIVITY / TOTAL
ODOMETRY OF THE BICYCLE
On this screen, the head unit will alternately show the
distance travelled from the moment the activity is being
recorded and, if an X35 equipped ebike is connected, the
total odometry of the system.
The distance travelled can be reset to zero (together with
the activity time). See the Setting section of this manual.
8.5. NAVIGATION BETWEEN DATA FIELDS
If an ebike equipped with the X35 system is connected, the assist levels can be changed
from the OC ANT+ LEV display by pressing on the left and right arrow button (A) (C). Press
the right button (C) to change to a more powerful assist level until level 3 is reached (L3).
Press the left button (A) to change to a less powerful assist level until the no assist level is
reached (L0). The available assist levels, and their visualization on the screen are:
Nivel 0. No assist (L0)
Nivel 1. Eco (L1)
Nivel 2. Medium (L2)
Nivel 3. Turbo (L3)
After a few seconds from the moment the assist level was selected, the system will remain
on the selected level and the screen will go back to show the current speed. The selected
assist level will be displayed on the left part of the screen by a symbol:
Nivel 0. No symbol
Nivel 1. Bottom pointing arrow
Nivel 2. Horizontal line
Nivel 3. Top pointing arrow
— Assist levels
8.6. CHANGING BETWEEN ASSIST LEVELS

34 | ORBEA TECHNICAL MANUAL
1. CHANGING THE WHEEL CIRCUMFERENCE.
WARNING. Modifying this value will only affect the speed reading if an ANT+ speed sen-
sor has been paired to the head unit. If a speed sensor is connected, the current speed
reading will depend on the value given by the speed sensor depending on the selected
wheel circumference. If no speed sensor is connected, the current speed eld will show
by default the speed value given by the X35 system, and the circumference value will be
irrelevant.
STEPS:
1. Press the center button (B) until the Distance travelled/Odometry is shown.
2. Press and hold for 2 seconds the center button (B) until the Clear Distance (Clr dist)
message is shown.
3. Press again the center button (B) until the text Length (Len) is shown.
4. Press and hold for 2 second the center button (B) until “Set” is visible on the screen.
5. Use the left and right arrow button (A and C) to adjust the value to the desired circum-
ference.
6. Wait until the head unit automatically goes back to the main screen.
8.7. SETTINGS. CHANGING THE WHEEL CIRCUMFERENCE,
MEASURING UNITS AND DISTANCE
— Change the wheel circumference.
2 seg. 2 seg.
2. RESET THE ACTIVITY DISTANCE TO ZERO
1. Press the center button (B) to reach the distance
travelled/odometry screen.
2. Press and hold the center button (B) for 2 seconds until
the text Clear Distance (Clr dist) is shown.
1. Press the center button (B) to reach the distance
travelled/odometry screen.
2. Press and hold the center button (B) for 2 seconds until
the text Clear Distance (Clr dist) is shown.
3. Press twice the center button (B) until the text Unit is
shown.
4. Press and hold for two seconds the center button (B)
until the text Set is shown.
— Reset the distance.
— Changing the measuring units.
2 seg. 2 seg.
5. Press the center button (B) to change between meters
(m) and inches (in).
6. Once the desired measuring unit is selected, do not
press any other button. After 2 seconds the unit will au-
tomatically go back to the main screen and the changes
will be visible on the top right hand corner of the screen.
3. Press and hold the center button (B) for 2 seconds until
the distance travelled is reset to zero.
This method also resets the activity time.
4. Wait until the unit automatically goes back to the main
screen.
2 seg. 2 seg.x2
3. CHANGING THE MEASURING UNITS (Km/h>Mi/h)
2 sec.
2 sec. 2 sec.
2 sec.
2 sec. 2 sec.

OC ANT+ LEV DISPLAY36 | ORBEA ORBEA | 37TECHNICAL MANUAL
Through the ANT+ LEV connection, errors on the MAHLE Ebikemotion® X35 system can
be displayed on the compatible head units. If the system has recovered from a previous
error, this can also be displayed in the head unit..
- Errors in the X35 system: If there is an error code in the system, this will be shown in
the head unit by the generic error code E255. All system error codes (regardless of the
specic error code in the system) will be shown by the code E255 in the head unit. Con-
nect the X35 system to the MAHLE Ebikemotion® X35 mobile apps (User or Dealer app) to
access the system´s specic error code and the diagnostics/repair method.
- Error recovery visualization: If the system has recovered from an error, this will be
shown in the OC ANT+ LEV display by the generic code E000 when the system is switched
on and paired with the display. The E000 code will disappear after a few seconds. The
system has no errors.
8.8. X35 SYSTEM ERRORS
VISUALIZATION
— Generic error code E255. — Error recovery code E000.
Orbea S. Coop. 2020. All rights reserved.
ORBEA participates actively on facebook and Twitter with
our fantastic global community of riders. Looking to nd
spots to ride or plan a vacation? Someone will have the
answers:
FACEBOOK
www.facebook.com/OrbeaBicycles
TWITTER
www.twitter.com/Orbea/
YOUTUBE
Visit our Orbea Channel on You Tube for a variety of helpful
setup and tech videos:
www.youtube.com/user/OrbeaBicycles
INSTAGRAM
www.instagram.com/orbeabicycles
ORBEA CONTENT
View and download photos, videos and documents.
content.orbea.com/us-en/
ADDITIONAL INFORMATION
BLOG ORBEA
www.orbea.com/es-es/blog/
YOUR ORBEA DEALER
Our dealers are experts and should be able to assist you
with setting up and maintaining your Orbea bicycle. A com-
plete listing of Orbea dealers and distributors can be located
on our website:
www.orbea.com/us-en/dealers/?country=INT
CONTACT
www.orbea.com

WWW.ORBEA.COM
Table of contents
Languages:
Other Orbea Bicycle Accessories manuals
Popular Bicycle Accessories manuals by other brands

EVBIKE
EVBIKE EVBAT48V9A installation manual

by.schulz
by.schulz Stem Alpha +10 SDS Compact instructions

ACID
ACID PACK PRO 11/15 quick start guide

Grin Technologies
Grin Technologies Phaserunner V3 quick start guide

Qstarz
Qstarz SR-Q2100 Quick installation guide

Shimano
Shimano deore XT Technical service instruction