Sixpack Z-TRIX CF User manual

EN
User Manual
Grips

Intended use 6
Compatibility 6
Guarantee / Crash Replacement 6
Care and maintenance 7
Mounting the grips 8
Content

6 7
Sixpack grips must only be used on bicycles.
Intended use
The grips are compatible with bicycle handlebars with a diameter
of 22.2 mm.
The grips must not be modied.
The statutory warranty applies to all components. If damage occurs outside
the warranty, contact us and we will try to nd an individual solution.
Compatibility
Guarantee / Crash Replacement
The following activities must be carried out regularly:
• Regularly check the tight t of the grips and the tightening torque of the
clamping screws.
• Clean the grips regularly with clean water or soapy water and check for
wear and damage. Replace heavily worn or damaged grips.
• Check / replace the end plugs.
• If you have any doubts or questions, you must seek the help of a trained
bicycle mechanic or the Sixpack Service!
Care and maintenance
45°- 65°
8 9
• The handlebar manufacturer's user manual must be checked for
tightening torque and compatibility.
• Grips must not be shortened.
• The grips are designed exclusively for use on bicycle handlebars
with a diameter of 22.2 mm.
• If you have any doubts or questions, you must seek the help of a
trained bicycle mechanic or the Sixpack Service!
Mounting the grips
DANGER
Danger of accident due to incorrectly
mounted grips! 3
Remove the old grips and clean and degrease the surfaces on the
handlebar.
1
2
6
4
5
Check that the new grips can be pushed fully onto the handlebars.
If necessary, move the control elements on the handlebars (shift
lever, brake lever, etc.).
Check the tight t of the grips.
It shall not be possible to twist the grips by hand.
Check the position of the control elements and adjust them if
necessary. The control elements must be mounted according to
the specications of the respective manufacturer or handlebar
manufacturer.
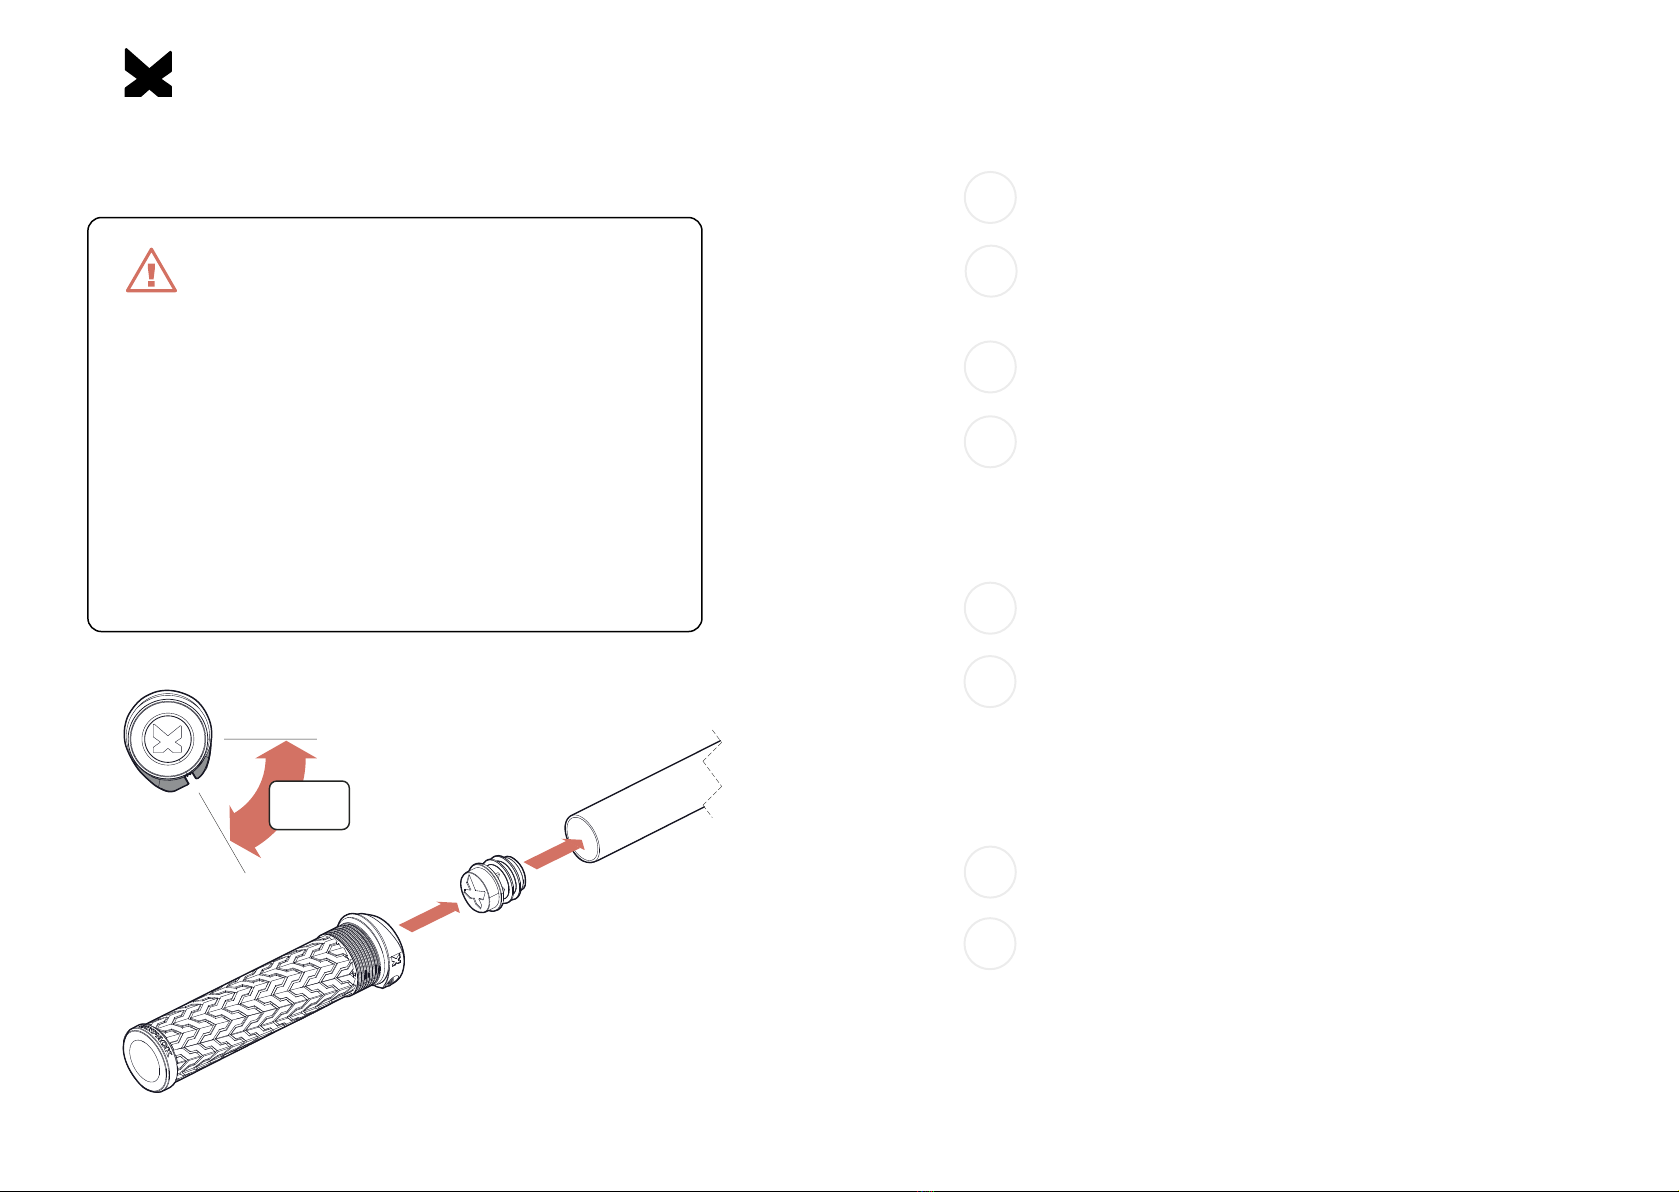
Insert the end plugs into the handlebar. Make sure that the
direction of the logo is correct.
Push the grips completely onto the handlebar.
• Mount the grip with the "L" marking on the left and the grip with
the "R" marking on the right side of the handlebar.
• The grip is fully attached when the grip is ush with the end
plug.
Tighten the clamping screws of the grips.
• Plastic collar with Torx 15 clamping screw: Tighten the
clamping screw until the grip can no longer be twisted. The
tightening torque of 1.5 Nm must not be exceeded.
• Aluminum collar with 3 mm hex clamping screw: Tightening
torque 2.5 to 3 Nm.
7
Align the grips so that the clamping slot points backwards by
about 45° to 65°.
8
This manual suits for next models
17
Other Sixpack Bicycle Accessories manuals


Popular Bicycle Accessories manuals by other brands

Bryton
Bryton rider 310 user manual

Lezyne
Lezyne LED ZECTO Series quick start

Steco
Steco Flow Assembly manual

Wuxi LingDe Microelectronics
Wuxi LingDe Microelectronics LD902GU instruction manual

Burley
Burley NOMAD RACK Owner's instruction and safety manual

aerosensor
aerosensor Aerodynamic Cycling System instructions

Tout Terrain
Tout Terrain STREAMLINER owner's manual

BAFANG
BAFANG DP E08.CAN user manual

C.B.T. Italia
C.B.T. Italia TFT 850C instruction manual

buratti meccanica
buratti meccanica Clorofilla Trail Use and maintenance manual

Shimano
Shimano SG-8R20 Service instructions

Bosch
Bosch BULLS KIOX300 Translation of original operating instructions


