manuals.online logo
Brands
  1. Home
  2. •
  3. Brands
  4. •
  5. Oreck
  6. •
  7. Vacuum Cleaner
  8. •
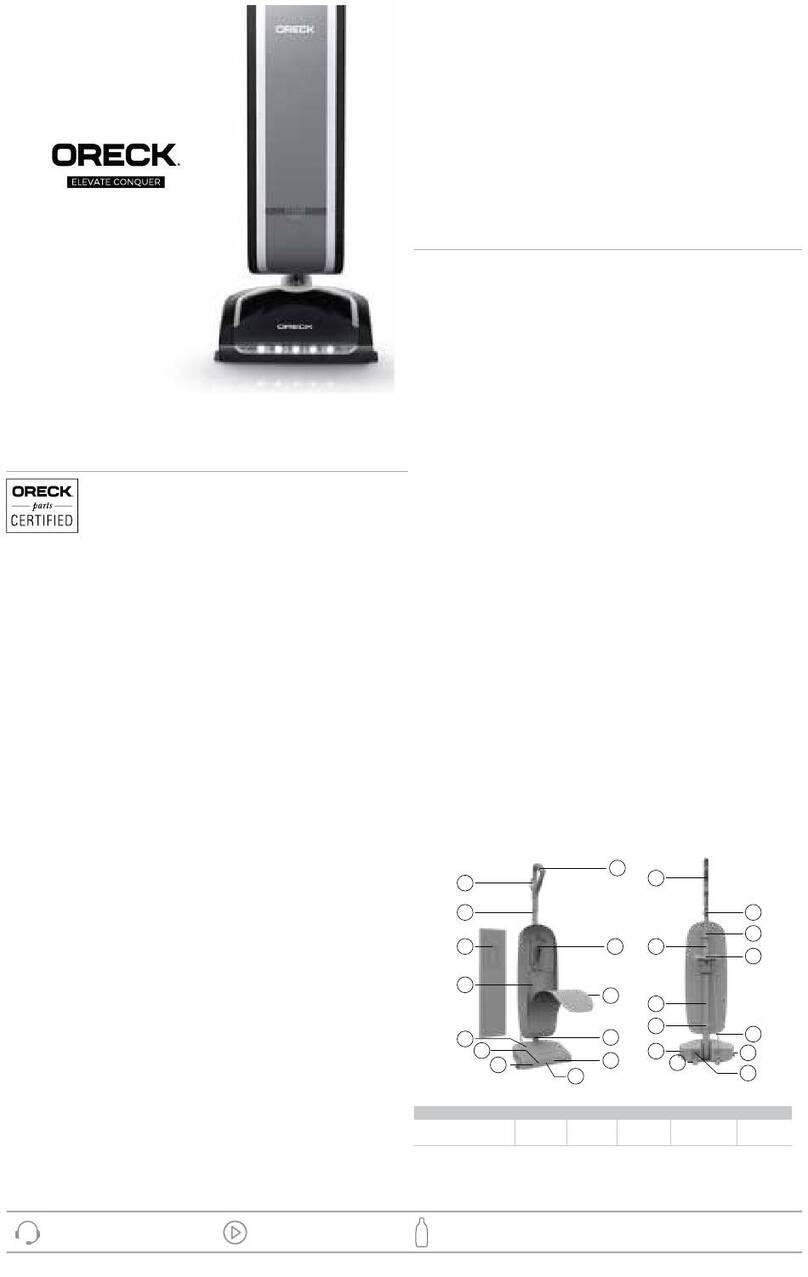
  9. Oreck ELEVATE Control UK30100PC Operating instructions

Oreck ELEVATE Control UK30100PC Operating instructions

1 | P a g e
Service Instructions
Oreck® ELEVATE Control™:
UK30100PC, UK30100, UK30100COM
Technical Service –April 2016
2 | P a g e
Table of contents
Base Assembly - Section 1 –Page 4
Belt / Brushroll - Section 2 –Page 4
Motor / PCB - Section 3 –Page 4 / 5
Motor Assembly / Intake Pivot Assembly / Fan Housing - Section 4 –Page 5 / 6
Handle Detent - Section 5 –Page 6
LED PCB - Section 6 –Page 6
Power PCB - Section 7 –Page 6 / 7
Cord Assembly / Power Cord - Section 8 –Page 7
Bag Assembly - Section 9 –Page 8
Carry Handle - Section 10 –Page 8
Wiring Diagram - Section 11 –Page 9
Electrical Troubleshooting - Section 12 –Page 10 / 11
3 | P a g e
Exploded View
4 | P a g e
1. Base Assembly
a. Remove 7 screws and lift base assembly off
of unit. This requires a T20 torx driver.
b. The base is stocked as an assembly which
includes the components shown below.
Once the base assembly is removed the
internal components can be accessed.
2. Belt / Brushroll
a. Remove edge brush holder to access belt –
2 screws.
Remove belt by sliding it off of the motor
shaft and brushroll pulley.
Brushroll
a. Remove base assembly –section 1.
b. Slide Brushroll out of baseplate.
Upon reassembly position brushroll with
thread guard with no notches upward for
worn brushroll and notches upward for new
brushroll. Both sides must be the same.
5 | P a g e
3. Motor PCB
a. Motor PCB is held in position by two
screws. Terminals connections are noted.
4. Motor Assembly / Intake Pivot Assembly /
Fan Housing
a. Remove base assembly –section 1.
b. Separate lower handle from fan housing
assembly –Rotate lower spine connector
CCW to remove.
c. Remove three screws that secure motor
and intake pivot assembly.
d. Lift motor / fan housing assembly out of
position.
e. Disconnect motor lead wires –2 wire
connectors.
f. To separate motor and fan chamber
assembly locate and remove fan nut by
securing the armature shaft and turning the
nut clockwise –LH Thread.
g. Slide fan housing off of motor.
NOTE: Fan housing removal tool (part number
75377-01) and the upright collar tool (part
number COLLARTOOL) are available to order
–however these tools are not required to
complete the disassembly.
h. Remove fan by removing fan seal –press
fit.
Note –felt seal and spacer must be in
position on motor at reassembly.
6 | P a g e
Intake Pivot Assembly
a. Intake pivot assembly stocked with felt
inlet seal. Both seals are available separately.
5. Handle Detent
Located under the Motor / Fan Chamber
Assembly.
a. Remove base assembly –section 1.
b. Remove motor / fan chamber assembly.
c. Remove handle detent –2 screws.
6. LED PCB
a. Remove base assembly –section 1.
b. Disconnect LED PCB connection at main
PCB.
c. Remove two screws located in brushroll
cavity –one in each front corner.
d. Turn unit over and lift upward on fascia to
remove.
e. Remove headlight lens –lift up slightly on
cosmetic strip to allow clearance and remove
headlight lens.
f. Remove LED PCB.
7. Power PCB
a. Remove five screws shown in upper handle
–one holding the cord clip.
7 | P a g e
b. Remove cord clip to access sixth screw and
remove.
c. Lift off handle cover.
d. Remove switch button –snap fit.
e. Disconnect yellow and red lead at terminal
connections in top of handle and slightly
spread handle seat to remove Power PBC.
8. Cord Assembly / Power Cord
a. Remove handle cover –section 7.
b. Locate and remove cord assembly lead
wires at applicable terminals - black at top of
handle and white at midpoint of handle.
c. Feed cord strain relief out of handle to
remove Cord Assembly.
Power Cord
a. Remove lead wires at white and black to
yellow terminals and feed power cord out of
handle.
b. Remove base assembly –section 1.
c. Disconnect power cord connector at PCB.
d. Remove strain relief from main body and
feed power cord out of position.
8 | P a g e
9. Bag Assembly
a. Pull bag cardboard collar down to release
plastic bag dock from connector. Remove
paper bag.
Note: A boss was added to the rear bag dock
to prevent usage of unauthorized bags. A
notch was added to the bag assembly to
allow the bag to be locked into position.
b. Separate bag dock and bag dock rear by
pressing inward on bag dock rear to unhinge.
c. Carefully spread forks on bag dock rear and
work bag dock rear upward and off of bag
duct.
d. Slide bag assembly off unit.
10. Carry Handle
a. Remove screw in carry handle retainer.
b. Spread handle retainer apart and slide it off
of the connector assembly.
c. Remove carry handle –trapped in position
by the handle retainer.
9 | P a g e
11. Wiring Diagram
10 | P a g e
12. Electrical troubleshooting
A. Motor will not run when switch is in the on position.
1. Disconnect the power cord connector from the circuit board.
2. Check for continuity between the wide blade of the attachment cord and the white connection
terminal on the circuit board. This will show continuity regardless of the switch position.
3. Check for continuity between the narrow blade on the attachment cord and the black
connection terminal on the circuit board. This will show continuity when the switch is in the on
position and no continuity when the switch is in the off position.
If continuity exists, go to step 4.
If 1 or 2 above show no continuity it indicates a failure of the power cord, the power line cord, or
power PCB.
a. Check power line cord by checking for continuity between the white connection terminal on the
circuit board and the white lead at the terminal connection in the handle. Check for continuity
between the black connection terminal and the black lead wire that connects to the red lead from
the switch. If continuity exists go to step 4. If not, replace the power line cord.
11 | P a g e
b. Check power cord by checking for continuity between the wide blade on the power cord and the
white lead at the terminal connection in the handle and the narrow blade on the power cord to the
black lead at the terminal connection in the handle. If continuity exists go to step 4. If not, replace
the power cord.
c. Check the power PCB by checking for continuity between the yellow and red lead wires. Cycle the
switch and check for continuity. If continuity exists go to step 4. If not, replace the power PCB.
4. Check voltage output from the circuit board.
a. Remove Brushroll and Belt
b. Check for voltage at black and white lead wire connections at motor.
d. Voltage should read 120VAC. If voltage exists replace motor assembly. If no voltage exists,
replace PCB.

This manual suits for next models

2

Other Oreck Vacuum Cleaner manuals

Oreck XL2200RS User manual

Oreck

Oreck XL2200RS User manual

Oreck U3980H2 User manual

Oreck

Oreck U3980H2 User manual

Oreck XL7705ECB User manual

Oreck

Oreck XL7705ECB User manual

Oreck XL 2310RS User manual

Oreck

Oreck XL 2310RS User manual

Oreck APU255 User manual

Oreck

Oreck APU255 User manual

Oreck XL PLATINUM 79011-01REVB User manual

Oreck

Oreck XL PLATINUM 79011-01REVB User manual

Oreck XLPRO6 User manual

Oreck

Oreck XLPRO6 User manual

Oreck CC1400A Guide

Oreck

Oreck CC1400A Guide

Oreck U2251 User manual

Oreck

Oreck U2251 User manual

Oreck compact canister Vaccum User manual

Oreck

Oreck compact canister Vaccum User manual

Oreck DISCOVER UK30500 User manual

Oreck

Oreck DISCOVER UK30500 User manual

Oreck U3770 User manual

Oreck

Oreck U3770 User manual

Oreck BB1100 User manual

Oreck

Oreck BB1100 User manual

Oreck BB1000DC Guide

Oreck

Oreck BB1000DC Guide

Oreck XL PRO DS1700HY User manual

Oreck

Oreck XL PRO DS1700HY User manual

Oreck XL2310 User manual

Oreck

Oreck XL2310 User manual

Oreck XL U2505RH User manual

Oreck

Oreck XL U2505RH User manual

Oreck 2000 User manual

Oreck

Oreck 2000 User manual

Oreck XL U2007RH User manual

Oreck

Oreck XL U2007RH User manual

Oreck DP-460 User manual

Oreck

Oreck DP-460 User manual

Oreck U2000RB-1 User manual

Oreck

Oreck U2000RB-1 User manual

Oreck XL20R7RH User manual

Oreck

Oreck XL20R7RH User manual
Oreck elevate control User manual

Oreck

Oreck elevate control User manual

Oreck TaskVac CK93010 User manual

Oreck

Oreck TaskVac CK93010 User manual

Popular Vacuum Cleaner manuals by other brands

EINHELL BT-VC 1250 S operating instructions

EINHELL

EINHELL BT-VC 1250 S operating instructions

MPM MOD-23 user manual

MPM

MPM MOD-23 user manual

yeedi Vac Max user manual

yeedi

yeedi Vac Max user manual

Pontec Pondomatic Vacuum Cleaner operating instructions

Pontec

Pontec Pondomatic Vacuum Cleaner operating instructions

ecofort Gtech Pro ATF301 operating manual

ecofort

ecofort Gtech Pro ATF301 operating manual

Minuteman Parker LV02675B Operation, service and parts instruction manual

Minuteman

Minuteman Parker LV02675B Operation, service and parts instruction manual

iRobot Roomba 500 Series Servicing and repair guide

iRobot

iRobot Roomba 500 Series Servicing and repair guide

Clatronic AKS 828 instruction manual

Clatronic

Clatronic AKS 828 instruction manual

Emerson RIDGID WD1455BR0 owner's manual

Emerson

Emerson RIDGID WD1455BR0 owner's manual

Ritter SES 10 Operating and assembly instructions

Ritter

Ritter SES 10 Operating and assembly instructions

Philips BP300 operating instructions

Philips

Philips BP300 operating instructions

Hercules DUO 1250 operating instructions

Hercules

Hercules DUO 1250 operating instructions

Atrix ERGO PRO VACBPAIC owner's manual

Atrix

Atrix ERGO PRO VACBPAIC owner's manual

GRE P1117 instruction manual

GRE

GRE P1117 instruction manual

Hoover Nano-Lite U2440-900 owner's manual

Hoover

Hoover Nano-Lite U2440-900 owner's manual

EUFY RoboVac owner's manual

EUFY

EUFY RoboVac owner's manual

F.F. Group DC 50 PLUS Original instructions

F.F. Group

F.F. Group DC 50 PLUS Original instructions

Hoover CH54013 user manual

Hoover

Hoover CH54013 user manual

manuals.online logo
manuals.online logoBrands
  • About & Mission
  • Contact us
  • Privacy Policy
  • Terms and Conditions

Copyright 2025 Manuals.Online. All Rights Reserved.