08
Begin To Use Your New ESC
IMPORTANT! Because different transmitter has different throttle range, please calibrate
throttle range before flying.
Throttle range setting: (Throttle range should be reset whenever a new transmitter is
being used)
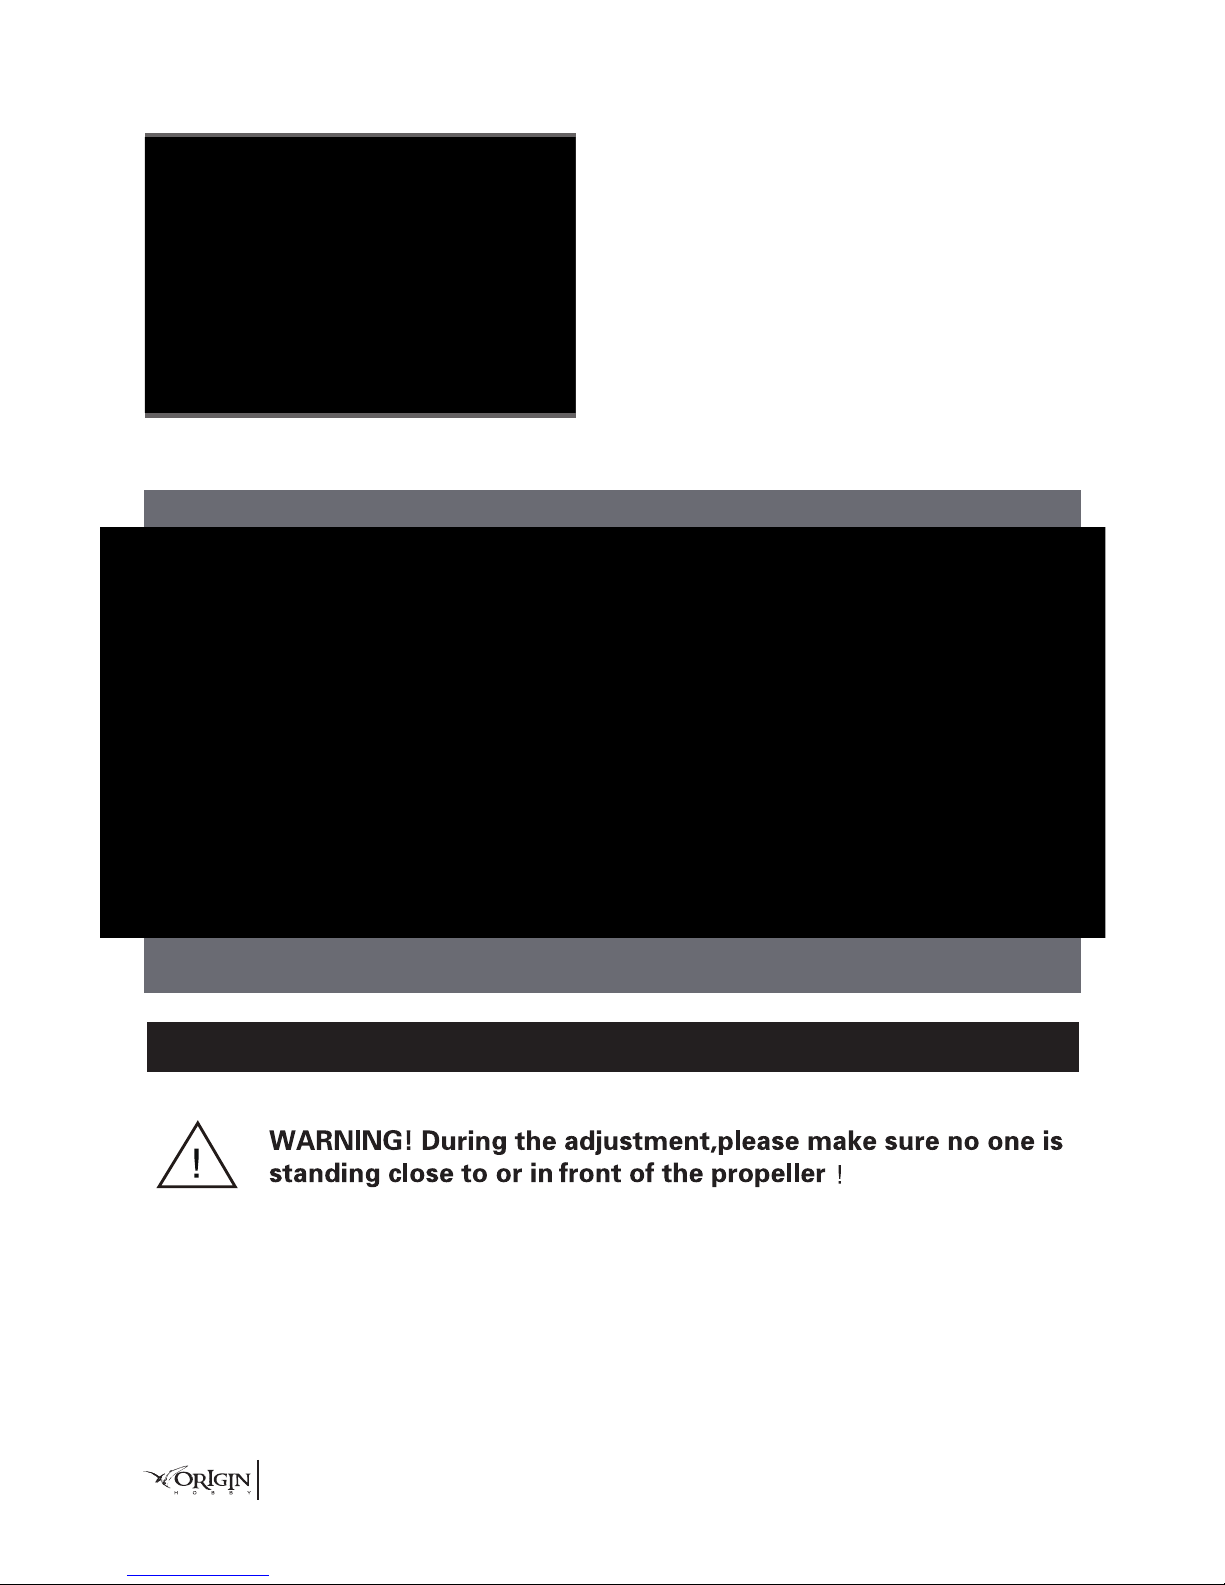
Switch on the
transmitter,
move throttle
stick to the top
position
Connect battery
pack to the ESC,
and wait for about
2 seconds
The “Beep-Beep-” tone should be
emitted, means the top point of
throttle range has been confirmed
Move throttle stick to the bottom
position, several “beep-” tones should
be emitted to present the amount of
battery cells
A long “Beep-” tone should be
emitted, means the lowest point of
throttle range has been correctly
confirmed
1.44*6=8.64V, when “Medium” cut-off threshold is set, the cut-off voltage will be:
8.64*50%=4.32V。
5.Startup Mode:Normal /Soft /Super-Soft (300ms / 1.5s / 3s)
Normal mode is suitable for fixed-wing aircraft. Soft or Super-soft modes are suitable for
helicopters. The initial acceleration of the Soft and Super-Soft modes are slower, it takes
1.5 second for Soft startup or 3 seconds for Super-Soft startup from initial throttle advance
to full throttle. If the throttle is completely closed (throttle stick moved to bottom position)
and opened again (throttle stick moved to top position) within 3 seconds after the first
startup, the re-startup will be temporarily changed to normal mode to get rid of the chance
of a crash caused by slow throttle response. This special design is suitable for aerobatic
flight when quick throttle response is needed.
6. Timing:Low / Medium / High,( 3.75°/15°/26.25°)
Usually, low timing is suitable for most motors. To get higher speed, High timing value can
be chosen.