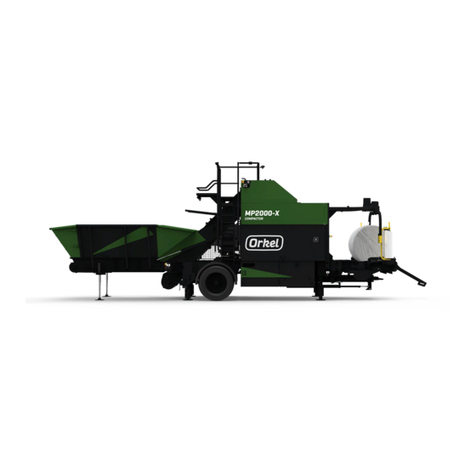
ORKEL Dens-X Compactor User manual

Table of contents
1 General 11
1.1 Introduction 11
1.1.1 Foreword 11
1.1.2 Disclaimer 11
1.1.3 Range of use 12
1.2 Control before delivery 12
1.2.1 Preparation at customer location 12
1.3 Identification of the machine 12
1.4 The operators manual 13
1.4.1 How to use this manual 13
1.5 Warranty 13
1.6 Declaration of conformity 14
2 Safety 15
2.1 Introduction 15
2.2 Symbols 15
2.2.1 Warning, danger and caution 15
2.3 Emergency stop 17
2.4 To the operator 18
2.4.1 Exercise of security 18
2.4.2 Personal protection 18
2.4.3 Personal safety 19
2.4.4 Safe operation 19
2.4.5 Important issues 19
2.4.6 Danger zones 19
2.5 Precautions 20
2.5.1 Know your machine 20
2.5.2 Equipment control 20
2.5.3 Cleaning 20
2.5.4 Environmental protection 20

2.6 Break-in period 20
3 Settings and hydraulic adjustments 22
3.1 Main parts 23
3.1.1 Principle of operation 23
3.2 Hydraulics 23
3.2.1 Guidelines for hydraulic adjustments 24
3.2.2 Tank valves Dens-X 24
3.3 Feed hopper 24
3.3.1 Control panels 24
3.3.2 Settings 25
3.3.3 Correction of the sideways movement of the feed hop-
per-F25 25
3.4 Elevator and sub conveyor 26
3.4.1 Settings 26
3.5 Chamber 26
3.5.1 Opening speed settings 26
3.5.2 Chamber pressure settings 27
3.6 Plastic tying unit 27
3.6.1 Principle of operation 27
3.6.2 Brake and feed speed 28
3.6.3 Settings 29
3.6.4 Remote control 29
3.7 Wrapping table 30
3.7.1 Wrapping settings 30
3.7.2 Film cutter settings 31
3.7.3 Wrapping table tilt speed 32
3.7.4 Wrapping table ultrasonic sensor 32
3.7.5 Microsonic sensor (S1) 32
3.8 Drawbar 33
3.8.1 Flexible drawbar 33

4 Operation 35
4.1 Safety 36
4.1.1 Safe work routine 36
4.1.2 Operator safety 36
4.1.3 Other people's safety 36
4.1.4 Assembly on site 36
4.1.5 Elements of hazard during operation 37
4.1.6 Danger zones during operation 37
4.1.7 Risk of overturning 37
4.1.8 Leaving the machine 37
4.2 Connection and setting up the machine 37
4.2.1 Rig up 37
4.2.2 Flexible drawbar and feed hopper F25 37
4.2.3 Lever/Controls overview 40
4.2.4 Lever list 40
4.2.5 Leveling the machine 41
4.2.6 Power take off 41
4.2.7 PTO Speed 41
4.2.8 Electrical power source 41
4.2.9 Hydraulic connections 41
4.2.10 Oil temperature 42
4.2.11 Stairs 42
4.3 Daily checklist 42
4.3.1 Daily checklist prior to startup 42
4.3.2 Checkpoints while baling 43
4.4 Break-in period 43
4.4.1 Precautions during the break-in period 43
4.4.2 After the first 50 hours of operation 43
4.5 Automatic operation 44
4.6 Film roller storage 45
4.7 Wrapping arms 46

4.7.1 Wrapping arm emergency stop 46
4.7.2 Installing a new film roller in the wrapper 46
4.8 Parking brake 48
4.9 Operators platform 48
4.10 Compressed air cleaner system 48
4.10.1 Mode of operation 49
4.10.2 Recommendations 49
5 Transport 51
5.1 Transport safety 51
5.1.1 Speed limit 51
5.1.2 On road preparation 51
5.1.3 Lifting points 51
5.1.4 Strapping and tie down 52
5.1.5 Dismantling the machine 52
5.2 Highway use 53
5.2.1 Transport preparation, Flexible drawbar and feed hop-
per F25 53
6 Control system 54
6.1 User interface 54
6.1.1 Main page 54
6.1.2 Icons for starting program sequences 55
6.1.3 Menu 55
6.1.4 User settings [Language and screen] 56
6.1.5 System information 57
6.1.6 Manual controls 57
6.1.7 Machine settings 59
6.1.8 Quick settings 60
6.1.9 Presets 61
6.1.10 Sensors 61
6.1.11 Messages 62
6.1.12 Time and date 63

6.1.13 User data 63
6.1.14 Weighing system 65
6.1.15 Reset 65
6.1.16 Software 65
6.1.17 Settings and explanations 67
7 Maintenance and mechanical adjustments 69
7.1 Safety 70
7.1.1 Before maintenance 70
7.1.2 Safety precautions during maintenance and mechanical
adjustments 70
7.1.3 Elements of hazard during maintenance 71
7.1.4 Control after repair or maintenance 71
7.2 Electrics 71
7.2.1 Fuses 72
7.3 Wheels 72
7.4 Chains 72
7.4.1 Chain tensioner A 72
7.4.2 Chain tensioner B and C 73
7.5 Feed hopper 73
7.5.1 Tightening the feed hopper belts F25 74
7.5.2 Ball bearings 74
7.6 Drive chains 74
7.6.1 Drive chains overview 75
7.6.2 Drive chains tensioning 75
7.7 Elevator and sub conveyor 76
7.7.1 Conveyor belts and feeder carrier 76
7.7.2 Adjusting the conveyor chains 76
7.7.3 Chain tensioner, sub conveyor 77
7.7.4 Chain tensioner, elevator F25 78
7.7.5 Ball bearings elevator 78
7.8 Baling chamber 78

7.8.1 Inspection 78
7.8.2 Adjusting the front chamber belt 79
7.8.3 Adjusting the rear chamber belt 79
7.8.4 Adjusting the chamber belt tensioner 82
7.8.5 Replacing chamber belt 83
7.9 Plastic tying unit 84
7.9.1 Control and maintenance 84
7.10 Wrapping table 85
7.10.1 Inspection 85
7.10.2 Adjusting the wrapping table belt 86
7.11 Frame, drawbar, attachments 88
7.11.1 Frame 88
7.11.2 Main components, fastening points 88
7.12 Chamber roller bushings 88
7.12.1 Wear inspection 88
7.12.2 Permissible wear 89
7.12.3 Remove sprockets 90
7.13 Hydraulics 91
7.13.1 Hydraulics oil 91
7.13.2 Hoses and connections 91
7.13.3 Hydraulic pump, gearbox 91
7.13.4 Heat exchanger 92
7.14 Oil change and oil filter 92
7.14.1 Changing oil and filter 93
7.15 Welding and grinding 94
7.15.1 Precautions when welding 94
7.16 Service history 95
8 Lubrication 96
8.1 Lubrication system, beka max EP 1 96
8.1.1 Oil lubrication, mode of operation 96
8.1.2 Grease lubrication, mode of operation 96

8.1.3 Beka max grease lubrication system 98
8.2 Refilling lubricants 98
8.2.1 Refilling the oil reservoir 99
8.2.2 Adjusting the amount of grease 99
8.2.3 Bleeding the grease system 99
8.3 Electric pump and main distributor 100
8.4 Troubleshooting for Beka max 100
8.5 Oil temperature 101
8.6 Approved lubricants 101
8.6.1 Hydraulics 101
8.6.2 Chain lubrication 101
8.6.3 Greasing 101
8.6.4 Gearbox and gears for hydraulic motors 102
8.7 Manual lubrication charts 103
8.7.1 The compactor 103
8.7.2 Feed hopper F25 104
8.7.3 Flexible drawbar 105
8.8 Lubrication list - Manual greasing points 106
9 Preservation 107
9.1 Cleaning 107
9.1.1 Using high pressure washer 107
9.2 Storage 107
9.2.1 Long time storage 107
9.2.2 Oil filling in the grease lubrication storage 107
10 Electrics 108
10.1 Main power supply, e-stop switches and electrical
cabinet 109
10.2 Electrical cabinet power supply rail 110
10.3 Sensors and manual controls 111
10.4 Valves, fan motors and pumps 112

10.5 Inputs and outputs 113
10.5.1 IO block 1 113
10.5.2 IO block 2 113
10.5.3 IO block 3 114
10.5.4 IO block 5 114
10.5.5 IO block 6 115
10.5.6 IO block 7 116
10.6 Power supply 116
10.6.1 Supply block 1 116
10.6.2 Supply block 2 117
10.7 Inputs and outputs sorted by number 118
10.7.1 IO list 1 118
10.7.2 IO list 2 119
10.7.3 IO list 3 120
10.8 Inputs and outputs sorted by type 120
10.8.1 Inductive sensors 120
10.8.2 Other sensors and switches 121
10.8.3 Directional valves 121
10.8.4 Sensors, 7-lead cable 122
10.8.5 Film system remote control 122
10.8.6 Radio remote control 122
10.8.7 Proportional valves 122
10.8.8 Valves 122
10.8.9 Cable detection 123
10.9 Sensor overview 124
10.10 Sensor list and function 125
11 Hydraulics 127
11.1 Hydraulic diagram 127
11.1.1 Complete diagram 128
11.1.2 Wrapping table, chamber and elevator control 129
11.1.3 Plastic tying unit, sub conveyor and feed hopper 130

11.1.4 Additional feed hopper control for F25 and chamber
drive 131
11.1.5 Hydraulic diagram list 132
11.2 Valve overview 133
11.2.1 Valve chart for Dens-X 133
11.2.2 Valve list for Dens-X 134
12 Specifications 135
12.1 Electrical system 135
12.2 Power take off 135
12.3 Lubrication system beka-max 135
12.4 Hydraulic system 136
12.5 Wheels and tyres 136
12.6 Dimensions and weight 136
12.6.1 Measurements 136
12.6.2 Power requirements 136
12.6.3 Dimensional sketch F25, operating mode 137
12.6.4 Dimensional sketch F25, transport mode 138
Glossary 139
Index 141

1 General
1.1 Introduction 11
1.1.1 Foreword 11
1.1.2 Disclaimer 11
1.1.3 Range of use 12
1.2 Control before delivery 12
1.2.1 Preparation at customer location 12
1.3 Identification of the machine 12
1.4 The operators manual 13
1.4.1 How to use this manual 13
1.5 Warranty 13
1.6 Declaration of conformity 14
1.1 INTRODUCTION
1.1.1 Foreword
The products from Orkel AS are well known for their high quality, reliability and strength. We will therefore
congratulate you, choosing one of our products.
To fulfill our own goals, regarding quality and strength, Orkel AS has implemented a continuing product-
developing process. All compactors undergo a thorough quality control before leaving the factory.
Read thoroughly, and familiarize yourself with our recommendations, regarding machine - safety, use and
maintenance. Make daily maintenance a routine. By doing this, the machine will be safe to operate, and
you will contribute to a longer machine lifespan and an effective utilization of the machine.
With regards
Orkel AS
1.1.2 Disclaimer
The original parts used in an Orkel® machine are designed and built to provide optimal fit, function, safety,
and structural integrity. For this reason, Orkel® DOES NOT in any circumstance approve of the use of after-
market, gray market, or imitation parts.
The information provided by Orkel® hereunder is provided “as is, where is” and with all faults, and the
entire risk associated with such information is entirely with the Buyer.
Orkel® does not grant, explicitly or implicitly, to any party any patent rights, licenses, or any other IP
rights, whether with regard to such information itself or anything described by such information.
Information provided in this document is proprietary to Orkel®, and Orkel® reserves the right, at its sole
discretion, to make any changes or modification to the information in this document or to any products
and services at any time without notice.
Orkel® does not assume responsibility for any damages associated with the machine or failure caused by
incorrect use of the machine. Neither do we assume responsibility for any changes to the product made
after initial delivery.
1 GENERAL 11

1.1.3 Range of use
The Dens-X compactor is designed for compressing soft organic materials to bales wrapped in plastic film
for storage or transport. The compactor must only be used for this purpose.
NOTE: Other materials can also be compressed, but have to be confirmed by Orkel AS in each case. This due to
warranty legislations.
1.2 CONTROL BEFORE DELIVERY
This machine is tested, controlled and has passed final inspection, before leaving the factory.
1.2.1 Preparation at customer location
Orkel AS will set-up the machine for the customer if requested/agreed. An introduction course, both in
handling and operating the compactor will be held at site if requested/agreed. During commissioning and
start-up period, we’re offering our technical assistance and answering all questions regarding the com-
pactor start-up.
NOTE: Please see the delivery - warranty formula in section 1.1 "Forms and reports"
1.3 IDENTIFICATION OF THE MACHINE
A sticker describing the serial number is located on the right side of the machine. In addition, the number
is also imprinted on top of the frame. See Figure 1.1.
The serial number must always be provided when contacting your dealer, either it’s for ordering parts or
technical assistance.
The serial number is the safest way to identify your machine. Do not remove or change the serial number.
Figure 1.1 :
Serial number location
1 GENERAL 12

1.4 THE OPERATORS MANUAL
1.4.1 How to use this manual
This manual is organized after the «see—think—use»-principle. The content and explanations are
arranged in smaller sequential operations, and the main chapters are arranged according to the normal
use of the machine (Example: Setup —> Operation —> Maintenance).
Chapter overview:
1. GENERAL This chapter contains some of the formularities associated with a new compactor. Quality
control, identification the machine, and copies of the delivery and warranty forms.
2. SAFETY This chapter consist of the general safety measures one have to consider at all times when
dealing with the machinery. More specific safety measures and warnings are listed and explained
when relevant.
3. SETTINGS AND HYDRAULIC ADJUSTMENTS An introduction to the functionality of the machine. Fur-
thermore, it explains how and where one can adjust the hydraulics to achieve the wanted func-
tionality. Topics organized and gathered for every machine module. Same order as in chapter 7
"Maintenance and mechanical adjustments".
4. OPERATION Describes the rig up process, what to consider prior to and during operation. It also spe-
cifies the running in period.
5. TRANSPORT States all the safety measures and preparations necessary for successful and safe
transport of the compactor.
6. CONTROL SYSTEM Gives a detailed overview of the control system and its functions.
7. MAINTENANCE AND MECHANICAL ADJUSTMENTS A detailed overview of the necessary maintenance
and procedures for mechanical adjustments. Topics organized and gathered for every machine mod-
ule. Same order as in chapter 3 "Settings and hydraulic adjustments".
8. LUBRICATION Explains oil and grease lubrication functionality, settings, troubleshooting and shows
detailed lubrication charts for manual lubrication.
9. PRESERVATION Washing, and other preparations prior to and during long time storage.
10. ELECTRICS Electric schematics.
11. HYDRAULICS Hydraulic diagrams.
12. SPECIFICATIONS An overview over the general machine capacities and performances.
1.5 WARRANTY
Orkel AS recommends that you study the document «Warranty conditions» for detailed information
regarding warranty terms and conditions. This document can be found enclosed in the binder delivered
with the compactor. You can also contact our after sales department.
1 GENERAL 13

1.6 DECLARATION OF CONFORMITY
1 GENERAL 14

2 Safety
2.1 Introduction 15
2.2 Symbols 15
2.2.1 Warning, danger and caution 15
2.3 Emergency stop 17
2.4 To the operator 18
2.4.1 Exercise of security 18
2.4.2 Personal protection 18
2.4.3 Personal safety 19
2.4.4 Safe operation 19
2.4.5 Important issues 19
2.4.6 Danger zones 19
2.5 Precautions 20
2.5.1 Know your machine 20
2.5.2 Equipment control 20
2.5.3 Cleaning 20
2.5.4 Environmental protection 20
2.6 Break-in period 20
2.1 INTRODUCTION
This operator’s safety manual is made to describe safe and good routines when operating the compactor.
On the other hand, it is not possible to describe every operational and safety matters that may arise. Care-
fully consider all your actions, if it is posing a safety hazard to you, or others close to the compactor! • Acci-
dents may kill you or make you disabled. • Accidents can be avoided.
2.2 SYMBOLS
This symbol means:
lATTENTION!
lBE CAUTIOUS!
lCONSERNFORYOURPERSONALSAFETY!
When you see this symbol in the operator’s manual, be aware that violation of instructions given, can
cause you or others in the working area of the machine, being injured or killed.
2.2.1 Warning, danger and caution
Each time you see the words and symbols as shown below, please note the different directions they sym-
bolize. The pictograms are used in this manual or/and on the machine.
2 SAFETY 15

The symbol and the word DANGER,
state a direct or immediate dan-
gerous situation that will cause
DEATH OR SERIOUS INJURY if not
avoided.
The symbol and the word WARNING, indic-
ates a potentially hazardous situation. If
you fail to comply with instructions given it
could result in personal injury or loss of life.
Do not start operating the machine
until you have read and understood
the safety precautions.
Always stop the tractor engine or external
power unit before; lubricating, adjusting,
maintaining or repairing the machine. Also,
remove the ignition key to prevent acci-
dental start.
Ensure that there are no people
between tractor and machine during
connecting and disconnecting.
Never allow children to stay near the
machine during operation. Young children
can do unpredictable things
Danger rotating parts. Keep clear of
moving/rotating parts in chamber.
Operator or others close to the machine
must be aware when the bale is unloaded
from the wrapper table. Bales dropped
may roll more than 10 m, or even dropped
prematurely.
Always use the hydraulic securing
valves on the chamber door lifting
cylinders, to ensure that the
chamber door stays in open position
during maintenance or repair.
The net or widefilm is cut with a sharp
knife. Be careful when loading a new roller,
or if any adjustment is done to the knife
system.
All parking of the machine must be
on a firm levelled ground, and
secured with wheel chocks.
Unauthorized personell are not allowed
closer than 5 meters, when the machine is
operating or when maneuvering.
Danger. Film holder/cutter has a
sharp knife and there is a risk of
cutting/crushing injury. Always keep
closed when the machine is not
operating.
Keep clear! Do not enter below bunker or
frame when operating the compactor.
2 SAFETY 16

Noise zone. Use ear protection. Stairway. Access only for operators or
mechanics.
Make sure the transmission is run-
ning with the correct speed and
direction. Wrong speed and/or
direction can damage machinery and
may cause great danger to persons
nearby. The machine is designed for
a PTO-speed of 850 rpm.
Stay clear, rotating machinery.
Strapping point. Lifting point.
Jacking point. Hydraulics securing valves, locking the tail-
gate lifting cylinders.
Between the tractor and the machine, there is a rotating PTO-
shaft. No one is allowed to stand between the tractor and the
machine while the engine is running. Do not wear loose clothes,
scarfs etc.
Warning signs, indicating danger or warning attached to the machine, must not be removed or
painted over. Unreadable signs shall be replaced by new ones. These can be ordered from Orkel
AS.
2.3 EMERGENCY STOP
The machine is equipped with 5 manual emergency stop buttons. Four are accessible from ground level
and one on top of the machine as indicated on Figure 2.1.
2 SAFETY 17

Figure 2.1 :
Red circles indicates emergency stop locations. Two more buttons are located on
the opposite side, ground level.
When an emergency stop button has been triggered, the emergency stop button has to be reset so that
the machine can be started from the control panel.
Figure 2.2 :
Mushroom head type emergency stop button. Twist the head to reset.
2.4 TO THE OPERATOR
2.4.1 Exercise of security
lAs operator, it is your responsibility that you read and understand the safety instructions given in
this operator’s safety manual.
lThese instructions must be followed without exception. The operator is the key to safety on this
machine, not only for you, but also for others in the compactors working area.
lFollow the safety instructions, and you will experience the compactor as a safe and secure place to
work.
2.4.2 Personal protection
The Compactor might generate a lot of dust and noise, depending on which material being com-
pressed. For your own health, we recommend that operators use personal protective equip-
ment, such as safety goggles, dust/filter mask, and ear-protection during operation.
2 SAFETY 18

2.4.3 Personal safety
Use all available protective and safety equipment. Provide good lighting in the area where the machine is
positioned. All covers must remain intact and attached during operation. If pressing of flammable mater-
ials, a fire extinguisher must be in close proximity.
2.4.4 Safe operation
Persons under 16 years of age should under no circumstances operate this machine.
Personnel under influence of alcohol or other drugs must not operate this machine.
2.4.5 Important issues
Be aware of children and other unauthorized persons in close proximity to the machine. Never allow
unqualified persons to operate this machine.
2.4.6 Danger zones
Only operators and maintenance personnel are allowed “inside” the danger zone! All others
must be turned away, due to their own safety!
The entire left side of the compactor is a blind spot for the operator.
2 SAFETY 19

2.5 PRECAUTIONS
2.5.1 Know your machine
Know your machine. Learn all the functions and actuating mechanisms, and familiarize where the emer-
gency stop switches are located. Learn the machines capacity and limitations, to avoid unnecessary down-
time and mechanical brake-down.
IMPORTANT: If any dangerous situations occur, shut down the power take off (PTO) right away.
2.5.2 Equipment control
Before starting up, make sure that the machine and its equipment is in place and in good working order!
See chapter 7 "Maintenance and mechanical adjustments".
2.5.3 Cleaning
A good cleaning of the machine increases durability and safety. Therefore, keep all surfaces clean, remove
dirt, oil-spills and other remains.
2.5.4 Environmental protection
Hazardous waste, such as rubber, oil and other materials that could harm the environment, must be dis-
posed at approved disposal centres.
2.6 BREAK-IN PERIOD
Check Check points
Do not run compactor at maximum capacity the first 25 hours of operation
Be observant – monitor that functions are working correctly.
Check for abnormal sounds from the machinery
Fine tune the process to be carried out so that the compactor can reach maximum capa-
city, based on material being baled.
2 SAFETY 20
Table of contents
Other ORKEL Garbage Disposal manuals
Popular Garbage Disposal manuals by other brands
KitchenAid
KitchenAid KBDS100T - NA Batch Feed 1 HP MultiGrind Installation instructions manual

DELTA-SPORT
DELTA-SPORT 313455 Instructions for use

JNF
JNF IN.60.567 quick start guide

Step 2
Step 2 Lakewood owner's manual

SERRES
SERRES NEMO Installation, operation and maintenance instructions

Rev-A-Shelf
Rev-A-Shelf HURV-1512 installation instructions