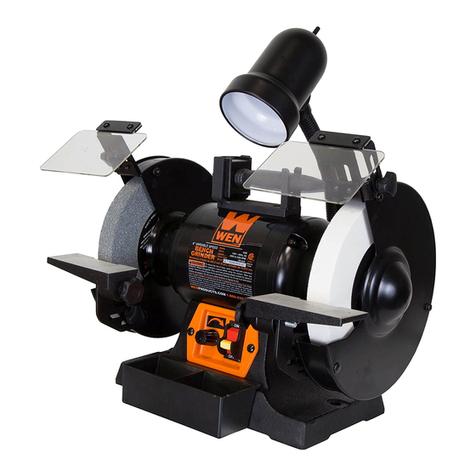
Osaki OSA-279-8000K User manual

150mm (6”) BENCH GRINDER-250W
ORDER CODE
OSA-279-8000K
OPERATOR S MANUAL
P ease retain this information for future reference.
WAR I G:
THE SAFETY I FORMATIO GIVE I SIDE MUST BE READ
A D U DERSTOOD BY A Y PERSO USI G, I STALLI G, REPAIRI G OR
MAI TAI I G THIS PRODUCT.
•Suitable for DIY & hobby use
•Powerful 250W smooth running motor,
230-240V/50Hz supply
•Spark deflectors/eye shields
•Adjustable work supports
- Supplied with:
150 x 20 x 36 grit wheel
150 x 20 x 60 grit wheel
QUALITY GUARANTEE & WARRANTY
O AKI POWER TOOL carry a one year manufacturer’s warranty.
O AKI POWER TOOL are designed & produced to the highest standards & specifications.
O AKI POWER TOOL are fully guaranteed against faulty materials & workmanship.
Should they be found to be defective, they will either be repaired or replaced free of charge
(fair wear and tear and/or misuse excepted). This does not affect your legal rights.
Please retain supplier invoice as proof of purchase.
OSA I POWER TOOLS are designed for DIY and hobby use only.
They are not covered by an industrial warranty. Industrial use will invalidate this guarantee.
Specifications may change without prior notice. E&EO
THE ENVIRONMENT
DECLARATION OF CONFORMITY
We hereby certify that the
OSAKI 150MM (6”) BE CH GRI DER - 250W
(ORDER CODE: OSA-279-8000K)
complies with all the relevant provisions of the
Machinery Directive 2006/42/EC
Standards Applied: EN 61029-1:2009/A11:2010, EN 61029-2-4:2011
EMC Electromagnetic Compatibility Directive 2014/30/EU
Standards Applied: EN 55014-1:2006/A2:2011, EN 55014-2:1997/A2:2008, EN 61000-3-2:2014, EN 61000-3-3:2013
RoHS2 Restriction of Hazardous Substances Directive 2011/65/EU
Standards Applied: EN 50581-1:2012
igned:
Date: 29th November 2017
Name: eith Read
Position: HSQE Manager
Official Agent
KENNEDY TOOLS
Wigston, Leicester, England, LE18 2F .
www.kennedy-tools.co.uk
Always dispose of unwanted tools, accessories and packaging materials in an environmentally
friendly manner.
In observance of European Directive 2012/19/EU on Waste Electrical and Electronic Equipment
(WEEE) and its implementation in accordance with national law, electrical goods that have
reached the end of their life must be collected separately and returned to an environmentally
compatible recycling facility.
Do not dispose of electrical goods with domestic waste materials as inappropriate disposal may
cause potential hazards to the environment and human health.
For further information, please contact your local authority or the retailer from whom you
purchased the product.
This product does not contain any restricted substances in concentrations and applications
which are banned by the European RoHS2 Directive.
© The Kennedy Group Ltd. 11/17
THE KE EDY GROUP LTD, Wigston, Leicester, England, LE18 2FS.

Osaki Power Too s are committed to the production of a range of qua ity power too s
that are designed for high performance and ong service ife. By fo owing the
recommended safety and maintenance procedures they wi ast for many years.
WORK AREA CAUTION
PERSONAL SAFETY
1.
Keep your work area clean and well lit. Cluttered
benches and dark areas will invite accidents.
2. Do not operate power tools in explosive
environments. for example; in presence of
flammable liquids, gases, or dust. Power tools
create sparks which may ignite the dust or
fumes.
3. tore tools out of reach of children or other
untrained persons. Tools are dangerous in the
hands of untrained users.
4. Keep bystanders and children away while
operating the power tool. Distraction can
cause you to loose control.
WARNING!
Grinding dust becomes a potential health problem when
airborne. Breathing these particles may cause allergic respiratory symptoms,
mucosal & non-allergic respiratory symptoms & cancer.
1. ALWAY wear the approved eye, ear and respiratory protection during operation.
Use safety glasses or goggles which conform to BSEN136 or CE equivalent that
provide protection from the front and side. It is always the user’s responsibility for
following accepted eye, face, respiratory, hearing and body protection.
2. Dress appropriately. Always ensure that all long hair and loose clothing, ties,
scarves, jewellery, etc., are secured or removed.
3. TAY ALERT! Watch what you are doing and use common sense when operating a
grinder. Do not use the tool while tired or under the influence of drugs, alcohol, or
medication. Loss of concentration while operating power tools may result in serious
personal injury.
4. To avoid accidental starting be sure the power switch is in the ‘off ’ position before plugging in.
Plugging in tools that have the switch on is very dangerous.
5. Remove wrenches before turning the grinder ‘on’. A wrench that is left attached to a rotating part
of the tool may result in personal injury.
6. Never use the grinder without the safety guards in position and operating correctly.
2
NOTES

3
6
ELECTRICAL AFETY
A RCCB (Residual Current Circuit Breaker) should be fitted in the mains
electricity distribution board.
PLUG FITTING
A moulded U 3 pin plug with ASTA/BS approval is already fitted for your
safety. If it becomes damaged, and needs replacing, cut off the plug and
prepare the wires. Use the following instructions:
a) Connect the GREEN/YELLOW earth wire to the earth terminal marked
either ‘E’ or with the earth symbol ‘ ’.
b) Connect the BROWN live wire to the live terminal marked ‘L’.
c) Connect the BLUE neutral wire to the neutral terminal marked ‘N’.
d) After wiring, check there are no bare wires, that all wires have been correctly connected, that the cable
external insulation extends beyond the cable restraint and that the restraint is tight.
Yellow & Green = Earth wire
Brown = Live wire
Blue = Neutral wire
Cable restraint
UK
ONLY
ELECTRONIC INFORMATION
13amp
fuse
SPECIFICATIONS
Order code OSA-279-8000K
Motor input capacity 250W
Motor supply voltage 230V-240V/50Hz
No load speed 2950RPM
Wheel size 150 x 20 x 12.7mm
Size inc. guards (HxWxD) 250 x 320 x 230mm
Net weight 7.5kg
WHEEL REPLACEMENT
When the distance between the outer diameter of the grinding
wheel and the edge of the work support is greater than 5mm,
the grinding wheel needs to be replaced.
Checking New Grinding Wheels
New grinding wheels must be tested using a “ringing test”
method. A light tap on the grinding wheel with a light non-
metallic implement or knocking the grinding wheel against a
surface, will produce a clear ringing sound which will indicate
that it is intact.
Changing A Grinding Wheel
1. Loosen the three screws.
2. Remove the outer covering plate.
3. Remove the holding nut, flange and grinding wheel.
4. Insure that the second flange remains on the shaft.
5. Put the replacement grinding wheel onto the shaft.
6. Replace the flange and the nut.
7. Secure the nut fully but do not over tighten.
8. Remount the covering plate with the three screws.
9. Adjust the spark deflector and work support to a 2mm gap.
A certain oscillation of the wheel is normal, up to 0.3mm in radial and 0.5mm in axial direction
measured at the circumference of the wheel.
ELECTRICAL SAFETY
1. Power tool plugs must match the outlet.
Never modify the plug in any way. Do not use
any adaptor plugs with earthed (grounded)
power tools. Matching plugs and outlets will
reduce risk of electric shock.
2. Avoid body contact with grounded surfaces
such as pipes, r a d i a t o r s , r a n g e s and
refrigerators. There is an increased risk of
electric shock if your body is grounded.
3. DO NOT expose power tools to rain or wet
conditions. Water entering a power tool will
increase the risk of electric shock.
4. DO NOT abuse the cord. Never use the cord to
pull the plug from an outlet. eep the cord
away from heat, oil, sharp edges or moving
parts. Damaged cords should be replaced
immediately by qualified repair personnel.
Damaged cords will increase the risk of
electric shock.
5. When o p e r a t i n g the grinder in a d a m p
location or outside, use a heavy duty
extension cord in conjunction with a residual
current device (RCD) rated at 30mA or less.

4 5
IDENTIFICATION
This tool has been designed for metal grinding applications. Please read its instructions to familiarise
yourself with the major components of this tool before using it.
Eye Shield
Spark deflector
Motor Housing
Work Support
Adjusting nob
On/Off switch
Fixing hole 8mm
Adjusting Screw
Coarse
36 Grit
Medium
60 Grit
Wheel
guard
cover
Outer
Flange
Inner
Flange
ASSEMBLY
<2mm
<2mm
All the following components must be fitted correctly before
using the bench grinder.
• Spark Deflectors - These are provided to prevent sparks
from re-entering the grinding wheel assembly. The gap
between the spark deflector and the face of grinding wheel
is adjustable and should be kept at a distance of 2mm.
Fitted in two parts, the mounting bracket and the deflector.
Firstly, screw the mounting bracket to the wheel guard as
shown in Fig.2 then fix the deflector to the mounting
bracket, setting it at a distance of 2mm from the grinding
wheel. see Fig.3
INSTALLATION
The bench grinder must be placed on a flat, horizontal and stable surface. The bench grinder should be
fixed to something heavy enough, so that it will not move whilst in use.
Attach the bench grinder using screws or nuts and bolts using the four 8mm fixing holes provided at the
base of the unit.
When using the bench grinder for the first time, it should be allowed to run for at least five minutes
before it is used to grind a work piece.
OPERATION
Remember to wear the appropriate personal protective equipment.
Check that the machine is assembled and adjusted correctly then switch on the machine.
The machine must reach full speed before any grinding work commences.
For best results use the coarse grinding wheel first followed by the medium grinding wheel.
Rest the workpiece on the Work Support to eliminate chatter then add a small amount of pressure to
grind away to the desired amount.
Grinding Wheel Handling and torage
All grinding wheels can be easily damaged by mishandling that results in the wheel being subjected to any
shock loading. This can occur by inadvertently dropping, knocking or banging against any other object.
Any grinding wheel subjected to such mishandling should be carefully examined for signs of damage.
If in doubt do not use.
During storage, grinding wheels must not be subjected to:
Humidity, water or other liquids. Freezing temperatures. Any temperature low enough to cause the
formation of condensation.
• Eye Shields - Protect from grinding
debris which is thrown out at a
high velocity and can damage
your eyes. The eyeshields are
fitted to the top of the spark
deflectors using a 50mm Cross
Head Cap Screw, nut and
washers.
Before changing an eye shield
ensure that the machine is
switched off. Always ensure that
eyeshields are undamaged and
fitted securely before operating
the machine.
• Work Supports - Used to provide a firm and stable support to rest
the work piece on. The distance between the work support and
grinding wheel is adjustable, checked frequently and should be
kept at a distance of 2mm.
Fig.3
Fig.1
Fig.2
Fig.4
Fig.5
Other Osaki Grinder manuals
