OSKA REGIS Installation instructions

OSKA REGIS
USER INSTRUCTIONS

CHANGING
LIVES

YOUR CHAIR
Getting started
Safety instructions
Chair set up
Handset control
Upholstery care
Warranty
THANK YOU
Thank you for purchasing an OSKA chair. Please take
time to read this leaet which contains essential
instructions on your chair set up, handset usage and
upholstery care, as well as important safety, warranty
and contact details. However, if for any reason
you are unsure of anything, please contact OSKA
immediately for further information.

4
IMPORTANT SAFETY INSTRUCTIONS
The following instructions are for your own safety, the safety of others
and to ensure that the chair is used correctly and in line with the warranty
conditions.
PLEASE ENSURE THAT:
YOU KEEP THESE INSTRUCTIONS SAFE as you will need them for
reference purposes.
ALL CARERS AND ATTENDANTS are trained in the full use of the chair
and are qualied to provide advice on the pressure management and
postural care options.
YOU UNDERSTAND the recommended user weight limit (25 stone)
for your chair. It will be dependent on the OSKA chair model that you
have chosen. Please ensure that you understand these limits and DO
NOT exceed them. This may damage the chair and will invalidate your
warranty.
YOU CHECK the chair and cables regularly to ensure that they are in a
suitable working condition and that there is no damage. DO NOT USE the
chair if it is not working properly or damaged.
NO cables are trapped under the chair and that YOU DO NOT run over
the cables with the castors or other equipment e.g. vacuum cleaner.
YOU ALWAYS move the chair around using the push handle. DO NOT use
other parts of the chair to move it around.

5
YOU ALWAYS use the locking castors when the chair is stationary or for
making changes to the chair set up. THIS WILL AVOID any movements
that could cause possible personal injury.
YOU ALWAYS store your handset on the loop provided. This will ensure
that it will not be damaged by either falling on the oor or from anyone
sitting on it.
Children DO NOT play with the handset and on, or with, the chair. To do
so may result in personal injury.
NO ONE stands or sits on the arms, leg rest or footplate as this may
cause the chair to tip and/or damage the chair. To do so may result in
personal injury.
NO ONE stands on the seat as this may cause the chair to tip and/or
damage the chair. To do so may result in personal injury.
YOU NEVER exit the chair whilst the footplate is extended or the leg rest
is elevated.
YOU ONLY USE approved parts on your chair. These can be obtained
through your supplier. Failure to use approved parts will invalidate your
warranty.
YOU ALWAYS get OSKA Engineers to carry out any repairs or t new
parts to the chair. DO NOT attempt to carry out your own repairs to the
chair as this will invalidate your warranty.
YOU ALWAYS disconnect your chair from the power source before
checking any part of the chair.
YOU PROVIDE your original purchase invoice and serial number when
ordering parts or when making a claim under your warranty.

6
CHAIR LOCATION
Position the chair in your chosen location, ensuring that the chair has
enough space to recline fully and freely. There should be no objects
behind the chair that will obstruct the chair movement and it should
never touch the wall when it reclines. Such obstructions will cause
damage to the chair and its mechanism and will invalidate your warranty.
The leg rest should move freely with no objects to restrict this movement.
Position the chair free from any trailing wires.
Ensure that the chair is within easy reach of a power point to plug in the
transformer (unless tted with an Accupak) and the air pump if your
chair has an OSKA cushion.

7
CHAIR SET UP
Here we have detailed the key functionality which will allow you to set up
the chair enabling you to provide additional comfort and posture control
for the user. Please read the User Manual for complete details on how to
operate your model of chair.
ALWAYS lock the castors when setting up the chair or making any
alterations to the set up.
To position the back onto the base of the chair stand behind the chair
and lay the back of the chair, face down and on top of the arms, ensuring
that you align the brackets on the back rest to the upright supports on
the base of the chair.
Using slight pressure, slot the back onto these supports and click into
place. You will nd a small lever attached to both brackets (locking bar).
These should be pushed forward to lock the back into position. Fit the back
ap by using the Velcro attachments to complete the back set up.

8
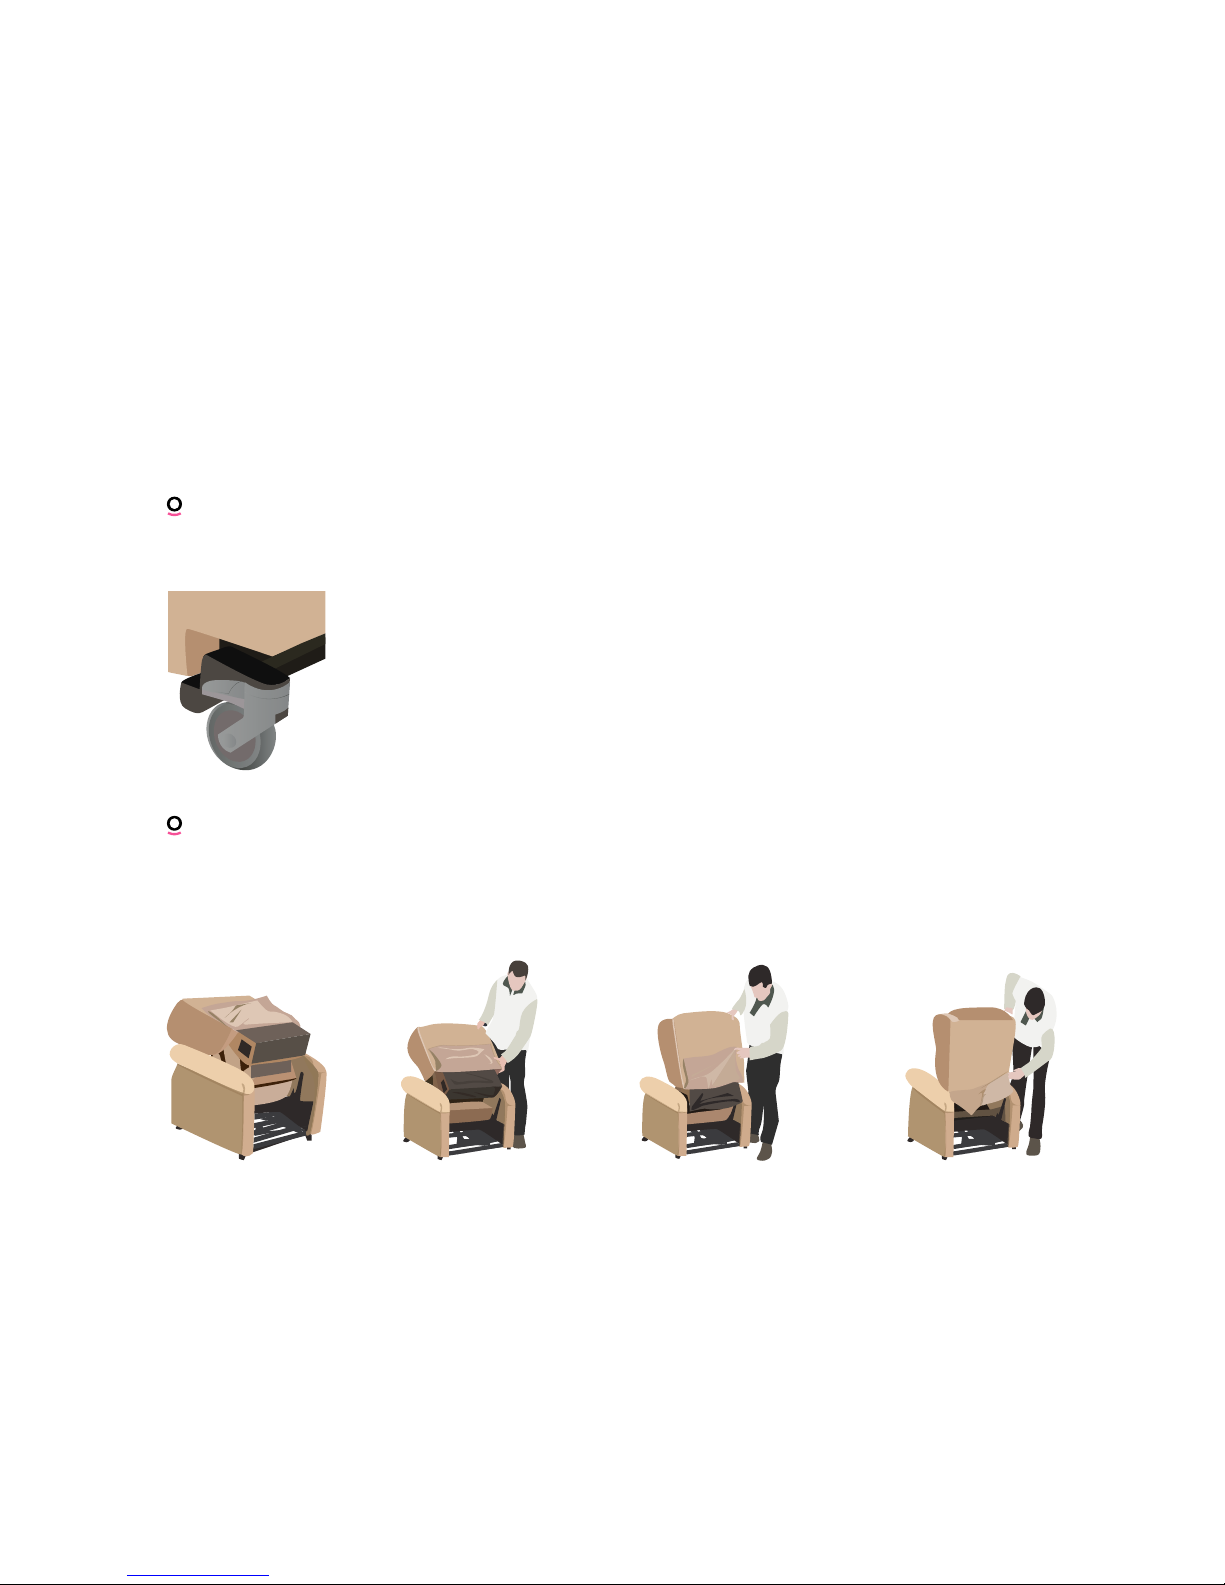
If you need to remove the back, release the locking bars and pull the back
upwards and off.
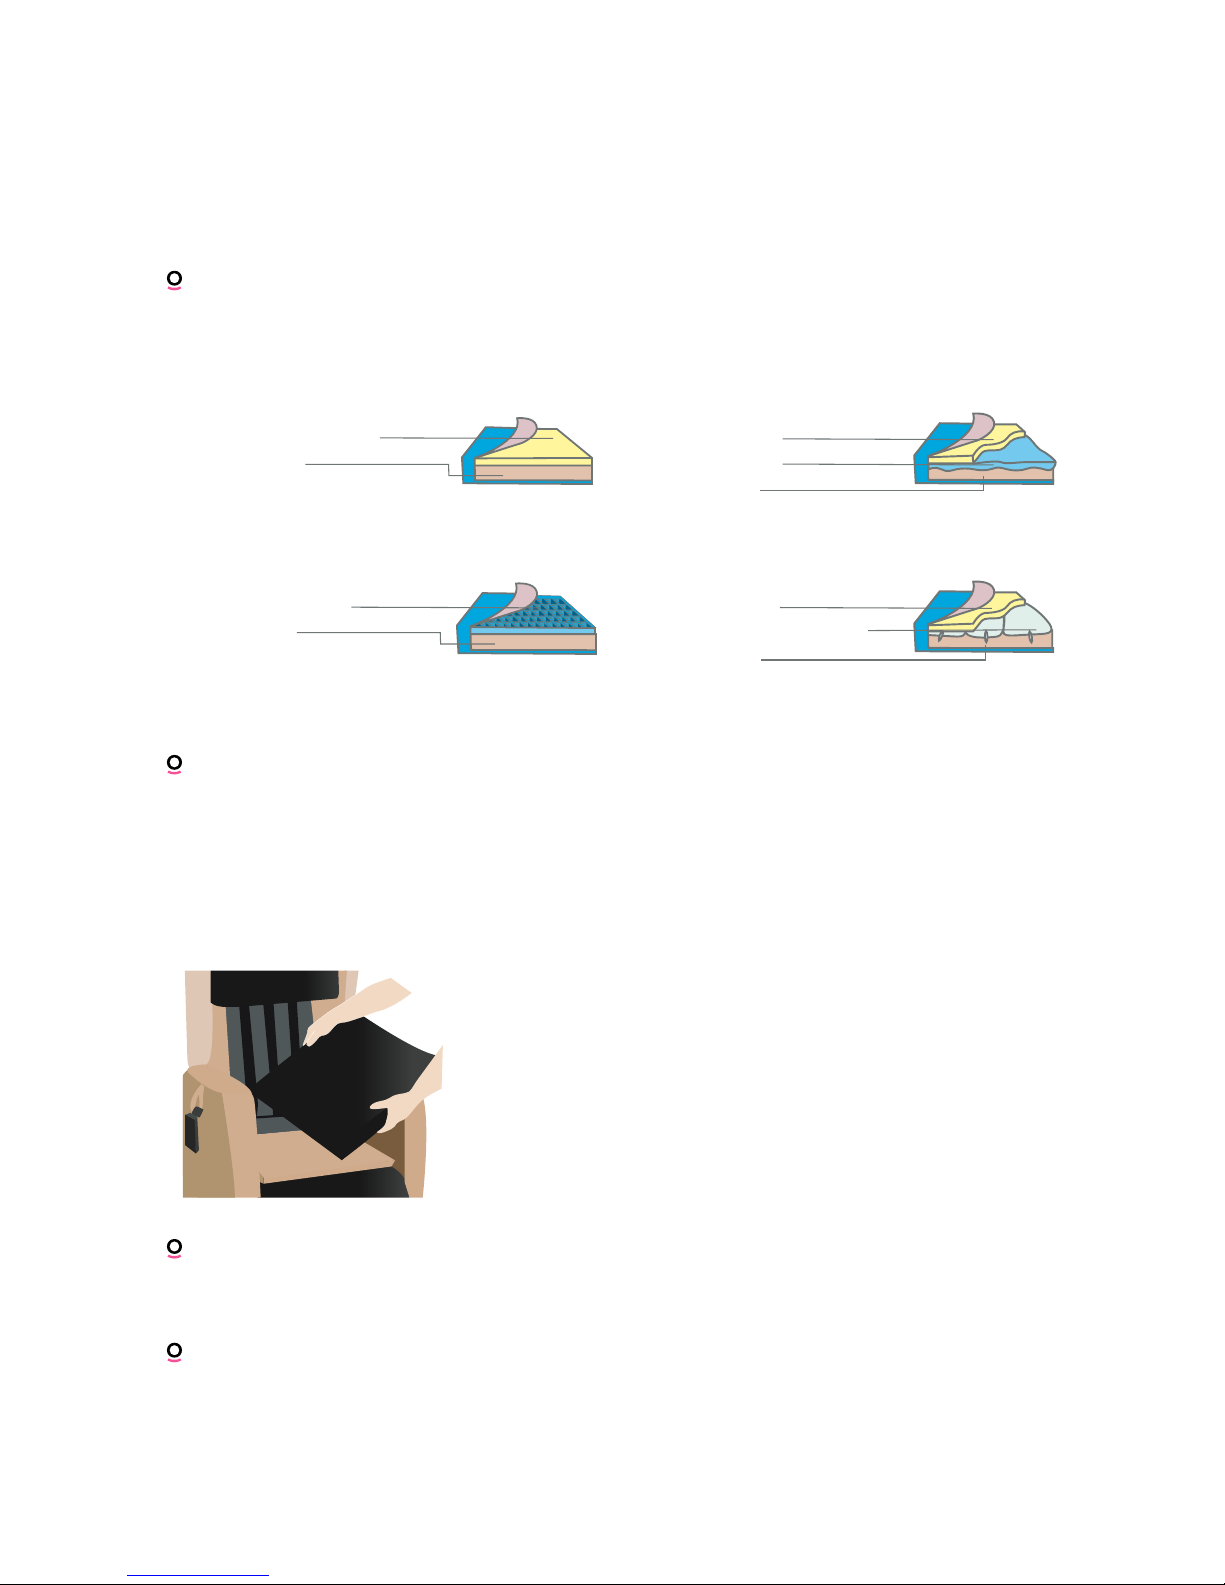
ALWAYS ensure that the transformer is placed in a at position and the
correct way up.
With an electric powered chair for safety reasons check that the
extension cable, which is located at the rear of the chair, has not been
damaged in transportation. On satisfaction connect the chair to your
transformer.
Once the transformer has been connected to the chair, plug the unit into
the power source and switch the power on ready for use.
NB: The chair is safe when the power source is left on.
Important Note: The Regis can be manufactured with a rechargeable
battery system at the time you place your order. This will enable it to be
positioned away from any electricity supply. Please note an electricity
supply will be required when you wish to charge and recharge the battery.
This switch mode power supply adjusts automatically to the
voltage in any country, so only the matching plug-in mains
cable is need for the country.
- Output voltage: 29V DC constant voltage output
- Power supply: wide input voltage range 100-240V AC
- Safety: NTC temperature sensor, primary fuse, overload
protection, overcurrent switch off, short circuit proof output.

9
HANDSET INSTRUCTIONS
These chairs come with pressure management features such as different
seat cushion options and different backs. You should always seek
professional advice and/or support when using a chair for pressure
management and postural control.
The back cushions can come in different styles and are inter-changeable
for your postural and comfort requirements.
Please consult your supplier for different options or for the latest brochure.
To reposition the back cushions simply pull each of the 3 waterfall
cushions away from the back where they are positioned using Velcro
strips – then position as required. Alternative back solutions can be
added by removing the existing cushions and replacing them with the
new ones, again using the Velcro strips.

10
There are a number of seat options depending on your postural and
comfort requirements. They offer differing pressure management options.
Please consult your supplier for the different options.
To change the seat cushion slip your hand down the back of the seat
cushion and pull. This will release the seat cover from the Velcro. Then
peel back the seat cover to reveal the cushion. Simply pull the cushion
free from its Velcro and replace with new seat cushion option ensuring
that the Velcro is correctly aligned. Always ensure that the tted label is
at the front of the seat, face up.
The seat depth can be adjusted with 1” or 2” adjuster pads that t behind
the back cushions.
If you choose the Air Cushion please ensure that you carefully read the
instructions on the separate pump leaet.
Viscoform
Memory foam (std)
Reex Foam
Pressure Risk: Low - Medium
Liquiform
Memory foam
Liquid gel sac
Reex foam
Pressure: Medium-High
Celiform
Gelacel mesh gel
Reex foam
Pressure: Medium-High
Airform
Memory foam
3xmanual air cushions
Reex foam
Pressure: High

11
HANDSET INSTRUCTIONS
The Regis dual tilt in space comes with the following 4 button handset. The
following instructions will aid easy use of your chair.
Dual Motor (Dewert/Okin)
Button 1 Back up
Button 2 Chair rises, leg rest in
Button 3 Back down
Button 4 Chair lowers, leg rest out
1
2
3
4

12
BASIC TECHNICAL CHECK
ALWAYS disconnect your chair from the power source before checking any
part of the chair. Then:
CHECK the wall socket is in working order by trying another appliance.
CHECK the connection from the chair to the transformer is connected.
CHECK to see if any of the cables are damaged or trapped. Damaged
cables should be reported to your supplier.
CHECK to see if any cable connections have become disconnected.
CHECK the electrical fuse and batteries (where applicable.) DO NOT
open or attempt to open any electrical components other than to t,
as instructed, batteries or electrical fuses. To do so may invalidate your
warranty.
CHECK the handset is not damaged. If your handset has a small green
indicator light, is this lighting up?

13
Pressure mapping
All OSKA seat designs undergo rigorous pressure
mapping testing to ensure we achieve the highest
standards possible. A mat of pressure sensors is
applied to the seat. The matrix of sensors quanties
the surface pressure between a person and the
support surface the chair provides. The results provide
a map for analysis by clinicians who can then advise
our design teams. The aim is to ensure that pressure
is as evenly distributed as possible and that the
maximum area of the thighs and buttocks is supported
as at low an interface pressure as possible.
Pressure Map for individual; Gender:Female; Age:35
Years; Weight: 10.5st.
Note: Users with pressure relief needs or concerns are
advised to seek the advice of a tissue viability clinician
on the most suitable level of pressure relief for their
medical requirements.
PRESSURE CARE MANAGEMENT
Depending on the model of chair that you have purchased you will have
different pressure management features such as different seat cushion
options and different backs. Ask OSKA for details and please note that you
should always seek professional advice and/or help when using a chair for
pressure management and postural control.
Considered users, those who
require:
Postural support
Pressure care management
Portering
High leg elevation
Suitable for:
Home
Healthcare
Nursing and Residential Homes

14
UPHOLSTERY CARE
ALWAYS ensure that you follow the cleaning instructions for YOUR
PARTICULAR UPHOLSTERY. Your supplier will provide you with
cleaning instructions. Please note that different fabrics will have different
characteristics and cleaning instructions. ASK YOUR SUPPLIER IF YOU
ARE IN ANY DOUBT about the cleaning instructions. OSKA cannot be
held responsible for any damage caused by cleaning.
REGULAR CLEANING is required to maintain the appearance and
cleanliness of your chair. Small dust and dirt particles can increase the
wear and tear of the upholstery and may dull the fabric.
Your UPHOLSTERY SHOULD NOT BE EXPOSED to direct sunlight for
long periods of time as this will cause your fabric to fade. If your furniture
is positioned within prolonged light, ensure your curtains and blinds are
drawn for protection.
ENSURE your upholstery is protected from sharp objects or buckles
as these may cause the fabric and/or upholstery to snag or become
damaged.
AVOID allowing pets onto your furniture as their claws may cause
damage to the fabric and upholstery. All animals have a degree of oil in
their coats which may transfer to your fabric if they go onto the chair.
This will cause your fabric to prematurely wear.
If you have bre lled cushions regularly plump to avoid the bres
attening.

15
WARRANTY
Your OSKA chair comes with a 2 year warranty on the mechanics and
metal frame. You also have a 1 year warranty on the wooden frame,
upholstery and alternating seat cushions.
OSKA will repair or replace, at our discretion and free of charge to
the original purchaser, any parts covered by this warranty and that on
examination, are found to be defective in material and/or workmanship. The
warranty is for parts and labour only and for transportation to and from the
original delivery point. It does not include any white glove delivery service.
If this is required you will incur an additional cost.
WARRANTY EXCLUSIONS
Fabric damage resulting from misuse, negligence, abuse, accident or
incorrect cleaning.
Unauthorised repairs, alterations and modications.
Damage to the chair from misuse, negligence, abuse or accident.
Damage caused by common carrier abuse or mishandling and any
special, indirect, incidental and/or consequential damages.

WARRANTY CLAIM
Please contact your supplier with your original purchase invoice and
Serial Number chair batch number and they will make the necessary
arrangements with OSKA.
If you are in any doubt about any information or instructions please email
[email protected].com or phone 0845 381 0600 for further assistance.
Serial Number
Recommended supplier
For terms and conditions of sale and or agreement please refer to
your supplier.
1-3 College Hill
London EC4R 2RA
oska.uk.com
0845 381 0600
Table of contents
Other OSKA Indoor Furnishing manuals
Popular Indoor Furnishing manuals by other brands

Eureka Ergonomic
Eureka Ergonomic ERK-CV-32 user guide

Elektra Beckum
Elektra Beckum WT 840 Assembly instructions

Sauder
Sauder Primary Street 417912 Assembly instruction

Wilding Wallbeds
Wilding Wallbeds Brittany Installation booklet

Forte
Forte WNPS123E1 Assembling Instruction

HULALA HOME
HULALA HOME SFYB0365 quick start guide