IMPORTANT NOTE:
1. Use hand tools only for assembly as power tools may
cause damage
2. Carefully remove any staples used for packaging.
3. Phillips Screwdriver also needed for assembly
(not provided)
Remove all parts from carton, separate by part numbers indicated on parts list, and verify part quantities.
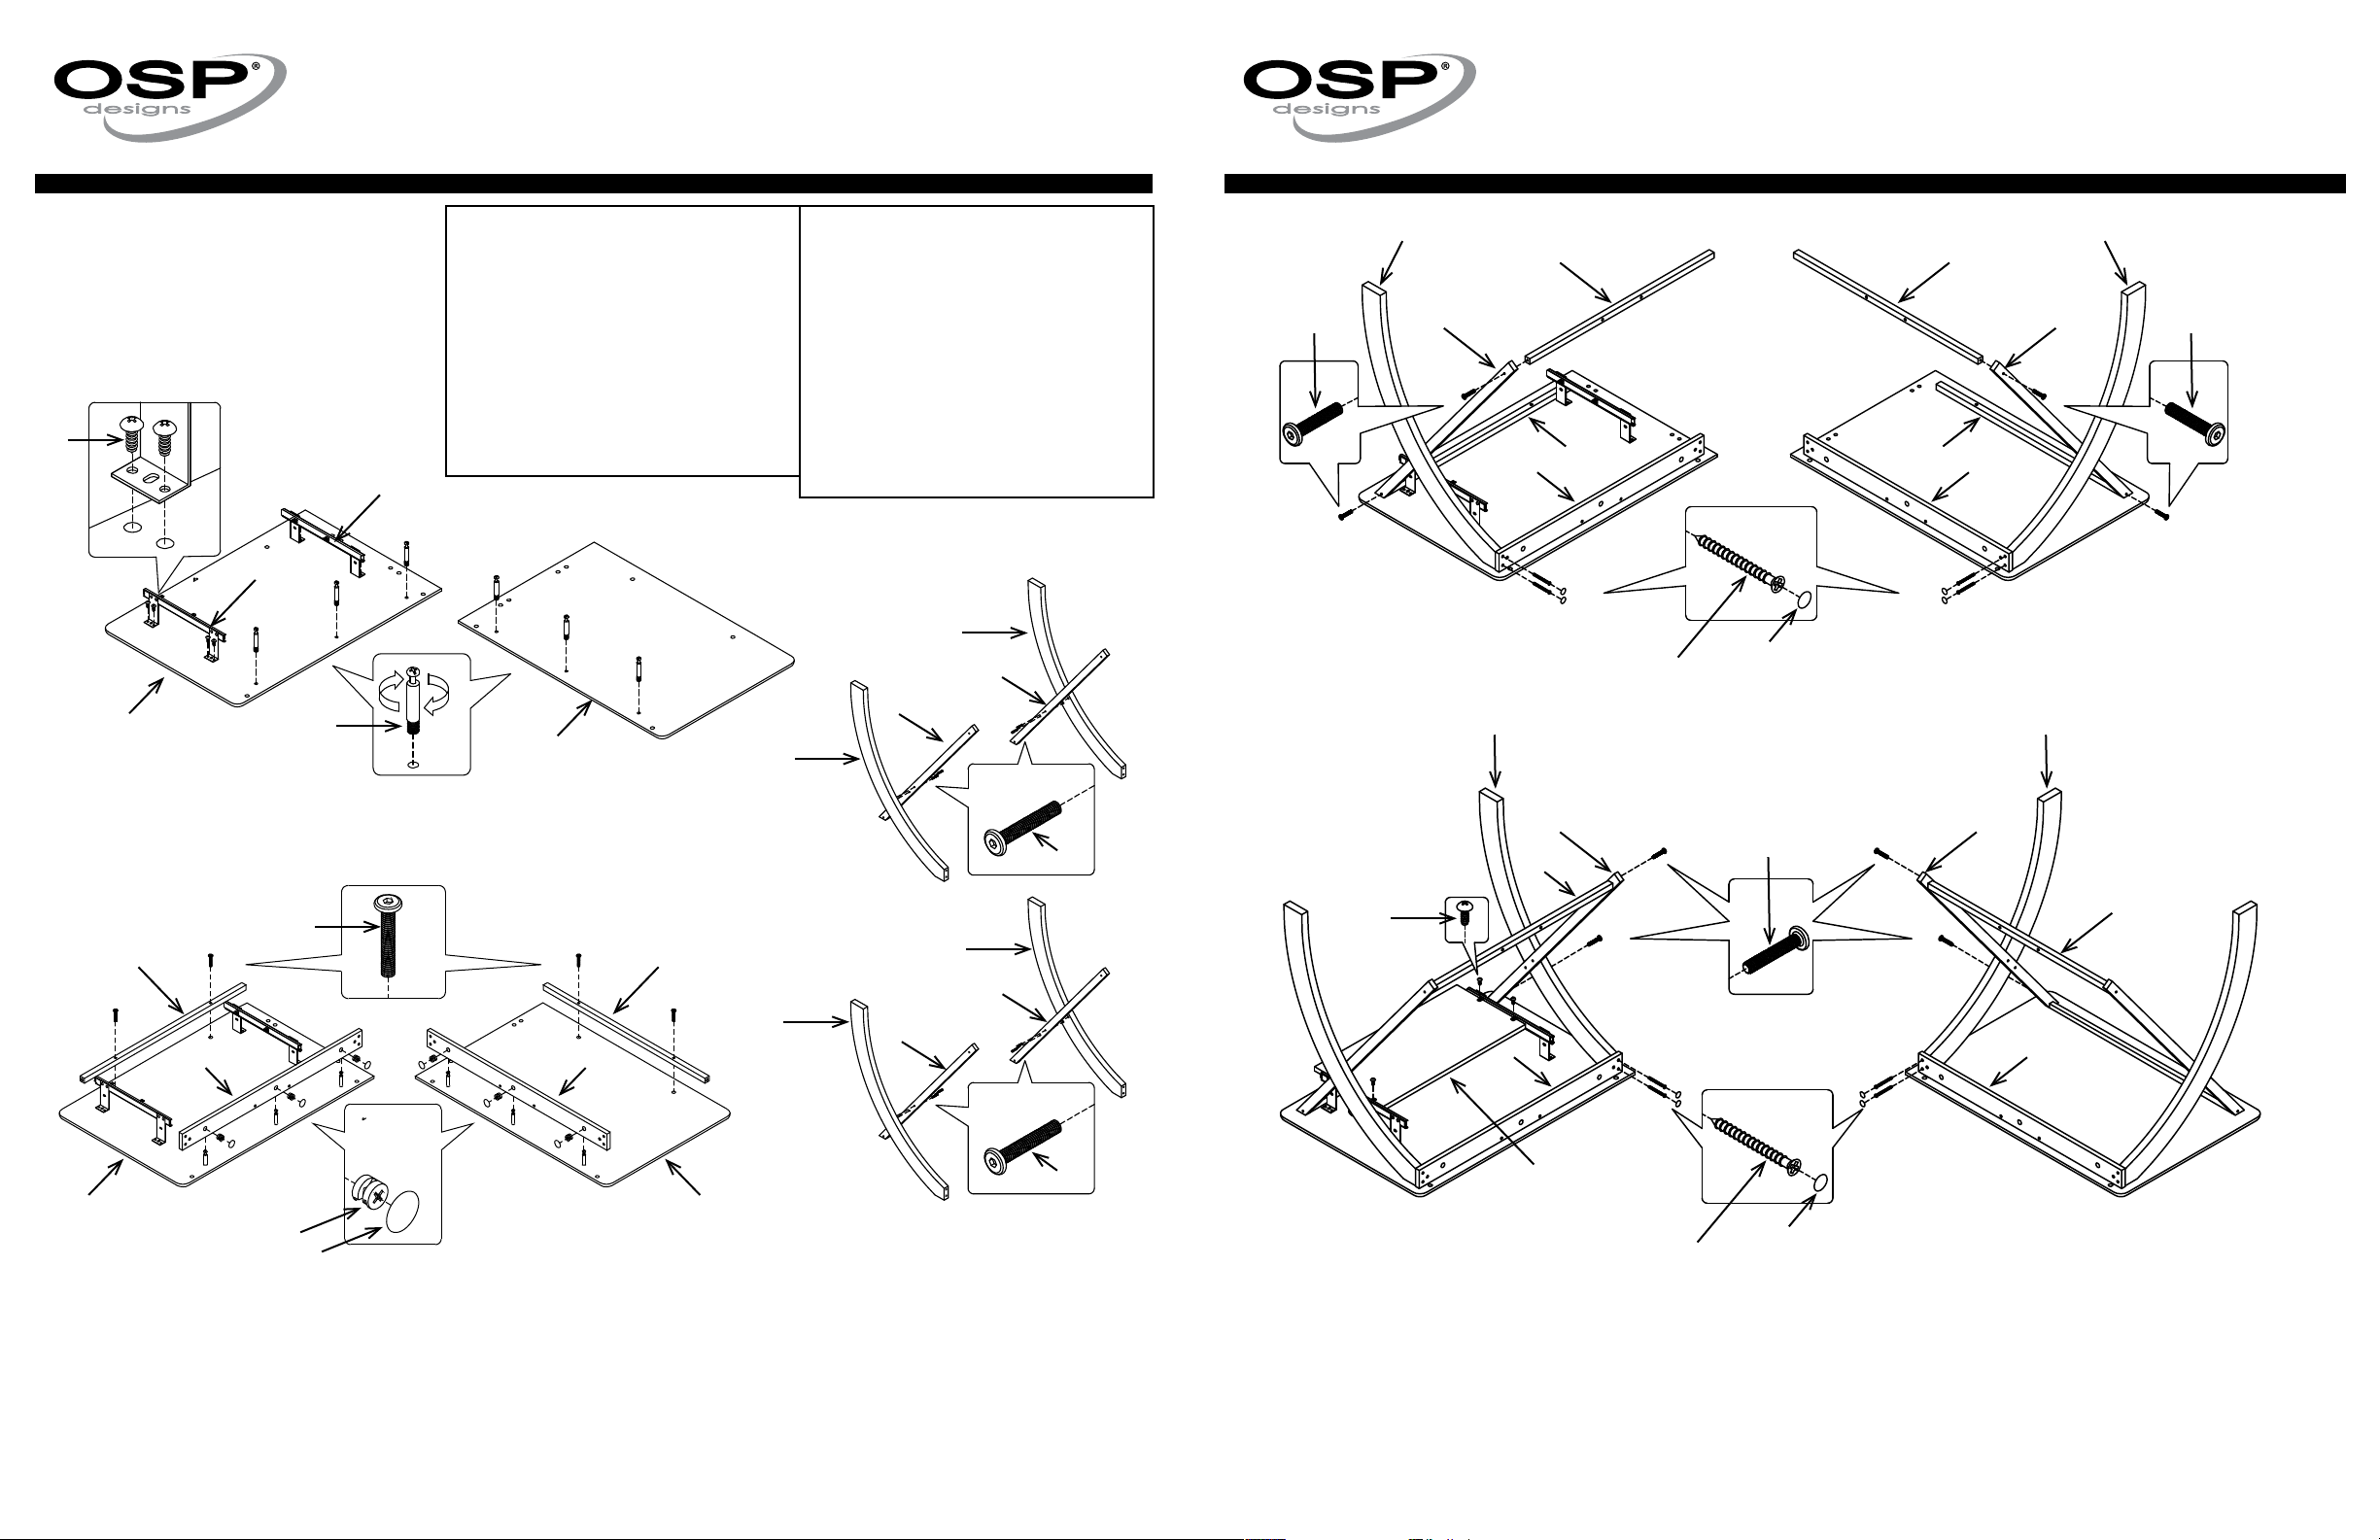
STEP 1 Insert three Cam Lock Studs (14) into Desk Tops (1L & 1R). Attach Slides (10L 7 10R) using two Short Screws (18) for each Slide (10).
FULLY TIGHTEN ALL CAM LOCK STUDS (14) AND SHORT SCREWS (18) USING PHILLIPS SCREWDRIVER (not provided).
STEP 2 Attach one Back Rail (5) to each Desk Top (1) and secure using three Cam Locks (14) for each Back Rail (5), FULLY TIGHTEN ALL CAM
LOCKS (13) USING PHILLIPS SCREWDRIVER (not provided). Cover Cam Locks (13) using six Cam Caps (15). Attach one Top Metal
Rail (9) to each Desk Top (1) using two Long Bolts (17) for each Top Metal Rail (9). FULLY TIGHTEN ALL LONG BOLTS (17) USING
ALLEN WRENCH (23).
STEP 3 Attach two Metal Legs (7) to both Wooden Legs (6L & 6R) using two Long Bolts (17) for each Metal Leg (7). FULLY TIGHTEN ALL LONG
BOLTS (17) USING ALLEN WRENCH (23).
PART QTY
12. Metal L-Bracket ..............4
13. Cam Lock ..................6
14. Cam Lock Stud ..............6
15. Cam Cap ...................6
16. Short Bolt ..................24
17. Long Bolt ..................24
18. Short Screw ................12
19. Medium Screw ...............4
20. Long Screw .................8
21. Wooden Dowel ..............6
22. Sticker ....................12
23. Allen Wrench (not shown) ......1
XT82L
L-SHAPED DESK
ASSEMBLY INSTRUCTIONS
XT82L
L-SHAPED DESK
ASSEMBLY INSTRUCTIONS
STEP 4 Secure Wooden Legs (6L & 6R) to Back Rails (5) using two Long Screws (20) for each Wooden Leg (6L & 6R), secure Metal Legs (7) to Top Metal
Rails (9) using one Long Bolt (17) for each Top Metal Rail (9). Attach Bottom Metal Rails (8) to Metal Legs (7) using one Long Bolt (17) for each Metal Leg (7).
FULLY TIGHTEN ALL LONG BOLTS (17) USING ALLEN WRENCH (23), FULLY TIGHTEN ALL LONG SCREWS (20) USING
PHILLIPS SCREWDRIVER (not provided). Cover holes of Long Screws (20) using four Stickers (22).
STEP 5 REPEAT STEP 4 FOR REMAIING WOODEN LEGS (6L & 6R). Attach Keyboard (3) to Slides (10L & 10R) using
four Short Screws (18).
FULLY TIGHTEN ALL SHORT SCREWS (18) USING PHILLIPS SCREWDRIVER (not provided).
PART QTY
1. Desk Top (1L & 1R) ............2
2. Corner Top ..................1
3. Keyboard ....................1
4. Back Panel ..................2
5. Back Rail ....................2
6. Wooden Leg (6L & 6R) .........4
7. Metal Leg ....................4
8. Bottom Metal Rail .............2
9. Top Metal Rail ................2
10. Slide (10L & 10R) ............2
11. Metal Plate ..................4
STEP 1
STEP 2
STEP 3
1L
1R
13
14
15
17
6L
18
6R
7
9
10L
10R
STEP 4
STEP 5
9
1L 1R
6R
6L
7
7
7
17
17 3
5
20
8
22
6L 6R
17 17
8
77
9 9
5
55
17
6R 6L
20 22
5 5
18
77
8
8


