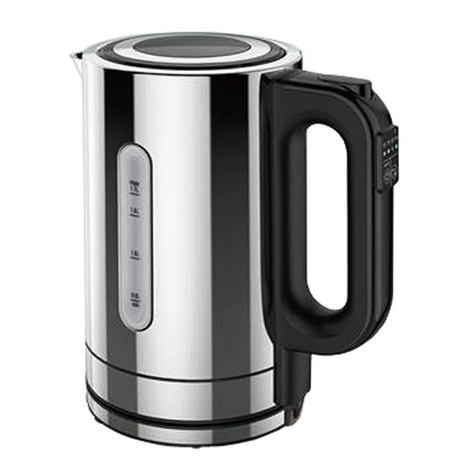
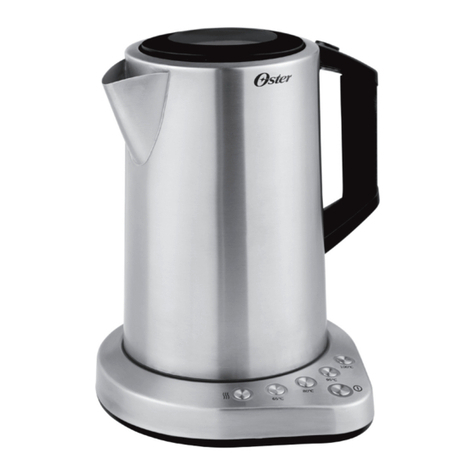
Oster BVSTKT8980 User manual

Manual de Instrucciones
HERVIDOR ELÉCTRICO DE VIDRIO CON CONTROL DE TEMPERATURA DIGITAL
LEA TODAS LAS INSTRUCCIONES ANTES DE USAR ESTE APARATO
Instruction Manual
DIGITAL ELECTRIC GLASS KETTLE WITH TEMPERATURE CONTROL
READ ALL INSTRUCTIONS BEFORE USING THIS APPLIANCE
MODELO
MODEL BVSTKT8980

Español - 1
PRECAUCIONES IMPORTANTES
Para disminuir el riesgo de incendios, descargas eléctricas o lesiones personales, se deben seguir
siempre las precauciones básicas de seguridad al utilizar artefactos eléctricos, incluyendo las siguientes:
1. LEA TODAS LAS INSTRUCCIONES ANTES DE UTILIZAR EL HERVIDOR ELÉCTRICO.
2. NO toque las supercies calientes. Utilice las asas o las perillas.
3. Para protegerse contra descargas eléctricas, no sumerja el artefacto, incluyendo la base de
alimentación, en agua ni en ningún otro líquido.
4. Desenchufe la base de alimentación del tomacorriente cuando no esté en uso, antes de colocarla
nuevamente en su lugar y de limpiarla. Deje que se enfríe antes de colocar o sacar piezas y antes
de limpiar el electrodoméstico.
5. NO utilice un electrodoméstico que tenga un cable o un enchufe dañado, ni después de que el
artefacto haya presentado fallas, o haya sufrido cualquier otro daño. Lleve el artefacto al Centro de
Servicio Autorizado Oster®más cercano para su inspección, reparación o ajuste.
6. El uso de aditamentos no recomendados por el fabricante puede ocasionar incendios, descargas
eléctricas o lesiones personales.
7. NO utilice en exteriores.
8. NO deje que el cable cuelgue del borde de la mesa o la mesada ni que entre en contacto con
supercies calientes.
9. NO coloque este artefacto cerca o sobre un quemador caliente, ya sea de gas o eléctrico, ni dentro
de un horno caliente.
10. Precaucion extrema debe tenerse cuando maneje o mueva el hervidor y cuando sirva el liquido
caliente del hervidor.
11. Asegúrese de que el hervidor esté debidamente colocado en la base de alimentación antes de
enchufarlo a la pared o encenderla. Para desconectarlo, saque el enchufe del tomacorriente.
12. Retire el hervidor de su base antes de llenar o servir. No intente mover el hervidor de su base hasta
que este apagado, manual o automaticamente.
13. Saque el hervidor de la base de alimentación antes de llenarlo o utilizarlo para verter. NO intente sacar el
hervidor de la base de alimentación hasta que esté apagado, ya sea por acción manual o automática.
14. Utilice el hervidor únicamente con su respectiva base de alimentación, y viceversa.
15. NO utilice este producto para otros nes distintos a los recomendados.
16. Coloque sobre una supercie plana y nivelada para evitar interrumpir el ujo de aire por debajo
del electrodoméstico.
17. Debe emplearse extrema precaución al manipular o mover el hervidor y al utilizarlo para servir
agua hirviendo.
18. Si se abre la tapa durante el ciclo de hervido pueden producirse quemaduras por vapor.
19. NO TOQUE la placa calentadora durante el uso de su artefacto o cuando termine de usarlo, ni
despues de haberlo apagado o desconectado del tomacorriente, la placa calentadora puede estar
caliente despues de su uso, espere a que se enfrie antes de tocarla.
20. Este artefacto eléctrico no está destinado para ser usado por personas (incluyendo niños) cuyas
capacidades físicas, sensoriales o mentales estén disminuidas, o carezcan de experiencia y
conocimiento, a menos que una persona responsable por su seguridad les haya supervisado o
instruido en el uso de este electrodoméstico. Los niños deberán estar bajo supervisión para
cerciorarse de que no jueguen con el artefacto eléctrico.
21. Manipule la unidad con cuidado para evitar la rotura del vidrio.
22. Se requiere estricta supervisión cuando las personas discapacitadas o los niños utilicen cualquier
electrodoméstico o estén cerca de él.
23. Este artefacto ha sido diseñado para uso doméstico o en aplicaciones similares tales como: áreas
de cocina del personal de tiendas, ocinas y otros ambientes de trabajo, Casas de campo, granjas,
por clientes de hoteles, moteles y otros ambientes de tipo residencial, así como en ambientes de
hospederías, dormitorio o comedor.
CONSERVE ESTAS INSTRUCCIONES

Español - 2
INSTRUCCIONES ESPECIALES PARA EL CABLE
1. Se proporciona un cable de alimentación corto para disminuir los riesgos originados
por enredos o tropiezos con cables largos.
2. Si se necesita un cable más largo, puede utilizarse una extensión adecuada.
La potencia nominal indicada de la extensión debe ser igual o mayor a el hervidor
eléctrico (vea la potencia nominal marcada en la etiqueta del producto). El cable
alargado resultante debe colocarse de manera que no cuelgue del mostrador o de la
mesa, donde los niños podrían halarla o podría ocasionar tropiezos accidentales.
INFORMACIÓN IMPORTANTE ACERCA DE LA ROTURA DEL VIDRIO
Este hervidor se ha fabricado con un duradero vidrio templado de alta calidad. Sin
embargo, puede romperse en ciertas condiciones. Para garantizar su durabilidad, evite que
el vidrio entre en contacto con objetos duros, como grifos, armarios, utensilios de metal y
otros materiales que puedan romper el vidrio.
NOTA: LA GARANTÍA DE ESTE PRODUCTO NO CUBRE NINGUNA ROTURA DEL
VIDRIO DE DE LA CARCASA.
PRECAUCIONES:
ADVERTENCIA: PARA EVITAR QUEMADURAS, manipule el hervidor con cuidado
mientras el agua esté calentándose, hirviendo o enfriándose. El hervidor debe tener la tapa
cerrada mientras esté en funcionamiento para evitar quemaduras de vapor. Mantenga la
boquilla alejada de las personas, ya que el vapor puede producir quemaduras.
1. Coloque el hervidor eléctrico de forma que quede alejado del borde del mostrador o mesada.
2. El hervidor está diseñado SÓLO PARA HERVIR AGUA. No intente calentar ningún
otro líquido ni cocinar alimentos en el electrodoméstico.
3. NUNCA coloque el hervidor eléctrico CERCA DE SUPERFICIES CALIENTES.
4. Lave el ltro únicamente a mano. NINGUNA DE LAS PIEZAS DEL ARTEFACTO SON
APTAS PARA USO EN LAVAPLATOS AUTOMÁTICOS.
5. NO rebase la marca del nivel máximo de agua (“Max”) al llenar el hervidor.
Llenarlo en exceso puede ocasionar que el agua hierva y se desborde por la boquilla.
6. NO mantenga presionado los botones ya que esto podría dañar el mecanismo de
apagado automático.
7. Transporte o mueva el hervidor eléctrico únicamente tomándolo por el asa.
8. El cuerpo de el hervidor puede ponerse muy caliente, tenga cuidado al manipularlo.
9. No sumerja el hervidor ni la base de alimentación en agua ni en ningún otro líquido.
SOLO PARA USO DOMÉSTICO.

Español - 3
DESCRIPCIÓN DEL PRODUCTO
1. Tapa
2. Botón para soltar la tapa
3. Boquilla
4. Panel de control digital
a. Botón de
encendido / apagado
b. Botón para seleccionar el
tipo de té
c. Luces LED indicadoras de
la función
5. Asa
6. Jarra de vidrio iluminada
7. Base de alimentación
8. Compartimiento para el
cable (abajo de la base
de alimentación)
1
3
5
4
6
7
8
c
4
ab
2

Español - 4
ANTES DE USAR POR PRIMERA VEZ
1. Lave el interior de el hervidor y la tapa con detergente suave y agua. Enjuague bien
todas las piezas. No sumerja el hervidor eléctrico ni la base de alimentación en agua ni
en ningún otro líquido. Estas piezas no son aptas para uso en lavaplatos automáticos.
2. Llene el hervidor eléctrico con agua limpia hasta la marca del nivel máximo de agua
“MAX” que indica la ventanilla. Hierva el agua de acuerdo a las instrucciones que
aparecen más adelante.
3. Cuando el agua y la unidad se hayan enfriado, deseche el agua. Enjuáguela con
agua fría y repita la operación.
4. Su hervidor eléctrico ya está listo para usar.
INSTRUCCIONES PARA EL FUNCIONAMIENTO
1. Coloque la base de alimentación en una supercie plana resistente al calor, tan
cerca del tomacorriente como pueda.
2. Disponga el cable de la base de alimentación de acuerdo a la guías de salida. Si el
cable se dispone de manera adecuada, la base de alimentación quedará nivelada
al colocar el hervidor encima. No haga funcionar el hervidor eléctrico si la base de
alimentación no está nivelada. Si no lo está, retire el hervidor de la base de
alimentación y vuelva a seguir las instrucciones para colocar el cable.
3. Abra la tapa para llenar con agua. Llene el hervidor eléctrico con agua por debajo de
la marca del nivel máximo de agua “MAX” que indica la ventanilla. NOTA: No rebase
la marca del nivel máximo de agua “MAX” al llenar el hervidor eléctrico.
CÓMO SELECCIONAR LAS FUNCIONES
PARA EL TÉ NEGRO O PARA HERVIR AGUA:
Esta función ha sido diseñada para calentar el agua a la temperatura ideal en la
preparación de té negro y/o hervir agua.
1. Enchufe el cable en el tomacorriente adecuado.
2. Coloque el hervidor sobre la base, la unidad pitará dos veces.
3. Seleccione la función de té negro/hervir agua pulsando el botón “ ” hasta que se
encienda la luz LED con el símbolo de té negro/hervir agua hirviendo “B”. (ver gura 1)
gura 1

Español - 5
4. Una vez seleccionado, presione el botón “ ” y la unidad comenzará a hervir y
usted notará que la jarra de vidrio con iluminación en color rojo se ilumina.
NOTA: Alternativamente, usted simplemente puede presionar el botón “ ”
después de colocar la pava eléctrica sobre la base como té negro/hervir es
la selección por defecto.
5. La unidad se apagará automáticamente cuando la temperatura del agua alcance los
aproximadamente 100°C, que es la temperatura ideal para preparar té negro, así
como el punto de ebullición para el agua.
NOTA: Si necesita detener el calentamiento del hervidor, presione el botón “ ” una vez,
el hervidor emitirá un pitido y tanto la iluminación como la luz LED se apagarán.
PARA EL MATE:
Esta función ha sido diseñada para calentar el agua a la temperatura ideal en la
preparación de Mate.
1. Enchufe el cable en el tomacorriente adecuado.
2. Coloque el hervidor sobre la base, la unidad pitará dos veces.
3. Seleccione la función mate pulsando el botón “ ” hasta que se encienda la luz LED
con el símbolo de mate “M”. (ver gura 2)
gura 2
4. Una vez seleccionado, presione el botón “ ” y la unidad comenzará a hervir y usted
notará que la jarra de vidrio con iluminación en color azul se ilumina.
5. La unidad se apagará automáticamente una vez que la temperatura del agua alcance
la temperatura ideal para preparar mate.
NOTA: Si necesita detener el calentamiento del hervidor, presione el botón “ ” una vez,
el hervidor emitirá un pitido y tanto la iluminación como la luz LED se apagarán.
PARA EL TÉ BLANCO O VERDE:
Esta función ha sido diseñada para calentar el agua a la temperatura ideal en la
preparación de té blanco y/o verde.
1. Enchufe el cable en el tomacorriente adecuado.
2. Coloque el hervidor sobre la base, la unidad pitará dos veces.

Español - 6
3. Seleccione la función de té blanco/verde pulsando el botón “ ” hasta que se encienda
la luz LED con el símbolo de té blanco/verde “W/G”. (ver gura 3)
gura 3
4. Una vez seleccionado, presione el botón “ ” y la unidad comenzará a hervir y usted
notará que la jarra de vidrio con iluminación en color verde se ilumina.
5. La unidad se apagará automáticamente una vez que la temperatura del agua
alcance la temperatura ideal para preparar té blanco y/o verde.
NOTA: Si necesita detener el calentamiento del hervidor, presione el botón “ ” una vez,
el hervidor emitirá un pitido y tanto la iluminación como la luz LED se apagarán.
PARA EL TÉ DE OOLONG:
Esta función ha sido diseñada para calentar el agua a la temperatura ideal en la
preparación de té Oolong.
1. Enchufe el cable en el tomacorriente adecuado.
2. Coloque el hervidor sobre la base, la unidad pitará dos veces.
3. Seleccione la función de té de Oolong pulsando el botón “ ” hasta que se encienda la
luz LED con el símbolo de té de Oolong “O”. (ver gura 4)
gura 4
4. Una vez seleccionado, presione el botón “ ” y la unidad comenzará a hervir y usted
notará que la jarra de vidrio con iluminación en color púrpura se ilumina.
5. La unidad se apagará automáticamente una vez que la temperatura del agua alcance
la temperatura ideal para preparar té de Oolong.
NOTA: Si necesita detener el calentamiento del hervidor, presione el botón “ ” una vez,
el hervidor emitirá un pitido y tanto la iluminación como la luz LED se apagarán.
FUNCIÓN PARA MANTENER CALIENTE:
La función para mantener caliente se puede activar de la siguiente manera:

Español - 7
SI EL HERVIDOR HIERVE HASTA SECARSE
Si el hervidor se utiliza de acuerdo a las instrucciones de uso proporcionadas, es poco
probable que hierva hasta secarse. Sin embargo, en el caso de que esto sucediera,
el hervidor cuenta con un dispositivo de seguridad a prueba de fallas que apagará
automáticamente el hervidor si detecta esta irregularidad y lo mantendrá apagado hasta que
se le vuelva a agregar por lo menos la cantidad mínima de agua. Deje que el hervidor se
enfríe al menos durante media hora antes de volverlo a utilizar si ha hervido hasta secarse.
1. Enchufe el cable en el tomacorriente adecuado.
2. La unidad pitará dos veces.
3. Presione el botón “”hasta que la luz LED del té deseado se encienda.
4. Mantenga presionado el botón “ ” durante 2 segundos.
5. La unidad comenzará a calentar a la temperatura asignada al té seleccionado.
(NOTA: la luz LED parpadeará durante el proceso de calentamiento y la jarra de vidrio
se iluminará con el color correspondiente al té seleccionado).
6. Una vez que la temperatura haya sido alcanzada, la unidad cambiará
automáticamente al ajuste de mantener caliente.
7. La luz LED continuará parpadeando bajo el símbolo del té seleccionado que indica
que la función de mantener caliente está activa.
8. La unidad mantendrá el agua caliente durante 30 minutos, después de lo cual la luz
LED se apagará.
NOTA: Si necesita detener el calentamiento del hervidor, presione el botón “ ” una
vez, el hervidor emitirá un pitido y tanto la iluminación como la luz LED se apagarán.
NOTA: Cuando utilice la función mantener caliente para el té negro/hervir agua, la
unidad se mantendrá caliente a una temperatura ligeramente inferior, que en este caso
es el ajuste de temperatura para el té de Oolong.

Español - 8
MANTENIMIENTO Y LIMPIEZA
1. Los residuos minerales presentes en el agua del grifo pueden ocasionar que se
formen depósitos minerales en el hervidor eléctrico al usarlo con frecuencia.
Para eliminar dichos depósitos, llene el hervidor con una solución de 3 tazas de
vinagre blanco y 3 tazas de agua. Deje reposar toda la noche.
2. Vacíe el hervidor eléctrico y deseche la solución de vinagre. Elimine las manchas
que queden en el interior frotándolo con un paño húmedo.
3. Llene el hervidor eléctrico con agua limpia. Colóquelo en la base de alimentación,
hágalo hervir y luego deseche el agua. Repita una vez más la operación y el
hervidor quedará listo para usar.
4. El hervidor eléctrico no funcionará nuevamente hasta que no se presione hacia
abajo interruptor de encendido/apagado.
5. Saque el hervidor de la base de alimentación y desconéctela del tomacorriente
antes de limpiar la unidad. No sumerja el hervidor ni la base de alimentación en
agua ni en ningún otro líquido.
6. La parte exterior del hervidor eléctrico puede limpiarse con un paño húmedo.
NOTA: No utilice nunca químicos, estropajos de metal ni limpiadores abrasivos para
limpiar ninguna parte del hervidor, incluyendo la base de alimentación.
INSTRUCCIONES PARA EL FILTRO
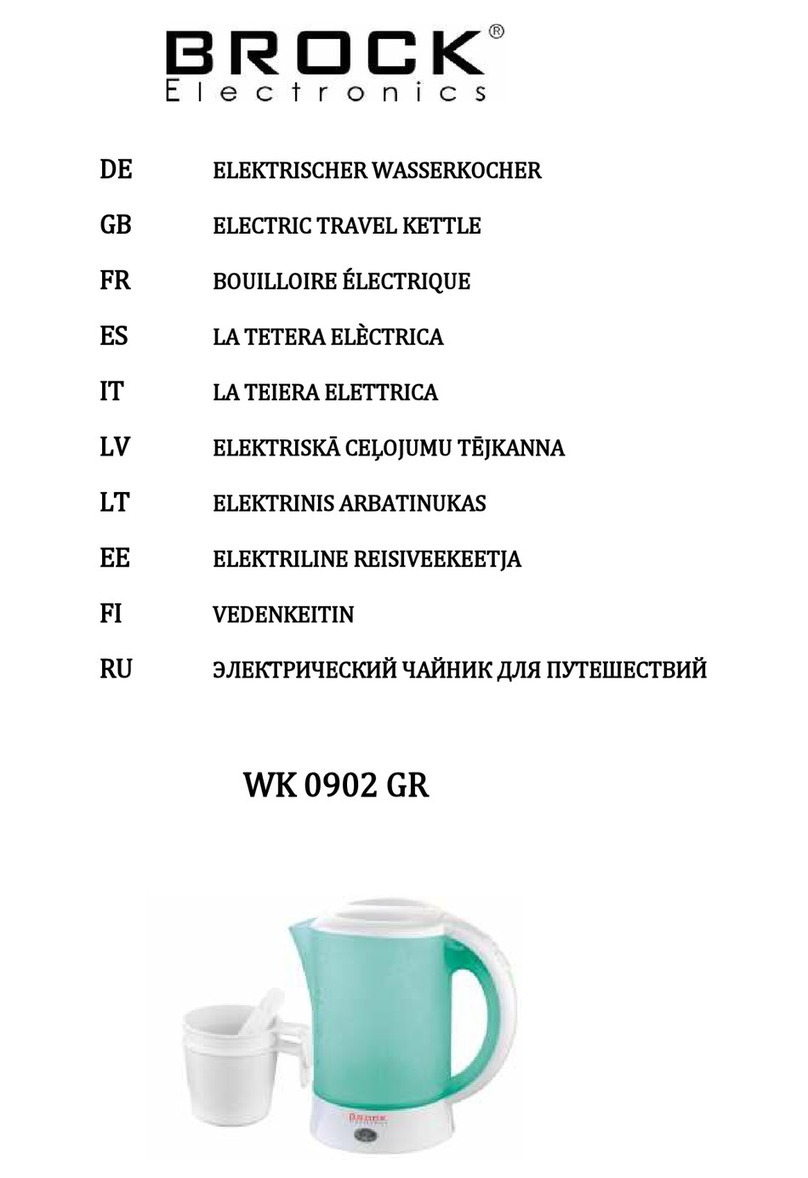
Se ha incorporado un ltro de malla al hervidor para disminuir la cantidad de residuos
minerales que puedan entrar en sus bebidas o alimentos. Para evitar la acumulación de
residuos minerales, vacíe el hervidor y deseche el agua sobrante después de hervir.
La frecuencia con la que se debe limpiar el ltro variará dependiendo del lugar en el
que viva y de qué tan a menudo usa el hervidor. El ltro deberá limpiarse siempre que
queden residuos visibles y especialmente si disminuye la velocidad de vertido.
LIMPIEZA DEL FILTRO
IMPORTANTE: El hervidor debe estar apagado, desconectado del tomacorriente
y totalmente frío antes de poder sacar o colocar nuevamente el ltro. No emplee
demasiada fuerza ya que esto podría dañar el ltro o la tapa.
1. Vacíe el hervidor y levante la tapa.
2. Sujete la parte superior del filtro con el dedo índice y el pulgar, y hale hacia arriba.
Posiblemente deba sostener el hervidor al sacar el filtro. PRECAUCIÓN: No toque
la malla con los dedos. Ejercer presión sobre la malla puede dañar el filtro.
3. Para limpiarlo, enjuáguelo con agua del grifo y cepíllelo ligeramente con un cepillo
de cerdas suaves.
4. Para volver a colocar el filtro, sujételo nuevamente con el dedo índice y el pulgar.
Empuje suavemente el filtro dentro de la cavidad correspondiente en el hervidor
hasta que escuche un chasquido. El filtro ha quedado en su lugar. Tire levemente
del filtro para asegurarse de que haya quedado bien colocado.
5. Enjuague el hervidor con agua limpia y estará listo para usarlo.

English - 1
IMPORTANT SAFEGUARDS
When using electrical appliances, basic safety precautions should always be followed to reduce the
risk of re, electric shock, and/or injury to persons, including the following:
1. READ ALL INSTRUCTIONS BEFORE USING THE ELECTRIC KETTLE.
2. DO NOT touch hot surfaces. Use handles or knobs.
3. To protect against electric shock, DO NOT immerse this appliance, including power
base, in water or any other liquid.
4. Unplug the power base from the power outlet when not in use, before repositioning and before
cleaning. Allow it to cool before putting on or taking off parts, and before cleaning the appliance.
5. DO NOT operate any appliance with a damaged cord or plug or after the appliance
malfunctions, or has been damaged in any manner. Take the appliance to the nearest
Authorized Oster®Service Center for examination, repair or adjustment.
6. The use of accessory attachments not recommended by the appliance manufacturer, and may
result in re, electric shock or injury to persons.
7. DO NOT use outdoors.
8. DO NOT let cord hang over edge of table or counter, or touch hot surfaces.
9. DO NOT place this appliance on or near a hot gas or electric burner or in a heated oven.
10. Extreme caution should be taken when handling or moving the kettle and when serving hot liquids.
11. Ensure that the kettle is properly located on the power base before plugging into the wall or switching
on. To disconnect, turn all controls to the off position “O” then remove plug from wall outlet.
12. Remove the kettle from its base before lling or serving. Do not attempt to move the kettle away from
its base until it is switched off, either manually or automatically.
13. Remove the kettle from power base before lling or pouring. DO NOT attempt to remove the
kettle from the power base until it is switched off, manually or automatically.
14. Use the kettle only with the power base supplied and vice versa.
15. DO NOT use appliance for anything other than its intended use.
16. Use on a hard, at, level surface only, to avoid interruption of airow underneath the appliance.
17. Extreme caution must be used when handling or moving the kettle, and pouring from the kettle
when containing boiling water.
18. Scalding may occur if the lid is open during the heating cycle.
19. DO NOT TOUCH the bottom cover of the body of the kettle, (this includes the inside and the
outside part of the bottom of the kettle) during use.
20. Handle unit carefully to avoid breaking glass.
21. This appliance is not intended for use by persons (including children) with reduced physical,
sensory or mental capabilities, or lack of experience and knowledge, unless they have been
given supervision or instruction concerning use of the appliance by a person responsible for
their safety. Children should be supervised to ensure that they do not play with the appliance.
22. Close supervision is necessary when any appliance is used by or near children, or
incapacitated individuals.
23. This appliance has been designed for home use or in similar applications such as: kitchen
areas of store personnel, ofces and other work environments, cottages, farms, by clients
of hotels, motels and other residential environments, as well as in environments of hostels,
bedrooms or dining rooms.
SAVE THESE INSTRUCTIONS

English - 2
SPECIAL CORD SET INSTRUCTIONS
1. A short power supply cord is provided to reduce the hazard resulting from becoming
entangled in or tripping over a longer cord.
2. If a longer cord is necessary, an approved extension cord may be used. The
electrical rating of the extension cord must be equal to or greater than the electrical
rating of the electric kettle (see rating label marked on product). The resulting extended
cord must be arranged so that it will not drape over the counter top or table top where
it can be pulled on by children or tripped over accidentally.
IMPORTANT INFORMATION ABOUT GLASS BREAKAGE
This Kettle is manufactured with high quality and durable tempered glass. However,
glass can still break under certain conditions. To ensure durability, prevent the glass from
contacting hard objects such as faucets, cabinets, metal utensils and other materials that
can break the glass.
NOTE: THE WARRANTY FOR THIS PRODUCT DOES NOT COVER ANY BREAKAGE
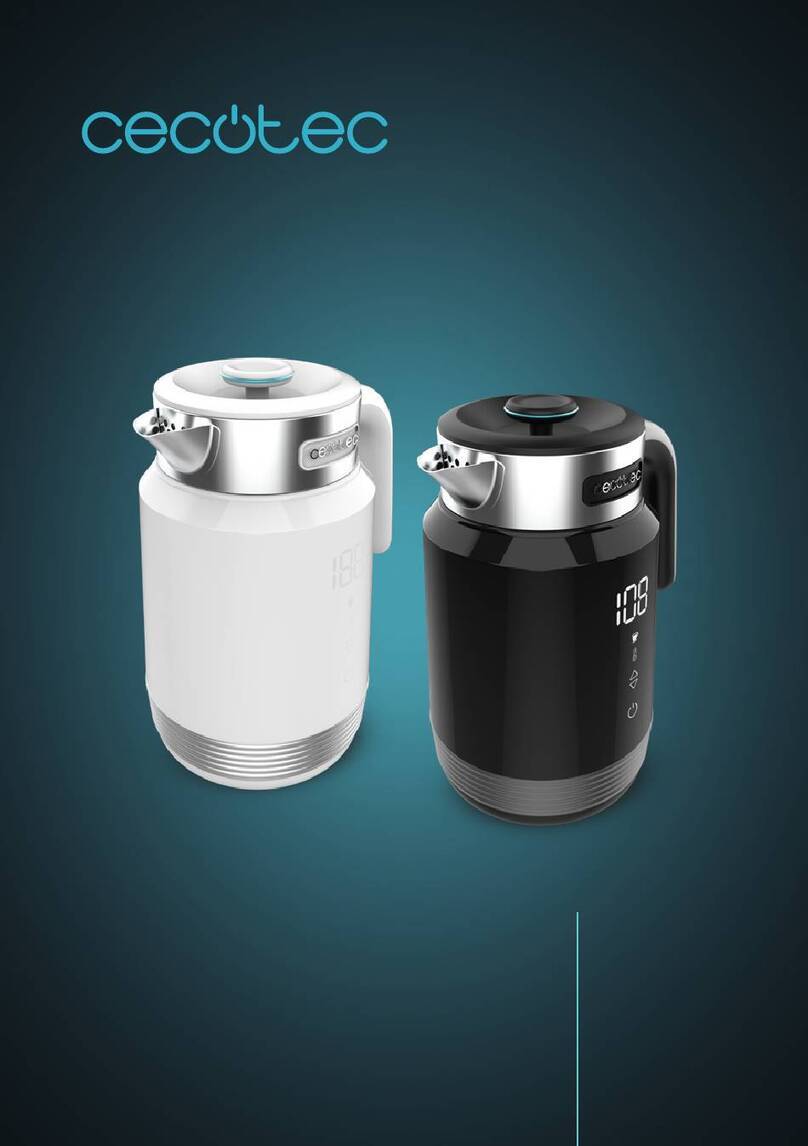
OF THE GLASS HOUSING.
PRECAUTIONS:
WARNING: TO AVOID SCALDING, handle this kettle with care as water is heating,
boiling, and cooling. The lid must remain closed during use to avoid steam burns.
Keep spout away from persons as scalding can result from steam.
1. Place the electric kettle well back from the edge of the counter.
2. This kettle is intended for boiling WATER ONLY. Do not heat any other liquid or
attempt to cook any food in this appliance.
3. NEVER place the kettle NEAR HOT SURFACES.
4. Hand wash lter only. NO PARTS ARE DISHWASHER SAFE.
5. Do not exceed the “Max” water level mark when lling. Overlling could cause hot
water to boil out of the spout.
6. Do not hold the switch on as this may damage the auto shut-off mechanism.
7. Carry or move electric kettle by handle only.
8. Kettle body may get very hot, be careful when handling.
9. Do not immerse the kettle or power base in water or any other liquid.
FOR HOUSEHOLD USE ONLY.

English - 3
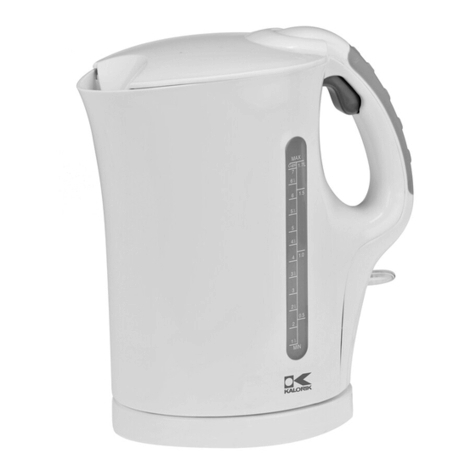
DESCRIPTION OF THE APPLIANCE
1
3
5
4
6
7
8
c
4
ab
2
1. Lid
2. Lid Unlock Button
3. Spout & Fine Screen Filter
4. Digital Control Panel
a. On/Off Button
b. Tea Selection Button
c. LED Indicator Lights
5. Handle
6. Illuminating Glass Housing
7. Power Base
8. Cord Wrap Area
(under the power base)

English - 4
BEFORE THE FIRST USE
1. Wash the inside of the kettle and lid with mild detergent and water. Rinse each
thoroughly. Do not immerse the kettle or power base in water or any other liquid.
These items are not dishwasher safe.
2. Fill the electric kettle with fresh water to the “MAX” water level mark on water
window. Boil the water, following the directions below for use of your kettle.
3. When the water and unit have cooled, discard the water. Rinse with cold water
and repeat.
4. Your electric kettle is now ready for use.
OPERATING INSTRUCTIONS
1. Position the power base on a at, heat resistant surface, as close as possible to a
power outlet.
2. Follow cord routing in power base according to exit patterns. Proper cord routing will
result in the power base laying at when kettle is placed in base. DO NOT operate
kettle if power base is not at. If power base is not at, remove kettle from power
base and repeat cord placement instructions.
3. To ll with water, open lid. Fill the electric kettle with water below the “MAX” water
level mark. NOTE: Do not exceed the “MAX” water level mark indicated on the
electric kettle.
SELECTING THE FUNCTIONS
FOR BLACK TEA OR TO BOIL WATER:
This function was designed to heat the water at the ideal temperature to prepare Black
Tea and/or boil water.
1. Plug the electric cord into the appropriate electrical outlet.
2. Place kettle onto the base, the unit will beep twice.
3. Select the Black Tea/Boil by pushing the button “ ” until the LED light under the
symbol for Black Tea/Boil Water “B” lights up, (see gure 1).
gura 1

English - 5
4. Once selected, press the “ ” and the unit will begin to heat up and you will notice the
illuminating glass housing illuminates red. NOTE: Alternatively, you can simply push
button “ ” after placing kettle onto base as Black Tea/Boil is default selection.
5. The unit will shut off automatically once the temperature of the water reaches the ideal
temperature to brew black tea as well as the boiling point for water.
NOTE: If you need to stop the kettle heating press the “ ” button once, the kettle will
beep and the illumination and LED light will go out.
FOR MATE TEA:
This function was designed to heat the water at the ideal temperature to brew Mate.
1. Plug the electric cord into the appropriate electrical outlet.
2. Place kettle onto the base, the unit will beep twice.
3. Select the Mate function by pushing the button “ ” until the LED light under the
symbol for Mate “M” lights up, (see gure 2).
gura 2
4. Once selected, press the “ ” and the unit will begin to heat up and you will notice the
water window change to the color blue.
5. The unit will shut off automatically once the temperature of the water reaches the ideal
temperature to brew Mate.
NOTE: If you need to stop the kettle heating press the “ ” button once, the kettle will
beep and the illumination and LED light will go out.
FOR WHITE OR GREEN TEA:
This function was designed to heat the water at the ideal temperature to brew White
and/or Green Tea.
1. Plug the electric cord into the appropriate electrical outlet.
2. Place kettle onto the base, the unit will beep twice.

English - 6
3. Select the White/Green Tea function by pushing button “ ” until the LED light under
the symbol for White/Green Tea “W/G” lights up, (see gure 3).
gura 3
4. Once selected, press the “ ” and the unit will begin to heat up and you will notice the
water window change to the color green.
5. The unit will shut off automatically once the temperature of the water reaches the ideal
temperature to brew white and/or green tea.
NOTE: If you need to stop the kettle heating press the “ ” button once, the kettle will
beep and the illumination and LED light will go out.
FOR OOLONG TEA:
This function was designed to heat the water at the ideal temperature to brew Oolong Tea.
1. Plug the electric cord into the appropriate electrical outlet.
2. Place kettle onto the base, the unit will beep twice.
3. Select the Oolong Tea function by pushing button “ ” until the LED light under the
symbol for Oolong Tea “O” lights up, (see gure 4).
gura 4
4. Once selected, press the “ ” and the unit will begin to heat up and you will notice the
water window change to the color purple.
5. The unit will shut off automatically once the temperature of the water reaches the ideal
temperature to brew Oolong tea.
NOTE: If you need to stop the kettle heating press the “ ” button once, the kettle will
beep and the illumination and LED light will go out.

English - 7
KEEP WARM FUNCTION
The keep warm function can be activated as follows:
1. Plug the electric cord into the appropriate electrical outlet.
2. The unit will then beep twice.
3. Press button “” until the LED light over the desired tea lights up.
4. Press and hold button “ ” for 2 seconds.
5. The unit will begin to heat to the temperature assigned to the selected tea.
(NOTE: the LED light will blink during the heating process and the glass housing will
illuminate with the color corresponding to the selected tea).
6. Once the temperature is reached, the unit will then automatically switch to the Keep
Warm setting.
7. The LED light will continue to blink under the selected tea symbol indicating that the
Keep Warm function is active.
8. The unit will keep the water warm for 30 minutes, after which the LED light will shut off.
NOTE: If you need to stop the keep warm function press the “ ” button once, the kettle
will beep and the illumination and LED light will go out.
NOTE: When using the keep warm function for Black Tea / Boil, the unit will keep warm at
a slightly lower temperature, which in this case is the Oolong Tea temperature setting.

English - 8
IF THE KETTLE BOILS DRY
If the kettle is operated in accordance with instructions for use, it is unlikely that the kettle will
boil dry. However, in the event that the kettle does boil dry, it is protected by a boil dry, fail-safe
device which will switch the kettle off automatically upon sensing a boil dry situation. The kettle
will remain off until it is relled with at least the minimum amount of water. Always allow the
kettle to cool for half an hour before reuse if the kettle has boiled dry.
FILTER INSTRUCTIONS
A mesh lter has been integrated into the kettle to reduce the amount of scale residues
entering your beverages or food. To reduce scale build-up, empty out any residual water
after boiling.
How often the lter should be cleaned will vary according to where you live and how often
you use your kettle. The lter should be cleaned whenever there are noticeable deposits
left on the lter and especially if the rate of pouring decreases.
CLEANING THE FILTER
IMPORTANT: The kettle must be switched off, disconnected from the power outlet
and allowed to cool down completely prior to removing or retting the lter. Do not use
excessive force, as this might damage the lter or the lid.
1. Empty the kettle and lift lid.
2. Grip the top part of the lter with index nger and thumb and pull upwards. You may
have to hold kettle while removing lter. CAUTION: Keep ngers clear of mesh.
Pressing into mesh may damage lter.
3. To clean the lter, rinse under a tap while brushing it gently with a soft brush.
4. To ret lter, once again hold lter with index nger and thumb. Gently push lter back
into the kettle until you hear a click. The lter is now reattached. Gently tug on lter to
ensure lter is attached properly.
5. Rinse out kettle with fresh water and it’s ready for use.

English - 9
CARE AND CLEANING
1. Mineral deposits in tap water may cause scale deposits to form inside the electric
kettle after frequent use. To remove this scale build-up, ll the kettle with a solution of
3 cups of white vinegar and 3 cups water. Let sit overnight.
2. Empty the vinegar solution from the electric kettle. Remove any stain remaining
inside by rubbing with a damp cloth.
3. Fill the electric kettle with clean water. Place kettle on power base and bring to a boil,
then discard water. Repeat and the electric kettle will be ready to use.
4. The electric kettle will not operate again until the on/off switch is pressed downward.
5. Always remove kettle from power base and disconnect power base from electrical
outlet before cleaning. Do not immerse kettle or power base in water or other liquid.
6. The outside of the electric kettle can be wiped with a soft damp cloth.
NOTE: Never use any chemical, steel wool, or abrasive cleaners to clean any part of the
kettle, including the power base.

Características eléctricas de los modelos de la serie:
Electric characteristics of series models: BVSTKT8980-XXX
Voltaje/Voltage Frecuencia/Frequency Potencia/Power
220 V 50-60 Hz 2 000 W
220 V 50 Hz 2 000 W
220 V 60 Hz 2 000 W
XXX en donde X es cualquier numero entre 0 y 9 o cualquier letra entre A y Z.
XXX where X is any number between 0 and 9 or any letter between A and Z.
© 2017 Sunbeam Products, Inc. Todos los derechos reservados. Distribuido por Sunbeam Latin
America, LLC, 5200 Blue Lagoon Drive, Suite 860, Miami, FL 33126.
Garantía limitada de un año – por favor consulte los detalles en el inserto.
© 2017 Sunbeam Products, Inc. All rights reserved. Distributed by Sunbeam Latin America, LLC,
5200 Blue Lagoon Drive, Suite 860, Miami, FL 33126.
One year limited warranty – please see insert for details.
www.oster.com
OSTERLATINO
Impreso en China
Printed in China
P.N. 193250
CBA-071217
Table of contents
Languages:
Other Oster Kettle manuals

Oster
Oster 5966-33 User manual

Oster
Oster BVSTKT672 User manual

Oster
Oster BVST-EKSRG2 User manual

Oster
Oster BVSTKT687 User manual

Oster
Oster BVSTKT673SS User manual

Oster
Oster BVSTKT4510B User manual

Oster
Oster BVSTKE5802B User manual

Oster
Oster 3203-33 and warranty Guide

Oster
Oster BVSTKT5970 User manual

Oster
Oster BVSTKT3177W User manual

Oster
Oster BVSTKE4410 User manual

Oster
Oster BVSTKT4970 User manual

Oster
Oster 124612 User manual

Oster
Oster BYST-EK18 Series User manual

Oster
Oster Designer 3206 User manual

Oster
Oster BVSTKT3237 User manual

Oster
Oster BVSTKT5970 User manual

Oster
Oster BVSTKT7098 Series User manual

Oster
Oster BVSTKT900R-052 User manual

Oster
Oster BVSTKTC0 Series User manual