OTICON INO miniRITE User manual

INSTRUCTIONS FOR USE miniRITE

Thank you
Thank you for choosing our product as your means to better hearing.
To support your efforts, we have put great care and attention into making sure that your
new hearing instruments are of the highest quality and that they are easy to use and
maintain.
We recommend that you read this manual carefully to achieve the maximum benefit of
your new hearing instruments.
Congratulations on your decision to actively improve your hearing with today’s most
advanced hearing technology in the market.
Contents
Instrument view miniRITE 5a
Instrument view miniRITE Power with Power Dome 5b
Instrument view miniRITE Power with Mould 5c
Warnings
Changing batteries 7
Turning your instruments ON and OFF 9
Left/Right ear marking 10
Putting on your instrument 11
Push-button 12
Programs (Optional) 14
Volume Control (Optional) 16
Standby (Optional) 17
Tamper-resistant battery door (Optional) 19
Auto Phone (Optional) 20
Caring for your hearing instrument 22
Daily maintenance with Mould 24
Daily maintenance with Domes 26

5a
Instrument view miniRITE
Your ear piece
Open Domes:
6mm 8mm 10mm
Micro mould
Plus dome
Speaker unit
Sound outlet
IMPORTANT NOTICE
Please familiarise yourself with the entire contents of this booklet before using your
hearing instruments. It contains instructions and important information about the use
and handling of your hearing instruments and batteries.
CAUTION
The miniRITE Power is a powerful hearing instrument. In case you are fitted with
miniRITE Power, never allow others to wear your hearing instruments as incorrect or
wrongful usage could cause permanent damage to their hearing.
Wax protection
Microphone openings
Push-button
Battery door
Using your hearing instrument 30
Common problems and their solutions 36
Warranty Certificate 40

5b
Instrument view miniRITE Power with Power Dome
Your ear piece
Power Domes:
8mm 10mm 12mm Plus dome
Speaker
Sound outlet
Wax protection
Microphone openings
Push-button
Battery door

5c
Instrument view miniRITE Power with Mould
Sound outlet +
wax protection
system
Ventilations openings
Battery door
Microphone openings
Push-button

Warnings
You should familiarize yourself fully with the following general warnings and the entire
contents of this booklet before using your hearing instruments.
Hearing instruments can be dangerous if swallowed or used improperly. Such actions can
result in severe injury, permanent hearing loss, or can even be fatal.
• Hearing instruments, their parts, and batteries are not toys and should be kept out of
reach of children and anyone who might swallow these items or otherwise cause injury
to themselves.
• Never change the battery or adjust the controls of the hearing instruments in front of
infants, small children or people with learning difficulties.
• Discard batteries carefully in a place where infants, small children or people with
learning difficulties cannot reach them.
• Batteries have occasionally been mistaken for pills. Therefore carefully check your
medicine before swallowing any pills.
• Never put your hearing instruments or batteries in your mouth for any reason, as they
are slippery and could be swallowed by accident.

Warnings
Dysfunction in hearing instruments
• Hearing instruments may stop functioning, for instance if the batteries have expired or
if the receiver/loudspeaker is blocked by moisture or earwax. You should be aware of
this possibility, in particular when you are in traffic or otherwise dependent on warning
sounds.
Interference
• Your hearing instrument has been thoroughly tested for interference, according to the
most stringent international standards. But new technical developments constantly
bring new products into society, and some may emit electromagnetic radiation, leading
to unforeseen interference in hearing instruments, for example induction cooking
appliances, walkie talkies, mobile telephones, fax machines, personal computer devices,
home automation etc. If you experience disturbances, move a few centimeters away
from the disturbing device.
• Your hearing instruments are designed to comply with the most stringent Standards of
International Electromagnetic Compatibility. However, hearing instruments may cause
interference with other medical devices. Such interference can also be caused by radio
signals, power line disturbances, airport metal detectors, electromagnetic fields from
other medical devices and eletrostatic discharges.
Warnings
• Some hearing instruments can be supplied with a tamper-resistant battery compart-
ment upon request. This is strongly recommended for infants, small children, and
people with learning difficulties.
If a battery or hearing device is swallowed, see a doctor immediately.
Usage of hearing instruments
• Hearing instruments should be used only as directed and adjusted by your Hearing
Care Professional. Misuse could result in sudden and permanent hearing loss.
• Never allow others to wear your hearing instruments as incorrect/wrongful usage
could cause permanent damage to their hearing.
Battery use
• Always use batteries recommended by your Hearing Care Professional. Batteries of
low quality may leak and cause bodily harm.
• Never attempt to recharge your batteries. They may explode and cause serious injury.
• Never dispose of batteries by burning them. There is a risk that they will explode and
cause serious injury.

Warnings
X-ray, CT, MR, PET scanning and electrotherapy
• Remove your hearing instrument for example during X-ray, CT / MR / PET scanning,
electrotherapy or surgery as your hearing instruments may be damaged when exposed
to strong fields.
Possible side effects
• Hearing instruments may cause an accelerated accumulation of cerumen (ear wax).
• The otherwise non-allergenic materials used in hearing instruments may in rare cases
cause a skin irritation.
Consult a doctor if you experience any of these side effects.
Safety requirements regarding Direct Audio Input (DAI)
• The safety of hearing instruments with DAI (Direct Audio Input) is determined by the
external signal source. When the DAI is connected to mains-operated equipment, this
equipment must comply with IEC-60065, IEC-60601 or equivalent safety standards.
Warnings
Active Implants
• Oticon shows caution and advise to follow the guideline as recommended by manufac-
turers of implantable defibrillators and pacemakers regarding use of mobile phones. If
you wear an active implant, then keep the hearing instruments more than 15 cm away
from the implant e.g. do not carry them in a breast pocket.
• If you have an active brain implant, please contact the manufacturer of your implantable
device for information about the risk of disturbance.
• The included case for instrument storage has a built-in magnet. If you have an implant-
able device, such as pacemakers or defibrillators, the instrument case should not be
carried in a chest pocket or near to the chest.
Explosives
• The power source in your hearing instrument has insufficient energy to cause fire in
normal conditions of use. The hearing instrument has not been tested for compliance
with international standards concerning explosive atmospheres. It is recommended not
to use your hearing instruments in areas where there is a danger of explosions.

7
Changing batteries
Your hearing instrument battery size is 312. Batteries
perform differently. Ask your hearing care professional
for help choosing a high quality battery for your hearing
instrument.
A worn out battery should be removed immediately.
When the battery power is low, you will hear 2 beeps.
This pre-warning starts when the battery has only
a few hours of operation left. The pre-warning will be
repeated with moderate intervals to indicate it is time
to change the battery.
If the battery runs out the instrument turns off. When
that happens, 4 beeps are played to indicate that the
instrument is no longer operating.
It is not an indication of a malfunction.
Warnings
Wax protection system
• Always visually inspect your hearing instruments to ensure that there is no gap
between the wax protection flange and the tip of the Micro Mould.
If you are in any doubt about the use or replacement of your wax protection system,
contact your Hearing Care Professional.
Warning to hearing instrument dispenser and user
• Special care should be excercised in selecting, fitting and using a hearing instrument
where maximum sound pressure capability exceeds 132 dB SPL (IEC 711) as there
may be risk of impairing the remaining hearing of the hearing instrument user.
• The included case for instrument storage has a built-in magnet. If you have an
implantable device, such as pacemakers or defibrillators, the instrument case should
not be carried in a chest pocket or near to the chest.

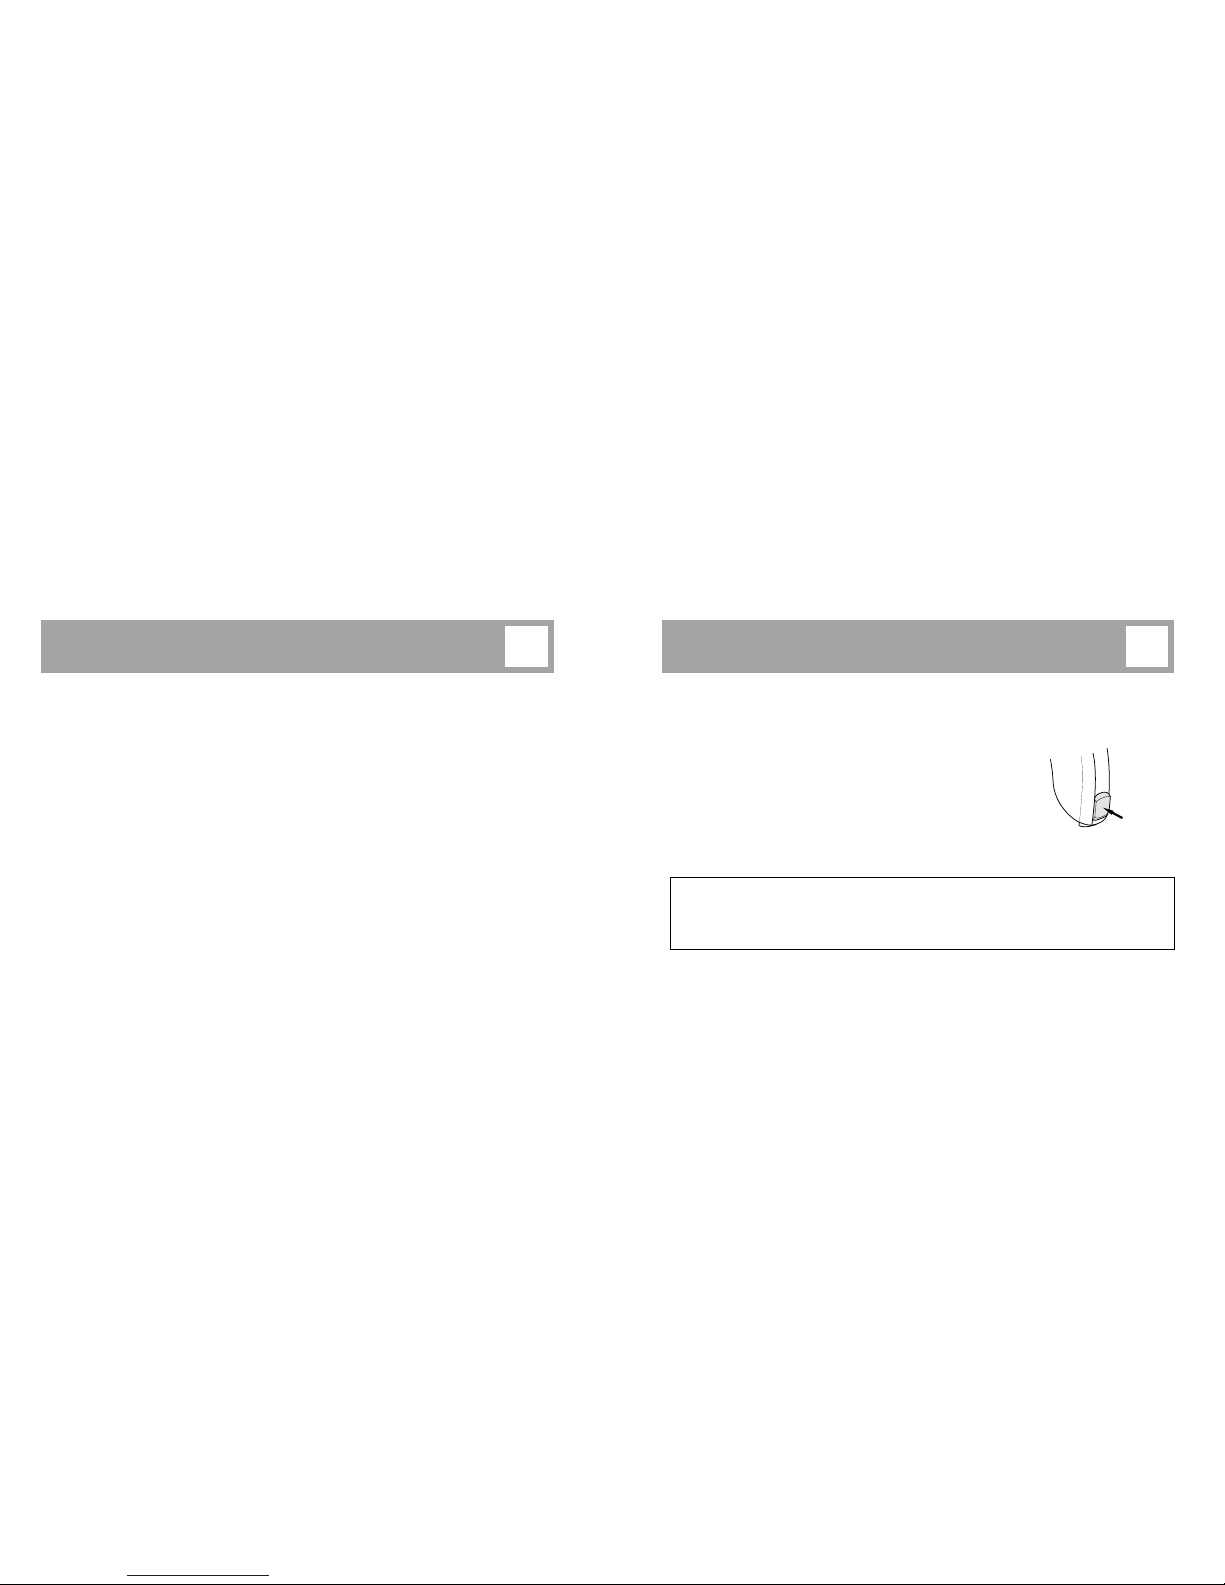
9
Turning your instruments ON and OFF
Turn ON your hearing instrument by closing the battery door completely with the battery
in place. When the battery door is closed the instrument will start up by playing a jingle.
This indicates that the battery is working and the instrument is operating.
Turn OFF your hearing instrument by opening the battery door slightly until a click is felt.
To preserve the battery, make sure your hearing instrument is switched off when you are
not wearing it.
IMPORTANT NOTICE
Open the battery door fully to
allow air to circulate whenever
you are not using your hearing
instrument, especially at night!
ON OFF
Click Click
To replace the battery, follow these instructions:
• Open the battery door completely by pushing the raised edge in the bottom of
the instrument. Remove the old battery.
• Remove the sticky label from the + side of the new battery.
• Insert the new battery so that its + marking faces the + sign printed on the battery
door. Close the battery door.
Any moisture on the battery surface should be wiped
off before use.
When you change battery, it will take a few seconds
before the battery works to full capacity.
To assist the handling of the batteries, the magnet
placed at the end of the tool can be used.
8
MultiTool

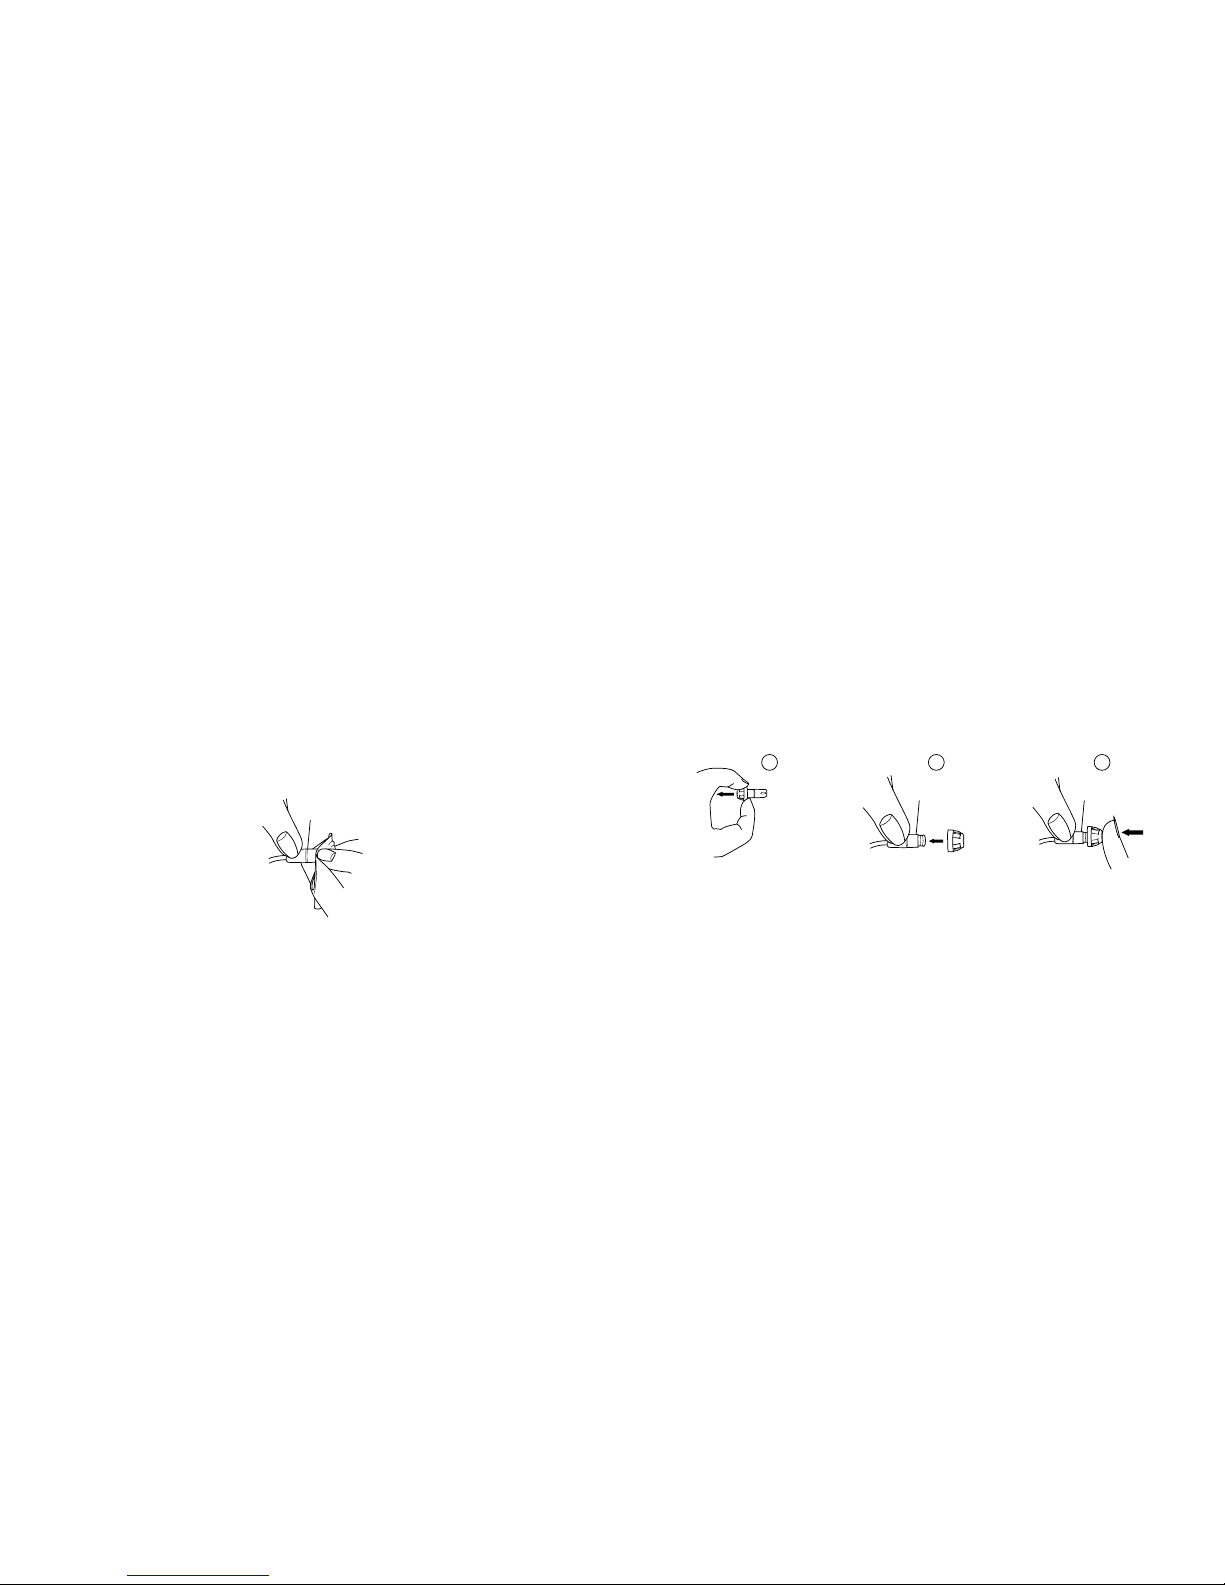
10 11
Putting on your instrument
Place the speaker, with the ear piece attached, into your ear
first (1) and then place the instrument behind your ear (2).
If the power instrument has a Mould as ear piece, make sure
it is positioned in the ear so it perfectly fits the ergonomics
of the ear canal in a tight and comfortable way.
Make sure that the ear piece is placed so that the tube
follows the contour of the skin.
If the instrument has an ear grip, place it in the ear as
indicated in drawing 3 and 4 so it follows the contour of
the ear.
2
1
3
4
Left/Right ear marking
Hearing instruments are fitted to the uniqueness of each ear, which means if you have
two instruments then your left hearing instrument is programmed differently from your
right. That is why it is important to distinguish between the left hearing instrument and
the right.
In order to easily identify whether it is left ear or right ear instrument, colour markings
may be applied inside the battery door.
A blue dot marks the LEFT instrument.
A red dot marks the RIGHT instrument.

12
The push-button on your hearing instrument can be programmed to one of 3 functionalities.
Left Right
Only program shift:
Press shortly to change program.
Only volume control: *
Press shortly to adjust the volume.
Both volume control and program shift: *
Press shortly to adjust the volume and press long (about 2 seconds)
to shift program.
* only if you have two Ino Pro instruments!
Using 2 instruments
If you have two Ino Pro instruments the push-button on one instrument will change the
status on both hearing instruments. This means, when you adjust the program or volume
for one instrument, it automatically adjusts the other.
This is programmed by your Hearing Care Professional!
Push-button
Your hearing instrument has a push-button.
If you have one instrument, the push button can be used for switching between different
programs.
If you have two Ino Pro instruments, the push-button can be used for both adjusting the
volume and switching between programs.
Push
14 15
Press the push-button to switch forwards in the program cycle, e.g. from P1-P2.
If you have two Ino Pro instruments, then:
The RIGHT hearing instrument switches forwards in the program cycle, e.g. P1-P2.
The LEFT hearing instrument switches backwards in the program cycle, e.g. P2-P1.
Below you can see a description of the programs available in your hearing instrument.
Prg. 1:
Prg. 2:
Prg. 3:
Prg. 4:
Programs (Optional)
Your hearing instrument can have up to 4 different programs.
When switching between the different programs, your hearing instrument will beep.
The number of beeps will indicate which program you are using.
One beep, when you switch to program 1
Two beeps, when you switch to program 2
Three beeps, when you switch to program 3
Four beeps, when you switch to program 4
16 17
Standby (Optional)
Press the button for a minimum of 3 seconds to set the instrument in standby mode.
To reactivate the instrument, push the button shortly again.
Use the standby function if you need to silence the instrument
while you have the instrument on.
WARNING
Do not use the standby function as a switch off as the hearing instruments still draws
current from the battery in this mode.
Push
3 sec
Volume Control (Optional)
Only when using two Ino Pro instruments a volume control can be activated. The volume
control allows you to adjust the volume in specific listening situations to the level you
feel comfortable with.
When pressing the push-button on one instrument, the volume is adjusted in both
instruments simultaneously.
To increase volume, shortly press the push-button on the RIGHT ear instrument.
To decrease volume, shortly press the push-button on the LEFT ear instrument.
When the hearing instrument is turned on, it starts up at a preferred volume level.
When adjusting the volume control to the preferred level, this is indicated by a beep.

19
Tamper-resistant battery door (Optional)
This is strongly recommended for infants, small children and people with learning
difficulties.
The battery door is designed only to be opened by using a tool. Use the MultiTool to
unlock the door by inserting it into the indent on the door side and then tip it to open.

20 21
WARNING
If you use an Autophone magnet:
• Keep magnets out of reach of children and pets. If a magnet is swallowed,
see a doctor immediately.
• Do not wear the magnet in a breast pocket and always keep it 30 cm away from
active implanatable devices. Preferably, use the telephone with magnet on the
opposite side than a pacemaker or other active implantants.
• Keep the magnet 30 cm away from credit cards and other magnetically sensitive
devices.
Auto Phone (Optional)
The hearing instrument may have an Auto Phone functionality. When the hearing instrument
is close to a telephone receiver, the Auto Phone will activate a Phone Program. When the
Phone Program is activiated you will hear a number of beeps.
When you end your telephone conversation, the hearing instrument will automatically
return to the previous program.
Not all telephones can activate the Auto Phone.
The telephone receiver may need to have a special magnet
fitted. Please follow the separate instructions for mounting
the magnet, which is available from your Hearing Care
Professional.

22 23
Cleaning the instruments
A range of dedicated cleaning tools is prepared for the special purpose of cleaning the
instrument. These should be used to ensure the best care and performance of your
hearing instruments.
Use the cloth to wipe clean the surface of the instruments.
Replace the brush when necessary. Just pull it out of the tool and insert a new fresh brush.
Press the new one firmly into the handle.
BrushCover Handle
Magnet
Screwdriver
MultiTool
Caring for your hearing instrument
Your ear canal produces ear wax (cerumen) which may clog up the earpiece. Therefore
your hearing instrument contains a filter to prevent wax accumulation. Consult your
Hearing Care Professional for instructions about the specific wax protection system in
your hearing instrument and how it can be replaced.
When handling a hearing instrument, keep it over a soft surface to avoid damage if you
drop it.
Before retiring at night:
• Make sure that there is no ear wax in any of the earpiece openings since it may reduce
the hearing instrument’s efficiency.
• Open the battery door to allow air to circulate.

25
Replace the wax protection system
1. Remove the tool from the shell. The tool has two ends, one with a new filter
and one with the removal tool.
2. Insert the removal tool into the sound outlet of the Mould.
3. Pull the used wax filter out slowly keeping the tool straight.
4. Turn the tool 180°.
5. Push the new filter into the sound outlet and gently remove the tool.
6. Discard the used tool. Do not reuse.
The wax filter should be changed:
• When you can see that the filter placed in the Mould is clogged.
• When the hearing instrument does not sound normal.
Use the Wax protection systems delivered by your Hearing Care Professional!
Detailed instructions on replacing the wax protection system are also found on
its packaging.
24
Daily maintenance with Mould
The Mould should be cleaned regularly:
• Clean the ventilation opening by pressing the brush through the hole while twisting
it slightly.
The hearing instrument itself with Mould must never be washed or immersed in water or
other liquids!
26 27
Changing the dome
The dome is easy to replace. Replace it whenever needed.
Use a finger nail and hold the bottom of the dome. Then pull it off. Place the new dome
on the speaker and ensure that it is fastened securely.
2
13
Daily maintenance with Domes
Clean the speaker unit daily. Use the cloth and rub off any earwax.
The dome should not be cleaned. When you require a fresh, clean dome, remove the
existing one and put on a fresh one.
We recommend the dome to be replaced at least once a month or as directed by your
Hearing Care Professional.

28 29
Avoiding heat, humidity and chemicals
Your hearing instrument must never be exposed to extreme heat e.g. left inside a parked
car in the sun. They must never be exposed to a lot of moisture e.g. steam baths, showers
or heavy rain. Nor must they be dried in microwave ovens or other ovens.
Wipe the batteries carefully if moisture is present as it may affect their performance.
Using an anti-humidity kit can help to avoid these problems and may even extend the life
of your hearing instrument. Consult your Hearing Care Professional for further advice.
The chemicals in cosmetics, hairspray, perfume, after shave lotion, suntan lotion and
insect repellant can damage your hearing instrument. You should always remove your
hearing instrument before applying such products and allow time for the product to dry
before reinserting your hearing instrument.
If you use lotion, be sure to wipe your hands dry before putting on your hearing instrument.
Under the dome you will notice a white wax filter attached to the end of the speaker.
This is a wax filter that will keep debris from damaging the speaker. If this filter becomes
clogged, contact your Hearing Care Professional for service and replacement of the filter.
IMPORTANT NOTICE
The dome is made of a soft, medically approved rubber material. If the dome comes
off in the ear canal, it will not cause any harm. If you can – carefully take it out. If
necessary, let another person help you. Do not push the dome into the ear canal.
Do not push the speaker unit into the ear again before the dome is removed from the
ear. If you have any doubts, contact your Hearing Care Professional.
Table of contents
Popular Hearing Aid manuals by other brands


Williams Sound
Williams Sound HEARING HELPER PFM 300 user guide

Starkey Hearing Technologies
Starkey Hearing Technologies RIC 10 Operation manual

ClearSounds
ClearSounds QUATTRO 4L quick start guide

Pyle
Pyle PHLHA42 user manual

Phonak
Phonak Roger Touchscreen Mic user guide

ReSound
ReSound LiNX Quattro MIH quick guide