oticon FittingLINK User manual
INSTRUCTIONS FOR USE

Introduction to this booklet
This booklet gives you guidance on how to use and maintain FittingLINK. Please read the
booklet carefully including the Warnings section. This will help you get the most out of
FittingLINK.
If you have additional questions about the use of FittingLINK, please contact your local
distributor.
For your convenience, this booklet contains the below navigation bar to help you navigate
easily through the dierent sections.
About Start-up Handling Warnings More info
Intended use
Intended use FittingLINK is an accessory to the tting software used when
programming SBO wireless hearing aids. FittingLINK is intended for
wireless transfer of tting data between the hearing aids and the device
running the tting software. FittingLINK can be connected to the device
running the tting software through the provided Bluetooth adapter or
USB cable.
Indications for use No indications for use.
Intended user Hearing care professionals and hearing aid users.
User environment Hearing care professional's oce.
Contraindications Users of active implants must pay special attention when using the
device. For more information, read the warnings section.
Clinical benets See clinical benets of the hearing aid.

Table of contents
About
FittingLINK overview 6
Package content 8
Start-up
Basic functions - rst-time use 10
Turn FittingLINK ON/OFF 11
Charge FittingLINK 12
Charge FittingLINK with the charger and charging cradle 14
Charge FittingLINK with the charging cradle and USB cable 15
Charge FittingLINK without the charging cradle 17
Low battery indicator 18
Connect to a PC 20
Connect to a PC via the Bluetooth adapter 21
How to re-establish pairing between FittingLINK and the Bluetooth adapter 22
Connect to a PC via the USB cable 25
Handling
FittingLINK and tting software 26
How to use FittingLINK 27
How to use FittingLINK on children 34
How to use FittingLINK for coupler-based verication using
hearing aid analysers 36
Overview of LED indicators 38
Caring for FittingLINK 42
Warnings
Warnings 43
More info
Conditions of use 48
Technical information FittingLINK 49
Technical information Bluetooth adapter 51
Technical information 54
International warranty 55

6About Start-up Handling Warnings More info
FittingLINK overview
Neck loop
Front LED
indicator - blue
Front LED
indicator - red
Top LED indicator
Power supply
(and USB port)
ON/OFF button
ON/OFF
About

INSTRUCTIONS FOR USE
89
About Start-up Handling Warnings More info
Package content
The packaging box consists of the following elements:
USB cable 3 m
Box 1 Box 3Box 2
Bluetooth adapter
Charging cradle
Clip
Charger*
*Charger will vary from
country to country.
This booklet (Instructions for Use)FittingLINK

POWER
10 11
About Start-up Handling Warnings More info
Basic functions - rst-time use
Insert the USB cable in the bottom of the charging cradle and the charger is ready for use.
Turn FittingLINK ON/OFF
Power ON
Press the ON/OFF button on top of FittingLINK for about 2 seconds until you see a green steady
light from the top LED and a short red and blue ash from the front LED indicators. The LED lights
indicate that FittingLINK is powered on and you can release the ON/OFF button.
If FittingLINK cannot power on, make sure it is charged.
If the top LED shows a red light instead of the green light the battery is running low (steady red
light) or very low (ashing red light) and FittingLINK should be charged. Please refer to “Charge
FittingLINK”.
Power OFF
Press and hold the ON/OFF button on top of FittingLINK for about 2 seconds until the top LED
indicator turns o.
Start-up

12 13
About Start-up Handling Warnings More info
Charge FittingLINK
FittingLINK uses an internal rechargeable battery.
FittingLINK can be charged either by using the provided charger and charging cradle or by using
the USB cable provided.
When charging FittingLINK for the rst time, it should be left to charge for at least two hours even
if the top LED indicator on the device shows that the battery is fully charged. We recommend that
you turn o and store FittingLINK in the charging cradle whenever it is not in use, to ensure the
best possible performance.
It is safe to leave FittingLINK in the charging cradle overnight – the battery cannot be
overcharged.
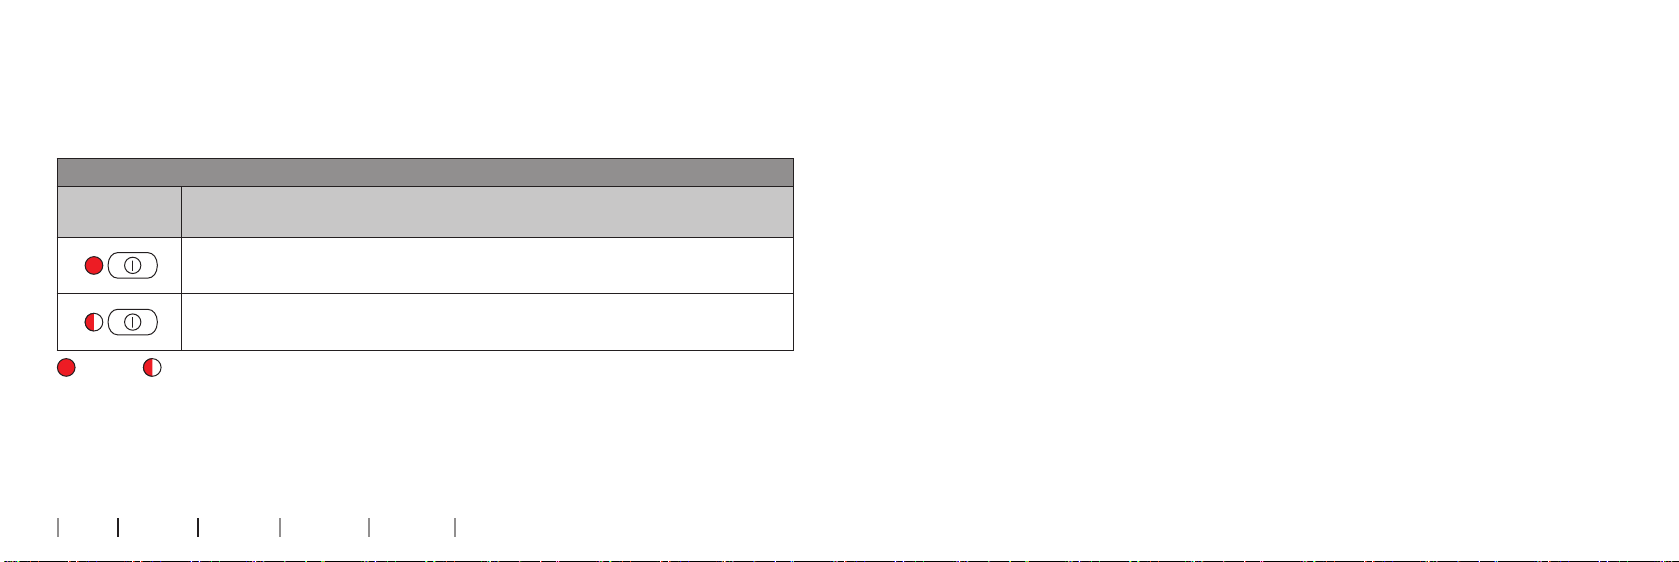
Charging
Top LED
indicator
Description
Device on and fully charged
Device on and charging
Device o and charging
Once fully charged, the LED will be o
Steady Flash
IMPORTANT NOTICE
When charging FittingLINK, use the supplied original power supply 5.0V/1A,
CE and safety marked.
IMPORTANT NOTICE
When charging, the charging indicators should be lit as described in this booklet.
If the charging indicators are not lit as described, disconnect the device from the charger and
consult your local distributor.

14 15
About Start-up Handling Warnings More info
Charge FittingLINK with the charger and charging cradle
Place FittingLINK in the charging cradle when you want to charge FittingLINK with the provided
charger and charging cradle. Remember to connect the charger to a power outlet. As soon as the
power is switched on, FittingLINK will start charging.
Charge FittingLINK with the charging cradle and USB cable
When charging FittingLINK with the provided charging cradle and the USB cable, place
FittingLINK in the charging cradle and connect the USB cable to a USB port on your PC.
Please note that if you charge via a USB hub, some hubs do not deliver enough power to actually
charge FittingLINK. In this case we recommend use of the provided charger instead.

16 17
About Start-up Handling Warnings More info
Only recharge FittingLINK using the provided charger or a stabilised USB hub/charger that
provides 5VDC and ≥500 mA.
Charge FittingLINK without the charging cradle
If you prefer not to use the charging cradle when charging FittingLINK, you have the option to
insert the USB cable directly into FittingtLINK instead of the charging cradle.
Note: When using the USB cable, always insert the USB cable into FittingLINK before connecting the cable to other
equipment.
18 19
About Start-up Handling Warnings More info
Low battery indicator
FittingLINK will indicate low battery (about 20 minutes programming capacity left) with a steady
red light, and very low battery (about 5 minutes programming capacity left) with a ashing red
light.
Low battery indicator
Top LED
indicator
Description
Low battery – about 20 minutes capacity left
Very low battery – about 5 minutes capacity left
Steady Flash
To ensure the best possible performance, we recommend that you turn o and store FittingLINK
in the charging cradle whenever it is not in use.
The battery should not be drained completely. Keeping the battery fully charged will prolong the
capacity of the battery. The battery cannot be replaced by the user.
The battery capacity is up to 8 hours of typical daily use.
Battery charge time is 2 hours for complete charge, using the provided power supply.

20 21
About Start-up Handling Warnings More info
Connect to a PC
You can connect FittingLINK to your PC either by using the provided Bluetooth adapter or the
USB cable.
The Bluetooth adapter enables you to connect FittingLINK wirelessly to your computer.However,
in some locations Bluetooth technology is not allowed. When this is the case, simply connect
FittingLINK with the computer via the provided USB cable.
Before you start connecting FittingLINK to a PC for the rst time, please make sure that you
have the latest version of your tting software installed on the PC. Please also make sure that
FittingLINK is fully charged. See “Charge FittingLINK”.
Please note that FittingLINK only connects to the Bluetooth adapter provided.
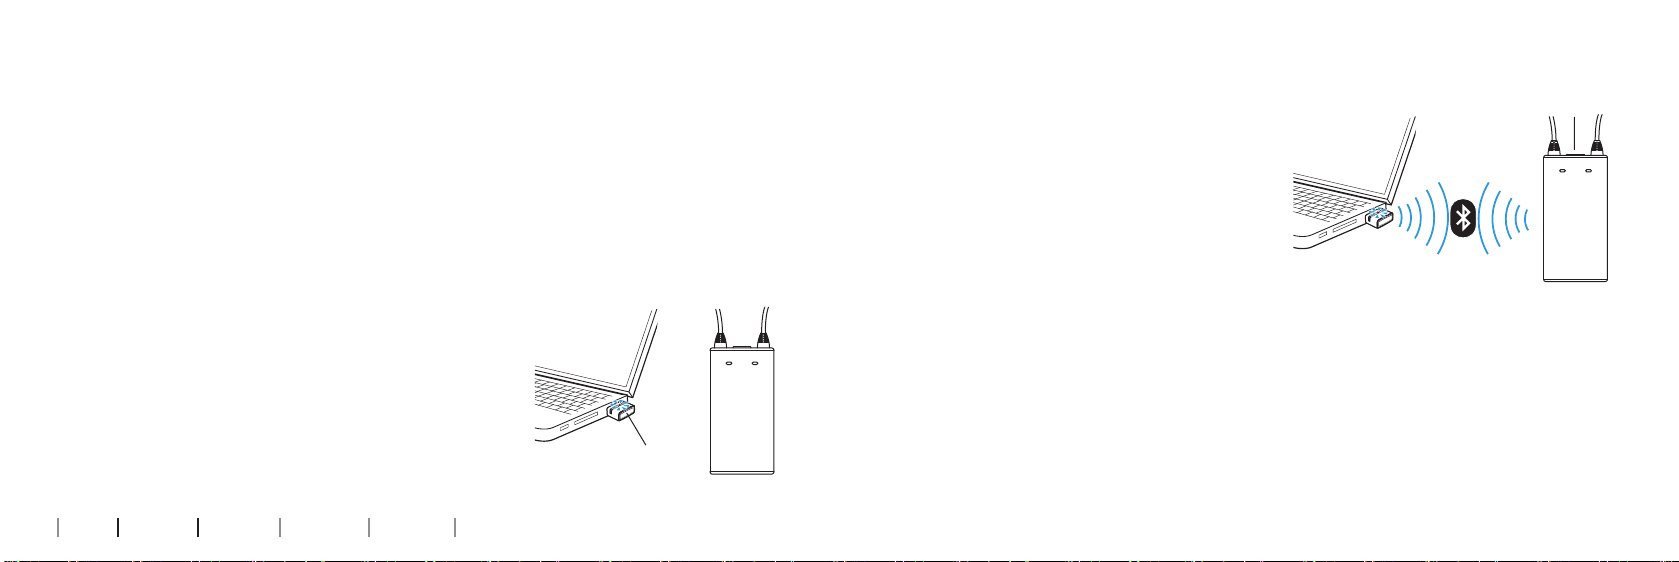
Connect to a PC via the Bluetooth adapter
Make sure that FittingLINK is turned OFF.
To obtain wireless connection between FittingLINK and your PC, simply plug the provided
Bluetooth adapter into a USB port on your PC and turn the PC ON.
FittingLINK has already been paired by the manufacturer with the
Bluetooth adapter provided in the box set. However the rst time
you connect to a PC, a message may appear on the screen and
inform you that the applicable driver is being installed. Allow the
installation to run before you proceed.
Now turn ON FittingLINK. See "Turn FittingLINK ON/OFF".
FittingLINK is now ready for programming compatible
wireless hearing aids.
22 23
About Start-up Handling Warnings More info
How to re-establish pairing between FittingLINK
and the Bluetooth adapter
FittingLINK has been paired by the manufacturer with the adapter provided in the box set.
If for some reason the PC running your tting software does not recognise FittingLINK, you may
have to re-establish the pairing between FittingLINK and the Bluetooth adapter. In this case
please close the tting software before you continue.
1. Press and hold the pairing button on the Bluetooth adapter for ve seconds until the LED lights
up with a ashing blue light.
2. Press the ON/OFF button on FittingLINK for
ve seconds and the top LED will light up with
a ashing blue light. The pairing will begin
automatically. FittingLINK must be close to
the Bluetooth adapter (about 10 cm) while the
pairing takes place.
3. When the pairing is successfully completed the
adapter LED will show steady blue (until the
tting software is turned on) while the top LED
on FittingLINK shows steady blue for about 10
seconds.
Please note that FittingLINK can only be paired
with a single Bluetooth adapter at a time and vice
versa.
ON/OFF
Pairing button

24 25
About Start-up Handling Warnings More info
Pairing
Top LED
indicator
Description
FittingLINK in pairing mode
Pairing complete
Flash Steady
When pairing is nished, open your tting software, detect and select FittingLINK as your
programming device. It is necessary to perform and complete this selection procedure only once.
FittingLINK is now ready for programming the hearing aids.
Connect to a PC via the USB cable
To connect FittingLINK to your PC with the USB cable, insert the USB cable in the USB port in the
bottom of FittingLINK and then insert the other end of the cable in a USB port on your PC.
Turn ON your PC and then turn ON FittingLINK. Open your tting software, detect and select
FittingLINK as your programming device. It is only necessary to perform and complete this
selection procedure the rst time.
FittingLINK is now ready for programming wireless hearing aids.
Please note, you can leave the Bluetooth adapter in your PC while connecting via the USB cable.
Note: If you connect the USB cable to a non-powered USB hub, FittingLINK may not charge.
It is recommended to connect the USB cable directly to your PC.

26 27
About Start-up Handling Warnings More info
How to use FittingLINK
FittingLINK has been designed to oer
you the best possible daily use during
programming sessions with and without
your clients.
Programming without a client
When you want to program hearing aids
without a client wearing them, turn ON
FittingLINK.
Place FittingLINK with the neck loop at
on a table and the hearing aids on each
side of the neck loop as shown in the
drawing.
When you program hearing aids, the neck
loop must always be closed as shown in
the drawing.
5-10 cm/
2-4 in.
5-10 cm/
2-4 in.
FittingLINK and tting software
When opening your tting software the rst time after FittingLINK has been installed on the PC, it
will be detected as a programming device.
Depending on which tting software you are using, FittingLINK is either automatically added as
an option on the "Detect button" or needs to be manually detected and selected as programming
device in the "Preferences" menu.
For specic information about how to use FittingLINK with your tting software, please refer to
the documentation delivered with your tting software (e.g. installation handbooks, help les or
instructional videos).
Handling

28 29
About Start-up Handling Warnings More info
Make sure that the neck loop is not curled or touching any electrical wires or equipment and that
the hearing aids are not touching the neck loop.
The optimal placement of the hearing aids is on the outside of the neck loop, between 5-10 cm.
from the neck loop as shown in the drawing.
The distance between FittingLINK and the Bluetooth adapter in your PC can be no more than
10 metres (in direct line of sight).
Devices and installations such as power cables, TVs, PC monitors, LED light bulbs and other
devices emitting magnetic noise might decrease the programming performance if placed too
close to FittingLINK. Likewise a table made of or containing a lot of metal, may lead to decreased
performance.
Please note that other active FittingLINK devices and wireless hearing aid accessories in
proximity may create interference and should be turned OFF.
If you experience decreased performance, we recommend that you relocate FittingLINK or turn o
possible sources of interference.
At the end of the session and before disconnecting or removing FittingLINK make sure that you
have saved your programming to the hearing aids.
Please consult the tting software for further guidance.

30 31
About Start-up Handling Warnings More info
Programming with a client
When you want to program hearing aids while your client is wearing them, please make sure that
FittingLINK is suciently charged.
For easy placement, the neck loop can be opened, as shown on the drawing below, while placing
FittingLINK around the client's neck.
When opening the neck loop, pull the connectors
apart. Do not pull the neck loop antenna.
When you program hearing aids, the neck loop must
always be closed as shown in the drawing to the
right.
The distance between FittingLINK and the Bluetooth
adapter in your PC can be no more than 10 metres
(in direct line of sight).
Devices and installations such as power cables,
TVs, PC monitors, LED light bulbs and other
devices emitting magnetic noise might decrease
the programming performance if placed too close
to FittingLINK. Please note that other active
FittingLINKs and wireless hearing aid accessories
in proximity may create interference and should be
turned o.

32 About Start-up Handling Warnings More info
If you experience decreased performance, we recommend that you turn o possible sources of
interference.
At the end of the session and before disconnecting or removing FittingLINK make sure that you
have saved your programming to the hearing aids.
Please consult the tting software for further guidance.
34 35
About Start-up Handling Warnings More info
How to use FittingLINK on children
For children who are old enough to provide verbal feedback regarding their hearing aid, it will be
possible to use FittingLINK for programming, real-ear verication or ne-tuning.
It is also possible to use FittingLINK with babies or small children. However, the programming
process with infants and small children diers from adults since they are not able to provide
verbal feedback on their hearing aids’ sound quality. Therefore, it is recommended that the actual
verication of the hearing aid be done using the coupler-based verication method. See below for
instructions.
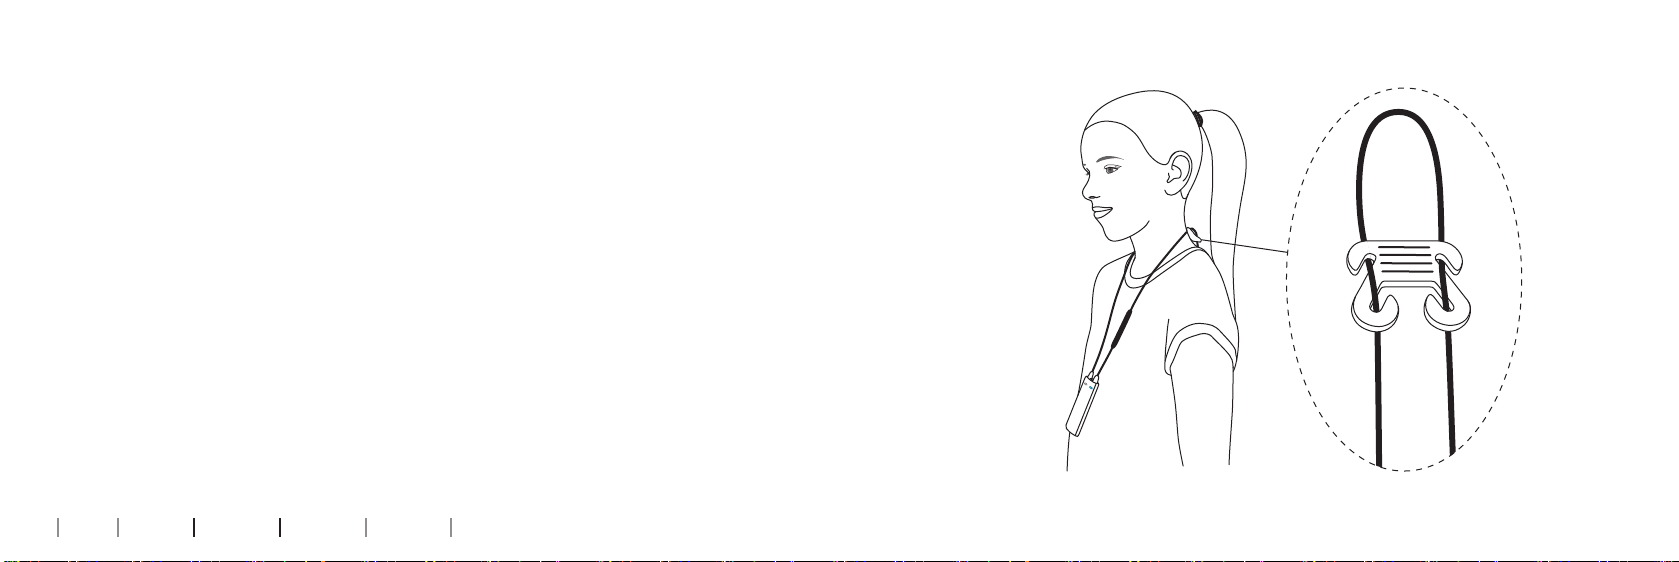
When working with children, it can be necessary to shorten the neck loop. Always use the
provided clip to shorten the neck loop. Do not shorten or modify the neck loop in an unauthorised
way. Please refer to the drawing on how to place the clip.

36 37
About Start-up Handling Warnings More info
How to use FittingLINK for coupler-based verication using
hearing aid analysers
Place FittingLINK in the test chamber. Connect the hearing aid to the 2cc coupler and place the
hearing aid 5-10 cm away from the outside of the neck loop, as shown here.
Close the lid of the test chamber and proceed with the coupler-based verication.
Please note that FittingLINK will not work in some test chambers, due to the chambers being
too small to ensure the 5-10 cm distance, or due to electromagnetic interference. If this is the
case, programming must be done using the hearing aid programming cables and a non-wireless
programming interface (e.g., EXPRESSlink).

38 39
About Start-up Handling Warnings More info
Overview of LED indicators
How to read the Bluetooth adapter LED indicator.
Bluetooth adapter
LED
indicator
Description
Bluetooth adapter active
Bluetooth adapter searching for in-range FittingLINK
Bluetooth adapter pairing
Bluetooth adapter inactive
Self test error - contact your supplier
Steady Slow ash Fast ash LED o
How to read FittingLINK LED indicators.
The top LED indicator is the battery status indicator.
Battery status
Top LED
indicator
Description
FittingLINK on and battery fully charged
Battery charging
Low battery
Very low battery
Steady Flash
Table of contents
Other oticon Recording Equipment manuals


