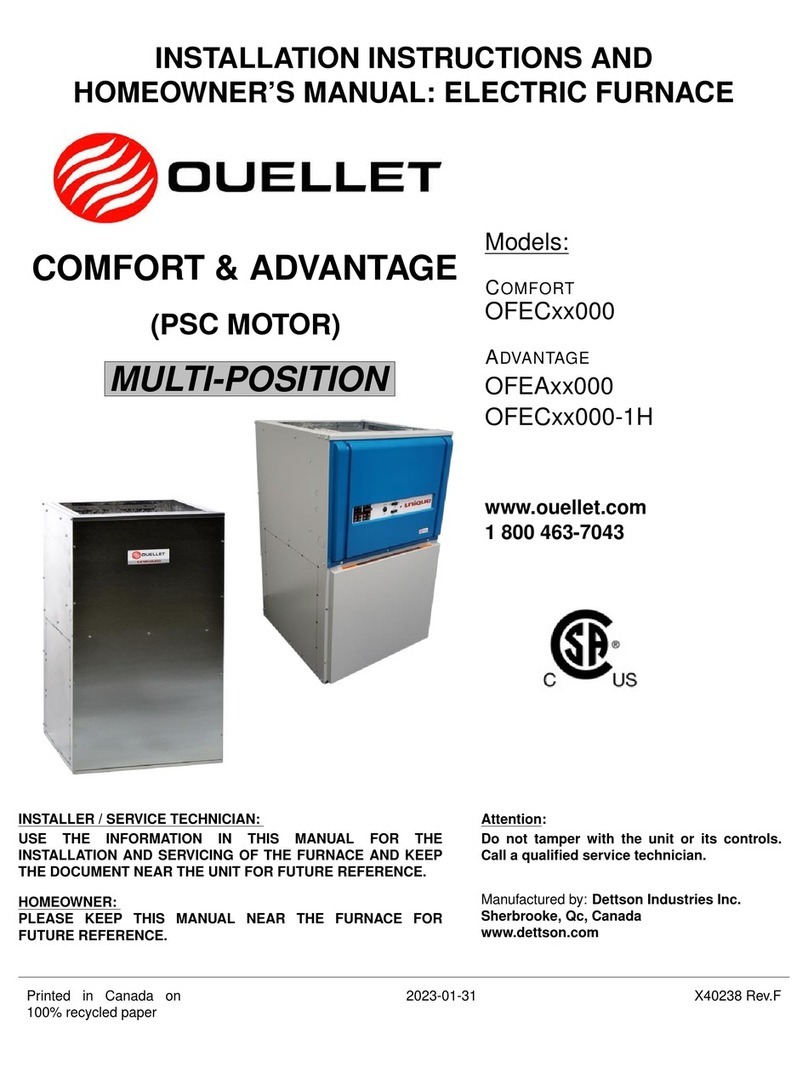
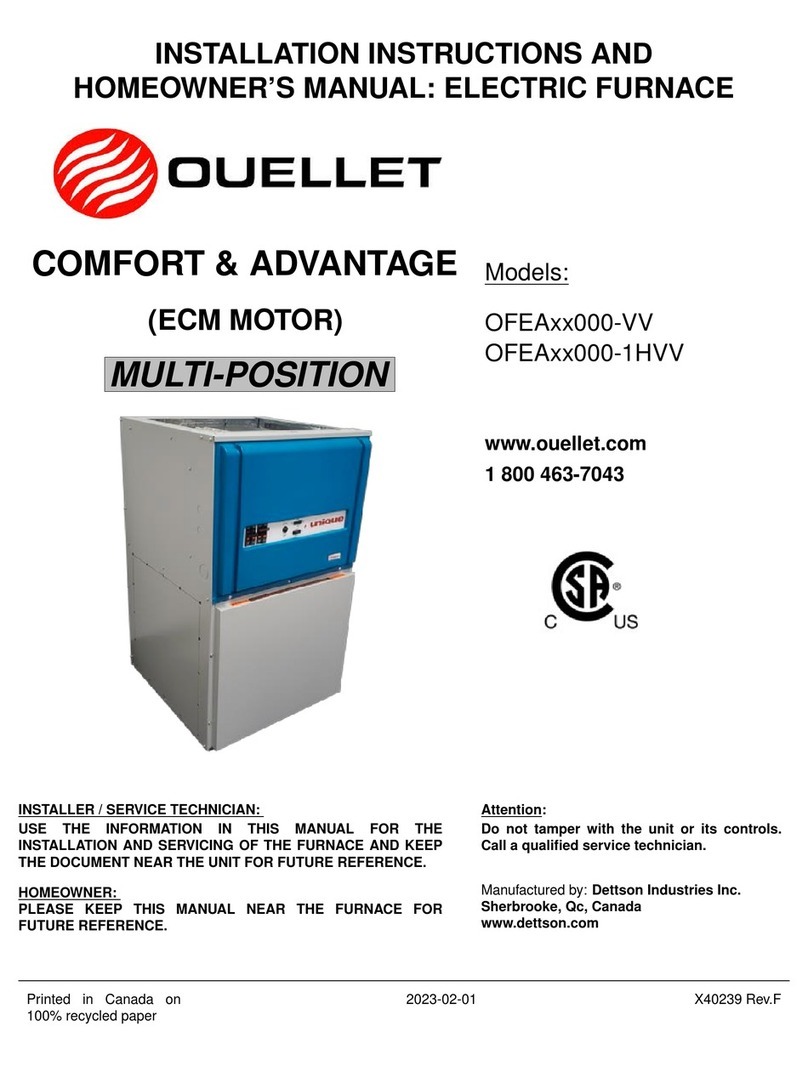
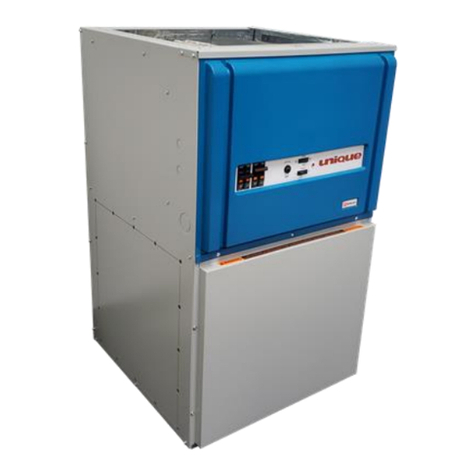
Ouellet OFEA 000-VV Series Assembly instructions

Printed in Canada
Printed on 100% recycled paper
2021-11-02
X40239 Rev. D
Models:
OFEAxx000-VV
OFEAxx000-1HVV
ADVANTAGE
(ECM MOTOR)
Caution: Donot tamper with
the unit or its controls. Call a
qualified service technician.
INSTALLER / SERVICE TECHNICIAN:
USE THE INFORMATION IN THIS MANUAL FOR THE INSTALLATION AND
SERVICING OF THE FURNACE AND KEEPTHE DOCUMENTNEAR THE UNIT
FOR FUTURE REFERENCE.
HOMEOWNER:
PLEASE KEEP THIS MANUAL NEAR THE FURNACE FOR FUTURE
REFERENCE.
Manufactured by :
Industries Dettson inc.
Sherbrooke, Québec - Canada
www.dettson.ca
www.ouellet.com 1 800 463-7043

2
TABLEOFCONTENT
1- SAFETY..................................................................3
1.1- DANGER, WARNING AND CAUTION............... 3
1.2- IMPORTANT INFORMATION............................ 3
1.3- DANGER OF FREEZING .................................. 3
2- INSTALLATION.....................................................3
2.1- POSITIONING THE FURNACE ......................... 4
2.2- CLEARANCES TO COMBUSTIBLE MATERIAL 4
2.2.1- Heating unit..........................................................................4
2.2.2- Supply air ducts..................................................................4
2.3- CONFIGURATIONS ......................................... 4
2.3.1- Upflow installation .............................................................4
2.3.2- Downflow installation........................................................4
2.3.3- Horizontal installation .......................................................4
2.4- ELECTRICAL SYSTEM .................................... 4
2.4.1- Conversion from two to one supply wires for model
over 27kW..............................................................................................5
2.5- INSTALLATION OF THE THERMOSTAT .......... 5
2.5.1- Anticipator adjustment(if required) on thermostat
equipped with heat anticipator adjustment .................................6
2.5.2- Air ducts................................................................................6
2.6- SUPPLY AIR ADJUSTMENTS .......................... 6
2.6.1- HEAT KW/CFM adjustment..............................................6
2.6.2- AC/HP size............................................................................7
2.6.3- System type .........................................................................7
2.6.4- AC/HP CFM adjust..............................................................7
2.6.5- ON/OFF delay.......................................................................7
2.6.6- Continuous fan....................................................................7
2.6.7- Low-voltage circuit.............................................................7
2.6.8- Basic furnace configuration............................................7
2.7- INSTALLATION OF ACCESSORIES................. 8
2.7.1- Humidifier and humidistat connection .........................8
2.7.2- Electronic Air Cleaner (EAC) connections ..................8
2.7.3- Dehumidify capability with standard humidistat
connection ............................................................................................8
2.7.4- Use of a heat pump............................................................8
3- OPERATION..........................................................8
3.1- START-UP ....................................................... 8
3.2- USE OF MANUAL FURNACE CONTROLS ON
ADVANTAGE FURNACE ....................................... 8
3.3- OPERATING SEQUENCE ................................ 9
3.3.1- Continuous fan....................................................................9
3.3.2- Cooling mode –single stage...........................................9
3.3.3- Cooling mode –two stage ...............................................9
3.3.4- Cooling mode –dehumidification..................................9
3.3.5- Electric heating mode –1 stage .....................................9
3.3.6- Electric heating mode –2 stage.....................................9
3.3.7- Heat pump heating mode –single stage.....................9
3.3.8- Heat pump heating mode –two stage..........................9
3.4- AIRFLOW VERIFICATION...............................10
3.4.1- Supply Air Temperature Rise Test..............................10
3.4.2- High limit verification......................................................10
4- MAINTENANCE..................................................10
4.1- AIR FILTER ....................................................10
4.2- MOTOR LUBRICATION ..................................10
5- FURNACE INFORMATION...............................11
TABLES
Table 1: Sequence of operation.....................................12
Table 2: Technical specifications...................................13
Table 3: Airflowtables UNIQUE Advantage ECM ½ HP
motor ............................................................................14
Table 4: Airflowtables UNIQUE Advantage ECM 1 HP
motor ............................................................................15
Table 5: Parts list, UNIQUE Advantage ECM ..................19
FIGURES
Figure 1: Upflow installation ............................................4
Figure 2: Downflow installation........................................4
Figure 3: Horizontal installation .......................................4
Figure 4 : Conversion from two to one supply wires.........5
Figure 5: 1-stage thermostat, electric heating only ..........5
Figure 6: 2-stage thermostat, electric heating only ..........5
Figure 7: 1-stage thermostat, electricheat and cooling
application.......................................................................5
Figure 8: 2-stage heating & 1-stage air conditioning &
heat pump thermostat .....................................................6
Figure 9: 2-stage heating & 2-stage air conditioning &
heat pump thermostat + dehumidification mode ..............6
Figure 10 : Fan Control Board.........................................6
Figure 11 : Standard humidistat connections...................8
Figure 12 : Thermostat connections................................8
Figure 13 : Electronic air cleaner connections.................8
Figure 14 : Advantage furnace controls...........................9
Figure 15 : Furnace dimensions....................................16
Figure 16 : Electrical diagram UNIQUE Advantage ECM.17
Figure 17: Parts list, UNIQUE Advantage ECM ...............18

3
1-SAFETY
1.1- DANGER, WARNING AND CAUTION
The wordsDANGER, WARNING andCAUTION are used to
identifythe levelsof seriousnessof certainhazards.It is
importantthat you understandtheir meaning.You willnotice
these wordsin the manual asfollows:
DANGER
Immediate hazards which WILL result in death or serious
bodily and/or materialdamage.
WARNING
Hazardsor unsafe practices which CAN result in death or
serious bodily and /or materialdamage.
CAUTION
Hazardsor unsafe practices which CAN result in minor
bodily and /or materialdamage.
1.2- IMPORTANT INFORMATION
WARNING
Non-observance of the safety regulations outlined in this
manual will potentially lead to consequences resulting in
death, serious bodily injury and/or property damage.
WARNING
Installation and repairs performed by unqualified persons
can result in hazards to them and to others. Installations
must conform to local codes or, in the absence of such
codes, to codes of the country having jurisdiction.
The information contained in this manual is intended for
use by a qualified technician, familiar with safety
procedures and who is equipped with the proper tools and
test instruments.
Failure to carefully read and follow all instructions in this
manual can result in death, bodily injury and/or property
damage.
a. It is the homeowner’s responsibility to engage a
qualified technician for the installation and subsequent
servicing of this furnace;
b. Do not use this furnace if anypartof it wasunder water.
Call a qualified service technician immediately to
assessthe damage and to replace all critical parts that
were in contact with water;
c. Do not store gasoline or any other flammable
substances, such as paper or carton near the furnace;
d. Never block or otherwise obstruct the filter and/or
return air openings;
e. Ask the technician installing your furnace to show and
explain to you the following items:
i. The main disconnect switchor circuit breaker;
ii. The air filter and how to change it (check monthly
and clean or replace if necessary);
f. Before calling for service, be sure to have the
information of section 5 of your manual close by in
order to be able to provide the contractor with the
required information, such as the model and serial
numbers of the furnace.
IMPORTANT: All local and national code requirements
governing the installation of central electric heatingequipment,
wiring andthe flue connectionMUSTbe followed. Some of the
codesthat mayapplyare:
ANSI/NFPA 70: NationalElectricalCode
CSA C22.1 or CSA C22.10: CanadianElectricalCode
Only the latest issuesof thesecodes maybe used,and are
availablefrom either:
The NationalFire Protection Agency
1 BatterymarchPark
Quincy, MA 02269
or
The Canadian StandardsAssociation
178Rexdale Blvd.
Rexdale, Ontario M9W 1R3
1.3- DANGER OF FREEZING
CAUTION
If your furnace is shut down during the cold weather
season, water pipes may freeze, burst and cause serious
water damage. Turn off the water supply and bleed the
pipes.
If the heater is left unattended duringthe cold weather season,
take the followingprecautions:
a. Close the main water valve in the house and purge the
pipesif possible. Open allthe faucetsinthe house;
b. Ask someone tofrequentlycheckthehouseduringthecold
weatherseason to makesure that there issufficientheatto
prevent the pipes from freezing. Tell this person to call an
emergencynumberif required.
2-INSTALLATION
This furnaceis a true multi-positionunit,inthat it willfunctionin
an upflow,downflow orhorizontal configuration to theleft or the
right. Only a few modifications are required during installation
to change from one position to another. The unit is shipped in
the upflowconfiguration andinstructionsastohowto changeto
the other positionsareincludedinthis manual.
The unit requires a 240 - 208 VAC power supply to the control
panel,thermostathook-upas shown on the wiringdiagram.

4
2.1- POSITIONING THE FURNACE
WARNING
Fire and explosion hazard.
The furnace must be installed in a level position, never
where it will slope toward the front.
Do not store or use gasoline or any other flammable
substancesnear the furnace.
Non-observance of theseinstructions will potentially result
in death, bodily injury and/or property damage.
CAUTION
This furnace is not watertight and is not designed for
outdoor installation. It must be installed in such a manner
as to protect its electricalcomponents fromwater. Outdoor
installation will lead to a hazardous electricalcondition and
to premature failure of the equipment.
If the furnace is installed in a basement or on a dirt floor, in a
crawl spaceforexample,itisrecommendedtoinstalltheuniton
a cement base 2.5 cm to 5.0 cm (1’’ to 2’’) thick.
In addition,theheatershouldalsobelocatedcloseto thecenter
of the air distribution system.
2.2- CLEARANCES TO COMBUSTIBLE MATERIAL
2.2.1- Heating unit
The furnace is approved for zero clearance to combustible
material regardlessof the heating capacity.
2.2.2- Supply air ducts
Ducts can be installed with a zero clearance to combustible
material.
2.3- CONFIGURATIONS
This furnacerequiressuitable ductwork.
2.3.1- Upflow installation
The return duct may be installed to the back, to the bottom, on
the leftside,oronthe rightsideof the unit.The supplyductshall
be installed on the top of the unit. Care should be taken not to
damage the wires inside while cutting the opening. It is also
recommended to install the blower door before handling or
moving theunit. Refer to
Figure 1: Upflow installation
2.3.2- Downflow installation
The returnduct maybe installedtothe back, on the left side,on
the right side orunderthe unit.The supplyductshall beinstalled
on the top of the unit.
The downflow base OFE-SO2 can be used. Refer to Figure 2
andthe installationinstructionsprovidedwiththe base.
Figure 2: Downflow installation
2.3.3- Horizontal installation
The return duct maybe installed tothe back, on the left side,on
the right side orunderthe unit.The supplyductshall beinstalled
on the top of the unit.
The furnace can be installed in the horizontal position, either
suspended orona combustible floorwithachoiceof rightor left
discharge. Refer to Figure 3 for additionaldetails.
Figure 3: Horizontal installation
2.4- ELECTRICAL SYSTEM
The UNIQUE furnace is completely pre-wired and all fieldwiring
mustbe connected to theterminal blocks on the unit. It requires
240- 208 voltage.
OFE-SO2

5
WARNING
Risk of fire.
The conductor sizing must conform to the lastedition of the
local or national codes.
Failure to follow this rule can result in death, bodily injury
and/or property damage.
Powersupplyto the unitcan be doneusingcopperor aluminum
wires. The wire size must be decided in accordance to the unit
power consumption, the over current protection type and
capacity, the wire type and length, and the environment where
the unit is installed. If an aluminum wire is used, other
precautions must be taken to insure the conformity of the
installation.In allcases, all the factors affectingthe wire gauge
mustbe consideredandthe installationcodesfollowed.
The exterior of the unit must have an uninterrupted ground to
minimizetherisk of bodilyharm. A groundterminalis supplied
with the control boxforthat purpose.A connectorissuppliedon
the groundterminaltoground an addedaccessory.
In the event that wiresinsidethe unitrequire replacement,these
must be copper wires only with same temperature rating and
sizes as originals.
The models of 27 kWand more are pre-wired in factory with two
terminal blocksallowing the usage of two smallergauge wires.
2.4.1- Conversion from two to one supply wires for
model over 27 kW
WARNING
Risk of fire.
When using one terminal block on models over 27 kW, the
installation must be performed with copper wire ONLY in
order to comply with the Canadian electrical code. The
usage of an aluminum or copper wire is acceptable on
models 25 kW and lower.
Move all wires from the two pole terminal to the three pole
terminal followingthe corresponding colors as shown in Figure
4.
The breakerand the supplyconductorsmustbe sizedbyadding
the ampacitiesof the two terminalsindicatedonthenameplate.
Refer to the electricaldiagram (Figure16).
. Figure 4 : Conversion from two to one supply wires
Before After
2.5- INSTALLATION OF THE THERMOSTAT
A thermostat mustbe installedto controlthe temperatureof the
area to be heated. Follow the instructions supplied with the
thermostat. Some thermostats need to connect the C terminal
on the furnace and thermostat. Install the thermostat on an
interior wall in a location where it will not be subject to direct
sunlight, lamps, air diffusers, fireplaces, etc. Seal openings in
wallstoavoid aircurrentsthat mayinfluence the operationof the
thermostat.Also refer to the wiring diagrams providedwith the
heating/airconditioning unit.The connectionsmustbemadeas
indicatedon Figure 5to Figure 9. Referto the electricaldiagram
(Figure 16).
Figure 5: 1-stage thermostat, electric heating only
Figure 6: 2-stage thermostat, electric heating only
Figure 7: 1-stagethermostat, electric heat and cooling
application

6
Figure 8: 2-stageheating & 1-stage air conditioning & heat
pump thermostat
Figure 9: 2-stageheating & 2-stage air conditioning & heat
pump thermostat+ dehumidification mode
2.5.1- Anticipator adjustment(if required) on thermostat
equipped with heat anticipator adjustment
Somethermostatsareequippedwithaheatanticipatorthatmust
be adjusted according to the instructions supplied. This is to
ensure that the heating mode is comfortable andeconomical.
Generally speaking, on a single stage thermostat,a reading of
the current mustbe takenwith an ammeterasfollows:
1. Move the anticipator to its highest setting, rendering it
ineffective.
2. Remove the wire from the W1 terminal and connect an
ammeterbetween theterminalandthewire.
3. Call for heat by raising the set point on the thermostat and
allowthe furnaceto run for 3 to 4 minutesto reachits peak
output.
4. Once the currenthas stabilized,a readingshouldbetaken
andthe anticipatoradjustedto that value. If longerheating
cycles are desired, the anticipator can be set to a higher
value
2.5.2- Air ducts
The ducts must be sized such a way as to accommodate the
specifiedairflowandtheavailablestatic pressure. Refer to the
applicablelocaland/ornationalinstallationcodes.
Insulate the ducts that lead through non-heated areas. Use
flexible supply and return air connectors to avoid the
transmissionof vibration. Tomakethe unitrun even quieter,the
installershould:
a. Use two elbows between each outlet and the supply and
return airplenum;
b. Coverthe vertical sectionsof the supplyand returnair duct
with soundproofingmaterial;
c. Use bafflesinshortradiuselbows;
d. Use flexiblehangerstosuspendtheducts.
A heat pumpor anair conditionercanbe added to this furnace,
in either the supply or return air duct. Carefully follow the
instructions provided with these appliances to ensure proper
installationandhook-uptothe electricfurnace. Refrigerantand
drainage pipes must in no way hinder access to the furnace
panels.
2.6- SUPPLY AIR ADJUSTMENTS
Fan Control Board taps are used by the installer to configure a
system. The ECM motor uses the selected taps to modify its
operationto a pre-programmedtableof airflows(Referto Table
3 and Table 4). Airflows are based on system size or mode of
operation and those airflows are modified in response to
thermostatinputssuch as dehumidificationrequest.
The UNIQUE furnace mustbeconfiguredtooperateproperlywith
system components with which it is installed. To successfully
configure a system (see information printed on circuit board
label located next to select pins), move the 6 select wires to the
pins which match the components used. (Refer to Figure 10
below)
Figure 10 : Fan Control Board
2.6.1- HEAT KW/CFM adjustment
Installer must verify (factory set) the electric heat airflow
adjustmentrequiredforkWsize heater installed.
The selectpinsare marked25,23/20,18/15, 10 (for½ HP ECM
motorunit) and 30/27, 25, 23, 20, (for 1.0 HP ECM motorunit).
Refer to the unit wiring diagram and select the pin for the kW
size heaterbeing used(Refer to Figure 10and Figure 16).
The airflow must be large enough for safe and continuous
operation.(Referto Table3 and 4 for airflowdeliveryCFM).

7
2.6.2- AC/HP size
Select System Size Installed
The factory setting for air conditioner or heat pump size is the
largest outdoorunit that can be used with the furnace. Installer
needsto select airconditioneror heat pump size to ensure that
airflow delivered falls within proper range for the size unit
installed.
The select pinsare marked 3, 2 ½, 2, 1 ½ for furnaceequipped
with½ HP ECMmotorand 5,4, 3 ½, 3 forfurnace equippedwith
1.0 HP ECM motor. Refer to the unit wiring diagram andselect
the pin for the outdoorunit size being used(Refer to Figure 10
andFigure 16).
2.6.3- System type
Select System Type Installed AC or HP
The type of system mustbe selected:
1. AC –Air Conditionerprovidesapproximately400 CFM per
ton for greater efficiency and humidity control with the
AC/HP CFM ADJUST set to the nominal (NOM) tap. To
achieve more or less than 400 CFM per ton, move tap to
(HI) or (LO) position respectively. Refer to appropriate
airflow tablesforexact CFM setting.
2. HP-COMFORT –Heat Pump Comfort provides
approximately 350 CFM per ton for higher than normal
heatingairdeliverytemperature.
3. HP-EFF –Heat Pump Efficiency provides same airflow for
heating and cooling modes to increase overall HP
efficiency;approximately400CFM per ton with the AC/HP
CFM ADJUST set to the nominal (NOM)tap.
The factorysetting is AC (Refer to Figure 10and Figure 16).
2.6.4- AC/HP CFM adjust
Select Medium, Low, or High Airflow
To provideairflowatratesdescribedabove,theAC/HPADJUST
select is factory set to the nominal (NOM) tap. The adjust
selectionsHI/LO will regulateairflow supplied forall operational
modes.
HI provides10% airflow overnominal unitsize selected and LO
provides10%airflowbelownominal unitsizeselected.
Setting options are provided to adjust airflow supplied to meet
individual installation needs for such things as noise, comfort,
andhumidityremoval. (Referto Figure 10and Figure 16)
2.6.5- ON/OFF delay
Select desired time delay profile
NOTE: Delay selections are active in cooling and heat pump
heating modes only. Electric heating modes have a one (1)
minute OFF delay at 50% airflow and zero (0) ON delay
programmed intotheECM motorthat cannotbe overridden.
Four (4) motor operation delay profiles are provided to
customize and enhance system operation. (Refer to Figure 10
andFigure 16).
Selectionoptionsare:
1. 0/90: No ON delay and 90 second OFF delay at 100%
airflow (factorysetting).
2. 30/90: 30 second ON delay with no airflowand 90 second
OFF delayat100%airflowprofile. Usedwhenitisdesirable
to allow system coils time to heat-up/cool-down in
conjunctionwiththe airflow.
3. 0/0: No delay option. Used for servicing unit or when a
thermostatis utilized to perform delayfunctions.
4. ENH: enhanced selection provides a 30 second ON delay
withno airflowfollowedby150secondsat70%airflow,and
no OFF delayfor addedcomfort. This profilewillminimize
cold blow in heat pump operation and could enhance
system efficiency.
2.6.6- Continuous fan
NOTE: If installed with atwo-stage outdoorunit,do notselect HI
speedcontinuousfan. If HI is selected,low stage compression
will also run HI fan speed possibly resulting in insufficient
dehumidification.
Select desired fan speed when thermostat is set on
continuous fan. (Refer to Figure 10 and Figure 16)
1. LO speed –factorysetting, 50% cooling mode airflow.
2. MED speed –moveconnectorto MED, 80% coolingmode
airflow.
3. HI speed –move connector to HI, 100% cooling mode
airflow.
2.6.7- Low-voltage circuit
Fusing and Reference
The low-voltage circuit is fused by a board-mounted 5-amp
automotive fuseplaced inserieswiththetransformerSEC2and
the R circuit. The C circuit of the transformer is referenced to
chassisgroundthrougha printedcircuit run at SEC1connected
to metal standoff markedwithground symbol.
2.6.8- Basicfurnace configuration
The following basic configuration of the furnace will provide ARI
rated performance of an airconditioner:
1. HEAT KW/CFM –Select the heater range for the size
electricheater installed.
2. AC/HP SIZE –Selectsystem sizeinstalled.
3. SYSTEM TYPE –Select system type AC
4. AC/HP CFM ADJUST –Select NOM.
5. ON/OFF DELAY –Select0/90 profile.
6. CONTINUOUS FAN –Select desired fan speed when
thermostatis set to continuousfan.
The following basicconfiguration of the furnace willprovide ARI
rated performance of a heatpump:
1. HEAT KW/CFM –Select the heater range for the size
electricheater installed.
2. AC/HP SIZE –Selectsystem sizeinstalled.
3. SYSTEM TYPE –Select system type HP-EFF
4. AC/HP CFM ADJUST –Select NOM.
5. ON/OFF DELAY –Select0/90 profile.
6. CONTINUOUS FAN –Select desired fan speed when
thermostatis set to continuousfan.

8
2.7- INSTALLATION OF ACCESSORIES
WARNING
Electrical shock hazard.
Turn OFF electrical power at the fuse box or service panel
before making any electrical connection and ensure that a
proper ground connection is made before connecting line
voltage.
Failure to do so can result in death or bodily injury.
2.7.1- Humidifier and humidistat connection
Fan Control Board terminals HUM1 (directly connected
internallyto C on terminal block)andHUM2(directlyconnected
internally to G on terminal block) are provided for direct
connectionsto the low-voltagecontrolof a humidifierthrougha
standardhumidistat(refertoFigure 11).
Figure 11 : Standard humidistat connections
These terminalsare energizedwith24VAC whenG thermostat
signalispresent. Alternately,the24 VAC signal maybesourced
from the W1 and C terminal block connections when electric
heaters are used as a primary heating source (refer to Figure
12).
Figure 12 : Thermostat connections
2.7.2- Electronic Air Cleaner (EAC) connections
FanControlBoard terminalsAUX1(directlyconnectedinternally
to C on terminalblock)and AUX2 (directlyconnected internally
to G onterminal block)are providedfordirectconnectionsto the
low-voltagecontrol of an electronicaircleaner.These terminals
are energizedwith24VAC whenG thermostatsignalis present
(referto Figure 13)
Figure 13 : Electronic air cleaner connections
2.7.3- Dehumidify capability with standard humidistat
connection
Latent capacities for systems using this unit are better than
average systems. If increased latent capacity is an application
requirement, the field wiring terminal block provides a
connection terminal (DH) foruse of a standard humidistat. The
furnace control will detect the humidistat contact opening on
increasing humidityandreduceitsairflowtoapproximately80%
of nominal cooling modeairflow. Thisreduction will increase the
system latent capacity until the humidity falls to a level which
causesthe humidistatcontactto close its contacts.
When the contact closes again, the airflows comes back to
100% of the coolingairflow selected.
2.7.4- Useof a heat pump
When using a heat pump, a thermostat with dual fuel option or
a fossil fuel kit is required that prevents the operation of the
electricelementsand the heat pumpatthe sametime. Refer to
the instructions provided with the thermostat or the “Fossil Fuel”
kit for the properwiringof the furnaceand the heatpump.
The simultaneous operation of the electric elements and the
heat pump will cause overheating of either unit. The safety
controls of the appliances will shut down the elements or heat
pump,sincethey are not designedtofunctioninthis fashion.
3-OPERATION
3.1- START-UP
Before starting up the unit, be sure to check that the following
itemsare in compliance:
1. The electricalinstallationandventilation are conform;
2. The blower access door is in place and the blower rail
lockingscrewsare well tightened;
3. The blower speed adjustments for heating and air
conditioning are appropriate and according to the
specificationsin thismanual;
4. The thermostat of the room is in heating mode and is set
higherthan the ambienttemperature.
5. The breakerson frontpanelare set on the “ON” position
To start the unit,turn the main electricalswitchon.
3.2- USE OF MANUAL FURNACE CONTROLS ON
ADVANTAGE FURNACE
When thereis a demand forheat,the pilotlight(L-1) comeson.
Refer to the wiringdiagram (Figure16).
When the “HI/LO” switch is put into the “LO” position, it will shut
down approximatelyhalf the elements.
However, it is important to put the switch back to the “HI”
position during the winter months to ensure adequate
heating.
Also, this switch must remain in the “HI” position when a 2-stage
or outdoorthermostatis used to control the electricelementsof
the secondstage. Refer to the diagram inSection 2.5-.
The “ON/OFF VENT/FAN” switch engages the blower in the
continuous low speed mode. This will filter the air and provide
forbetter air distributioninthe building.
The 15 A circuit breaker is there to protect the motor and the
controlcircuitconductors. If theunitdoesnot function,pressthe
DNS-1154 Rev. A
DNS-1154 Rev. A
DNS-1154 Rev. A

9
circuit breakerbutton to see if it may have disengaged due to a
power surge. If the breaker has to be pressed again, the unit
mustbe checked by a qualified servicetechnician.
Figure 14 : Advantage furnace controls
3.3- OPERATING SEQUENCE
This unit is designed to provide the required airflow in order to
match with any of four (4) different electronic heat capacity, air
conditionerorheatpump outdoorunitsizes(see Tables3 and 4
forCFM values).
Also, the blowermotoris a true variablespeedmotor designed
to deliverconstantCFM. ConstantCFMisvalidforsystemswith
total external static pressurebetween 0.1 and0.8 incheswater
column.
Refer also to Table 1 for sequence of operation summary,
dependingonthermostatinputsandtypes.
3.3.1- Continuous fan
•Thermostatclosescircuit R to G.
Blowerruns at continuousfan airflow.
3.3.2- Cooling mode –single stage
NOTE: For single stage systems, do not use the Y1 terminal.
•If indoor temperature is above temperature set point and
humidity is below humidity set point, thermostat closes
circuits R to G, R to Y/Y2 andR to O.
Furnace deliverssinglestagecoolingairflow.
3.3.3- Cooling mode –two stage
•First stage(low)cooling:Thermostatcloses circuits Rto G,
R to O, and R to Y1.
Furnace deliverslowstage coolingairflow.
•Second stage (high) cooling: Thermostat closes circuits R
to G, R to O, R to Y1 andR to Y/Y2.
Furnace delivershighstage coolingairflow.
3.3.4- Cooling mode –dehumidification
NOTE: Removejumper« J1» on board toactivate thisfunction.
(Refer to Figure 10 andFigure 16)
•If indoor temperature is above temperature set point and
humidity is above humidity set point, thermostat closes
circuits R to G, R to Y/Y2 and R to O and humidistatopens
circuit R to DH.
The furnacedeliversairflow whichisapproximately80%of
the nominal coolingairflowtoincrease the latentcapacityof
the system.
3.3.5- Electric heating mode –1 stage
•Thermostatclosescircuit R to W1 or W2.
Furnace delivers the selected electric heat airflow and
maximum heatingcapacity is powered starting the heating
elements in sequence with a delay of 3 seconds between
each.
3.3.6- Electric heating mode –2 stage
NOTE: Removejumper« J2» on board toactivate thisfunction.
(Refer to Figures10 and16)
•First stageheating:thermostatcloses circuit R to W1.
Furnace deliverslow stage heating airflow (50% of nominal
electric heating airflow) and approximately half of the
heating capacity is powered starting the heating elements
in sequence witha delayof 3 secondsbetween each.
•Secondstage heating:thermostatclosescircuit R to W2.
Furnace delivers high stage heating airflow (100% of
nominal electric heating airflow) and maximum heating
capacity is powered starting the heating elements in
sequencewitha delayof 3 secondsbetweeneach.
3.3.7- Heatpump heating mode –single stage
NOTE: For single stagesystems, do not use the Y1 terminal.
•Thermostatclosescircuits R to G and R to Y/Y2.
Furnace deliversselected heat pump heatingairflow.
3.3.8- Heatpump heating mode –two stage
•First stage (low)heating:Thermostat closes circuits Rto G
andR to Y1.
Furnace deliverslowstage heatingairflow.
•Second stage (high)heating: Thermostatcloses R to G, R
to Y1 and R to Y/Y2.
Furnace delivershighstage heatingairflow.
WARNING
Electrical shock or unit damage hazard
Failure to carefully read and follow this WARNING could
result in equipment malfunction, property damage,
personal injury and/or death.
Disconnect power to unit before removing or replacing
connectorsor servicingmotor. Wait atleastfive (5)minutes
after disconnecting power before handling.

10
3.4- AIRFLOW VERIFICATION
Verifytheairflow bytaking readingsofthefollowingpoints,while
the elementsare in heating mode:
a. Total amperage of allthe heating elements;
b. Voltage at the furnace;
c. Supply air temperature. The point of the readingmust not
be affected byradiantheat from the elements;
d. Return air temperature.
From these readings, one can arrive at an approximate
calculation of the average airflow. To do that, the following
formulashouldbeused:
0.82 x amps.x volts
Liter/s= -------------------------
Diff. temperature ˚C
3.1 x amps.x volts
CFM = ------------------------
Diff. temperature ˚F
3.4.1- Supply Air TemperatureRise Test
1. Operatethe unit at maximumpowerforatleast10 minutes;
2. Measurethe air temperatureinthe returnair plenum;
3. Measurethe air temperatureinthe largesttrunk coming off
the supplyairplenum,justoutsidethe range of radiantheat
from the heat exchanger. 0.3 m (12”) from the plenum of
the main take-off isusuallysufficient;
4. Calculatethe temperaturerise by subtractingthe return air
temperaturefrom thesupplyairtemperature.
If the temperature rise exceeds the temperature specified in
Table 2 by 5˚F/2.8°C, move the “AC/HP CFM ADJUST” black
wire to high (HI) position. If the excessive temperature rise
cannot be reduced by increasing fan speed, investigate for
ductworkobstructionsor dirty and improperairfilter.
CAUTION
It is important to check the airflow and to ascertainthat the
unit does not operate above the temperatures specified in
the Technical Specifications (Table 2). This is particularly
important if a cooling coil ora heatpump hasbeen installed
in the ducts.
Hi-Limit thermal protectors should never need to engage
during the normal functioning of the appliance. They are
strictlydesigned to engage during the improper functioning
of the blower or when the filter was improperly maintained.
3.4.2- High limit verification
After operating the furnace for at least 15 minutes, restrict the
return air supply by blocking the filters or the return air register
and allow the furnace to shut off on High Limit. The electric
heaters must deactivate themselves before the warm air
temperature exceeds 200˚F (93°C).
Removethe obstructionand the elementsshouldrestartafter a
fewminutes.
4-MAINTENANCE
WARNING
Electrical shock hazard.
Turn OFF power to the furnace before any disassembly or
servicing.
Failure to do so can result in death, bodily injury and/or
property damage.
Preventive maintenance is the best way to avoid unnecessary
expense and inconvenience. Have your heating system
inspected by a qualified service technician at regular intervals.
Do not attempt to repair the furnace or its controls. Call a
qualifiedservicetechnician.
Beforecallingforrepairservice,check the followingpoints:
1. Checkfusesor the circuit breakers;
2. Check if the 15 A circuit breaker on the furnace is
disengaged;
3. Checkif the 5 A fuseof the control boardis blown;
4. Set thethermostathigherthanroom temperature. If the unit
doesnot start up, cut the powerandcalla qualifiedservice
technician.
When callingforserviceor ordering a replacementpart,specify
the model and serial numberof yourappliance.
4.1- AIR FILTER
The disposable filter should be replaced twice a year. The
presence of animal hair, dust, etc. may necessitate more
frequent changes. Dirty filters have an adverse effect on the
performanceof the central heating system.
4.2- MOTOR LUBRICATION
Do not lubricate the blower motor, since it is permanently
lubricated.

11
5-FURNACEINFORMATION
Model:
Serialnumber:
Furnace installationdate:
Service telephone # -Day:
Night:
Service technician nameand
address:
START-UP RESULTS
Voltage:
Total currentconsumed bythe elements:
Supplyairtemperature:
Returnairtemperature:
Supplyairductstaticpressure:
Returnairductstaticpressure:
Totalpressure:
Calculatedairflow:
Currentconsumedbytheblowermotor:
Currentconsumed bythe accessories:

12
Table 1: Sequence of operation
Mode
Thermostat to Control
Board 24 VAC
Control
State
Control Function
ON Fan ON at the selected continous fan CFM
OFF Fan OFF
ON Fan ON at 50% of the selected Heat CFM, 1st stage of Heat ON**
OFF 1st stage of Heat OFF, Fan OFF
ON Fan ON at selected Heat CFM, 1st stage & 2nd stage of Heat ON**
OFF 1st stage & 2nd stage of Heat OFF, Fan OFF
ON Fan ON at the selected continous fan CFM
OFF Fan OFF
ON Fan ON at 50% of the selected Heat CFM, 1st stage of Heat ON**
OFF 1st stage of Heat OFF, Fan OFF
ON Fan ON at selected Heat CFM, 1st stage & 2nd stage of Heat ON**
OFF 1st stage & 2nd stage of Heat OFF, Fan OFF
ON Compressor ON, Fan ON after delays at selected Cooling CFM
OFF Compressor OFF, Fan OFF after selected cooling delays
ON Compressor ON, Fan ON after delays at 80% of the selected Cooling CFM
OFF Compressor OFF, Fan OFF after selected cooling delays
ON Fan ON at the selected continous fan CFM
OFF Fan OFF
ON Fan ON at 50% of the selected Heat CFM, 1st stage of Heat ON**
OFF 1st stage of Heat OFF, Fan OFF
ON Fan ON at selected Heat CFM, 1st stage & 2nd stage of Heat ON**
OFF 1st stage & 2nd stage of Heat OFF, Fan OFF
ON Compressor ON, Fan ON after delays at 80% of the selected Cooling CFM
OFF Compressor OFF, Fan OFF after selected cooling delays
ON Compressor ON, Fan ON after delays at selected Cooling CFM
OFF Compressor OFF, Fan OFF after selected cooling delays
ON Compressor ON, Fan ON after delays at 80% selected Cooling CFM
OFF Compressor OFF, Fan OFF after selected cooling delays
ON Fan ON at the selected continous fan CFM
OFF Fan OFF
ON Compressor ON, Fan ON after delays at selected Cooling CFM
OFF Compressor OFF, Fan OFF after selected Cooling delays
ON Compressor ON, Fan ON after delays at 80% of the selected Cooling CFM
OFF Compressor OFF, Fan OFF after selected cooling delays
ON Compressor ON, Fan ON after delays at selected Heat Pump CFM
OFF Compressor OFF, Fan OFF after selected Heat Pump delays
ON Fan ON at selected Heat CFM, 1st stage & 2nd stage of Heat ON**
OFF 1st stage & 2nd stage of Heat OFF, Fan OFF
ON Fan ON at the selected continous fan CFM
OFF Fan OFF
ON Compressor ON, Fan ON after delays at 80% of the selected Cooling CFM
OFF Compressor OFF, Fan OFF after selected cooling delays
ON Compressor ON, Fan ON after delays at selected Cooling CFM
OFF Compressor OFF, Fan OFF after selected cooling delays
ON Compressor ON, Fan ON after delays at 80% of the selected Cooling CFM
OFF Compressor OFF, Fan OFF after selected cooling delays
ON Compressor ON, Fan ON after delays at 80% of the selected Heat Pump CFM
OFF Compressor OFF, Fan OFF after selected Heat Pump delays
ON Compressor ON, Fan ON after delays at selected Heat Pump CFM
OFF Compressor OFF, Fan OFF after selected Heat Pump delays
ON Fan ON at selected Heat CFM, 1st stage & 2nd stage of Heat ON**
OFF 1st stage & 2nd stage of Heat OFF, Fan OFF
* The 24 VAC is removed is remove from DH when there is a call for dehumidification
** Electric heat elements are controlled by relays with a delay sequence from Rectifier timer board on the relays
∆ The thermostat must provide Dual Fuel option or a Fossil Fuel kit must be used (electric heat elements & Heat pump must not run at the same time)
▼ Jumper J2 on the electronic board provide connection between W1 & W2. Remove it for 2 stage Electric Heat using a 2 stages thermostat.
Electric Heat only
Continous Fan
(Fan switch ON)
G
Themostat calls for 1st stage Heat
W1 ▼
Themostat calls for 2nd stage Heat
W1 & W2 ▼
Cooling 1 stage, with Electric Heat
Continous Fan
(Fan switch ON)
G
Themostat calls for 1st stage Heat
W1 ▼
Themostat calls for 2nd stage Heat
W1 & W2 ▼
Themostat calls for Cooling
Y/Y2 & G
Themostat calls for Cooling &
Dehumidification
Y/Y2 & G & (DH)*
Cooling 2 stages, with Electric Heat
Continous Fan
(Fan switch ON)
G
Themostat calls for 1st stage Heat
W1 ▼
Themostat calls for 2nd stage Heat
W1 & W2 ▼
Themostat calls for 1st stage Cooling
Y1 & G
Themostat calls for 2nd stage Cooling
Y/Y2 & Y1 & G
Themostat calls for 2nd stage Cooling &
Dehumidification
Y/Y2 & Y1 & G & (DH)*
Heat pump 1 stage, with Electric Heat
Continous Fan
(Fan switch ON)
G
Themostat calls for Cooling
Y/Y2 & G & O
Themostat calls for Cooling &
Dehumidification
Y/Y2 & G & O & (DH)*
Themostat calls for 1st stage Heat
(Heat pump heating mode)
Y/Y2 & G
Themostat calls for 2nd stage Heat
(Electric heat) ∆
W1 & W2 ▼
Heat pump 2 stages, with Electric Heat
Continous fan
(Fan switch ON)
G
Themostat calls for 1st stage Cooling
Y1 & G & O
Themostat calls for 2nd stage Cooling
Y/Y2 & Y1 & G & O
Themostat calls for 2nd stage Cooling &
Dehumidification
Y/Y2 & Y1 & G & (DH)*
Themostat calls for 3rd stage Heat
(Electric Heat) ∆
W1 & W2
Themostat calls for 1st stage Heat
(Heat pump heating mode)
Y1 & G
Themostat calls for 2nd stage Heat
(Heat pump heating mode)
Y1 & Y/Y2 & G

13
Table 2: Technical specifications
Capacity 10 15 18 20 23 25 27 30
Power, total @ 240V / 208V (Kw) 10 / 7.5 15 / 11.3 18 / 13.5 20 /15 23 / 17.3 25 / 18.8 27 / 20.3 30 / 22.5
Power, first stage @ 240V / 208V (Kw) 5/ 3.8 10 / 7.5 9/ 6.8 10 / 7.5 13 / 9.8 15 / 11.3 15 / 11.3 15 / 11.3
Net capacity@ 240V (BTU/h)
@ 208V
34,120
25,628
51,180
38,442
61,420
46,130
68,240
51,256
78,480
58,944
85,300
64,070
92,124
69,195
102,360
76,884
Temperature rise range @ 240V (°F) 168 54 65 53 58 58 59 65
Volts - Hertz - Phase
Electrical element #1 @ 240V / 208V
(Kw)
5/ 3.7 5/ 3.7 4/ 3.1 5/ 3.7 4/ 3.1 5/ 3.7 5/ 3.7 5/ 3.7
Electrical element #2 @ 240V / 208V
(Kw)
5/ 3.7 5/ 3.7 5/ 3.7 5/ 3.7 5/ 3.7 5/ 3.7 5/ 3.7 5/ 3.7
Electrical element #3 @ 240V / 208V
(Kw)
5/ 3.7 4/ 3.1 5/ 3.7 4/ 3.1 5/ 3.7 5/ 3.7 5/ 3.7
Electrical element #4 @ 240V / 208V
(Kw)
5/ 3.7 5/ 3.7 5/ 3.7 5/ 3.7 4/ 3.1 5/ 3.7
Electrical element #5 @ 240V / 208V
(Kw)
5/ 3.7 5/ 3.7 4/ 3.1 5/ 3.7
Electrical element #6 @ 240V / 208V
(Kw)
4/ 3.1 5/ 3.7
Blower motor Consumption @ 240V /
208V (Amp. Max.)
2.3 / 2.7 2.3 / 2.7 2.3 / 2.7 2.3 / 2.7 5.2 / 6.0 5.2 / 6.0 5.2 / 6.0 5.2 / 6.0
Heating Elements Consumption @
240V / 208V (Amp)
41.4 / 35.9 62.1 / 53.8 75.8 / 65.7 82.8 / 71.8 96.5 / 83.6 103.5 / 89.7 113.6 / 98.5
124.3 /
107.7
Total Consumption @ 240V / 208V
(Amp)
43.7 / 38.6 64.4 / 56.5 78.1 / 68.4 85.1 / 74.5 101.7 / 89.6 108.7 / 95.7
118.8 /
104.5
129.5 /
113.7
Ampacity - Terminal block #1 @ 240V
/ 208V ²
54.0 / 47.8 78.6 / 69.2 94.7 / 83.2 103.2 / 90.5
122.7 /
108.3
131.1 /
115.6
53.1 / 48.0 57.3 / 51.7
Ampacity - Terminal block #2 @ 240V
/ 208V ²
- - - - - - 90.0 / 78.0 98.4 / 85.2
Breaker size - Terminal block #1 @
240V / 208V ²
60 / 50 80 / 70 100 / 90 125 / 90 125 / 125 150 / 125 60 / 50 60 / 60
Breaker size - Terminal block #2 @
240V / 208V ²
- - - - - - 90 / 80 100 / 90
Motor (HP) / number of speeds
Nominal blower size (diam. X width)
Overall dim. (width x depth x height)
Supply
Return
Filter quantity and size
Shipping weight
Maximum cooling capacity
RATINGS AND PERFORMANCE
OFEAxx000-1HVV
1 HP / 240V Motor
ELECTRICAL SYSTEM
2 wires 240/208 - 60 - 1
BLOWER DATA
18" x 18"
(1) 20" x 20"
48 Kg / 105 lbs
OFEAxx000-VV
1/2 HP / 240V Motor
1/2 HP ECM EON
1 HP ECM EON
12 x 8
12 x 9
GENERAL INFORMATION
1) Can be adjusted by +10% or -10% using ''CFM adjust'' option on the control board.
2) Calculated on the basis of standard C22.2-236.
22" x 22" x 36.5"
20" x 20"
3 tons
5 tons

14
Table 3: Airflow tables UNIQUE Advantage ECM ½ HP motor
AC / HP SIZE
Adjustment
BLUE wire position
A/C size
(TONS)
CFM ²
AC/HP CFM
ADJUST
BLACK wire
position = (NOM)
CFM ²
AC/HP CFM
ADJUST
BLACK wire position
= (LO)
CFM ²
AC/HP CFM
ADJUST
BLACK wire position
= (HI)
36 3.0 1200 1080 1320
30 2.5 1000 900 1100
24 2.0 800 720 880
18 1.5 600 540 660
AC / HP SIZE
Selection
BLUE wire position
A/C size
(TONS)
CFM ¹
CONTINUOUS
FAN
YELLOW wire
position = (LO)
CFM ¹
CONTINUOUS FAN
YELLOW wire
position = (MED)
CFM ¹
CONTINUOUS FAN
YELLOW wire
position = (HI)
36 3.0 600 960 1200
30 2.5 500 800 1000
24 2.0 400 640 800
18 1.5 300 480 600
HEAT KW/CFM
adjustment
RED wire position
POWER
(Kw)
CFM
First stage
24 VAC on W1 ¹
CFM
Second stage
24 VAC on W1
and/or W2 ¹
25 25 715 1359
23/20 23 620 1178
23/20 20 620 1178
18/15 18 450 855
18/15 15 450 855
10 10 238 452
ON / OFF DELAY
Adjustment
WHITE wire position
ON-Delay
Time
OFF-Delay
% CFM - Time
0 / 90 0 sec. 100% - 90 sec.
30 / 90 30 sec. 100% - 90 sec.
0 / 0 0 sec. 0 sec.
ENH 30 sec. 70 % - 150 sec.
No adjustment
required
ON-Delay
Time
OFF-Delay
% CFM - Time
- 0 sec. 50% - 60 sec.
¹ Remove the Jumper J2 when a 2 stages thermostat is used
ON & OFF DELAY FOR COOLING AND HEAT PUMP HEATING
DELAY PROFILE FOR ELECTRIC HEATING MODE
COOLING OR HEAT PUMP HEATING MODE (WITH HP-EFF SELECTED ¹)
¹ "SYSTEM TYPE"
² In Cooling - Dehumidification mode (with Jumper J1 remove), with no 24 VAC input to DH, the CFMs are
reduced by 15%.
The CFMs shown are reduced by 20% if there is 24 VAC input to Y1 only (Y/Y2 not powered)
CONTINUOUS FAN
¹ CFM's when AC/HP CFM ADJUST at NOM position. CFM's 10% lower or higher if AC/HP CFM ADJUST at
LO or HI position.
ELECTRIC HEATING MODE

15
Table 4: Airflow tables UNIQUE Advantage ECM 1 HP motor
AC / HP SIZE
Adjustment
BLUE wire position
A/C size
(TONS)
CFM ²
AC/HP CFM
ADJUST
BLACK wire
position = (NOM)
CFM ²
AC/HP CFM
ADJUST
BLACK wire position
= (LO)
CFM ²
AC/HP CFM
ADJUST
BLACK wire
position = (HI)
60 5.0 2000 1800 2200
48 4.0 1600 1440 1760
42 3.5 1400 1260 1540
36 3.0 1200 1080 1320
AC / HP SIZE
Selection
BLUE wire position
A/C size
(TONS)
CFM ¹
CONTINUOUS
FAN
YELLOW wire
position = (LO)
CFM ¹
CONTINUOUS FAN
YELLOW wire
position = (MED)
CFM ¹
CONTINUOUS FAN
YELLOW wire
position = (HI)
60 5.0 1000 1600 2000
48 4.0 800 1280 1600
42 3.5 700 1120 1400
36 3.0 600 960 1200
HEAT KW/CFM
adjustment
RED wire position
POWER
(Kw)
CFM
First stage
24 VAC on W1 ¹
CFM
Second stage
24 VAC on W1
and/or W2 ¹
30/27 30 715 1424
30/27 27 715 1424
25 25 675 1345
23 23 620 1235
20 20 477 950
ON / OFF DELAY
Adjustment
WHITE wire position
ON-Delay
Time
OFF-Delay
% CFM - Time
0 / 90 0 sec. 100% - 90 sec.
30 / 90 30 sec. 100% - 90 sec.
0 / 0 0 sec. 0 sec.
ENH 30 sec. 70 % - 150 sec.
No adjustment
required
ON-Delay
Time
OFF-Delay
% CFM - Time
- 0 sec. 50% - 60 sec.
ON & OFF
DELAY FOR COOLING AND
HEAT PUMP HEATING MODE
DELAY PROFILE FOR ELECTRIC HEATING MODE
COOLING OR HEAT PUMP HEATING MODE (WITH HP-EFF SELECTED ¹)
¹ "SYSTEM TYPE"
² In Cooling - Dehumidification mode (with Jumper J1 remove), with no 24 VAC input to DH, the
CFMs are reduced by 15%.
The CFMs shown are reduced by 20% if there is 24 VAC input to Y1 only (Y/Y2 not powered)
CONTINUOUS FAN
24 VAC (R) input on G only
¹ CFM's when AC/HP CFM ADJUST at NOM position. CFM's 10% lower or higher if AC/HP CFM
ADJUST at LO or HI position.
ELECTRIC HEATING MODE
24 VAC (R) input on W1 and/or W2 only
¹ Remove the Jumper J2 when a 2 stages thermostat is used

16
Figure 15 : Furnace dimensions

17
Figure 16 : Electrical diagram UNIQUE Advantage ECM

18
Figure 17: Parts list, UNIQUE Advantage ECM

19
Table 5: Parts list, UNIQUE Advantage ECM
#
Item
Description
Comments
1
OFE-B04431
Acoustic insulation
2
OFE-B04343-04
Left side panel assembly
Left panel, items 3 and 1 included
3
OFE-B04340-02
Left side panel insulation
4
OFE-B04344-02
Back panel assembly
5
OFE-B04341
Top back panel insulation
6
OFE-B04343-02
Right side panel assembly
Right panel, items 7 and 1 included
7
OFE-B04340-01
Right side panel insulation
8
OFE-B04302-01
Top front panel
9
OFE-B04312
Breakers support
10
OFE-L01J006
Breaker 60 A
11
OFE-K03071
Sequencer card assembly
Card and plastic pins
12
OFE-B03531-03
Electronic card assembly
13
OFE-B03531-04
Electronic card assembly
14
OFE-B04000-01
Modified 12 positions terminal
15
OFE-X02333
Label " Terminal OFE-A (ECM)"
16
OFE-B04421
Components support
17
OFE-X50066
Cosmetic "OFE A" 3 breaker
OFE 23/25/27/30kw
18
OFE-X50065
Cosmetic "OFE-A" 2 breaker
OFE 15/18/20kw
19
OFE-X50064
Cosmetic "OFE-A" 1 breaker
OFE 10kw
20
OFE-L01L006
Indicator light
21
OFE-L07F015
Switch SPDT
22
OFE-L01J001
Breaker 15 A
23
OFE-B04281
Electrical sequencer kit
OFE 27/30kw
24
OFE-B04282
Electrical sequencer kit
OFE 23/25kw
25
OFE-B04283
Electrical sequencer kit
OFE 18/20kw
26
OFE-B04284
Electrical sequencer kit
OFE 15kw
27
OFE-B04280
Electrical sequencer kit
OFE 10kw
28
OFE-B04275
Plastic top door
29
OFE-X50053
Label logo Ouellet
30
OFE-B04349
Bottom door assembly
31
OFE-B04357-01
Blower assem bly
OFE 10 @ 20kw 1/2hp -ECM
32
OFE-B04357-02
Blower assem bly
OFE 23 @ 30kw 1hp -ECM
33
OFE-Z01I036
Blower 112-9R
OFE 23 @ 30kw 1hp -ECM
34
OFE-Z01I035
Blower 112-8R
OFE 10 @ 20kw 1/2hp -ECM
35
OFE-B01889
Motor support band and legs
36
OFE-B03813-17
Motor ass'y ECM 1 hp (prog)
OFE 23 @ 30kw 1hp -ECM
37
OFE-B03811-26
Motor ass'y ECM 1/2 hp (prog)
OFE 10 @ 20kw 1/2hp -ECM
38
OFE-B04285
Electrical blower kit
39
OFE-B03141-02
Inductor
40
OFE-B04303
Floor
41
OFE-B04309
Fan slide
42
OFE-B04304
Fan separator
43
B03299-02
Filter holder tip
44
B03298-02
Filter support outline
45
OFE-R02N028
Hi-Limit 125+/-5.5C
46
OFE-B04308
Hi-lim it deflector
47
OFE-B04305
Front separator
48
OFE-L01H030
Relay DPST 22 VDC
49
OFE-B04369
Electrical power kit
50
OFE-B04351-02
Elem ent assembly
5kw
51
OFE-B04351-01
Elem ent assembly
4kw
52
OFE-B04315-01
Elem ent plate
53
OFE-L01F010
Transformer 208/240/24
54
OFE-L99F007
Terminal bloc 600V/175A (1423570)
3 positions
55
OFE-L99F008
Terminal bloc 600V/175A (1422570)
2 positions
56
OFE-B04306
Deflector
57
OFE-B04307
Elem ent support
Accessories
OFE-SO2
Downflow base
(ref: B03310-04)
OFE-AK2
Adaptor kit 17" x 17"
(ref: B04407)

20
Other manuals for OFEA 000-VV Series
1
This manual suits for next models
1
Table of contents
Other Ouellet Furnace manuals
Popular Furnace manuals by other brands

Comfortaire
Comfortaire GUH95A installation instructions
M-TI
M-TI OTF Series Test instruction
Drieaz
Drieaz Dragon X2 F429 owner's manual

Isotech
Isotech 970-1 instruction manual
Comfortaire
Comfortaire GUH96C installation instructions
Stove Builder International
Stove Builder International CADDY ALTERNA II manual

Blue Ridge
Blue Ridge BOLBF User's information manual
Isotech
Isotech 465 User maintenance manual/handbook
heatco
heatco HE SERIES installation instructions
Comfortaire
Comfortaire GDD92C Service manual
Tempstar
Tempstar F8MTL installation instructions

Payne
Payne PG9MXA Series Installation, start-up, and operating instructions
