NEOxl 80 6U Tape Library Base Module Quick Start Guide
10400897 ©2019 Overland-Tandberg Page 3 of 4
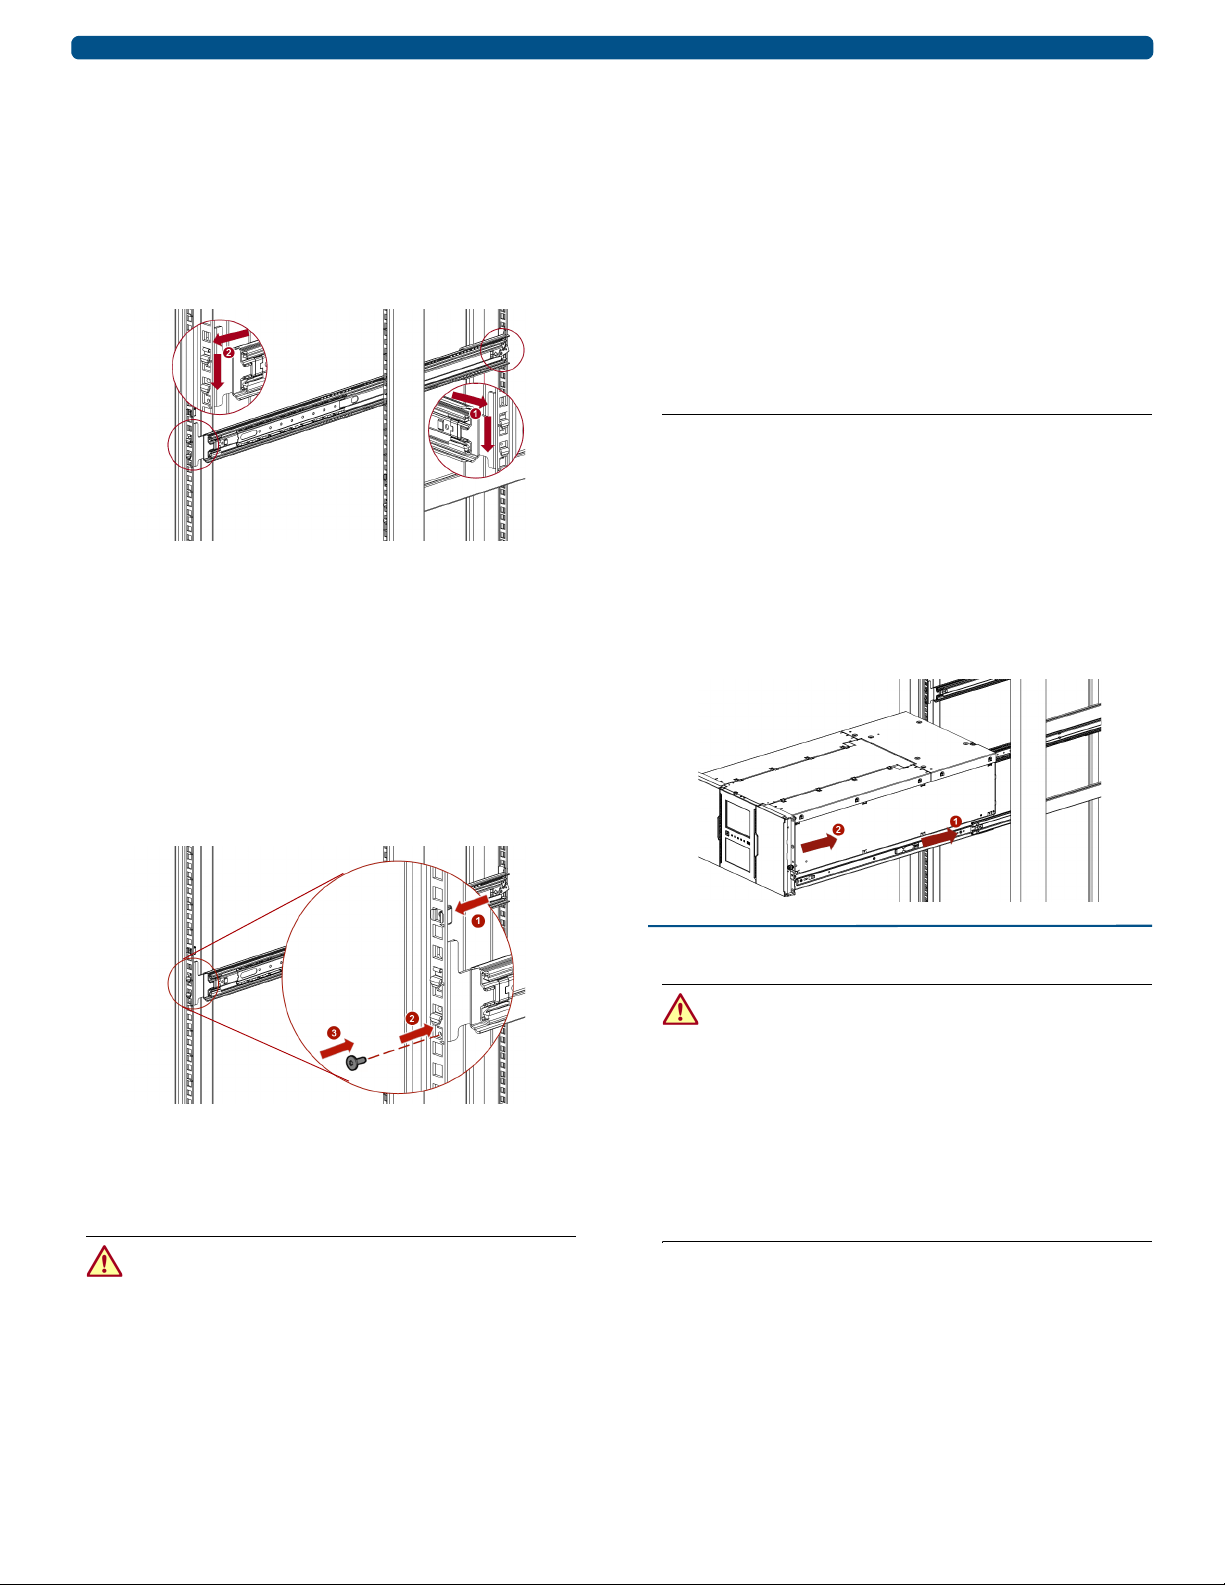
IMPORTANT: Follow the component instructions included
with each item to be sure they are installed correctly.
Step 5
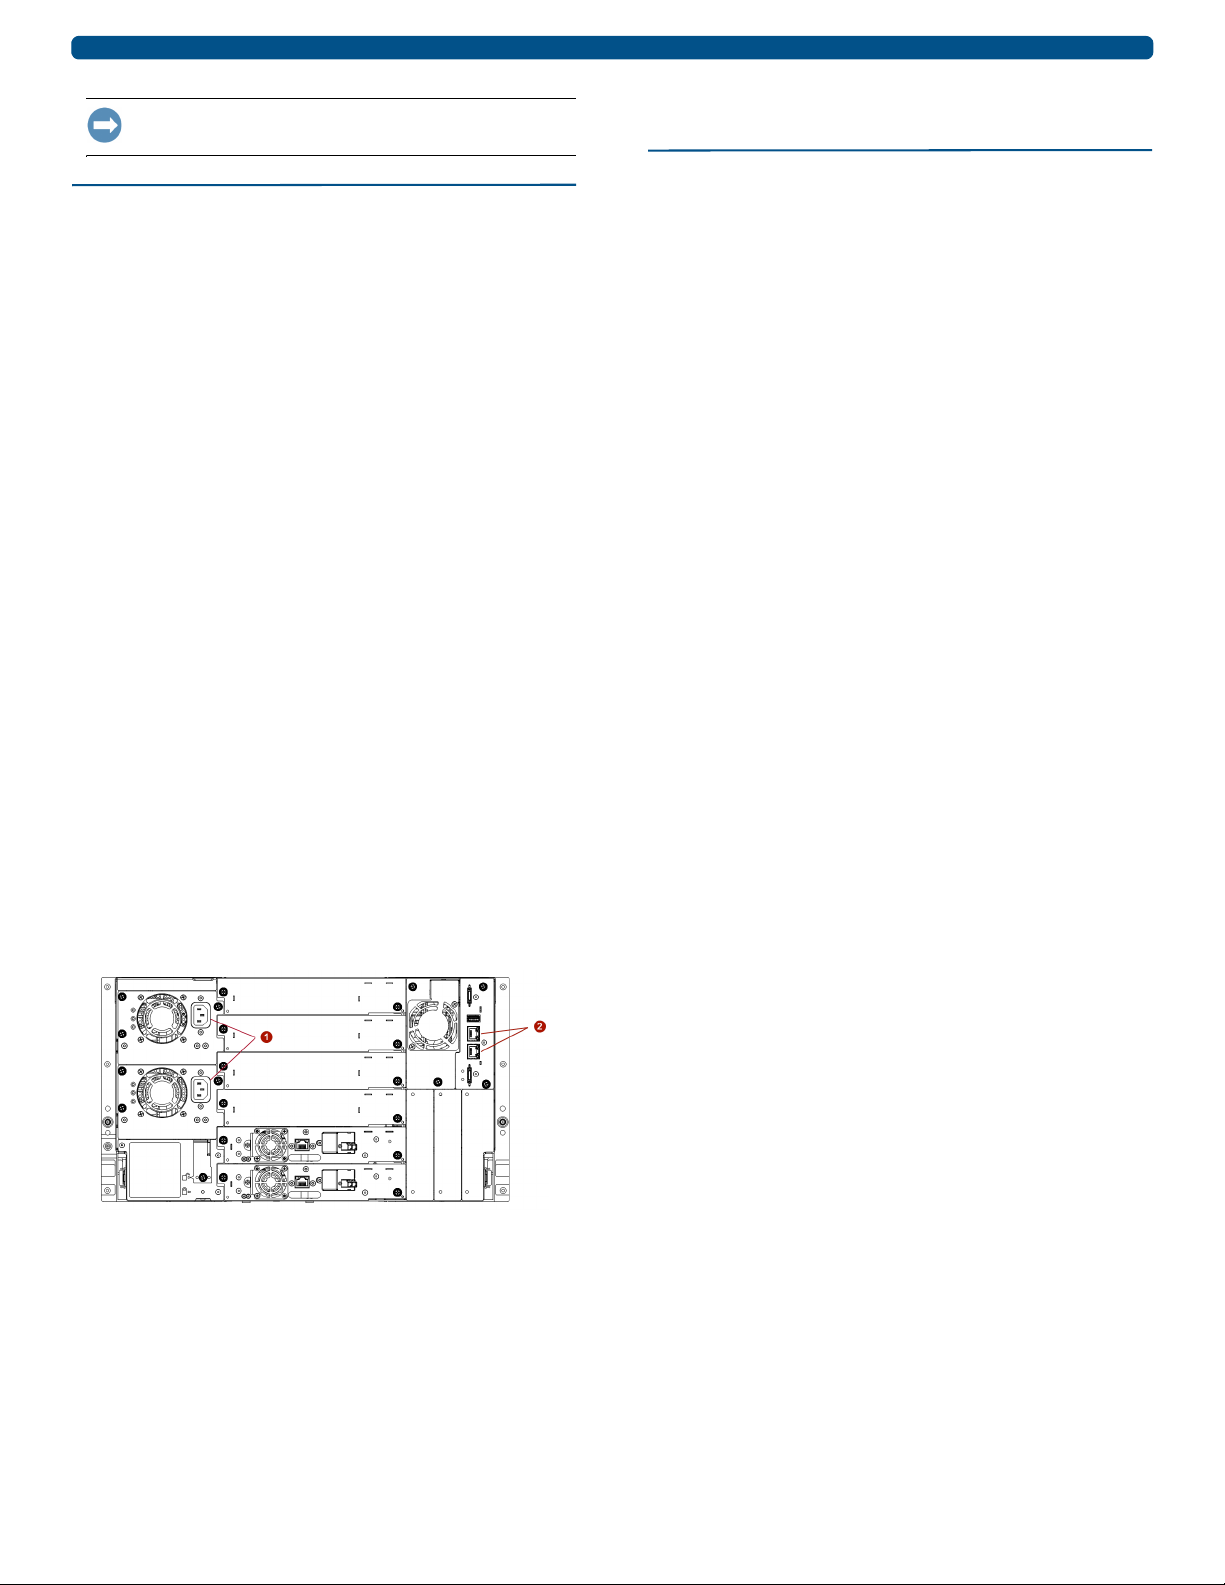
All cabling, power connections, and cooling are located on the
rear panels.
1. Attach one end of the host interface cable to the Base
Module:
•For a Serial Attached SCSI (SAS) connected module,
attach one end of the SAS cable to Port A SAS HBA
(top) on the SAS drive.
If you are using a SAS fanout/hydra cable, attach one
mini-SAS connector into the connector on each tape
drive. The unused ends of the SAS fanout cable are
single channel and not suitable for use with disk
arrays. Use the other ends to connect tape drives, or
coil and secure them to the rack to minimize stress
on the connectors.
•For a Fibre Channel (FC) module, attach one end of
the fibre cable to Port A (top) connector on the FC
drive, removing the cap if necessary.
2. Attach the other end of the host interface cable as
follows:
•For a SAS module, connect the host interface
cable to the host HBA. Unused SAS connectors do
not need termination.
If you are using a SAS fanout/hydra cable, the end of
the cable with only one connector should be plugged
into the HBA.
•For a Fibre Channel module, connect the fibre
cable to the host or to a switch.
3. Plug the network Ethernet (management) cable
into the Ethernet port (2) on the rear panel of the Base
Module.
NOTE: If the Ethernet connection is directly attached to a
server or laptop, a crossover Ethernet cable may be required.
It is the customer's responsibility to supply the crossover
cable if one is required.
4. Plug the power cable into the power connector (1) on
each Power Supply Module and into power outlets.
NOTE: The library has dual redundant power supplies. To
increase redundancy, plug each power cord into a different
AC power circuit.
5. Power on the library from the Base Module front panel
by pressing and holding down the power button for
three (3) seconds until the green light on the front panel
illuminates indicating the status is
Ready
.
Step 6
The library can be operated using either the Operator
Control Panel (OCP) on the front of the device or remotely
using the Remote Management Unit (RMU) web interface.
Power On the Library for the First Time
1. Power on the library by pressing the power button on
the base module just below the OCP; the green light
illuminates.
When first powered on, the library inventories the tape
cartridges, checks the firmware version on all modules,
configures the tape drives, confirms the presence of the
existing modules, and searches for any new modules.
2. At the IP address warning that appears in the OCP,
select a IP range from the drop-down list that is not
used by your network, and then press
Set and Proceed
.
Library will then reboot. After rebooting, the login
screen appears in the OCP.
3. At the login prompt, choose
Administrator
(no password)
and press
Login
.
The library displays a message indicating that the
library has no default partition.
4. Press
OK
and the library displays
Initial Configuration
default screen.
5. Press Next to start the Initial Configuration Wizard.
The wizard will guide you through configuring the time
zone, date and time, and network settings, setting the
administrator password, and then start an initial
system test. You can skip items and stop the wizard at
any time.
6. Once you have configured the network settings and set
the administrator password, run the wizard in the
RMU to complete the remaining configurations.
7. Verify the host connection.
Label and Load Tape Cartridges
While the library will power on without cartridges,
cartridges are needed before performing data read and write
operations, or any tests or operations that transfer
cartridges. Bar code labels are recommended in production
environments to improve inventory time in the library and
ease cartridge handling processes outside the library.
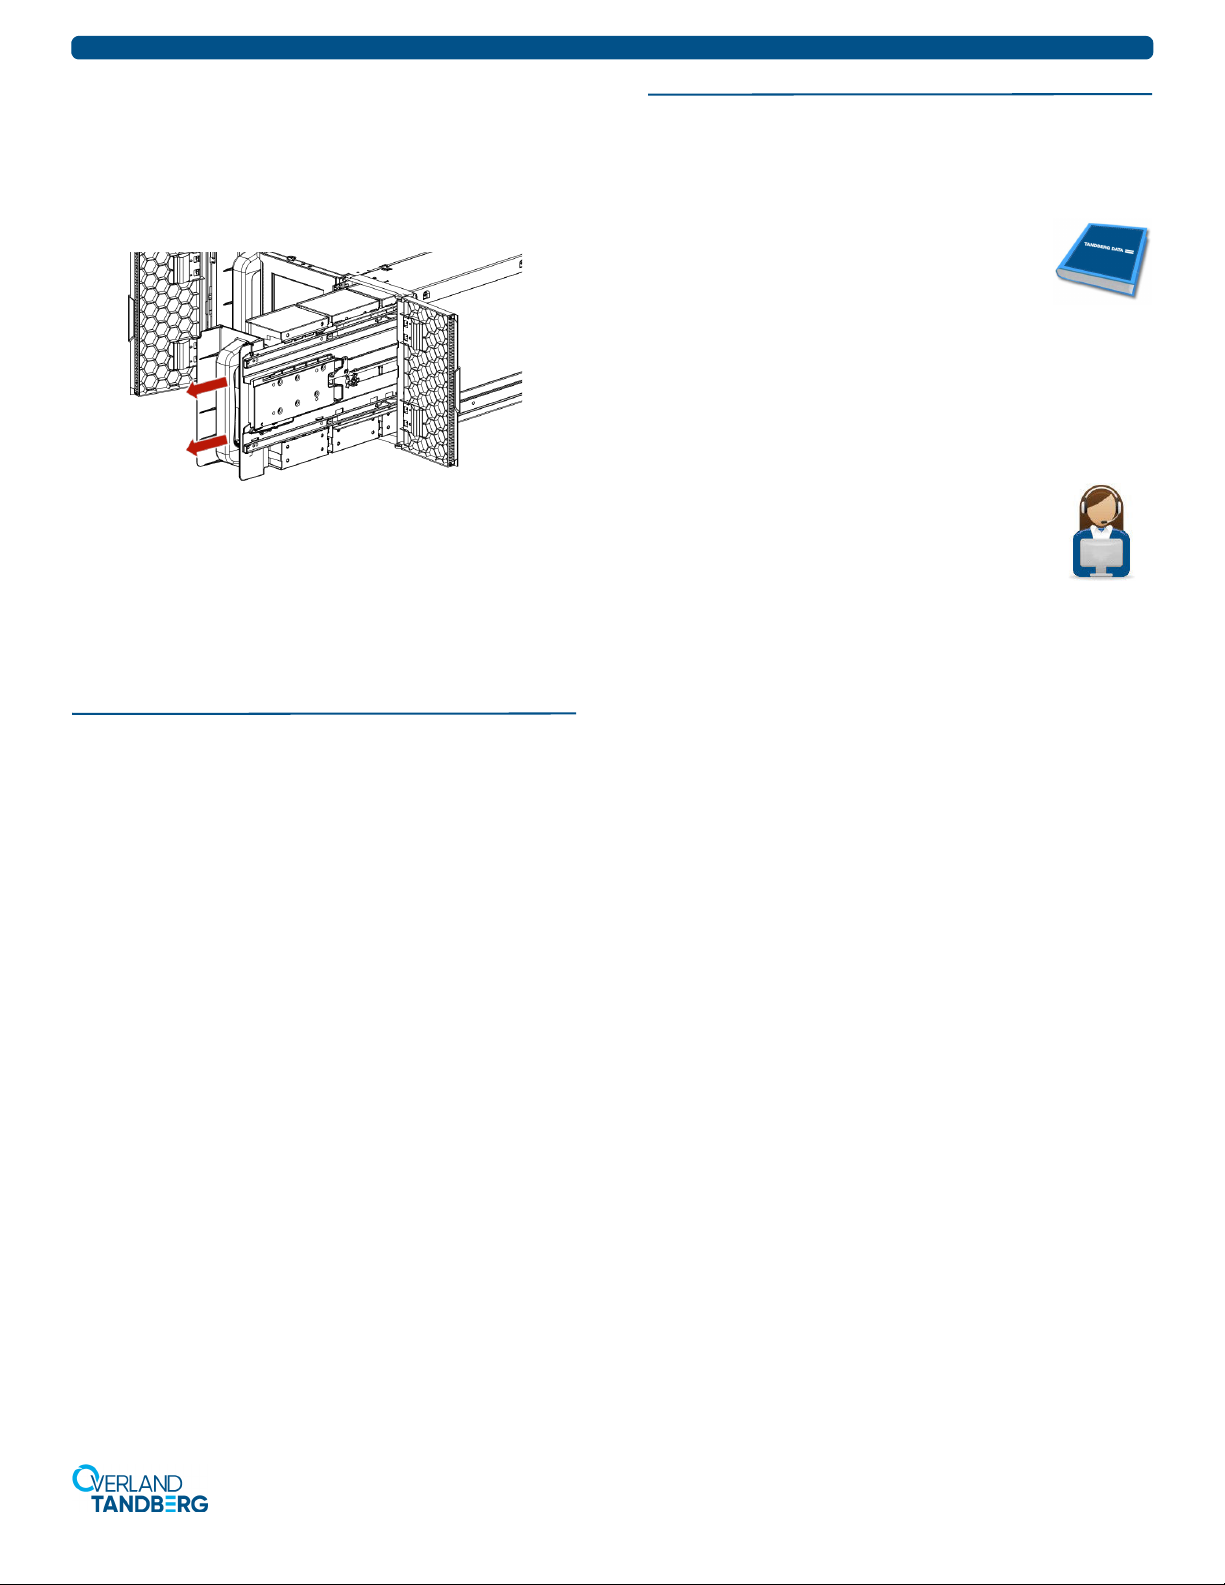
The two ways to load cartridges into the library:
• Using Mailslot Magazine for Loading – If the mail
slot is enabled, you can use it to load cartridges into the
library. On the
Home
screen, tap
Open Mailslot
, open
the magazine access door, and then pull the mailslot out
for loading.
•UsingBulkLoadingMagazines for Loading –
Extend one or more of the tape magazines from the
library for loading.