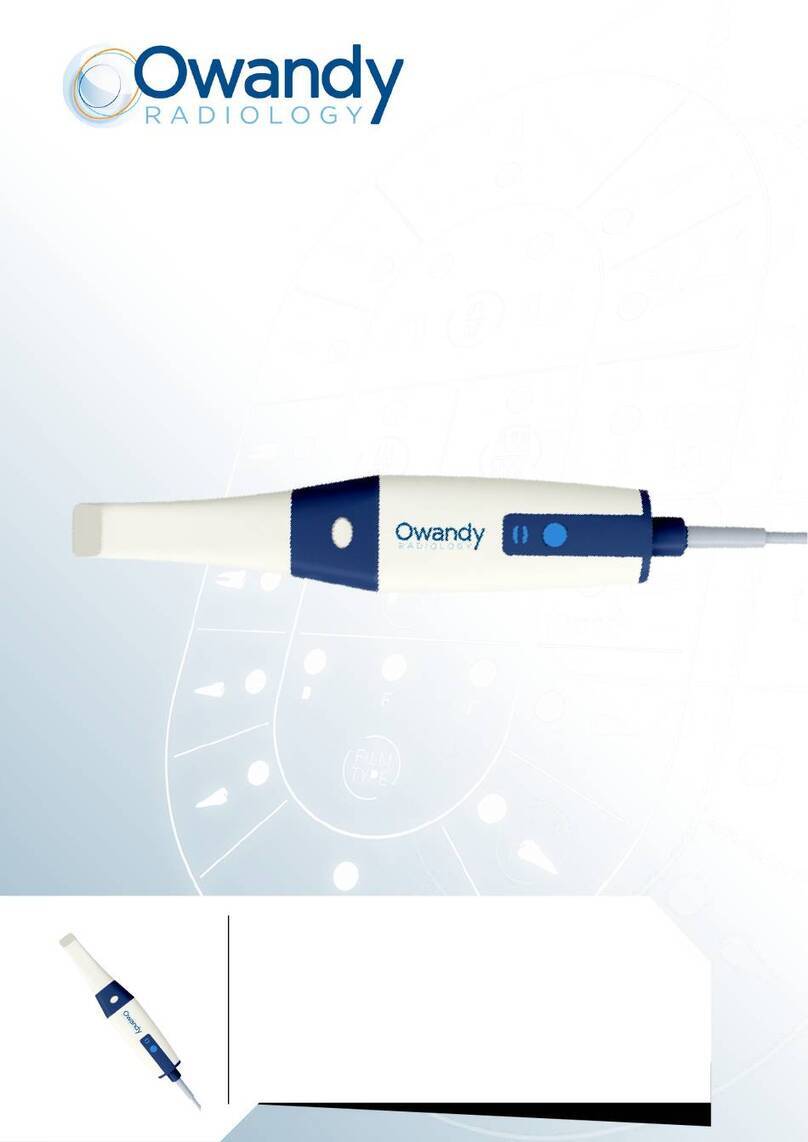
Owandy Radiology OwandyCam User manual

EN
• INSTALLATION AND USER MANUAL
7735006300 • Version 08, October 2017
https://stomshop.pro

https://stomshop.pro

EN
OwandyCam – User Manual Page 3/25
Index
1INTRODUCTION.......................................................................................................................................4
1.1 COMPLIANCE WITH REGULATIONS..............................................................................................................4
1.2 POWER SUPPLY .......................................................................................................................................4
1.3 INSTALLATION PRECAUTIONS ....................................................................................................................4
1.4 LIABILITY AND OPERATORS .......................................................................................................................5
1.5 PACKAGING AND ENVIRONMENT ................................................................................................................5
1.6 MARKING AND LABELLING SYMBOLS...........................................................................................................6
2CONTENT..................................................................................................................................................7
3INSTALLATION ........................................................................................................................................8
3.1 PRECAUTIONS..........................................................................................................................................8
3.2 SOFTWARE INSTALLATION.........................................................................................................................9
3.3 EQUIPMENT INSTALLATION......................................................................................................................10
3.4 CONFIGURATION IN THE OWANDY IMAGING SOFTWARE.............................................................................12
3.5 SHARING HANDPIECE BETWEEN DIFFERENT WORKSTATIONS .....................................................................12
4USE..........................................................................................................................................................13
4.1 PRECAUTIONS........................................................................................................................................13
4.2 BUTTONS ON THE HANDPIECE .................................................................................................................13
4.3 CAPTURING AN IMAGE ............................................................................................................................14
5HYGIENE AND MAINTENANCE............................................................................................................19
5.1 HYGIENE AND DISINFECTION ...................................................................................................................19
5.2 MAINTENANCE .......................................................................................................................................19
6TROUBLESHOOTING............................................................................................................................20
6.1 GENERAL...............................................................................................................................................20
6.2 IMAGE QUALITY ......................................................................................................................................21
7SPECIFICATIONS...................................................................................................................................22
8ACCESSORIES.......................................................................................................................................23
OWANDY RADIOLOGY reserves the right to modify its products or their specifications in order to improve their performance, quality or
productibility. The specifications of the products or accessories can be modified without prior notification.
No part of this manual can be reproduced without the express permission of the company OWANDY RADIOLOGY.
Language in which original document written: French.
Year CE marking assigned: 2009
OWANDY RADIOLOGY
2, rue des Veilles Vignes
77183 Croissy-Beaubourg
FRANCE
Téléphone : +33 1.64.11.18.18
Fax : +33 1.64.11.18.10
https://stomshop.pro

EN
OwandyCam – User Manual Page 4/25
1 Introduction
You have just received your OwandyCam intraoral imaging set. We thank you for the confidence you have
placed in us and hope that this product will provide you a complete satisfaction.
We advise you to read this manual carefully prior to installation. Observance of the use and installation
precautions in this document removes risks to the patient and for the care team. Please keep it with your
equipment so that you can refer to it later.
Your intraoral camera is a new generation of digital imaging equipment with USB2 connection. With its
ergonomic design and tailored shape, it enables you to obtain quickly and simply a perfect and clear image
of the endobuccal cavities of your patients. This equipment does not involve backup on a flash memory card,
so avoiding any loss of quality due to compression. Therefore, the USB2 connection enables images to be
transferred and integrated directly into your image processing software, without even relying on an external
power supply box or built-in battery.
1.1 Compliance with regulations
The OwandyCam unit is a class I medical system in accordance with European Directive 93/42/CEE relating
to EC branding. It is also a class I type BF system under the terms of regulation EN/IEC60601-1.
The OwandyCam is, therefore in compliance with that directive and that regulation, as also with regulation
EN/IEC60601-1-2 regarding electromagnetic compatibility.
Under certain conditions (see paragraph “1.3 Installation precautions”) is necessary for any other
components of the system connected (computer and optional peripherals) also to be in compliance with
regulation CEI950 (EN60950) and that the installation is in compliance with regulation EN/IEC60601-1.
1.2 Power supply
The power supply for the handpiece which lights the 6 LEDs is assured via the USB connection linking it to
the computer, i.e. by a 5V DC supply.
1.3 Installation precautions
The regulations require that your computer is at least in compliance with regulation CEI/EN60950-
1. If you have a Class 1 computer, see that its earth is connected to the building’s earth.
As the handpiece of the OwandyCam is located in the patient environment (less than 1.5 metres / 4.9 feet
from the patient), it is imperative that your computer complies with regulation EN/CEI60601-1, or that your
installation including the computer has been made compliant with regulation EN/CEI60601-1. When your
whole installation is in compliance with regulation EN/CEI60601-1, you can then connect the box to your
computer without further precautions being necessary.
If the computer is not located in the patient environment and is not in compliance with regulation
EN/CEI60601-1, it is imperative to insulate the handpiece from the patient by placing it in a non-conducting
envelope (hygienic covers).
https://stomshop.pro

EN
OwandyCam – User Manual Page 5/25
1.4 Liability and operators
Installer: installation of the set requires computer equipment and software knowledge. For equipment and
software installation, follow the recommendations and directions in the installation chapter.
User: the unit must be used by a dental practitioner.
In no event must the handpiece be opened by the user. Only the manufacturer is authorised to
open it and carry out necessary repairs. Return the equipment to your distributor in the case of
failure and/or if the documentation in your possession does not contain the information needed for
the (authorised) maintenance of the failed part.
The manufacturer will not be liable in case of:
•interventions or repairs carried out by persons not authorised by the manufacturer or distributor and
not included in the actions accepted,
•use of the unit with an installation that is not in compliance with the applicable regulations and
decrees, in particular in cases of non-compliance with regulation EN/CEI60601-1-1 relating to the
safety rules for electromedical systems. Ensure that the installation of the equipment is in compliance
with the legislation in current effect,
•use other than that specified in this manual (use of the unit in normal conditions of use and in
accordance with its original purpose).
1.5 Packaging and environment
Transport, storage and environment: the set is delivered to you in a packaging that guarantees its safety
(protection against mechanical shocks and antistatic packaging). It must be stored under the following
conditions:
Ambient temperature: +5°C to +68°C / 41°F to 154°F
Relative humidity: under 80%
Atmospheric pressure: 860hPa to 1060hPa
Operation: In accordance with international safety regulation EN/CEI60601-1 (section 2), the set was
designed to respect the following operating conditions, in normal use:
Ambient temperature: +5°C to +68°C / 41°F to 154°F
Relative humidity: under 80%
Atmospheric pressure: 860hPa to 1060hPa
Packaging of equipment when returning to distributor: should it prove necessary to return the
OwandyCam set to the distributor, take care to package it in its original packaging after carefully cleaning it.
Loss of documentation: every set is delivered with its own documentation. Should this documentation be
lost, please contact your distributor in order to obtain replacement documentation.
https://stomshop.pro

EN
OwandyCam – User Manual Page 6/25
1.6 Marking and labelling symbols
These symbols are used on the product labels, or the product itself, and inform you as to the component’s
compliance with the regulations and the technical specifications.
Reference of the set Serial number of the system
Year of make of the system
Type BF equipment – under
regulation EN/CEI 60601-1.
CE marking certifies that this
product is in compliance with
European directive 93/42 CEE.
Important information: follow
this manual’s written
instructions.
Equipment is subject to a selective collection in accordance with directive 2002/96/EC relating to electrical
and electronic equipment waste (WEEE) and Decree 2005-829 of 20 July 2005 relating to the composition
of electrical and electronic equipment and to the elimination of waste produced by this equipment (only in
France).
https://stomshop.pro

EN
OwandyCam – User Manual Page 7/25
2 Content
Your OwandyCam set is made of the following parts (illustrations not contractually binding):
Handpiece
Wall support with 2 fixing screws
One braided USB 2.0 cable (3m)
One bag of single-use, disposable hygienic covers
Installation CD-ROM
Imaging software CD-ROM (optional)
One installation and use manual
https://stomshop.pro

EN
OwandyCam – User Manual Page 8/25
3 Installation
3.1 Precautions
The set must be handled with care, minimising twisting, pulling and bending of the USB cable
connecting to the PC. Do not walk or drive over the cable. To disconnect the cable, do not pull on
it but rather on the connector plug.
In order to avoid interference in the image, do not use the system in the presence of strong magnetic
fields. Also avoid nearness to sources of electrostatic radiation.
Refer to paragraph “1.3 Installation precautions” to ensure the installation is in compliance with the
regulations.
Install your imaging software before the installation of the drivers and utilities and the OwandyCam
equipment set.
3.1.1 Minimum recommended configuration
Failure of the computer installations to meet the minimum configuration can prevent the proper
operation or the start-up of your OwandyCam set. Check the specifications of your computer(s)
before installation.
Operating systems Windows 7, 8, 10 (32 and 64 bits)
Computer
Motherboard
USB port
Marked CE-CE1950
Intel Pentium III, 800MHz chipset and processor
USB 2.0 High-Speed compatible
Graphics card
Monitor DirectX 9.0 compatible
1024x768 (15inch) high resolution
Random access memory (RAM)
Hard disk 256Mb
10Gb
CD-ROM reader
Backup system 24x
external/extractable disks, CD-ROM/DVD…
Printer
Mouse and keyboard Laser, inkjet, thermal
At capture station OwandyCam set with appropriate drivers
Imaging software
3.1.2 Equipment recommendations
The computer and screen with which the USB2.0 digital intraoral camera will be used, will preferably be
located near the seat, in the practitioner’s field of view, in order to enable immediate use. Also provide a view
for the patient so that he can share the imaging information.
The screen must be placed so as to avoid any reflection or direct light that could be detrimental to the display
of the intraoral images. It must be regulated (for contrast and luminosity) so as to display contrasted, luminous
and coloured images.
https://stomshop.pro

EN
OwandyCam – User Manual Page 9/25
3.2 Software installation
Install the Owandy (or third party’s) imaging software and check its proper operation before installing the
equipment and its drivers. Refer to the software manual for the installation and configuration instructions.
You need administrator rights for the installation and use of the software and equipment. Consult
your computer specialist for the creation of an appropriate user account.
3.2.1 Installation of drivers
The OwandyCam drivers are compatible with Windows 7, 9, 10 (32 or 64 bits) operating systems.
To install the drivers:
1. Insert the CD-ROM in the CD-ROM-driver or download the drivers on our website
http://www.owandy.com/support/
2. Click on the OwandyCam icon and follow the instructions.
3.2.2 Drivers update
If you need to update your driver:
1. Insert the CD-ROM in the CD-ROM-driver or download the drivers on our website
http://www.owandy.com/support/
2. Click on the OwandyCam icon and follow the instructions.
https://stomshop.pro

EN
OwandyCam – User Manual Page 10/25
3.3 Equipment installation
3.3.1 Connecting the handpiece
The intraoral camera is connected directly to the braided USB 2.0 cable supplied in the kit, via its female
socket located directly at the rear of the handpiece (see image below).
3.3.2 Connections to computer
The cable so connected to the handpiece can be connected directly to your computer.
Connect the plug of the USB 2.0 cable to one of your computer’s available ports – do not exert force when
inserting the plug as this could damage the connector (see image below).
https://stomshop.pro

EN
OwandyCam – User Manual Page 11/25
If the distance between the camera body and the computer is greater than the 3 metres of USB cable supplied
with the set, it is possible to add longer USB cables, by using a powered USB hub between each cable.
Connection without USB2.0 hub
Connection with powered USB2.0 hub
The computer’s USB port must be a USB 2.0 port. Only use USB 2.0 cables and hubs with a USB
2.0 port and ensure that the hub has its own external power supply (do not use a hub that is self-
supplied by the USB cable). No USB cable may exceed 5 metres / 16.3 feet in length.
Check the correct connection of the handpiece by pressing the camera’s general switch. If the LEDs
light up, the camera is correctly supplied.
3.3.3 Wall support
The OwandyCam can be placed on the support delivered with the set.
The support can take the handpiece alone or connected to its USB2.0 cable.
Do not fix this wall support the wrong way round or horizontally, as the
camera could fall to the floor and be damaged.
Attach the support with the screws: you can fix the support permanently to a
working surface using the screws delivered in the set. Depending on the material of
the support you can use plugs or make holes in advance, spaced 20 mm. apart along
the vertical axis.
https://stomshop.pro

EN
OwandyCam – User Manual Page 12/25
3.4 Configuration in the Owandy imaging software
In order to use correctly your set, you must configure your equipment in the following manner, after starting
up it, in case of the use under Quickvision:
1. Start up the imaging software (double click on the desk icon or use the link under ”Start/All
programs/Owandy/QuickVision”).
2. In the main menu bar, click on the “Mouth or Imaging” button.
3. Click on “Camera” icon from the dental regime module.
4. Right-Click on the window opened and select the “Périphérique vidéo USB” model by the drop-
down menu.
Your OwandyCam set is now ready to be used (see 4.3.2 “Use of Owandy software”).
3.5 Sharing handpiece between different workstations
Sharing OwandyCam enables one or more handpieces to be used in turn in a practice equipped with more
than one seat. It is recommended to link the various workstations in a network in order to allow the central
storage and sharing of images.
The OwandyCam set can be shared between different workstations, by moving only the handpiece from
station to station. A USB cable must be provided at each computer workstation.
Windows will automatically recognise the equipment when it is connected and i
t will be available immediately for image capture.
In order to allow sharing of one set between different workstations, it is necessary first to install the imaging
software that enables image capture, the drivers on all the computers on which the OwandyCam is to be
used.
https://stomshop.pro

EN
OwandyCam – User Manual Page 13/25
4 Use
4.1 Precautions
The set must be handled with care, minimising twisting, pulling and bending of the connecting
cables. Do not walk or drive over the cable.
Although the camera is shock-resistant, it is strongly recommended not to drop it on the floor. In
the event of a physical shock which might somehow occur, contact your distributor and do not try
to take any action yourself.
4.2 Buttons on the handpiece
You will find below a description of all the actuators provided on the OwandyCam set’s handpiece.
6 white light LEDs
Focus-free lens
Endoscope section
Image capture buttons
LEDs On/Off Button
https://stomshop.pro

EN
OwandyCam – User Manual Page 14/25
4.3 Capturing an image
4.3.1 Preparing the handpiece
In order to record an intraoral image, you must first proceed according to the following methodology:
1. First start up your computer and your imaging software.
2. Connect the USB cable to your computer’s configured port and then to the handpiece.
3. Insert the handpiece into the case composed of the hygienic cover and its packaging. The lens of
the endoscope should be facing the white peel-off paper. Then pull on the blue strip to tear the
packaging while keeping the hygienic cover in place on the handpiece.
In order to avoid any opaque or blurred fogging on the image, make sure that the transparent part
of the hygienic cover is perfectly tight on the lens and the 6 LEDs on the handpiece’s endoscope. If
necessary readjust the positioning of the cover by stretching the transparent plastic over the head
of the endoscope.
4. You are now ready to examine. The camera can then be positioned manually in front of the patient’s
teeth or in his endobuccal cavity.
https://stomshop.pro

EN
OwandyCam – User Manual Page 15/25
4.3.2 Use of the Owandy software
Modes of operation
The OwandyCam set can operate according to two methods:
•By the Twain protocol: select the “OwandyCam USB” driver under the TWAIN capture option in
your imaging software. Then run the desired TWAIN capture.
•By the Owandy imaging software: click on the “Camera” icon from the dental regime module. Then
click on the “Video” icon from the toolbar “CAM” that has just been opened, to launch the camera
video window.
Icons
Description
Icon “Camera”: launch the image capture interface with camera, from the
dental regime module.
Toolbar ”CAM”: include the tools linked to the images capture with a camera:
•Exit of the menu,
•Save an image,
•Image information,
•Print an image,
•Tools of cosmetics module.
•Horizontal and vertical symmetries,
•Video camera.
Icon ”Video”: activate the video camera window.
https://stomshop.pro

EN
OwandyCam – User Manual Page 16/25
Camera Video Windows
On clicking on the aforementioned icon, the simple video capture window opens. You then have access to
the functions described below:
Switches to full screen mode
Closes the video capture window
Activates Capture with 4 miniatures mode
Opens Format menu - See « Configuration menus »
Opens Source menu - See « Configuration menus »
Freezes or activates the video flow using the computer’s mouse (button
equivalent to the camera’s capture buttons)
https://stomshop.pro

EN
OwandyCam – User Manual Page 17/25
By clicking on the appropriate icon, you will be able to use the Video with 4 miniatures mode shown below:
You will then be able to freeze 4 miniatures while keeping video active. A green marker (frame+arrow)
indicates on which miniature the next image captured will be recorded; if an image is already entered on it,
the new image captured will replace it.When your intraoral imagerysession has ended, you will then be able,
by clicking on the following cursor, , to select which images you want to keep and export to your imaging
software.
When an image is captured and replaces a miniature already selected, the latter is definitively
removed from your capture database and cannot be recovered to export it to your imaging software.
https://stomshop.pro

EN
OwandyCam – User Manual Page 18/25
Configuration menus
The source menu gives you access to all the imaging adjustments shown in the 2 tabs below.
In particular, you will be able to adjust the luminosity and contrast of your image, and also its sharpness by
software correction. The symmetries and rotations of the video image can also be modified: in this way you
will more easily adapt the movements of the camera to your way of working.
The format menu specifically gives you access to image resolution adjustment (from 160x120px up to
1280x1024px). The more you increase the resolution of your image, the more the size of the file so generated
will increase, and the more the image flow frequency will decrease.
https://stomshop.pro

EN
OwandyCam – User Manual Page 19/25
5 Hygiene and maintenance
5.1 Hygiene and disinfection
5.1.1 Cable
The cable does not require any particular maintenance; it must be cleaned with a rag and non-abrasive
detergents.
5.1.2 Handpiece
In order to avoid any contamination between patients, it is imperative to use single-use biocompatible
hygienic covers (approved by the FDA for the USA, and marked CE for Europe). Hygienic covers suitable for
your country are delivered with each set.
To do this, insert the handpiece directly into the bag containing the hygienic cover (cf. 4.1 Installation
precautions).
After each use on a patient, the hygienic cover used must be disposed of with the dental practice’s other
biologically dangerous waste. Even with the use of these hygienic covers, the head of the camera must be
decontaminated at least once a day using wet wipes or cleaning products suitable for disinfecting non-
immersible devices. You can also use a non-fluffy rag lightly moistened with medical alcohol.
•The handpiece must not be immersed in a liquid solution or the device could
be destroyed: the degree of water resistance of the camera’s endoscope was not
designed for this purpose.
•As the handpiece is composed of an electronic card and plastic casings, it
must not be decontaminated by hot sterilisation or it may be destroyed.
Covers validated for North America: BANTA HEALTHCARE or TIDI PRODUCTS radiological sensor
covers and STERI-SHIELD PRODUCTS RS covers.
5.2 Maintenance
5.2.1 Handpiece and cable
Before each use, check that the lens is clean. If it is not, clean it with a moist non-fluffy rag or a special optical
paper.
Make sure not to use a dry tissue or rough paper to clean the lens: you will risk scratching it
irreversibly.
Periodically check the good condition of the connections between the USB cable and the female socket fixed
to the base of the handset. The connecting socket must not show any play in relation to the plastic joining
part.
Also check periodically the proper operation of the handpiece’s LEDs On/Off button, the working of the 6
white light LEDs, and the correct independent use of the 2 image capture buttons (the diametrically opposite
orange buttons).
5.2.2 Protection of computer data
Your patient and image databases must be subject to a regular backup in order to be able to recover them if
the need should arise (damage to hard disk or computer). Ask your computer retailer for advice as to the
most suitable backup system for your computer configuration (external or extractable disk, Zip or Jaz system,
CD-ROM or DVD writer, etc.). Test and store copies in a safe place.
https://stomshop.pro

EN
OwandyCam – User Manual Page 20/25
6 Troubleshooting
If a problem arises during use, check the points in this quick troubleshooting guide. If you do not manage to
solve your problem, consult your retailer.
6.1 General
Symptom Cause / Solution
The LEDs do not light up when you press
the handpiece’s On/Off button
•
Check that the USB cable’s connectors are correctly
inserted.
There is no automatic equipment
recognition response when you insert the
USB cable into the computer's connector.
•Check that the handpiece is switched on (LEDs lit): if
necessary press the camera’s LEDs On/Off button.
•Re-insert the USB cable into the computer’s connector.
•Disconnect the cable, restart your computer and then try
connecting again.
Images cannot be frozen. •
Check that the USB cable’s connectors are correctly
inserted.
•Check the installation and redo if necessary, proceeding in
the following strict sequence: first install the driver via OSP,
then connect and switch on the camera via the USB cable.
•
Restart your computer after installing the driver and
imaging software in order to complete the installation of the
files correctly.
Images are not clear. •To re-
adjust the image parameters, see paragraph 6.2
below.
•Position the camera stably: using a firm base avoids
superfluous movement.
•Check that the hygienic cover has not been placed the
wrong way round: with the opaque area
covering the
display lens
The computer displays images showing
black marks. •Check your computer’s screen to determine whether the
black marks result from a fault in it. If necessary, change it.
•Clean the camera lens gently.
•If necessary contact your retailer or computer specialist.
https://stomshop.pro
Table of contents
Other Owandy Radiology Dental Equipment manuals

Owandy Radiology
Owandy Radiology Ow-RX User manual

Owandy Radiology
Owandy Radiology OWANDY-CAM HD User manual

Owandy Radiology
Owandy Radiology RX-DC User manual

Owandy Radiology
Owandy Radiology CR2 User manual

Owandy Radiology
Owandy Radiology OWANDY-IOS TP101 User manual

Owandy Radiology
Owandy Radiology i-max touch 3D User manual

Owandy Radiology
Owandy Radiology RX-AC User manual