OXO BREW User manual

1
8-Cup Coffee Maker
INSTRUCTION MANUAL

2
•Read all instructions. Use this product only as
described in this manual.
•Keep the packaging material (cardboard, plastic,
etc.) out of the reach of children (danger of
asphyxiation or injury).
•Do not touch hot surfaces. Use handles or knobs.
Care must be taken, as burns can occur from
touching hot parts or from spilled hot liquid.
•To protect against fire, electric shock, and injury
to persons, do not immerse cord, plugs, or
Coffee Maker in water or other liquid.
•Children should be supervised to ensure that they
do not play with the appliance.
•Unplug Coffee Maker from outlet when
not in use and before cleaning. Allow to cool
before putting on or taking off parts and
before cleaning the appliance.
•To prevent scalding, do not open brew basket lid,
attempt to dislodge a potential clog, or otherwise
touch the brew basket area until Coffee Maker has
sufficiently cooled. Scalding may occur if the lid is
removed during brewing cycles.
•Coffee Maker must be operated on a flat surface
away from the edge of counter to prevent
accidental tipping.
•Do not operate any appliance with a damaged cord
or plug, or after the appliance malfunctions or is
dropped or damaged in any manner. Contact OXO
Customer Service at (800) 545-4411. Do not
return to store.
•The use of accessory attachments not recommended
by OXO may result in fire, electric shock, or injury
to persons.
•Use only the carafe provided with the Coffee Maker
to capture brewed coffee when in Carafe mode.
IMPORTANT SAFEGUARDS
Read all instructions.
When using electrical appliances, basic safety precautions should always be followed to
reduce the risk of fire, electric shock, and/or injury to persons, including the following:
A Note About Safety

3
•Do not let cord hang over edge of table or counter
or touch hot surfaces.
•Do not place on or near a hot gas or electric
burner, or in a heated oven.
•Always attach plug to appliance first, then plug
cord into the wall outlet. To disconnect, turn any
control to the off position, then remove plug from
wall outlet.
•The coffee carafe is designed for use with this
appliance. It must never be used on a range top
or in a microwave oven.
•Do not put any substances other than water,
descaling products, or coffee grounds into the
Coffee Maker. Do not use Coffee Maker to
cook or prepare other liquids or foods.
•Do not use appliance without lid properly placed
on carafe.
•Do not touch internal parts while Coffee Maker
is brewing.
•Do not rotate or remove carafe or brew basket
while brewing coffee.
•This appliance is intended for household
use only.
Do not use appliance for other than intended use.
Do not use outdoors.
To reduce the risk of fire or electric shock, do
not remove the bottom cover. Doing so will void
the warranty. No user-serviceable parts are inside.
Repair should be done by authorized service
personnel only.
Shock Hazard:
This appliance has a polarized plug (one wide blade)
that reduces the risk of electric shock. The plug fits
only one way into a polarized outlet. Do not defeat
the safety purpose of the plug by modifying the plug
in any way or using an adapter. If the plug does
not fit, reverse the plug. If it still does not fit, have
an electrician replace the outlet. Do not plug this
appliance into an outlet with a voltage other than
specified on the bottom of this appliance.
•If the supply cord is damaged, it must be
replaced by the manufacturer, its service agent,
or similarly qualified persons in order to avoid
a hazard.
•To avoid an electrical circuit overload,
do not use any high wattage appliance on the
same circuit as this appliance. This Coffee Maker
is not intended for use by children, persons with
reduced physical, sensory, or mental capabilities,
or lack of experience and knowledge, unless
they have received supervision or instruction
concerning use of the appliance by a person
responsible for their safety.

4
SAVE THESE INSTRUCTIONS
This symbol alerts you to important operating and service instructions. This symbol alerts you to the risk of fire or electric shock in the
accompanying message.

5
A Note About Safety............................ 2
Registration Info ................................... 5
Meet Your Coffee Maker...................... 6
Before You Begin.................................. 7
Brewing Into Carafe ............................. 8
Brewing Into Mug................................. 9
Cleaning And Care............................. 10
Descaling ............................................11
Troubleshooting...................................12
Our Guarantee................................... 13
This machine
was tested to
guarantee quality.
As a result, a small amount
of filtered water may
remain inside.
Congratulations on your new
OXO Brew appliance!
Register your product at oxo.com/productregistration
for updates and other relevant information.
Although we appreciate registration, it is not required. As part of our privacy policy,
we never sell or give away your information.
If you have any trouble with the product during the warranty period, do not attempt to return
it to a retail store. Instead, please email info@oxo.com or call (800) 545-4411.

6
2-4 CUPS 5-8 CUPS
RainmakerTM
Showerhead
Large Filter
Brew Cycles
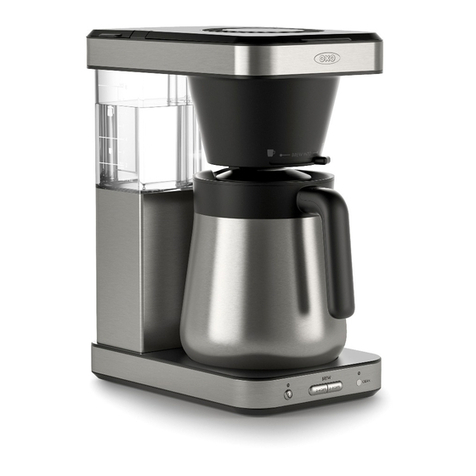
Power
Brew
Basket
Stainless Steel
Carafe
Water Tank
Optional Single-Serve Accessory:
optimizes flavor when brewing 2-4 cups
Kalita Wave
Filter 185
Single-Serve
Accessory
Use the Accessory and wave filter inside
the Brew Basket for single-serve brewing.
The Single Serve Accessory was designed
for brewing 2–4 cups into the carafe
or directly into a mug. Its compact size
and shape changes the way the brewing
water and grounds interact during the
extraction, meaning the Accessory will
draw out different nuanced characteristics
of your favorite coffee.
Reversible Well Cover
and Platform
Mug/Carafe Mode Switch
Coffee Scoop
Clean Cycle
Meet Your Coffee Maker

7
1Remove all
packaging 2Clean and
wash all parts 3Plug in
Coffee Maker 4Run Water-Only
5-8 Cup
Brew Cycle
For detailed cleaning
instructions, see p.10
Do not use abrasive pads,
harsh chemicals or spray cleaners.
Carafe is not dishwasher safe.
We selected a short cord for this Coffee Maker
to reduce the hazards of becoming tangled
in, or tripping over a longer cord. If you need
to use a longer cord, an approved extension
cord may be used. The electrical rating of the
extension cord must be equal to or greater
than the rating of Coffee Maker. Make sure the
extension cord is arranged so that it cannot be
pulled on by children or tripped over.
Fill water tank to MAX
fill line.
A Note About Water
Your Coffee Maker uses all of the water you put in the tank
every time you brew. Add only as much water as you need for
your coffee. For example, if you want to make 3 cups of coffee,
only fill the water tank to the 3 cup fill line.
Brew tip: If you’re brewing a single mug, use your mug to
measure the water and fill the water tank for a perfect cup.
Note: For best results, always use filtered water.
Do not use distilled water.
Water/Coffee Ratio
Yield 2 Cups 3 Cups 4 Cups 5 Cups 6 Cups 7 Cups 8 Cups
Water 10 oz /
296 mL 15 oz /
444 mL 20 oz /
591 mL 25 oz /
739 mL 30 oz /
887 mL 35 oz /
1035 mL 40 oz /
1183 mL
Coffee
(Ground)
16 g
(2 scoops) 24 g
(3 scoops) 32 g
(4 scoops) 40 g
(5 scoops) 48 g
(6 scoops) 56 g
(7 scoops) 64 g
(8 scoops)
OXO recommends using approximately 8 grams of medium-ground coffee per cup (5 fl oz). Coffee dosage recommendations are
based on the Specialty Coffee Association (SCA) Golden Cup Standard designed for optimal extraction and strength.
1 OXO scoop = approximately 8 grams of medium-ground coffee.
Before You Begin

8
2-4 CUPS 5-8 CUPS
Brewing into Carafe
1
Adjust Mug/Carafe
Mode Switch
Carafe mode activates drip-free
valve. Ensure switch is pushed all
the way to the right.
2
Snap in
Brew Basket
Ensure brew basket is securely
in place and handle is down,
then add large paper filter and
ground coffee.
3
Add Filtered Water
to Water Tank
Fill to number of cups desired.
Your Coffee Maker will use all of the
water you put in the tank for every
brew cycle. Always fill between the
MIN and MAX fill lines.
4
Press Power then
Brew Button to Start
When brewing is complete, Coffee
Maker will chime and Brew button
light will turn off. Power light will
remain on for 15 minutes.
Do not open the brew basket lid during
brew cycle
2-4 CUPS 5-8 CUPS
Always align the
opening and the spout
to prevent leaking.
The lid features a
convenient marking to
indicate the opening.

9
2-4 CUPS 5-8 CUPS
Brewing into Mug
1
Adjust Mug/Carafe
Mode Switch
Mug Mode will open valve to brew
into any cup or mug. Ensure switch is
pushed all the way to the left.
If the switch is not on Mug
mode, the brew basket will not
drain and could overflow.
2
Snap in
Brew Basket
Ensure brew basket is securely in
place, then add large paper filter
and ground coffee.
3
Add Filtered Water
to Water Tank
Never fill above 4 cups (20 fl oz) in
Mug mode; only use as much water as
your cup or mug can hold. The Coffee
Maker will use all water in the tank.
Tip: Use your mug to measure the perfect
amount of water.
4
Place Mug Under
Brew Basket
Turn over well cover to
elevate mug with platform, if
needed. Well cover can also
be removed for taller mugs.
5
Press Power then
2-4 Cup Button to Start
When brewing is complete, Coffee
Maker will chime and Brew button
light will turn off. Power light will
remain on for 15 minutes.
Do not open the brew basket lid during
brew cycle
2-4 CUPS 5-8 CUPS
Optional Single-Serve Accessory:
optimizes flavor when brewing 2-4 cups
Insert wave filter
(Kalita 185) into
the Single-Serve
Accessory.
Place the Single-Serve
Accessory directly into
the brew basket. Snap
brew basket into place.
Add 2-4 cups of
filtered water to water
tank and press 2-4 CUPS
button to brew.
Rinse the Single-Serve Accessory after
each use to prevent clogs and / or overflow.

10
Always unplug your Coffee Maker before cleaning it. Any service or
maintenance other than cleaning or descaling should be performed by an
authorized service representative. For more information,
call OXO Customer Service at (800) 545-4411.
Cleaning & Care
Never immerse the Coffee Maker power cord or plug in water.
Do not allow liquid to come in contact with power cord or plug.
Doing so can result in electrical shock or death.
To prevent damage to the appliance when cleaning, do not use
alkaline cleaning agents, abrasive pads, harsh chemicals, or spray
cleaner chemicals when cleaning.
Regular Cleaning
Clean exterior regularly with a damp cloth and wipe dry.
Descale your Coffee Maker regularly.
See pg. 11 for descaling instructions.
Stain Removal
Remove coffee oil stains in the carafe by soaking overnight
with a small amount of dishwasher detergent and water.
Filters
To replace filters for Single Serve Accessories,
look for Kalita Wave Filter 185.
To replace large filters, look for basket filters
labeled as 8-12 cup filters.
Hand Wash Removable Parts
carafe and lid with mild detergent after use. Rinse
thoroughly. Carafe and lid are not dishwasher safe.
Placing carafe in dishwasher will compromise the
vacuum insulation.
are all top-rack
dishwasher safe.

11
Descaling
The Clean button light will turn on after every 90 cycles as a helpful reminder to descale.
Your Coffee Maker will not work properly if it is not descaled regularly.
The warranty is voided if descaling is not carried out in accordance with these instructions.
Using filtered water will help prevent mineral buildup.
1
Fill
Water Tank
Add descaling solution and
filtered water to the tank up to
the MAX fill line.The mixture should
not exceed the MAX fill line.
Make sure empty carafe is in place
with lid fully screwed on. Remove any
filters or the Single Serve Accessory
from the brew basket. Ensure brew
basket is securely in place.
2
Start
Clean Cycle
Slide switch to Carafe mode.
Press Power, then press the Clean
button to start the clean cycle.
When clean cycle is complete,
machine will chime and Clean button
light will turn off.To cancel the cycle,
press the Clean button or Power.
3
Start
Rinse Cycle
After descaling, fill the water
tank to the MAX fill line and run
a 5-8 cup water-only brew cycle.
Discard water before next use.
Notes on Descaling
Scale is a naturally occurring buildup of mineral deposits.
How often you should descale your Coffee Maker depends
on water hardness.
Buy descaling solution where household cleaning products
are sold; follow solution’s recommended use.
Clean cycle will take around 25 minutes. Time will vary
based on amount of mineral deposit. Allow cycle to finish
to ensure machine is fully descaled.

12
Troubleshooting
Problem Solution
Coffee Maker beeps when pressing Brew button
and won’t start Make sure there is water in the tank. If water is in the tank and beeping continues,
please contact Customer Service.
Brew basket is overflowing
Make sure you are using only one paper filter before brewing.
Check to ensure the brew basket drain hole is not blocked.
If necessary, clean out with a soft-bristled brush.
Make sure carafe is properly in place.
Check that the Mug/Carafe mode switch is positioned correctly.
Try using a medium grind; too fine a grind may cause water build-up.
Make sure the brew basket is snapped securely in place.
Rinse all removable parts with water.
Wipe down machine with a damp cloth.
I want to brew fewer than 2 cups In order to consistently make high-quality coffee, the OXO 8-Cup Coffee Maker
does not allow you to brew fewer than 2 cups.
Brew cycle is taking more than 8 minutes to complete There might be mineral deposit obstruction in the water tubes.
See page 11 for descaling instructions.
Coffee is brewing into carafe very slowly Make sure carafe lid is engaged with valve at the bottom of brew basket.
Check for obstruction in brew basket drain hole.
Coffee drips out of brew basket when carafe or mug
is removed from Coffee Maker
Check that the Mug/Carafe mode switch is positioned correctly.
Drip-free valve is deactivated when in mug mode.
Allow brew basket to drain fully before removing mug.
Can I use the Single-Serve Accessory
without the brew basket?The Single-Serve Accessory must be used inside the brew basket.
For the most up-to-date troubleshooting information, visit oxo.com

13
Our Guarantee
Two-Year Warranty:
Your OXO Brew appliance is guaranteed by OXO for two years
from the date of purchase in the case of any manufacturing defects in
materials or workmanship. This OXO warranty is only offered on OXO
Brew appliances sold new and utilized in the US and Canada.
The OXO warranty covers all costs related to restoring the proven
defective product through the repair or replacement of any
defective part and necessary labor so that it conforms to its original
specifications. A replacement product may be provided instead of
repairing a defective product. OXO’s exclusive obligation under this
warranty is limited to such repair or replacement.
A receipt indicating the purchase date is required for any
claims, so please keep it in a safe place. We recommend
that you register your product on our website, www.oxo.com/
productregistration. Although greatly appreciated, the product
registration is not required to activate any warranty and product
registration does not eliminate the need for the original proof of
purchase.
The warranty does not cover damages resulting from misuse or abuse
of the product and/or uses inconsistent with this Instruction Manual,
attempts at repair, theft, use with unauthorized attachments or failure
to follow the instructions provided with the product.
The warranty becomes void if attempts at repair are made by non-
authorized third parties and/or if spare parts, other than those
provided by OXO, are used. You may also arrange for service after
the warranty expires at an added cost.
For questions, returns, repairs or warranty claims within the U.S.,
please visit www.oxo.com or contact OXO Customer Service at
(800) 545-4411. We will be glad to assist you.
For customer service, claims, or questions on sales in Canada, OXO
Customer Service will gladly put you in touch with the appropriate
individuals.
This warranty gives you specific legal rights, and you may have other
legal rights which vary from state to state, country to country, or
province to province. The customer may assert any such rights at their
sole discretion.
CONTACT INFO:
If you have any trouble with the product during the warranty period, do not attempt to return it to a retail store.
Instead, please visit us online at www.oxo.com or contact us here:
OXO U.S. Customer Service
Hours: Monday–Friday, 8:00am – 5:00pm (ET)
Phone: (800) 545-4411
Mail: OXO International, Inc.
1331 S Seventh St., Building 1,
Chambersburg, PA 17201-9912
Outside the U.S.
Please contact your local distributor or email info@oxo.com

Better brewing.
Better coffee. Better day.

Better brewing.
Better coffee. Better day.

13
Notre garantie
GARANTIE DE DEUX ANS:
Votre appareil OXO Brew est garanti deux ans à compter de la date
d'achat dans le cas d'un vice de fabrication ou de main-d’œuvre. Cette
garantie OXO est uniquement offerte pour les appareils OXO Brew
vendus neufs et utilisés aux États-Unis et au Canada.
La garantie OXO couvre tous les frais liés à la remise en état du produit
prouvé défectueux, par le biais de la réparation ou du remplacement
de toute pièce défectueuse et de la main-d’œuvre nécessaire de
manière à ce qu'il soit conforme à ses spécifications d'origine. Il peut
être envisagé de remplacer le produit défectueux plutôt que de le
réparer. L’obligation exclusive de OXO dans le cadre de cette garantie
est limitée à la réparation ou au remplacement du produit.
Toute réclamation doit être accompagnée d’un reçu
indiquant la date d'achat. Il est donc vivement conseillé de
le garder en lieu sûr. Nous vous recommandons d’enregistrer votre
produit sur notre site web, www.oxo.com/registration.aspx.
Bien que très apprécié, l’enregistrement du produit n'est pas obligatoire
pour activer la garantie, et l’enregistrement du produit n’élimine pas la
nécessité de présenter la preuve d’achat originale.
La garantie ne couvre pas les dommages résultant de l’utilisation
impropre ou abusive du produit et/ou d’utilisations incompatibles
avec ce mode d’emploi, de tentatives de réparation, d’un vol, d’une
utilisation avec des accessoires non autorisés ou du non-respect des
instructions fournies avec le produit.
La garantie devient nulle si des tentatives de réparation sont effectuées
par des tiers non autorisés et/ou si des pièces de rechange, autres
que celles fournies par OXO, sont utilisées. Vous pouvez également
organiser une réparation après l’expiration de la garantie à un coût
supplémentaire.
En cas de questions, retours, réparations ou réclamations dans le cadre
de la garantie à l'intérieur des États-Unis, veuillez visiter www.oxo.
com ou contacter le service à la clientèle OXO au (800) 545-4411.
Nous serons heureux de vous aider.
Pour le service après-vente, ou toute réclamation ou question sur les
ventes au Canada, le service à la clientèle OXO se fera un plaisir de
vous mettre en contact avec le personnel concerné.
Cette garantie vous confère des droits juridiques spécifiques et vous
pouvez jouir d’autres droits qui peuvent varier d’un État à l'autre, d’un
pays à l’autre ou d’une province à l'autre. Le client peut faire valoir de
tels droits à son entière discrétion.
INFOS CONTACT:
Si vous avez le moindre problème avec le produit pendant la période de garantie, n’essayez pas de le renvoyer à un magasin de détail. Consultez
plutôt notre site web à l’adresse www.oxo.com ou contactez-nous ici:
Service à la clientèle OXO U.S.
Horaires: Lundi - Vendredi de 8h00 à 17h00 (HE)
Téléphone: (800) 545-4411
Mail: OXO International, Inc.
1331 S Seventh St., Building 1,
Chambersburg, PA 17201-9912
En dehors des États-Unis.
Veuillez contacter votre distributeur local ou envoyez un e-mail à
info@oxo.com

12
Dépannage
Problème Solution
La cafetière émet un signal sonore lorsque vous appuyez
sur le bouton Brew et ne démarre pas Vérifiez qu’il y a de l’eau dans le réservoir. S’il y a de l’eau dans le réservoir et que le
signal sonore persiste, veuillez contacter le Service à la clientèle.
Le panier à infusion déborde
Assurez-vous d’utiliser un seul filtre en papier avant l’infusion.
Vérifiez que l'orifice du panier à infusion n’est pas obstrué.
Si nécessaire, nettoyez avec une brosse à poils souples.
Assurez-vous que la carafe est bien mise en place.
Vérifiez que le commutateur de mode Chope/Carafe est correctement positionné.
Essayez d’utiliser une mouture moyenne; une mouture fine peut causer une accumulation
d'eau.
Assurez-vous que le panier à infusion est bien enclenché en place.
Le panier à infusion déborde Rincez toutes les pièces amovibles avec de l'eau. Essuyez l’appareil avec un chiffon
humide.
Je souhaite préparer moins de 2 tasses Pour vous permettre de préparer régulièrement du café de grande qualité, la cafetière
OXO 8 tasses ne vous permet pas de préparer moins de 2 tasses.
Le programme d’infusion dure plus de 8 minutes Il se peut que les tuyaux d’arrivée d’eau soient obstrués de calcaire.
Voir la page 11 relative aux instructions de détartrage.
La distribution du café dans la carafe est très lente
Assurez-vous que le couvercle de la carafe est fixé à la valve dans le bas du panier à
infusion.
Vérifiez si l’orifice du panier à infusion est obstrué.
Le café s’égoutte du panier à infusion lorsque la carafe ou
la chope est retirée de la cafetière
Vérifiez que le commutateur de mode Chope/Carafe est correctement positionné.
La valve anti-goutte est désactivée avec le mode Chope. Laissez le panier à infusion se
vider complètement avant d’enlever la chope.
Puis-je utiliser le petit panier tour seul (sans le panier à
infusion)? Non. Il doit toujours être dans le panier a infusion.
Pour voir les informations de dépannage les plus récentes, visitez oxo.com

11
Détartrage
Le voyant du bouton Clean (nettoyage) s’allume tous les 90 programmes pour vous rappeler de détartrer l’appareil.
Votre cafetière ne fonctionnera pas correctement si vous ne la détartrez pas régulièrement.
La garantie devient caduque si le détartrage n’est pas effectué conformément à ces instructions.
L'utilisation d'eau filtrée aidera à prévenir l'accumulation de minéraux.
1
Remplissez
le réservoir à eau
Versez la solution de détartrant et d’eau
dans le réservoir jusqu’à la ligne repère
MAX. Le mélange ne doit pas dépasser
la ligne repère MAX. Ne le remplissez
pas trop. Mettez en place la carafe vide
et vissez à fond le couvercle.
2
Lancez le cycle
de nettoyage
Sélectionnez le mode Carafe. Appuyez
sur le bouton d’alimentation puis sur le
bouton Clean (nettoyage) pour lancer
le programme de nettoyage.3 Lorsque
le programme de nettoyage est terminé,
l’appareil sonne et le voyant du bouton
Clean s’étein.
3
Lancez le cycle
de rinçage
Après le détartrage, remplissez le
réservoir à eau jusqu’à la ligne repère
MAX et exécutez un programme
d’infusion avec de l’eau seulement
pour 5-8 tasses. Jetez l’eau avant la
prochaine utilisation.
Notes sur le détartrage
Le calcaire est une accumulation naturelle de dépôts minéraux.
La fréquence de détartrage de votre cafetière dépend de la
dureté de l’eau
Achetez une solution de détartrage chez un revendeur de
produits d’entretien et suivez les recommandations d’utilisation.
Le programme de nettoyage peut durer 25 minutes. La durée
dépend de la quantité de calcaire. Pour que l’appareil soit
bien détartré, attendez la fin du programme.

10
Nettoyage régulier
Nettoyez régulièrement l’extérieur avec un chiffon
humide et essuyez-le. Détartrez régulièrement
votre cafetière. Voir page 11 pour
les instructions de détartrage.
Elimination des taches
Pour éviter d’endommager l’appareil, ne pas utiliser
d’agents de nettoyage alcalins, de tampons abrasifs,
de produits chimiques puissants ou de produits
chimiques à vaporiser pour le nettoyage. Utiliser un
chiffon doux et un détergent doux si nécessaire.
Filtres
Utilisez des filtres Kalita Wave Filter 185 pour
le petit panier/mode Tasse.
Utilisez des filtres plats 8-12 tasses pour
le grand panier/ mode Carafe.
Nettoyage
Débranchez toujours votre cafetière avant de la nettoyer. Toute intervention
d’entretien ou de maintenance, autre que le nettoyage ou le détartrage,
doit être effectuée par un dépanneur agréé. Pour plus d’informations,
appelez le service à la clientèle OXO au (800) 545-4411.
Ne jamais plonger la fiche ou le cordon d’alimentation de la
cafetière dans l’eau. Ne laisser aucun liquide entrer en contact avec la
fiche ou le cordon d’alimentation. Le non-respect de cette instruction peut
causer un décès ou un choc électrique.
our éviter d’endommager l’appareil, ne pas utiliser d’agents de
nettoyage alcalins, de tampons abrasifs, de produits chimiques puissants
ou de produits chimiques à vaporiser pour le nettoyage. Utiliser un
chiffon doux et un détergent doux si nécessaire.
Lavez la carafe à la main Les Pièces amovibles
avec un détergent doux après utilisation.
Rincez soigneusement. La carafe ne passe pas
au le lave-vaisselle pour préserver ses
propriétés thermiques.
telles la plateforme
ou les paniers
passent au lave-vaisselle

9
2-4 CUPS 5-8 CUPS
Mode Tasse
1
Sélectionnez
le mode Tasse
Ce mode ouvre la valave anti-goutte.
Si le commutateur n’est pas
sur le mode Chope, le panier
à infusion ne se vide pas et
risque de déborder.
2
insérez le
panier à infusion
Assurez-vous que le panier à infusion
est enclenché avant d’ajouter le filtre.
Une fois le panier en place, ajoutez un
filtre en papier à fond plat et du café.
3
Remplissez le réservoir
avec de l’eau filtrée
Ne dépassez jamais la ligne repère
de 4 tasses (20 fl oz) en mode a la
Tasse; utilisez seulement la quantité
d’eau que contient votre tasse ou
mug. La cafetière utilise toute l’eau du
réservoir.
Conseil:Utilisez votre mug pour mesurer la
quantité d’eau exacte.
4
Placez le mug
sous le panier
Retournez le couvercle pour
relever le mug avec la plate-forme,
si nécessaire. Le couvercle peut être
retiré pour les plus grandes mugs.
5Appuyer sur le bouton
d’alimentation, puis sur
le bouton 2-4 tasses
pour démarrer
Une fois l’infusion terminée, la machine
à café émettra un son et le voyant
du bouton d’infusion s’éteindra.
Le voyant de l’alimentation restera
allumé pendant 15 minutes.
N’ouvrez pas le couvercle du panier
d’infusion pendant le cycle d’infusion.
2-4 CUPS 5-8 CUPS
Petit panier optionnel :
extraction optimale pour 2-4 tasses
Rincez le filtre individuel en option après
chaque utilisation pour éviter les obstructions
et/ou débordements.
Insérez le filtre Kalita
(Kalita 185) dans le petit
panier
Placez le petit panier
à l’intérieur du grand
panier.
Ajoutez 2-4 tasses d’eau
filtrée dans le réservoir
sélectionnez le cycle
d’infusion 2-4 CUPS
(bouton Brew).
Other manuals for BREW
10
Table of contents
Other OXO Coffee Maker manuals