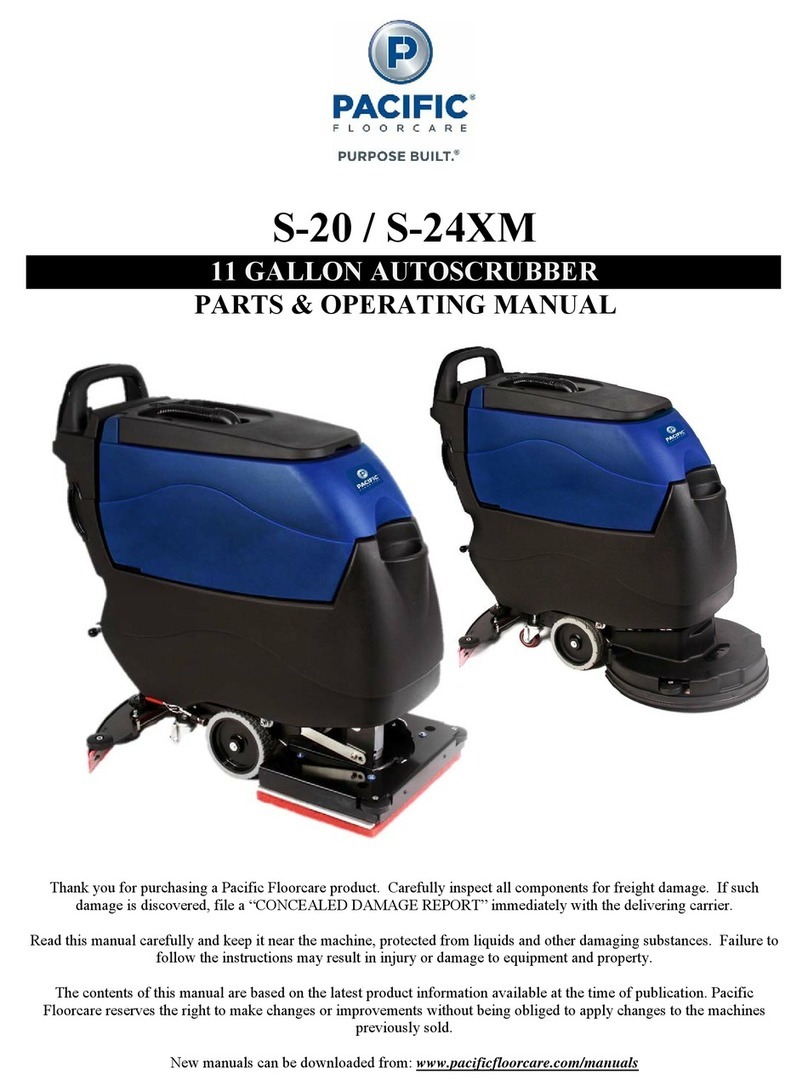
Pacific Floorcare S-24 User manual

Thank you for purchasing a Pacic Floorcare product. Carefully inspect all components for freight damage.
If such damage is discovered, le a “CONCEALED DAMAGE REPORT” immediately with the delivering
carrier.
Read this manual carefully and keep it near the machine, protected from liquids and other damaging
substances. Failure to follow the instructions may result in injury or damage to equipment and property.
The contents of this manual are based on the latest product information available at the time of publication.
Pacic Floorcare reserves the right to make changes or improvements without being obliged to apply changes
to the machines previously sold.
New manuals can be downloaded from: www.pacicoorcare.com/manuals
S-24 / S-28 / S-32S-24 / S-28 / S-32
22 GALLON MID-SIZE AUTOSCRUBBER22 GALLON MID-SIZE AUTOSCRUBBER
PARTS & OPERATING MANUALPARTS & OPERATING MANUAL

22 GALLON AUTOSCRUBBER SPECIFICATIONS
Features Specications
Model: S-24 (Disk) S-28 (Orbital)
Solution Delivery System
Solution capacity: 22 gal / 83 l 22 gal / 83 l
Solution control: (Standard) 0-.55 gpm / 0-2.1 lpm, Variable knob adjustment 0-.55 gpm / 0-2.1 lpm, Variable knob adjustment
Solution control: (w/ Chemical
Injection)
Low, Med & High ow settings
(.10, .25 & .45 gpm / .38, .95 & 1.7 lpm)
Speed Sensitive Flow or Constant Output Flow Control
Low, Med & High ow settings
(.10, .25 & .45 gpm / .38, .95 & 1.7 lpm)
Speed Sensitive Flow or Constant Output Flow Control
Scrubbing System
Cleaning path: 24 in / 610 mm 28 in / 711 mm
Pad/brush size: (2) 12 in / 305 mm (1) 28 x 14 in / 711 x 356 mm
Productivity (per hour)-
Theoretical max: 26,400 ft 30,800 ft
Productivity (per hour)-Average
coverage rate:* 19,525 ft 22,425 ft
Brush Drive System
Brush motor horsepower (each): (1) 1 hp / 750 W (1) 1 hp / 750 W
Brush rpm: 360 rpm 2,200 rpm
Brush/pad pressure: 50, 100 & 140 lb / 23, 45 & 64 kg 70, 110 & 160 lb / 32, 50 & 73 kg
Brush/pad attachment/removal: Automatic on/o Manual
Recovery System
Recovery tank accessibility: Full clean out access Full clean out access
Recovery tank capacity: 25 gal / 95 l (3 gal / 11.4 l demisting chamber) 25 gal / 95 l (3 gal / 11.4 l demisting chamber)
Vacuum motor: .7 hp / 522 W, 3-stage .7 hp / 522 W, 3-stage
Vac motor cfm / cmm: 71 cfm / 2.0 cmm 71 cfm / 2.0 cmm
Vac motor water-lift: 71 in / 180 cm 71 in / 180 cm
Standard / Narrow Aisle Squeegee
width: 35 / 30 in (89 / 76 cm) 40 / 35 in (102 / 89 cm)
Drive System
Drive Type: Transaxle Drive Transaxle Drive
Motor horsepower: .5 hp / 373 W .5 hp / 373 W
Battery System
System voltage: 24 V 24 V
Battery amp hour rating: (4) 6V: 260 AH (wet) / 250 AH (MF) (4) 6V: 260 AH (wet) / 250 AH (MF)
Battery run time: Up to 5.5 hours Up to 5.5 hours
Charger description: On-board (standard)
O-board (optional)
On-board (standard)
O-board (optional)
Machine specications
Product length: 54 in / 137 cm 52 in / 132 cm
Product width (without squeegee): 26 in / 66 cm 28 in / 71 cm
Product height: 44 in / 112 cm 44 in / 112 cm
Product weight (with batteries): 650 lb / 295 kg 665 lb / 302 kg
Sound level (operator’s ear): 65 dBA 63 dBA
Construction: Rotationally molded polyethylene tanks, powder coated steel
frame
Rotationally molded polyethylene tanks, powder coated steel
frame
*Productivity calculations utilize key factors from ISSA 540 cleaning times handbook
Note: Specications subject to change without notice

22 GALLON AUTOSCRUBBER SPECIFICATIONS
Features Specications
Model: S-28 (Disk) S-32 (Disk)
Solution Delivery System
Solution capacity: 22 gal / 83 l 22 gal / 83 l
Solution control: (Standard) 0-.55 gpm / 0-2.1 lpm, Variable knob adjustment 0-.55 gpm / 0-2.1 lpm, Variable knob adjustment
Solution control: (w/ Chemical
Injection)
Low, Med & High ow settings
(.10, .25 & .45 gpm / .38, .95 & 1.7 lpm)
Speed Sensitive Flow or Constant Output Flow Control
Low, Med & High ow settings
(.10, .25 & .45 gpm / .38, .95 & 1.7 lpm)
Speed Sensitive Flow or Constant Output Flow Control
Scrubbing System
Cleaning path: 28 in / 711 mm 32 in / 813 mm
Pad/brush size: (2) 14 in / 356 mm Disks (2) 16 in / 406 mm Disks
Productivity (per hour)-Theoretical
max: 30,800 ft 35,200 ft
Productivity (per hour)-Average
coverage rate:* 22,425 ft 25,125 ft
Brush Drive System
Brush motor horsepower (each): (2) 1 hp / 750 W (2) 1 hp / 750 W
Brush rpm: 300 rpm 300 rpm
Brush/pad pressure: 70, 110 & 150 lb / 32, 50 & 68 kg 70, 110 & 150 lb / 32, 50 & 68 kg
Brush/pad attachment/removal: Automatic on/o Automatic on/o
Recovery System
Recovery tank accessibility: Full clean out access Full clean out access
Recovery tank capacity: 25 gal / 95 l (3 gal / 11.4 l demisting chamber) 25 gal / 95 l (3 gal / 11.4 l demisting chamber)
Vacuum motor: .7 hp / 522 W, 3-stage .7 hp / 522 W, 3-stage
Vac motor cfm / cmm: 71 cfm / 2.0 cmm 71 cfm / 2.0 cmm
Vac motor water-lift: 71 in / 180 cm 71 in / 180 cm
Standard / Narrow Aisle Squeegee
width: 40 / 35 in (102 / 89 cm) 44.5 / 40 in (113 / 102 cm)
Drive System
Drive Type: Transaxle Drive Transaxle Drive
Motor horsepower: .5 hp / 373 W .5 hp / 373 W
Battery System
System voltage: 24 V 24 V
Battery amp hour rating: (4) 6V: 260 AH (wet) / 250 AH (MF) (4) 6V: 260 AH (wet) / 250 AH (MF)
Battery run time: Up to 4.5 hours Up to 4.0 hours
Charger description: On-board (standard)
O-board (optional)
On-board (standard)
O-board (optional)
Machine specications
Product length: 56 in / 142 cm 58 in / 147 cm
Product width (without squeegee): 30 in / 76 cm 34 in / 86 cm
Product height: 44 in / 112 cm 44 in / 112 cm
Product weight (with batteries): 660 lb / 299 kg 665 lb / 302 kg
Sound level (operator’s ear): 65 dBA 65 dBA
Construction: Rotationally molded polyethylene tanks, powder coated steel
frame
Rotationally molded polyethylene tanks, powder coated steel
frame
*Productivity calculations utilize key factors from ISSA 540 cleaning times handbook
Note: Specications subject to change without notice

TABLE OF CONTENTSTABLE OF CONTENTS
SAFETY INFORMATION ���������������������������������������������������������������������������������������������������������������������������������������������������1
UNPACKING THE MACHINE �������������������������������������������������������������������������������������������������������������������������������������������2
TRANSPORTING THE MACHINE �����������������������������������������������������������������������������������������������������������������������������������3
BATTERIES ���������������������������������������������������������������������������������������������������������������������������������������������������������������������������4
SELECTION ..................................................................................................................................................................4
INSTALLATION ...........................................................................................................................................................4
SERVICING LEAD ACID BATTERIES (NON-HYDROLINK® MODELS) ..............................................................5
SERVICING LEAD ACID BATTERIES WITH HYDROLINK® ..............................................................................6
WATERING SYSTEM ..................................................................................................................................................6
BATTERYSHIELD® AUTOMATED WET BATTERY PROTECTION SYSTEM......................................................7
CHARGING ���������������������������������������������������������������������������������������������������������������������������������������������������������������������������9
ON-BOARD CHARGER ..............................................................................................................................................9
OFF-BOARD CHARGER ........................................................................................................................................... 11
PRE-USE SETUP�����������������������������������������������������������������������������������������������������������������������������������������������������������������12
ORBITAL PADS & CHEMICAL-FREE FINISH REMOVAL (CFR) ........................................................................16
DISK MACHINE PAD DRIVERS & BRUSHES .......................................................................................................17
SQUEEGEE SYSTEM ................................................................................................................................................19
RECOMMENDED MAINTENANCE�������������������������������������������������������������������������������������������������������������������������������22
RECOMMENDED SERVICE PARTS ������������������������������������������������������������������������������������������������������������������������������23
TROUBLESHOOTING GUIDE ����������������������������������������������������������������������������������������������������������������������������������������26
PARTS DIAGRAMS������������������������������������������������������������������������������������������������������������������������������������������������������������28
BATTERIES, BATTERYSHIELD® & HYDROLINK® .............................................................................................28
OPTIONAL ONBOARD CHARGER .........................................................................................................................29
CONTROLS .................................................................................................................................................................30
ELECTRONICS ...........................................................................................................................................................37
FRAME ASSEMBLY ..................................................................................................................................................41
HEAD LIFT ASSEMBLY ............................................................................................................................................42
SOLUTION TANK ......................................................................................................................................................43
RECOVERY TANK AND VACUUM .........................................................................................................................44
OPTIONAL CHEMICAL INJECTION .......................................................................................................................46
35” SQUEEGEE ASSEMBLY .....................................................................................................................................47
40” SQUEEGEE ASSEMBLY .....................................................................................................................................48
45” SQUEEGEE ASSEMBLY .....................................................................................................................................49
SQUEEGEE LINK.......................................................................................................................................................50
SCRUB HEADS ..........................................................................................................................................................52
WIRING DIAGRAMS ��������������������������������������������������������������������������������������������������������������������������������������������������������64
S-24 WIRING DIAGRAM ..........................................................................................................................................64
S-28 (DISK) & S-32 WIRING DIAGRAM .................................................................................................................66
S-28 ORBITAL WIRING DIAGRAM ........................................................................................................................68
BATTERYSHIELD® (OPTIONAL) WIRING DIAGRAM ........................................................................................70
OPTIONAL CHEMICAL INJECTION WIRING DIAGRAM ...................................................................................71

WARNING: This product can expose you to chemicals including lead and lead compounds which are known to the State
of California to cause cancer and birth defects or other reproductive harm. For more information go to
www.P65Warnings.ca.gov.
WARNING: This machine is not equipped with explosion proof motors. Never use near ammable or reactive materials,
liquids, vapors or combustible dusts. Electric motors spark internally during operation and could cause a
ash re or explosion.
WARNING: Batteries emit hydrogen and oxygen gas.
- Keep sparks and open ame away. Do not smoke near the machine
- Charge batteries in a well-ventilated area with the battery compartment open
WARNING: Do not plug in charger cable if wall cord or battery harness is damaged.
WARNING: Disconnect battery cables before servicing.
WARNING: Do not wear jewelry when working near moving or electrical components.
WARNING: Do not use the machine as a means for transport.
WARNING: Never allow children to play on or around machine.
WARNING: Do not bump into shelves or scaoldings, especially where there is a risk of falling objects.
WARNING: Support the machine on safety stands before working underneath.
CAUTION: Keep hands away from spinning brushes.
CAUTION: Do not operate machine unless trained and authorized.
CAUTION: Do not modify the machine from its original design.
CAUTION: Do not operate machine if it is not in proper operating condition.
CAUTION: Wear non-slip shoes when operating machine.
CAUTION: Reduce speed when turning or operating on inclines and slippery surfaces.
CAUTION: Use Bromine only in your tank treatment system! Do not use chlorine. Chlorine can interact with ammonia-
based detergents and cause harmful fumes.
CAUTION: Follow mixing and handling instructions on chemical containers.
CAUTION: Remove the batteries and get assistance before lifting the machine manually.
CAUTION: Park and service the machine on a level surface and remove the key.
CAUTION: Always wear protective clothing, gloves and goggles when handling and charging batteries.
CAUTION: Avoid moving parts and do not wear loose jackets, shirts or sleeves when servicing.
NOTE: Do not power spray or hose o the machine. Electrical malfunction may occur.
NOTE: All repairs must be performed by a qualied service technician using approved replacement parts.
NOTE: To avoid damaging the oor, do not allow the brush/pad to operate while the machine is stationary.
NOTE: Use a ramp with no more than a 12° incline when loading or unloading the machine.
NOTE: Use tie down straps to secure the machine to the truck or trailer during transport.
NOTE: Turn power o and put the scrub head in the lowered position during transport.
NOTE: Discontinue use and report machine damage or faulty operation immediately.
NOTE: Store the machine indoors where the temperature is between 32º and 104ºF (0º and 40ºC).
NOTE: Do not lower the orbital head without a pad. Doing so damages the Mighty-Lok® face.
NOTE: Failure to clean the HydroLink® light pipe will limit BatteryShield’s® ability to read the water level and
will reduce battery life.
NOTE: Do not use an extension cord. This will void the warranty on the charger.
NOTE: Batteries designed for automotive or marine and RV use are not suited for use in oor scrubbers.
NOTE: Ensure battery charging and storage locations comply with OSHA and any governing agencies’ standards
based on your particular location and application.
SAFETY INFORMATION
WARNING: A potentially hazardous situation that, if not avoided, could result in death or serious injury�
CAUTION: A potentially hazardous situation that, if not avoided, could result in moderate injury or serious property
damage�
NOTE: Information that will prevent premature equipment failure or minor property damage�
This machine is intended for commercial use. Only use recommended pads or brushes and commercially approved oor cleaning
chemicals intended for machine application.

RETURN TO
TABLE OF
CONTENTS
- 2 -
UNPACKING THE MACHINE
NOTE: Use a ramp with no more than a 12° incline when loading or unloading the machine.
1. Remove the outer packaging
2. Remove the four cleats and two tie down brackets holding the machine to the pallet
3. Raise the scrub head into the transport position.
4. Use a suitable ramp or platform and carefully pull the machine backwards down from the pallet.

RETURN TO
TABLE OF
CONTENTS - 3 -
TRANSPORTING THE MACHINE
CAUTION: Remove the batteries and get assistance before lifting the machine manually.
NOTE: Use a ramp with no more than a 12° incline when loading or unloading the machine.
NOTE: Turn power o and put the scrub head in the lowered position during transport.
NOTE: Do not rest the orbital head on a hard surface without a pad. Doing so damages the Mighty-Lok® face.
TIE DOWN PROCEDURETIE DOWN PROCEDURE
The S-Series Scrubber was designed for easy transport on a route cleaning program. Two options are available
for tying the machine down to a truck or trailer during transport.
Tie down holes are located on both
sides of the main frame
Run tie down straps between the
recovery tank and solution tank

RETURN TO
TABLE OF
CONTENTS
- 4 -
BATTERIES
WARNING: Battery posts, terminals, and related accessories contain lead and lead compounds, chemicals
known to the State of California to cause cancer and reproductive harm, and during charging,
strong inorganic acid mists containing sulfuric acid are involved, a chemical known to the State
of California to cause cancer. Wash hands after handling. For more information go to www.
P65Warnings.ca.gov.
WARNING: Batteries emit hydrogen and oxygen gas.
-Keep sparks and open ame away. Do not smoke near the machine.
-Charge batteries in a well-ventilated area with the battery compartment open.
WARNING: Do not wear jewelry when working near moving or electrical components.
CAUTION: Remove the batteries and get assistance before lifting the machine manually.
CAUTION: Park and service the machine on a level surface and remove the key.
CAUTION: Always wear protective clothing, gloves and goggles when handling and charging batteries.
NOTE: All repairs must be performed by a qualied service technician using approved replacement parts.
NOTE: Batteries designed for automotive or marine and RV use are not suited for use in oor scrubbers.
SELECTION
The machine requires four 6 VDC Lead Acid or AGM Deep Cycle batteries designed for oor scrubber use with
the following maximum dimensions:
• Width: 7 1/8 in (181 mm)
• Length: 12 15/16 in (264 mm)
• Height: 10 5/8 in (295 mm)
INSTALLATION
1. Open the recovery tank.
2. Use a lifting device capable of transferring the bat-
teries safely.
3. Slide the batteries forward.
4. Connect the batteries in a series to obtain an overall
voltage of 24V on the lugs.
5. Fully charge the batteries before using the machine.

RETURN TO
TABLE OF
CONTENTS - 5 -
SERVICING LEAD ACID BATTERIES (NON-HYDROLINK®MODELS)
WARNING: Battery posts, terminals, and related accessories contain lead and lead compounds, chemicals
known to the State of California to cause cancer and reproductive harm, and during charging,
strong inorganic acid mists containing sulfuric acid are involved, a chemical known to the State
of California to cause cancer. Wash hands after handling. For more information go to www.
P65Warnings.ca.gov.
WARNING: Batteries emit hydrogen and oxygen gas.
-Keep sparks and open ame away. Do not smoke near the machine.
-Charge batteries in a well-ventilated area with the battery compartment open.
WARNING: Do not wear jewelry when working near moving or electrical components.
CAUTION: Always wear protective clothing, gloves and goggles when handling and charging batteries.
REQUIRED EQUIPMENT
• Eye protection
• Acid resistant gloves
• Distilled water
• Baking soda (neutralizes acid spills)
SAFETY
NEVER:
• Add acid to a battery.
• Smoke near batteries.
• Charge a frozen battery.
• Leave an acid spill unattended.
• Store batteries unless they are fully charged.
• Charge a battery when the temperature is above 122°F (50°C).
• Charge a ooded battery without securing vent caps on the cells.
• Place objects on top of batteries, which can cause a short circuit.
ALWAYS:
• Neutralize acid spills with baking
soda and water.
• Use insulated tools and check that
connections are tight.
Remove the caps and place
them upside down to inspect
WATERING
• If contact with electrolyte (sulfuric acid) occurs, ush with large amounts of water.
• Use only distilled water (tap water can contain contaminants that will damage the battery).
• Remove the caps and place them upside down to check electrolyte levels.
• For discharged or partially charged batteries, add just enough water to cover the plates.
• Fully charge the batteries.
• Add distilled water to a level of 1/8” below the vent well.
CLEANING & INSPECTION
• Fluid on the top of a battery may mean it is being over-watered or overcharged.
• Check cleanliness and keep terminals and connectors free of corrosion.
• Clean with a solution of 1 cup baking soda to 1 gallon of water.
• Do not allow cleaning solution to get inside the battery.
• Rinse with water and dry with a clean cloth.
• Keep the area around batteries clean and dry.
• Properly secure all vent caps.
• Check battery cables and connections. Replace any damaged cables and tighten any loose connections.

RETURN TO
TABLE OF
CONTENTS
- 6 -
SERVICING LEAD ACID BATTERIES WITH HYDROLINK®
WATERING SYSTEM
WARNING: Battery posts, terminals, and related accessories contain lead and lead compounds, chemicals
known to the State of California to cause cancer and reproductive harm, and during charging,
strong inorganic acid mists containing sulfuric acid are involved, a chemical known to the State
of California to cause cancer. Wash hands after handling. For more information go to www.
P65Warnings.ca.gov.
1. Position the container of distilled water below the level of the top of the batteries
to prevent siphoning.
2. Place the end of the watering system hose in the distilled water and squeeze the
bulb to ll the system.
3. Remove the dust cover from the Hydrolink® snake connected to the batteries.
4. Connect the coupler on the Hydrolink® snake to the coupler on the watering
system using the quick disconnect ttings.
5. While squeezing the hand pump, observe the ow indicator (spinning red balls).
As the batteries begin to ll, the spinning of the ow indicator balls will slow.
Batteries are full when the ow indicators completely stop spinning.
NOTE: Battery systems may take more than 1/2 gallon of water once the
BatteryShield® light has illuminated. Failure to actuate the hand pump until
the ow indicator stops spinning will result in batteries being under or
unevenly serviced which will reduce battery life.
6. When the ow indicator stops, and not before, immediately disconnect the
couplers by depressing the push button on the watering system coupler.
NOTE: Leaving the watering system connected could result in the batteries being
over lled. Disconnecting the watering system before the ow indicator stops
spinning will result in batteries being under serviced and battery life will be
reduced.
7. Replace the dust cover on the Hydrolink® snake.

RETURN TO
TABLE OF
CONTENTS - 7 -
BATTERYSHIELD®AUTOMATED WET BATTERY PROTECTION
SYSTEM
Scrubbers equipped with BatteryShield® technology have a sensor on the battery pack and a red LED indicator
on the control panel which monitor and communicate low water conditions.
1. When batteries are fully charged and the key is turned on, BatteryShield® will check the water level.
• If the LED remains o, there is sucient water in the batteries.
• A solid red LED means BatteryShield® senses a low-water level. The brush motor will be
disabled to prevent battery damage.
• A blinking red LED means the BatteryShield® light pipe needs to be cleaned (see below).
NOTE: Failure to clean the HydroLink® light pipe will limit the BatteryShield’s® ability to read the water level
and will reduce battery life.
2. Turn the key o and use the HydroLink® single-point battery watering system to ll the batteries.
NOTE: Battery packs equipped with BatteryShield® may take more than 1/2 gallon of water after the
BatteryShield® LED has illuminated. Failure to pump the HydroLink™bulb until it will no
longer compress may result in uneven battery servicing and premature battery failure�
3. After completing the HydroLink® watering procedure, cycle the key to verify the LED stays o.

RETURN TO
TABLE OF
CONTENTS
- 8 -
CLEANING THE BATTERYSHIELD® SENSOR LIGHT PIPE
WARNING: Battery posts, terminals, and related accessories contain lead and lead compounds, chemicals
known to the State of California to cause cancer and reproductive harm, and during charging,
strong inorganic acid mists containing sulfuric acid are involved, a chemical known to the State
of California to cause cancer. Wash hands after handling. For more information go to www.
P65Warnings.ca.gov.
WARNING: Do not wear jewelry when working near moving or electrical components.
WARNING: Batteries emit hydrogen and oxygen gas.
-Keep sparks and open ame away. Do not smoke near the machine.
-Charge batteries in a well-ventilated area with the battery compartment open.
CAUTION: Always wear protective clothing, gloves and goggles when handling and charging batteries.
NOTE: Failure to clean the HydroLink® light pipe will limit the BatteryShield’s® ability to read the water level
and will reduce battery life.
1. Remove the cap with the black sensor module, being careful not
to damage the yellow oats. Do not remove the black module from
the cap assembly.
2. Thoroughly wipe the clear light pipe next to the middle yellow
oat, paying attention to the tip of the pipe.
3. While the cap is still removed, cycle the key and verify the LED
stays on steady. Turn the key o.
4. Carefully align the cap and press it rmly onto the battery
making sure it is fully seated.
5. Complete the battery servicing procedures above, cycle the key,
and verify the light stays o.
6. The machine is ready for use.

RETURN TO
TABLE OF
CONTENTS - 9 -
CHARGING
WARNING: Battery posts, terminals, and related accessories contain lead and lead compounds, chemicals
known to the State of California to cause cancer and reproductive harm, and during charging,
strong inorganic acid mists containing sulfuric acid are involved, a chemical known to the State
of California to cause cancer. Wash hands after handling. For more information go to www.
P65Warnings.ca.gov.
WARNING: Do not plug in charger cable if wall cord or battery harness is damaged.
NOTE: Do not use an extension cord. This will void the warranty on the charger.
NOTE: Ensure battery charging and storage locations comply with OSHA and any governing agencies’
standards based on your particular location and application.
ON-BOARD CHARGER
The on-board charger has three LEDs to indicate the status of the charging cycle when it is plugged in:
LED INDICATION MEANING
GREEN ashing (2 seconds) Charger is set for AGM batteries
YELLOW ashing (continuous) Unsuitable battery connected or output short circuit
RED ashing (2 seconds) Charger is set for Lead Acid batteries
RED ashing (continuous) Safety timer exceeded or internal short circuit
Solid GREEN The unit is fully charged
Solid YELLOW Phase 2 of charging is in progress
Solid RED Charging cycle has begun
NOTE: Do not use an extension cord. This will void the warranty on the charger.

RETURN TO
TABLE OF
CONTENTS
- 10 -
SETTING THE CHARGER ON MACHINES PURCHASED WITHOUT
BATTERIES
Congure the charging prole to the type of batteries installed on the machine. Switch banks SW1 and SW2
are located behind the label on the lower right corner of the charger next to the green LED.
DP2 DP1 CHARGING CURRENT
ON ON 15A
ON OFF 20A
OFF ON 25A
OFF OFF 25A
SW2: Set the charge current according to the battery amp hour rate
(Reference CHARGE CURRENT AND BATTERY AMP
HOURS table below).
SW1: Set the current prole according to the battery installed.
DP2 DP1 CHARGING CURRENT
OFF ON Lead-Acid (Wet) Batteries
OFF OFF AGM FULLRIVER
ON OFF AGM DISCOVER
ON ON Gel
CHARGING CURRENT BATTERY AMP HOUR RANGE
(5h) (20h)
15A 100-150 Ah 130-180 Ah
20A 120-195 Ah 150-240 Ah
25A 180-258 Ah 220-315 Ah

RETURN TO
TABLE OF
CONTENTS - 11 -
OFF-BOARD CHARGER
WARNING: Battery posts, terminals, and related accessories contain lead and lead compounds, chemicals
known to the State of California to cause cancer and reproductive harm, and during charging,
strong inorganic acid mists containing sulfuric acid are involved, a chemical known to the State
of California to cause cancer. Wash hands after handling. For more information go to www.
P65Warnings.ca.gov.
WARNING: Do not plug in charger cable if wall cord or battery harness is damaged.
NOTE: Ensure battery charging and storage locations comply with OSHA and any governing agencies’
standards based on your particular location and application.
Set the Battery Type switch to match the battery conguration of the machine.
• Up for Lead Acid batteries.
• Down for sealed, maintenance-free AGM batteries
1. Connect the charger to the wall outlet.
2. Connect the red plug (pictured below) to the battery harness below the control panel at the rear of the
machine.
O-board status LEDs:
• Primary (green) LED:
• Blinking slowly: Batteries are below 80% of full charge.
• Blinking rapidly: Batteries are above 80% of full charge.
• Solid: Batteries are fully charged.
• Fault (red) LED:
• See the charger manual for fault information.

RETURN TO
TABLE OF
CONTENTS
- 12 -
PRE-USE SETUP
The key switch is located on the control panel. When the machine is not in use, remove the key and store it in a
secure location.
TURNING THE UNIT ON/OFF
CIRCUIT BREAKERS
The circuit breakers on the control panel protect the components from high amp-draw. In particular, the scrub
head circuit will draw too many amps when overloaded by improper application setup. Solution ow, oor sur-
face, and down-pressure should be considered when operating the machine (example: high down-pressure on a
rough oor with no solution ow will overload the circuit). Repeatedly tripping the breaker will cause the need
for replacement.
BATTERY POWER LEVEL & FAULT INDICATORBATTERY POWER LEVEL & FAULT INDICATOR
When switched to the ON position, the Battery Power Level Indicator illuminates indicating
the battery charge level. A full charge is indicated when all LEDs are lit. As the power level
decreases, the LEDs go out from right to left.
When the battery charge is depleted, the last red LED will ash and the brush motor will turn o. The vacuum
and traction drive will continue to function allowing nal water recovery and transport to the charging station.
NOTE: Using AGM battery-equipped units after the last yellow LED goes out can reduce the life of the
batteries.
NOTE: After a ll charge, operate the machine for at least 30 minutes before recharging the batteries again. Do
not leave the batteries discharged overnight.
A ashing Battery Power Level Indicator indicates a detected fault. The following is a list of fault codes:
The battery needs to be charged or there is a faulty connection to the battery.
Check the connection to the motor.
The motor has a short circuit.
The controller is being inhibited from driving.
Throttle fault, check the connection.
Controller fault, check connections
Parking brake fault, check the motor connections.
Excessive voltage, check the battery connections.

RETURN TO
TABLE OF
CONTENTS - 13 -
DRIVE SYSTEMDRIVE SYSTEM
DRIVING OPERATION
1. Bail: Squeezing the Bail activates solution ow, the brush motor, and traction drive.
2. Speed Control: Rotate the Speed Control with either thumb.
• Clockwise: Faster
• Counter-Clockwise: Slower
3. Reverse Button: Depress Reverse Button and squeeze Bail for reverse operation.
123
SOLUTION DISTRIBUTIONSOLUTION DISTRIBUTION
FILLING THE SOLUTION TANK
Use liquid detergent in the concentration and manner specied by the manufacturer for a 22-gallon solution
tank. Excess foam will damage the vacuum motor. In addition to properly-mixed low-foam detergent, use a
small amount of de-foaming liquid in the recovery tank. Never use pure acids.
NOTE: The front ll port strainer blocks debris from falling into the tank. Keep the solution tank free from
debris to prevent lter clogs and reduced solution ow.
1. Add water and cleaning agent via the front or rear ll port. Water temperature should not exceed 120°F
(50°C).
2. Monitor the solution level through the sight tube and the marks on the tank at the rear of the machine.
3. To drain the tank, slide the solution sight tube o of the upper tting and lower to a drain or mop sink.
FILL PORTS
12
3

RETURN TO
TABLE OF
CONTENTS
- 14 -
INSPECTION & CLEANING
NOTE: If excessive debris is present, drain and ush the solution
tank.
1. Close the shuto valve.
2. Remove the lter bowl and screen.
3. Clean and rinse any debris in the lter assembly.
SOLUTION FLOW: NON-CHEMICAL INJECTION MODELS
The Solution Control Knob is located on the top left corner of the control panel. The valve electrically turns on
and o with the Scrub Head. The knob controls how much solution passes through the valve when activated.
OPTIONAL CHEMICAL INJECTION MODELS
1. Place a 1-gallon chemical container in the holder in the battery compartment and remove the cap.
2. Insert the leader hose so that the end is resting on the bottom of the container and screw on the cap.
3. Match the mix ration dial on the control panel to the setting (in ounces per gallon) prescribed on the
chemical’s container.
4. Set the solution ow rate to low, medium, or high.
5. A solid green LED indicates that the system is automatically mixing the chemical while the machine
operates.
NOTE: If the detergent is not priming, temporarily select a higher setting until detergent appears on the oor.
NOTE: To purge old detergent, set the mixture dial to the highest ration and run until the leader hose line is
empty.

RETURN TO
TABLE OF
CONTENTS - 15 -
SCRUB DECK SETUPSCRUB DECK SETUP
STANDARD DOWN
PRESSURE
MEDIUM DOWN
PRESSURE
HEAVY DOWN
PRESSURE
HEAD LIFT
• Depress the foot lever (located at the lower right rear
corner of the machine) and shift it to the right.
• Once clear of the notch, allow the lever to rise while
the head lowers into the operating position.
• Disk machines are equipped with a self-adjusting
shroud and bristle skirt that virtually eliminates over-
spray.
SELECTING DOWN PRESSURE
1. Standard: For daily cleaning of normal soils.
2. Heavy: For toughest soils or chemical-free nish removal.
SCRUB HEAD DOWN PRESSURE
24” DISK 28” ORBITAL 28” & 32” DISK
STANDARD 50 lbs (23kgs) 70 lbs (32 kgs) 70 lbs (32 kgs)
MEDIUM 100 lbs (45 kgs) 110 lbs (50 kgs) 110 lbs (50 kgs)
HEAVY 140 lbs (64 kg) 160 lbs (73 kgs) 150 lbs (68 kgs)

RETURN TO
TABLE OF
CONTENTS
- 16 -
ORBITAL PADS & CHEMICAL-FREE FINISH REMOVAL (CFR)
NOTE: Do not lower the orbital head without a pad installed. Doing so may damage the Mighty-Lok® face.
STANDARD CLEANING OPERATIONS
1. Align the corners of the pad to the corners of the aluminum plate and press to attach.
2. Lower the scrub deck onto the pad.
3. Ensure the pad is properly aligned front-to-back and left-to-right.
CHEMICAL-FREE FINISH REMOVAL (CFR) PAD ASSEMBLY
A specialized surface preparation pad, in addition to the traditional cleaning pad, is required for chemical-free
nish removal. The traditional pad acts as a “backer pad” and compensates for variances in the oor.
1. Place the black retainer pad 2” back from the front of the red
scrub pad and the maroon CFR pad to allow water saturation.
2. Align and assemble the pads with the red pad on top and the
maroon pad on the bottom facing the oor.
3. Ensure the gap mentioned in step 1 is facing forward and refer
to steps 1-3 of “Standard Cleaning Operations” above to
install the CFR Pad Assembly.
MACHINE SETUP
1. Install the CFR Pad Assembly as described above.
2. Fill the solution tank with clean water.
3. Set the down pressure to Heavy (see “Selecting Down Pressure” above).
4. Set the solution ow to midrange. Adjust as needed for maximum nish removal, using the least amount of
water needed for eective rinsing.
5. Adjust the machine speed as required.
Other manuals for S-24
1
This manual suits for next models
2
Other Pacific Floorcare Scrubber manuals

Pacific Floorcare
Pacific Floorcare S-SERIES User manual

Pacific Floorcare
Pacific Floorcare S-20 User manual

Pacific Floorcare
Pacific Floorcare RS28 User manual

Pacific Floorcare
Pacific Floorcare S-28HD User manual

Pacific Floorcare
Pacific Floorcare S-24XM User manual

Pacific Floorcare
Pacific Floorcare S-24 User manual

Pacific Floorcare
Pacific Floorcare QS-12 User manual