Pager Genius T9005 User manual

Pager Genius
Paging System
USER MANUAL
Pager P2000
T9005/P2000
Transmitter T9005
www.pagergenius.com
Pager Genius, INC.
9852 W Katella Ave, Suite #500, Anaheim, CA 92804

www.pagergenius.comUser manual 2
T9005/P2000
Thank you for purchasing
the Pager Genius System
We provide a great paging product, and 24-7 customer service. Please
familiarize yourself and sta with the contents of this instruction in order
to properly operate and maintain your system. If you have any question or
service problems, please call.
Please keep this manual in a safe place for the sta and managers to
view in the future.
1-800-289-3823
9852 W Katella Ave, Suite #500,
Anaheim, CA 92804

www.pagergenius.comUser manual 3
T9005/P2000
TABLE OF CONTENTS
TRANSMITTER KEYPAD OPERATION
PAGING YOUR PAGER
CANCELLING A PAGE
RESETTING A PAGER TO THE TRANSMITTER
GROUP PAGING
CHARGING THE PAGERS
SETTING THE PAGER ALERTS
SETTING THE TIME ON THE PAGER
SETTING THE DURATION OF THE PAGE
CLEANING THE PAGERS AND TRANSMITTERS
TROUBLE SHOOTING
WARRANTY
PAGER GENIUS PAGING SYSTEM
If you are a new customer to Pager Genius, your paging system has already
been set-up, and are ready to use right away. If your pagers have completely
died, plug them in, and the pagers will read LOBT, which means low battery.
LOBT will display on the pager for 10 to 20 minutes, and then the pager
numbers will start showing up.
Test the range of the paging system by doing test paging around the
property. If range is a issue for some reason, we do sell range extenders that
more than triple the range, and you can use as many range extenders as
needed to cover whatever kind of area you are looking to cover.
4
4
4
5
6
6
7
8
8
9
9
10

www.pagergenius.comUser manual 4
T9005/P2000
TRANSMITTER KEYPAD OPERATION
The other buttons should not be pressed, and are used for programming.
The only buttons that should be pressed is the Numbers, Enter, and Cancel.
PAGING YOUR PAGER
The Pager Genius Transmitter can page single pages numbered 1-999. To
pager a pager, simply press the number of the pager you would like to page
followed by the enter key.
Example: To page pager #15, press 15 on the keypad followed by enter.
CANCELLING A PAGE
There are two ways to cancel a page:
1. You can cancel the page by pressing the number of the pager you want
canceled followed by cancel.
Number Keys (1-99)
Press the number of the pager
you wish to notify
Cancel
To cancel a page, press the number
of the pager followed by the cancel
button
Enter
To send the numeric page

www.pagergenius.comUser manual 5
T9005/P2000
2. You can place the pager back on its charging stack, and the page will cancel
automatically.
RESETTING A PAGER TO THE TRANSMITTER
When you order more pagers, our we send you out a replacement pager, you
will need to add the pagers to the transmitter. Below are the following steps
to add a pager to your system:
Step 1: Turn the pager around, and press the Learn button, the middle
button on the rear of the pager. The digital display of the pager will read [----].
Step 2: Press the number you would like the pager to display, followed by
the enter button. The pager will start alerting, and the pager number will
have changed to the number entered.
The pager will always display this number, unless the settings are changed
manually by the end user.
Step 1:
Press the Learn button
to reset the Pager
Step 2:
Use Number Keys to
input a number for
the selected Pager
Step 3:
Press the Enter
button to conrm
and save the number

www.pagergenius.comUser manual 6
T9005/P2000
GROUP PAGING
With your Pager Genius System group paging is an option.
For example, you can group numbers together, you can have ten #1 pagers and
ten #2 pagers, when #1 is paged all ten #1 pagers go o all at the same time.
You can go from group paging back to individual paging in a matter of
minutes. All end users can make changes on the y, and have complete
control of how the pagers are grouped.
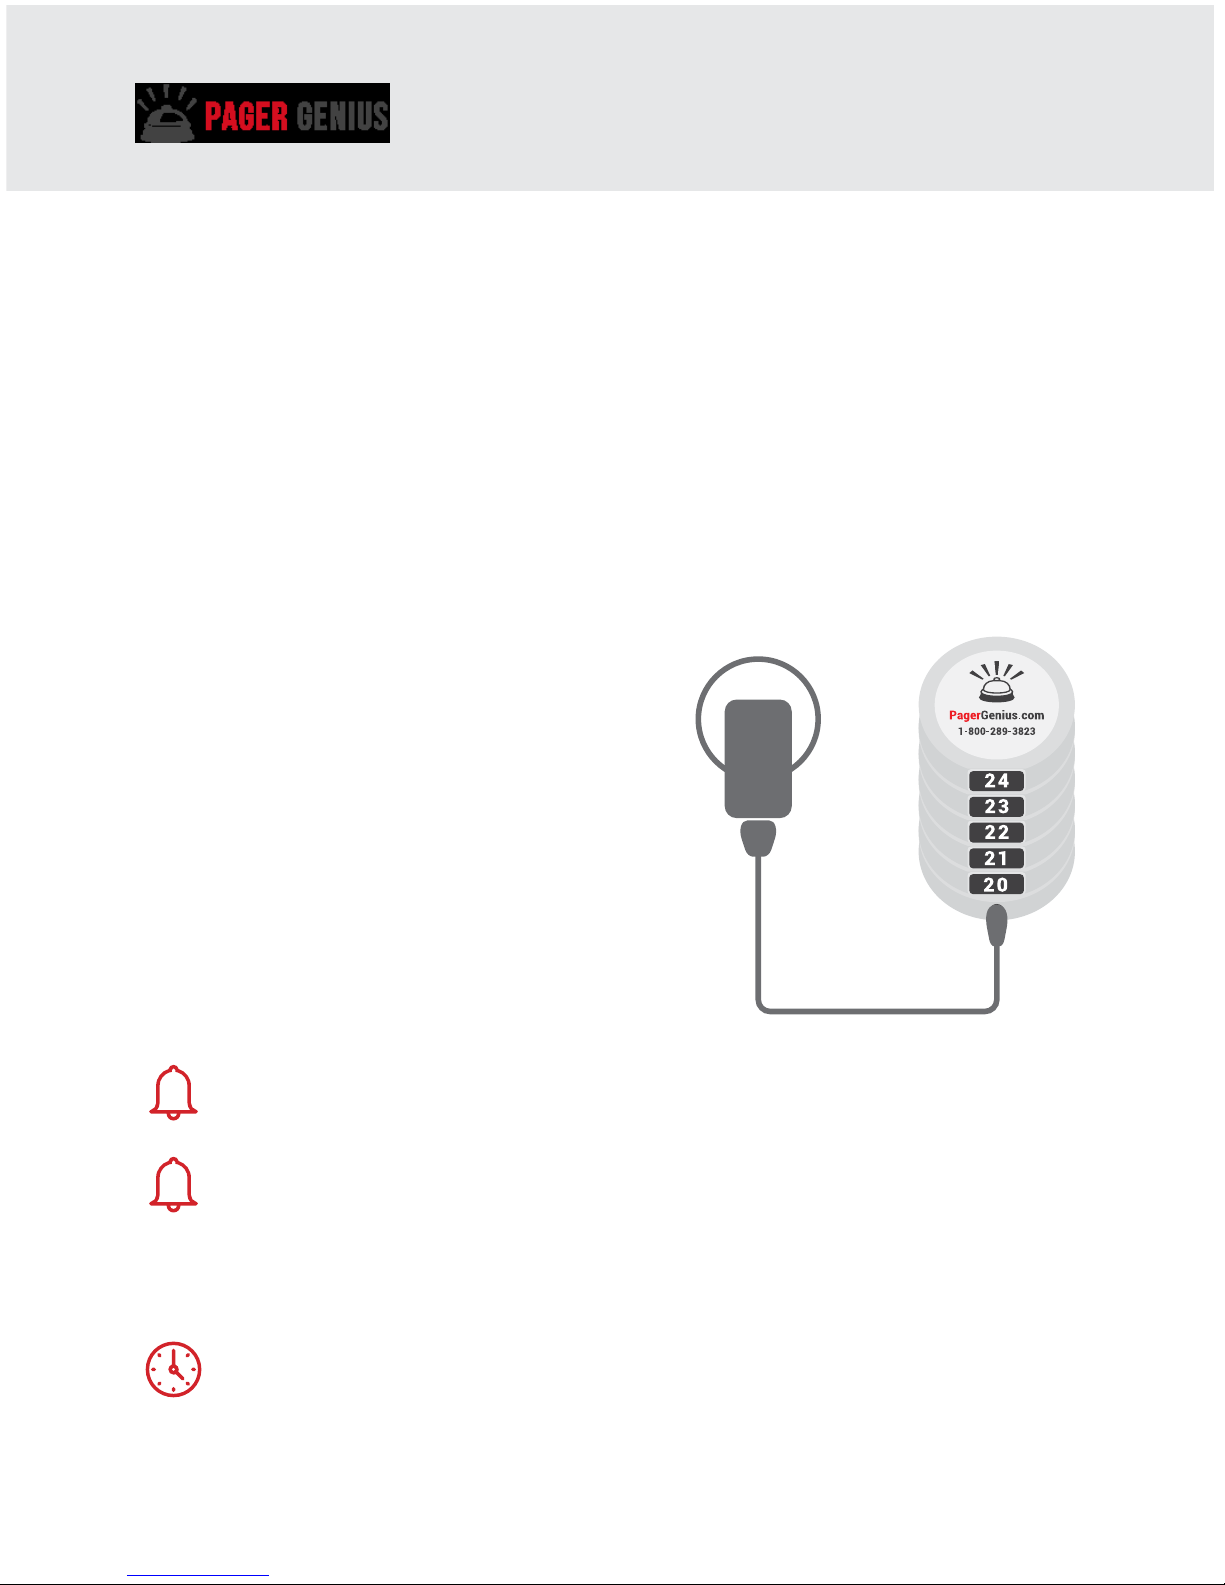
CHARGING THE PAGERS
The pagers sit on to of a charging base
that is plugged into a power outlet. One
charging base can support up to 15
pagers.
Pager Genius provides a charging base
for every 10 pagers ordered.
There is a charging light at the rear of the
pager, and when the pagers are charging
properly, you can see the charging light
illuminate on the rear pager.
Encourage sta to always look for the charging light illumination
when closing at night.
It is important that the pagers always be charging, even when they
are not being used for long periods of time.
Once the pagers are fully charged, they take up very little electricity. Once
fully charged, the pagers can operate up to ve days without charging.
The pagers fully charge in just 90 minutes time.

www.pagergenius.comUser manual 7
T9005/P2000
SETTING THE PAGER ALERTS
You have the option to have the pager do one, two, or all three of the
following alerts; Vibrate, Light-Up, and Beep.
Also the pager has a clock option, where the pager can display the time of
day on it's digital display.
Below are directions on how to change alerts for individual pagers:
Step 1: Turn the pager around and press the Mode button.
Step 2: Press the Learn button several times until you nd the setting you are
looking for: F(Flash), B(Beep), S(Vibrate), C (Clock).
If the pager digital screen is displaying FB, the pager will only Flash and beep.
If the pager is displaying FBS, the pager will ash, beep, and vibrate.
After you are done choosing your setting press the Stop button.
Step 1:
Press the Mode button
to set up the Pager
Step 2:
Press the Learn button
several times to nd the
setting you are looking for
Step 3:
The pager digital
screen will display
the setting

www.pagergenius.comUser manual 8
T9005/P2000
SETTING THE TIME ON THE PAGER
Pager Genius pagers keep military time, and is
anoption if you would like you pagers to display time.
How to set-up the time display on a pager:
Step 1: Make sure the pager has the C (Clock) setting
option selected.
Step 2: Press the Mode button several times until
you get the correct hour, and then press the Stop
button to move the time to the minutes area. You
use the Stop button to toggle between the hours and
minutes.
SETTING THE DURATION OF THE PAGE
You can have the pagers alerted 15, 30, 45, 60, and 90 seconds time. Usually
15 seconds is a good amount of time to alert the person you are looking to page.
If the person does not respond to the rst page, you can keep alerting the
person over and over again.
You can change the paging time by turning a pager over and locating the
time switches.
Move the switches back and forth, each time you do the time will move on
the digital display. Set the time that is right for your environment
The pager digital
screen will display
C (Clock)

www.pagergenius.comUser manual 9
T9005/P2000
CLEANING THE PAGERS AND TRANSMITTERS
We recommend using isopropyl alcohol based cleaners to clean the pagers
and transmitter. This is the only approved cleaner that we recommend at this
time. It is recommended the paging system be wiped down once a week.
TROUBLE SHOOTING
Pagers do not vibrate, beep or light-up anymore
Make sure that the feature alert mode is set in the correct setting (See page 6).
The range of the transmitter is covering most of the building and parking lot,
but I need the signal to cover the entire area. (BOLD Print)
If you need to increase the range of your current paging system,
Pager Genius has the tools to do this. We sell a Pager Genius Range
Extenders (Model RE8000) on our website www.pagergenius.com.
One of our pagers is dead
Make sure there are no obstructions on the bottom two metal charging
docks on the rear of the pager.
If a pager is displaying LOBT, this means that the pager battery is low,
and in 20 minutes time the pager number will appear.
Tighten up the pager with a small phillips screwdriver, place it directly
on top of the charging dock, look for the charging light at the rear of
the pager, and the LOBT display. In less than 20 minutes time the
pager will be operational again.

www.pagergenius.comUser manual 10
T9005/P2000
WARRANTY
Pager Genius warrants this product against any defects that are due to faulty
material or workmanship for a standard two-year period after the original
date of consumer purchase. The warranty does not include damage to the
product resulting from accident, misuse, improper electrical connection, or
failure to charge the product within 35 days of receipt. Rechargeable pagers
are required to stay on charge while not in use. Rechargeable pagers that are
left o of charge for longer than 35 days will have a negative impact on the
life of the batteries requiring them to be replaced thus voiding the warranty.
If this product should become defective within the warranty period, we will
repair or replace it with a replacement product, free of charge. Pager Genius
will pay for shipping to and from if there is a problem under the warranty.
Pager Genius Customer Support
1-800-289-3823
9852 W Katella Ave, Suite
#500, Anaheim, CA 92804

www.pagergenius.comUser manual 11
T9005/P2000
FCC STATEMENT
1. This device complies with Part 15 of the FCC Rules. Operation is subject
to the following two conditions: (1) This device may not cause harmful
interference. (2) This device must accept any interference received, including
interference that may cause undesired operation.
2. Changes or modications not expressly approved by the party responsible
for compliance could void the user's authority to operate the equipment.
NOTE: This equipment has been tested and found to comply with the limits
for a Class B digital device, pursuant to Part 15 of the FCC Rules.
These limits are designed to provide reasonable protection against harmful
interference in a residential installation. This equipment generates uses
and can radiate radio frequency energy and, if not installed and used in
accordance with the instructions, may cause harmful interference to radio
communications. However, there is no guarantee that interference will not
occur in a particular installation.
If this equipment does cause harmful interference to radio or television
reception, which can be determined by turning the equipment o and on,
the user is encouraged to try to correct the interference by one or more of
the following measures:
• Reorient or relocate the receiving antenna.
• Increase the separation between the equipment and receiver.
• Connect the equipment into an outlet on a circuit dierent from that to
which the receiver is connected.
• Consult the dealer or an experienced radio/TV technician for help.
RF warning statement: The device has been evaluated to meet general
RF exposure requirement. The device can be used in portable exposure
condition without restriction.
Other manuals for T9005
1
This manual suits for next models
1
Table of contents
Other Pager Genius Microphone manuals
Popular Microphone manuals by other brands

Austrian Audio
Austrian Audio OC707 owner's manual

PCB Piezotronics
PCB Piezotronics 377 Series Installation and operating manual

Monacor
Monacor JTS UT-16HW-5 manual

Shure
Shure Microflex MX424/N Online user's guide

Motorola
Motorola RMN5065 instruction manual

Electro-Voice
Electro-Voice PL4 Specification sheet

Audio Technica
Audio Technica AT2020 Operation and maintenance

Sennheiser
Sennheiser SpeechLine IS Series instruction manual

Zoom
Zoom MicTrak M4 Update guide

Sennheiser
Sennheiser MD 22 Instructions for use

Sennheiser
Sennheiser ME 34 Product sheet

Audio Technica
Audio Technica ES905 Installation and operation