Palmer Fixture HD0950-09 Service manual

Automatic
Hand Dryer
PALMER
FIXTURE
COMPANY
Palmer Fixture Company
P.O. Box 10887
Green Bay, WI 54307
1-800-558-8678
www.palmerfixture.com
BERLS.COM (704) 937-2673 129 Oakpark Drive, Unit A, Mooresville, NC 28115
COMMERCIAL
SUPPLY

BERLS.COM (704) 937-2673 129 Oakpark Drive, Unit A, Mooresville, NC 28115
COMMERCIAL
SUPPLY

Operating Instructions and Parts Manual (Automatic)
Surface Mount
Hand dryer
HIGHSPEED
COVER TYPE/ COVER FINISH
1
ITEM CATEGORY
Operating Voltage
Warm Air Speed Output
Air Output Temperature
Dryer Shall Deliver
Motor Type
Motor Thermal Protection
Heater Element
Heater Thermal Protection
Drying Time
Circuit Operation
Sensor Range
Timing Protection
Drip proof
Isolation
Net Weight
Shipping Weight
Unit Size
PERFORMANCE DATA
TECHNICAL SPECIFICATIONS
HD-0950-09 110-120Vac, 50/60 Hz, 1.19-1.4 kW
HK-0951-09 220-240Vac, 50/60 Hz, 1.19-1.4 kW
145.4-212.5 mi/hr (65-95 m/s), adjustable
131 (5 ) (25 )°F 5°C – Ambient Temp. 77°F °C
32.4-58.9 CFM (55-100 m³/h)
350-700W, 12000-18000 R.R.M., Adjustable;
Brush Type, Dual Ball Bearings
Auto Resetting Thermostat turns unit off,
120V at 275°F (135°C), 240V at 221°F (95°C)
450-700W, adjustable
Auto Resetting Thermostat turns unit off at, 185°F (85°C)
Less than 15 seconds
Infrared Automatic, self adjusting
4” to 13" [51 mm to 330 mm], adjustable; standard 7" [18 cm ± 2 cm]
60 seconds auto shut off
IP31
CLASS 1
12.1 lbs (5.5 kgs)
13.4 lbs (6.1 kgs)
8-15/16" W x 11-3/16” H x 6-31/32" D [227 mm x 284 mm x 177 mm]
PALMER
FIXTURE
COMPANY
284 mm
227 mm177 mm
HD0950-09
HD0951-09
Stainless steel; #4 satin finished. (AISI 304 t:1.5 mm)
BERLS.COM (704) 937-2673 129 Oakpark Drive, Unit A, Mooresville, NC 28115
COMMERCIAL
SUPPLY

General safety information
2
Disconnect power at
the service breaker before installing or
servicing. Full pole disconnection device
must be incorporated in the fixed wiring
This product is
intended for installation by a qualified
service person. Use 2.0 mm² (AWG NO.14)
solid conductor for wiring.
All units must be
supplied with a 3-wire service. The
ground wire must be connected to the
dryer's backplate.
Failure to properly
ground unit could result in severe
electrical shock and/or death.
【Type Y attachment】
If the power supply cord is damaged, it must be replaced by the manufacturer
or its service agent or a qualified person in order to avoid a hazard. Disconnect
the fixed wiring only in accordance with the wiring rules.
This appliance is not intended for use by persons (including children) with
reduced physical, sensory or mental capabilities, or lack of experience and
knowledge, unless they have been given supervision or instruction concerning
use of the appliance by a person responsible for their safety.
Children should be supervised to ensure that they do not play with the appliance.
NOTE: We do not recommend installing this dryer above a basin. If you are installing
this dryer above a basin, please make sure that reflection won’t occur.
in accordance with the wiring rules.
Circuit Diagram
Motor With Ther mal Switch
Circuit Board Module
SENSOR
Transistor
Power Switch
Heater With Thermo-fuse
Thermostat
G
NL
Brown
Blue
G/Y
1 2 3 4 5
MO2 HE2
N L
MO1 HE1
VR
Red (110-120~Vac)
Brown(220-240~Vac)
Black
Black
White(110-120~Vac)
Blue(220-240~Vac)
Operating Instructions and Parts Manual
Hand Dryer Surface-mounted high speed hand dryer
BERLS.COM (704) 937-2673 129 Oakpark Drive, Unit A, Mooresville, NC 28115
COMMERCIAL
SUPPLY

Installation
1. Make sure power supply breaker is switched off. Installation must be carried out in accordance
with the current edition of the local wiring regulations code having jurisdiction. Installation should
be performed only by a qualified electrician.
2. Place template against wall at desired height (see mounting height recommendations) and mark
locations of 4 mounting holes and wire service entry at knockout (KO) location.
Note: For two or more dryers, dryers should be no closer than 24 inches (610 mm) on center.
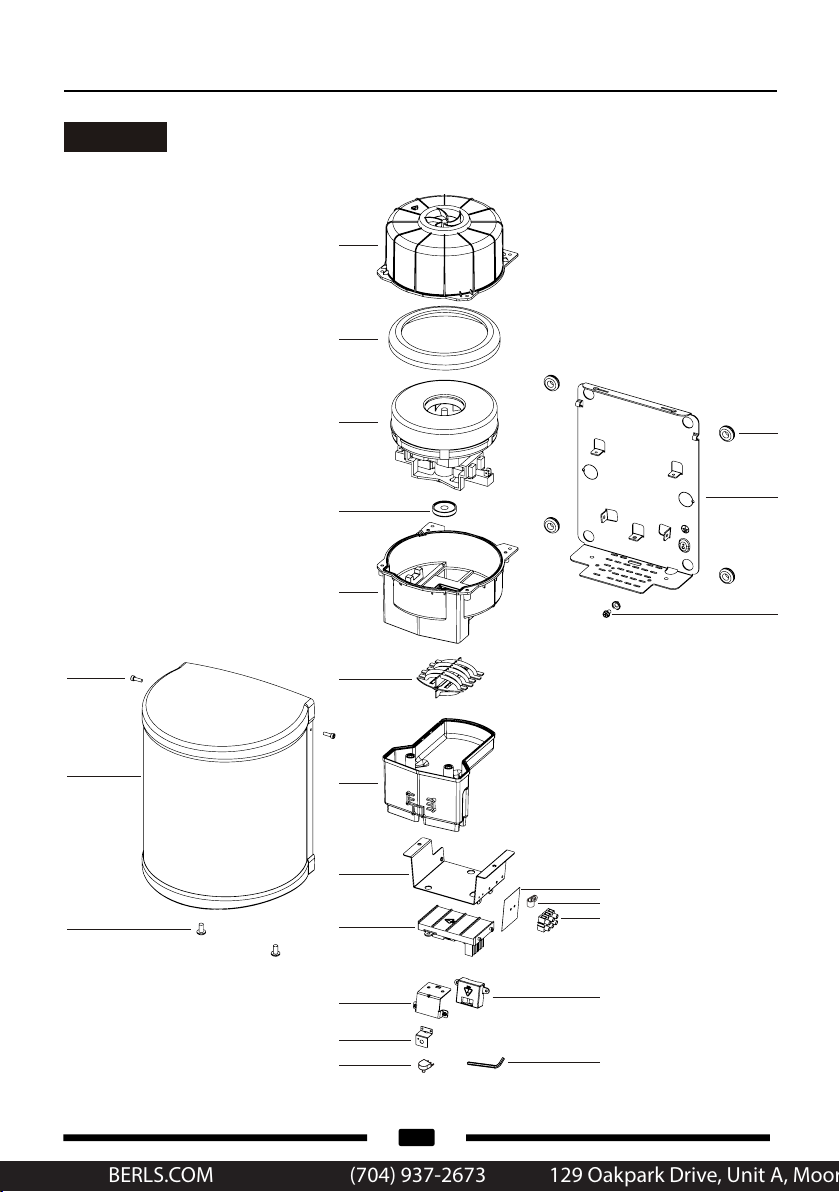
3. Remove upper and lower retaining screws with the Allen wrenches provided.
4. Connect supply wires to terminal block where indicated and connect ground wire to base plate
with ground screw
Connections :
A. Connect the live wire (colored red or brown or white) to the terminal block where marked " L ".
B. Connect the neutral wire (colored black or blue) to the terminal block where marked " N ".
C. Connect the earth wire (colored green and yellow or green), note bare earth wires should be
Note that colors of live and neutral wires depend on voltage of supply service.
5. Replace cover. Do not over-tighten screws.
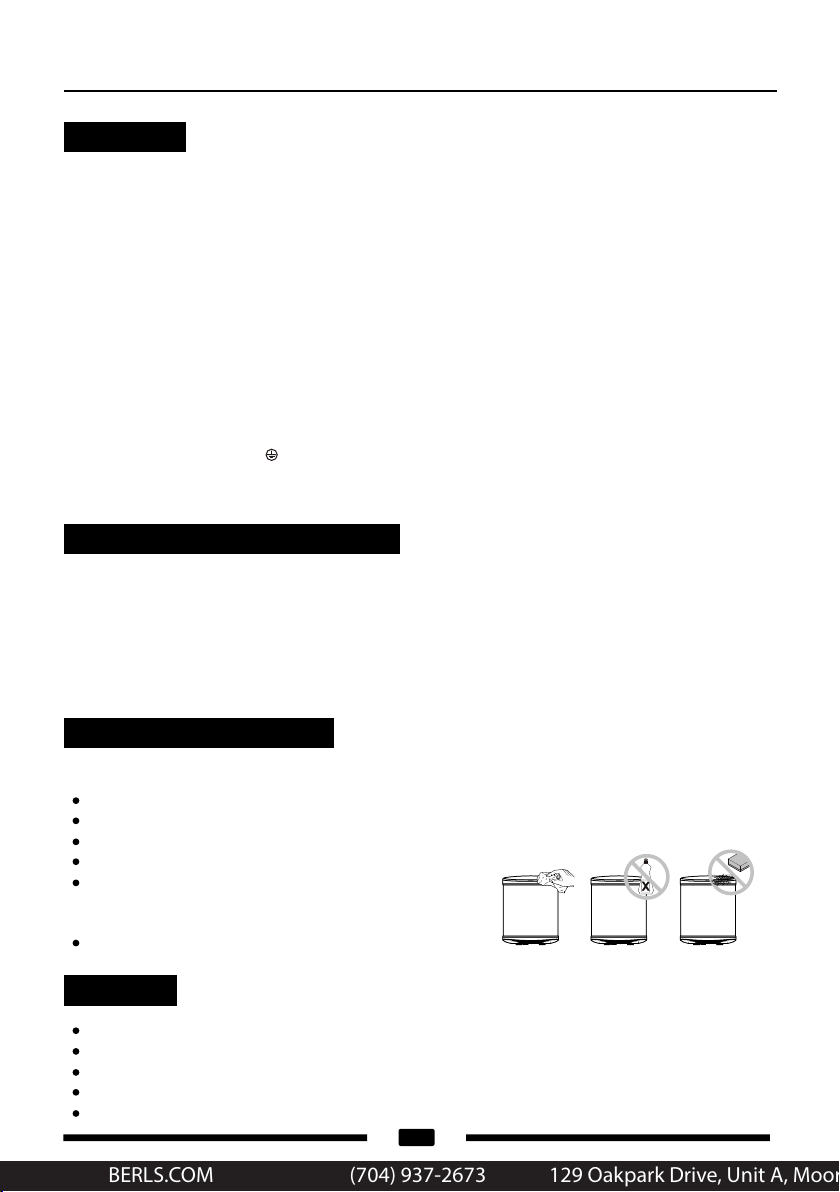
Operation
No-touch operation.
Shake excess water from hands.
Place hands under the outlet to start operation.
Rub hands lightly and rapidly.
Stops automatically after hands are removed.
Periodic cleaning of the unit is recommended to ensure optimum performance.
Cleaning and Maintenance
Disconnect the electrical supply.
Remove upper and lower retaining screws with the Allen wrenches provided.
Remove the cover.
Clean all dust lint from the interior of the dryer.
Wipe the cover with a damp cloth and mild
cleaning solution. Do not Soak. Never use
abrasives to clean the cover.
Replace the cover. Do not over tighten the screws.
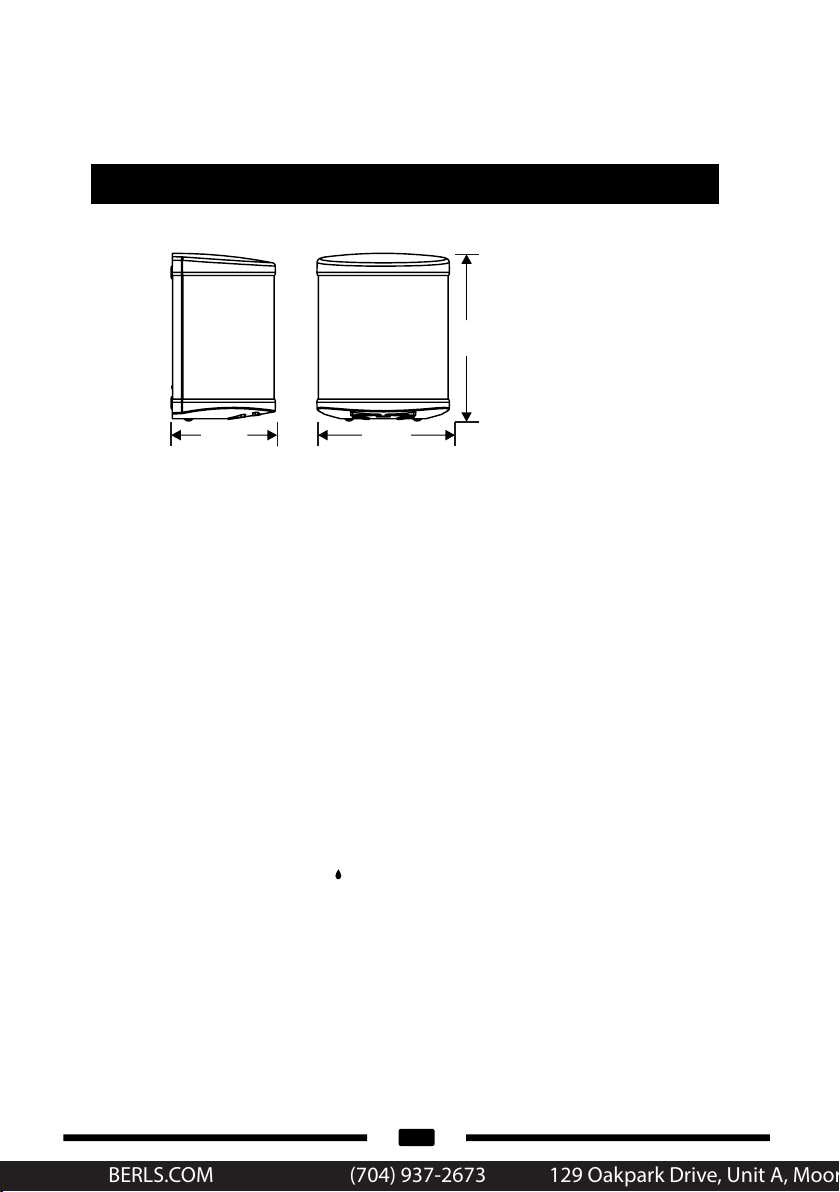
Recommended mounting heights - from bottom edge of dryer above finished floor (AFF)
Men
Woman
Children 4-7 years
Children 8-10 years
Children 11-13 years
Children 14-16 years
Handicapped
50"
47"
35"
39"
43"
47"
40"
(1270 mm)
(1194 mm)
(889 mm)
(991 mm)
(1092 mm)
(1194 mm)
(1016 mm)
3
Operating Instructions and Parts Manual
Hand Dryer Surface-mounted high speed hand dryer
sleeved with green and yellow or green sleeving to the ground washer where marked with
the earth symbol " ".
BERLS.COM (704) 937-2673 129 Oakpark Drive, Unit A, Mooresville, NC 28115
COMMERCIAL
SUPPLY

Diagram
4
1
2
3
4
5
6
7
9
8
10
11
12
13
14
16
17
18
20
19
21
15
22
23
Operating Instructions and Parts Manual
Hand Dryer Surface-mounted high speed hand dryer
BERLS.COM (704) 937-2673 129 Oakpark Drive, Unit A, Mooresville, NC 28115
COMMERCIAL
SUPPLY

Repair parts list
Side cover screw (2 reqd.)
Stainless Steel - Satin finish
Security hex screw (2 reqd.)
Blower housing - Top
Motor rubber - Large
Motor 110-120Vac 700W
Motor 220-240Vac 700W
Motor ruber - Small
Blower housing - Bottom
Heater element 120Vac 700W
Heater element 240Vac 700W
Air outlet
Air outlet bracket
Circuit Board Module 110-120Vac
Circuit Board Module 220-240Vac
Sensor bracket
VR bracket
VR (variable resistance) 50K - 110-120Vac
VR (variable resistance) 100K - 220-240Vac
Rubber grommet -Base (4 reqd.)
Base plate
Grounding screw
Insulation mylar
Cable clamp
Terminal block
Sensor Module
Security hex wrench
Key Description
1
2
3
4
5
6
7
8
9
10
11
12
13
14
15
16
17
18
19
20
21
22
23
5
Operating Instructions and Parts Manual
Hand Dryer Surface-mounted high speed hand dryer
BERLS.COM (704) 937-2673 129 Oakpark Drive, Unit A, Mooresville, NC 28115
COMMERCIAL
SUPPLY

BERLS.COM (704) 937-2673 129 Oakpark Drive, Unit A, Mooresville, NC 28115
COMMERCIAL
SUPPLY
This manual suits for next models
1
Other Palmer Fixture Dryer manuals
Popular Dryer manuals by other brands

Beko
Beko DCJ 83133 W user manual

Whirlpool
Whirlpool WHD5090GW0 Use & care guide

Beko
Beko B3T67249WSPB user manual

Bosch
Bosch WTW85490BY Installation and operating instructions

Bosch
Bosch WTMC3321CN Operating, care and installation instructions

Bharat Bijlee
Bharat Bijlee BP-HLA-981 Installation & user manual