manuals.online logo
Brands
  1. Home
  2. •
  3. Brands
  4. •
  5. Panasonic
  6. •
  7. Camcorder
  8. •
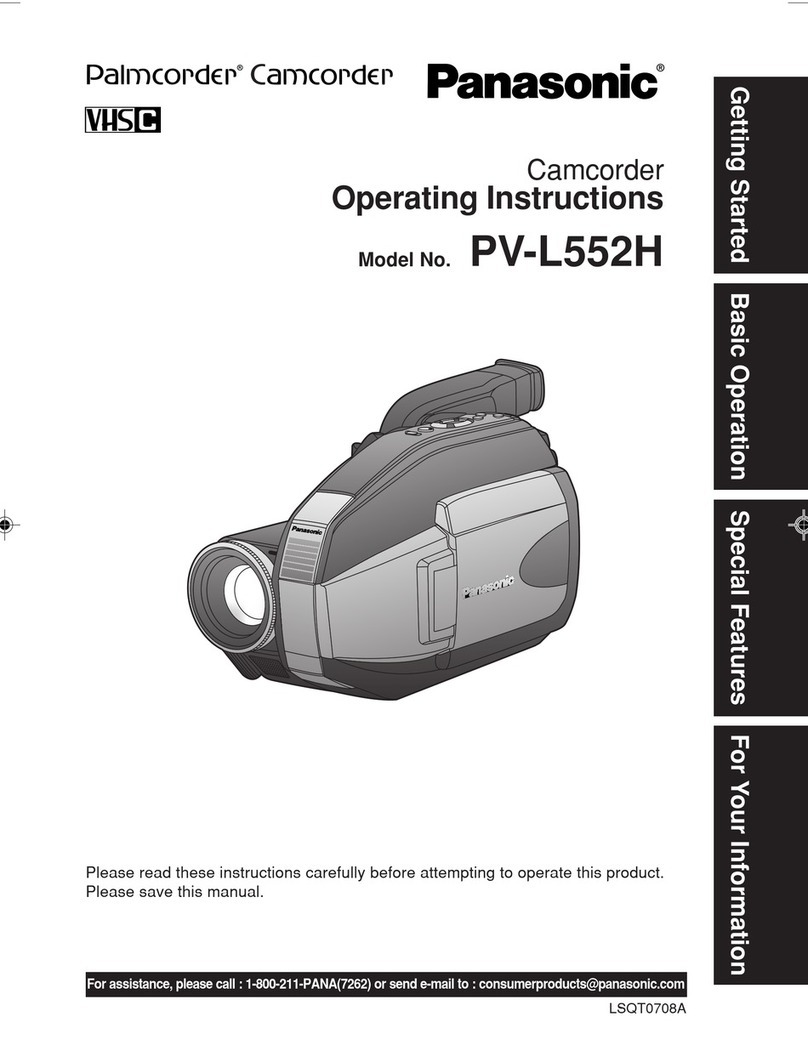
  9. Panasonic Palmcorder IQ PV-A396 User manual

Panasonic Palmcorder IQ PV-A396 User manual

Panasonic’
Palmcorder
IQ
°
Camcorder
Operating
Instructions
PV-A396
Deters
añemplino
to
connait,
opecadar
or
seljuad
Ihia
pradurti,
pies
rund
nane
trial
actio
ther
Dl,
Spanish
Quick
Use
Guide
is
included.
Guia
para
rápida
consulta
en
espanol
está
incluida.
VEL
Wua
dS
Things
You
Should
Know
Thank
you
for
choosing
Panasonic!
You
have
purchased
one
of
the
most
sophisticated
and
reliable
products
on
the
Dealer
Purchased
From
market
today.
Used
properly,
we're
sure
it
will
bring
you
and
your
family
years
of
Dealer
Address
enjoyment.
Please
take
time
to
fill
in
the
information
at
right.
The
serial
number
is
on
|
Dealer
Phone
No.
the
tag
located
on
the
underside
of
your
Palmcorder.
Be
sure
to
retain
this
manual
|
Model
No.
as
your
convenient
Palmcorder
information
source.
Serial
No.
Unpack
your
Palmcorder
These
accessories
are
provided
in
order
to
set
up
or
use
your
Palmcorder.
1
pc.
AC
Adaptor
1
pc.
Battery
Pack
1
pc.
Audio/Video
1
pc.
Shoulder
Strap
(PV-A17)
(PV-BP15)
Cable
(VJAW0032)
(VYCWO108)
with
DC
Power
ze
Cable
Date
of
Purchase
1
pc.
VHS
PlayPak
1
pc.
9-Function
Remote
1
pc.
CR2025
Clock
(PV-P1/VYMWO0009)
(VSQW0031
or
VSQWO0033)
Battery
(VSBW0004)
and
one
"AA"
battery
with
one
Cee?
Battery
(installed
in
Palmcorder)
e?
Remote
has
been
loaded
with
battery
and
comes
stored
in
Palmcorder.
See
page
22.
Safety
Precautions
WARNING:
TO
PREVENT
FIRE
OR
SHOCK
HAZARD,
DO
NOT
EXPOSE
THIS
EQUIPMENT
TO
RAIN
OR
MOISTURE.
Your
Compact
VHS
Palmcorder
is
designed
to
record
This
Palmcorder
is
equipped
with
the
HQ
System
to
and
play
back
in
Standard
Play
(SP)
and
Super
Long
provide
excellen!
video
pictures,
and
is
compatible
Play
(SLP)
modes.
You
can
also
play
a
Compact
VHS
with
standard
VHS
equipment.
Palmcorder
recording
on
your
VHS
VCR
using
the
it
is
recommended
that
only
cassette
tapes
that
have
VHS
PlayPak
supplied.
been
tested
and
inspected
for
use
in
VCR
machines
with
the
and/or
mark
be
used.
This
symbol
warns
the
user
that
uninsulated
voltage
within
the
unit
may
CAUTION
have
sufficient
magnitude
to
cause
electric
ERE
yd
ERE
shock.
Therefore,
it
is
dangerous
to
make
any
kind
of
contact
with
any
inside
part
of
this
unit.
CAUTION:
TO
REDUCE
THÉ
RISK
OF
ELECTRIC
SHOCK,
DO
NOT
REMOVE
COVER
(OR
BACK)
This
symbol
alerts
the
user
that
important
NO
USER-SERVICEABLE
PARTS
INSIDE
literature
concerning
the
operation
and
REFER
SERVICING
TO
QUALIFIED
SERVICE
PERSONNEL
maintenance
of
this
unit
has
been
Included
Theretore,
it
should
be
read
carefully
in
order
to
avoid
any
problems.
The
above
markings
are
located
on
the
appliance
bottom
cover.
Important
Safeguards
.
Read
Instructions
—
All
the
safety
and
operating
instructions
should
be
read
before
the
unit
is
operated.
Retain
Instructions
—
The
satety
and
operating
instructions
should
be
retained
for
future
reference.
Heed
Warnings
—
All
warnings
on
the
unit
and
in
the
operating
instructions
should
be
adhered
to.
Follow
Instructions
—
All
operating
and
maintenance
instructions
should
be
followed.
Cleaning
—
Unplug
this
video
unit
from
the
wall
outlet
before
cleaning.
Do
not
use
liquid
or
aerosol
-
cleaners.
Use
a
dry
cloth
for
cleaning.
Attachments
—
Do
not
use
attachments
not
recommended
by
the
video
product
manufacturer
as
they
may
be
hazardous.
Water
and
Moisture
—
Do
not
use
this
video
unit
near
water
—
for
example
near
a
bath
tub,
wash
bowl,
kitchen
sink,
or
laundry
tub,
in
a
wet
basement,
or
near
a
swimming
pool,
and
the
like.
.
Accessories
—
Do
not
place
this
video
unit
on an
unstable
cart,
stand,
tripod,
bracket,
or
table.
The
video
unit
may
fall,
causing
serious
injury
to
a
child
or
adult,
and
serious
damage
to
the
unit.
Use
only
with
a
cart,
stand,
tripod,
bracket,
or
table
recommended
by
the
manufacturer,
or
sold with
the
video
unit.
Any
mounting
of
the
unit
should
follow
the
manufacturer's
instructions
and
should
use
a
mounting
accessory
recommended
by
the
manufacturer.
An
appliance
and
cart
combination
should
be
moved
with
care.
Quick
stops,
excessive
force,
and
uneven
surfaces
may
cause
the
appliance
and
cart
combination
to
overtum.
.
Ventilation
—
Slots
and
openings
in
the
cabinet
are
provided
for
ventilation
and
to
ensure
reliable
operation
of
the
video
unit
and
to
protect
it
from
overheating.
These
openings
must
not
be
blocked
or
covered.
Never
place
the
video
unit
on
a
bed,
sofa,
rug,
or
other
similar
surface,
or
near
or
over
a
radiator
or
heat
register.
This
video
unit
should
not
be
placed
in
a
built-in
installation
such
as
a
bookcase
or
rack
unless
proper
ventilation
is
provided
or
the
manufacturer's
instructions
have
been
adhered
to.
.
Power
Sources
—
This
video
unit
should
be
operated
only
from
the
type
of
power
source
indicated
on
the
marking
label.
if
you
are
not
sure
of
the
type
of
power
supply
to
your
home,
consult
your
appliance
dealer
or
local
power
company.
For
video
units
intended
to
be
operated
from
battery
power,
or
other
sources,
refer
to
the
operating
instructions.
11.
Grounding
or
Polarization
—
This
video
unit
may
1
1
1
2.
3.
^
be
equipped
with
either
a
polarized
2-wire
AC
(Alternating
Current)
line
plug
(a
plug
having
one
blade
wider
than
the
other)
or
3-wire
grounding
type
plug,
a
plug
having
a
third
(grounding)
pin.
The
2-wire
polarized
plug
will
fit
into
the
power
outlet
only
one
way.
This
is
a
safety
feature.
If
you
are
unable
to
insert
the
plug
fully
into
the
outlet,
try
reversing
the
plug.
If
the
plug
still
fails
to
fit,
contact
your
electrician
to
replace
your
obsolete
outlet.
Do
not
defeat
the
safety
purpose
of
the
polarized
plug.
The
3-wire
grounding
type
plug
will
fit
into
a
grounding
type
power
outlet.
This
is
a
safety
feature.
If
you
are
unable
to
insert
the
plug
into
the
outlet,
contact
your
electrician
to
replace
your
obsolete
outlet.
Do
not
defeat
the
safety
purpose
of
the
grounding
type
plug.
Power-Cord
Protection
—
Power-supply
cords
should
be
routed
so
that
they
are
not
likely
to
be
walked
on
or
pinched
by
items
placed
upon
or
against
them,
paying
particular
attention
to
cords
of
plugs,
convenience
receptacles,
and
the
point
where
they
exit
from
the
unit.
Outdoor
Antenna
Grounding
—
If
an
outside
antenna
or
cable
system
is
connected
to
the
video
unit,
be
sure
the
antenna
or
cable
system
is
grounded
so
as
to
provide
some
protection
against
voltage
surges
and
built-up
static
charges.
Part
1
of
the
Canadian
Electrical
Code,
in
USA
Section
810
of
the
National
Electrical
Code,
provides
information
with
respect
to
proper
grounding
of
the
mast
and
supporting
structure,
grounding
of
the
lead-in
wire
to
an
antenna
discharge
unit,
size
of
grounding
conductors,
location
of
antenna
discharge
unit,
connection
to
grounding
electrodes,
and
requirements
for
the
grounding
electrode.
2
ROUNDING
{NEC
ART
250,
PART
Hj
NEC
—
NATIONAL
ELECTRICAL
CODE
.
Lightning
—
For
added
protection
of
this
video
unit
receiver
during
a
lightning
storm,
or
when
it
is
left
unattended
and
unused
for
long
periods
of
time,
unplug
it
from
the
wall
outlet
and
disconnect
the
antenna
or
cable
system.
This
will
prevent
damage
to
the
video
unit
due
to
lightning
and
power-line
surges.
Important
Safeguards
15.
Power
Lines
—
An
outside
antenna
system
should
b.
If
any
liquid
has
been
spilled
onto,
or
objects
not
be
located
in
the
vicinity
of
overhead
power
have
fallen
into
the
video
unit.
lines
or
other
electric
light
or
power
circults,
or
c.
If
the
video
unit
has
been
exposed
to
rain
or
where
it
can
fall
into
such
power
lines
or
circults.
water.
When
installing
an
outside
antenna
system,
d.
If
the
video
unit
does
not
operate
normally
by
extreme
care
should
be
taken
to
keep
from
touching
such
power
lines
or
circuits
as
contact
with
them
might
be
fatal.
following
the
operating
instructions.
Adjust
only
those
controls
that
are
covered
by
the
operating
instructions,
as
an
improper
adjustment
of
other
16.
Overloading
—
Do
not
overload
wall
outlets
and
controls
may
result
in
damage
and
will
often
extension
cords
as
this
can
result
in
a
risk
of
fire
or
require
extensive
work
by
a
qualified
technician
electric
shock.
to
restore
the
video
unit
to
its
normal
operation.
17.
Objects
and
Liquids
—
Never
push
objects
of
any
e.
ff
the
video
unit
has
been
dropped
or
the
cabinet
kind
into
this
video
unit
through
openings
as
they
has
been
damaged.
may
touch
dangerous
voltage
points
or
short
out
f.
When
the
video
unit
exhibits
a
distinct
change
in
parts
that
could
result
in
a
fíre
or
electric
shock.
Never
spill
liquid
of
any
kind
onto
the
video
unit.
18.
Servicing
—
Do
not
attempt
to
service
this
video
unit
yourself
as
opening
or
removing
covers
may
expose
you
to
dangerous
voltage
or
other
hazards.
Refer
all
servicing
to
qualified
service
personnel.
performance
—
this
indicates
a
need
for
service.
20.
Replacement
Parts
—
When
replacement
parts
are
required,
be
sure
the
service
technician
has
used
replacement
parts
specified
by
the
manufacturer
or
have
the
same
characteristics
as
the
original
part.
Unauthorized
substitutions
may
result
in
fire,
19.
Damage
Requiring
Service
—
Unpiug
this
video
electric
shock
or
other
hazards.
unit
from
the
wall
outlet
and
refer
servicing
to
21.
Safety
Check—
Upon
completion
of
any
service
or
qualified
SONICS
personnel
under
the
following
repairs
to
this
video
vnit,
ask
the
service
technician
conditions:
i
to
perform
safety
checks
to
determine
that
the
a.
When
the
power-supply
cord
or
plug
is
video
unit
Is
in
safe
operating
order.
damaged.
Precautions
USE
&
LOCATION
*
TO
AVOID
SHOCK
HAZARD
...
Your
Camcorder
and
power
supply
should
not
be
exposed
to
rain
or
moisture.
Do
not
connect
the
power
supply
or
operate
your
Camcorder
if
it
gets
wet.
Your
Camcorder
has
been
designed
tor
outdoor
use,
however
it
is
not
designed
to
sustain
direct
exposure
to
water,
rain,
sleet,
snow,
sand,
dust,
or
a
direct
splashing
from
a
pool
or
even
a
cup
of
coffee.
This
action
could
permanently
damage
the
interna!
parts
of
your
Camcorder.
Do
not
attempt
to
disassemble
this
unit.
There
are
no
user
serviceable
parts
inside.
Unplug
your
Camcorder
from
the
power
supply
before
cleaning.
*
DO
NOT
AIM
YOUR
CAMCORDER
AT
THE
SUN
OR
OTHER
BRIGHT
OBJECTS
*
DO
NOT
LEAVE
THE
PALMCORDER
WITH
THE
EVF
AIMED
DIRECTLY
AT
THE
SUN
AS
THIS
MAY
CAUSE
DAMAGE
TO
THE
INTERNAL
PARTS
OF
THE
EVF
*
DO
NOT
EXPOSE
YOUR
CAMCORDER
TO
EXTENDED
HIGH
TEMPERATURE
...
Such
as,
in
direct
sunlight,
inside
a
closed
car,
next
to
a
heater,
etc...
This
action
could
permanently
damage
the
internal
parts
of
your
Camcorder.
*
AVOID
SUDDEN
CHANGES
IN
TEMPERATURE
...
If
the
unit
is
suddenly
moved
from
a
cold
place
to
a
warm
place,
moisture
may
form
on
the
tape
and
inside
the
unit.
*
DO
NOT
LEAVE
YOUR
CAMCORDER
OR
THE
POWER
SUPPLY
TURNED
ON
WHEN
NOT
IN
USE.
*
STORAGE
OF
YOUR
CAMCORDER
...
Store
and
handle
your
Camcorder
in
a
manner
that
will
not
subject
it
to
unnecessary
movement
(avoid
shaking
and
striking).
Your
Camcorder
contains
a
sensitive
pick-up
device
which
could
be
damaged
by
improper
handling
or
storage.
CARE
*
TO
CLEAN
YOUR
CAMCORDER
...
Do
not
use
strong
or
abrasive
detergents
when
cleaning
your
Camcorder
body.
*
TO
PROTECT
THE
LENS
...
Do
not
touch
the
surface
of
the
lens
with
your
hand.
Use
a
commercial
camcorder
tens
solution
and
lens
paper
when
cleaning
the
lens.
Improper
cleaning
can
scratch
the
lens
coating.
¢
TO
PROTECT
THE
FINISH
OF
YOUR
CAMCORDER
...
Before
handling
your
Camcorder,
make
sure
your
hands
and
face
are
free
from
any
chemical
products,
such
as
suntan
lotion,
as
it
may
damage
the
finish.
4
Table
of
Contents
Getting
Started
AAA
oossssoipi
ne
ninani
raissas
kaiia
ioo
asies
Ke
eseo
atai
ss
2
Important
Safeguards
ets
usse
e
etes
dice
epe
dicas
statue
Ded
veiut
neidio
ERR
AR
Sae
3,4
Precautions
..
Pac
E
EE
UNT
DERE
PO
e
Quick
Operation
Guide
.
Supplying
Power
Charge
he
Ballory
PACK
civic
tdci
7
Use
thé
Battery
Pack
ota
veep
varcvencdoumeinekGeentooweas
7
Battëry
Refresh
ue
[i
TT
——
—
Á——
8
ruta
45r
m
———
————
——X
!——
—
8
AG
Livi
dier
cm
9
Car
Battery
Cord
(pippa
ss
Qoa
EEE
E
ees
E
A
EA
OR
A
E
EE:
9
Cassette
InfolmiabliOli
cornisas
tdi
rata
VO
Setting
the
Clock
Set
the
Time
Zone
..
M
———————
—
MÀ
P
Set
the
Daylight
Saving
Ti
Time...
O
d
Maid
Prec
vet
tor
A
WE
Set
thé
Date
and
TIME
ooo
aet
cea
hao
adan
iaa
13
Replace
the
Battery
...
add
.14
Electronic
Viewfinder
Indications
.
———————
TT
“15,
16,
17
Attaching
the
Shoulder
AAA
A
UO
Basic
Operation
Camera
Recording
Simple
Recording
Stand-by
Mode
MPH
20
Stand-by
Relea
Se
neee
sys
vede
Renee
ph
vb
ay
Pe
RE
ve
O
EASY
Edit
Sand
od
21
Manual
Easy
Editing
AAA
A
A
21
9-Function
Remote
Control
Programmed
Recording
«securo
nave
rho
a
a
vn
rpaa
Cres
nacta
eo
vp
FER
pa
vr
ees
ke
eaa
pus
on
spa
V
S
Uca
EG
23
Playback
your
Recordings
Playback:
using
the
EVE...
oed
eesee
pres
A
ERE
24
Playback
using
the
PlayPak.......eoeeeer
riter
noa
year
aro
exer
exer
epa
E
teaavestiesicuees
Wecsseeveusaveaanvaynn
MED
Playback
or
VIBW
OD
8
TW
herd
e
ede
ao
aede
toute
tee
peste
tees
MB
Special
Features
Four-Speed
Power
Zoom
........
ins
eri
eoa
spina
ear
asea
va
xo
dob
a
Sup
Or
air
Qu
RP
ERE
EE
NR
eoa
gea
eq
andina
M
PAR
27
COne-Touch
Auto
PRO.
ur
od
n
hp
itur
R
er
rude
der
gl
QR
pP
IPTE
28
ambas
Rcg
pde
DD
—————'——e
BacKhghio
EE
eie
Leur
ci
A
OAE
E
EE
EE
29
Intelligent
Titler...
des
PO,
Copying
your
Tapes
(dubbing)
..
iia
31
For
Your
Information
Paimcorder
Accessory
stems
ep
DRE
V
Notes
Regarding
ee
uc
TT
RHENO:
Specifications
...
en
n
r——
——Á——
GÓC
Before
Requesting
S
Service
..
TET
RENTRER
ci
ad
ao
Index
of
Controls
..
Mop
REM
OUBLIE
Index
C)
©
=
3
à
iU
"r
iu
m
D
o.
RRA
AAA
O
Quick
Operation
Guide
Camera
Recording
Charge
the
Battery
Pack
fully
before
operation
(see
page
7).
Attach
the
Battery
(see
page
7).
Make
sure
Battery
is
charged
before
use
(see
page
7).
Slide
the
TAPE
EJECT
switch
to
open
the
door.
3
insert
a
cassette
(see
page
10).
Mb
cscs
here
to
close
the
door.
5
Set the
POWER
switch
to
CAMERA.
Built-In
Lens
Cover
opens
and
POWER
Lamp
lights.
6
siiae
the
TAPE
SPEED
Selector
for
SP
or
SLP
(see
page
10).
|
with
the
Eye
Cup
up
to
your
eye,
p
PS
=
adjust
the
Vision
Adjustment
Control
Ea
i
li
E
to
your
eyesight.
aie
8
e
SPUR
|
Press
RECORD/PAUSE
to
sta
E
AG
=
ol
recording.
m
N//
Y
:
$
LESEN
Press
RECORD/PAUSE
again
to
pause
SLP;
S
recording
(see
page
19).
1
Set
the
POWER
switch
to
VCR.
2
Press
REWIND/SEARCH
to
rewind
the
tape.
3
Press
PLAY
to
start
playback.
A
press
STOP
to
stop
playback.
Supplying
Power
Charge
the
Battery
Pack
Charge
the
Battery
Pack
fully
before
operation.
G)
D
=
=
To)
o
Land
D
>
D
o
CUR
1
Plug
in
the
AC
Adaptor.
CHARGE
;
Lamp
POWER
Lamp
lights
up.
insert
the
Battery
®
Align
the
right
side
of
the
Battery
with
the
line
on
the
AC
Adaptor.
(8)
Press
down
on
the
Battery
and
then
slide
it
in
the
direction
of
the
arrow.
CHARGE
Lamp
lights
up.
It
goes
out
when
charging
is
done
(about
one
hour).
3
Remove
the
Battery
Slide
the
Battery
out
and
then
tift
up.
Battery
Charging
Confirmation
Marker
*
The
useful
operation
time
of
the
Battery
will
gradually
decrease
after
repeated
use
and
recharging.
The
Battery
is
no
longer
serviceable
if
the
operation
time
is
very
short,
even
after
a
Use
this
marker
as
a
reminder
to
yourself
sufficient
charge.
when
the
battery
is
fully
charged
or
in
Note:
need
of
a
charge.
This
marker
performs
After
recharging
the
Battery
Pack
about
5
times,
no
function
and
is
for
your
reference
only.|
use
the
BATTERY
REFRESH
feature
as
explained
on
page
8.
Use
the
Battery
Pack
With
a
fully
charged
Battery
Pack,
you
will
have
a
maximum
of
about
one
hour
of
continuous
use.
1
Attach
the
Battery
®
Align
the
Battery
with
the
top
of
the
mounting
surface.
®
Press
it
into
place
until
it
locks
with
a
click.
2
Remove
the
Battery
While
sliding
the
BATTERY
RELEASE
button,
remove
the
Battery.
7
Supplying
Power
Battery
Refresh
Feature
This
feature
completely
discharges
the
Battery
before
recharging
begins.
To
maintain
your
battery's
operating
capacity,
use
the
refresh feature
after
about
every
five
charges.
CHARGE
Lamp
I
Plug
in
AC
Adaptor.
2
Place
the
Battery
into
the
SS
AC
Adaptor.
NS
Io
Press
the
BATTERY
REFRESH
button.
The
CHARGE
Lamp
will
flash
when
discharging
begins
and
stop
flashing
when
fully
discharged.
POWER
Lamp
will
stay
lit
when
fully
charged.
4
Remove
the
Battery
*
Should
you
accidentally
press
the
BATTERY
REFRESH
button,
remove
Battery
and
then
re-insert
it
to
begin
charging.
*
It
takes
about
five
hours
when
both
Battery
Refresh
and
charging
are
performed.
ONLY
FOR
U.S.A.
ATTENTION:
The
product
that
you
have
purchased
is
powered
by
a
rechargeable
battery.
The
battery
is
recyclable.
At
the
end
of
its
useful
life,
under
various
state
and
local
laws,
it
may
be
illegal
to
dispose
of
this
battery
into
the
municipal
waste
stream.
Check
with
your
local
solid
waste
officials
for
details
in
your
area
for
recycling
options
or
proper
disposal.
Battery
Care
Caution:
To
avoid
damage
to
the
Battery:
*
Charge
only
with
specified
charger.
*
Do
not
drop
or
jar
the
Battery.
«
The
Battery
can
be
charged
within
a
tempera-
*
Use
the
Battery
with
specified
units
only.
ture
range
of
32°
F
(0°
C)
and
104°
F
(40?
C).
*
If
the
Battery
is
used
in
extremely
high
*
The
Battery
may
be
warm
after
charging
or
temperatures,
a
safety
device
will
automati-
just
after
use.
This
is
normal.
cally
prevent
operation.
*
Do
not
use
an
insufficiently
charged
or
worn
out
Battery.
To
insure
longer
battery
life:
,
;
*
While
not
in
use,
remove
Battery
from
the
=e
f
Fed
Miss
diss
or
diapose
ot
ih
Patmcorder
and
AC
Adaptor
and
store
ina
fire
9
Y
'
P
cool,
dark,
dry
place.
|
+
Do
not
directly
connect
(short
circuit)
the
*
Keep
the
Battery
terminals
clean.
positive
(+)
and
negative
(-)
terminals.
*
Never
attempt
to
disassemble
or
reassemble
the
Battery.
8
Supplying
Power
AC
Adaptor
payeys
Bbuiyje5
DC
Power
Cable
DC
IN
1
Connect
the
VCR
DC
OUT
on
Connector
the
AC
Adaptor
to
the
DC
IN
on
the
Palmcorder
with
the
DC
Power
Cable
(supplied).
POWER
Lamp
VCR
DC
OUT
Connector
ed
*
The
POWER
Lamp
will
light
up.
Note:
*
AC
Adaptor
can
not
be
used
to
power
the
Palmcorder
while
charging
the
Battery.
*
While
not
in
use,
unplug
the
AC
Adaptor
from
the
AC
outlet.
(AC
Adaptor
consumes
1.2W
of
electric
power
if
it
is
plugged
into
an
AC
outlet
even
when
not
in
use.)
1
Connect
a
PV-C16
Car
Battery
Cord
(optional)
to
the
DC
IN
of
the
Palmcorder.
2
Start
your
car
engine
and
then
insert
the
Car
Battery
Cord
plug
into
your
cigarette
tighter
socket.
*
There
is
a
fuse
located
in
the
lighter
plug
end
of
the
cord.
Cigarette
Lighter
Should
fuse
replacement
be
necessary
Socket
(12V)
use
the
exact
current
rating
(in
amps).
Note:
*
This
cord
can
only
be
used
in
vehicles
equipped
with
DC
12V
(negative
ground)
batteries.
Use
only
the
specified
car
battery
cord.
If
you
are
not
sure
check
with
your
local
car/truck
dealer
as
to
what
type
of
DC
battery
ground
you
have
in
your
vehicle.
Car
Battery
Cord
Cigarette
*
Be
sure
to
start
your
car
engine
before
j
I
;
inserting
the
cigarette
lighter
plug
of
the
(optional
Lighter
Plug
Car
Battery
Cord
into
the
lighter
socket;
otherwise,
the
cigarette
lighter
plug
fuse
may
burn
out.
*
Because
the
car
is
running
while
your
Palmcorder
is
in
operation,
make
sure
you're
in
a
well
ventilated
area.
*
Disconnect
the
cigarette
lighter
plug
when
your
Palmcorder
is
not
being
used.
9
Cassette
Information
Cassette
Insertion/Removal
I
Turn
the
Tape
Wheel
in
the
direction
of
the
arrow
until
there
is
no
slack.
2
Attach
the
Battery
(see
page
7).
3
Slide
the
TAPE
EJECT
switch
to
open
the
door.
7
ENS
the
cassette
vertically
with
its
window
side
facing
out.
5
Press
here
to
close
the
door.
+.
To
remove
the
cassette,
slide
the
TAPE
EJECT
switch.
Record/Playback
Time
TAPE
SPEED
Selector
Use
tapes
with
the
(VS
[e]
mark
in
this
unit.
Tape
Speed
Selector
Cassette
type
SLP
(Super
Long
Play)
|
1
hour
1
hour
2
hours
30
minutes
*
SP
provides
the
best
picture.
*
SLP
has
slightly
more
picture
noise
during
playback.
Erase
Protection
Tab
Cassettes
have
a
record
tab
to
ensure
that
recordings
are
not
accidentally
erased.
1
To
prevent
accidental
erasure
Break
off
the tab
with
a
screwdriver.
(Or,
slide
tab
open.)
210
record
again
Cover
the
hole
with
adhesive
tape.
(Or,
slide
tab
closed.)
Setting
the
Clock
Setting
the
clock
is
divided
into
three
sections;
Set
the
Time
Zone,
Set
the
Daylight
G)
Saving
Time,
and
Set
the
Date
and
Time.
Please
follow
instructions
in
the
order
o
presented.
Before
you
begin...
S
Set
the
Time
Zone
+
Connect
the
Palmcorder
to
a
power
source.
ra)
The
Palmcorder
is
set
to
the
Eastern
*
Set
the
POWER
switch
to
VCR
or
CAMERA.
T,
Standard
time
zone
at
the
factory.
If
you
Note:
y
live
in
a
different
time
zone,
follow
the
CLOCK
SET
menu
disappears
if,
after
A
steps
below
to
change
it.
Then,
when
activation,
CLOCK
SET
UP
A,
DOWN
¥
or
(0
traveling,
rather
than
resetting
the
clock
to
|
DISPLAY
buttons
are
not
pressed
within
30
Q.
the
local
time,
you
can
simply
set
the
seconds.
appropriate
time
zone.
The
Palmcorder's
clock
may
lose
or
gain
up
to
two
minutes
per
month. Please
adjust
as
necessary
(refer
to
page
13).
1
Press
CLOCK
SET
UP
A
to
display
the
CLOCK
SET
menu.
Press
UP
A
or
DOWN
Y
repeatedly
|
to
select]
38
MILAN
from
the
CLOCK
SET
menu.
Press
DISPLAY
to
display
the
SELECT
TIME
ZONE
menu.
Press
UP
A
or
DOWN
Y
repeatedly
to
select
one
of
the
eight
time
zones
of
the
location
where
you
are
using
the
Palmcorder.
5
Press
DISPLAY
to
fix
the
Time
Zone.
The
CLOCK
SET
menu
appears.
To
exit
from
the
CLOCK
SET
menu,
select
ESNY]
and
press
DISPLAY.
Note:
When
you
travel
outside
the
eight
time
zones
right,
please
set
the
clock
;
000:
9:00
:10:00:11:00:12:00:
1:00
:
2:00
manually
(see
page
13).
11
Setting
the
Clock
ATT
aa
Before
you
begin...
The
clock
will
automatically
adjust
to
daylight
saving
time.
PETER
ESA
el
AUT
OB
If
you
do
not
want
the
clock
to
automatically
adjust
to
daylight
saving
time,
OFFERS
steps
1-5
below.
CLOCK
SET
Spring:
First
Sunday
in
April
(DAYLIGHT
SAVING
TIME:
AUTO)
Automatically
adds
one
hour
and
adjusts
the
clock.
1:00
a.m.
2:00
a.m.
Daylight
Saving
Time
Autumn:
Last
Sunday
in
October
(DAYLIGHT
SAVING
TIME:
AUTO)
Automatically
turns
back
one
hour
and
adjusts
the
clock.
Daylight
Saving
1:00
a.m.
2:00
a.m.
Time
:
Normal
Time
6
3:00
a.m.
4:00
a.m.
—o—
1:00
a.m.
2:00
a.m,
*
Connect
the
Palmcorder
to
a
power
source.
*
Set
the
POWER
switch
to
VCR
or
CAMERA.
Note:
CLOCK
SET
menu
disappears
if,
after
activation,
CLOCK
SET
UP
A,
DOWN
Y
or
DISPLAY
buttons
are
not
pressed
within
30
seconds.
This
feature
will
not
function
if
Hawaii
or
Samoa
Time
Zone
is
selected.
1
Press
CLOCK
SET
UP
A
to
display
the
CLOCK
SET
menu.
Press
UP
A
or
DOWN
Y
repeatedly
to
select
PRAVIA
ON
TERI
from
the
CLOCK
SET
menu.
3,DA
ME
SETTING
4.ENO
SELECT:
PUSH
V/A
KEY
SET
:
PUSH
DISPLAY
3
Press
DISPLAY
to
display
the
DAYLIGHT
SAVING
TIME
menu.
4
press
UP
A
or
DOWN
Y
to
select
AUTO
or
OFF.
5
Press
DISPLAY
to
fix
the
DAYLIGHT
SAVING
TIME
setting.
The
CLOCK
SET
menu
appears.
To
exit
from
the
CLOCK
SET
menu,
select
EXZT
and
press
DISPLAY.
Setting
the
Clock
Set
the
Date
and
Time
Before
you
begin...
a :
:
i
*
Connect
the
Palmcorder
to
a
power
source.
The
date
and
time
is
calculated,
including
:
leap
year,
up
to
DEC
31
2094.
*
Set
the
POWER
switch
to
VCR
or
CAMERA.
Note:
CLOCK
SET
menu
disappears
if,
after
activation,
CLOCK
SET
UP
A,
DOWN
Y
or
DISPLAY
buttons
are
not
pressed
within
30
C)
M
ct
-
(O
o
m~r
seconds.
m
eo
O
o
1
Press
CLOCK
SET
UP
4
to
display
the
CLOCK
SET
menu.
Press
UP
A
or
DOWN
Y
repeatedly
to
select
ER»
AUTE
DIO
from
the
CLOCK
SET
menu.
DATE/TIME
SETTING
menu.
As
UP
A
or
DOWN
Y
repeatedly
E
(or
hold
down)
to
enter
the
desired
MP
ETE
pA
ES
numbers,
then,
press
DISPLAY
to
fix
ar”
Ed
on™
O
JARA
OEM
that
portion
and
move
to
the
next.
Adjust
the
flashing
digits
for
the
hour,
minute,
month,
day
and
year.
5-3:
00PM
mb
TX
gop.
cps
R^
1995
m»
O
JAN
i
dos
“+
OATETIME
SETTING
-
--
JAN
040895
Gh
UB
VOR
O
:20:00PM
SELECT:
PUSH
V/A
KEY
q”
FEB-
11995
FEE
“11995
SET
—
:
PUSH
DISPLAY
KEY
M
:
0
M
When
o
fi
i
h
i
(4;
:20:00P
:20:00PM.
y
u
finis
setting
the
year,
the
Y
=p
O
F
a
M
l
t
o
AS
B
12-1995
clock
starts
operating,
and
the
CLOCK
SET
menu
appears.
cisPLay
To
exit
from
the
CLOCK
SET
menu,
ES
FEB
12706m
O)
select
EMANI]
and
press
DISPLAY.
13
Setting
the
Clock
Replace
the
Battery
The
date
and
time
operates
on
a
miniature
battery
preinstalled
in
the
underside
of
your
Palmcorder.
^
Replace
battery
with
Panasonic
PART
NO.
VSBW0004
(CR2025)
only.
Use
of
another
battery
may
present
a
risk
of
fire
or
explosion.
Caution-battery
may
explode
if
mistreated.
Dispose
of
used
battery
promptly.
Keep
away
from
children.
Do
not
recharge,
disassemble
or
dispose
of
in
fire.
14
1
While
pinching
the
stopper
tabs,
pull
the
tray
out
of
the
Battery
Compartment.
2
Remove
the
Battery
by
bending
the
locking
tab
outward.
=>
3
Place
the
new
Battery
into
the
Battery
tray
with
the
®
mark
facing
down
until
it
snaps
into
place.
*
Do
not
reverse
the
polarity.
A
EA
the
Battery
tray
so
that
the
small
triangle
marks
meet.
Note:
+
Make
sure
your
Palmcorder
is
off
when
replacing
the
Battery.
*
Keep
the
Battery
out
of
the
reach
of
children
since
swallowing
it
may
be
harmful.
*
When
the
Battery
is
installed
improperly,
is
discharged,
or
missing,
"CLOCK
BATTERY"
appears
in
the
EVF.
*
Battery
life
is
approximately
5
years.
Electronic
Viewfinder
Indications
Tape/Battery
Remaining
The
tape
remaining
and
battery
charge
level
can
be
displayed
during
recording.
Í
Set
the
POWER
switch
to
CAMERA.
payeys
Bune
2
Press
DISPLAY
repeatedly
to
select
the
desired
display.
EVF
indications
(Initial
screen)
First
Battery
Charge
Tape
Remaining:
Remaining:
-Jal-
(No
tape)
FULL
MEMO
G2
IA
FULL
Fourth
y
Second
|
=
press
press
-
1x
sp
EMPTY
T^
E
EMPTY
*
It
will
take
several
seconds
for
the
tape
remaining
indicator
to
operate
after
the
tape
starts
moving.
Record
the
Date
and
Time
I
Set
the
POWER
Press
DISPLAY
switch
to
once
to
change
the
CAMERA.
When
display
to
date
only.
Press
once
placed
in
Record
:
or
twice
more
to
mode,
the
time
and
date
will
be
remove
the
date/
recorded
on
the
time
display.
tape.
Note:
|
Only
the
Date
and/or
Time
are
recorded
on
the
Tape.
|
Display-Off
Mode
This
feature
allows
you
to
remove
all
Electronic
Viewfinder
Indications.
Before
inserting
a
tape,
press
DISPLAY
and
STOP
together
for
more
than
one
second
to
remove
the
indications
except
time
and
date".
To
display
the
Electronic
Viewfinder
Indications
again,
turn
the
Palmcorder
Power
off
and
then
on
again.
Paro
*
To
remove
the
time
and
date,
see
“Record
the
Date
and
Time"
above.
15
Electronic
Viewfinder
Indications
(D
e
©
VCR-MODE
12:00:00AM
AN
1
1995
(D
Battery
Remaining
Indication
(see
page
15)
-E
When
a
battery
recharge
is
necessary,
"WARNING"
will
begin
to
flash
in
the
EVF
and
"LOW
BATTERY”
will
appear
as
the
Power
Lamp
will
also
flash.
The
Palmcorder
will
automatically
turn
OFF
in
15
seconds.
@
Tape
Remaining
Indication
*
|f
the
Palmcorder
is
in
camera
mode
with
no
cassette
tape
inserted
or
the
record
tab
is
missing,
“E3”
will
flash
for
one
minute
and
“CHECK
TAPE”
will
appear
for
5
seconds,
and
recording
will
not
start.
*
While
recording,
as
the
tape
reaches
to
the
end,
"TAPE
END"
will
appear
for
5
seconds
as
a
warning.
©
10-Second
Reminder
An
elapsed
time
indicator
appears
for
one
second
every
10
seconds
that
recording
continues.
This
is
a
reminder
of
how
long
you
have
been
shooting
a
particular
scene
and
can
help
keep
your
recordings
fresh
and
interesting.
0:00
0:10
0:20
.....
59:50
(return
to
0:00
and
continue)
*
The
10-Second
Reminder
will
be
reset
whenever
you
press
Record/Pause.
@
TAPE
SPEED
Indication
(see
page
10)
Indicates
the
tape
speed
(SP
or
SLP).
(
Operating
Mode
Indications
REC
(record)
(RECORD
will
first
appear
in
large
characters
for
one
second
and
then
small
characters.)
PAUSE
(PAUSE
will
first
appear
in
large
characters
for
one
second
and
then
small
characters.)
FF
(fast
forward)
PLAY
REW
(rewind)
16
Electronic
Viewfinder
Indications
payeys
Buinoso
12:00:00AM
AN
1
1995
©
Backlight
Indication
(see
page
29).
@
Manual
Focus
Indication
(see
page
28).
(8
Fade
Indication
(see
page
27).
(9
Zoom
Magnification
level
(see
page
27).
49
High
Speed
Shutter
Indication
(see
page
29).
d»
VCR-MODE
Indication
"VCR-MODE"
will
appear
for
one
minute
if
the
POWER
switch
is
set
to
VCR
or
the
RECORD/PAUSE
button
is
pushed
in
VCR
MODE.
(2
DEW
Indication
If
excessive
moisture
condenses
in
the
unit,
"WARNING"
and
Power
Lamp
will
flash,
"DEW
DETECTED"
will
appear,
and
the
Palmcorder
will
automatically
turn
OFF
in
15
seconds.
In
this
case,
wait
until
the
indicator
no
longer
flashes
when
your
Palmcorder
is
turned
on
before
using
your
Palmcorder
again.
(3
Date
and
time
Indication
(see
page
13).
17
Attaching
the
Shoulder
Strap
Make
sure
the
Battery
Pack
is
not
attached.
I
Unthread
the
strap
from
the
buckle.
2
Thread
the
strap
ends
through
the
Strap
Attachment
Rings.
3
Then
thread
the
ends
of
the
strap
through
the
buckle.
*
Make
sure
the
strap
is
not
twisted.
~~
O
qe
ansni
UNEA
RNN
AEN.
1
Pull
a
loop
of
the
strap
loose
from
the
buckle.
Adjust
the
length
of
the
strap
to
the
size
of
your
hand
as
illustrated
at
left.
18
Camera
Recording
Before
you
begin...
*
Connect
the
Palmcorder
to
a
power
source.
*
Insert
a
cassette
with
record
tab
(see
page
10).
Simple
Recording
1
Set the
POWER
switch
to
CAMERA.
Built-In
Lens
Cover
opens.
EVF
PAUSE
Record/Pause
mode.
2
With
the
Viewfinder
Eye
Cup
up
to
your
eye,
adjust
the
Vision
Adjust-
ment
Control
to
your
eyesight.
0
t
2.
o
O
A
D
um
1
c
E
o
3
E
Slide
the
TAPE
SPEED
Selector
to
SP
or
SLP
(refer
to
page
10).
Zo
RECORD/PAUSE
to
start
recording.
The
Tally
Lamp
and
RECORD/PAUSE
are
lit
during
recording.
Note:
*
Do
not
leave
the
Palmcorder
with
the
EVF
aimed
directly
at
the
sun
as
this
may
cause
RECORD
damage
to
the
internal
parts
of
the
EVF.
Press
RECORD/PAUSE
again
to
pause
recording.
Set the
POWER
switch
to
OFF
after
recording
is
finished.
*
To
remove
the
cassette
in
Record/Pause
mode,
slide
the
TAPE
EJECT
Switch
(refer
to
page
10).
*
When
your
Palmcorder
is
aimed
at
excessively
bright
objects,
or
bright
lights,
a
vertical
bar
may
appear
in
the
picture.
This
is
a
norma!
characteristic
of
the
CCD
pick-up
device.
Try
to
avoid
this
when
possible.
19
Camera
Recording
Stand-by
Mode
Whenever
the
Palmcorder
has
been
in
Record/Pause
mode
for
5
minutes,
it
will
auto-
matically
go
into
Stand-by
mode
to
conserve
power.
To
resume
recording,
it
is
necessary
to
turn
the
Palmcorder
POWER
switch
to
OFF
and
then
to
CAMERA.
Or,
you
may
use
the
following
feature
to
avoid
having
to
turn
the
Palmcorder
off
and
on
again.
Stand-by
Release
EE
yeu
begin.
:
;
*
Connect
the
Palmcorder
to
a
power
source.
ane
feature
allows
you
to
eeu
record
*
Insert
a
cassette
with
record
tab
(see
page
10).
ing
from
Stand-by
mode
by
simply
pressing
the
RECORD/PAUSE
button.
1
While
pressing
the
UP
A
button,
set
the
POWER
switch
to
CAMERA.
2
Press
UP
A
more
than
2
seconds
to
display
the
STAND-BY
RELEASE
selection
screen.
STAND-BY
RELEASE
BY
RECORU/PAUSE
KEY
ACTIVE
NON-ACTIVE
SELECT:
PUSH
V/A
KEY
SET
:
PUSH
DISPLAY
KEY
J
Press
UP
A
or
DOWN
Y
as
necessary
to
select
aiid.
A
bres:
DISPLAY
to
set
your
selection
and
exit
this
screen.
.
You
may
now
turn
the
Palmcorder
back
on
after
it
has
gone
into
Stand-
RECORD/PAUSE
by
mode
by
pressing
the
RECORD/
PAUSE
button.
Note:
If
was
selected
in
step
3
above,
you
must
set
the
POWER
switch
to
OFF
and
then
to
CAMERA
to
resume
recording
from
Stand-by
mode.
20

Other manuals for Palmcorder IQ PV-A396

1

Other Panasonic Camcorder manuals

Panasonic HDC-SDT750 User manual

Panasonic

Panasonic HDC-SDT750 User manual

Panasonic NV-GS180EG User manual

Panasonic

Panasonic NV-GS180EG User manual

Panasonic AG-DVC30P User manual

Panasonic

Panasonic AG-DVC30P User manual

Panasonic HC-WX970HC-V770M Technical specifications

Panasonic

Panasonic HC-WX970HC-V770M Technical specifications

Panasonic AJSPX800 - P2 CAMCORDER User manual

Panasonic

Panasonic AJSPX800 - P2 CAMCORDER User manual

Panasonic NV-GS300 Operating instructions

Panasonic

Panasonic NV-GS300 Operating instructions

Panasonic PV-GS180P User manual

Panasonic

Panasonic PV-GS180P User manual

Panasonic Palmcorder Palmsight PV-L650 User manual

Panasonic

Panasonic Palmcorder Palmsight PV-L650 User manual

Panasonic VDR-D160GC User manual

Panasonic

Panasonic VDR-D160GC User manual

Panasonic NV-DS28A User manual

Panasonic

Panasonic NV-DS28A User manual

Panasonic Palmcorder PV-GS300 Instruction sheet

Panasonic

Panasonic Palmcorder PV-GS300 Instruction sheet

Panasonic HDC-HS9P User manual

Panasonic

Panasonic HDC-HS9P User manual

Panasonic Digital Palmcorder PV-DV101 User manual

Panasonic

Panasonic Digital Palmcorder PV-DV101 User manual

Panasonic AVCCAM AG-AC90P User manual

Panasonic

Panasonic AVCCAM AG-AC90P User manual

Panasonic NV-GS80EB User manual

Panasonic

Panasonic NV-GS80EB User manual

Panasonic Palmcorder PV-DV601 User manual

Panasonic

Panasonic Palmcorder PV-DV601 User manual

Panasonic AG-AC90MC User manual

Panasonic

Panasonic AG-AC90MC User manual

Panasonic SDR-SW21P User manual

Panasonic

Panasonic SDR-SW21P User manual

Panasonic HDC-SD600 User manual

Panasonic

Panasonic HDC-SD600 User manual

Panasonic HX-WA10D User manual

Panasonic

Panasonic HX-WA10D User manual

Panasonic AJ-HPM110MC User manual

Panasonic

Panasonic AJ-HPM110MC User manual

Panasonic HDCTM60K User manual

Panasonic

Panasonic HDCTM60K User manual

Panasonic Palmcorder PV-A226 User manual

Panasonic

Panasonic Palmcorder PV-A226 User manual

Panasonic HDC-SDT750PP User manual

Panasonic

Panasonic HDC-SDT750PP User manual

Popular Camcorder manuals by other brands

Sony PMW-150 operating instructions

Sony

Sony PMW-150 operating instructions

Sony HANDYCAM PMW-320K operating instructions

Sony

Sony HANDYCAM PMW-320K operating instructions

Insignia NS-DV1080P Quick setup guide

Insignia

Insignia NS-DV1080P Quick setup guide

JVC GR-SXM515U instructions

JVC

JVC GR-SXM515U instructions

RCA CC6392 Specifications

RCA

RCA CC6392 Specifications

JVC GZMG40US - Everio Camcorder - 1.33 MP Schematic diagrams

JVC

JVC GZMG40US - Everio Camcorder - 1.33 MP Schematic diagrams

Sony PXW-Z150 XDCAM operating guide

Sony

Sony PXW-Z150 XDCAM operating guide

Sony Handycam DCR-HC46 Specifications

Sony

Sony Handycam DCR-HC46 Specifications

Samsung VP-D10 Owner's instruction book

Samsung

Samsung VP-D10 Owner's instruction book

Vivitar iTwist DVR 613HD user manual

Vivitar

Vivitar iTwist DVR 613HD user manual

Hitachi VM-7400A instruction manual

Hitachi

Hitachi VM-7400A instruction manual

AgfaPhoto APDV-1005 user manual

AgfaPhoto

AgfaPhoto APDV-1005 user manual

Insignia NS-DV1080P user guide

Insignia

Insignia NS-DV1080P user guide

Canon XL1 3CCD manual

Canon

Canon XL1 3CCD manual

Kodak PLAYFULL ZE1 Extended user guide

Kodak

Kodak PLAYFULL ZE1 Extended user guide

Vivitar DVR 850W owner's manual

Vivitar

Vivitar DVR 850W owner's manual

Philips M620/21 operating instructions

Philips

Philips M620/21 operating instructions

JVC GR-D371U instructions

JVC

JVC GR-D371U instructions

manuals.online logo
manuals.online logoBrands
  • About & Mission
  • Contact us
  • Privacy Policy
  • Terms and Conditions

Copyright 2025 Manuals.Online. All Rights Reserved.