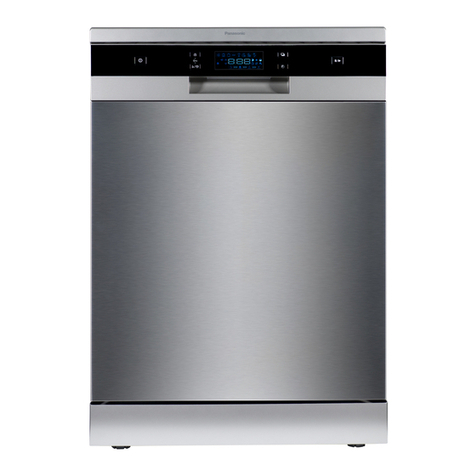
Panasonic NP-TH1HK User manual

Panasonic Corporation
Web Site: http://www.panasonic.com
© Panasonic Corporation 2018 P9901-13T00
S1218-0
Printed in China
NP-TH1HK.indd 56 2018/11/15 9:32:21
Job Name B685891_NP-TH1取説(香港)
Color K
File Name 0056_NP-TH1HK.pdf
Refine Time 2018-11-15 09:39:03 Print Time 2018-12-10 15:24:52
Job Name
B685891_NP-TH1取説(香港)
Color K
File Name 0056_NP-TH1HK.pdf
Refine Time 2018-11-15 09:39:03 Print Time 2018-12-10 15:24:52
English 中文
使用說明書
洗碗碟機(家用型)
Model No. NP-TH1HK
隨附安裝說明
衷心感謝您購買 Panasonic 產品。
使用產品前請仔細閱讀並妥善保管本使用說明書。
使用前必須仔細閱讀「安全注意事項」(第 HK1 - HK2 頁)。
Operating Instructions
Dishwasher (Household Use)
A copy of the Installation Instructions is attached.
Thank you for purchasing this Panasonic product.
Before using this appliance, please read these instructions and Safety Precautions (Pages EN1 - EN2)
carefully and keep this manual for future reference.
P9901
-
13T00
NP-TH1HK.indd 1 2018/11/29 19:20:01
Job Name B685891_NP-TH1取説(香港)
Color K
File Name 0001_NP-TH1HK.pdf
Refine Time 2018-11-29 19:37:48 Print Time 2018-12-10 15:24:53

Table of Contents
Quick Start Guide……………………… EN6
Instructions for Use …………………… EN7
• Loading the Dishwasher ……………………… EN7
•
Adding Detergent and Washing ……………… EN9
•
Drying •Delay Start •Changing the settings
…… EN11
Maintenance …………………………… EN13
Frequently Asked Questions ………… EN15
Error Indication ………………………… EN16
•
Freezing prevention, Not in use for a long time
…… EN17
Troubleshooting ……………………… EN18
Installation Instructions ……………… EN19
Specifications ………………………… EN25
Safety Precautions ………………… EN1
Notes on Use ………………………… EN2
Parts Identification/Accessories……… EN3
Confirmation and
Preparation before Use
…………………
EN5
安全注意事項 ………………………… HK1
使用要求 ……………………………… HK2
部件名稱 / 附件 ………………………… HK3
使用前的確認與準備 ………………… HK5
快速使用指南 ………………………… HK6
使用方法 ……………………………… HK7
• 擺放餐具 ………………………………………… HK7
• 添加洗滌劑 · 清洗 …………………………… HK9
• 乾碗 · 延遲啟動 · 更改設定 ………………… HK11
保養 …………………………………… HK13
常見問題 ……………………………… HK15
異常提示 ……………………………… HK16
• 預防凍結 · 長時間不使用 ………………… HK17
故障排除 ……………………………… HK18
安裝方法 ……………………………… HK19
規格 …………………………………… HK25
目錄
3
2
NP-TH1HK.indd 2 2018/11/29 21:24:24
Job Name B685891_NP-TH1取説(香港)
Color K
File Name 0002_NP-TH1HK.pdf
Refine Time 2018-11-29 21:31:52 Print Time 2018-12-10 15:24:53
Job Name
B685891_NP-TH1取説(香港)
Color K
File Name 0002_NP-TH1HK.pdf
Refine Time 2018-11-29 21:31:52 Print Time 2018-12-10 15:24:53
English 中文
Table of Contents
Quick Start Guide……………………… EN6
Instructions for Use …………………… EN7
• Loading the Dishwasher ……………………… EN7
•
Adding Detergent and Washing ……………… EN9
•
Drying •Delay Start •Changing the settings
…… EN11
Maintenance …………………………… EN13
Frequently Asked Questions ………… EN15
Error Indication ………………………… EN16
•
Freezing prevention, Not in use for a long time
…… EN17
Troubleshooting ……………………… EN18
Installation Instructions ……………… EN19
Specifications ………………………… EN25
Safety Precautions ………………… EN1
Notes on Use ………………………… EN2
Parts Identification/Accessories……… EN3
Confirmation and
Preparation before Use
…………………
EN5
安全注意事項 ………………………… HK1
使用要求 ……………………………… HK2
部件名稱 / 附件 ………………………… HK3
使用前的確認與準備 ………………… HK5
快速使用指南 ………………………… HK6
使用方法 ……………………………… HK7
• 擺放餐具 ………………………………………… HK7
• 添加洗滌劑 · 清洗 …………………………… HK9
• 乾碗 · 延遲啟動 · 更改設定 ………………… HK11
保養 …………………………………… HK13
常見問題 ……………………………… HK15
異常提示 ……………………………… HK16
• 預防凍結 · 長時間不使用 ………………… HK17
故障排除 ……………………………… HK18
安裝方法 ……………………………… HK19
規格 …………………………………… HK25
目錄
3
2
NP-TH1HK.indd 3 2018/11/29 21:24:29
Job Name B685891_NP-TH1取説(香港)
Color K
File Name 0003_NP-TH1HK.pdf
Refine Time 2018-11-29 21:31:53 Print Time 2018-12-10 15:24:54

This appliance is not intended for use by persons (including children) with reduced physical,
sensory or mental capabilities, or lack of experience and knowledge,unless they have been
given supervision or instruction concerning use of the appliance by a person responsible for
their safety. Children should be supervised to ensure that they do not play with the appliance.
Safety Precautions
■The following symbols indicate what you must observe.
■The following indicates the degree of hazards and damages caused by incorrect operation.
To prevent personal injuries and property damages, be sure to observe the following instructions.
■To prevent fire, burns or
electric shock
Indicates a potential hazard may result in minor or moderate personal injury
if not avoided.
Indicates a potential hazard may result in serious personal injury or death
if not avoided.
Indicates actions which are prohibited. Indicates actions which must be enforced.
EN1
must observe
Do not splash or sprinkle water on the appliance body. (It may cause fire or electric shock.)
Keep the appliance away from a flame or heat sources. (It may cause a fire.)
• Mosquito coils, cigarettes, candles, electric heaters, etc.
Ensure at least 15 cm clearance between the appliance and heat sources such
as a gas stove. (It may cause a fire.)
Do not bang the appliance while it is in operation.
(It may cause electric shock, electricity leakage, or short circuit, resulting fire.)
Do not open the dishwasher during operation or within 30 minutes after the end
of the operation. (The high temperature inside the appliance, washing water or steam may cause burns.)
→ Please wait for 30 minutes after the end of the operation before opening the dishwasher
(to take out the items, carry out cleaning or maintenance).
→ If you need to open the dishwasher during operation, you must pause the operation first and
open the door carefully and slowly.
Do not disassemble, repair or modify the appliance.
(It may cause fire or injury due to abnormal operation.)
Do not use the power cord or power plug incorrectly. (It may cause fire or electric shock.)
●Do not damage the cord or plug; do not modify, forcibly bend, twist, pull, load with heavy objects,
bundle, or place near heat sources.
→ If the cord or plug is damaged, it must be replaced by the manufacturer, its Service Centre
or other relevant qualified persons in order to avoid a hazard.
●Do not use wet hands to plug or unplug the power plug.
●Do not use if the cord or plug is damaged.
Please use the power cord and power plug correctly.
●Use exclusively one power socket with the rating of 10 A/220 V AC.
(If the socket is shared with other electrical appliances, it may cause fire due to heat.)
●The power plug must be fully inserted into the power socket. (Otherwise, it may cause fire due to
electric shock or heat. Do not use if the plug is damaged or the socket is loose.)
●Wipe the plug periodically with a dry cloth. (Dust or moisture built up on the plug may cause poor
insulation, resulting fire.)
●Be sure to unplug the appliance if you do not intend to use it for a long period of time or when you
perform cleaning or maintenance.
●When unplugging the appliance, always hold and pull the plug (instead of pulling the cord)
(as it may cause fire due to electric shock or short circuit).
Make sure this appliance is reliably earthed.
(There will be the risk of electric shock caused by malfunction or leakage.)
→ Be sure to use a single-phase, two-pole, earthed power socket or hire a qualified person to
carry out earthing of the appliance.
WARNING
CAUTION
WARNING
Notes on Use
■The dishwasher must be used
correctly
Knives and other cutlery with sharp
points must be loaded in the baskets
pointed down or placed in a horizontal
position. (It may cause cuts.)
If abnormality or error occurs, stop using
the appliance immediately, close the
supply valve and unplug the power plug.
(It may cause smoking, combustion, or electric shock.)
→ Contact Service Centre for inspection
and repair.
Examples of abnormality or error
· Sometimes the appliance does not operate
after the power is turned on.
· The door does not open or close normally.
· Abnormal sound is heard during operation.
· The appliance body is deformed or becomes
abnormally hot.
Be sure to close the water tap every time
after operation. (It may cause water leakage.)
This appliance is intended to be used in household
and similar applications such as:
· staff kitchen areas in shops, offices and other
working environments;
· farm houses;
· by clients in hotels, motels and other residential
environments;
· bed and breakfast type environments.
●
Do not place the dishwasher in a location near
electrical appliances such as a TV or radio
(which may cause distorted images or noises).
●
Do not pour water/hot water.
(Water may leak or enter components.)
Repair or service may be needed.
(This is out of scope of warranty.)
●
Do not use the appliance other than for its
washing or drying function. (Otherwise, it
may cause a failure.)
●
Do not tilt or move the appliance during
operation (which may cause water leakage).
●
The door should not be left in an open
position. (This could present a tripping
hazard.)
●
If the dishes are heavily soiled with grease,
increase an appropriate amount of dishwasher
detergent. (Otherwise, it may cause odour.)
■ Make sure to use dishwasher
detergent.
■
To prevent fire, burns
or electric shock
■To prevent fire
or injury
● Any kitchen detergent used for soaking
or pre-wash must be completely washed
away before the utensils are loaded
into the dishwasher.
●
Do not use kitchen detergent or baking soda.
(Excessive foam may be generated causing
water leakage or malfunction).
→Always use dishwasher detergent
(referred to as dishwasher tablet or
dishwasher powder)
(dishwasher
tablet)
(baking soda)
(kitchen
detergent)
(dishwasher
powder)
● Do not install in a place where freezing may
occur (below 0 °C).
(If not properly handled after freezing, it may
cause damage to the supply valve or pipes).
If draining is required for freezing prevention,
please contact Service Centre.
●
Do not use if the water contains impurities, as it
may cause poor water supply and malfunction.
● This appliance may have a rubber or resin
smell for a while after it is purchased.
There are no adverse effects to the human body,
and the odour will disappear after a period of time.
● In this manual, “×” indicates actions that are
incorrect or prohibited while “○” indicates
actions that are correct or appropriate.
EN2
Do not put in knives and choppers
(to avoid damage to the dishwasher).
Do not lean or press on the open door
with force
(as the appliance may topple or fall, causing injuries).
Do not stay near or touch the drain hose
or vent (as the exhaust hot water, hot air or steam
may cause burns).
If the appliance is connected with a water
heater, be careful of the hot water that may
come out when you turn on another tap
(as the outflow of hot water may cause burns).
Do not forcibly close the door if the
utensils protrude from the dishwasher
(as this may cause the door to deform or hot water
may squirt out resulting burns).
When opening the door, do not pry
open the upper part of the door
(as this may cause the door to deform or hot water
may squirt out resulting burns).
Open and close the door carefully to avoid
pinching your fingers (which may cause injuries)
The door should not stay in an open
position (as this may cause the utensils to
tumble and fall over resulting injuries)
WARNING
CAUTION
Reminder
NP-TH1HK.indd 4 2018/11/29 15:00:22
Job Name B685891_NP-TH1取説(香港)
Color K
File Name 0004_NP-TH1HK.pdf
Refine Time 2018-11-29 15:12:52 Print Time 2018-12-10 15:24:54
Job Name
B685891_NP-TH1取説(香港)
Color K
File Name 0004_NP-TH1HK.pdf
Refine Time 2018-11-29 15:12:52 Print Time 2018-12-10 15:24:54
English
This appliance is not intended for use by persons (including children) with reduced physical,
sensory or mental capabilities, or lack of experience and knowledge,unless they have been
given supervision or instruction concerning use of the appliance by a person responsible for
their safety. Children should be supervised to ensure that they do not play with the appliance.
Safety Precautions
■The following symbols indicate what you must observe.
■The following indicates the degree of hazards and damages caused by incorrect operation.
To prevent personal injuries and property damages, be sure to observe the following instructions.
■To prevent fire, burns or
electric shock
Indicates a potential hazard may result in minor or moderate personal injury
if not avoided.
Indicates a potential hazard may result in serious personal injury or death
if not avoided.
Indicates actions which are prohibited. Indicates actions which must be enforced.
EN1
must observe
Do not splash or sprinkle water on the appliance body. (It may cause fire or electric shock.)
Keep the appliance away from a flame or heat sources. (It may cause a fire.)
• Mosquito coils, cigarettes, candles, electric heaters, etc.
Ensure at least 15 cm clearance between the appliance and heat sources such
as a gas stove. (It may cause a fire.)
Do not bang the appliance while it is in operation.
(It may cause electric shock, electricity leakage, or short circuit, resulting fire.)
Do not open the dishwasher during operation or within 30 minutes after the end
of the operation. (The high temperature inside the appliance, washing water or steam may cause burns.)
→ Please wait for 30 minutes after the end of the operation before opening the dishwasher
(to take out the items, carry out cleaning or maintenance).
→ If you need to open the dishwasher during operation, you must pause the operation first and
open the door carefully and slowly.
Do not disassemble, repair or modify the appliance.
(It may cause fire or injury due to abnormal operation.)
Do not use the power cord or power plug incorrectly. (It may cause fire or electric shock.)
●Do not damage the cord or plug; do not modify, forcibly bend, twist, pull, load with heavy objects,
bundle, or place near heat sources.
→ If the cord or plug is damaged, it must be replaced by the manufacturer, its Service Centre
or other relevant qualified persons in order to avoid a hazard.
●Do not use wet hands to plug or unplug the power plug.
●Do not use if the cord or plug is damaged.
Please use the power cord and power plug correctly.
●Use exclusively one power socket with the rating of 10 A/220 V AC.
(If the socket is shared with other electrical appliances, it may cause fire due to heat.)
●The power plug must be fully inserted into the power socket. (Otherwise, it may cause fire due to
electric shock or heat. Do not use if the plug is damaged or the socket is loose.)
●Wipe the plug periodically with a dry cloth. (Dust or moisture built up on the plug may cause poor
insulation, resulting fire.)
●Be sure to unplug the appliance if you do not intend to use it for a long period of time or when you
perform cleaning or maintenance.
●When unplugging the appliance, always hold and pull the plug (instead of pulling the cord)
(as it may cause fire due to electric shock or short circuit).
Make sure this appliance is reliably earthed.
(There will be the risk of electric shock caused by malfunction or leakage.)
→ Be sure to use a single-phase, two-pole, earthed power socket or hire a qualified person to
carry out earthing of the appliance.
WARNING
CAUTION
WARNING
Notes on Use
■The dishwasher must be used
correctly
Knives and other cutlery with sharp
points must be loaded in the baskets
pointed down or placed in a horizontal
position. (It may cause cuts.)
If abnormality or error occurs, stop using
the appliance immediately, close the
supply valve and unplug the power plug.
(It may cause smoking, combustion, or electric shock.)
→ Contact Service Centre for inspection
and repair.
Examples of abnormality or error
· Sometimes the appliance does not operate
after the power is turned on.
· The door does not open or close normally.
· Abnormal sound is heard during operation.
· The appliance body is deformed or becomes
abnormally hot.
Be sure to close the water tap every time
after operation. (It may cause water leakage.)
This appliance is intended to be used in household
and similar applications such as:
· staff kitchen areas in shops, offices and other
working environments;
· farm houses;
· by clients in hotels, motels and other residential
environments;
· bed and breakfast type environments.
●
Do not place the dishwasher in a location near
electrical appliances such as a TV or radio
(which may cause distorted images or noises).
●
Do not pour water/hot water.
(Water may leak or enter components.)
Repair or service may be needed.
(This is out of scope of warranty.)
●
Do not use the appliance other than for its
washing or drying function. (Otherwise, it
may cause a failure.)
●
Do not tilt or move the appliance during
operation (which may cause water leakage).
● The door should not be left in an open
position. (This could present a tripping
hazard.)
●
If the dishes are heavily soiled with grease,
increase an appropriate amount of dishwasher
detergent. (Otherwise, it may cause odour.)
■ Make sure to use dishwasher
detergent.
■
To prevent fire, burns
or electric shock
■To prevent fire
or injury
● Any kitchen detergent used for soaking
or pre-wash must be completely washed
away before the utensils are loaded
into the dishwasher.
●
Do not use kitchen detergent or baking soda.
(Excessive foam may be generated causing
water leakage or malfunction).
→Always use dishwasher detergent
(referred to as dishwasher tablet or
dishwasher powder)
(dishwasher
tablet)
(baking soda)
(kitchen
detergent)
(dishwasher
powder)
●Do not install in a place where freezing may
occur (below 0 °C).
(If not properly handled after freezing, it may
cause damage to the supply valve or pipes).
If draining is required for freezing prevention,
please contact Service Centre.
●
Do not use if the water contains impurities, as it
may cause poor water supply and malfunction.
● This appliance may have a rubber or resin
smell for a while after it is purchased.
There are no adverse effects to the human body,
and the odour will disappear after a period of time.
●In this manual, “×” indicates actions that are
incorrect or prohibited while “○” indicates
actions that are correct or appropriate.
EN2
Do not put in knives and choppers
(to avoid damage to the dishwasher).
Do not lean or press on the open door
with force
(as the appliance may topple or fall, causing injuries).
Do not stay near or touch the drain hose
or vent (as the exhaust hot water, hot air or steam
may cause burns).
If the appliance is connected with a water
heater, be careful of the hot water that may
come out when you turn on another tap
(as the outflow of hot water may cause burns).
Do not forcibly close the door if the
utensils protrude from the dishwasher
(as this may cause the door to deform or hot water
may squirt out resulting burns).
When opening the door, do not pry
open the upper part of the door
(as this may cause the door to deform or hot water
may squirt out resulting burns).
Open and close the door carefully to avoid
pinching your fingers (which may cause injuries)
The door should not stay in an open
position (as this may cause the utensils to
tumble and fall over resulting injuries)
WARNING
CAUTION
Reminder
NP-TH1HK.indd 5 2018/12/07 15:34:34
Job Name B685891_NP-TH1取説(香港)
Color K
File Name 0005_NP-TH1HK.pdf
Refine Time 2018-12-07 15:40:32 Print Time 2018-12-10 15:24:54

Nozzle (back)
Nozzle (top)
Nozzle
(bottom)
Filter
(page EN13)
Rails
(right and left sides)
Parts Identification/Accessories
Door
Control panel
Open Door
button
Accessories
❶Supply hose (1) ❷Drain hose (1)
❺Clamp (1)
● A box of dishwasher detergent (sample) for trial use is included.
● Please refer to Installation Instructions (page EN19).
Reminder
❻Sucker (1)
❸
Supply hose connector (1)
❹Gasket (1)
Supply hose connector
Drain hose connector
Power cord
Back of the appliance
1
Power button
● After the power is turned on, by default it is automatically set to the program of
the last operation (except if the last program was "Dry Only")
4
Delay Start button
● Press this button, the program will start to operate automatically 4 hours later,
and the indicator “4 hours” will light up.
● Press the button again, it will cancel the Delay Start setting. The “4 hours”
display indicator will light off.
5
Start/Pause button
● Press this button to start operation. If you press this button during operation,
the operation will pause. Press it again, the operation will continue.
● If you do not press this button after the above steps, the power will be turned off
automatically after 10 minutes.
● If the door is not closed, pressing this button will not start the operation.
2
Program button
● In selecting the wash program, each time you press the button, you can switch
the wash mode. The display indicators will light up in turn to show the
corresponding mode. (page EN10)
3
Dry button
● Each time you press it, you can switch the drying mode, and the display
indicators will light up in turn to show the corresponding mode (page EN11).
6
● If the dishwasher salt is not adequate, the display indicator "Salt" will light up.
→
There is no need to add salt in Hong Kong. Please set it to option 0.
"Salt" indication disappears. (Page EN9)
2
3
1
5
4
6
Display
EN3
EN4
■ Attaching the basket
■ Removing the basket
■Attaching the basket
Upper basket Lower basket
■ Removing the basket
As shown in the illustration, lift up the convex
part of the basket from the concave part and
pull it out.
To attach the basket, do the reverse of removing it.
Align the rails and slide in.
Pull out the basket, then lift up to take out.
Convex
Concave
Cutlery container
The cover
grid can be
removed
following the
direction of
the arrow
● The shape and colour of the illustrations in this manual may differ from the actual appliance. Please refer
to the actual dishwasher.
Open the door
NP-TH1HK.indd 6 2018/11/15 9:29:47
Job Name B685891_NP-TH1取説(香港)
Color K
File Name 0006_NP-TH1HK.pdf
Refine Time 2018-11-15 09:38:49 Print Time 2018-12-10 15:24:55
Job Name
B685891_NP-TH1取説(香港)
Color K
File Name 0006_NP-TH1HK.pdf
Refine Time 2018-11-15 09:38:49 Print Time 2018-12-10 15:24:55
English
Nozzle (back)
Nozzle (top)
Nozzle
(bottom)
Filter
(page EN13)
Rails
(right and left sides)
Parts Identification/Accessories
Door
Control panel
Open Door
button
Accessories
❶Supply hose (1) ❷Drain hose (1)
❺Clamp (1)
● A box of dishwasher detergent (sample) for trial use is included.
● Please refer to Installation Instructions (page EN19).
Reminder
❻Sucker (1)
❸
Supply hose connector (1)
❹Gasket (1)
Supply hose connector
Drain hose connector
Power cord
Back of the appliance
1
Power button
● After the power is turned on, by default it is automatically set to the program of
the last operation (except if the last program was "Dry Only")
4
Delay Start button
● Press this button, the program will start to operate automatically 4 hours later,
and the indicator “4 hours” will light up.
● Press the button again, it will cancel the Delay Start setting. The “4 hours”
display indicator will light off.
5
Start/Pause button
● Press this button to start operation. If you press this button during operation,
the operation will pause. Press it again, the operation will continue.
● If you do not press this button after the above steps, the power will be turned off
automatically after 10 minutes.
● If the door is not closed, pressing this button will not start the operation.
2
Program button
● In selecting the wash program, each time you press the button, you can switch
the wash mode. The display indicators will light up in turn to show the
corresponding mode. (page EN10)
3
Dry button
● Each time you press it, you can switch the drying mode, and the display
indicators will light up in turn to show the corresponding mode (page EN11).
6
● If the dishwasher salt is not adequate, the display indicator "Salt" will light up.
→
There is no need to add salt in Hong Kong. Please set it to option 0.
"Salt" indication disappears. (Page EN9)
2
3
1
5
4
6
Display
EN3
EN4
■ Attaching the basket
■ Removing the basket
■Attaching the basket
Upper basket Lower basket
■ Removing the basket
As shown in the illustration, lift up the convex
part of the basket from the concave part and
pull it out.
To attach the basket, do the reverse of removing it.
Align the rails and slide in.
Pull out the basket, then lift up to take out.
Convex
Concave
Cutlery container
The cover
grid can be
removed
following the
direction of
the arrow
● The shape and colour of the illustrations in this manual may differ from the actual appliance. Please refer
to the actual dishwasher.
Open the door
NP-TH1HK.indd 7 2018/11/15 9:29:50
Job Name B685891_NP-TH1取説(香港)
Color K
File Name 0007_NP-TH1HK.pdf
Refine Time 2018-11-15 09:38:48 Print Time 2018-12-10 15:24:55

Confirmation and Preparation before Use
Preparation
■ Avoid light-weight items that may easily be blown off. (It may cause damage, smoke, burns and odour.)
●
Plastic spoons and lid
●
Styrofoam containers
●
Sponges and dishwashing cloths
●
Baby bottle nipples
■
Avoid items that are easy to discolour or its coating are easy to peel off.
●Silver, aluminum, copper, iron items
●Wooden (bamboo, rattan) items
●
Lacquered, gilded, or overglaze-painted items
●Fluorine processing pans
■ Avoid items with narrow mouth, the inside of which cannot be washed.
●Bottles and decanters
May re-deposit
Hand wash in advance
Fine residue such as seasonings, spices or
sesame seeds may re-deposit
Toothpicks, fish bones or rubber bands may
cause valve failure
Fish skin may cause odour
Remove food residues and foreign objects
before loading
Utensils with roasted food
or steamed eggs, stubborn
stains on burnt pans that
are difficult to clean
Soak and clean up
before loading
■ The following stains may not be completely removed
■If the items are stained with food colours (such as ketchup or curry), the pigment may adhere to the
inside of the dishwasher. Remove before loading.
•
Accumulated tea rust
•
Lipstick stains (depends on the types)
•
Plastic tableware stained with food colours
■ Avoid non-heat proof items (that are easy to be deformed by heat).
●Plastic items with a heat resistance of 90 °C or less
(including items without a heat-proof label).
●Iron frying pans, knives
■ Avoid items that are easy to get rusted.
■ Avoid fragile items
●Cracked, broken items
●Crackle glaze dinnerware (tableware with crack pattern)
●Crystal glass, tempered carved glass
●Pans with a wooden handle
●Other items that are not mentioned above or which you are not sure whether they should be washed
in the dishwasher, please refer to the instructions on the dishwasher detergent or contact the dealer.
Tough soils
Food
residues
Burns and
scorches
EN5
Items that are not suitable for the dishwasher.
CAUTION
Avoid tempered glasses
(which may scatter when broken, resulting in injuries)
Quick Start Guide
❶To open the door,
❷ Loading the dishwasher
■ To close the door
Press the upper central part of the
door above the Open Door button to
close the door until the left and right
door latches are set firmly.
①
press the Open Door button,
②open the door
Preparation • Confirm the installation (pages EN19 - EN24) and the placement of the filter
(page EN13) are correct
• Confirm the utensils are suitable for cleaning by the dishwasher (page EN5)
• Use only dishwasher detergent. Read carefully and follow the instructions on the dishwasher detergent.
Loading the dishwasher
(pages EN7 - EN8)
Adding detergent (page EN9)
• Select the program as needed, and press Start/Pause to start the operation.
• If you have to open the door during operation (for example, to load more items), you must press Start/Pause
and open the door slowly.
(Otherwise, washing water may spill out.)
• If you open the door without pressing Start/Pause during operation, the operation will stop.
→ Close the door and the operation will re-start.
Washing and Drying (pages EN10 - EN11)
• Six beep sounds end the operation.
• Take out the items after 30 minutes from the completion of the operation. (When the operation is completed,
the temperature inside the dishwasher is still very high and it is easy to get burnt.)
• Cleaning the filter (page EN13)
Operation completed
Placing items improperly may result in the door not being able to open and close, causing steam leakage,
water leakage, and damage and deformation of the dishwasher and utensils, or affecting the cleaning result.
Therefore, please observe the following instructions.
1
2
3
4
5
■ Avoid overlapping the items
■ The soiled surfaces should face
inward towards the nozzles.
■Tilt the items if they have a concave
bottom to reduce residual water.
Residual water
will be reduced.
• Items should be loaded
facing down
• Items should not block the
back nozzle
(to avoid blocking the spraying
water to clean items in the
upper basket)
•
Items should not protrude
from the door
• Do not overlap the items
•
Items should not protrude
outside the basket or from the
bottom of the basket, or touch
the nozzle
(Otherwise, the nozzle rotation
may stop, hence affecting the
washing result.)
•
Items should be loaded with
the soiled surfaces facing
inward towards the nozzle
Clicking
EN6
Open Door
button
NP-TH1HK.indd 8 2018/11/30 15:11:17
Job Name B685891_NP-TH1取説(香港)
Color K
File Name 0008_NP-TH1HK.pdf
Refine Time 2018-11-30 15:16:59 Print Time 2018-12-10 15:24:55
Job Name
B685891_NP-TH1取説(香港)
Color K
File Name 0008_NP-TH1HK.pdf
Refine Time 2018-11-30 15:16:59 Print Time 2018-12-10 15:24:55
English
Confirmation and Preparation before Use
Preparation
■ Avoid light-weight items that may easily be blown off. (It may cause damage, smoke, burns and odour.)
●
Plastic spoons and lid
●
Styrofoam containers
●
Sponges and dishwashing cloths
●
Baby bottle nipples
■
Avoid items that are easy to discolour or its coating are easy to peel off.
●Silver, aluminum, copper, iron items
●Wooden (bamboo, rattan) items
●
Lacquered, gilded, or overglaze-painted items
●Fluorine processing pans
■ Avoid items with narrow mouth, the inside of which cannot be washed.
●Bottles and decanters
May re-deposit
Hand wash in advance
Fine residue such as seasonings, spices or
sesame seeds may re-deposit
Toothpicks, fish bones or rubber bands may
cause valve failure
Fish skin may cause odour
Remove food residues and foreign objects
before loading
Utensils with roasted food
or steamed eggs, stubborn
stains on burnt pans that
are difficult to clean
Soak and clean up
before loading
■ The following stains may not be completely removed
■If the items are stained with food colours (such as ketchup or curry), the pigment may adhere to the
inside of the dishwasher. Remove before loading.
•
Accumulated tea rust
•
Lipstick stains (depends on the types)
•
Plastic tableware stained with food colours
■ Avoid non-heat proof items (that are easy to be deformed by heat).
●Plastic items with a heat resistance of 90 °C or less
(including items without a heat-proof label).
●Iron frying pans, knives
■ Avoid items that are easy to get rusted.
■ Avoid fragile items
●Cracked, broken items
●Crackle glaze dinnerware (tableware with crack pattern)
●Crystal glass, tempered carved glass
●Pans with a wooden handle
●Other items that are not mentioned above or which you are not sure whether they should be washed
in the dishwasher, please refer to the instructions on the dishwasher detergent or contact the dealer.
Tough soils
Food
residues
Burns and
scorches
EN5
Items that are not suitable for the dishwasher.
CAUTION
Avoid tempered glasses
(which may scatter when broken, resulting in injuries)
Quick Start Guide
❶To open the door,
❷ Loading the dishwasher
■ To close the door
Press the upper central part of the
door above the Open Door button to
close the door until the left and right
door latches are set firmly.
①
press the Open Door button,
②open the door
Preparation • Confirm the installation (pages EN19 - EN24) and the placement of the filters
(page EN13) are correct
• Confirm the utensils are suitable for cleaning by the dishwasher (page EN5)
• Use only dishwasher detergent. Read carefully and follow the instructions on the dishwasher detergent.
Loading the dishwasher
(pages EN6 - EN8)
Adding detergent (page EN9)
• Select the program as needed, and press Start/Pause to start the operation.
• If you have to open the door during operation (for example, to load more items), you must press Start/Pause
and open the door slowly.
(Otherwise, washing water may spill out.)
• If you open the door without pressing Start/Pause during operation, the operation will stop.
→ Close the door and the operation will re-start.
Washing and Drying (pages EN10 - EN11)
• Six beep sounds end the operation.
• Take out the items after 30 minutes from the completion of the operation. (When the operation is completed,
the temperature inside the dishwasher is still very high and it is easy to get burnt.)
• Cleaning the filter (page EN13)
Operation completed
Placing items improperly may result in the door not being able to open and close, causing steam leakage,
water leakage, and damage and deformation of the dishwasher and utensils, or affecting the cleaning result.
Therefore, please observe the following instructions.
1
2
3
4
5
■ Avoid overlapping the items
■ The soiled surfaces should face
inward towards the nozzles.
■Tilt the items if they have a concave
bottom to reduce residual water.
Residual water
will be reduced.
• Items should be loaded
facing down
• Items should not block the
back nozzle
(to avoid blocking the spraying
water to clean items in the
upper basket)
•
Items should not protrude
from the door
• Do not overlap the items
•
Items should not protrude
outside the basket or from the
bottom of the basket, or touch
the nozzle
(Otherwise, the nozzle rotation
may stop, hence affecting the
washing result.)
•
Items should be loaded with
the soiled surfaces facing
inward towards the nozzle
Clicking
EN6
Open Door
button
NP-TH1HK.indd 9 2018/12/10 15:12:09
Job Name B685891_NP-TH1取説(香港)
Color K
File Name 0009_NP-TH1HK.pdf
Refine Time 2018-12-10 15:13:42 Print Time 2018-12-10 15:24:56

Instructions for Use
Upper basket
Rice bowls
Tea cups
Glasses
Soup spoon
■ Basket partitions
● Items should be loaded with the soiled surfaces facing the nozzles (see ) for effective
water spraying so as to achieve satisfactory washing result.
Loading the Dishwasher
Noodle bowls
Chopsticks
Deep plates
Rice spoon
Sauce plate
Sauce plate
Cutlery container
Spoons
Lower basket (with a cutlery container)
Shallow plates
• A sauce plate can
be placed here.
(top view)
• the tip (soiled end)
facing downward
EN7
■ Adjusting the baskets
There are movable racks in the upper and lower baskets of the dishwasher (a total of 4 movable racks)
for placing larger items.
If long items such as chopsticks in the lower basket touch the upper basket, the resin rack of the upper
basket can be raised up.
To put in larger items such as pans, the rack for holding soup spoons can be raised up, or the racks for
placing the noodle bowls and deep plates can be laid flat.
●The sizes of items that the dishwasher can accommodate are as follows:
[ Upper basket ] Glasses: height or less 160 mm
[ Upper basket ] Tea cups: height or less 120 mm
[ Upper basket ] Soup spoon: length below, less than 250 mm
[ Lower basket ] Sauce plates: diameter below, less than 180 mm
[ Lower basket ] Deep plates, shallow plates: diameter below, less than 230 mm; if the movable rack (❶) of
the upper basket is raised up, then 270 mm or less
[ Lower basket] Items in cutlery container: height 330 mm or less
(If there are many chopsticks, remove the top grid of the cutlery container (page EN3) to put in more items)
Upper basket movable rack (❶)
Lower basket movable racks (❷❸❹)
Bulge placed on top
Hooks placed on top
❶
❷
❸
❹
After adjustment
EN8
Reminder
NP-TH1HK.indd 10 2018/11/15 9:30:00
Job Name B685891_NP-TH1取説(香港)
Color K
File Name 0010_NP-TH1HK.pdf
Refine Time 2018-11-15 09:38:45 Print Time 2018-12-10 15:24:56
Job Name
B685891_NP-TH1取説(香港)
Color K
File Name 0010_NP-TH1HK.pdf
Refine Time 2018-11-15 09:38:45 Print Time 2018-12-10 15:24:56
English
Instructions for Use
Upper basket
Rice bowls
Tea cups
Glasses
Soup spoon
■ Basket partitions
● Items should be loaded with the soiled surfaces facing the nozzles (see ) for effective
water spraying so as to achieve satisfactory washing result.
Loading the Dishwasher
Noodle bowls
Chopsticks
Deep plates
Rice spoon
Sauce plate
Sauce plate
Cutlery container
Spoons
Lower basket (with a cutlery container)
Shallow plates
• A sauce plate can
be placed here.
(top view)
• the tip (soiled end)
facing downward
EN7
■ Adjusting the baskets
There are movable racks in the upper and lower baskets of the dishwasher (a total of 4 movable racks)
for placing larger items.
If long items such as chopsticks in the lower basket touch the upper basket, the resin rack of the upper
basket can be raised up.
To put in larger items such as pans, the rack for holding soup spoons can be raised up, or the racks for
placing the noodle bowls and deep plates can be laid flat.
Upper basket movable rack (❶)
Lower basket movable racks (❷❸❹)
Bulge placed on top
Hooks placed on top
❶
❷
❸
❹
After adjustment
EN8
Reminder
●The sizes of items that the dishwasher can accommodate are as follows:
[ Upper basket ] Glasses: height 160 mm or less
[ Upper basket ] Tea cups: height 120 mm or less
[ Upper basket ] Soup spoon: length 250 mm or less
[ Lower basket ] Sauce plates: diameter 180 mm or less
[ Lower basket ] Deep plates, shallow plates: diameter 230 mm or less; if the movable rack (❶) of the upper
basket is raised up, then 270 mm or less
[ Lower basket] Items in cutlery container: height 330 mm or less
(If there are many chopsticks, remove the top grid of the cutlery container (page EN3) to put in more items)
NP-TH1HK.indd 11 2018/11/29 15:01:24
Job Name B685891_NP-TH1取説(香港)
Color K
File Name 0011_NP-TH1HK.pdf
Refine Time 2018-11-29 15:12:49 Print Time 2018-12-10 15:24:56

Instructions for Use
For Hong Kong, set the option code "0".
1
If using the dishwasher in an area of high water hardness level, whitish staining may leave on the utensils and
baskets.The dishwasher can be programed according to the level of water hardness. By adding dishwasher salt,
the water will be softened to reduce its hardness to achieve a better cleaning result.
●Make the following settings to avoid consuming more dishwasher salt and water and having a poor
cleaning result.
■
Area setting (while power is turned off)
1Press Delay Start and Start/Pause for
2.5 seconds simultaneously. After 2
beep sounds, start setting.
2Press Delay Start, select the function
code “Air”.
3Press Program and select the
corresponding option code according
to the water hardness level.
Confirm power is turned off
■ Adding dishwasher salt (while power is off)
Remove the lower basket, unscrew the lid, and
carefully pour in the dishwasher salt (about 400 g).
Then, tighten the cover.
• When using for the first time, fill in water (about 200 g)
fully after adding the salt. Stir well until it dissolves.
4Press Start/Pause to save the setting.
Six beep sounds complete the setting.
Water Softening System
●
When adding the salt, use a scale to weigh it and pour in with a measuring cup. If you accidentally spill the salt,
wipe off the salt on the dispenser (to prevent the salt rubbing against the lid, hence reducing the tightness).
●When using for the first time or when the "Salt” indicator lights up, please add the dishwasher salt (do not
use edible salt), and read carefully and follow the instructions on the dishwasher salt.
●If you use all-in-one dishwasher detergent which contains dishwasher salt, and the water hardness is less
than 300 mg/L, you don't need to use the dishwasher salt. However, if water hardness is over 300 mg/L,
you still need to add dishwasher salt.
Adding dishwasher detergent
2
Add into the dishwasher according to the
instructions on the dishwasher detergent.
The standard amount for each washing
(for reference only)
Dishwasher tablet : 1 tab (about 10 g)
Dishwasher powder : 21 g
or
(Dishwasher
tablet)
(Dishwasher
powder)
●Please read carefully and follow the
precautions and instructions on the
dishwasher detergent.
Adding Detergent and Washing
Air
0
Air + Intense
100 [mg/L] or less
1100 - 200 [mg/L]
2Air + Basic *
200 - 300 [mg/L]
3
Air
+
Intense, Basic
300 - 400 [mg/L]
4Air + Speedy
400 - 500 [mg/L]
Display indicator
(lights up)
* The above are factory set.
Function code
(press Delay
Start)
Option code
(water hardness)
(press Program)
Air
EN9
close open
400 g
200 g
Reminder
Reminder
Confirm power is turned off
Adding Detergent
For Hong Kong with option code "0", there is no need to add salt.
Please skip this step and move to the next step (Adding Detergent).
Press to select a program
4
• Each time you press the Program button, you can switch the mode shown in the chart below, and the
indicators in the display will light up in turn.
• When an indicator lights up, the mode of the previous operation is set by default
(except if the last operation was “Dry Only”) (Mode ①is factory set).
Press to turn on the power
3
•After all indicators in the display blink once, only the indicator of the last operation will light up
(and the other indicators will light off) (except if the last operation was "Dry Only").
• If all indicators in the display keep lighted up, close the door and turn the power on again.
Select functions
●①
and
②
are suitable for washing immediately after the meal.
③
and
④
are suitable for washing several hours after
the meal or when the items are heavily soiled.
⑤
and
⑥
are suitable for washing immediately after the meal, when
there are less items to wash or when water-saving and energy-saving are in mind.
⑦
and
⑧
are for cleaning and
maintenance of the inside of the dishwasher.
⑨
is applicable for drying after hand wash, or using as a dish warmer.
⑩
and
⑪
are best when the items are slightly or lightly soiled.
●
Basic, Intense, Care, Eco, Speedy programs (i.e. except Dry) can supplement or cancel the Keep setting.
When Keep is set, air will be intermittently blowing for about 2 hours.
●
The Sanitize mode can be combined with other programs (except Dry). The maximum water temperature
during rinsing can be changed to 80 °C, hence achieving better cleaning result.
●
The operating times in the above chart are measured at room temperature 20 °C, supply water temperature 15 °C,
and water pressure 0.24 MPa. The actual operating time depends on room temperature, water temperature,
water pressure, and the location of the items loaded and so on.
●
During the operation, the indicator of the relevant mode will keep light on and off, indicating that operation is in progress.
EN10
4
Display
3
5
6
Main
program
Additional
mode
Main
drying
function
Additional
drying
mode
Operation process and operation time (approx.)
Wash (31 minutes) → Rinse 3 times (35 minutes, 70 °C)
→ Dry (30 minutes) → Keep (2 hours)
Basic -0.5 h Keep
Sanitize
Wash (31 minutes) → Rinse 3 times (43-53 minutes,
maximum temperature up to 80 °C) → Dry (30 minutes)
→ Keep (2 hours)
Basic 0.5 h Keep
Intense -0.5 h Keep Wash (60 minutes) → Rinse 3 times (40 minutes, 70 °C)
→ Dry (30 minutes) → Keep (2 hours)
SanitizeIntense 0.5 h Keep
Wash (60 minutes) → Rinse 3 times (48 - 58 minutes,
maximum temperature up to 80 °C) → Dry (30 minutes)
→ Keep (2 hours)
Care - --
Wash (108 minutes) → Rinse 3 times (26 minutes, 60 °C)
Care Sanitize -- Wash (108 minutes) → Rinse 3 times (34 - 44 minutes,
maximum temperature up to 80 °C)
Dry Only
--
1 h Dry (60 minutes)
Speedy ---
Wash (17 minutes) → Rinse 2 times (18 minutes, 60 °C)
Speedy Sanitize --
Wash (17 minutes) → Rinse 2 times (26 - 36 minutes,
maximum temperature up to 80 °C)
Eco Air
- - Wash (31 minutes) → Rinse 3 times (73 minutes, 60 °C)
→ Air (240 minutes)
SanitizeEco Air -Wash (31 minutes) → Rinse 3 times (81 - 91 minutes,
maximum temperature up to 80 °C) → Air (240 minutes)
①
②
③
④
⑤
⑥
⑦
⑧
⑨
⑩
⑪
Serial
No.
Reminder
NP-TH1HK.indd 12 2018/11/29 15:01:46
Job Name B685891_NP-TH1取説(香港)
Color K
File Name 0012_NP-TH1HK.pdf
Refine Time 2018-11-29 15:12:46 Print Time 2018-12-10 15:24:57
Job Name
B685891_NP-TH1取説(香港)
Color K
File Name 0012_NP-TH1HK.pdf
Refine Time 2018-11-29 15:12:46 Print Time 2018-12-10 15:24:57
English
Instructions for Use
For Hong Kong, set the option code "0".
1
If using the dishwasher in an area of high water hardness level, whitish staining may leave on the utensils and
baskets.The dishwasher can be programed according to the level of water hardness. By adding dishwasher salt,
the water will be softened to reduce its hardness to achieve a better cleaning result.
●Make the following settings to avoid consuming more dishwasher salt and water and having a poor
cleaning result.
■
Area setting (while power is turned off)
1Press Delay Start and Start/Pause for
2.5 seconds simultaneously. After 2
beep sounds, start setting.
2Press Delay Start, select the function
code “Air”.
3Press Program and select the
corresponding option code according
to the water hardness level.
Confirm power is turned off
■ Adding dishwasher salt (while power is off)
Remove the lower basket, unscrew the lid, and
carefully pour in the dishwasher salt (about 400 g).
Then, tighten the cover.
• When using for the first time, fill in water (about 200 g)
fully after adding the salt. Stir well until it dissolves.
4Press Start/Pause to save the setting.
Six beep sounds complete the setting.
Water Softening System
●
When adding the salt, use a scale to weigh it and pour in with a measuring cup. If you accidentally spill the salt,
wipe off the salt on the dispenser (to prevent the salt rubbing against the lid, hence reducing the tightness).
●When using for the first time or when the "Salt” indicator lights up, please add the dishwasher salt (do not
use edible salt), and read carefully and follow the instructions on the dishwasher salt.
●If you use all-in-one dishwasher detergent which contains dishwasher salt, and the water hardness is less
than 300 mg/L, you don't need to use the dishwasher salt. However, if water hardness is over 300 mg/L,
you still need to add dishwasher salt.
Adding dishwasher detergent
2
Add into the dishwasher according to the
instructions on the dishwasher detergent.
The standard amount for each washing
(for reference only)
Dishwasher tablet : 1 tab (about 10 g)
Dishwasher powder : 21 g
or
(Dishwasher
tablet)
(Dishwasher
powder)
●Please read carefully and follow the
precautions and instructions on the
dishwasher detergent.
Adding Detergent and Washing
Air
0
Air + Intense
100 [mg/L] or less
1100 - 200 [mg/L]
2Air + Basic *
200 - 300 [mg/L]
3
Air
+
Intense, Basic
300 - 400 [mg/L]
4Air + Speedy
400 - 500 [mg/L]
Display indicator
(lights up)
* The above are factory set.
Function code
(press Delay
Start)
Option code
(water hardness)
(press Program)
Air
EN9
close open
400 g
200 g
Reminder
Reminder
Confirm power is turned off
Adding Detergent
For Hong Kong with option code "0", there is no need to add salt.
Please skip this step and move to the next step (Adding Detergent).
Press to select a program
4
• Each time you press the Program button, you can switch the mode shown in the chart below, and the
indicators in the display will light up in turn.
• When an indicator lights up, the mode of the previous operation is set by default
(except if the last operation was “Dry Only”) (Mode ①is factory set).
Press to turn on the power
3
•After all indicators in the display blink once, only the indicator of the last operation will light up
(and the other indicators will light off) (except if the last operation was "Dry Only").
• If all indicators in the display keep lighted up, close the door and turn the power on again.
Select functions
●①
and
②
are suitable for washing immediately after the meal.
③
and
④
are suitable for washing several hours after
the meal or when the items are heavily soiled.
⑤
and
⑥
are suitable for washing immediately after the meal, when
there are less items to wash or when water-saving and energy-saving are in mind.
⑦
and
⑧
are for cleaning and
maintenance of the inside of the dishwasher.
⑨
is applicable for drying after hand wash, or using as a dish warmer.
⑩
and
⑪
are best when the items are slightly or lightly soiled.
●
Basic, Intense, Care, Eco, Speedy programs (i.e. except Dry) can supplement or cancel the Keep setting.
When Keep is set, air will be intermittently blowing for about 2 hours.
●
The Sanitize mode can be combined with other programs (except Dry). The maximum water temperature
during rinsing can be changed to 80 °C, hence achieving better cleaning result.
●
The operating times in the above chart are measured at room temperature 20 °C, supply water temperature 15 °C,
and water pressure 0.24 MPa. The actual operating time depends on room temperature, water temperature,
water pressure, and the location of the items loaded and so on.
●
During the operation, the indicator of the relevant mode will keep light on and off, indicating that operation is in progress.
EN10
4
Display
3
5
6
Main
program
Additional
mode
Main
drying
function
Additional
drying
mode
Operation process and operation time (approx.)
Wash (31 minutes) → Rinse 3 times (35 minutes, 70 °C)
→ Dry (30 minutes) → Keep (2 hours)
Basic -0.5 h Keep
Sanitize
Wash (31 minutes) → Rinse 3 times (43-53 minutes,
maximum temperature up to 80 °C) → Dry (30 minutes)
→ Keep (2 hours)
Basic 0.5 h Keep
Intense -0.5 h Keep Wash (60 minutes) → Rinse 3 times (40 minutes, 70 °C)
→ Dry (30 minutes) → Keep (2 hours)
SanitizeIntense 0.5 h Keep
Wash (60 minutes) → Rinse 3 times (48 - 58 minutes,
maximum temperature up to 80 °C) → Dry (30 minutes)
→ Keep (2 hours)
Care - --
Wash (108 minutes) → Rinse 3 times (26 minutes, 60 °C)
Care Sanitize -- Wash (108 minutes) → Rinse 3 times (34 - 44 minutes,
maximum temperature up to 80 °C)
Dry Only
--
1 h Dry (60 minutes)
Speedy ---
Wash (17 minutes) → Rinse 2 times (18 minutes, 60 °C)
Speedy Sanitize --
Wash (17 minutes) → Rinse 2 times (26 - 36 minutes,
maximum temperature up to 80 °C)
Eco Air
- - Wash (31 minutes) → Rinse 3 times (73 minutes, 60 °C)
→ Air (240 minutes)
SanitizeEco Air -Wash (31 minutes) → Rinse 3 times (81 - 91 minutes,
maximum temperature up to 80 °C) → Air (240 minutes)
①
②
③
④
⑤
⑥
⑦
⑧
⑨
⑩
⑪
Serial
No.
Reminder
NP-TH1HK.indd 13 2018/11/29 15:01:57
Job Name B685891_NP-TH1取説(香港)
Color K
File Name 0013_NP-TH1HK.pdf
Refine Time 2018-11-29 15:12:53 Print Time 2018-12-10 15:24:57

Instructions on Use
Press to start
6
• When you want to adjust the drying function included in the previous program, you can do so by pressing
the Dry button. Each time you press, you can switch the drying mode according to the chart below.
The display indicators will light on in turn.
• Drying starts according to the selected program,
and ends with 6 beep sounds.
• If you do not press this button after the above steps,
power will be automatically turned off after 10 minutes.
Press and select drying
5
●Take out the items after 30 minutes from
the end of operation (to avoid burns).
●Clean the filter after each operation. (page EN13)
Basic, Intense program Speedy, Care program
Dry Only program
Eco program
■ Delay Start program
You can preset to start the operation 4 hours later by the following procedure.
Press , the indicator for in the display will light up,
After step 5 in pages EN9 - EN11,
(operation will start 4 hours later)
press
●You cannot use the Delay Start function in Dry Only, Speedy, Speedy + Sanitize programs.
●If you want to cancel Delay Start, press , the indicator “4 hours” will light off.
●After adjusting the drying mode, the overall operating time will also change.
●
When No Drying is selected, air blowing will continue for about 3 minutes (about 30 minutes if dishwasher
salt is added), which is normal. (This is to discharge some of the hot air to avoid burns.)
EN11
0.5 h
0.5 h
1 h
1 h
↓
↓
↓
↓
↓
↓
Air
No Drying
Air
Keep
Factory
setting
+
Keep
+
Keep
+Air
1 h
Air
No Drying
↓
↓
↓
↓
↓
↓
0.5 h
1 h
0.5 h
Keep
+
Keep
+
No Drying
Air
0.5 h
0.5 h
↓
↓
↓
↓
↓
↓
1 h
Air
1 h
Keep
+
Keep
+
Keep
+
Keep
+
1 h
0.5 h
↓
Reminder
Caution
Reminder
Drying · Delay Start · Changing the settings
■ Changing the settings
Various settings can be changed according to your preference or actual situation.
If you want to enhance the washing performance by extending the
washing time, change the settings as follows.
If you want to enhance the drying performance by extending the drying
time, change the settings as follows.
Enhanced drying settin
gs
1Press Delay Start and Start/Pause
for 2.5 seconds simultaneously.
Start setting after 2 beep sounds.
2Press Delay Start, and select
function code “1 h”.
3Press Program again and select
the option code as needed
(whether to enhance washing).
4Press Start/Pause to save the
setting and 6 beep sounds complete
the setting.
1Press Delay Start and Start/Pause
for 2.5 seconds simultaneously.
Start setting after 2 beep sounds.
2Press Delay Start and select the
function code “Air + 1 h”.
3Press Program again and select
the option code as needed
(whether to enhance drying).
4Press Start/Pause to save the
setting and 6 beep sounds complete
the setting.
Disable the buzzer setting after operation
1Press Delay Start and Start/Pause
for 2.5 seconds simultaneously.
Start setting after 2 beep sounds.
2Press Delay Start and select the
function code “0.5 h”.
3Press Program again and select the
option code as needed (whether to
disable the buzzer for operation
completion).
4
Press Start/Pause to save the setting
and 6 beep sounds complete the setting.
Confirm power is turn off
Confirm power is turned off
Enhanced washing settings
If you want to disable the buzzer at the completion
of the dishwashing, make the changes as follows.
* Indicates that the operation mode is factory set.
EN12
Option code
(whether to enhance
drying)
(press Program)
Air + 1 h
0 No need Air + 1 h *
1 Enhanced Air + 1 h
+ Intense
Function code
(press
Delay Start)
Display indicator
(lights up)
Option code
(whether to enhance
washing)
(press Program)
Display indicator
(lights up)
1 h
0 No need
1 Enhanced 1 h + Intense
Function code
(press
Delay Start)
1 h *
Function code
(press
Delay Start)
Option code
(whether to enable or
disable the buzzer for
operation completion)
(press Program)
0.5 h
0 Disable 0.5 h
1 Enable 0.5 h
+ Intense *
Display indicator
(lights up)
NP-TH1HK.indd 14 2018/11/15 9:30:17
Job Name B685891_NP-TH1取説(香港)
Color K
File Name 0014_NP-TH1HK.pdf
Refine Time 2018-11-15 09:38:54 Print Time 2018-12-10 15:24:57
Job Name
B685891_NP-TH1取説(香港)
Color K
File Name 0014_NP-TH1HK.pdf
Refine Time 2018-11-15 09:38:54 Print Time 2018-12-10 15:24:57
English
Instructions on Use
Press to start
6
• When you want to adjust the drying function included in the previous program, you can do so by pressing
the Dry button. Each time you press, you can switch the drying mode according to the chart below.
The display indicators will light on in turn.
• Drying starts according to the selected program,
and ends with 6 beep sounds.
• If you do not press this button after the above steps,
power will be automatically turned off after 10 minutes.
Press and select drying
5
●Take out the items after 30 minutes from
the end of operation (to avoid burns).
●Clean the filter after each operation. (page EN13)
Basic, Intense program Speedy, Care program
Dry Only program
Eco program
■ Delay Start program
You can preset to start the operation 4 hours later by the following procedure.
Press , the indicator for in the display will light up,
After step 5 in pages EN9 - EN11,
(operation will start 4 hours later)
press
●You cannot use the Delay Start function in Dry Only, Speedy, Speedy + Sanitize programs.
●If you want to cancel Delay Start, press , the indicator “4 hours” will light off.
●After adjusting the drying mode, the overall operating time will also change.
●
When No Drying is selected, air blowing will continue for about 3 minutes (about 30 minutes if dishwasher
salt is added), which is normal. (This is to discharge some of the hot air to avoid burns.)
EN11
0.5 h
0.5 h
1 h
1 h
↓
↓
↓
↓
↓
↓
Air
No Drying
Air
Keep
Factory
setting
+
Keep
+
Keep
+Air
1 h
Air
No Drying
↓
↓
↓
↓
↓
↓
0.5 h
1 h
0.5 h
Keep
+
Keep
+
No Drying
Air
0.5 h
0.5 h
↓
↓
↓
↓
↓
↓
1 h
Air
1 h
Keep
+
Keep
+
Keep
+
Keep
+
1 h
0.5 h
↓
Reminder
Caution
Reminder
Drying · Delay Start · Changing the settings
■ Changing the settings
Various settings can be changed according to your preference or actual situation.
If you want to enhance the washing performance by extending the
washing time, change the settings as follows.
If you want to enhance the drying performance by extending the drying
time, change the settings as follows.
Enhanced drying settin
gs
1Press Delay Start and Start/Pause
for 2.5 seconds simultaneously.
Start setting after 2 beep sounds.
2Press Delay Start, and select
function code “1 h”.
3Press Program again and select
the option code as needed
(whether to enhance washing).
4Press Start/Pause to save the
setting and 6 beep sounds complete
the setting.
1Press Delay Start and Start/Pause
for 2.5 seconds simultaneously.
Start setting after 2 beep sounds.
2Press Delay Start and select the
function code “Air + 1 h”.
3Press Program again and select
the option code as needed
(whether to enhance drying).
4Press Start/Pause to save the
setting and 6 beep sounds complete
the setting.
Disable the buzzer setting after operation
1Press Delay Start and Start/Pause
for 2.5 seconds simultaneously.
Start setting after 2 beep sounds.
2Press Delay Start and select the
function code “0.5 h”.
3Press Program again and select the
option code as needed (whether to
disable the buzzer for operation
completion).
4
Press Start/Pause to save the setting
and 6 beep sounds complete the setting.
Confirm power is turn off
Confirm power is turned off
Enhanced washing settings
If you want to disable the buzzer at the completion
of the dishwashing, make the changes as follows.
* Indicates that the operation mode is factory set.
EN12
Option code
(whether to enhance
drying)
(press Program)
Air + 1 h
0 No need Air + 1 h *
1 Enhanced Air + 1 h
+ Intense
Function code
(press
Delay Start)
Display indicator
(lights up)
Option code
(whether to enhance
washing)
(press Program)
Display indicator
(lights up)
1 h
0 No need
1 Enhanced 1 h + Intense
Function code
(press
Delay Start)
1 h *
Function code
(press
Delay Start)
Option code
(whether to enable or
disable the buzzer for
operation completion)
(press Program)
0.5 h
0 Disable 0.5 h
1 Enable 0.5 h
+ Intense *
Display indicator
(lights up)
NP-TH1HK.indd 15 2018/11/15 9:30:20
Job Name B685891_NP-TH1取説(香港)
Color K
File Name 0015_NP-TH1HK.pdf
Refine Time 2018-11-15 09:38:53 Print Time 2018-12-10 15:24:58

Maintenance
● Take out the utensils, clean the food filter, and carry out maintenance after 30 minutes from
operation completion (to avoid burns)
● Be sure to turn off the power before carrying out maintenance.
●
Do not fill in water by hand when performing maintenance (to avoid water leakage, damage or error alarm).
(If after-sales service such as repair is required as a result of manual water injection, it will not be covered
by the free warranty even within the warranty period.)
●
Do not use bleacher, detergent, thinner, benzine, cleanser, wax or pesticide (as it may cause damage or discolouration.)
● When using a chemical wipe cloth, please follow the instructions on the product.
Clean the filter
Wipe the door, vent and sealing with a damp soft cloth
As shown in the illustration, take out the food filter from the dishwasher, disassemble the filter and rinse
them with water.
● After cleaning, put them back in the reverse order.
Once a
month
Every time
Take out the basket and then the filter.
· If it is difficult to rinse off the deposit,
use a brush to remove them.
●
If the filters are clogged, the cleaning performance may deteriorate, or the filters may become mouldy,
cause odour or water leakage.
● Dirts are easy to accumulate at the edge sealing and vent of the dishwasher. Please clean carefully.
● Pull out the baskets and wipe off the dirts on the inside walls of the dishwasher.
Select the Care program to clean the internal body
Cleaning the inside of the dishwasher
(Care program)
2~3 times
each month
Do not put in any items when performing the Care program.
● During the operation, it will pause 2 times (about 30 minutes apart)
(so that the high temperature steam will float up the dirts)
● The spraying water may not be able to reach the door edge sealing → Please wipe by hand
●
Colored soils such as ketchup and curry are difficult to clean
→
Please rinse those utensils before loading
● The detergent in the ❶ step can be replaced by a dishwasher cleaner sold in the market.
Please follow the instructions on the product when using it.
Add the dishwasher detergent (about 2 times of the standard amount)
❶
❸Press to select Care
❹Press to start cleaning the dishwasher
❷Press to turn on the power
❶
Rotate
❷ Take out
Turn to this
position
Clean the drain filter once a month, or when you are particularly concerned about
dirts deposited on the drain filter.
(You have to take out the baskets first as described above before taking out the
drain filter)
● When the filter is removed, there will be water left at the bottom, which is normal.
● After cleaning, please put it back.
Cleaning the drain filter …
Once a
month
Vent
Door
Sealing
· Do not pull to avoid
water leakage.
Clean the door, vent, sealing,
inside of the dishwasher
EN14
EN13
Reminder
Reminder
NP-TH1HK.indd 16 2018/12/07 15:34:46
Job Name B685891_NP-TH1取説(香港)
Color K
File Name 0016_NP-TH1HK.pdf
Refine Time 2018-12-07 15:40:34 Print Time 2018-12-10 15:24:58
Job Name
B685891_NP-TH1取説(香港)
Color K
File Name 0016_NP-TH1HK.pdf
Refine Time 2018-12-07 15:40:34 Print Time 2018-12-10 15:24:58
English
Maintenance
● Take out the utensils, clean the food filter, and carry out maintenance after 30 minutes from
operation completion (to avoid burns)
● Be sure to turn off the power before carrying out maintenance.
●
Do not fill in water by hand when performing maintenance (to avoid water leakage, damage or error alarm).
(If after-sales service such as repair is required as a result of manual water injection, it will not be covered
by the free warranty even within the warranty period.)
●
Do not use bleacher, detergent, thinner, benzine, cleanser, wax or pesticide (as it may cause damage or discolouration.)
● When using a chemical wipe cloth, please follow the instructions on the product.
Clean the filter
Wipe the door, vent and sealing with a damp soft cloth
As shown in the illustration, take out the food filter from the dishwasher, disassemble the filter and rinse
them with water.
● After cleaning, put them back in the reverse order.
Once a
month
Every time
Take out the basket and then the filter.
· If it is difficult to rinse off the deposit,
use a brush to remove them.
●
If the filters are clogged, the cleaning performance may deteriorate, or the filters may become mouldy,
cause odour or water leakage.
● Dirts are easy to accumulate at the edge sealing and vent of the dishwasher. Please clean carefully.
● Pull out the baskets and wipe off the dirts on the inside walls of the dishwasher.
Select the Care program to clean the internal body
Cleaning the inside of the dishwasher
(Care program)
2~3 times
each month
Do not put in any items when performing the Care program.
● During the operation, it will pause 2 times (about 30 minutes apart)
(so that the high temperature steam will float up the dirts)
● The spraying water may not be able to reach the door edge sealing → Please wipe by hand
●
Colored soils such as ketchup and curry are difficult to clean
→
Please rinse those utensils before loading
● The detergent in the ❶ step can be replaced by a dishwasher cleaner sold in the market.
Please follow the instructions on the product when using it.
Add the dishwasher detergent (about 2 times of the standard amount)
❶
❸Press to select Care
❹Press to start cleaning the dishwasher
❷Press to turn on the power
❶
Rotate
❷ Take out
Turn to this
position
Clean the drain filter once a month, or when you are particularly concerned about
dirts deposited on the drain filter.
(You have to take out the baskets first as described above before taking out the
drain filter)
● When the filter is removed, there will be water left at the bottom, which is normal.
● After cleaning, please put it back.
Cleaning the drain filter …
Once a
month
Vent
Door
Sealing
· Do not pull to avoid
water leakage.
Clean the door, vent, sealing,
inside of the dishwasher
EN14
EN13
Reminder
Reminder
NP-TH1HK.indd 17 2018/12/07 15:34:54
Job Name B685891_NP-TH1取説(香港)
Color K
File Name 0017_NP-TH1HK.pdf
Refine Time 2018-12-07 15:40:33 Print Time 2018-12-10 15:24:59

■ If the following situations occur while using the dishwasher, please check and handle as follows.
Symptoms
Cleaning
performance is
not satisfactory
Glassware become
whitish and opaque
Powder detergent
remains
●Did you add detergent or did you use a non-dishwasher detergent?
Please add an appropriate amount of dishwasher detergent (page EN9)
●Did the cutlery touch the nozzles, so that the nozzles did not rotate,
hence affecting the cleaning performance?
●Were the items placed properly (Did the items overlap or face the
wrong direction)? (pages EN6 - EN8)
●Were burnt pans scraped and cleaned before loading? (page EN5)
●Did the water used contain many minerals?
Increase an appropriate amount of dishwasher detergent
●Were the filters clogged?
Please clean the filters (page EN13)
●Did you check the water hardness level of your area and then set the
area setting? (page EN9)
Check the causes and solutions
●Are the dishwasher powder dampened or are there lumps?
If there are lumps, crush them before use.
●Glassware with minor flaws on the surface occasionally become
whitish and opaque after being washed with high-temperature water.
●Were the glasses very greasy?
Please use more dishwasher detergent or select the Intense program.
Items turns yellowish
or slightly black
●This may be caused by tea stains or the iron contained in the water.
Please wipe the dishes often.
White spots are left
on the glasses.
●Is the water hardness level in your area high?
If yes, reset the water hardness level suitable for your area (page EN9).
Water droplets are
left on the concave
bottom of the dishes
and the drying result
is not satisfactory
●Water may not be drained completely from the concaves.
Tilt the items slightly (page EN6), or set to Enhanced Drying to extend
the drying time so as to reduce the residual water (page EN12).
Frequently Asked Questions
EN15
Error Indication
■ When the following alerts appear on the display of the dishwasher (and the buzzer sounds out simultaneously),
please check and resolve as follows. If the problem cannot be solved, please contact Service Centre.
(Press and hold the Program button for more than 5 seconds, the display will show the last error)
Symptoms Check the causes and solutions
Display
Basic and Intense blink
simultaneously
●Poor water supply
Display
Intense, Speedy and Care
blink simultaneously
Display
All indicators light up
● Poor water drainage
●The door is open or
is not closed properly
Turn off the power before checking the following
●Is the water tap or water supply valve opened?
●Is there a water supply suspension?
●Are the water pipes or the supply hose frozen?
●Is the supply hose connector clogged?
●Do you use well water?
(Impurities in the well water may cause malfunction.)
Turn off the power before checking the following
●Is the filter clogged? (page EN13)
After confirming, turn on the power, select Dry to run,
and turn off the power after draining.
If you still have problems after the above procedures,
please contact Service Centre.
Hold the central position above
the Open Door button and push
until the latches on left and right
sides of the door are firmly set.
(page EN6)
Open Door button
EN16
Display
Clicking
“Speedy”, “Intense”,
“Keep” are blinking
●There may be excessive
foam.
●There may be water
leakage.
Close the water tap first.
Then unplug the power cord from the outlet and leave the door
closed.
After about 30 minutes, plug in the power plug, turn on the power,
and check the display.
●When "Speedy" "Intense" "Keep" disappear, open the water
tap and restart the operation.
●When "Speedy" "Intense" "Keep" are still blinking, contact the
Service Centre.
If the problem cannot be solved after checking the above, or other problems not mentioned above occur,
please unplug the power socket, turn off the water tap, and contact the Service Centre.
NP-TH1HK.indd 18 2018/11/29 15:02:08
Job Name B685891_NP-TH1取説(香港)
Color K
File Name 0018_NP-TH1HK.pdf
Refine Time 2018-11-29 15:12:54 Print Time 2018-12-10 15:24:59
Job Name
B685891_NP-TH1取説(香港)
Color K
File Name 0018_NP-TH1HK.pdf
Refine Time 2018-11-29 15:12:54 Print Time 2018-12-10 15:24:59
English
■ If the following situations occur while using the dishwasher, please check and handle as follows.
Symptoms
Cleaning
performance is
not satisfactory
Glassware become
whitish and opaque
Powder detergent
remains
●Did you add detergent or did you use a non-dishwasher detergent?
Please add an appropriate amount of dishwasher detergent (page EN9)
●Did the cutlery touch the nozzles, so that the nozzles did not rotate,
hence affecting the cleaning performance?
●Were the items placed properly (Did the items overlap or face the
wrong direction)? (pages EN6 - EN8)
●Were burnt pans scraped and cleaned before loading? (page EN5)
●Did the water used contain many minerals?
Increase an appropriate amount of dishwasher detergent
●Were the filters clogged?
Please clean the filters (page EN13)
●Did you check the water hardness level of your area and then set the
area setting? (page EN9)
Check the causes and solutions
●Are the dishwasher powder dampened or are there lumps?
If there are lumps, crush them before use.
●Glassware with minor flaws on the surface occasionally become
whitish and opaque after being washed with high-temperature water.
●Were the glasses very greasy?
Please use more dishwasher detergent or select the Intense program.
Items turns yellowish
or slightly black
●This may be caused by tea stains or the iron contained in the water.
Please wipe the dishes often.
White spots are left
on the glasses.
●Is the water hardness level in your area high?
If yes, reset the water hardness level suitable for your area (page EN9).
Water droplets are
left on the concave
bottom of the dishes
and the drying result
is not satisfactory
●Water may not be drained completely from the concaves.
Tilt the items slightly (page EN6), or set to Enhanced Drying to extend
the drying time so as to reduce the residual water (page EN12).
Frequently Asked Questions
EN15
Error Indication
■ When the following alerts appear on the display of the dishwasher (and the buzzer sounds out simultaneously),
please check and resolve as follows. If the problem cannot be solved, please contact Service Centre.
(Press and hold the Program button for more than 5 seconds, the display will show the last error)
Symptoms Check the causes and solutions
Display
Basic and Intense blink
simultaneously
●Poor water supply
Display
Intense, Speedy and Care
blink simultaneously
Display
All indicators light up
● Poor water drainage
●The door is open or
is not closed properly
Turn off the power before checking the following
●Is the water tap or water supply valve opened?
●Is there a water supply suspension?
●Are the water pipes or the supply hose frozen?
●Is the supply hose connector clogged?
●Do you use well water?
(Impurities in the well water may cause malfunction.)
Turn off the power before checking the following
●Is the filter clogged? (page EN13)
After confirming, turn on the power, select Dry to run,
and turn off the power after draining.
If you still have problems after the above procedures,
please contact Service Centre.
Hold the central position above
the Open Door button and push
until the latches on left and right
sides of the door are firmly set.
(page EN6)
Open Door button
EN16
Display
Clicking
“Speedy”, “Intense”,
“Keep” are blinking
●There may be excessive
foam.
●There may be water
leakage.
Close the water tap first.
Then unplug the power cord from the outlet and leave the door
closed.
After about 30 minutes, plug in the power plug, turn on the power,
and check the display.
●When "Speedy" "Intense" "Keep" disappear, open the water
tap and restart the operation.
●When "Speedy" "Intense" "Keep" are still blinking, contact the
Service Centre.
If the problem cannot be solved after checking the above, or other problems not mentioned above occur,
please unplug the power socket, turn off the water tap, and contact the Service Centre.
NP-TH1HK.indd 19 2018/11/29 15:02:18
Job Name B685891_NP-TH1取説(香港)
Color K
File Name 0019_NP-TH1HK.pdf
Refine Time 2018-11-29 15:12:55 Print Time 2018-12-10 15:25:00

Error Indication (cont.)
EN17
Freezing prevention Not in use for a long time
In the event of freezing occurs and the problem is ignored, it may cause damage to the supply
valve and piping. For draining treatment and freezing prevention, please contact Service Centre.
■ If the relevant parts or pipes were already frozen, please do the following
❶
Select Speedy to run 1 - 2 times to defrost. (If the situation is serious, repeat the operation several times)
❷After the process is completed, wait for 30 minutes, remove the supply hose from the
dishwasher, and drain out the water from the hose.
❸Take off the rubber cover (black) at the front, shake the dishwasher on all sides, and drain out
all the water inside.
❹Put the rubber cover back in place.
Panasonic staff handling the draining should note the following:
Troubleshooting
■ Check the following first. If the problem still continues or there are other symptoms, please contact Service Centre.
EN18
●Is the door closed firmly? → Close the door firmly and restart the operation.
●Dew condensation may occur due to the temperature difference between the
dishwasher body and the kitchen, which is not a malfunction.
●Steam or warm air may come out, but this is not a malfunction.
●This is caused by the minerals contained in the water.
●Water may be left at the bottom. This is normal.
●The water supply valve may be broken. Close the water supply valve or
the water tap valve (but leave the power plug connected), and contact
Service Centre.
●For a while after it is purchased, the rubber and resin components of the
dishwasher may emit some odour, which have no adverse effect on the
human body and will disappear after a period of time.
●This is due to residue such as fish skin left on the filter.
→
Remove and clean it using a brush (page EN13). If the smell persists,
select and run the Care program.
●This is the sound of the nozzles switching sequentially before spraying,
which is not a malfunction.
●Depending on the types of tableware and how they are loaded, the noises
may get louder during operation.
●
Are the filters clogged? (When the filters are clogged, the sound of the pump
may suddenly become loud during operation.) → Clean the filters (page EN13)
● During operation, the electronic components will make chattering sounds
when they are switched. This is not a malfunction.
●Is the dishwasher (location, drain hose, supply hose) installed correctly?
→ Check carefully (page EN24)
●
A foul odour may be generated as a result of the deterioration of water remained in
the appliance if it is left unused for a long time. → Select and run the Care program.
●
Have you used kitchen detergents? Or is kitchen detergent not rinsed off completely
from the items in the pre-wash?
→
You must use dishwasher detergent.
(Kitchen detergent may generate excessive foam. Supplying and draining
water repeatedly is necessary to eliminate the foam. The operation time will
be prolonged. Do not open the door during the process to avoid water leakage.)
Symptoms Causes and Solutions
The appliance
does not work
Water is supplied and
drained repeatedly
Dew condensation
around the door.
Odour emits during
operation
Fishy smell
Noises change during
operation
Freezing
Water leakage
Water supply stops
Power cut
Circuit breaker has
tripped
"Salt" stays
lighted up in the display
When the nozzles start
spraying, they make a
clattering sound
Smell like a sewer
Steam comes out from
around the door during
operation.
After using for a while,
the inside walls of the
dishwasher become whitish.
Water is left under
the filter
Water supply does not
stop
Dishwasher Body Smell
●① Select and run the Speedy program 1 - 2 times (to defrost).
②Check whether you can run the Speedy program.
• If the freezing is the result of being left unused for a long period of time,
defrost may not work even after running the Speedy program 1 - 2 times.
→ Contact Service Centre (page EN17)
●Turn off the power to stop the operation. When water supply resumes,
discharge the muddy water from another tap, and then restart the operation.
●
When electricity supply resumes, press Start/Pause to restart the operation.
•
The program will resume from the beginning of the process which was running
at the time of the power cut.
•
If delay start was selected and was waiting to start later, the selected program
with delay start will be cancelled.
●
Check the causes, reset the circuit breaker, press Start/Pause to restart the operation.
•
The program will resume from the beginning of the process which was running
at the time of the power cut.
•
If delay start was selected and was waiting to start later, the selected program with
delay start will be cancelled.
●
For Hong Kong with option code "0", there is no need to add salt. (page EN9)
Abnormal sound Others
NP-TH1HK.indd 20 2018/11/29 15:02:30
Job Name B685891_NP-TH1取説(香港)
Color K
File Name 0020_NP-TH1HK.pdf
Refine Time 2018-11-29 15:12:56 Print Time 2018-12-10 15:25:00
Job Name
B685891_NP-TH1取説(香港)
Color K
File Name 0020_NP-TH1HK.pdf
Refine Time 2018-11-29 15:12:56 Print Time 2018-12-10 15:25:00
English
Error Indication (cont.)
EN17
Freezing prevention Not in use for a long time
In the event of freezing occurs and the problem is ignored, it may cause damage to the supply
valve and piping. For draining treatment and freezing prevention, please contact Service Centre.
■ If the relevant parts or pipes were already frozen, please do the following
❶
Select Speedy to run 1 - 2 times to defrost. (If the situation is serious, repeat the operation several times)
❷After the process is completed, wait for 30 minutes, remove the supply hose from the
dishwasher, and drain out the water from the hose.
❸Take off the rubber cover (black) at the front, shake the dishwasher on all sides, and drain out
all the water inside.
❹Put the rubber cover back in place.
Panasonic staff handling the draining should note the following:
Troubleshooting
■
Check the following first. If the problem still continues or there are other symptoms, please contact Service Centre.
EN18
●Is the door closed firmly? → Close the door firmly and restart the operation.
●Dew condensation may occur due to the temperature difference between the
dishwasher body and the kitchen, which is not a malfunction.
●Steam or warm air may come out, but this is not a malfunction.
●This is caused by the minerals contained in the water.
●Water may be left at the bottom. This is normal.
●The water supply valve may be broken. Close the water supply valve or
the water tap valve (but leave the power plug connected), and contact
Service Centre.
●For a while after it is purchased, the rubber and resin components of the
dishwasher may emit some odour, which have no adverse effect on the
human body and will disappear after a period of time.
●This is due to residue such as fish skin left on the filter.
→
Remove and clean it using a brush (page EN13). If the smell persists,
select and run the Care program.
●This is the sound of the nozzles switching sequentially before spraying,
which is not a malfunction.
●Depending on the types of tableware and how they are loaded, the noises
may get louder during operation.
●
Are the filters clogged? (When the filters are clogged, the sound of the pump
may suddenly become loud during operation.) → Clean the filters (page EN13)
● During operation, the electronic components will make chattering sounds
when they are switched. This is not a malfunction.
●Is the dishwasher (location, drain hose, supply hose) installed correctly?
→ Check carefully (page EN24)
●
A foul odour may be generated as a result of the deterioration of water remained in
the appliance if it is left unused for a long time. → Select and run the Care program.
●
Have you used kitchen detergents? Or is kitchen detergent not rinsed off completely
from the items in the pre-wash?
→
You must use dishwasher detergent.
(Kitchen detergent may generate excessive foam. Supplying and draining
water repeatedly is necessary to eliminate the foam. The operation time will
be prolonged. Do not open the door during the process to avoid water leakage.)
Symptoms Causes and Solutions
The appliance
does not work
Water is supplied and
drained repeatedly
Dew condensation
around the door.
Odour emits during
operation
Fishy smell
Noises change during
operation
Freezing
Water leakage
Water supply stops
Power cut
Circuit breaker has
tripped
"Salt" stays
lighted up in the display
When the nozzles start
spraying, they make a
clattering sound
Smell like a sewer
Steam comes out from
around the door during
operation.
After using for a while,
the inside walls of the
dishwasher become whitish.
Water is left under
the filter
Water supply does not
stop
Dishwasher Body Smell
●① Select and run the Speedy program 1 - 2 times (to defrost).
②Check whether you can run the Speedy program.
• If the freezing is the result of being left unused for a long period of time,
defrost may not work even after running the Speedy program 1 - 2 times.
→ Contact Service Centre (page EN17)
●Turn off the power to stop the operation. When water supply resumes,
discharge the muddy water from another tap, and then restart the operation.
●
When electricity supply resumes, press Start/Pause to restart the operation.
•
The program will resume from the beginning of the process which was running
at the time of the power cut.
•
If delay start was selected and was waiting to start later, the selected program
with delay start will be cancelled.
●
Check the causes, reset the circuit breaker, press Start/Pause to restart the operation.
•
The program will resume from the beginning of the process which was running
at the time of the power cut.
•
If delay start was selected and was waiting to start later, the selected program with
delay start will be cancelled.
●
For Hong Kong with option code "0", there is no need to add salt. (page EN9)
Abnormal sound Others
NP-TH1HK.indd 21 2018/11/29 17:28:47
Job Name B685891_NP-TH1取説(香港)
Color K
File Name 0021_NP-TH1HK.pdf
Refine Time 2018-11-29 17:30:47 Print Time 2018-12-10 15:25:00

bc
a
Installation Instructions
●Panasonic Corporation shall not be held responsible for any accidents, damage or injuries that may occur as
a result of failure to follow the Installation Instructions in the setup, trial operation or inspection of this appliance.
●After the installation is completed, you must carry out trial operation and inspection before using it.
●Do not use old water supply hose or drain hose in order to avoid water leakage.
●The dishwasher was factory tested with water filled in. When unpacking, there may be residual water.
This is not abnormal.
●Please enquire your local water supplies authority or water works professionals to check the water pressure
and flow rate of the tap water.
· The applicable inflow water pressure for this appliance is 0.05 MPa - 1 MPa
(When the water pressure is low, the operating time may be prolonged)
· Flow rate: When the water tap is open fully, the rate of inflow is required to reach 8 liters per minute or more
(When the flow rate is low, the operating time may be prolonged or abnormality may occur)
· When operating the water tap, be sure to install the specified pressure relief valve if the tap water pipe
generates abnormal sounds (water hammer phenomenon)
Connect the water supply hose and drain hose to the
dishwasher body
2
❶Insert the water supply hose into the body as shown and tighten the nut.
(Keep the nut in a horizontal position to avoid water leakage)
❷Insert the drain hose into the body as shown, and tighten the clamp.
(The clamp needs to catch the port of the drain hose and the connector of the body to avoid water leakage)
❸
Place the water supply hose and drain hose to the right or left, depending on the position of the water tap and drain pipe.
water
supply
hose
❸
placing the water
pipe (example for
placing to the left)
drain hose
water supply hose, drain hose connection
(bottom view of the
dishwasher body)
horizontal
tilted
(
❶
water supply hose)
nut
(❷drain hose)
Confirm the installation position
1
· The dishwasher should be installed in an open space.
(Make sure to leave a space clearance of a > 65 cm, b > 0.5 cm, c > 0.5 cm, d > 15 cm or more)
· Place the dishwasher on a solid horizontal surface.
·
The location should be exclusively equipped with a rated 10 A, AC 220 V single-phase, two-pole, earthed power socket.
Do not install the dishwasher
in the following places:
· Locations with direct
exposure to sunlight.
·
Places where freezing may
occur in winter (below 0 °C)
(It may cause malfunction
or deformation.)
· On the carpet.
(It may block the bottom
vent.)
d
d>15 cm
single-phase
two-pole
earthed
power socket
a>65 cm
b>0.5 cm
c>0.5 cm
EN19
heat sources
such as a
gas stove
● The status when the
connection is completed
clamp
●
When connecting, wet the inside of the end
of the drain hose for easier connection.
●
When the clamp is set at the connector,
turn it to the side so that its tail will not protrude
from the main body of the appliance
(to avoid the tail of the clamp touching the wall)
First put on the clamp
connector
Reminder
supply hose
connector
water
supply
hose
screw
gasket
A
Before installation
Add the water tap and
the supply hose connector
●
supply hose connector
After installation
Combined
tap
Tap type
Transverse
water tap
supply hose
connector
Transverse
water tap
❷
❸
❶
adapter
handle
water
supply
hose
Install the water supply hose connector
3
EN20
■Please add a new water tap for connection. Be sure to install the supply pipe accessories
at the port of the transverse water tap.
● Install the supply hose connector to the water tap according to the installation instructions.
CAUTION
•
Fasten A of the supply hose connector
(otherwise it may cause water leakage)
•
If the fixing screws are too tight, it may cause damage of gasket
and lead to water leakage.
Note
•
After installation, make sure the fixing screws are tight.
Note
❸ Connect the water supply hose
Please confirm the other end of the water
supply hose has been
connected to the joint of the dishwasher before conducting
the following operations:
1) Connect the water supply hose and supply hose connector.
2) Turn on the handle of the water tap after connecting the water
supply hose.
3)
Please confirm carefully whether there is water leakage at the water
tap and each connecting point after the installation is completed.
4)
New hose-sets supplied with the appliance are to be used and
old hose-sets should not be reused.
To connect the water supply hose
❶
Loosen screws on the adapter and take down the adapter.
❷
Fix the supply hose connector, with the gasket, to the water tap.
●Do not install the supply hose connector to the ports other than the port of the transverse water tap.
Important
■Confirming the setup when the appliance is connecting with a water heater
●
To supply hot water, connect a front type water
heater which generates a hot water yield of at least
10 L per minute. Regardless of the hot water supply
capacity, do not connect a rear type water heater.
●
When using a water heater, set the temperature
of the supplied hot water below 60 °C.
(It may cause unsatisfactory cleaning results.)
●
For high temperature water heater (60 °C above) of
which the temperature of supplied hot water cannot
be set, connection is prohibited.
●To re-connect a water heater, please contact the
Service Centre. (Especially in areas where water
pressure is high, be sure to install the specified
pressure relief valve at the water heater.)
NP-TH1HK.indd 22 2018/11/29 21:29:09
Job Name B685891_NP-TH1取説(香港)
Color K
File Name 0022_NP-TH1HK.pdf
Refine Time 2018-11-29 21:31:50 Print Time 2018-12-10 15:25:01
Job Name
B685891_NP-TH1取説(香港)
Color K
File Name 0022_NP-TH1HK.pdf
Refine Time 2018-11-29 21:31:50 Print Time 2018-12-10 15:25:01
English
bc
a
Installation Instructions
●Panasonic Corporation shall not be held responsible for any accidents, damage or injuries that may occur as
a result of failure to follow the Installation Instructions in the setup, trial operation or inspection of this appliance.
●After the installation is completed, you must carry out trial operation and inspection before using it.
●Do not use old water supply hose or drain hose in order to avoid water leakage.
●The dishwasher was factory tested with water filled in. When unpacking, there may be residual water.
This is not abnormal.
●Please enquire your local water supplies authority or water works professionals to check the water pressure
and flow rate of the tap water.
· The applicable inflow water pressure for this appliance is 0.05 MPa - 1 MPa
(When the water pressure is low, the operating time may be prolonged)
· Flow rate: When the water tap is open fully, the rate of inflow is required to reach 8 liters per minute or more
(When the flow rate is low, the operating time may be prolonged or abnormality may occur)
· When operating the water tap, be sure to install the specified pressure relief valve if the tap water pipe
generates abnormal sounds (water hammer phenomenon)
Connect the water supply hose and drain hose to the
dishwasher body
2
❶Insert the water supply hose into the body as shown and tighten the nut.
(Keep the nut in a horizontal position to avoid water leakage)
❷Insert the drain hose into the body as shown, and tighten the clamp.
(The clamp needs to catch the port of the drain hose and the connector of the body to avoid water leakage)
❸
Place the water supply hose and drain hose to the right or left, depending on the position of the water tap and drain pipe.
water
supply
hose
❸
placing the water
pipe (example for
placing to the left)
drain hose
water supply hose, drain hose connection
(bottom view of the
dishwasher body)
horizontal
tilted
(
❶
water supply hose)
nut
(❷drain hose)
Confirm the installation position
1
· The dishwasher should be installed in an open space.
(Make sure to leave a space clearance of a > 65 cm, b > 0.5 cm, c > 0.5 cm, d > 15 cm or more)
· Place the dishwasher on a solid horizontal surface.
·
The location should be exclusively equipped with a rated 10 A, AC 220 V single-phase, two-pole, earthed power socket.
Do not install the dishwasher
in the following places:
· Locations with direct
exposure to sunlight.
·
Places where freezing may
occur in winter (below 0 °C)
(It may cause malfunction
or deformation.)
· On the carpet.
(It may block the bottom
vent.)
d
d>15 cm
single-phase
two-pole
earthed
power socket
a>65 cm
b>0.5 cm
c>0.5 cm
EN19
heat sources
such as a
gas stove
● The status when the
connection is completed
clamp
●
When connecting, wet the inside of the end
of the drain hose for easier connection.
●
When the clamp is set at the connector,
turn it to the side so that its tail will not protrude
from the main body of the appliance
(to avoid the tail of the clamp touching the wall)
First put on the clamp
connector
Reminder
supply hose
connector
water
supply
hose
screw
gasket
A
Before installation
Add the water tap and
the supply hose connector
●
supply hose connector
After installation
Combined
tap
Tap type
Transverse
water tap
supply hose
connector
Transverse
water tap
❷
❸
❶
adapter
handle
water
supply
hose
Install the water supply hose connector
3
EN20
■Please add a new water tap for connection. Be sure to install the supply pipe accessories
at the port of the transverse water tap.
● Install the supply hose connector to the water tap according to the installation instructions.
CAUTION
•
Fasten A of the supply hose connector
(otherwise it may cause water leakage)
•
If the fixing screws are too tight, it may cause damage of gasket
and lead to water leakage.
Note
•
After installation, make sure the fixing screws are tight.
Note
❸ Connect the water supply hose
Please confirm the other end of the water
supply hose has been
connected to the joint of the dishwasher before conducting
the following operations:
1) Connect the water supply hose and supply hose connector.
2) Turn on the handle of the water tap after connecting the water
supply hose.
3)
Please confirm carefully whether there is water leakage at the water
tap and each connecting point after the installation is completed.
4)
New hose-sets supplied with the appliance are to be used and
old hose-sets should not be reused.
To connect the water supply hose
❶
Loosen screws on the adapter and take down the adapter.
❷
Fix the supply hose connector, with the gasket, to the water tap.
●Do not install the supply hose connector to the ports other than the port of the transverse water tap.
Important
■Confirming the setup when the appliance is connecting with a water heater
●
To supply hot water, connect a front type water
heater which generates a hot water yield of at least
10 L per minute. Regardless of the hot water supply
capacity, do not connect a rear type water heater.
●
When using a water heater, set the temperature
of the supplied hot water below 60 °C.
(It may cause unsatisfactory cleaning results.)
●
For high temperature water heater (60 °C above) of
which the temperature of supplied hot water cannot
be set, connection is prohibited.
●To re-connect a water heater, please contact the
Service Centre. (Especially in areas where water
pressure is high, be sure to install the specified
pressure relief valve at the water heater.)
NP-TH1HK.indd 23 2018/11/29 21:29:40
Job Name B685891_NP-TH1取説(香港)
Color K
File Name 0023_NP-TH1HK.pdf
Refine Time 2018-11-29 21:31:49 Print Time 2018-12-10 15:25:01

Installation Instructions (cont.)
EN21
● Another installation
(under the kitchen counter connection)
Pass the water supply hose through the hole of the sink and fit on the protective sleeve. Depending on the
piping arrangement at your home, you may choose to connect directly to the supply valve or connect to the
supply valve together with other pipes through a three-way connector.
❶ protective sleeve
supply valve
hole of
the sink
water
supply
hose
screw
tight
Installation is
completed
protective
sleeve (bolt)
protective
sleeve (nut)
Important ・Do not connect the dishwasher to the water heater's water pipe (do not use hot water).
・The water temperature applicable for the dishwasher is 5 °C to 40 °C.
The following optional accessories are required, which can be purchased at the dealer.
optional accessories
water supply
hose (1) three-way
connector (1)
gasket (3)
protective sleeve (bolt set) (1)
bolt
nut
①Unscrew ②Open in the
direction of
the arrow
● splitting
Install the water supply hose to the supply valve
3
EN22
●Do not miss out the gasket when installing (it may cause water leakage).
●If it does not affect the usage of other water pipes, it is recommended to close the supply valve after
each operation.
❷connect to the supply valve
supply valve
gasket
screw tight
three - way connector installation
direct installation
water supply hose
screw tight screw
tight other pipes
gasket
gasket
supply valve
three-way
connector
screw tight
water supply hose
■Confirming the tap water pressure
●
Please use the appliance at an inflow water pressure of 0.05 MPa - 1 MPa. When operating the water tap in the
kitchen, be sure to install the specified pressure relief valve if the tap water pipe generates abnormal sounds
(water hammer phenomenon).
●
When the water tap is fully open, the rate of
inflow is required to reach at least 8 L per minute.
●Please contact the Service Centre to confirm the water pressure and rate of inflow.
Important
Recommendation
NP-TH1HK.indd 24 2018/11/29 17:28:50
Job Name B685891_NP-TH1取説(香港)
Color K
File Name 0024_NP-TH1HK.pdf
Refine Time 2018-11-29 17:30:48 Print Time 2018-12-10 15:25:01
Job Name
B685891_NP-TH1取説(香港)
Color K
File Name 0024_NP-TH1HK.pdf
Refine Time 2018-11-29 17:30:48 Print Time 2018-12-10 15:25:01
English
Installation Instructions (cont.)
EN21
● Another installation
(under the kitchen counter connection)
Pass the water supply hose through the hole of the sink and fit on the protective sleeve. Depending on
the piping arrangement at your home, you may choose to connect directly to the supply valve or connect to
the supply valve together with other pipes through a three-way connector.
❶ protective sleeve
supply valve
hole of
the sink
water
supply
hose
screw
tight
Installation is
completed
protective
sleeve (bolt)
protective
sleeve (nut)
Important ・Do not connect the dishwasher to the water heater's water pipe (do not use hot water).
・The water temperature applicable for the dishwasher is 5 °C to 40 °C.
The following optional accessories are required, which can be purchased at the dealer.
optional accessories
water supply
hose (1) three-way
connector (1)
gasket (3)
protective sleeve (bolt set) (1)
bolt
nut
①Unscrew ②Open in the
direction of
the arrow
● splitting
Install the water supply hose to the supply valve
3
EN22
●Do not miss out the gasket when installing (it may cause water leakage).
●If it does not affect the usage of other water pipes, it is recommended to close the supply valve after
each operation.
❷connect to the supply valve
supply valve
gasket
screw tight
three - way connector installation
direct installation
water supply hose
screw tight screw
tight other pipes
gasket
gasket
supply valve
three-way
connector
screw tight
water supply hose
■Confirming the tap water pressure
●
Please use the appliance at an inflow water pressure of 0.05 MPa - 1 MPa. When operating the water tap in the
kitchen, be sure to install the specified pressure relief valve if the tap water pipe generates abnormal sounds
(water hammer phenomenon).
●
When the water tap is fully open, the rate of
inflow is required to reach at least 8 L per minute.
●Please contact the Service Centre to confirm the water pressure and rate of inflow.
Important
Recommendation
NP-TH1HK.indd 25 2018/11/29 15:04:15
Job Name B685891_NP-TH1取説(香港)
Color K
File Name 0025_NP-TH1HK.pdf
Refine Time 2018-11-29 15:13:01 Print Time 2018-12-10 15:25:02

Secure the drain hose with a sucker
4
Trial operation
5
● Make sure that all adhesive tapes used to fix the door and inside of the dishwasher and the
packaging bags of all parts have been removed.
● Make sure that the supply valve is open, plug in the power plug and close the door.
●Please perform a trial test of the dishwasher according to the following procedures.
· If there is no water supply and electricity supply temporarily, perform a trial test of the
dishwasher when water supply and electricity supply resume. (Do not fill in water by hand)
Drain hose
→If the drain hose is too long, cut neatly at the appropriate
position along the core wire (transparent).
sucker
■ Procedures for trial operation
· Please confirm the following during and after the operation.
· Power will automatically be turned off and the display indictors light off after
completion of the trial operation
· The indictors for Speedy and Care in the display light up and emit 2 beep sounds
EN23
❶ Press to turn on the power
❷ Press and hold for more than 3 seconds simultaneously
❸ Press to start the trial operation
● After the trial operation is completed, keep the supply valve open.
●If the dishwasher will not be used for a long time, close the water valve to avoid water leakage.
● If freezing may occur, arrange draining treatment. (It may cause damage to the supply valve
resulting water leakage) → If freezing occurs, contact Service Centre
Reminder
■ Trial operation confirmation
Error indication : There should be no alarm sound nor abnormal indication on the display.
(page EN16)
Water leakage : There should be no leakage at the joints of the water supply hose and drain hose.
After 6 beep sounds, power will be automatically turned off
Drainage condition : Open the door and confirm that the water inside the dishwasher
has been drained out.
No water supply condition : When the power is off, confirm that no water is draining
out from the drain outlet.
During operation
When the operation completed
Installation Instructions (cont.)
Checkup
6
●Please check the following before use.
Is the dishwasher installed on a solid horizontal surface? Make sure it won't shake or tilt.
Is the water supply hose tightened, steady and straight?
Is there no water leakage at the connection between the water supply hose and the back
of the dishwasher?
Is there no water leakage at the connection between the water supply hose and the supply valve?
(If there is water leakage, please check whether the gasket is fitted properly.)
Is the drain hose tightened, steady and straight?
Is the drain hose bent, entangled, or damaged?
Is the drain hose raised 20 cm or more?
(Examples of incorrect drain hose arrangement)
Bent Entangled Raised 20 cm
EN24
NP-TH1HK.indd 26 2018/11/29 15:06:20
Job Name B685891_NP-TH1取説(香港)
Color K
File Name 0026_NP-TH1HK.pdf
Refine Time 2018-11-29 15:12:59 Print Time 2018-12-10 15:25:02
Job Name
B685891_NP-TH1取説(香港)
Color K
File Name 0026_NP-TH1HK.pdf
Refine Time 2018-11-29 15:12:59 Print Time 2018-12-10 15:25:02
English
Secure the drain hose with a sucker
4
Trial operation
5
● Make sure that all adhesive tapes used to fix the door and inside of the dishwasher and the
packaging bags of all parts have been removed.
● Make sure that the supply valve is open, plug in the power plug and close the door.
●Please perform a trial test of the dishwasher according to the following procedures.
· If there is no water supply and electricity supply temporarily, perform a trial test of the
dishwasher when water supply and electricity supply resume. (Do not fill in water by hand)
Drain hose
→If the drain hose is too long, cut neatly at the appropriate
position along the core wire (transparent).
sucker
■ Procedures for trial operation
· Please confirm the following during and after the operation.
· Power will automatically be turned off and the display indictors light off after
completion of the trial operation
· The indictors for Speedy and Care in the display light up and emit 2 beep sounds
EN23
❶ Press to turn on the power
❷ Press and hold for more than 3 seconds simultaneously
❸ Press to start the trial operation
● After the trial operation is completed, keep the supply valve open.
●If the dishwasher will not be used for a long time, close the water valve to avoid water leakage.
● If freezing may occur, arrange draining treatment. (It may cause damage to the supply valve
resulting water leakage) → If freezing occurs, contact Service Centre
Reminder
■ Trial operation confirmation
Error indication : There should be no alarm sound nor abnormal indication on the display.
(page EN16)
Water leakage : There should be no leakage at the joints of the water supply hose and drain hose.
After 6 beep sounds, power will be automatically turned off
Drainage condition : Open the door and confirm that the water inside the dishwasher
has been drained out.
No water supply condition : When the power is off, confirm that no water is draining
out from the drain outlet.
During operation
When the operation completed
Installation Instructions (cont.)
Checkup
6
●Please check the following before use.
Is the dishwasher installed on a solid horizontal surface? Make sure it won't shake or tilt.
Is the water supply hose tightened, steady and straight?
Is there no water leakage at the connection between the water supply hose and the back
of the dishwasher?
Is there no water leakage at the connection between the water supply hose and the supply valve?
(If there is water leakage, please check whether the gasket is fitted properly.)
Is the drain hose tightened, steady and straight?
Is the drain hose bent, entangled, or damaged?
Is the drain hose raised 20 cm or more?
(Examples of incorrect drain hose arrangement)
Bent Entangled Raised 20 cm
EN24
NP-TH1HK.indd 27 2018/11/29 15:06:34
Job Name B685891_NP-TH1取説(香港)
Color K
File Name 0027_NP-TH1HK.pdf
Refine Time 2018-11-29 15:12:57 Print Time 2018-12-10 15:25:02

Specifications
■ Specifications
●When the power is turned off, approximately 0.5 W of power is consumed constantly in order to detect
water leakage.
Power supply
Power consumption
Dimension (Width × Depth × Height)
Net weight
Water consumption
Tap water pressure
Drying method
Program
Washing method
Rinsing method
Standard capacity
Model No.
Item NP-TH1HK
220 V 50 Hz
1170 W
550 mm×344 mm×598 mm
20 kg
11.7 L(Eco program)
0.05 MPa - 1 MPa
Total 39 items
Fan-drying, heat-drying
Basic, Intense, Eco, Care, Dry Only, Speedy, Sanitize,
Delay Start (4 hours Later), Dry (0.5 h, 1 h, Air, Keep)
Rotary nozzle spray, fixed nozzle spray
Turbo rinsing, spray rinsing
Rice bowl 5 Tea cup 2 Glass 3 Soup spoon 1 Chopsticks 10
Rice spoon 1 Noodle bowl 3 Sauce plate 3 Deep plate 2
Shallow plate 4 Spoons 5
■ High temperature sanitization
Testing object
Report No.
Dishwasher
China Testing &
Inspection Institute
for Household
Electric Appliances
Sanitization rate
Escherichia coli ≥ 99.9 %
Staphylococcus aureus ≥ 99.9 %
WXw-18-30347
Testing agency Testing method
Result
QB/T 5133-2017
EN25
MEMO
EN26
NP-TH1HK.indd 28 2018/11/15 10:52:21
Job Name B685891_NP-TH1取説(香港)
Color K
File Name 0028_NP-TH1HK.pdf
Refine Time 2018-11-15 10:53:43 Print Time 2018-12-10 15:25:03
Job Name
B685891_NP-TH1取説(香港)
Color K
File Name 0028_NP-TH1HK.pdf
Refine Time 2018-11-15 10:53:43 Print Time 2018-12-10 15:25:03
English
Specifications
■ Specifications
●When the power is turned off, approximately 0.5 W of power is consumed constantly in order to detect
water leakage.
Power supply
Power consumption
Dimension (Width × Depth × Height)
Net weight
Water consumption
Tap water pressure
Drying method
Program
Washing method
Rinsing method
Standard capacity
Model No.
Item NP-TH1HK
220 V 50 Hz
1170 W
550 mm×344 mm×598 mm
20 kg
11.7 L(Eco program)
0.05 MPa - 1 MPa
Total 39 items
Fan-drying, heat-drying
Basic, Intense, Eco, Care, Dry Only, Speedy, Sanitize,
Delay Start (4 hours Later), Dry (0.5 h, 1 h, Air, Keep)
Rotary nozzle spray, fixed nozzle spray
Turbo rinsing, spray rinsing
Rice bowl 5 Tea cup 2 Glass 3 Soup spoon 1 Chopsticks 10
Rice spoon 1 Noodle bowl 3 Sauce plate 3 Deep plate 2
Shallow plate 4 Spoons 5
■ High temperature sanitization
Testing object
Report No.
Dishwasher
China Testing &
Inspection Institute
for Household
Electric Appliances
Sanitization rate
Escherichia coli ≥ 99.9 %
Staphylococcus aureus ≥ 99.9 %
WXw-18-30347
Testing agency Testing method
Result
QB/T 5133-2017
EN25
MEMO
EN26
NP-TH1HK.indd 29 2018/11/15 11:02:51
Job Name B685891_NP-TH1取説(香港)
Color K
File Name 0029_NP-TH1HK.pdf
Refine Time 2018-11-15 11:03:42 Print Time 2018-12-10 15:25:03

本產品不宜供肢體、感官或精神上有殘疾或缺乏經驗和知識的人士(包括兒童)使用,必
須有監護人從旁監督及指導使用本產品,並且對使用者的安全承擔責任。請預防兒童將本
產品當作玩具,以免產生危險。
請勿朝機身潑水或灑水(可能導致火災、觸電)
請勿靠近火源、熱源(可能導致火災)
• 蚊香、香煙、蠟燭、電熱器等
安全注意事項
■ 以下圖示說明必須遵守的事項。
■ 按照錯誤操作而產生的危害及損害程度分別說明如下。
為防止人身傷害及財產損失,必須遵守以下說明。
■ 為防止火災、燙傷、觸電等…
表示如不避免,則可能造成輕微或中度人身傷害的某種潛在危害情況
表示如不避免,則可能造成死亡或嚴重人身傷害的某種潛在危害情況
表示「禁止」的事項。 表示「強制執行」的事項。
請勿放置於煤氣爐等熱源 15 cm 範圍之內(可能導致火災)
在運作進行中請勿撞擊機身(可能導致觸電、漏電、短路而造成火災)
請勿擅自拆開機器進行修理、改裝(可能引起火災或因異常運作而導致受傷)
請勿錯誤使用電線、插頭(可能導致火災、觸電)
●
請勿損傷電線、插頭;請勿對電線加工、彎曲、扭轉、拉伸;請勿置電線於高溫處,或用重物重壓、捆紮
→ 如有損壞,為免危險,必須由製造商、服務中心或類似部門的專業人員更換
●請勿用濕手插入、拔出插頭
●插頭、電線如有損壞,請勿使用
請正確使用電線、插頭
在運作進行中或操作結束後 30 分鐘內,請勿打開洗碗碟機
(可能因高溫的機身內部、洗滌水、蒸氣等導致燙傷)
→ 請待操作結束 30 分鐘後方可打開機門(取出餐具、清洗保養等)
→ 如中途需要打開機門,必須暫停操作,並小心緩慢打開機門
●請獨立使用額定電流 10 A/220 V 交流電插座(若與其他電器共用,可能因發熱導致火災)
●
插頭需確切插入至底部(否則可能因觸電、發熱而導致火災。插頭如有破損及插座出現鬆脫時,請勿使用)
●定期用乾布擦拭插頭(灰塵或濕氣積壓,可能導致絕緣不良,引起火災)
●長時間不使用或進行保養時,必須拔出插頭
●拔出插頭時,必須拿著插頭拔出(切勿拉拽電線)(可能因觸電或短路而導致火災)
本產品應確保可靠接地(當發生故障或漏電時有觸電危險)
→ 請使用單相兩極接地插座或委託專業人員進行接地作業
HK1
必須遵守
警告
注意
警告
使用要求
■ 必須正確使用洗碗碟機
出現異常、故障時,應立即停止使用,
關閉進水閥,切斷電源
(可能導致冒煙、起火、觸電)
→ 如需檢修,請聯絡服務中心
擺放刀具及其他尖銳餐具時,
必須平放或尖頭朝下放入碗籃內。
(以免受傷)
異常、故障示例
·有時接通電源後仍無法運作
·開啟/關閉機門異常
·運作時,發出異常聲響
·機身變形或異常發熱
請勿放入菜刀
(以免損壞洗碗碟機)
請勿按壓打開的機門
(可能因倒下、跌落導致受傷)
請勿靠近、觸碰排水管、排氣口
(排出的熱水、熱風、蒸氣可能導致燙傷)
餐具露出機身時,請勿強行關閉機門
(可能導致機門變形、熱水飛濺或燙傷)
開門時,請勿用力掰著機門上部強行打開
(可能導致機門變形、熱水飛濺或燙傷)
請勿讓機門保持長開狀態
(可能導致餐具翻倒、磕碰受傷)
操作結束後,請關閉水龍頭
(可能導致漏水)
• 請勿靠近電視機、收音機等電器產品
(可能導致影像錯亂或出現雜音)
• 請勿用手注水洗滌
(以免造成漏水、破損或異常警報)
• 請勿用於洗滌和烘乾餐具以外的用途
(可能導致故障)
• 運作時,請勿傾斜或移動機身
(可能導致漏水)
• 機門不應一直處於打開的位置
(可能導致器具翻倒)
•
當油污較多時,請適量增加洗碗碟機專用
洗滌劑
(以免產生異味)
■必須使用洗碗碟機專用洗滌劑!
開關機門時,請注意不要夾到手指
(可能導致受傷)
當與熱水器連接使用時,請注意其他
水龍頭打開時流出的熱水
(可能導致燙傷)
■ 為防止火災、
燙傷、觸電等…
■ 為防止火災、
受傷等…
•
若使用洗潔精浸泡或預洗,必須先將餐具的
洗潔精沖洗乾淨,才可放入洗碗碟機。
• 請勿使用洗潔精或梳打粉
(以免產生大量泡沫,導致漏水或故障)
→ 請使用洗碗碟機專用洗滌劑
(以下簡稱「洗滌塊」或「洗碗粉」)
(洗碗碟機專用
洗滌塊)
(梳打粉)(洗潔精)
(洗碗碟機專用
洗碗粉)
●
請勿安裝在可能會凍結的地方(0 ℃以下的地方)
(若凍結後沒有妥善處理,可能會造成進水閥
或管道破損)
→ 如需進行排水防止凍結處理,
請聯絡服務中心
●
若水中含有雜質,請勿使用,可能導致供水不良、
運作故障
●
剛購買時,洗碗碟機中的橡膠、樹脂可能會發出
一些異味,對人體並無不良影響,經過一段時間後
異味會自動消失。
●
本說明書中「×」表示錯誤或禁止事項;「○」
表示正確或適當事項。
HK2
本洗碗碟機適合家居以及類似的環境中
使用,例如:
·商店、辦公室和其他工作場所的員工廚房;
·農莊;
·供酒店、旅館和其他住宿場所的顧客使用;
·提供早餐的住宿場所使用。
提示
警告
注意
NP-TH1HK.indd 30 2018/11/30 15:11:36
Job Name B685891_NP-TH1取説(香港)
Color K
File Name 0030_NP-TH1HK.pdf
Refine Time 2018-11-30 15:17:00 Print Time 2018-12-10 15:25:04
Job Name
B685891_NP-TH1取説(香港)
Color K
File Name 0030_NP-TH1HK.pdf
Refine Time 2018-11-30 15:17:00 Print Time 2018-12-10 15:25:04
中文
本產品不宜供肢體、感官或精神上有殘疾或缺乏經驗和知識的人士(包括兒童)使用,必
須有監護人從旁監督及指導使用本產品,並且對使用者的安全承擔責任。請預防兒童將本
產品當作玩具,以免產生危險。
請勿朝機身潑水或灑水(可能導致火災、觸電)
請勿靠近火源、熱源(可能導致火災)
• 蚊香、香煙、蠟燭、電熱器等
安全注意事項
■ 以下圖示說明必須遵守的事項。
■ 按照錯誤操作而產生的危害及損害程度分別說明如下。
為防止人身傷害及財產損失,必須遵守以下說明。
■ 為防止火災、燙傷、觸電等…
表示如不避免,則可能造成輕微或中度人身傷害的某種潛在危害情況
表示如不避免,則可能造成死亡或嚴重人身傷害的某種潛在危害情況
表示「禁止」的事項。 表示「強制執行」的事項。
請勿放置於煤氣爐等熱源 15 cm 範圍之內(可能導致火災)
在運作進行中請勿撞擊機身(可能導致觸電、漏電、短路而造成火災)
請勿擅自拆開機器進行修理、改裝(可能引起火災或因異常運作而導致受傷)
請勿錯誤使用電線、插頭(可能導致火災、觸電)
●
請勿損傷電線、插頭;請勿對電線加工、彎曲、扭轉、拉伸;請勿置電線於高溫處,或用重物重壓、捆紮
→ 如有損壞,為免危險,必須由製造商、服務中心或類似部門的專業人員更換
●請勿用濕手插入、拔出插頭
●插頭、電線如有損壞,請勿使用
請正確使用電線、插頭
在運作進行中或操作結束後 30 分鐘內,請勿打開洗碗碟機
(可能因高溫的機身內部、洗滌水、蒸氣等導致燙傷)
→ 請待操作結束 30 分鐘後方可打開機門(取出餐具、清洗保養等)
→ 如中途需要打開機門,必須暫停操作,並小心緩慢打開機門
●請獨立使用額定電流 10 A/220 V 交流電插座(若與其他電器共用,可能因發熱導致火災)
●
插頭需確切插入至底部(否則可能因觸電、發熱而導致火災。插頭如有破損及插座出現鬆脫時,請勿使用)
●定期用幹布擦拭插頭(灰塵或濕氣積壓,可能導致絕緣不良,引起火災)
●長時間不使用或進行保養時,必須拔出插頭
●拔出插頭時,必須拿著插頭拔出(切勿拉拽電線)(可能因觸電或短路而導致火災)
本產品應確保可靠接地(當發生故障或漏電時有觸電危險)
→ 請使用單相兩極接地插座或委託專業人員進行接地作業
HK1
必須遵守
警告
注意
警告
使用要求
■ 必須正確使用洗碗碟機
出現異常、故障時,應立即停止使用,
關閉進水閥,切斷電源
(可能導致冒煙、起火、觸電)
→ 如需檢修,請聯絡服務中心
擺放刀具及其他尖銳餐具時,
必須平放或尖頭朝下放入碗籃內。
(以免受傷)
異常、故障示例
·有時接通電源後仍無法運作
·開啟/關閉機門異常
·運作時,發出異常聲響
·機身變形或異常發熱
請勿放入菜刀
(以免損壞洗碗碟機)
請勿按壓打開的機門
(可能因倒下、跌落導致受傷)
請勿靠近、觸碰排水管、排氣口
(排出的熱水、熱風、蒸氣可能導致燙傷)
餐具露出機身時,請勿強行關閉機門
(可能導致機門變形、熱水飛濺或燙傷)
開門時,請勿用力掰著機門上部強行打開
(可能導致機門變形、熱水飛濺或燙傷)
請勿讓機門保持長開狀態
(可能導致餐具翻倒、磕碰受傷)
操作結束後,請關閉水龍頭
(可能導致漏水)
• 請勿靠近電視機、收音機等電器產品
(可能導致影像錯亂或出現雜音)
• 請勿用手注水洗滌
(以免造成漏水、破損或異常警報)
• 請勿用於洗滌和烘乾餐具以外的用途
(可能導致故障)
• 運作時,請勿傾斜或移動機身
(可能導致漏水)
• 機門不應一直處於打開的位置
(可能導致器具翻倒)
•
當油污較多時,請適量增加洗碗碟機專用
洗滌劑
(以免產生異味)
■必須使用洗碗碟機專用洗滌劑!
開關機門時,請注意不要夾到手指
(可能導致受傷)
當與熱水器連接使用時,請注意其他
水龍頭打開時流出的熱水
(可能導致燙傷)
■ 為防止火災、
燙傷、觸電等…
■ 為防止火災、
受傷等…
•
若使用洗潔精浸泡或預洗,必須先將餐具的
洗潔精沖洗乾淨,才可放入洗碗碟機。
• 請勿使用洗潔精或梳打粉
(以免產生大量泡沫,導致漏水或故障)
→ 請使用洗碗碟機專用洗滌劑
(以下簡稱「洗滌塊」或「洗碗粉」)
(洗碗碟機專用
洗滌塊)
(梳打粉)(洗潔精)
(洗碗碟機專用
洗碗粉)
●
請勿安裝在可能會凍結的地方(0 ℃以下的地方)
(若凍結後沒有妥善處理,可能會造成進水閥
或管道破損)
→ 如需進行排水防止凍結處理,
請聯絡服務中心
●
若水中含有雜質,請勿使用,可能導致供水不良、
運作故障
●
剛購買時,洗碗碟機中的橡膠、樹脂可能會發出
一些異味,對人體並無不良影響,經過一段時間後
異味會自動消失。
●
本說明書中「×」表示錯誤或禁止事項;「○」
表示正確或適當事項。
HK2
本洗碗碟機適合家居以及類似的環境中
使用,例如:
·商店、辦公室和其他工作場所的員工廚房;
·農莊;
·供酒店、旅館和其他住宿場所的顧客使用;
·提供早餐的住宿場所使用。
提示
警告
注意
NP-TH1HK.indd 31 2018/11/29 19:50:22
Job Name B685891_NP-TH1取説(香港)
Color K
File Name 0031_NP-TH1HK.pdf
Refine Time 2018-11-29 19:52:48 Print Time 2018-12-10 15:25:04

噴嘴(背面)
噴嘴(上方)
噴嘴(底部)
過濾網
(第 HK13 頁) 輪軌
(左右兩側)
部件名稱 / 附件
機門
控制板
開門掣
附 件
❶ 進水管(1 根) ❷ 排水管(1 根)
❺ 卡箍(1 個)
● 隨附洗碗碟機專用洗滌劑免費試用裝 1 盒
● 請參閱「安裝方法」(第 HK19 頁)進行安裝
❻ 吸盤(1 個)
❸ 進水管接頭(1 個) ❹ 墊片(1 個)
打 開 機 門
進水管接頭
排水管接頭
電線
機身背部
4
延遲啟動鍵
●
按下此鍵,4 小時後會自動開始運作,而顯示屏「4 hours(4 小時)」指示燈會亮燈。
● 再按一次,會取消延遲啟動程序,顯示屏「4 hours(4 小時)」指示燈會熄滅。
5
開始/暫停鍵
● 按下此鍵後開始運作。若在運作中按下此鍵運作會暫停,再按此鍵,運作會繼續。
● 上述步驟後若沒有再按此鍵,10 分鐘後電源將會自動切斷。
● 若機門未關上,按下此鍵不會啟動操作。
2
程序鍵
●
選擇清洗程序,每按一次,可以切換清洗模式,顯示屏的指示燈會循環亮燈顯示相關模式
(第 HK10 頁)。
3乾碗鍵
● 每按一次,可切換乾碗模式,顯示屏將會隨之循環顯示相應模式(第 HK11 頁)。
6
● 當專用鹽不足時,顯示屏「Salt(專用鹽)」指示燈會亮燈。
→
香港地區使用時無需添加專用鹽。請設置代碼為 0,指示燈會熄滅 。(第 HK9 頁)
1電源開關鍵
●
開啟電源後,自動設定為上一次的操作程序(若上一次為「Dry Only(只乾碗)」程序則除外)。
2
3
1
5
4
6
顯示屏
HK3
HK4
■ 安裝方法
■ 取出方法
■ 安裝方法
上層碗籃 下層碗籃
■ 取出方法
如圖示,把碗籃凸部從凹部向上提起,再拉出即可
按照與取出碗籃的方法相反的順序進行安裝 對準輪軌滑入即可
先拉出碗籃,再向上拉起即可脫離
凸部
凹部
小物件格
可沿箭頭方向
取下蓋子
● 本說明書插圖的形狀及顏色與實物可能有差異,請以實物為準。
提示
NP-TH1HK.indd 32 2018/12/07 15:34:57
Job Name B685891_NP-TH1取説(香港)
Color K
File Name 0032_NP-TH1HK.pdf
Refine Time 2018-12-07 15:40:37 Print Time 2018-12-10 15:25:04
Job Name
B685891_NP-TH1取説(香港)
Color K
File Name 0032_NP-TH1HK.pdf
Refine Time 2018-12-07 15:40:37 Print Time 2018-12-10 15:25:04
中文
噴嘴(背面)
噴嘴(上方)
噴嘴(底部)
過濾網
(第 HK13 頁) 輪軌
(左右兩側)
部件名稱 / 附件
機門
控制板
開門掣
附 件
❶ 進水管(1 根) ❷ 排水管(1 根)
❺ 卡箍(1 個)
● 隨附洗碗碟機專用洗滌劑免費試用裝 1 盒
● 請參閱「安裝方法」(第 HK19 頁)進行安裝
❻ 吸盤(1 個)
❸ 進水管接頭(1 個) ❹ 墊片(1 個)
打 開 機 門
進水管接頭
排水管接頭
電線
機身背部
4
延遲啟動鍵
●
按下此鍵,4 小時後會自動開始運作,而顯示屏「4 hours(4 小時)」指示燈會亮燈。
● 再按一次,會取消延遲啟動程序,顯示屏「4 hours(4 小時)」指示燈會熄滅。
5
開始/暫停鍵
● 按下此鍵後開始運作。若在運作中按下此鍵運作會暫停,再按此鍵,運作會繼續。
● 上述步驟後若沒有再按此鍵,10 分鐘後電源將會自動切斷。
● 若機門未關上,按下此鍵不會啟動操作。
2
程序鍵
●
選擇清洗程序,每按一次,可以切換清洗模式,顯示屏的指示燈會循環亮燈顯示相關模式
(第 HK10 頁)。
3乾碗鍵
● 每按一次,可切換乾碗模式,顯示屏將會隨之循環顯示相應模式(第 HK11 頁)。
6
● 當專用鹽不足時,顯示屏「Salt(專用鹽)」指示燈會亮燈。
→
香港地區使用時無需添加專用鹽。請設置代碼為 0,指示燈會熄滅 。(第 HK9 頁)
1電源開關鍵
●
開啟電源後,自動設定為上一次的操作程序(若上一次為「Dry Only(只乾碗)」程序則除外)。
2
3
1
5
4
6
顯示屏
HK3
HK4
■ 安裝方法
■ 取出方法
■ 安裝方法
上層碗籃 下層碗籃
■ 取出方法
如圖示,把碗籃凸部從凹部向上提起,再拉出即可
按照與取出碗籃的方法相反的順序進行安裝 對準輪軌滑入即可
先拉出碗籃,再向上拉起即可脫離
凸部
凹部
小物件格
可沿箭頭方向
取下蓋子
● 本說明書插圖的形狀及顏色與實物可能有差異,請以實物為準。
提示
NP-TH1HK.indd 33 2018/12/07 15:34:59
Job Name B685891_NP-TH1取説(香港)
Color K
File Name 0033_NP-TH1HK.pdf
Refine Time 2018-12-07 15:40:36 Print Time 2018-12-10 15:25:05

使用前的確認與準備
確認不適合洗碗碟機洗滌的器皿
餐具準備
■ 請勿放入容易被甩飛的輕質物品(可能導致破損或產生冒煙、燒焦、異味)
● 塑膠湯匙、蓋子 ● 發泡膠容器
● 海綿、洗碗布等 ● 奶瓶的奶嘴
■ 請勿放入容易褪色或塗層容易剝落的餐具
● 銀、鋁、銅、鐵餐具
● 木(竹、藤)餐具
● 塗漆餐具、貼金餐具、彩繪餐具
● 氟層加工平底鍋
■ 請勿放入瓶口細小、內部無法清洗的餐具
● 瓶子、酒壺
可能導致再次粘附
→ 事先用手清洗
可能導致再次粘附:調料、香料、芝麻等細小殘留物
可能導致閥門故障:牙籤、魚骨、橡筋圈等
可能導致異味:魚皮等
→
事先清除食物殘渣、異物
烤焗、蒸蛋後的器皿、
燒焦鍋具的頑固污漬
難以清洗
→ 事先浸泡、清理
■以下污漬可能無法徹底清除。
■若食物色素(番茄醬、咖喱等)較多,色素可能沾染機身內部,建議事先洗掉。
• 累積的茶銹 • 唇膏污漬(視乎個別牌子) • 沾染食物色素的塑膠餐具
■ 請勿放入非耐熱(容易受熱變形)的器具
● 耐熱低於 90 ℃ 的塑膠器具(包括沒有耐熱標識的器具)
● 鐵製鍋、菜刀
■ 請勿放入容易生銹的餐具
■ 請勿放入易碎餐具
● 有裂痕、破損的餐具
● 裂紋釉餐具(有裂縫花紋的餐具)
● 水晶玻璃、鋼化雕花玻璃
● 附有木柄的鍋具
● 其他以上未提及或不確定可否可以由洗碗碟機洗滌的餐具,請參考有關洗碗碟機專用洗滌劑的說明,
或諮詢有關餐具經銷商
油污嚴重
食物殘渣
燒焦焦糊
HK5
注意 禁止洗滌強化玻璃製品
(可能因粉碎並飛濺而導致受傷)
快速使用指南
❶ 打開機門時
❷ 擺放餐具
■ 關閉機門時
① 按開門掣 ② 打開機門
如圖示按住開門掣上方中央位置,
直至機門左右門鎖確切鎖上為止
準備 • 確認是否正確安裝(第 HK19 - HK24 頁),確認過濾網的安放狀況(第 HK13 頁)
• 確認餐具是否均適合由洗碗碟機清洗(第 HK5 頁)
• 只能使用洗碗碟機專用洗滌劑,並仔細閱讀所購專用洗滌劑的注意事項,遵守其使用說明。
擺放餐具(第 HK6 - HK8 頁)
加入專用洗滌劑(第 HK9 頁)
• 按照需要選擇程序、乾碗等功能,按 Start/Pause(開始/暫停)鍵開始運作。
•
運作期間若不得不打開機門(例如想添加餐具)時,必須先按 Start/Pause(開始/暫停)鍵然後慢慢打開。
(否則洗滌水可能會濺出)
• 運作期間若沒有按下 Start/Pause(開始/暫停)鍵便打開機門,運行會停止。
→ 關好機門,便可重新運作。
清洗~乾碗(第 HK10 - HK11 頁)
• 發出 6 聲「嗶」响,運作結束。
• 運作結束 30 分鐘後,方可取出餐具。(運行剛結束時,機內溫度仍然很高,容易燙傷)
• 清洗過濾網(第 HK13 頁)
完成
餐具擺放不正確,可能導致機門無法開關,發生蒸氣洩漏、漏水,導致機身和餐具破損、變形,
或影響清潔效果,因此請遵守以下事項。
1
2
3
4
5
開門掣
■ 請勿疊放餐具
■ 污漬面應朝內對著噴嘴
■ 餐具底部的凹面容易殘留水分,
請稍微傾斜擺放 傾斜可減少
水分殘留
• 餐具應朝下擺放
• 餐具不應阻擋背面噴嘴
(以免擋住噴射出的水而無法
清洗乾淨上層碗籃的餐具)
• 餐具不可露出機門
• 請勿疊放餐具
• 餐具不可露出碗籃外部或底部,
或碰到噴嘴
(以免阻擋噴嘴轉動而無法漂洗)
• 餐具的污漬面應朝內對著噴嘴
喀嚓
HK6
NP-TH1HK.indd 34 2018/11/30 15:11:49
Job Name B685891_NP-TH1取説(香港)
Color K
File Name 0034_NP-TH1HK.pdf
Refine Time 2018-11-30 15:17:01 Print Time 2018-12-10 15:25:05
Job Name
B685891_NP-TH1取説(香港)
Color K
File Name 0034_NP-TH1HK.pdf
Refine Time 2018-11-30 15:17:01 Print Time 2018-12-10 15:25:05
中文
使用前的確認與準備
確認不適合洗碗碟機洗滌的器皿
餐具準備
■ 請勿放入容易被甩飛的輕質物品(可能導致破損或產生冒煙、燒焦、異味)
● 塑膠湯匙、蓋子 ● 發泡膠容器
● 海綿、洗碗布等 ● 奶瓶的奶嘴
■ 請勿放入容易褪色或塗層容易剝落的餐具
● 銀、鋁、銅、鐵餐具
● 木(竹、藤)餐具
● 塗漆餐具、貼金餐具、彩繪餐具
● 氟層加工平底鍋
■ 請勿放入瓶口細小、內部無法清洗的餐具
● 瓶子、酒壺
可能導致再次粘附
→ 事先用手清洗
可能導致再次粘附:調料、香料、芝麻等細小殘留物
可能導致閥門故障:牙籤、魚骨、橡筋圈等
可能導致異味:魚皮等
→
事先清除食物殘渣、異物
烤焗、蒸蛋後的器皿、
燒焦鍋具的頑固污漬
難以清洗
→ 事先浸泡、清理
■以下污漬可能無法徹底清除。
■若食物色素(番茄醬、咖喱等)較多,色素可能沾染機身內部,建議事先洗掉。
• 累積的茶銹 • 唇膏污漬(視乎個別牌子) • 沾染食物色素的塑膠餐具
■ 請勿放入非耐熱(容易受熱變形)的器具
● 耐熱低於 90 ℃ 的塑膠器具(包括沒有耐熱標識的器具)
● 鐵製鍋、菜刀
■ 請勿放入容易生銹的餐具
■ 請勿放入易碎餐具
● 有裂痕、破損的餐具
● 裂紋釉餐具(有裂縫花紋的餐具)
● 水晶玻璃、鋼化雕花玻璃
● 附有木柄的鍋具
● 其他以上未提及或不確定可否可以由洗碗碟機洗滌的餐具,請參考有關洗碗碟機專用洗滌劑的說明,
或諮詢有關餐具經銷商
油污嚴重
食物殘渣
燒焦焦糊
HK5
注意 禁止洗滌強化玻璃製品
(可能因粉碎並飛濺而導致受傷)
快速使用指南
❶ 打開機門時
❷ 擺放餐具
■ 關閉機門時
① 按開門掣 ② 打開機門
如圖示按住開門掣上方中央位置,
直至機門左右門鎖確切鎖上為止
準備 • 確認是否正確安裝(第 HK19 - HK24 頁),確認過濾網的安放狀況(第 HK13 頁)
• 確認餐具是否均適合由洗碗碟機清洗(第 HK5 頁)
• 只能使用洗碗碟機專用洗滌劑,並仔細閱讀所購專用洗滌劑的注意事項,遵守其使用說明。
擺放餐具(第 HK6 - HK8 頁)
加入專用洗滌劑(第 HK9 頁)
• 按照需要選擇程序、乾碗等功能,按 Start/Pause(開始/暫停)鍵開始運作。
•
運作期間若不得不打開機門(例如想添加餐具)時,必須先按 Start/Pause(開始/暫停)鍵然後慢慢打開。
(否則洗滌水可能會濺出)
• 運作期間若沒有按下 Start/Pause(開始/暫停)鍵便打開機門,運行會停止。
→ 關好機門,便可重新運作。
清洗~乾碗(第 HK10 - HK11 頁)
• 發出 6 聲「嗶」响,運作結束。
• 運作結束 30 分鐘後,方可取出餐具。(運行剛結束時,機內溫度仍然很高,容易燙傷)
• 清洗過濾網(第 HK13 頁)
完成
餐具擺放不正確,可能導致機門無法開關,發生蒸氣洩漏、漏水,導致機身和餐具破損、變形,
或影響清潔效果,因此請遵守以下事項。
1
2
3
4
5
開門掣
■ 請勿疊放餐具
■ 污漬面應朝內對著噴嘴
■ 餐具底部的凹面容易殘留水分,
請稍微傾斜擺放 傾斜可減少
水分殘留
• 餐具應朝下擺放
• 餐具不應阻擋背面噴嘴
(以免擋住噴射出的水而無法
清洗乾淨上層碗籃的餐具)
• 餐具不可露出機門
• 請勿疊放餐具
• 餐具不可露出碗籃外部或底部,
或碰到噴嘴
(以免阻擋噴嘴轉動而無法漂洗)
• 餐具的污漬面應朝內對著噴嘴
喀嚓
HK6
NP-TH1HK.indd 35 2018/11/29 19:20:46
Job Name B685891_NP-TH1取説(香港)
Color K
File Name 0035_NP-TH1HK.pdf
Refine Time 2018-11-29 19:37:56 Print Time 2018-12-10 15:25:05

使用方法
上層碗籃
飯碗
茶杯
玻璃杯
湯羹
■ 碗籃擺放餐具分區
●
擺放餐具時,請將餐具污漬面沿著 方向朝向各噴嘴,以便噴到水,達到良好洗潔效果。
擺放餐具
麵碗
筷子
深碟
飯羹
醬料碟
醬料碟
小物件格
匙羹
下層碗籃(設有小物件格)
淺碟
• 此處可放一個醬料碟
(俯視圖)
• 尖端(污漬端)向下
HK7
■ 調校碗籃
洗碗碟機上下層碗籃的支架均可調校(共有 4 處可調校部分),以方便擺放較大、較高的餐具。
當下層碗籃擺放較長的餐具例如筷子而碰到上層碗籃時,可將上層碗籃的樹脂架調高一層。
若想擺放較大的餐具例如鍋具時,可將放置匙羹的支架收起來,或將下層碗籃放置麵碗、深碟的支架放平。
● 洗碗碟機容納餐具的大小要求如下:
【上層碗籃】玻璃杯:高度 160 mm 以下
【上層碗籃】茶杯:高度 120 mm 以下
【上層碗籃】湯羹:長度 250 mm 以下
【下層碗籃】醬料碟:直徑 180 mm 以下
【下層碗籃】深碟、淺碟:直徑 230 mm 以下,若將上層碗籃可調校部分(❶)調高時,則為 270 mm 以下
【下層碗籃】小物件格內物品:高度 330 mm 以下
(筷子較多時,可取下小物件格上的蓋子(第 HK3 頁),便可放入較多物品)
上層碗籃 可調校部分(❶)
下層碗籃 可調校部分(❷❸❹)
凸起架到上面
卡口架到上面
❶
❷
❸
❹
調校後的情況
HK8
提示
NP-TH1HK.indd 36 2018/11/30 15:12:16
Job Name B685891_NP-TH1取説(香港)
Color K
File Name 0036_NP-TH1HK.pdf
Refine Time 2018-11-30 15:17:02 Print Time 2018-12-10 15:25:06
Job Name
B685891_NP-TH1取説(香港)
Color K
File Name 0036_NP-TH1HK.pdf
Refine Time 2018-11-30 15:17:02 Print Time 2018-12-10 15:25:06
中文
使用方法
上層碗籃
飯碗
茶杯
玻璃杯
湯羹
■ 碗籃擺放餐具分區
●
擺放餐具時,請將餐具污漬面沿著 箭咀方向朝向各噴嘴,以便噴到水,達到良好洗潔效果。
擺放餐具
麵碗
筷子
深碟
飯羹
醬料碟
醬料碟
小物件格
匙羹
下層碗籃(設有小物件格)
淺碟
• 此處可放一個醬料碟
(俯視圖)
• 尖端(污漬端)向下
HK7
■ 調校碗籃
洗碗碟機上下層碗籃的支架均可調校(共有 4 處可調校部分),以方便擺放較大、較高的餐具。
當下層碗籃擺放較長的餐具例如筷子而碰到上層碗籃時,可將上層碗籃的樹脂架調高一層。
若想擺放較大的餐具例如鍋具時,可將放置匙羹的支架收起來,或將下層碗籃放置麵碗、深碟的支架放平。
● 洗碗碟機容納餐具的大小要求如下:
【上層碗籃】玻璃杯:高度 160 mm 以下
【上層碗籃】茶杯:高度 120 mm 以下
【上層碗籃】湯羹:長度 250 mm 以下
【下層碗籃】醬料碟:直徑 180 mm 以下
【下層碗籃】深碟、淺碟:直徑 230 mm 以下,若將上層碗籃可調校部分(❶)調高時,則為 270 mm 以下
【下層碗籃】小物件格內物品:高度 330 mm 以下
(筷子較多時,可取下小物件格上的蓋子(第 HK3 頁),便可放入較多物品)
上層碗籃 可調校部分(❶)
下層碗籃 可調校部分(❷❸❹)
凸起架到上面
卡口架到上面
❶
❷
❸
❹
調校後的情況
HK8
提示
NP-TH1HK.indd 37 2018/11/15 15:47:39
Job Name B685891_NP-TH1取説(香港)
Color K
File Name 0037_NP-TH1HK.pdf
Refine Time 2018-11-15 16:01:47 Print Time 2018-12-10 15:25:06

使用方法
香港地區使用時請設置代碼為0。
1
如果所處地區的水硬度較高,餐具及碗籃容易留下白色水垢。洗碗碟機可根據水質硬度進行設定,加入專用鹽後,
自動將水的硬度降低軟化,以達到更佳的清潔效果。
● 進行以下設定,否則可能會多消耗專用鹽、自來水或令清潔效果欠佳。
■ 地區設定(在關閉電源狀態下設定)
1
同時按下 Delay Start(延遲啟動)鍵和
Start/Pause(開始/暫停)鍵 2.5 秒,
發出 2 聲「嗶」响後,開始設定
2
按 Delay Start(延遲啟動)鍵,
功能代碼選擇「Air(風乾)」
3
再按 Program(程序)鍵,根據水質硬度
選擇相應選項代碼
■ 添加專用鹽的方法
(在關閉電源狀態下設定)
取出下層碗籃,旋開蓋子,小心倒入專用鹽(約 400 g),
再旋緊蓋子。
•
第一次使用時,加鹽之後,還需注滿水(約 200 g),
並充分攪拌溶解。
4
按 Start/Pause(開始/暫停)鍵保存設定,
發出 6 聲「嗶」响,完成設定
軟水系統
● 加鹽時可用計量器稱量,用市面出售的量杯倒入。若不小心把鹽撒出,請擦掉蓋口上的鹽。
(以免撒出的鹽與蓋子摩擦,令其密封程度變差)
● 第一次使用或顯示屏亮起「Salt(專用鹽)」指示燈時,請添加洗碗碟機專用鹽(不可使用食用鹽),
並仔細閱讀所購專用鹽的注意事項,遵照其使用說明。
● 若使用內附專用鹽的多合一洗碗碟機專用洗滌劑,而水質硬度小於 300 mg/L 時,可無需使用專用鹽,
但若大於 300 mg/L 時,則仍需加入專用鹽。
添加專用洗滌劑
2
按照所購洗碗碟機專用洗滌劑的使用說明,
直接適量加入機內便可。
或
(洗碗碟機專用
洗滌塊)
(洗碗碟機專用
洗碗粉)
●
請仔細閱讀所購洗碗碟機專用洗滌劑的
注意事項,並遵照其使用說明。
添加洗滌劑·清洗
0
Air(風乾)+ Intense(高效清洗)
100 [mg/L] 以下
1
100 - 200 [mg/L]
2
Air(風乾)+ Basic(標準)※
200 - 300 [mg/L]
3
Air(風乾)+ Intense(高效清洗)、
Basic(標準)
300 - 400 [mg/L]
4
Air(風乾)+ Speedy(超快速)
400 - 500 [mg/L]
顯示屏指示燈
(亮燈)
※: 表示該內容為出廠時的設定
功能代碼
(按延遲啟動鍵)
選項代碼(水質硬度)
(按程序鍵)
Air(風乾)
一次大約標準使用量(參考)
洗滌塊:1 塊(約 10 g)
洗碗粉:21 g
HK9
開
關
400 g
200 g
確定關閉電源
確定關閉電源
提示
提示
香港地區使用時,設置代碼為 0,無需添加專用鹽。請跳過此步驟,到添加洗滌劑。
Air(風乾)
添加洗滌劑
按下 ,選擇程序
4
• 每按一次程序鍵,可切換以下圖表中的所示模式,顯示屏的指示燈亦會隨之如下循環亮燈。
•
亮燈時默認為上一次操作的設定(若上一次為「Dry Only(只乾碗)」則除外)(出廠設定默認為以下①模式 )。
按下 ,開啟電源
3
•顯示屏所有程序的指示燈閃爍一下後,最後只顯示上一次操作的指示燈(其他指示燈會熄滅)。
(若上一次為「Dry Only(只乾碗)」則除外)
• 若顯示屏所有程序的指示燈一直亮燈,請關閉機門然後重新開啟電源。
選擇功能
主要
程序
附加程序
主要乾碗
功能
附加乾碟
功能
操作內容及大約操作時間(約)
清洗(31 分鐘)→ 漂洗 3 次(35 分鐘,70 ℃)
→ 乾碗(30 分鐘)→持續乾碗(2 小時)
Basic
(標準)
Basic
(標準)
-0.5 h
(30 分鐘)
0.5 h
(30 分鐘)
0.5 h
(30 分鐘)
Keep
(持續乾碗)
Sanitize
(高溫除菌)
Sanitize
(高溫除菌)
Sanitize
(高溫除菌)
清洗(31 分鐘)→ 漂洗 3 次(43 分鐘 - 53 分鐘,最高溫度可達 80 ℃)
→ 乾碗(30 分鐘)→ 持續乾碗(2 小時)
Intense
(高效清洗)
-清洗(60 分鐘)→ 漂洗 3 次(40 分鐘,70 ℃)
→ 乾碗(30 分鐘)→ 持續乾碗(2 小時)
清洗(60 分鐘)→ 漂洗 3 次(48 分鐘 - 58 分鐘,最高溫度可達 80 ℃)
→ 乾碗(30 分鐘)→ 持續乾碗(2 小時)
Care
(清潔機身)
Care
(清潔機身)
--- 清洗(108 分鐘)→ 漂洗 3 次(26 分鐘, 60 ℃)
--
清洗(108 分鐘)→ 漂洗 3 次(34 分鐘 - 44 分鐘,最高溫度可達 80 ℃)
Dry Only
(只乾碗)
-- 乾碗(60 分鐘)
Speedy
(超快速)
Speedy
(超快速)
---
清洗(17 分鐘)→ 漂洗 2 次(18 分鐘,60 ℃)
--
清洗(17 分鐘)→ 漂洗 2 次(26 分鐘 - 36 分鐘,最高溫度可達 80 ℃)
Eco
(節能)
Air
(風乾)
Air
(風乾)
- -
清洗(31 分鐘)→ 漂洗 3 次(73 分鐘,60 ℃)→ 風乾(240 分鐘)
-
清洗(31 分鐘)→ 漂洗 3 次(81 分鐘 - 91 分鐘,最高溫度可達 80 ℃)
→ 風乾(240 分鐘)
編號
①
②
③
④
⑤
⑥
⑦
⑧
⑨
⑩
⑪
● ①②適合餐後立即清潔;③④適合飯後數小時或油污較多時應用;⑤⑥適合餐後立即洗潔,餐具較少或想節
水節電時應用;⑦⑧適合清潔和保養機身內部時應用;⑨適合手洗後只需乾碗或想將餐具烘熱時應用;⑩⑪
適合餐具污漬很少或輕微時應用。
●
Basic(標準)、Intense(高效清洗)、Care(清潔機身)、Eco(節能)、Speedy(超快速)程序(即:除
「Dry Only(只乾碗)」之外的程序)均可補加或取消「Keep(持續乾碗)」的設定,設有「Keep(持續乾碗)」
程序進行時,會間歇性吹風約 2 小時。
●
「Sanitize(高溫除菌)」程序可與其他程序(「Dry Only(只乾碗)」程序除外)組合應用,漂洗時的最高水溫可變
為 80 ℃,清潔效果更佳。
●
上述圖表中的時間為室溫 20 ℃、進水溫度 15 ℃,水壓 0.24 MPa下所測量的溫度,實際操作時間視乎室溫、
水溫以及使用水壓、餐具擺放情況等變化而有差異。
● 操作過程中,相關模式的指示燈會不中斷亮著、熄滅,表示操作正在進行中。 HK10
顯示屏
43
5
6
提示
Intense
(高效清洗)
Eco
(節能)
Sanitize
(高溫除菌)
Sanitize
(高溫除菌)
0.5 h
(30 分鐘)
1 h
(60 分鐘)
Keep
(持續乾碗)
Keep
(持續乾碗)
Keep
(持續乾碗)
NP-TH1HK.indd 38 2018/11/29 19:20:57
Job Name B685891_NP-TH1取説(香港)
Color K
File Name 0038_NP-TH1HK.pdf
Refine Time 2018-11-29 19:37:55 Print Time 2018-12-10 15:25:06
Job Name
B685891_NP-TH1取説(香港)
Color K
File Name 0038_NP-TH1HK.pdf
Refine Time 2018-11-29 19:37:55 Print Time 2018-12-10 15:25:06
中文
使用方法
香港地區使用時請設置代碼為0。
1
如果所處地區的水硬度較高,餐具及碗籃容易留下白色水垢。洗碗碟機可根據水質硬度進行設定,加入專用鹽後,
自動將水的硬度降低軟化,以達到更佳的清潔效果。
● 進行以下設定,否則可能會多消耗專用鹽、自來水或令清潔效果欠佳。
■ 地區設定(在關閉電源狀態下設定)
1
同時按下 Delay Start(延遲啟動)鍵和
Start/Pause(開始/暫停)鍵 2.5 秒,
發出 2 聲「嗶」响後,開始設定
2
按 Delay Start(延遲啟動)鍵,
功能代碼選擇「Air(風乾)」
3
再按 Program(程序)鍵,根據水質硬度
選擇相應選項代碼
■ 添加專用鹽的方法
(在關閉電源狀態下設定)
取出下層碗籃,旋開蓋子,小心倒入專用鹽(約 400 g),
再旋緊蓋子。
•
第一次使用時,加鹽之後,還需注滿水(約 200 g),
並充分攪拌溶解。
4
按 Start/Pause(開始/暫停)鍵保存設定,
發出 6 聲「嗶」响,完成設定
軟水系統
● 加鹽時可用計量器稱量,用市面出售的量杯倒入。若不小心把鹽撒出,請擦掉蓋口上的鹽。
(以免撒出的鹽與蓋子摩擦,令其密封程度變差)
● 第一次使用或顯示屏亮起「Salt(專用鹽)」指示燈時,請添加洗碗碟機專用鹽(不可使用食用鹽),
並仔細閱讀所購專用鹽的注意事項,遵照其使用說明。
● 若使用內附專用鹽的多合一洗碗碟機專用洗滌劑,而水質硬度小於 300 mg/L 時,可無需使用專用鹽,
但若大於 300 mg/L 時,則仍需加入專用鹽。
添加專用洗滌劑
2
按照所購洗碗碟機專用洗滌劑的使用說明,
直接適量加入機內便可。
或
(洗碗碟機專用
洗滌塊)
(洗碗碟機專用
洗碗粉)
●
請仔細閱讀所購洗碗碟機專用洗滌劑的
注意事項,並遵照其使用說明。
添加洗滌劑·清洗
0
Air(風乾)+ Intense(高效清洗)
100 [mg/L] 以下
1
100 - 200 [mg/L]
2
Air(風乾)+ Basic(標準)※
200 - 300 [mg/L]
3
Air(風乾)+ Intense(高效清洗)、
Basic(標準)
300 - 400 [mg/L]
4
Air(風乾)+ Speedy(超快速)
400 - 500 [mg/L]
顯示屏指示燈
(亮燈)
※: 表示該內容為出廠時的設定
功能代碼
(按延遲啟動鍵)
選項代碼(水質硬度)
(按程序鍵)
Air(風乾)
一次大約標準使用量(參考)
洗滌塊:1 塊(約 10 g)
洗碗粉:21 g
HK9
開
關
400 g
200 g
確定關閉電源
確定關閉電源
提示
提示
香港地區使用時,設置代碼為 0,無需添加專用鹽。請跳過此步驟,到添加洗滌劑。
Air(風乾)
添加洗滌劑
按下 ,選擇程序
4
• 每按一次程序鍵,可切換以下圖表中的所示模式,顯示屏的指示燈亦會隨之如下循環亮燈。
•
亮燈時默認為上一次操作的設定(若上一次為「Dry Only(只乾碗)」則除外)(出廠設定默認為以下①模式 )。
按下 ,開啟電源
3
•顯示屏所有程序的指示燈閃爍一下後,最後只顯示上一次操作的指示燈(其他指示燈會熄滅)。
(若上一次為「Dry Only(只乾碗)」則除外)
• 若顯示屏所有程序的指示燈一直亮燈,請關閉機門然後重新開啟電源。
選擇功能
主要
程序
附加程序
主要乾碗
功能
附加乾碟
功能
操作內容及大約操作時間(約)
清洗(31 分鐘)→ 漂洗 3 次(35 分鐘,70 ℃)
→ 乾碗(30 分鐘)→持續乾碗(2 小時)
Basic
(標準)
Basic
(標準)
-0.5 h
(30 分鐘)
0.5 h
(30 分鐘)
0.5 h
(30 分鐘)
Keep
(持續乾碗)
Sanitize
(高溫除菌)
Sanitize
(高溫除菌)
Sanitize
(高溫除菌)
清洗(31 分鐘)→ 漂洗 3 次(43 分鐘 - 53 分鐘,最高溫度可達 80 ℃)
→ 乾碗(30 分鐘)→ 持續乾碗(2 小時)
Intense
(高效清洗)
-清洗(60 分鐘)→ 漂洗 3 次(40 分鐘,70 ℃)
→ 乾碗(30 分鐘)→ 持續乾碗(2 小時)
清洗(60 分鐘)→ 漂洗 3 次(48 分鐘 - 58 分鐘,最高溫度可達 80 ℃)
→ 乾碗(30 分鐘)→ 持續乾碗(2 小時)
Care
(清潔機身)
Care
(清潔機身)
--- 清洗(108 分鐘)→ 漂洗 3 次(26 分鐘, 60 ℃)
--
清洗(108 分鐘)→ 漂洗 3 次(34 分鐘 - 44 分鐘,最高溫度可達 80 ℃)
Dry Only
(只乾碗)
-- 乾碗(60 分鐘)
Speedy
(超快速)
Speedy
(超快速)
---
清洗(17 分鐘)→ 漂洗 2 次(18 分鐘,60 ℃)
--
清洗(17 分鐘)→ 漂洗 2 次(26 分鐘 - 36 分鐘,最高溫度可達 80 ℃)
Eco
(節能)
Air
(風乾)
Air
(風乾)
- -
清洗(31 分鐘)→ 漂洗 3 次(73 分鐘,60 ℃)→ 風乾(240 分鐘)
-
清洗(31 分鐘)→ 漂洗 3 次(81 分鐘 - 91 分鐘,最高溫度可達 80 ℃)
→ 風乾(240 分鐘)
編號
①
②
③
④
⑤
⑥
⑦
⑧
⑨
⑩
⑪
● ①②適合餐後立即清潔;③④適合飯後數小時或油污較多時應用;⑤⑥適合餐後立即洗潔,餐具較少或想節
水節電時應用;⑦⑧適合清潔和保養機身內部時應用;⑨適合手洗後只需乾碗或想將餐具烘熱時應用;⑩⑪
適合餐具污漬很少或輕微時應用。
●
Basic(標準)、Intense(高效清洗)、Care(清潔機身)、Eco(節能)、Speedy(超快速)程序(即:除
「Dry Only(只乾碗)」之外的程序)均可補加或取消「Keep(持續乾碗)」的設定,設有「Keep(持續乾碗)」
程序進行時,會間歇性吹風約 2 小時。
●
「Sanitize(高溫除菌)」程序可與其他程序(「Dry Only(只乾碗)」程序除外)組合應用,漂洗時的最高水溫可變
為 80 ℃,清潔效果更佳。
●
上述圖表中的時間為室溫 20 ℃、進水溫度 15 ℃,水壓 0.24 MPa下所測量的溫度,實際操作時間視乎室溫、
水溫以及使用水壓、餐具擺放情況等變化而有差異。
● 操作過程中,相關模式的指示燈會不中斷亮著、熄滅,表示操作正在進行中。 HK10
顯示屏
43
5
6
提示
Intense
(高效清洗)
Eco
(節能)
Sanitize
(高溫除菌)
Sanitize
(高溫除菌)
0.5 h
(30 分鐘)
1 h
(60 分鐘)
Keep
(持續乾碗)
Keep
(持續乾碗)
Keep
(持續乾碗)
NP-TH1HK.indd 39 2018/11/29 19:21:03
Job Name B685891_NP-TH1取説(香港)
Color K
File Name 0039_NP-TH1HK.pdf
Refine Time 2018-11-29 19:37:53 Print Time 2018-12-10 15:25:07
Table of contents
Other Panasonic Dishwasher manuals

Panasonic
Panasonic NP-6R2MUQNZ User manual

Panasonic
Panasonic NP-6R2MUQNZ-NZ User manual

Panasonic
Panasonic NP-B6M1FIGB User manual

Panasonic
Panasonic NP-TH1WEVN User manual

Panasonic
Panasonic NP-B6V2FTNZ Operating instructions

Panasonic
Panasonic NP-B6V1 Operating instructions

Panasonic
Panasonic NP-6F1MLQ User manual

Panasonic
Panasonic NP-B6M1 Operating instructions

Panasonic
Panasonic NP-B6M2FTNZ Operating instructions

Panasonic
Panasonic NP-6F2MUQNZ User manual