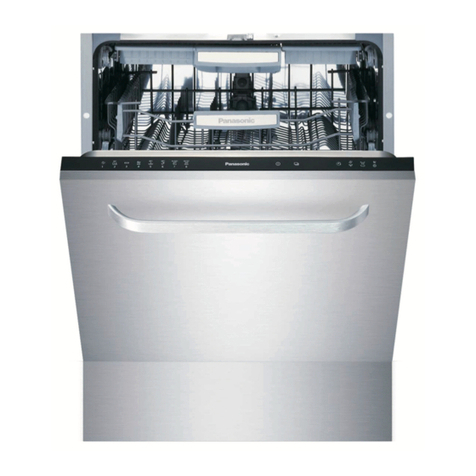
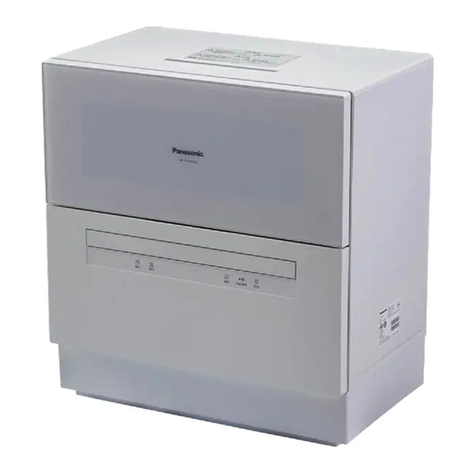
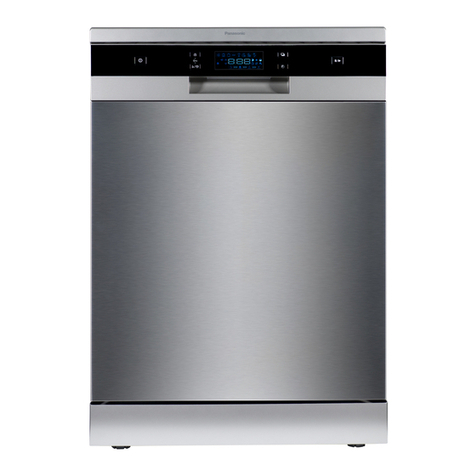
Panasonic NP-TH1WEVN User manual

PanasonicCorporation
WebSite:https://www.panasonic.com
©PanasonicCorporation2023
P9901-23N00
S0123-0
Printed in China
NP-TH1WEVN.indb1NP-TH1WEVN.indb1 2023/01/1017:52:262023/01/1017:52:26
English Tiếng Việt
Operating Instructions
Dishwasher (Household Use)
Hướng dẫn Vận hành
Máy rửa chén (Sửdụng trong gia đình)
A copy of the Installation Instructions is attached.
Có đính kèm Hướng dẫn Lắp đặt.
Thank you for purchasing this Panasonic product.
Before using this appliance, please read these instructions and Safety Precautions (pages EN1 - EN2)
carefully and keep this manual for future reference.
Cám ơn quý khách đã đặt mua sản phẩm này của Panasonic.
Trước khi sửdụng thiết bị, vui lòng đọc kỹbản hướng dẫn này và Biện pháp An toàn (Trang VI1 - VI2) và
hãy cất giữnó để tiện tham khảo sau này.
P9901
-
23N00
Model No. NP-TH1WEVN
NP-TH1WEVN.indb1NP-TH1WEVN.indb1 2023/01/1017:51:512023/01/1017:51:51

2
Items should be loaded with the soiled surfaces facing the nozzles (see ) for effective
water spraying so as to achieve satisfactory washing result.
Nên xếp vật dụng với bềmặt bẩn hướng vềphía các cần phun (xem ) để giúp hệthống
phun nước hoạt động hiệu quảhơn và cho ra kết quảrửa tốt hơn.
NP-TH1WEVN.indb2NP-TH1WEVN.indb2 2023/01/1017:51:512023/01/1017:51:51
3
English Tiếng Việt
Table of Contents
Mục lục
Safety Precautions .......................... EN1
Notes on Use..................................... EN2
Parts Identification/Accessories......... EN3
Confirmation and
Preparation before Use ..................... EN5
Quick Start Guide .............................. EN6
Instructions for Use............................ EN7
• Loading items to wash................................. EN7
• Adding Detergent and Washing...................EN9
• Drying • Delay Start •
Change the Settings...................................EN11
Biện pháp An toàn........................... VI1
Lưu ý sửdụng ................................... VI2
Các bộphận thiết bị/Phụkiện............ VI3
Kiểm tra và Chuẩn bịtrước khi rửa... VI5
Chỉdẫn Vận hành Nhanh .................. VI6
Hướng dẫn sửdụng.......................... VI7
• Xếp chén dĩa vào máy rửa chén .................VI7
• Thêm xà phòng và rửa chén .......................VI9
• Sấy • Hẹn giờ• Thay đổi cài đặt..................VI11
Maintenance...................................... EN13
Frequently Asked Questions.............. EN15
Error Indication .................................. EN16
• Freezing prevention,
Not in use for a long time ............................EN17
Troubleshooting................................. EN18
Installation Instructions...................... EN19
Specifications .................................... EN24
Bảo trì................................................ VI13
Câu hỏi thường gặp .......................... VI15
Tín hiệu báo lỗi.................................. VI16
• Phòng ngừa đóng băng, Không sửdụng
trong thời gian dài........................................VI17
Mẹo khắc phục sựcố........................ VI18
Hướng dẫn Lắp đặt ........................... VI19
Thông sốkỹthuật.............................. VI24
NP-TH1WEVN.indb3NP-TH1WEVN.indb3 2023/01/1017:51:522023/01/1017:51:52

EN1
Safety Precautions
This appliance is not intended for use by persons (including children) with reduced physical,
sensory or mental capabilities, or lack of experience and knowledge,unless they have been
given supervision or instruction concerning use of the appliance by a person responsible for
their safety. Children should be supervised to ensure that they do not play with the appliance.
Do not splash or sprinkle water on the appliance body. (It may cause fire or electric shock.)
Keep the appliance away from a flame or heat sources. (It may cause a fire.)
• Mosquito coils, cigarettes, candles, electric heaters, etc.
Ensure at least 15 cm clearance between the appliance and heat sources such
as a gas stove. (It may cause a fire.)
Do not bang the appliance while it is in operation.
(It may cause electric shock, electricity leakage, or short circuit, resulting fire.)
Do not open the dishwasher during operation or within 30 minutes after the end of
the operation. (The high temperature inside the appliance, washing water or steam may cause burns.)
→Please wait for 30 minutes after the end of the operation before opening the dishwasher (to take
out the items, carry out cleaning or maintenance).
→If you need to open the dishwasher during operation, you must pause the operation first and
open the door carefully and slowly.
Do not disassemble, repair or modify the appliance.
(It may cause fire or injury due to abnormal operation.)
Do not use the power cord or power plug incorrectly. (It may cause fire or electric shock.)
Do not damage the cord or plug; do not modify, forcibly bend, twist, pull, load with heavy objects,
bundle, or place near heat sources.
→If the cord or plug is damaged, it must be replaced by the manufacturer, its Service Centre or
other relevant qualified persons in order to avoid a hazard.
Do not use wet hands to plug or unplug the power plug.
Do not use if the cord or plug is damaged.
Please use the power cord and power plug correctly.
Use exclusively one power socket with the rating of 10 A/220 V AC.
(If the socket is shared with other electrical appliances, it may cause fire due to heat.)
The power plug must be fully inserted into the power socket. (Otherwise, it may cause fire due to
electric shock or heat. Do not use if the plug is damaged or the socket is loose.)
Wipe the plug periodically with a dry cloth. (Dust or moisture built up on the plug may cause poor
insulation, resulting fire.)
Be sure to unplug the appliance if you do not intend to use it for a long period of time or when you
perform cleaning or maintenance.
When unplugging the appliance, always hold and pull the plug (instead of pulling the cord)
(as it may cause fire due to electric shock or short circuit).
Make sure this appliance is reliably earthed.
(There will be the risk of electric shock caused by malfunction or leakage.)
→Be sure to use a single-phase, two-pole, earthed power socket or hire a qualified person to carry
out earthing of the appliance.
must observe
To prevent personal injuries and property damages, be sure to observe the following instructions.
■
The following indicates the degree of hazards and damages caused by incorrect operation.
WARNING Indicates a potential hazard may result in serious personal injury or death
if not avoided.
CAUTION Indicates a potential hazard may result in minor or moderate personal
injury if not avoided.
■The following symbols indicate what you must observe.
Indicates actions which are prohibited. Indicates actions which must be enforced.
WARNING
■To prevent fire, burns or
electric shock
NP-TH1WEVN.indb1NP-TH1WEVN.indb1 2023/01/1017:51:522023/01/1017:51:52
EN2
English
Do not put in knives and choppers
(to avoid damage to the dishwasher).
Do not lean or press on the open door
with force
(as the appliance may topple or fall, causing
injuries).
Do not stay near or touch the drain
hose or vent (as the exhaust hot water, hot air
or steam may cause burns).
Do not forcibly close the door if the
utensils protrude from the dishwasher
(as this may cause the door to deform or hot water
may squirt out resulting burns).
When opening the door, do not pry
open the upper part of the door
(as this may cause the door to deform or hot water
may squirt out resulting burns).
Open and close the door carefully to avoid
pinching your fingers (which may cause injuries).
The door should not stay in an open
position (as this may cause the utensils to
tumble and fall over resulting injuries).
Be sure to close the water tap every time
after operation. (It may cause water leakage.)
This appliance is intended to be used in
household and similar applications such as:
∙staff kitchen areas in shops, offices and other
working environments;
∙farm houses;
∙by clients in hotels, motels and other residential
environments;
∙bed and breakfast type environments.
Knives and other cutlery with sharp
points must be loaded in the baskets
pointed down or placed in a horizontal
position. (It may cause cuts.)
If abnormality or error occurs, stop using
the appliance immediately, close the
supply valve and unplug the power plug.
(It may cause smoking, combustion, or electric
shock.)
→
Contact Service Centre for inspection and repair.
Examples of abnormality or error
∙Sometimes the appliance does not operate
after the power is turned on.
∙The door does not open or close normally.
∙Abnormal sound is heard during operation.
∙The appliance body is deformed or becomes
abnormally hot.
Notes on Use
■
To prevent fire, burns
or electric shock
WARNING
CAUTION
■To prevent fire
or injury
■The dishwasher must be used
correctly
■Make sure to use dishwasher
detergent
●
Do not place the dishwasher in a location near
electrical appliances such as a TV or radio
(which may cause distorted images or noises).
●Do not pour water/hot water.
(Water may leak or enter components.)
Repair or service may be needed.
(This is out of scope of warranty.)
●Do not use the appliance other than for its
washing or drying function. (Otherwise, it
may cause a failure.)
●
Do not tilt or move the appliance during
operation (which may cause water leakage).
●The door should not be left in an open
position. (This could present a tripping
hazard.)
●
If the dishes are heavily soiled with grease,
increase an appropriate amount of dishwasher
detergent. (Otherwise, it may cause odour.)
●
Do not use kitchen detergent or baking soda.
(Excessive foam may be generated
causing water leakage or malfunction).
→Always use dishwasher detergent
(referred to as dishwasher tablet or
dishwasher powder)
Reminder
(kitchen
detergent)
(dishwasher
tablet) (dishwasher
powder)
(baking soda)
●Any kitchen detergent used for soaking
or pre-wash must be completely washed
away before the utensils are loaded into
the dishwasher.
●Do not install the dishwasher on the carpet.
(It may block the bottom vent.)
●New hose-set supplied with the appliance is
to be used and old hose-sets should not be
reused.
●Do not use if the water contains impurities,
as it may cause poor water supply and
malfunction.
●This appliance may have a rubber or resin
smell for a while after it is purchased.
There are no adverse effects to the human
body, and the odour will disappear after a
period of time.
●The applicable inflow water pressure for this
appliance is 0.05 MPa - 1 MPa.
●
Standard capacity for this appliance is 39 items.
Prohibited
Appropriate
NP-TH1WEVN.indb2NP-TH1WEVN.indb2 2023/01/1017:51:522023/01/1017:51:52
EN3
Parts Identification/Accessories
Nozzle (back)
Nozzle (top)
Nozzle
(bottom)
Filter
(page EN13)
Rails
(right and left sides)
Open the door
Power cord Drain hose connector
Supply hose connector
Back of the appliance
Open Door
button
Door
Upper basket Lower basket Cutlery basket
The cover
grid can be
removed
following the
direction of
the arrow
■Removing the basket
As shown in the illustration, lift up the convex
part of the basket from the concave part and
pull it out.
■Attaching the basket
To attach the basket, do the reverse of
removing it.
■Attaching the basket
Align the rails and slide in.
■Removing the basket
Pull out the basket, then lift up to take out.
Convex
Concave
●The shape and colour of the illustrations in this manual may differ from the actual appliance. Please refer to
the actual dishwasher.
NP-TH1WEVN.indb3NP-TH1WEVN.indb3 2023/01/1017:51:522023/01/1017:51:52
2
3
1
5
4
6
EN4
English
Display
Control panel
1
Power button
●Press this button to power on or off the dishwasher.
●After the power is turned on, by default it is automatically set to the program of the
last operation (except if the last program was “Dry Only”)
2
Program button
●In selecting the wash program, each time you press the button, you can switch the
wash mode. The display indicators will light up in turn to show the corresponding
mode. (page EN10)
3
Dry button
●Each time you press it, you can switch the drying mode, and the display indicators
will light up in turn to show the corresponding mode. (page EN11)
4
Delay Start button
●Press this button, the program will start to operate automatically 4 hours later, and
the indicator “4 hours” will light up.
●Press the button again, it will cancel the Delay Start setting. The “4 hours” display
indicator will light off.
5
Start/Pause button
●Press this button to start operation. If you press this button during operation, the
operation will pause. Press it again, the operation will continue.
●If you do not press this button after the above steps, the power will be turned off
automatically after 10 minutes.
●If the door is not closed, pressing this button will not start the operation.
6●The display indicator “Salt” will light up if the dishwasher salt is not adequate. For
option code “0”, “Salt” does not light up. (page EN9)
Accessories
❶Supply hose (1)
❺Clamp (1)
❷Drain hose (1)
❻Sucker (1) ❼Protective sleeve (bolt set) (1)
❹Gasket (3)
❸Three-way connector (1)
Reminder
●❹is in a small bag and it is in a large bag with ❸and it is included with other accessories.
●❼can be split into 4 parts.
●Please refer to Installation Instructions. (page EN19)
Bolt
Nut
●Splitting
①Unscrew ②Open in the
direction of the
arrow
NP-TH1WEVN.indb4NP-TH1WEVN.indb4 2023/01/1017:51:542023/01/1017:51:54

EN5
Confirmation and Preparation before Use
CAUTION Avoid tempered glasses
(which may scatter when broken, resulting in injuries)
Items that are not suitable for the dishwasher
■Avoid light-weight items that may easily be blown off. (It may cause damage, smoke, burns and odour.)
●Plastic spoons and lid ●Styrofoam containers
●Sponges and dishwashing cloths ●Baby bottle nipples
■Avoid non-heat proof items (that are easy to be deformed by heat).
●Plastic items with a heat resistance of 90 °C or less
(including items without a heat-proof label).
■Avoid items that are easy to discolour or its coating are easy to peel off.
●Silver, aluminum, copper, iron items
●Wooden (bamboo, rattan) items
●Lacquered, gilded, or overglaze-painted items
●Fluorine processing pans
■Avoid fragile items
●Cracked, broken items
●Crackle glaze dinnerware (tableware with crack pattern)
●Crystal glass, tempered carved glass
●Pans with a wooden handle
■Avoid items with narrow mouth, the inside of which cannot be washed.
●Bottles and decanters
■Avoid items that are easy to get rusted.
●Iron frying pans, knives
Other items that are not mentioned above or which you are not sure whether they should be washed in the
dishwasher, please refer to the instructions on the dishwasher detergent or contact the dealer.
Preparation
Food
residues
Burns and
scorches
Tough soils
Utensils with roasted
food or steamed eggs,
stubborn stains on burnt
pans that are difficult to
clean
→Soak and clean up
before loading
Fine residue such as seasonings, spices or
sesame seeds may re-deposit
Toothpicks, fish bones or rubber bands may
cause valve failure
Fish skin may cause odour
→Remove food residues and foreign objects
before loading
May re-deposit
→Hand wash in advance
■The following stains may not be completely removed
• Accumulated tea rust •
Lipstick stains (depends on the types)
•
Plastic tableware stained with food colours
■If the items are stained with food colours (such as ketchup or curry), the pigment may adhere to the
inside of the dishwasher. Remove before loading.
NP-TH1WEVN.indb5NP-TH1WEVN.indb5 2023/01/1017:51:542023/01/1017:51:54
EN6
English
Quick Start Guide
1Preparation
2Loading items to wash
(pages EN6 - EN8)
• Confirm the installation (pages EN19 - EN23) and the placement of the filters (page
EN13) are correct
• Confirm the utensils are suitable for cleaning by the dishwasher (page EN5)
Clicking
■To close the door
Press the upper central part of the door
above the Open Door button to close
the door until the left and right door
latches are set firmly.
■Avoid overlapping the items
■Tilt the items if they have a concave
bottom to reduce residual water.
■The soiled surfaces should face
inward towards the nozzles.
3 Adding detergent (page EN9)
• Use only dishwasher detergent. Read carefully and follow the instructions on the dishwasher detergent.
4 Washing and Drying (pages EN10 - EN11)
• Select the program as needed, and press Start/Pause to start the operation.
• If you have to open the door during operation (for example, to load more items), you must press Start/Pause
and open the door slowly.
(Otherwise, washing water may spill out.)
• If you open the door without pressing Start/Pause during operation, the operation will stop.
→Close the door and the operation will re-start.
5 Operation completed
• Six beep sounds end the operation.
• Take out the items after 30 minutes from the completion of the operation. (When the operation is completed,
the temperature inside the dishwasher is still very high and it is easy to get burnt.)
• Cleaning the filter (page EN13)
❶To open the door,
①press the Open Door button,
❷Loading items to wash
Placing items improperly may result in the door not being able to open and close, causing steam leakage,
water leakage, and damage and deformation of the dishwasher and utensils, or affecting the cleaning result.
Therefore, please observe the following instructions.
②open the door
Open Door
button
Residual water
will be reduced.
• Items should be loaded facing down
• Items should not block the back
nozzle
(to avoid blocking the spraying water
to clean items in the upper basket)
• Items should not protrude from
the door
• Do not overlap the items
• Items should be loaded with the
soiled surfaces facing inward
towards the nozzle
• Items should not protrude outside
the basket or from the bottom of the
basket, or touch the nozzle
(Otherwise, the nozzle rotation may
stop, hence affecting the washing
result.)
Correct Incorrect
NP-TH1WEVN.indb6NP-TH1WEVN.indb6 2023/01/1017:51:552023/01/1017:51:55

EN7
Instructions for Use
Items should be loaded with the soiled surfaces facing the nozzles (see ) for effective water
spraying so as to achieve satisfactory washing result.
■Basket partitions
Upper basket
Lower basket (with a cutlery basket)
Rice bowls
Tea cups
Glasses
Soup spoon
(top view) • A sauce plate can
be placed here.
Chopsticks
• the tip (soiled end)
facing downward
Deep plates
Spoons
Noodle bowls
Sauce plate
Cutlery basket
Sauce plate
Rice spoon
Shallow plates
NP-TH1WEVN.indb7NP-TH1WEVN.indb7 2023/01/1017:51:552023/01/1017:51:55
❶
❷
❸
❹
EN8
English
Loading items to wash
Reminder
●The sizes of items that the dishwasher can accommodate are as follows:
[ Upper basket ] Glasses: height 160 mm or less
[ Upper basket ] Tea cups: height 120 mm or less
[ Upper basket ] Soup spoon: length 250 mm or less
[ Lower basket ] Sauce plates: diameter 180 mm or less
[ Lower basket ] Deep plates, shallow plates: diameter 230 mm or less; if the movable rack (❶) of the upper
basket is raised up, then 270 mm or less
[ Lower basket] Items in cutlery basket: height 330 mm or less
(If there are many chopsticks, remove the top grid of the cutlery basket (page EN3) to put in more items)
■Adjusting the baskets
There are movable racks in the upper and lower baskets of the dishwasher (a total of 4 movable racks) for
placing larger items.
Upper basket
Lower basket
movable rack (❶)
movable racks (❷❸❹)
If long items such as chopsticks in the lower basket touch the upper basket, the resin rack of the upper basket
can be raised up.
To put in larger items such as pans, the rack for holding soup spoons can be raised up, or the racks for placing
the noodle bowls and deep plates can be laid flat.
Hooks placed on top
Bulge placed on top
After adjustment
NP-TH1WEVN.indb8NP-TH1WEVN.indb8 2023/01/1017:51:552023/01/1017:51:55

EN9
Instructions for Use
Water Softening System
Adding Detergent
1Set the option code according to the hardness of
the water in your area. (The factory setting is 0.)
If using the dishwasher in an area of high water hardness level, whitish staining may leave on the utensils and
baskets. The dishwasher can be programmed according to the level of water hardness. By adding dishwasher salt,
the water will be softened to reduce its hardness to achieve a better cleaning result.
●Make the following settings to avoid consuming more dishwasher salt and water and having a poor
cleaning result.
Confirm power is turned off
■Area setting (while power is turned off)
1Press Delay Start and Start/Pause for
2.5 seconds simultaneously. After 2 beep
sounds, start setting.
2Press Delay Start, select the function code
“Air”.
3Press Program and select the
corresponding option code according to the
water hardness level.
4Press Start/Pause to save the setting.
Six beep sounds complete the setting.
Function code
(press Delay
Start)
Option code
(water hardness)
(press Program)
Display indicator
(lights up)
Air
0 100 [mg/L] or less Air *
1 100 - 200 [mg/L] Air + Intense
2 200 - 300 [mg/L] Air + Basic
3 300 - 400 [mg/L] Air + Basic, Intense
4 400 - 500 [mg/L] Air + Speedy
* Factory setting.
With option code “0”, there is no need to add salt.
Please skip this step and move to the next step (Adding Detergent).
2Adding dishwasher detergent
Add into the dishwasher according to the
instructions on the dishwasher detergent.
The standard amount for each washing (for
reference only)
Dishwasher tablet : 1 tab (about 10 g)
Dishwasher powder : 10 g(20 gfor heavily
grease stain)
Reminder
●Please read carefully and follow the precautions
and instructions on the dishwasher detergent.
or
(Dishwasher
tablet)
(Dishwasher
powder)
close open
■Adding dishwasher salt (while power is off)
Remove the lower basket, unscrew the lid, and carefully
pour in the dishwasher salt (about 400 g).
Then, tighten the cover.
• When using for the first time, fill in water (about 200 g)
fully after adding the salt. Stir well until it dissolves.
Reminder
●
When adding the salt, use a scale to weigh it and pour in with a measuring cup. If you accidentally spill the salt,
wipe off the salt on the dispenser (to prevent the salt rubbing against the lid, hence reducing the tightness).
●When the “Salt” indicator lights up, please add the dishwasher salt (do not use edible salt), and read carefully
and follow the instructions on the dishwasher salt.
●If you use all-in-one dishwasher detergent which contains dishwasher salt, and the water hardness is less than
300 mg/L, you don’t need to use the dishwasher salt. However, if water hardness is over 300 mg/L, you still
need to add dishwasher salt.
Add dishwasher detergent
around the area of the filter.
filter
NP-TH1WEVN.indb9NP-TH1WEVN.indb9 2023/01/1017:51:562023/01/1017:51:56
EN10
English
Adding Detergent and Washing
Select functions 43
5
6
Display
3Press to turn on the power
• After all indicators in the display blink once, only the indicator of the last operation will light up (and the other
indicators will light off) (except if the last operation was “Dry Only”).
• If all indicators in the display keep lighted up, close the door and turn the power on again.
4Press to select a program
• Each time you press the Program button, you can switch the mode shown in the chart below, and the
indicators in the display will light up in turn.
• When an indicator lights up, the mode of the previous operation is set by default
(except if the last operation was “Dry Only”) (Mode ①is factory set).
• When you select “Keep” and start, it enhances the drying effect and reduces drip residue.
It also reduces dew and odour buildup in dishes and inside of the dishwasher.
* After the operation, it repeats air blowing and stopping for two hours.
Reminder
●①
and
②
are suitable for washing immediately after the meal.
③
and
④
are suitable for washing several hours after
the meal or when the items are heavily soiled.
⑤
and
⑥
are suitable for washing immediately after the meal, when
there are less items to wash or when water-saving and energy-saving are in mind.
⑦
and
⑧
are for cleaning and
maintenance of the inside of the dishwasher. ⑨is applicable for drying after hand wash, or using as a dish warmer.
⑩and ⑪are best when the items are slightly or lightly soiled.
●Basic, Intense, Care, Eco, Speedy programs (i.e. except Dry) can supplement or cancel the Keep setting.
When Keep is set, air will be intermittently blowing for about 2 hours.
●The 80°C mode can be combined with other programs (except Dry). The maximum water temperature during
rinsing can be changed to 80 °C, hence achieving better cleaning result.
●
The operating times in the above chart are measured at room temperature 20 °C, supply water temperature 15 °C,
and water pressure 0.24 MPa. The actual operating time depends on room temperature, water temperature, water
pressure, and the location of the items loaded and so on.
●
During the operation, the indicator of the relevant mode will keep light on and off, indicating that operation is in progress.
Serial
No.
Main
program
Additional
mode Main drying
function
Additional
drying mode
Operation process and operation time (approx.)
①Basic — 0.5 h Keep Wash (31 minutes) →Rinse 3 times (35 minutes, 70 °C)
→Dry (30 minutes) →Keep (2 hours)
②Basic 80°C 0.5 h Keep Wash (31 minutes) →Rinse 3 times (43-53 minutes, maximum
temperature up to 80 °C) →Dry (30 minutes) →Keep (2 hours)
③Intense — 0.5 h Keep Wash (60 minutes) →Rinse 3 times (40 minutes, 70 °C)
→Dry (30 minutes) →Keep (2 hours)
④Intense 80°C 0.5 h Keep Wash (60 minutes) →Rinse 3 times (48 - 58 minutes, maximum
temperature up to 80 °C) →Dry (30 minutes) →Keep (2 hours)
⑤Eco — Air — Wash (31 minutes) →Rinse 3 times (73 minutes, 60 °C)
→Air (240 minutes)
⑥Eco 80°C Air — Wash (31 minutes) →Rinse 3 times (81 - 91 minutes, maximum
temperature up to 80 °C) →Air (240 minutes)
⑦Care — — — Wash (108 minutes) →Rinse 3 times (26 minutes, 60 °C)
⑧Care 80°C — — Wash (108 minutes) →Rinse 3 times (34 - 44 minutes,
maximum temperature up to 80 °C)
⑨Dry Only — 1 h — Dry (60 minutes)
“Keep” is not available for “Dry Only” program.
⑩Speedy — — — Wash (17 minutes) →Rinse 2 times (18 minutes, 60 °C)
⑪Speedy 80°C — — Wash (17 minutes) →Rinse 2 times (26 - 36 minutes, maximum
temperature up to 80 °C)
Sanitization is carried out during the washing and rinsing process by
high-pressure water jets above 50 °C. (page EN24)
NP-TH1WEVN.indb10NP-TH1WEVN.indb10 2023/01/1017:51:592023/01/1017:51:59

EN11
Instructions for Use
5Press and select drying
• When you want to adjust the drying function included in the previous program, you can do so by pressing the
Dry button. Each time you press, you can switch the drying mode according to the chart below.
The display indicators will light on in turn.
6Press to start
• Drying starts according to the selected program,
and ends with 6 beep sounds.
• If you do not press this button after the above steps,
power will be automatically turned off after 10 minutes.
Reminder
●After adjusting the drying mode, the overall operating time will also change.
●When No Drying is selected, air blowing will continue for about 3 minutes (about 30 minutes if dishwasher salt is
added), which is normal. (This is to discharge some of the hot air to avoid burns.)
Caution
●Take out the items after 30 minutes from the end
of operation (to avoid burns).
●Clean the filter after each operation. (page EN13)
■Delay Start program
You can preset to start the operation 4 hours later by the following procedure.
After step 5 in pages EN9 - EN11,
Press , the indicator for in the display will light up,
press
(operation will start 4 hours later)
Reminder
●You cannot use the Delay Start function in Dry Only, Speedy, Speedy + 80°C programs.
●If you want to cancel Delay Start, press , the indicator “4 hours” will light off.
Factory
setting 0.5 h Keep
Keep
Keep
1 h
1 h
Air
Air
No Drying
0.5 h
+
+
+
Keep
Keep
Keep
1 h
1 h
Air
Air
No Drying
0.5 h
0.5 h
+
+
+
Keep
Keep
Keep
1 h
1 h
Air
Air
No Drying
0.5 h
0.5 h +
+
+
1 h
0.5 h
Basic, Intense program Eco program Speedy, Care program Dry Only program
NP-TH1WEVN.indb11NP-TH1WEVN.indb11 2023/01/1017:51:592023/01/1017:51:59
EN12
English
Drying • Delay Start • Change the Settings
Confirm power is turned off
1Press Delay Start and Start/Pause for
2.5 seconds simultaneously.
Start setting after 2 beep sounds.
2Press Delay Start, and select function
code “1 h”.
3Press Program again and select the
option code as needed (whether to
enhance washing).
4Press Start/Pause to save the setting
and 6 beep sounds complete the setting.
1Press Delay Start and Start/Pause for
2.5 seconds simultaneously.
Start setting after 2 beep sounds.
2Press Delay Start and select the function
code “1 h + Air”.
3Press Program again and select the
option code as needed
(whether to enhance drying).
4Press Start/Pause to save the setting
and 6 beep sounds complete the setting.
■Change the Settings
Various settings can be changed according to your preference or actual situation.
Enhanced washing settings
Enhanced drying settings
If you want to enhance the washing performance by extending the washing
time, change the settings as follows.
If you want to enhance the drying performance by extending the drying time,
change the settings as follows.
Function
code
(press Delay
Start)
Option code
(whether to
enhance washing)
(press Program)
Display indicator
(lights up)
1 h 0 No need 1 h *
1 Enhanced 1 h + Intense
Function
code
(press Delay
Start)
Option code
(whether to
enhance drying)
(press Program)
Display indicator
(lights up)
1 h + Air 0 No need 1 h + Air *
1 Enhanced 1 h + Air + Intense
Confirm power is turned off
1Press Delay Start and Start/Pause for
2.5 seconds simultaneously.
Start setting after 2 beep sounds.
2Press Delay Start and select the function
code “0.5 h”.
3Press Program again and select
the option code as needed (whether
to disable the buzzer for operation
completion).
4Press Start/Pause to save the setting
and 6 beep sounds complete the setting.
Disable the buzzer setting after operation
If you want to disable the buzzer at the completion of the
dishwashing, make the changes as follows.
Function
code
(press Delay
Start)
Option code
(whether to
enable or disable
the buzzer
for operation
completion)
(press Program)
Display indicator
(lights up)
0.5 h 0 Disable 0.5 h
1 Enable 0.5 h + Intense *
* Indicates that the operation mode is factory set.
NP-TH1WEVN.indb12NP-TH1WEVN.indb12 2023/01/1017:51:592023/01/1017:51:59

EN13
Maintenance
●Take out the utensils, clean the food filter, and carry out maintenance after 30 minutes from
operation completion (to avoid burns).
●Be sure to turn off the power before carrying out maintenance.
Every time
Clean the filter
Take out the basket and then the filter.
As shown in the illustration, take out the food filter from the dishwasher, disassemble the filter and rinse
them with water.
●After cleaning, put them back in the reverse order.
• If it is difficult to rinse off the deposit,
use a brush to remove them.
❷❷Take outTake out
❶❶
RotateRotate
Turn to thisTurn to this
positionposition
Cleaning the drain filter …
Once a
month
Clean the drain filter once a month, or when you are particularly concerned about
dirts deposited on the drain filter.
(You have to take out the baskets first as described above before taking out the
drain filter)
●When the filter is removed, there will be water left at the bottom, which is normal.
●After cleaning, please put it back.
Reminder
●If the filters are clogged, the cleaning performance may deteriorate, or the filters may become mouldy,
cause odour or water leakage.
NP-TH1WEVN.indb13NP-TH1WEVN.indb13 2023/01/1017:51:592023/01/1017:51:59
EN14
English
●Do not fill in water by hand when performing maintenance (to avoid water leakage, damage or error alarm).
(If after-sales service such as repair is required as a result of manual water injection, it will not be covered by the
free warranty even within the warranty period.)
●
Do not use bleacher, detergent, thinner, benzine, cleanser, wax or pesticide (as it may cause damage or discolouration.)
●When using a chemical wipe cloth, please follow the instructions on the product.
Once a
month
2~3 times
each month
Clean the door, vent, sealing,
inside of the dishwasher
Cleaning the inside of the dishwasher
(Care program)
Wipe the door, vent and sealing with a damp soft cloth
Dirts are easy to accumulate at the edge sealing and vent of the dishwasher. Please clean carefully.
Pull out the baskets and wipe off the dirts on the inside walls of the dishwasher.
Vent
Door
Sealing
• Do not pull to avoid
water leakage.
Select the Care program to clean the internal body
Do not put in any items when performing the Care program.
❶Add the dishwasher detergent (about 2 times of the standard amount)
❷Press to turn on the power
❸Press to select Care
❹Press to start cleaning the dishwasher
Reminder
●During the operation, it will pause 2 times (about 30 minutes apart)
(so that the high temperature steam will float up the dirts)
●The spraying water may not be able to reach the door edge sealing →Please wipe by hand
●Coloured soils such as ketchup and curry are difficult to clean →Please rinse those utensils before loading
●The detergent in the ❶step can be replaced by a dishwasher cleaner sold in the market.
Please follow the instructions on the product when using it.
NP-TH1WEVN.indb14NP-TH1WEVN.indb14 2023/01/1017:52:032023/01/1017:52:03

EN15
Frequently Asked Questions
■If the following situations occur while using the dishwasher, please check and handle as follows.
Symptoms Check the causes and solutions
Cleaning
performance is not
satisfactory
●Did you add detergent or did you use a non-dishwasher detergent?
→Please add an appropriate amount of dishwasher detergent (page EN9)
●Did the cutlery touch the nozzles, so that the nozzles did not rotate, hence
affecting the cleaning performance?
●Were the items placed properly (Did the items overlap or face the wrong
direction)? (pages EN6 - EN8)
●Were burnt pans scraped and cleaned before loading? (page EN5)
●Did the water used contain many minerals?
→Increase an appropriate amount of dishwasher detergent
●Were the filters clogged?
→Please clean the filters (page EN13)
●Did you check the water hardness level of your area and then set the area
setting? (page EN9)
Powder detergent
remains
●Are the dishwasher powder dampened or are there lumps?
→If there are lumps, crush them before use.
Glassware become
whitish and opaque
●Glassware with minor flaws on the surface occasionally become whitish and
opaque after being washed with high-temperature water.
●Were the glasses very greasy?
→Please use more dishwasher detergent or select the Intense program.
White spots are left
on the glasses
●Is the water hardness level in your area high?
→If yes, reset the water hardness level suitable for your area (page EN9).
Water droplets are
left on the concave
bottom of the dishes
and the drying result
is not satisfactory
●Water may not be drained completely from the concaves.
→Tilt the items slightly (page EN6), or set to Enhanced Drying to extend the
drying time so as to reduce the residual water (page EN12).
Items turns
yellowish or slightly
black
●This may be caused by tea stains or the iron contained in the water.
→Please wash the dishes by hand occasionally.
NP-TH1WEVN.indb15NP-TH1WEVN.indb15 2023/01/1017:52:062023/01/1017:52:06
EN16
English
Error Indication
Display
■When the following alerts appear on the display of the dishwasher (and the buzzer sounds out simultaneously),
please check and resolve as follows. If the problem cannot be solved, please contact Service Centre.
(Press and hold the Program button for more than 5 seconds, the display will show the last error)
Symptoms Check the causes and solutions
Display
Basic and Intense blink
simultaneously
Poor water supply
Turn off the power before checking the following
●Is the water tap or water supply valve opened?
●Is there a water supply suspension?
●Are the water pipes or the supply hose frozen?
●Is the supply hose connector clogged?
●Do you use well water?
(Impurities in the well water may cause malfunction.)
Display
Intense, Speedy and Care blink
simultaneously
Poor water drainage
Turn off the power before checking the following
●Is the filter clogged? (page EN13)
After confirming, turn on the power, select Dry to run, and turn off the
power after draining.
If you still have problems after the above procedures, please contact
Service Centre.
Display
All indicators light up
The door is open or is not
closed properly
Hold the central position above the Open Door button and push until the
latches on left and right sides of the door are firmly set.
(page EN6)
Clicking
Open Door button
“Speedy”, “Intense”,
“Keep” are blinking
There may be excessive
foam.
There may be water
leakage.
Close the water tap first.
Then unplug the power cord from the outlet and leave the door closed.
After about 30 minutes, plug in the power plug, turn on the power, and
check the display.
●When “Speedy” “Intense” “Keep” disappear, open the water tap and
restart the operation.
●When “Speedy” “Intense” “Keep” are still blinking, contact the Service
Centre.
If the problem cannot be solved after checking the above, or other problems not mentioned above occur, please
unplug the power socket, turn off the water tap, and contact the Service Centre.
NP-TH1WEVN.indb16NP-TH1WEVN.indb16 2023/01/1017:52:072023/01/1017:52:07

EN17
Error Indication (cont.)
Freezing prevention Not in use for a long time
In the event of freezing occurs and the problem is ignored, it may cause damage to the supply
valve and piping. For draining treatment and freezing prevention, please contact Service Centre.
Panasonic staff handling the draining should note the following:
■If the relevant parts or pipes were already frozen, please do the following
❶Select Speedy to run 1 - 2 times to defrost. (If the situation is serious, repeat the operation several times)
❷After the process is completed, wait for 30 minutes, remove the supply hose from the dishwasher, and
drain out the water from the hose.
❸Take off the rubber cover (black) at the front, shake the dishwasher on all sides, and drain out all the
water inside.
❹Put the rubber cover back in place.
NP-TH1WEVN.indb17NP-TH1WEVN.indb17 2023/01/1017:52:072023/01/1017:52:07
EN18
English
Troubleshooting
■Check the following first. If the problem still continues or there are other symptoms, please contact
Service Centre.
Symptoms Causes and Solutions
Dishwasher Body
The appliance does not
work ●Is the door closed firmly? →Close the door firmly and restart the operation.
Water is supplied and
drained repeatedly
●Have you used kitchen detergents? Or is kitchen detergent not rinsed off completely
from the items in the pre-wash? →You must use dishwasher detergent.
(Kitchen detergent may generate excessive foam. Supplying and draining water
repeatedly is necessary to eliminate the foam. The operation time will be prolonged.
Do not open the door during the process to avoid water leakage.)
Dew condensation
around the door ●Dew condensation may occur due to the temperature difference between the
dishwasher body and the kitchen, which is not a malfunction.
Steam comes out from
around the door during
operation ●Steam or warm air may come out, but this is not a malfunction.
After using for a while,
the inside walls of the
dishwasher become
whitish
●This is caused by the minerals contained in the water.
Water is left under the
filter ●Water may be left at the bottom. This is not a malfunction.
Water supply does not
stop ●The water supply valve may be broken. Close the water supply valve or the water tap
valve (but leave the power plug connected), and contact Service Centre.
Smell
Odour emits during
operation
●For a while after it is purchased, the rubber and resin components of the dishwasher
may emit some odour, which have no adverse effect on the human body and will
disappear after a period of time.
Smell like a sewer ●A foul odour may be generated as a result of the deterioration of water remained in the
appliance if it is left unused for a long time. →Select and run the Care program.
Fishy smell ●This is due to residue such as fish skin left on the filter.
→Remove and clean it using a brush (page EN13). If the smell persists, select and
run the Care program.
Abnormal sound
When the nozzles start
spraying, they make a
clattering sound
●This is the sound of the nozzles switching sequentially before spraying, which is not a
malfunction.
Noises change during
operation
●Depending on the types of tableware and how they are loaded, the noises may get
louder during operation.
●
Are the filters clogged? (When the filters are clogged, the sound of the pump may
suddenly become loud during operation.) →Clean the filters (page EN13)
●During operation, the electronic components will make chattering sounds when they
are switched. This is not a malfunction.
Others
Freezing
●①Select and run the Speedy program 1 - 2 times (to defrost).
②Check whether you can run the Speedy program.
• If the freezing is the result of being left unused for a long period of time, defrost may
not work even after running the Speedy program 1 - 2 times.
→Contact Service Centre (page EN17)
Water leakage ●Is the dishwasher (location, drain hose, supply hose) installed correctly?
→Check carefully (page EN24)
Water supply stops ●Turn off the power to stop the operation. When water supply resumes, discharge the
muddy water from another tap, and then restart the operation.
Power cut
●When electricity supply resumes, press Start/Pause to restart the operation.
• The program will resume from the beginning of the process which was running at the
time of the power cut.
• If delay start was selected and was waiting to start later, the selected program with
delay start will be cancelled.
Circuit breaker has
tripped
●
Check the causes, reset the circuit breaker, press Start/Pause to restart the operation.
• The program will resume from the beginning of the process which was running at the
time of the power cut.
• If delay start was selected and was waiting to start later, the selected program with
delay start will be cancelled.
“Salt” stays lighted up
in the display ●The display indicator “Salt” will light up if the dishwasher salt is not adequate.
(page EN9)
NP-TH1WEVN.indb18NP-TH1WEVN.indb18 2023/01/1017:52:072023/01/1017:52:07

bc
a
d
EN19
Installation Instructions
●Panasonic Corporation shall not be held responsible for any accidents, damage or injuries that may occur as a
result of failure to follow the Installation Instructions in the setup, trial operation or inspection of this appliance.
●Do not install in a place where freezing may occur (below 0 °C).
(If not properly handled after freezing, it may cause damage to the supply valve or pipes).
→If draining is required for freezing prevention, please contact Service Centre.
●After the installation is completed, you must carry out trial operation and inspection before using it.
●Do not use old water supply hose or drain hose in order to avoid water leakage.
●The dishwasher was factory tested with water filled in. When unpacking, there may be residual water.
This is not abnormal.
●Please enquire your local water supplies authority or water works professionals to check the water pressure and
flow rate of the tap water.
• The applicable inflow water pressure for this appliance is 0.05 MPa - 1 MPa
(When the water pressure is low, the operating time may be prolonged)
• Flow rate: When the water tap is open fully, the rate of inflow is required to reach 8 liters per minute or more
(When the flow rate is low, the operating time may be prolonged or abnormality may occur)
• When operating the water tap, be sure to install the specified pressure relief valve if the tap water pipe
generates abnormal sounds (water hammer phenomenon)
1Confirm the installation position
• The dishwasher should be installed in an open space.
(Make sure to leave a space clearance of a > 65 cm, b > 0.5 cm, c > 0.5 cm, d > 15 cm or more)
• Place the dishwasher on a solid horizontal surface.
• The location should be exclusively equipped with a rated 10 A, AC 220 V single-phase, two-pole, earthed
power socket.
a > 65 cm
b > 0.5 cm
c > 0.5 cm
d > 15 cm
single-phase
two-pole
earthed power
socket
heat sources
such as a gas
stove
Do not install the dishwasher in
the following places:
• Locations with direct exposure
to sunlight.
• Places where freezing may
occur in winter (below 0 °C)
(It may cause malfunction or
deformation.)
• On the carpet.
(It may block the bottom vent.)
NP-TH1WEVN.indb19NP-TH1WEVN.indb19 2023/01/1017:52:072023/01/1017:52:07
EN20
English
2Connect the water supply hose and drain hose to
the dishwasher body
❶Insert the water supply hose into the body as shown and tighten the nut.
(Keep the nut in a horizontal position to avoid water leakage)
❷Insert the drain hose into the body as shown, and tighten the clamp.
(The clamp needs to catch the port of the drain hose and the connector of the body to avoid water leakage)
❸Place the water supply hose and drain hose to the right or left, depending on the position of the water tap
and drain pipe.
drain hosewater
supply
hose
❸
placing the water
pipe (example for
placing to the left)
water supply hose, drain hose connection
horizontal tilted
(❶water supply hose) (bottom view of the
dishwasher body)
connector
●The status when the
connection is completed
clamp
First put on the clamp
(❷drain hose)
Reminder
●When connecting, wet the inside of the end of
the drain hose for easier connection.
●When the clamp is set at the connector, turn it to
the side so that its tail will not protrude from the
main body of the appliance
(to avoid the tail of the clamp touching the wall)
nut
3Install the water supply hose to the supply valve
Pass the water supply hose through the hole of the sink and fit on the protective sleeve. Depending on the
piping arrangement at your home, you may choose to connect directly to the supply valve or connect to the
supply valve together with other pipes through a three-way connector.
Important
●Please connect the dishwasher to cold water pipe. Do not connect to hot water pipe.
❶protective sleeve
hole of
the sink
water
supply
hose
supply valve
protective
sleeve (bolt)
protective
sleeve (nut)
Protective
sleeve is fixed
screw
tight
NP-TH1WEVN.indb20NP-TH1WEVN.indb20 2023/01/1017:52:072023/01/1017:52:07

EN21
Installation Instructions (cont.)
❷connect to the supply valve
direct installation three - way connector installation
water supply hose
screw tight
gasket
supply valve
water supply hose
screw tight
gasket
three-way
connector
screw
tight other pipes
screw tight
gasket
supply valve
Important
●Do not miss out the gasket when installing (it may cause water leakage).
Recommendation
●If it does not affect the usage of other water pipes, it is recommended to close the supply valve after
each operation.
■Confirming the tap water pressure
Please use the appliance at an inflow water pressure of 0.05 MPa - 1 MPa. When operating the water tap in the
kitchen, be sure to install the specified pressure relief valve if the tap water pipe generates abnormal sounds
(water hammer phenomenon).
When the water tap is fully open, the rate of inflow is required to reach at least 8 L per minute.
Please contact the Service Centre to confirm the water pressure and rate of inflow.
NP-TH1WEVN.indb21NP-TH1WEVN.indb21 2023/01/1017:52:082023/01/1017:52:08
EN22
English
4Secure the drain hose with a sucker
5Trial operation
Make sure that all adhesive tapes used to fix the door and inside of the dishwasher and the packaging bags
of all parts have been removed.
Make sure that the supply valve is open, plug in the power plug and close the door.
Please perform a trial test of the dishwasher according to the following procedures.
• If there is no water supply and electricity supply temporarily, perform a trial test of the dishwasher when
water supply and electricity supply resume. (Do not fill in water by hand)
Drain hose
→If the drain hose is too long, cut neatly at the appropriate position
along the core wire (transparent).
sucker
■Procedures for trial operation
■Trial operation confirmation
❶Press to turn on the power
❷Press and hold for more than 3 seconds simultaneously
• The indicators for Speedy and Care in the display light up and emit 2 beep sounds
❸Press to start the trial operation
• Please confirm the following during and after the operation.
• Power will automatically be turned off and the display indicators light off after completion of the trial
operation
When the operation completed
During operation
Error indication : There should be no alarm sound nor abnormal indication on the display.
(page EN16)
Water leakage : There should be no leakage at the joints of the water supply hose and drain hose.
After 6 beep sounds, power will be automatically turned off
Drainage condition : Open the door and confirm that the water inside the dishwasher has been
drained out.
No water supply condition : When the power is off, confirm that no water is draining out from the drain
outlet.
Reminder
After the trial operation is completed, keep the supply valve open.
If the dishwasher will not be used for a long time, close the water valve to avoid water leakage.
If freezing may occur, arrange draining treatment. (It may cause damage to the supply valve resulting water
leakage) →If freezing occurs, contact Service Centre
NP-TH1WEVN.indb22NP-TH1WEVN.indb22 2023/01/1017:52:082023/01/1017:52:08

EN23
Installation Instructions (cont.)
6Checkup
Please check the following before use.
Is the dishwasher installed on a solid horizontal surface? Make sure it won’t shake or tilt.
Is the water supply hose tightened, steady and straight?
Is there no water leakage at the connection between the water supply hose and the back of the
dishwasher?
Is there no water leakage at the connection between the water supply hose and the supply valve?
(If there is water leakage, please check whether the gasket is fitted properly.)
Is the drain hose tightened, steady and straight?
Is the drain hose bent, entangled, or damaged?
Is the drain hose raised 20 cm or more?
(Examples of incorrect drain hose arrangement)
Bent Entangled Raised 20 cm
NP-TH1WEVN.indb23NP-TH1WEVN.indb23 2023/01/1017:52:082023/01/1017:52:08
EN24
English
Specifications
■Specifications
Item Model No. NP-TH1WEVN
Power supply 220 V 50 Hz
Power consumption 1170 W
Dimension (Width × Depth × Height) 550 mm × 344 mm × 598 mm
Net weight 20 kg
Water consumption 9.9 L (Eco program)
Tap water pressure 0.05 MPa - 1 MPa
Washing method Rotary nozzle spray, fixed nozzle spray
Rinsing method Turbo rinsing, spray rinsing
Drying method Fan-drying, heat-drying
Program Basic, Intense, Eco, Care, Dry Only, Speedy, 80°C,
Delay Start (4 hours Later), Dry (0.5 h, 1 h, Air, Keep)
Standard capacity
Total 39 items
Rice bowl 5 Tea cup 2 Glass 3 Soup spoon 1 Chopsticks 10
Rice spoon 1 Noodle bowl 3 Sauce plate 3 Deep plate 2
Shallow plate 4 Spoons 5
●When the power is turned off, approximately 0.5 W of power is consumed constantly in order to detect water
leakage.
■Sanitization
Testing object Testing agency Testing method Result Report No.
Dishwasher
Japan Food
Research
Laboratories
Agar-plate test sanitized 99 % and above 22065038002-0101
NP-TH1WEVN.indb24NP-TH1WEVN.indb24 2023/01/1017:52:092023/01/1017:52:09

VI1
Biện pháp An toàn
Thiết bịnày không được sửdụng bởi những người (kểcảtrẻem) bịsuy giảm thểchất, cảm
giác hoặc thiểu năng trí tuệ, hay không có kinh nghiệm và kiến thức, trừkhi họđược trông
nom hoặc chỉdẫn liên quan tới việc sửdụng thiết bịbởi người chịu trách nhiệm cho sựan
toàn của họ. Trẻnhỏcần được trông chừng để đảm bảo chúng không đùa nghịch với thiết bị.
Không được tạt hoặc phun nước lên phần thân của thiết bị.(Việc này có thểgây ra
hoảhoạn hoặc chập điện.)
Đặt thiết bịxa nguồn lửa hoặc nguồn nhiệt. (Nếu không có thểgây hoảhoạn.)
• Nhang muỗi, thuốc lá, nến, máy sưởi điện, v.v…
Đảm bảo khoảng cách ít nhất giữa thiết bịvà nguồn nhiệt nhưbếp gas là 15 cm.
(Để phòng tránh hoảhoạn.)
Không được đập mạnh vào thiết bịkhi nó đang vận hành.
(Có thểgây ra chập điện, rò điện, hoặc đoản mạch, dẫn đến cháy nổ.)
Không được mởcửa máy rửa chén trong khi máy đang rửa hoặc trong vòng
30 phút sau khi rửa xong. (Nhiệt độ cao bên trong máy, nước và hơi nóng có thểlàm bạn bịbỏng.)
→Vui lòng đợi 30 phút sau khi chu trình rửa kết thúc để mởcửa máy rửa chén (để lấy chén dĩa ra,
vệsinh hoặc bảo trì máy).
→N ếu cần mởcửa máy rửa chén trong khi máy đang hoạt động, bạn phải nhấn nút tạm dừng và
mởcửa một cách cẩn thận và chậm rãi.
Không được tháo lắp, sửa chữa và thay đổi các bộphận của thiết bị.
(Có thểgây ra hoảhoạn hoặc chấn thương do sựcốvận hành.)
Không được sửdụng dây điện và phích cắm sai cách. (Có thểgây ra cháy nổhoặc chập điện.)
Không được làm hưhỏng dây điện hoặc phích cắm; không thay đổi, uốn cong, xoắn vặn, kéo, tải
các vật nặng, bó cột, hoặc đặt chúng gần nguồn nhiệt.
→N ếu dây điện hoặc phích cắm bịhưhỏng, cần phải được thay thế, việc thay thếcần được thực
hiện bởi nhà sản xuất hoặc các Trung tâm chăm sóc khách hàng của nhà sản xuất hoặc các kỹ
thuật viên có trình độ để phòng tránh các nguy hiểm tiềm tàng.
Không được cắm hoặc rút phích cắm điện khi tay đang ướt.
Không được sửdụng thiết bịnếu dây điện hoặc phích cắm bịhưhỏng.
Vui lòng sửdụng dây điện và phích cắm đúng cách.
Sửdụng một ổcắm điện riêng biệt cho thiết bịvới nguồn điện xoay chiều10 A/220 V.
(Nếu sửdụng chung ổcắm với các thiết bịđiện khác, có thểgây ra cháy nổdo quá nóng.)
Phích cắm cần được cắm chặt vào ổcắm điện. (Nếu không sẽgây cháy nổdo chập điện hoặc
đoản mạch. Không được sửdụng thiết bịnếu phích cắm bịhưhỏng hoặc cắm vào ổđiện lỏng lẻo.)
Lau chùi phích cắm định kì bằng giẻkhô. (Bụi bẩn hoặc hơi ẩm tích tụtrên phích cắm có thểngăn
cản quá trình tản nhiệt, dẫn đến cháy nổ.)
Đảm bảo rút phích cắm nếu nhưbạn không có ý định sửdụng thiết bịtrong khoảng thời gian dài
hoặc khi cần vệsinh hoặc bảo trì thiết bị.
Khi rút phích cắm, luôn giữvà rút phích cắm điện (không kéo dây điện)
(do có thểgây cháy nổbởi chập điện hoặc đoản mạch).
Cần đảm bảo thiết bịđược nối đất một cách chắc chắn.
(Do có rủi ro chập điện do sựcốhoặc rò rỉ.)
→C ần đảm bảo sửdụng ổcắm điện một pha, hai chấu, đã được nối đất hoặc có thểnhờkỹthuật
viên có trình độ thực hiện nối đất thiết bịcho bạn.
bắt buộc đọc
Để tránh thiệt hại vềngười và tài sản, vui lòng đọc kỹcác chỉdẫn sau đây.
■
Dưới đây thểhiện các mức độ nguy hiểm và thiệt hại gây ra bởi việc vận hành không đúng cách.
&Ҧ1+%È2 Thểhiện nguy cơtiềm tàng có thểdẫn đến chấn thương hoặc tửvong nếu
không phòng tránh.
CHÚ Ý Thểhiện nguy cơtiềm tàng có thểdẫn đến chấn thương nhẹhoặc trung bình
nếu không phòng tránh.
■Các kí hiệu sau đây thểhiện những mục cần phải đọc kỹ.
Thểhiện các thao tác nghiêm cấm thực hiện. Thểhiện các thao tác bắt buộc phải thực hiện.
&Ҧ1+%È2
■Để phòng tránh sựcố
cháy nổhoặc chập điện
NP-TH1WEVN.indb1NP-TH1WEVN.indb1 2023/01/1017:52:092023/01/1017:52:09
VI2
Tiếng Việt
Không để dao và các vật dụng sắc
nhọn vào máy
(để tránh gây hưhỏng máy rửa chén).
Không được đè hoặc nhấn mạnh lên
cửa máy
(có thểlàm đổ, ngã thiết bị, dẫn đến chấn thương).
Không đứng gần hoặc chạm vào ống
thoát nước hoặc rãnh thông hơi (nước
nóng, không khí nóng, hoặc hơi nước bốc ra có
thểlàm bỏng).
Không cốđóng cửa máy trong khi các
vật dụng bên trong máy rửa chén đang
nhô ra ngoài (do có thểlàm biến dạng cửa
hoặc văng nước nóng gây bỏng).
Khi mởcửa, không được cạy mởphần
trên của cửa (có thểlàm biến dạng cửa hoặc
văng nước nóng gây bỏng).
Mởvà đóng cửa một cách cẩn thận để
tránh bịkẹt tay (có thểgây chấn thương).
Không nên để cửa thiết bịmở(chén dĩa
rơi vỡcó thểgây ra chấn thương).
Cần đảm bảo khoá vòi nước sau mỗi
lần sửdụng. (Để tránh tình trạng rò rỉnước.)
Thiết bịnày được thiết kếsửdụng trong hộgia
đình và những nơi tương tựnhư:
∙khu vực bếp ăn nhân viên cửa hàng, văn phòng,
và các môi trường làm việc khác;
∙nhà ởkhu vực nông trại;
∙bởi khách trong khách sạn, nhà nghỉvà các kiểu
nhà trọkhác;
∙nhà nghỉcó phục vụbuổi sáng.
Dao và các vật dụng sắc bén có đầu nhọn
phải được xếp vào rổtheo phương thẳng
giỏđựng với đầu nhọn hướng xuống dưới
hoặc xếp nằm ngang. (Để tránh bịcắt vào tay.)
Trong trường hợp có sựcốhoặc lỗi vận
hành, ngay lập tức ngưng sửdụng thiết bị,
khoá nguồn nước và rút phích cắm điện.
(Có thểgây bốc khói, cháy, hoặc chập điện.)
→
Liên hệTrung tâm chăm sóc khách hàng để kiểm
tra và sửa chữa.
Các ví dụvềsựcốhoặc lỗi vận hành
∙Thỉnh thoảng thiết bịkhông hoạt động sau khi
bật nút nguồn.
∙Cửa thiết bịkhông đóng hoặc mởmột cách
bình thường.
∙Âm thanh bất thường trong khi rửa chén.
∙Thân máy bịbiến dạng hoặc trởnên nóng
một cách bất thường.
Lưu ý sửdụng
■
Để phòng tránh sựcố
cháy nổhoặc chập điện
&Ҧ1+%È2
CHÚ Ý
■Để phòng tránh hoảhoạn
hoặc chấn thương
■Máy rửa chén cần được sử
dụng đúng cách
■
Cần đảm bảo sửdụng xà phòng
rửa chén cho máy rửa chén
●Không được đặt máy rửa chén ởvịtrí gần
các thiết bịđiện khác nhưTivi hoặc máy
truyền thanh (có thểgây nhiễu hình ảnh hoặc
âm thanh).
●Không được đổ nước/nước nóng vào máy.
(Có thểgây rỉnước hoặc thấm nước bộ
phận máy.)
Có thểcần đến dịch vụsửa chữa.
(Không nằm trong phạm vi bảo hành.)
●Không được sửdụng thiết bịcho các mục
đích ngoài chức năng rửa và sấy chén. (Nếu
không, có thểgây ra hưhỏng.)
●Không được xoay hoặc di chuyển khi thiết bị
đang hoạt động (có thểgây ra rò rỉnước).
●Không được để cửa thiết bịmở. (Để tránh
nguy cơvấp ngã.)
●Nếu chén dĩa bẩn nhiều dầu mỡ, cần tăng xà
phòng rửa chén cho máy rửa chén lên liều
lượng thích hợp. (Nếu không, có thểgây ra
mùi khó chịu.)
●
Không được sửdụng nước rửa chén bằng tay
hoặc muối nổi. (Có thểtạo ra quá nhiều bọt
và gây ra rỉnước hoặc sựcốvận hành).
→
Luôn sửdụng xà phòng rửa chén cho máy
rửa chén (viên rửa chén hoặc bột rửa chén)
Ghi nhớ
(nước rửa chén
bằng tay)
(viên rửa chén) (bột rửa chén)
(muối nổi)
●Chén dĩa được rửa qua trước với nước
rửa chén bằng tay cần được rửa sạch sẽ
trước khi xếp vào máy rửa chén.
●Không được đặt máy rửa chén trên thảm trải
sàn. (Có thểgây bít tắc rãnh thông hơi phía
dưới máy.)
●Cần sửdụng bộống dẫn nước mới để nối
thiết bịvới nguồn cấp nước. Không dùng lại
bộống dẫn nước cũ.
●Không được sửdụng máy nếu nước có chứa
tạp chất, do có thểdẫn đến cấp nước kém và
gây ra sựcố.
●Thiết bịnày có thểcó mùi cao su hoặc nhựa
nhân tạo một thời gian sau khi mới mua. Việc
này không gây ra tác dụng có hại cho cơthể
người, và mùi nhựa sẽbiến mất dần sau một
thời gian sửdụng.
●
Áp lực nước vào cho thiết bịnày là 0.05 MPa -
1 MPa.
●
Sức chứa tiêu chuẩn của thiết bịnày là 39 món.
Nghiêm cấm
Phù hợp
NP-TH1WEVN.indb2NP-TH1WEVN.indb2 2023/01/1017:52:092023/01/1017:52:09

VI3
Các bộphận thiết bị/Phụkiện
Cần phun
(sau)
Cần phun
(trên)
Cần phun
(dưới)
Bộlọc
(trang VI13) Ray
(bên phải và trái)
Mởcửa
Dây điệnĐầu nối thoát nước
Đầu nối nguồn cấp nước
Mặt sau của thiết bị
Nút mởcửa
Cửa
Giỏđựng phía trên Giỏđựng phía dưới
Giỏđựng dao kéo
Lưới phủ
có thểđược
tháo rời theo
chiều mũi tên
■Tháo giỏđựng trên
Nhưminh hoạtrong hình, nâng phần chấu giỏ
đựng khỏi khe và kéo ra.
■Lắp giỏđựng trên
Để lắp giỏđựng, thao tác ngược lại với khi
tháo giỏ.
■Lắp giỏđựng dưới
Khớp đường ray và trượt vào.
■Tháo giỏđựng dưới
Kéo giỏđựng ra, sau đó nâng nó lên để lấy ra.
Chấu
Khe
●Hình dáng và màu sắc hình ảnh minh hoạtrong sổtay này có thểkhác với thiết bịthực tế. Vui lòng tham
khảo máy rửa chén thực tếcủa bạn.
NP-TH1WEVN.indb3NP-TH1WEVN.indb3 2023/01/1017:52:092023/01/1017:52:09
2
3
1
5
4
6
VI4
Tiếng Việt
Hiển thị
Bảng điều khiển
1
Nút Nguồn
●Nhấn vào nút này để bật hoặc tắt nguồn máy rửa chén.
●Sau khi bật nguồn, máy được cài đặt tựđộng mặc định chương trình của lần rửa
gần nhất (trừkhi chương trình gần nhất là “Dry Only (ChỉSấy)”)
2
Nút Chương trình
●
Khi lựa chọn chương trình rửa, mỗi lần nhấn nút, bạn có thểthay đổi qua lại các chế
độ rửa. Các đèn báo hiển thịsẽsáng lên hiển thịcác chếđộ tương ứng. (trang VI10)
3
Nút Sấy
●Mỗi lần nhấn nút, bạn có thểthay đổi chếđộ sấy, và các đèn báo hiển thịsẽsáng
lên hiển thịchếđộ tương ứng. (trang VI11)
4
Nút Hẹn giờ
●Nhấn vào nút này, thiết bịsẽtựkhởi động sau 4 giờ, và đèn báo “4 hours (4 giờ)”
sẽsáng lên.
●Nhấn vào nút này lần nữa để huỷcài đặt hẹn giờ. Đèn “4 hours (4 giờ)” sẽtắt.
5
Nút Khởi động/Dừng
●Nhấn nút này để bắt đầu rửa chén. Nếu bạn nhấn vào nút này trong khi thiết bị
đang hoạt động, máy sẽtạm dừng. Nhấn vào lần nữa để tiếp tục rửa chén.
●Nếu bạn không nhấn vào nút này sau khi đã thực hiện các bước trên, thiết bịsẽtự
động tắt nguồn sau 10 phút.
●Nếu cửa không được đóng lại, nhấn vào nút này cũng sẽkhông thểkhởi động thiết
bị.
6●Đèn báo hiển thị“Salt (Muối)” sẽsáng lên nếu muối rửa chén không còn đủ. Khi cài
đặt lựa chọn mã số“0”, đèn "Salt (Muối)” sẽkhông sáng. (trang VI9)
Phụkiện
❶Ống cấp (1)
❺Vòng kẹp (1)
❷Ống thoát nước (1)
❻Phễu hít (1) ❼Bao bảo vệ(bu lông) (1)
❹Vòng đệm (3)
❸Đầu nối ba chạc (1)
Ghi nhớ
●❹được đặt trong túi nhỏvà túi nhỏđặt trong túi lớn cùng với ❸và các phụkiện khác.
●❼có thểđược tách ra làm 4 phần.
●Vui lòng tham khảo Hướng dẫn Lắp đặt. (trang VI19)
Bu lông
Đai ốc
●Tách ra
①Vặn ra ②Mởra theo
chiều mũi tên
NP-TH1WEVN.indb4NP-TH1WEVN.indb4 2023/01/1017:52:112023/01/1017:52:11

VI5
Kiểm tra và Chuẩn bịtrước khi rửa
CHÚ Ý Tránh đồ thuỷtinh làm từkính cường lực
(để tránh bịchấn thương khi trong trường hợp bịvỡ)
Các vật dụng không thích hợp để rửa bằng máy rửa chén
■Tránh các vật dụng nhẹcó thểdễdàng bịthổi bay. (Có thểgây hưhỏng, bắt lửa, cháy hoặc mùi hôi.)
●Muỗng và nắp nhựa●Các vật dụng chứa Styrofoam
●Mút và vải rửa chén ●Núm vú bình sữa cho em bé
■Tránh các vật dụng chịu nhiệt kém (dễbịbiến dạng khi gặp nhiệt độ cao).
●Vật dụng bằng nhựa chịu nhiệt 90 °C hoặc thấp hơn
(bao gồm các vật dụng không có dán nhãn chịu nhiệt).
■Tránh các vật dụng dễbịđổi màu hoặc dễbịbong tróc lớp sơn ngoài.
●Các vật dụng làm từbạc, nhôm, đồng, sắt
●Đồgỗ(tre, mây)
●Các vật dụng sơn mài, thếp vàng, tráng men
●Chảo chống dính phủbằng Flourine
■Tránh các vật dễvỡ
●Các vật bịnứt, vỡ
●Chén dĩa có lớp phủtạo nứt (chén dĩa có hoa văn hình vết nứt)
●Đồlàm từpha lê, kính cường lực
●Chảo có tay cầm bằng gỗ
■Tránh các vật dụng có phần miệng hẹp, vì không thểrửa sạch bên trong.
●Chai và bình đựng
■Tránh các vật dụng dễbịrỉsét.
●Chảo chiên hoặc dao bằng sắt
Đối với vật dụng không được đề cập trên đây hoặc bạn không chắc chắn có thích hợp để rửa bằng máy rửa
chén, vui lòng tham khảo hướng dẫn ghi trên xà phòng rửa chén cho máy rửa chén bạn đang sửdụng hoặc liên
hệnhà sản xuất.
Chuẩn bịtrước khi rửa
Thức ăn
thừa
Vết khét và
cháy sém
Vết bẩn
cứng đầu
Đồ bếp dùng nấu các
thức ăn quay, trứng hấp,
vết bẩn cứng hoặc chảo
bịcháy khét khó rửa
sạch
→làm mềm trước khi
cho vào rửa
Thức ăn thừa nhưcác loại gia vị, hạt mè có
thểsẽđọng lại
Tăm, xương cá hoặc dây thun có thểgây
hỏng van
Da cá có thểgây mùi khó chịu
→G ạt bỏthức ăn thừa và tạp chất trước khi
xếp chén dĩa vào máy
Có thểtồn đọng lại
→r ửa sơtrước bằng tay
■Các vết bẩn sau đây có thểsẽkhông được loại bỏhoàn toàn
•Vết trà lâu ngày •
Vết son môi (tuỳloại)
•
Chén dĩa nhựa bịdính màu thực phẩm
■Nếu rửa các vật dụng có dính màu thực phẩm (nhưtương cà hoặc cà ri), phẩm màu có thểsẽbám
vào máy rửa chén. Nên làm sạch chén dĩa trước khi xếp vào máy.
NP-TH1WEVN.indb5NP-TH1WEVN.indb5 2023/01/1017:52:112023/01/1017:52:11
VI6
Tiếng Việt
Chỉdẫn Vận hành Nhanh
1Chuẩn bị
2
Xếp chén dĩa vào máy rửa chén
(trang VI6 - VI8)
•Đảm bảo việc lắp đặt (trang VI19 - VI23) và đặt các bộlọc (trang VI13) được thực
hiện đúng đắn
•Đảm bảo các vật dụng an toàn để rửa bằng máy rửa chén (trang VI5)
Tiếng click
■Để đóng cửa
Nhấn phần giữa của cửa bên trên nút
Mởcửa để đóng cửa cho đến khi các
chốt hai bên cửa cốđịnh chắc chắn.
■Tránh xếp chén dĩa chồng lên nhau
■Nghiêng các vật dụng có phần hốc,
lõm để giảm ứđọng nước.
■Hướng mặt bẩn vềphía các cần
phun.
3 Thêm xà phòng rửa chén (trang VI9)
•Chỉsửdụng xà phòng rửa chén cho máy rửa chén chuyên dụng cho máy rửa chén. Đọc kỹvà tuân thủtheo
hướng dẫn vềxà phòng rửa chén cho máy rửa chén.
4 Rửa và sấy(trang VI10 - VI11)
•Lựa chọn chương trình mong muốn, và nhấn Start/Pause (Nút khởi động/Dừng) để bắt đầu.
•Nếu cần phải mởcửa khi máy đang hoạt động (ví dụ, để xếp thêm chén dĩa), bạn phải nhấn Start/Pause (Nút
khởi động/Dừng) và chậm rãi mởcửa.
(Nếu không, có thểlàm tràn nước ra ngoài.)
•Nếu bạn mởcửa trong khi máy đang hoạt động mà không nhấn nút Start/Pause (Nút khởi động/Dừng), máy
sẽdừng hoạt động.
→Đóng cửa lại và hệthống sẽkhởi động lại.
5 Kết thúc chu trình rửa
• Sau khi rửa xong máy sẽphát ra tiếng bíp sáu lần.
•Đợi 30 phút sau khi hoàn tất rửa chén để lấy chén dĩa ra. (Sau khi rửa chén xong, nhiệt độ bên trong máy rửa
chén còn rất cao và dễgây bỏng.)
•Rửa bộlọc (trang VI13)
❶Để mởcửa,
①nhấn vào nút Mởcửa,
❷X ếp chén dĩa vào máy rửa chén
Xếp chén dĩa không đúng cách có thểlàm cho cửa không thểmởhay đóng, gây ra rò rỉhơi nóng, rỉnước,
làm hưhại và biến dạng máy rửa chén cũng nhưchén dĩa, hoặc ảnh hưởng đến kết quảrửa chén.
Vì vậy, vui lòng đọc kỹcác hướng dẫn sau đây.
②m ởcửa
Nút mởcửa
Giảm ứđọng
nước.
• Nên xếp chén dĩa hướng mặt xuống
dưới
• Không xếp chén dĩa cản trởcần
phun sau
(để tránh cản trởcần phun nước rửa
vật giỏđựng phía trên)
• Không nên để vật dụng nhô ra
khỏi cửa
•
Không xếp vật dụng chồng lên nhau
• Nên xếp chén dĩa với bềmặt bẩn
hướng vào phía cần phun
• Không để vật dụng chìa ra khỏi giỏ
đựng hoặc lọt khỏi đáy giỏđựng,
hoặc chạm vào cần phun
(Nếu không, cần phun không thể
xoay được và ảnh hưởng đến kết
quảrửa.)
Đúng Sai
NP-TH1WEVN.indb6NP-TH1WEVN.indb6 2023/01/1017:52:122023/01/1017:52:12

VI7
Hướng dẫn sửdụng
Nên xếp vật dụng với bềmặt bẩn hướng vềphía các cần phun (xem ) để giúp hệthống
phun nước hoạt động hiệu quảhơn và cho ra kết quảrửa tốt hơn.
■Phân vùng giỏđựng
Giỏđựng phía trên
Giỏđựng phía dưới (với giỏđựng dao kéo)
Chén
Tách trà
Ly
Muỗng súp
(nhìn từtrên
xuống)
•Dĩa lót tách trà có
thểxếp ởđây.
Đũa
•đầu đũa (phần
bịbẩn) hướng
xuống dưới
Dĩa sâu lòng
Muỗng
Tô
Dĩa lót tách trà
Giỏđựng dao kéo
Dĩa đựng tách trà
Muỗng ăn cơm
Dĩa lòng cạn
NP-TH1WEVN.indb7NP-TH1WEVN.indb7 2023/01/1017:52:122023/01/1017:52:12
❶
❷
❸
❹
VI8
Tiếng Việt
Xếp chén dĩa vào máy rửa chén
Ghi nhớ
●Kích thước của các vật dụng có thểxếp vào máy rửa chén nhưsau:
[ Giỏđựng phía trên ] Ly: cao 160 mm trởlại
[ Giỏđựng phía trên ] Tách trà: cao 120 mm trởlại
[ Giỏđựng phía trên ] Muỗng súp: dài 250 mm trởlại
[ Giỏđựng phía dưới ] Dĩa nhỏ: chu vi 180 mm trởlại
[ Giỏđựng phía dưới ] Dĩa lòng sâu, dĩa lòng cạn: chu vi 230 mm trởlại; nếu có nâng giá có thểtháo rời (❶) của
giỏđựng phía trên, chu vi 270 mm trởlại
[ Giỏđựng phía dưới ] Vật dụng trong giỏđựng dao kéo: cao 330 mm trởlại
(Nếu phải rửa nhiều đũa, có thểtháo rời phần lưới trên của giỏđựng dao kéo (trang VI3) để xếp thêm đũa vào)
■Điều chỉnh các giỏđựng
Ởgiỏđựng phía trên và dưới của máy rửa chén có các giá có thểtháo rời ra (tổng cộng 4 giá có thểtháo rời) để
có thểxếp các vật dụng to.
Giỏđựng phía trên
Giỏđựng phía dưới
Giá có thểtháo rời (❶)
Giá có thểtháo rời (❷❸❹)
Nếu các vật dụng dài nhưđũa ởgiỏđựng phía dưới bịchạm vào giỏđựng phía trên, có thểnâng chỉnh độ cao
của giá nhựa ởphần giỏđựng phía trên.
Để xếp các vật dụng to nhưchảo, giá đựng muỗng có thểđược lật lên, hoặc giá đựng tô và dĩa sâu lòng có
thểđược xếp phẳng lại.
Móc ởphía trên
Thanh chốt ởphía trên
Sau khi điều chỉnh
NP-TH1WEVN.indb8NP-TH1WEVN.indb8 2023/01/1017:52:122023/01/1017:52:12

VI9
Hướng dẫn sửdụng
Hệthống làm mềm nước
Thêm xà phòng rửa chén
1Cài đặt chếđộ tuỳthuộc vào độ cứng của nguồn
nước tại khu vực của bạn. (Chếđộ mặc định là 0.)
Nếu sửdụng máy rửa chén tại khu vực có nước với độ cứng cao, chén dĩa và các giỏđựng có thểsẽbịbám các
vết ốtrắng. Máy rửa chén có thểđược cài đặt tương thích với độ cứng của nước. Sửdụng thêm muối rửa chén sẽ
làm mềm nước, giảm độ cứng của nước và giúp đạt được kết quảrửa chén tốt hơn.
●Cài đặt nhưhướng dẫn sau đây để tránh tiêu thụnhiều muối rửa chén, nước và tránh kết quảrửa chén
không đạt.
Xác nhận lại đã tắt nguồn thiết bị
■Cài đặt khu vực(khi đã tắt nguồn)
1Nhấn cùng lúc nút Delay Start (Hẹn giờ)và
nút Start/Pause (Khởi động/Dừng) trong
vòng 2.5 giây. Sau 2 tiếng bíp, bắt đầu cài đặt.
2Nhấn nút Delay Start (Hẹn giờ), sau đó chọn
chức năng “Air (Gió)”.
3
Nhấn nút Program (Chương trình) và sau đó lựa
chọn mã phù hợp tuỳtheo độ cứng của nước.
4Nhấn nút Start/Pause (Khởi động/Dừng) để
lưu cài đặt.
Sau khi hoàn thành sẽnghe sáu tiếng bíp.
Chức năng
(nhấn nút
Delay Start
(Hẹn giờ))
Lựa chọn
(độ cứng của nước)
(nhấn Progarm
(Chương trình))
Đèn báo hiển thị
(sáng lên)
Air (Gió)
0100 [mg/L] hoặc
thấp hơnAir (Gió)*
1 100 - 200 [mg/L]
Air (Gió) + Intense (Tăng cường)
2 200 - 300 [mg/L] Air (Gió) + Basic (Cơbản)
3 300 - 400 [mg/L] Air (Gió) + Basic (Cơbản),
Intense (Tăng cường)
4 400 - 500 [mg/L] Air (Gió) + Speedy (Nhanh)
* Cài đặt mặc định.
Với lựa chọn mã “0”, bạn không cần phải cho thêm muối.
Vui lòng bỏqua bước này và thực hiện bước tiếp theo (Thêm xà phòng rửa chén).
2
Thêm xà phòng rửa chén cho máy rửa chén
Thêm máy rửa chén theo liều lượng nhưtrong chỉ
dẫn vềxà phòng rửa chén cho máy rửa chén.
Liều lượng tiêu chuẩn cho mỗi lần rửa (chỉmang
tính chất tham khảo)
Viên rửa chén : 1 viên (khoảng 10 g)
Bột rửa chén : 10 g(20 gnếu chén bát có
nhiều dầu mỡ)
Ghi nhớ
●
Vui lòng đọc kỹvà làm theo chỉdẫn và các biện pháp
an toàn vềxà phòng rửa chén cho máy rửa chén.
hoặc
(Viên rửa chén) (Bột rửa chén)
đóng mở
■Thêm muối rửa chén (khi đã tắt nguồn thiết bị)
Tháo giỏđựng phía dưới, vặn nắp đậy, cẩn thận đổ muối rửa
chén vào (khoảng 400 g).
Sau đó, đóng nắp đậy lại.
•
Khi sửdụng thiết bịlần đầu tiên, đổ đầy nước (khoảng 200 g)
sau khi đã thêm muối. Khuấy đều đến khi muối tan hết.
Ghi nhớ
●
Khi thêm muối rửa chén, dùng cân để cân muối và đổ muối vào bằng cốc đong. Nếu làm rơi vãi muối ra xung
quanh, phải lau sạch muối (để tránh việc muối cọxát với nắp đậy, gây khó khăn trong việc đóng mởnắp).
●Khi đèn báo “Salt (Muối)” sáng lên, vui lòng cho thêm muối rửa chén (không được dùng muối ăn), đọc cẩn thận
và làm theo hướng dẫn vềmuối rửa chén.
●Nếu bạn sửdụng xà phòng rửa chén cho máy rửa chén tổng hợp có chứa muối rửa chén, và độ cứng của
nước thấp hơn 300 mg/L, thì không cần dùng thêm muối rửa chén. Tuy nhiên, nếu độ cứng của nước vượt quá
300 mg/L, bạn vẫn phải cần dùng muối rửa chén.
Thêm xà phòng rửa chén
cho máy rửa chén xung
quanh khu vực bộlọc.
bộlọc
NP-TH1WEVN.indb9NP-TH1WEVN.indb9 2023/01/1017:52:132023/01/1017:52:13
VI10
Tiếng Việt
Thêm xà phòng và rửa chén
Lựa chọn chức năng 43
5
6
Hiển thị
3Nhấn nút để mởnguồn thiết bị
• Sau khi tất cảcác hiển thịnháy một lần, chỉđèn báo chếđộ rửa gần nhất sáng (các đèn báo khác đều tắt)
(trừkhi lần gần nhất là chếđộ “Dry Only (Chỉsấy)”).
•Nếu tất cảcác hiển thịvẫn sáng, đóng cửa và nhấn nút nguồn lại lần nữa.
4Nhấn nút để lựa chọn chương trình
•Mỗi lần bạn nhấn nút Program (Chương trình), bạn có thểthay đổi qua lại các chếđộ nhưbảng dưới đây, và
các hiển thịtương ứng sẽlần lượt sáng lên.
• Khi một đèn báo sáng lên, thiết bịsẽmặc định hiển thịchếđộ của lần rửa gần nhất (trừkhi lần gần nhất là
chếđộ “Dry Only (Chỉsấy)” (Cài đặt gốc là chếđộ ①).
• Khi bạn chọn chếđộ “Keep (Giữ)”, thiết bịsẽtăng cường hiệu ứng sấy và giảm thiểu lượng nước đọng.
Chếđộ này cũng hạn chếhơi nước và mùi tích tụởchén dĩa và trong máy rửa chén.
* Sau khi kết thúc rửa chén, thiết bịsẽquạt gió ngắt quãng trong vòng hai tiếng.
Ghi nhớ
●Chếđộ ①và ②phù hợp để rửa chén dĩa ngay sau bữa ăn. Chếđộ ③và ③phù hợp để rửa các chén dĩa bẩn đã
qua vài tiếng hoặc khi chén dĩa rất bẩn. Chếđộ ⑤và ⑥phù hợp để rửa ngay sau bữa ăn và có ít chén dĩa hoặc
để tiết kiệm nước và năng lượng. Chếđộ ⑦và ⑧để vệsinh và bảo trì bên trong máy rửa chén. Chếđộ ⑨để sấy
khô chén dĩa sau khi đã rửa qua bằng tay, hoặc có thểsửdụng để làm ấm chén dĩa.
Chếđộ ⑩và ⑪thích hợp nhất cho việc rửa vật dụng không quá bẩn.
●Các chếđộ Basic (Cơbản), Intense (Tăng cường), Care (Chăm sóc), Eco (Tiết kiệm), Speedy (Nhanh) (trừDry
(Sấy) có thểkết hợp hoặc không với chếđộ Keep (Giữ).
Khi bật chếđộ Keep (Giữ), thiết bịsẽquạt gió ngắt quãng trong 2 tiếng.
●Chếđộ 80°C (80 độ C) có thểkết hợp được với chếđộ khác (trừDry (Sấy)). Nhiệt độ nước tối đa trong quá trình
xảcó thểđiều chỉnh lên tối đa 80°C, để tăng cường hiệu quảrửa.
●
Thời gian rửa chén nhưbảng trên được đo lường với nhiệt độ phòng là 20 °C, nhiệt độ nguồn nước là 15 °C, và áp
lực nước là 0.24 MPa. Thời gian rửa thực tếsẽphụthuộc vào nhiệt độ phòng, nhiệt độ nước, áp lực nước, và cách
xếp chén dĩa, v,v...
●
Trong suốt chu trình rửa, đèn báo chếđộ rửa sẽliên tục nhấp nháy, báo hiệu thiết bịđang vận hành chếđộ được chọn.
Số
Seri
Chương trình
chính
Chếđộ bổ
sung Chức năng
sấy chính
Chếđộ sấy
bổsung
Quy trình rửa và thời gian rửa (ước lượng)
①Basic
(Cơbản) —0.5 h
(0.5 giờ)
Keep
(Giữ)
Rửa (31 phút) →Xả3 lần (35 phút, 70 độ C) →Sấy (30 phút) →
Giữ(2 tiếng)
②Basic
(Cơbản)
80°C
(80 độ C)
0.5 h
(0.5 giờ)
Keep
(Giữ)
Rửa (31 phút) →Xả3 lần (43 - 53, nhiệt đô tối đa là 80 độ C) →
Sấy (30 phút) →Giữ(2 tiếng)
③Intense
(Tăng cường) —0.5 h
(0.5 giờ)
Keep
(Giữ)
Rửa (60 phút) →Xả3 lần (40 phút, 70 độ C) →Sấy (30 phút) →
Giữ(2 tiếng)
④Intense
(Tăng cường)
80°C
(80 độ C)
0.5 h
(0.5 giờ)
Keep
(Giữ)
Rửa (60 phút) →Xả3 lần (48-58 phút, nhiệt độ tối đa là 80 độ C) →
Sấy (30 phút) →Giữ(2 tiếng)
⑤Eco
(Tiết kiệm) —Air
(Gió) —Rửa (31 phút) →Xả3 lần (73 phút, nhiệt độ tối đa là 60 độ C) →
Gió (240 phút)
⑥Eco
(Tiết kiệm)
80°C
(80 độ C)
Air
(Gió) —Rửa (31 phút) →Xả3 lần (81 - 91 phút, nhiệt độ tối đa là 80 độ C) →
Gió (240 phút)
⑦Care
(Chăm sóc) —— —Rửa (108 phút) →Xả3 lần (26 phút, 60 độ C)
⑧Care
(Chăm sóc)
80°C
(80 độ C) ——Rửa (108 phút) →Xả3 lần (33 - 44 phút, nhiệt độ tối đa là 80 độ C)
⑨Dry Only
(Chỉsấy) —1 h
(1 giờ)—Sấy (60 phút)
Chếđộ “Keep (Giữ)” không kết hợp được với chếđộ
“Dry Only (Chỉsấy)”.
⑩Speedy
(Nhanh) —— —Rửa (17 phút) →Xả2 lần (18 phút, 60 độ C)
⑪Speedy
(Nhanh)
80°C
(80 độ C) ——
Rửa chén (17 phút) →Xả2 lần (26 - 36 phút, nhiệt độ tối đa là 80 độ C)
Việc khửtrùng được tiến hành bằng phương pháp rửa và xảbằng
máy phun tia nước áp suất cao ởnhiệt độ trên 50 độ C. (trang VI24)
NP-TH1WEVN.indb10NP-TH1WEVN.indb10 2023/01/1017:52:162023/01/1017:52:16

VI11
Hướng dẫn sửdụng
5Nhấn và chọn chếđộ sấy
• Khi muốn tuỳchỉnh chếđộ sấy bao gồm cảchếđộ sấy của lần trước, bạn có thểnhấn nút Dry (Sấy). Mỗi lần
nhấn, bạn có thểthay đổi qua lại các chếđộ nhưtrong bảng dưới đây.
Các đèn báo hiển thịsẽlần lượt sáng lên.
6Nhấn để khởi động
•Bắt đầu sấy với chếđộ đã lựa chọn, và kết thúc với
6 tiếng bíp.
•
Nếu bạn không nhấn vào nút này sau khi đã thực hiện
các bước trên, thiết bịsẽtựđộng tắt nguồn sau 10 phút.
Ghi nhớ
●Sau khi điều chỉnh chếđộ sấy, tổng thời gian rửa cũng sẽthay đổi.
●Khi chọn chếđộ No Drying (Không sấy), thiết bịsẽquạt gió liên tục trong 3 phút (khoảng 30 phút nếu có thêm
muối rửa chén), việc này là bình thường. (Để thổi đi khí nóng nhằm tránh gây bỏng.)
Chú ý
●Lấy chén dĩa ra sau khi kết thúc rửa chén 30 phút
(để tránh bịbỏng).
●Vệsinh bộlọc sau mỗi lần rửa chén. (trang VI13)
■Chương trình Delay Start (Hẹn giờ)
Bạn có thểcài đặt trước để hẹn giờrửa chén sau 4 tiếng theo chỉdẫn sau đây.
Sau bước 5 trang VI9 - VI11,
Nhấn , hiển thịsẽsáng lên,
nhấn
(Máy sẽbắt đầu rửa chén sau 4 tiếng)
Ghi nhớ
●Bạn không thểsửdụng chức năng Delay Start (Hẹn Giờ) trong chương trình Dry Only (Chỉsấy), Speedy (Nhanh),
Speedy (Nhanh) + 80°C (80 độ C).
●Nếu bạn muốn huỷDelay Start (Hẹn giờ), nhấn , đèn báo “4 hours (4 giờ)” sẽtắt.
Cài đặt
gốc0.5 h
(0.5 giờ)Keep
(Giữ)
1 h
(1 giờ)
Air
(Gió)
No Drying
(Không sấy)
0.5 h
(0.5 giờ)
+
Keep
(Giữ)
1 h
(1 giờ)+
Keep
(Giữ)
Air
(Gió) +
1 h
(1 giờ)
Air
(Gió)
No Drying
(Không sấy)
0.5 h
(0.5 giờ)
Keep
(Giữ)
Air
(Gió) +
Keep
(Giữ)
0.5 h
(0.5 giờ)+
Keep
(Giữ)
1 h
(1 giờ)+
1 h
(1 giờ)
Air
(Gió)
No Drying
(Không sấy)
0.5 h
(0.5 giờ)
Keep
(Giữ)
0.5 h
(0.5 giờ)+
Keep
(Giữ)
1 h
(1 giờ)+
Keep
(Giữ)
Air
(Gió) +
1 h
(1 giờ)
0.5 h
(0.5 giờ)
Chương trình Basic
(Cơbản), Intense
(Tăng cường)
Chương trình Eco
(Tiết kiệm)
Chương trình Speedy
(Nhanh), Care (Chăm
sóc)
Chương trình Dry
Only (Chỉsấy)
NP-TH1WEVN.indb11NP-TH1WEVN.indb11 2023/01/1017:52:162023/01/1017:52:16
VI12
Tiếng Việt
Sấy • Hẹn giờ• Thay đổi cài đặt
Xác nhận lại đã tắt nguồn thiết bị
1Nhấn cùng lúc nút Delay Start (Hẹn giờ)
và Start/Pause (Khởi động/Dừng) trong
vòng 2.5 giây. Bắt đầu cài đặt sau 2 tiếng
bíp.
2Nhấn nút Delay Start (Hẹn giờ), và chọn
chức năng “1 h (1 giờ)”.
3Nhấn nút Program (Chương trình) lần
nữa và chọn chương trình rửa nhưmong
muốn (để tăng thời gian rửa)
4Nhấn Start/Pause (Khởi động/Dừng) để
lưu cài đặt và hoàn tất cài đặt với 6 tiếng
bíp.
1Nhấn cùng lúc nút Delay Start (Hẹn giờ)
và Start/Pause (Khởi động/Dừng) trong
vòng 2.5 giây. Bắt đầu cài đặt sau 2 tiếng
bíp.
2Nhấn nút Delay/Start (Hẹn giờ), và chọn
chức năng “1h (1 giờ) + Air (Gió)”.
3Nhấn nút Program (Chương trình) lần
nữa và chọn chương trình rửa nhưmong
muốn (để tăng thời gian sấy).
4Nhấn Start/Pause (Khởi động/Dừng) để
lưu cài đặt và hoàn tất cài đặt với 6 tiếng
bíp.
■Thay đổi cài đặt
Có nhiều lựa chọn để thay đổi tuỳtheo mong muốn và tình trạng thực tế.
Cài đặt tăng cường rửa
Cài đặt tăng cường sấy
Nếu bạn muốn tăng cường hiệu quảrửa chén bằng cách tăng thời gian rửa,
thay đổi cài đặt nhưsau.
Nếu bạn muốn tăng cường hiệu quảsấy bằng cách kéo dài thời gian sấy,
thay đổi cài đặt nhưsau.
Chức năng
(nhấn nút
Delay Start
(Hẹn giờ))
Lựa chọn
(để tăng cường rửa)
(nhấn Program
(Chương trình))
Đèn báo hiển thị
(sáng lên)
1 h
(1 giờ)
0 Không cần thiết 1 h (1 giờ) *
1Tăng cường
1 h (1 giờ) + Intense
(Tăng cường)
Chức năng
(nhấn nút
Delay Start
(Hẹn giờ))
Lựa chọn
(để tăng cường sấy)
(nhấn nút Program
(Chương trình))
Đèn báo hiển thị
(sáng lên)
1 h (1 giờ) +
Air (Gió)
0 Không cần thiết1 h (1 giờ) + Air
(Gió) *
1Tăng cường
1 h (1 giờ) + Air
(Gió) + Intense
(Tăng cường)
Xác nhận lại đã tắt nguồn thiết bị
1Nhấn giữcùng lúc nút Delay Start (Hẹn
giờ)và Start/Pause (Khởi động/Dừng)
trong vòng 2.5 giây. Bắt đầu cài đặt sau
2 tiếng bíp.
2Nhấn nút Delay Start (Hẹn giờ)và chọn
chức năng “0.5h (0.5 giờ)”.
3Nhấn nút Program (Chương trình) lần
nữa và chọn chương trình rửa nhưmong
muốn (để tắt âm báo sau khi kết thúc rửa
chén).
4Nhấn Start/Pause (Khởi động/Dừng)
để lưu cài đặt và hoàn tất cài đặt với
6 tiếng bíp.
Tắt âm báo kết thúc chu trình rửa
Nếu nhưbạn muốn tắt âm báo kết thúc chu trình rửa, thay đổi
cài đặt nhưsau.
Chức năng
(nhấn nút
Delay Start
(Hẹn giờ))
Lựa chọn
(Để bật hoặc tắt âm
báo kết thúc rửa
chén)
(nhấn Program
(Chương trình))
Đèn báo hiển thị
(sáng lên)
0.5 h
(0.5 giờ)
0Tắt 0.5 h (0.5 giờ)
1Bật
0.5 h (0.5 giờ)
+ Intense (Tăng
cường) *
* Báo hiệu đang vận hành cài đặt gốc.
NP-TH1WEVN.indb12NP-TH1WEVN.indb12 2023/01/1017:52:162023/01/1017:52:16
Table of contents
Languages:
Other Panasonic Dishwasher manuals

Panasonic
Panasonic NP-6F2MUQNZ User manual

Panasonic
Panasonic NP-B6M1 Operating instructions

Panasonic
Panasonic NP-B6V1 Operating instructions

Panasonic
Panasonic NP-B6M2FTNZ Operating instructions

Panasonic
Panasonic NP-6F2MUQNZ-NZ User manual

Panasonic
Panasonic NP-6F1MLQ User manual

Panasonic
Panasonic NP-6R2MUQNZ User manual

Panasonic
Panasonic NP-B6V2FTNZ Operating instructions

Panasonic
Panasonic NP-6R2MUQNZ-NZ User manual

Panasonic
Panasonic NP-B6M1FIGB User manual