manuals.online logo
Brands
  1. Home
  2. •
  3. Brands
  4. •
  5. Panasonic
  6. •
  7. DVD Player
  8. •
  9. Panasonic CN-DV2000EN User manual

Panasonic CN-DV2000EN User manual

Panasonic
Operating
Instructions
Bedienungsanleitung
MOBILE
NAVIGATION
SYSTEM
AND
DVD
VIDEO
PLAYER
NAVIGATIONSSYSTEM
UND
DVD-SPIELER
CN-DV2000EN
DVD DVD
dulaw
qe
ice
Be
OM
ad
=e
OIGITAL
IS
OSG
Please
read
these
instructions
carefully
before
using
this
product
and
save
this
manual
for
future
use.
ese
Bedienungsanieitung
vor
den
Verwendung
dieses
Produktes
aufmerksam
durch
und
bewahren
Sie
sie
danach
fir
spatere
Nachschlagzwecke
sorgfaltig
auf
m
z
9
a
G
=
Panasonic
welcomes
you
to
our
ever
growing
family
of
electronic
product
owners.
We
know
that
this
product
will
bring
you
many
hours
of
enjoyment.
Our
reputation
is
built
on
precise
electronic
and
mechanical
engineering,
and
our
products
are
manufactured
with
carefully
selected
components
and
assembled
by
people
who
take
pride
in
their
work.
Once
you
discover
the
quality,
reliability,
and
value
we
have
built
into
this
prod-
uct,
you
too
will
be
proud
to
be
a
member
of
our
family.
a
QO
Features
Compatible
with
PAL
DVD
(Video
CD)
and
NTSC
DVD
(Video
CD)
This
player
can
play
discs
recorded
in
either
PAL
or
NTSC
format.
However,
the
player
must
be
connected
to
a
PAL
TV
which
is
capable
of
receiving
PAL
525/60
system
to
play
both
PAL
DVD
(Video
CD)
and
NTSC
DVD
(Video
CD).
EEE
Q
Use
This
Product
Safety
When
Driving
Keep
the
volume
level
low
enough
to
be
aware
of
road
and
traffic
conditions.
When
Car
Washing
Do
not
expose
the
product
to
water
or
excessive
moisture.
This
could
cause
electrical
shorts,
fire
or
other
damage.
When
Parked
Parking
in
direct
sunlight
can
produce
very
high
temqperatures
inside
your
vehicle.
Give
the
interior
a
chance
to
cool
down
before
starting
playback.
Use
the
Proper
Power
Supply
This
product
is
designed
to
operate
with
a
12
volt
DC,
negative
ground
battery
system.
Protect
the
Disc
Mechanism
Avoid
inserting
any
foreign
objects
into
the
slot
of
this
player.
Failure
to
observe
this
many
cause
malfunction
due
to
the
precise
mechanism
of
this
unit.
Use
Authorized
Servicenters
Do
not
attempt
to
disassemble
or
adjust
this
precision
product.
Please
refer
to
the
Servicenter
list
included
with
this
product
for
service
assistance.
For
Installation
The
unit
should
be
installed
in
a
horizontal
position
with
the
front
end
up
at
a
conve-
nient
angle,
but
not
more
than
30°.
Introduction
The
CN-DV2000EN
is
a
mobile
navigation
system
with
multimedia
capabilities.
It
functions
as
a
*
Mobile
navigation
system,
¢
Music
CD
player,
and
¢
DVD*
video
and
video
CD
player
*
:
A
DVD
(Digital
Versatile
Disc)
is
a
storage
media
capable
of
storing
4.7
GB
of
data,
which
is
about
7
times
larger
than
the
storage
capacity
of
a
CD-ROM.
Mobile
Navigation
System
This
mobile
navigation
system
utilizes
GPS*
satellite
signals
to
track
and
display
your
vehicle's
current
position,
and
guide
you
from
your
starting
point
to
your
destination
along
a
calculated
route.
*:
GPS
(Global
Positioning
System)
is
a
position
detecting
system
utilizing
the
signals
from
GPS
satellites
deployed
by
the
U.S.
Defense
Department
The
CN-DV2000EN
Mobile
Navigation
System
has
the
following
spe-
cial
features:
¢
Detailed
maps
are
used.
Selected
destinations
will
be
displayed
for
easy
viewing.
¢
Desired
places
can
be
registered.
A
destination
can
be
set
whenever
you
like
from
among
the
desired
places
and
facilities
registered.
¢
DVD
video
can
be
watched.
Notice
to
Customers
Map
discs
you
may
use
are
optionally
available.
For
more
infor-
mation,
contact
the
store
where
you
purchased
the
product.
ON
t
CAL
Map
Disc
_
Ww
;
2
je
This
product
supports
the
Navtech
DVD-SDAL
map
dise
format
only.
Panasonic
cannot
be
responsible
for
accidents
resulting
from
the
ne
of
map
discs
of
otherformateic
:
fant
HSITINZ
m
=
9
jus
(2)
=
Features
........
83
Use
This
Product
Satety..
7
Introduction
.............
precautions
warning
caution
..........
ee
Accessories
and
Documentation
.........
Names
and
Functions
of
Remote
Control
BUtONS
oo
rasssscce-sasstesct
sats:
tess
tecitessitetnaeaed
9
Preparing
the
System
for
Initial
Use
.10
Inserting
Batteries
into
the
Remote
Control
...
10
Starting
the
Mobile
Navigation
System
Map
Displays
.
Pop
up
Menu
.
Wiring
Check
.
Automatic
Distance
Correction
‘Check
.
Checking
GPS
Satellite
Reception.
Operating
the
System
While
Driving
...
Destination
Input
and
Route
Search
Character
Input
.
es
Entering
an
Address
as
Destination
Entering
an
Intersection
as
Destination
Entering
a
POI
as
Destination.
History
.
Entering
a
1
Destination
from
Your
Destination
Marked
Point
..
Entering
a
Destination
Stored
in
your
Marked
Map
Display
............
.
34
Selecting
a
Destination
Dwecty
from
the
Map
Voice
Guidance...
ae
peeae
+.
85
Terminating
Route
Search|
ore
..
86
Previewing
a
Route.........
é
-.
36
Canceling
a
Route
.
2
.
Lin
36
Detouring.............cee
si
cedsastdeadw
OF
Alternative
Route
37
Detour
xxkm
.
see
37
Avoid
Streets
.
..
38
.
38
Via
Point...
Marked
Point
.
40
Marking
your
Current
Position
40
Marking
Any
Point
on
the
Map
....
we
40
Changing
a
Marked
Point
Icon
.....
41
Renaming
a
Marked
Point
...
rt!
42
Deleting
a
Marked
Point
.............
-43
Setup
Menu
44
Basic
Setup
Menu
Operations
.44
Map
..
45
Route
.
sees
5
47
System
oaies
;
bs
49
Information
.
51
SHMUIAWON
*;,
3-3
2c
gyssaedereon
coated
esersade
Sader
anger
tOT
Demonstration
...
.
51
Edit
Marked
Point
+
52
Vehicle
Position
52
GPS
53
Map
Matching
sieges
DO.
Intelligent
Map
Matching
........................54
Positioning
Accuracy
Route
Search
Route
Guide
Playing
Music
CDs
operation..............
DVD
Video/Video
CD
DVD
Video
.
Video
CD
Disc
Formats
Supprted
Individual
Property
Rights
Names
and
Functions
of
Remote
Control
Buttons........
Disc
Operation
Play
.
Stop..
Rapid
‘Advance/Rapid
Reverse
Skip
.....
Pause
......
nieF
Playing
a
Specified
Title/Chapter/
Track
..
On-Screen
Display
of
Playback
Information
Changing
the
Subtitle
Language
Changing
the
Audio
Soundtrack
cuguage
a
Changing
the
Viewing
Angle
.................
Setup
Menu
Menu
Language
Subtitle
Language
..
Audio
Language
TV
Aspect
.
TV
Mode
On-Screen
Messages
,
Audio
Output
Level
Dynamic
Range
Compression
Display
Type
Language
Code
List
Troubleshooting
Installation
Guide
Cautions
..........
When
installing
the
unit
with
the
L-:
rShapest
Brackets
.
Wiring
Connect
n
Installation
of
GPS
Antenna
.
Final
Check..........0.00000......
Specificatlons
......0.....ccccsssseesseeceseeesee
90
2
83
.
86
-
88
Markmale
Fir
einen
sichern
Gebrauch
dieses
Gerates
92
Vorwort.
seardeetea
Sicherheitshinweise.
Warnung...
Vorsicht
.
Zubehér
und
Dokumentation...
Funktionen
der
Fernbedienung
Vorbereitung
des
System
2 :
Einsetzen
der
Batterien
in
die
Fembedienung
98
Starten
des
Navigationssystems
99
Landkarten
.
;
paasee
101
Pop
up
Meni
.........
esate
wee
104
Uberpriifen
der
Anschitisse
Renan
105
Uberpriifen
der
Automatischen
Enttenungs
106
Uberprtifen
der
GPS
Satellitenempfangs
108
Bedienung
des
Systems
wahrend
der
fahrt
109
Zieleingabe
und
Routenplanung
110
Zeicheneingabe
én
AT
Routenplanung
anhand
der
‘Adresse
riavntip
hte
Routenplanung
anhand
einer
Kreuzung
.
115
POI
Kategorie
.....
W7
Routenplanung
anhand
eines
4§
Ziels
aus
dem
Zielarchiv
.
penee
.
120
Routenplanung
anhand
ve
von
n
markierten
Punkten
121
Routenplanung
anhand
eines
direkt
auf
Karten
gewahlten
Ziels
.
sade
122
Akustische
Fahrhinweise
.....................
123
Abbrechen
der
Routenplanung
s2s0si
124
Routenvorschau_
.
124
Léschen
einer
geplanten
Route
iptezat
124,
Abweichen
von
der
geplanten
Route
...
125
Alternativroute
.
Peigstteatsaed
125
Umgehung**km
125
Strassen
VERmedien.
126
Zwischenziele
126
Speichern
von
markierten
Punkten
‘im
Punktspeicher.................00006
eae
2B.
Markieren
des
aktuellen
Standorts
.
128
Markieren
eines
beliebigen
Punktes
auf
der
Karte
...
128
Zuweisen
eines
Icons..
estes
129
Zuweisen
eines
Namens
Aenpagened
..
130
Loschen
eines
markierten
Punktes
.
134
132
132
133
Set
up
-Meni._
....
Inhalt
des
Setup-mentis
karte
Route
135
System-Praferenzen
.
137
Zustandsinformationen
...............
:
139
Uberprtifen
der
geplanten
Route
......
+
139
Demo
. .
139
Editieren
von
markierten
Punkten
............
140
Ube
pelt
140
GPS.
=
we
141
Map
‘Matching
..
14d
Intelligent
Map
Matching
sraiviesae
142
Zuverlassigkeit
der
Positionsdaten
142
Routenplanung
Routenfuhrung
.
site
Wiedergabe
von
Musik-
CDs
..........
145
Bedienung
.....
‘
145
DVD
Video/Video
CD
vo
146
DVD
Video
zt
sees
146
Video
CD
............
Raids
147
Unterstutzte
Discformate
148
Individuelle
Urheberrechte
,
Bezeichnung
und
Funktionen
der
Bedienungselemente
an
der
Fernbedienung...
149
Discbetrieb
.
150
Widergabe
150
Stop
soar
BT
Schneller
Voraul/Schneller
Riicklaut
iene
181
Sprung
.......
de
eed
veers
151
Pause
.........
08,
152,
Wiedergabe
eines(einer)
‘spezifizierten
Titels/Kapitels/Spur..
a
seviae
NOS.
On-Screen
Display
der
gegenwartigen
Wiedergabeinformationen
........................
183
Anderung
der
Untertitelsprache
..
154
Anderung
der
Sprache
der
Tonspur...
155
Anderung
des
Betrachtungswinkels
.
156
Einstellungsmenii
187
Meniisprache
.
«167
Untertitelsprache
«187
Audiosprache
158
TV-Seitenverhalinis
»
158
TV-Modus..
.
On-Screen
Meldungen
Audioausgangspegell...
Komprimierung
des
Dynamikbereichs.
Anzeigetyp
........
List
der
Sprachcode
Stérungsbeseitigung
Installationsanleitung
...
Vorsichtsmassnahmen
..
Einbau
der
Einheit
mit
den
Einbauwinkeln
Installationsanleitung
.............6.0ce
cece
71
Wiring-Anschluss
2
AT4
Installation
der
GPS
Antenne
176
Final
Check
.......
77
Technischen
Daten
178
HOSLNAd
HSITDNA
b
i
N
a
Vv
i
Precautions
Read
the
operating
instructions
for
the
player
and
all
other
components
of
your
Mobile
Navigation
System
carefully
before
using
the
system.
They
contain
instructions
on
how
to
use
the
system
in
a
safe
and
effective
manner.
Panasonic
assumes
no
responsibility
for
problems
resulting
from
failure
to
observe
the
instructions
given
in
this
manual.
This
manual
uses
pictographs
to
show
you
how
to
use
the
product
safely
and
alert
you
to
potential
dangers
resulting
from
improper
connections
and
operations.
The
meanings
of
the
pictographs
are
explained
below.
It
is
important
that
you
fully
understand
their
mean-
ings
in
order
to
use
this
manual
and
the
system
properly.
AGREEMENT
PLEASE
READ
THIS
AGREEMENT
CAREFULLY
BEFORE
USING
OUR
PRODUCT
This
software
and
data
(“Software”)
is
provided
for
your
personal,
non-commercial
use
only.
Copyright
and
other
lows
protect
it.
By
using
this
Software
you
agree
to
the
following
terms
and
conditions.
You
agree
to
use
this
Software
for
solely
personal
use
or,
if
applicable,
for
use
in
your
business’
internal
opera-
tions,
and
not
for
service
bureau,
time-sharing
or
other
similar
purposes.
Except
to
save
it
on
your hard
drive,
you
may
not
copy
or
reproduce
this
Software,
and
may
not
distribute
it
in
any
form,
for
any
purpose.
You
agree
not
to
disassemble,
decompile
or
otherwise
reverse
engineer
the
Software,
except
to
the
extent
expressly
permitted
by
mandatory
laws.
Further
Restrictions.
You
may
not
use
this
Software
with:
(i)
any
positioning
devices,
including
without
limitation,
any
GPS
receivers,
compasses,
wheel
sensors,
or
any
other
distance
or
direction
sensors;
or
(ii)
any
products,
systems
or
applications
installed
in
or
otherwise
connected
to
or
in
communication
with
vehicles,
or
capable
of
vehicle
navigation,
positioning,
dispatch,
real
time
route
guidance,
fleet
management
or
similar
applications;
or
(ii)
any
hand-held
computer
devices,
cell
phones
or
similar
mobile
devices.
No
warranty.
This
Software
is
provided
to
you
“as
is,"
and
you
agree
to
use
it
at
your
own
risk,
Panasonic
and
its
suppliers
and
licencors
maqke
no
guarantees,
representations
or
warranties
of
any
kind,
express
or
implied,
arising
by
law
or
otherwise,
including
but
not
limited
to,
content,
quality,
accuracy,
completeness,
effectiveness,
reliability,
fitness
for
a
particular
purpose,
usefulness,
use
or
results
to
be
obtained
from
this
Software
will
be
uninterrupted
or
error-free.
Disclamer
of
Warranty:
Panasonic
AND
ITS
SUPPLIERS
AND
LICENSORS
DISCLAIM
ANY
WARRANTIES,
EXPRESS
OR
IMPLIED,
OF
QUALITY,
PERFORMANCE,
MERCHANTABILITY,
FITNESS
FOR
A
PARTICULAR
PURPOSE
OR
NON-INFRINGEMENT.
Some
States,
Territories
and
Countries
do
not
allow
certain
warranty
exclusions,
so
to
that
extent
the
above
exclusion
may
not
apply
to
you.
Disclaimer
of
Liability:
Panasonic
AND
ITS
SUPPLIERS
AND
LICENSORS
SHALL
NOT
BE
LIABLE
TO
YOU:
IN
RESPECT
OF
ANY
CLAIM,
DEMAND
OR
ACTION,
IRRESPECTIVE
OF
THE
NATURE
OF
THE
CAUSE
OF
THE
CLAIM,
DEMAND
OR
ACTION
ALLEGING
ANY
LOSS,
INQJURY
OR
DAMAGES,
DIRECT
OR
INDIRECT,
WHICH
MAY
RESULT
FROM
THE
USE
OR
POSSESSION
OF
THE
SOFTWARE;
OR
FOR
ANY
LOSS
OF
PROFIT,
REVENUE,
CONTRACTS
OR
SAVINGS,
OR
ANY
OTHER
DIRECT,
INDIRECT,
INCIDENTAL,
SPE-
CIAL
OR
CONSEQUENTIAL
DAMAGES
ARISING
OUT
OF
YOUR
USE
OF
OR
INABILITY
TO
USE
THIS
SOFT-
WARE,
ANY
DEFECT
IN
THE
SOFTWARE,
OR
THE
BREACH
OF
THESE
TERMS
OR
CONDITIONS,
WHETHER
IN
AN
ACTION
IN
CONTRACT
OR
TORT
OR
BASED
ON
A
WARRANTY,
EVEN
IF
Panasonic
OR
ITS
LICENSORS
HAVE BEEN
ADVISED
OF
THE
POSSIBILITY
OF
SUCH
DAMAGES.
Some
states,
Territories.
and
Countries
do
not
allow
certain
liability
exclusions
or
damages
limitations,
so
to
that
extent
the
above
may
not
apply
to
you
Indemnity.
You
agree
to
indemnify
and
hold
Panasonic
and
its
suppliers
and
licensors
harmless
from
any
liability
or
loss
of
any
kind
arising
out
of
or
in
connection
with
any
use
by
you
of
this
Software.
Export
Control.
You
agree
not
to
export
from
anywhere
any
part
of
the
Software
provided
to
you
or
any
direct
product
thereof
except
in
compliance
with
applicable
export
laws,
rules
and
regulations.
Governing
Law.
The
above
terms
and
conditions
shall
be
governed
by
the
laws
of
the
Netherlands,
without
giving
effect
to
(i)
its
conflict
of
laws
provisions,
or
(ii)
the
United
Nations
Convention
for
contracts
for
the
international
Saqle
of
Goods.
HSITINA
This
label
intends
to
alert
the
user
to
the
pres-
Warnin
ence
of
important
operating
instructions.
i]
Failure
to
heed
the
instructions
may
result
in
severe
injury
or
death.
Warning
:
DO
NOT
OPERATE
THE
SYSTEM
NOR
LOOK
AT
THE
MONITOR
SCREEN
WHILE
DRIVING.
Do
not
change
settings
and
destination
locations
while
driving
the
vehicle.
Minimize
the
amount
of
viewing
the
monitor
screen
and
listen
to
the
voice
guidance
while
driving.
Operating
the
system
will
distract
the
driver
from
look-
ing
ahead
of
the
vehicle
and
cause
accidents.
Always
stop
the
vehicle
in
a
safe
location
before
operating
the
system.
This
label
intends
to
alert
the
user
to
the
pres-
Caution
ence
of
important
operating
instructions.
Failure
to
heed
the
instructions
may
result
in
injury
or
material
damage.
Cautions
:
¢
COMPLY
WITH
LOCAL
TRAFFIC
REGULATIONS
WHILE
DRIVING
When
using
the
navigation
system,
always
comply
with
the
local
traffic
reg-
ulations.
DO
NOT
USE
THE
SYSTEM
OUTSIDE
THE
VEHICLE
Do
not
use
the
system
for
purposes
other
than
described
in
this
manual.
Failure
to
do
so
may
result
in
electric
shock
or
injury.
STOP
THE
VEHICLE
BEFORE
CARRYING
OUT
ANY
OPERATIONS
THAT
COULD
INTERFERE
WITH
YOUR
DRIVING
If
loading
or
unloading
a
disc
or
raising
or
lowering
the
monitor
could
inter-
fere
with
your
driving
(for
example
gear
lever
shifting),
stop
the
vehicle
in
a
safe
location
first,
then
operate
the
system.
How
to
abandon
battery
cells
(Netherlands)
Bij
dit
produkt
zijn
batterijen
geleverd.
Wanneer
deze
leeg
zijn,
moet
u
ze
niet
weggoolen
maar
inleveran
als
KCA.
This
appliance
contains
a
lithium
battery
for
memory
back-up
Please
consult
your
dealer
when
the
battery
needs
replacement
Do
not
throw
away
the
battery.
Instead,
take
it
to
the
designated
collection
point
and
hand
it
in
as
hazardous
waste
HSTTDNA
b
I
N
a
Vv
Accessories
and
Documentation
The
mobile
navigation
system
comes
with
the
accessories
shown
below.
Please
make
sure
that
all
accessories
are
included.
In
the
event
that
a
part
should
be
missing,
please
contact
your
dealer.
Remote
Control
Remote
Control
Holder
—_
Infrared
Receiver
Unit
for
remote
controlling
—
Holder
for
the
Remote
Receives
the
signals
from
the
operations
of
the
Control.
Mount
it
in
a
loca-
the
Remote
Control,
Point
mobile
navigation
system.
_
tion
where
it
does
not
the
Remote
Control
at
this
obstruct
your
driving.
receiver
to
remote
control
the
system.
&
a
For
other
mounting
kit
refer
to
page
82.
GPS
Antenna
Two
AA
Batteries
(R6PU)
Antenna
for
receiving
GPS
_
Install
these
in
the
Remote
signals.
Control
Unit.
Important
Note:
*
The
map
DVD-ROM
is
sold
optionally.
OCUMEN
te)
Operating
Instructions
(this
manual)
Wiring
Connection...
Warranty
Card
Names
and
Functions
of
Remote
Control
Buttons
ENTER
Press
to
execute
a
highlight-
ed
item
in
a
menu
and
apply
settings.
Joystick
Tilting
the
joystick
up,
down,
to
the
right
and
left
*
selects
a
highlighted
item
within
menus
and
*
scrolls
map
displays.
Lock
Switch
Up:
NAV/VIDEO
Mode
Down:
Key
Lock
Mode
DEST
Opens
the
[Select
Destination]
menu
for
desti-
nation
input
and
route
search
(™
page
24
-).
LAST
Switches
back
to
the
pre-
vious
screen.
ZOOM
®
Changes
the
map
scale
(™
page
15).
®
Scrolls
the
pages
up
or
down
of
the
list
displayed.
POS
©
Displays
your
current
posi-
tion
@
In
route
guidance,
switches
between
Current
Position
Map
and
Guidance
mode
Map
(=
page
13).
POP
UP
Opens
pop-up
menus
(™
page
16).
MODE
Changes
navigation
screen
mode
between
AV1
or
AV2
screen
or
vice
versa.
If
the
monitor
is
switched
to
external
input
while
the
navigation
system
is
in
operation,
the
screen
background
color
may
change
to
blue,
but
voice
guidance
remains
unaffected.
In
this
case,
switch
the
mode
to
NAV.
ve
M00
PLAYER,
SET
UP
Opens
the
Setup
Menu
(™
page
44).
VOICE
Initiates
vocal
guidance
for
next
route
maneuver
(=
page
35).
HSITDNZ
iu]
=
9
c
G
=
10
Preparing
the
System
for
initial
Use
The
system
needs
to
be
prepared
for
initial
use
as
described
below.
Make
sure
to
follow
these
instructions.
Inserting
Batteries
into
the
Remote
Contro
Open
the
battery
compartment
cover.
Lift
up
the tab
{
Ww
to
remove
the
cover.
Insert
new
batteries.
Make
sure
that
the
positive
and
negative
termi-
nals
of
the
batteries
are
oriented
as
shown.
Close
the
battery
compartment
cover.
=>
The
Remote
Control
is
now
ready
for
use.
For
remote
control,
point
the
infrared
emitter
on
the
top
of
the
Remote
Control
to
the
infrared
receiver.
Batteries:
2
AA
batteries
(R6PU)
Battery
life:
Approximately
five
months
in
nor-
mal
use
(based
on
manganese
batteries
at
room
temperature)
When
to
Replace
Batteries
*
Replace
the
batteries
as
soon
as
possible
when
the
infrared
receiver
does
not
respond
properly
to
remote
control
operations.
Remote
control
does
not
work.
*
When
placing
the
Remote
Control
into
the
console
box,
make
sure
there
is
no
pressure
applied
to
any
of
the
remote
control
buttons.
Pressure
on
any
of
the
buttons
will
drain
the
batteries.
Battery
Removal
Open
the
battery
compartment
cover
as
described
above,
and
remove
the
batteries.
Starting
the
Mobile
Navigation
System
Insert
the
map
DVD-ROM
(sold
optionally)
into
the
player
to
start
the
Mobile
Navigation
System.
CAUTION
!
Map
Disc
This
product
supports
the
Navtech
DVD-SDAL
map
disc
for-
mat
only.
Panasonic
cannot
be
keepenelblector
accidents
resulting
from
the
use
of
map
discs
of
other
formats.
HSITINA
switch
to
the
ON
or
ACC
1
Turn
the
vehicle's
ignition
position.
Slide
down
the
front
cover
of
2
the
player.
Insert
the
map
DVD-ROM
with
the
printed
side
facing
up,
and
close
the
front
cover
by
pushing
it
up.
=»
The
opening
screen
appears,
followed
by
the
[CAUTION]
screen,
*
The
map
DVD-ROM
is
not
included
with
the
CN-DV2000EN.
Plea
Opening
screen
[CAUTION]
screen
|
screen,
press
ENTER.
the
screen
remains
unchanged
till
the
@
button
is
pressed
f
=>
As
the
system
starts
up,
the
Current
Position
Map
is
displayed.
4
After
reading
the
contents
of
the
[CAUTION]
Current
Position
Map
Wf
N
a
Vv
Preparing
the
System
for
Initial
Use
Important
Notes:
*
The
map
DVD-ROM
cannot
be
inserted
or
ejected
while
the
igni-
tion
switch
is
in
the
OFF
position.
*
Remember
that
the
battery
can
run
down
if
the
ignition
switch
is
kept
in
the
ON
or
ACC
position
for
a
long
time
with
the
engine
not
running,
m
=
9
fe
wn
=
*
To
allow
the
system
to
stabilize,
do
not
start
driving
until
the
opening
screen
closes.
*
The
map
displayed
when
you
first
turn
on
the
player
will
show
a
different
area
from
where
your
vehicle
is
currently
located.
The
map
display
will
change
to
your
current
area
once
GPS
position-
ing
signals
are
received.
Removing
the
Map
DVD-ROM
Push
the
front
cover
of
the
player
all
the
way
down.
Press
the
EJECT
button,
and
then
remove
the
map
DVD-ROM.
ON
1
‘The
default
display
and
audio
of
the
unitis
English.
—
To
switch
the
display
language
rman,
see
page
50.
To
switch
the
audio
language
to
German,
see
page
50.
12
WET)
plays
HSTTINA
Types
of
Map
Displays
Current
Position
Map
Shows
the
current
position
of
your
vehicle
on
the
selected
magnification
scale.
Pressing
POS
on
the
Remote
Control
during
route
guidance
switches
to
the
Guide
Mode
Map.
Guide
Mode
Map
Shows
the
road
on
which
your
vehicle
is
cur-
rently
traveling
on an
enlarged
scale.
Pressing
POS
while
the
Current
Position
Map
is
dis-
played
switches
to
this
Guide
Mode
Map.
Pressing
POS
again
returns
you
to
the
Current
Position
Map.
if
you
deviate
from
the
route
in
the
guide
mode
after
setting
that
route,
guide
mode
is
switched
to
2D
Mode
Map.
Intersection
Zoom
Map
As
you
approach
an
intersection,
the
upcoming
junction
is
automatically
enlarged.
To
use
this
feature,
the
necessary
advance
settings
have
to
be
made
in
the
Setup
Menu.(™
page
46)
2D
Mode
Map
This
is
a
scrollable
map
with
a
crosshairs
cursor.
Operating
the
joystick
on
the
Current
Position
Map
will
automatically
switch
to
this
map
dis-
play.
Note:
As
you
get
close
to
your
destination,
a
flag
marked
with
a
D
appears
on
the
Guide
Mode
Map.
Note
though
that
the
place
where
the
flag
is
displayed
is
not
your
destination.
13
b
!
N
a
Vv
i
Preparing
the
System
for
Initial
Use
How
to
Read
Map
Displays
m
=
9
jes
G
=
1
Current
Position
Map
>
‘fam
—Map
orientation
Vehicle
position
Arrow
guidance
for
the
next
junction
Distance
to
the
next
turn
Destination
direction
_—Destination
distance
Distance
to
the the
next
turn
Current
Road
Name
Crosshair
cursor
Moving
the
crosshair
cursor
on
a
road
and
pressing
ENTER
will
display
the
street
name.
Changing
the
Map
Orientation
You
can
choose
to
have
your
maps
displayed
in
"North
Up"
or
"Head
Up"
direction.
HSTTINA
North
Up:
The
geographic
north
is
always
up
on
the
map.
Head
Up:
The
heading
direction
is
always
up
on
the
map.
North
Up
menu.
For
details
about
the
Pop
Up
menu
see
page
16.
wepear
1
Press
POP
UP
to
open
the
Pop
Up
Select
[North-Up]
or
[Head-Up]
by
moving
the
joystick.
=>
The
map
is
displayed
in
the
selected
orientation.
[North-Up]:
North
Up
[Head-Up]:
Head
Up
Changing
the
Map
Scale
You
can
change
the
scale
of
the
map
display.
12
scales
within
the
range
of
1/10,000
to
1/25,000,000
are
available.
1
Press
ZOOM.
ZOOMIN
A\:
_
Reduces
the
map.
ZOOM
OUT
\/:
Enlarges
the
map.
ZOOM
OUT
f
mie
ej)
«=
ZOOM
IN
eg
ZOOM
IN
ZOOM
OUT
15
2
9
c
G
=
16
b
N
a
Vv
Preparing
the
System
for
Initial
Use
Pop
Up
Menu
All
basic
operations
of
the
mobile
navigation
system
are
accessed
from
the
Pop
Up
menu
shown
below.
Press
POP
UP
to
open
the
Pop
Up
menu.
Use
the
joystick
to
highlight
an
item
in
the
Pop
Up
menu,
and
press
ENTER
to
execute
it.
—
To
change
the
route
after
having
input
the
desti-
nation
—
To
display
the
entire
route
from
the
point
of
departure
to
the
destination
—
To
display
a
list
of
destinations
from
the
point
of
departure.
To
register
a
list
of
marked
points
To
change
the
map
orientation
To
change
the
method
of
route
setting
to
the
des-
tination.
Route
Preview
To
stop
route
lel
r
Marked
Point
>
ortl
Ip
Marked
Point.
~—
Marked
Point.
Haute
reroute
is
set
to
j=
top
Cale.
FF
on
the
Setup
Rerout
menu,
reroute
can
be
manually
set.
(No
dis-
Calc.
Method
play
when
auto
reroute
is
ON.)
North
Up.
—
Some
functions
provide
access
to
a
submenu
as
shown
below.
;
,
.
ciated
with
[Detour]
The
Pop
Up
menu
is
not
available
on
the
Intersection
Zoom
Map.
Check
that
the
mobile
navigation
system
is
properly
wired
to
the
vehicle.
HSITINA
Press
SET
UP
to
open
the
[Set
Up
Sel
Up
Mer
Menu].
On
the
[Set
Up
Menu],
select
[Information]
by
moving
the
joystick,
and
then
press
ENTER.
ASTER
VSPA
ey
PNY
a
[ceeeeesdlealonsai
ed
|
ca
omonsteation
[Egil
Marked
Point]
jystern
[Vehicle
Posilion
|
On
the
[Set
Up
Menu
-
Information]
menu,
select
[Wiring
Check],
and
press
ENTER.
=>
Check
the
wiring
information.
Wiring
Check
Informatior
pax
Cena
ey
[Speed
Fase
|
acs
Oe
Perform
the
following
operations
and
confirm
that
the
4
lights
on
the
car
illus-
tration
come
on.
*
Turn
on
the
sidelights
™
[Side
Light]
lamp
on
*
Pull
the
side
brake
™
[Hand
Brake]
lamp
on
*
Pull
the
side
brake
and
shift
into
reverse
(R)
™»
[Reverse
Light]
lamp
on
*
[GPS]
lamp
on
The
(Wiring
Check
Information]
menu
also
contains
the
following
information:
°
Speed:
Shows
the
vehicle
speed.
*
ACC
Vol:
Shows
the
voltage
of
the
car
battery
(11
V
to
16
V)
*
Speed
Pulse:
Shows
the
speed
pulse
emitted
by
the
vehicle.
*
Status:
Shows
the
learning
level
of
vehicle
positioning
accuracy.
Select
[END],
and
press
ENTER.
7)
17
b
N
a
Vv
i
Preparing
the
System
for
Initial
Use
Automa
Distance
Correction
Check
The
mobile
navigation
system
calculates
and
indicates
the
vehicle
position
on
the
map
by
multiplying
the
speed
pulse
emitted
by
the
vehicle
with
a
correction
coeffi-
cient.
The
speed
pulse
emitted
differs
from
the
type
of
vehicle,
and
differences
in
tire
pressure
and
wear
require
a
different
correction
coefficient
even
for
vehicles
of
the
same
type.
The
system
corrects
distance
deviations
automatically
based
on
GPS
data.
To
be
able
to
use
the
system
effectively
in
the
following
cases,
make
sure
to
carry
out
the
procedure
described
below.
c
2)
i
*
Before
initial
use
*
After
a
tire
change
*
After
tire
rotation
*
When
installing
a
navigation
system
previously
installed
in
another
vehicle
4,
Press
SET
UP
to
open
the
[Set
Up
Set
Up
Menu
Menu].
stor
On
the
[Set
Up
Menu],
select
[Information]
by
moving
the
joystick,
and
then
press
ENTER.
menu,
select
[Wiring
Check],
and
then
press
ENTER.
[i
Wing:
Chacko
2
On
the
[Set
Up
Menu
-
Information]
Ss
Mi
=
Information
3
Select
[Clear],
and
press
ENTER.
Wing
Check
Information
4
ee
2a
=
[Status]
is
reset
to
[Level
0].
“gage
HSITTDNA
4
Select
[END],
and
press
ENTER.
Map
displayed.
=
As
the
distance
correction
coefficient
becomes
more
accurate,
any
deviation
between
the
actual
vehicle
position
and
that
on
the
map
is
eliminated.
5
Drive
your
vehicle
for
about
30
minutes
with
the
Current
Position
Important
Notes:
©
Do
not
start
driving
until
the
opening
screen
closes,
©
Drive
at
an
average
speed
of
at
least
20
km
per
hour
in
the
open
area
is
good.
*
The
mobile
navigation
system
uses
GPS
data
for
distance
correction.
Make
sure
that
GPS
signals
are
being
received
(checking
for
GPS
recep-
tion
is
described
on
the
next
page).
Depending
on
the
Vehicle
Model
*
The
vehicle
position
indicator
may
disappear
temporarily
after
speed
raises.
This
is
a
normal
phenomenon
indicating
that
the
system
is
cal-
culating
for
distance
correction.
19
b
|
N
a
Vv
Preparing
the
System
for
Initial
Use
Checking
GPS
Satellite
Reception
7
Press
SET
UP
to
open
the
[Set
Up
Sel
Up
Men
!
2
19)
e
nH
=z
20
Menu].
On
the
[Set
Up
Menu],
select
[Information]
by
moving
the
joystick,
and
then
press
ENTER.
On
the
[Set
Up
Menu
-
Information]
Sot
Up
Menu
=
Information
7
menu,
select
[GPS],
and
press
ENTER.
=
The
[GPS
Information]
menu
opens
with
the
following
information:
¢
Satellite
number
¢
Latitude
and
longitude
of
the
current
position
*
Current
date
and
time
Important
Notes:
¢
After
the
system
has
been
installed
in
the
vehicle,
it
takes
about
30
min-
utes
until
satisfactory
GPS
signal
reception
is
established.
¢
Check
GPS
reception
in
open
area
location.

Other Panasonic DVD Player manuals

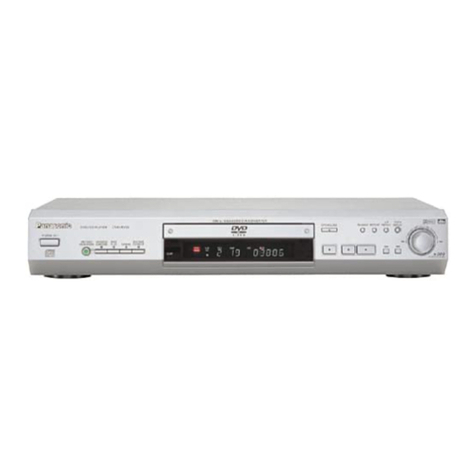
Panasonic SA-PM91DEE User manual

Panasonic

Panasonic SA-PM91DEE User manual

Panasonic DVDLX95 - PORTABLE DVD PLAYER User manual

Panasonic

Panasonic DVDLX95 - PORTABLE DVD PLAYER User manual

Panasonic DVD-K33 User manual

Panasonic

Panasonic DVD-K33 User manual

Panasonic NV-VP60GL User manual

Panasonic

Panasonic NV-VP60GL User manual

Panasonic DVD-S97 User manual

Panasonic

Panasonic DVD-S97 User manual

Panasonic DVD-RP62P User manual

Panasonic

Panasonic DVD-RP62P User manual

Panasonic DVDRV31 - DIG. VIDEO DISCPLAYE User manual

Panasonic

Panasonic DVDRV31 - DIG. VIDEO DISCPLAYE User manual

Panasonic DVD-K32 User manual

Panasonic

Panasonic DVD-K32 User manual

Panasonic DVD-S29GCS User manual

Panasonic

Panasonic DVD-S29GCS User manual

Panasonic DVD-S52S User manual

Panasonic

Panasonic DVD-S52S User manual

Panasonic DVD-CV51 User manual

Panasonic

Panasonic DVD-CV51 User manual

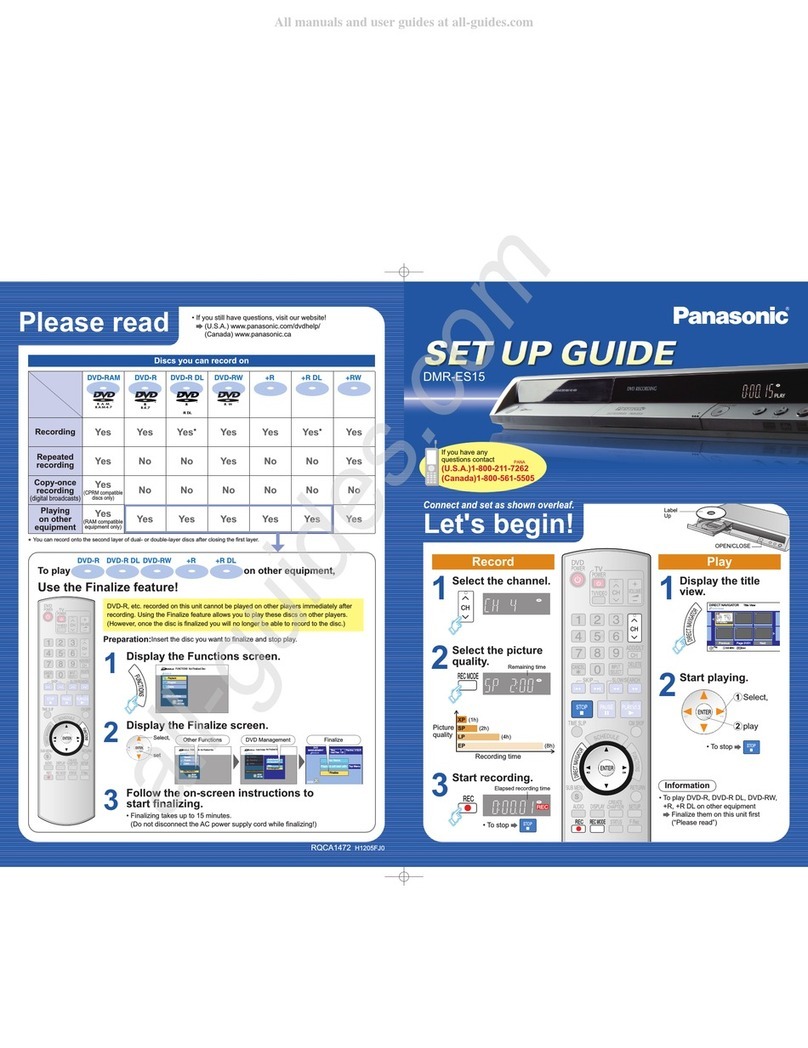
Panasonic DIGA DMR-ES15 User manual

Panasonic

Panasonic DIGA DMR-ES15 User manual

Panasonic DVDS38 - DVD/CD PLAYER - MULTI LANGUAGE User manual

Panasonic

Panasonic DVDS38 - DVD/CD PLAYER - MULTI LANGUAGE User manual

Panasonic DMP-BD10 - Blu-Ray Disc Player User manual

Panasonic

Panasonic DMP-BD10 - Blu-Ray Disc Player User manual

Panasonic DVDS1 - PORTABLE DVD PLAYER User manual

Panasonic

Panasonic DVDS1 - PORTABLE DVD PLAYER User manual

Panasonic DVD-S59 User manual

Panasonic

Panasonic DVD-S59 User manual

Panasonic DVD-S26 User manual

Panasonic

Panasonic DVD-S26 User manual

Panasonic TX-15LV1 User manual

Panasonic

Panasonic TX-15LV1 User manual

Panasonic DVD-A360A User manual

Panasonic

Panasonic DVD-A360A User manual

Panasonic DVD-PV55 User manual

Panasonic

Panasonic DVD-PV55 User manual

Panasonic DVD-XV10 User manual

Panasonic

Panasonic DVD-XV10 User manual

Panasonic DVD-CP67K Operating User manual

Panasonic

Panasonic DVD-CP67K Operating User manual

Panasonic DVD-S500 User manual

Panasonic

Panasonic DVD-S500 User manual

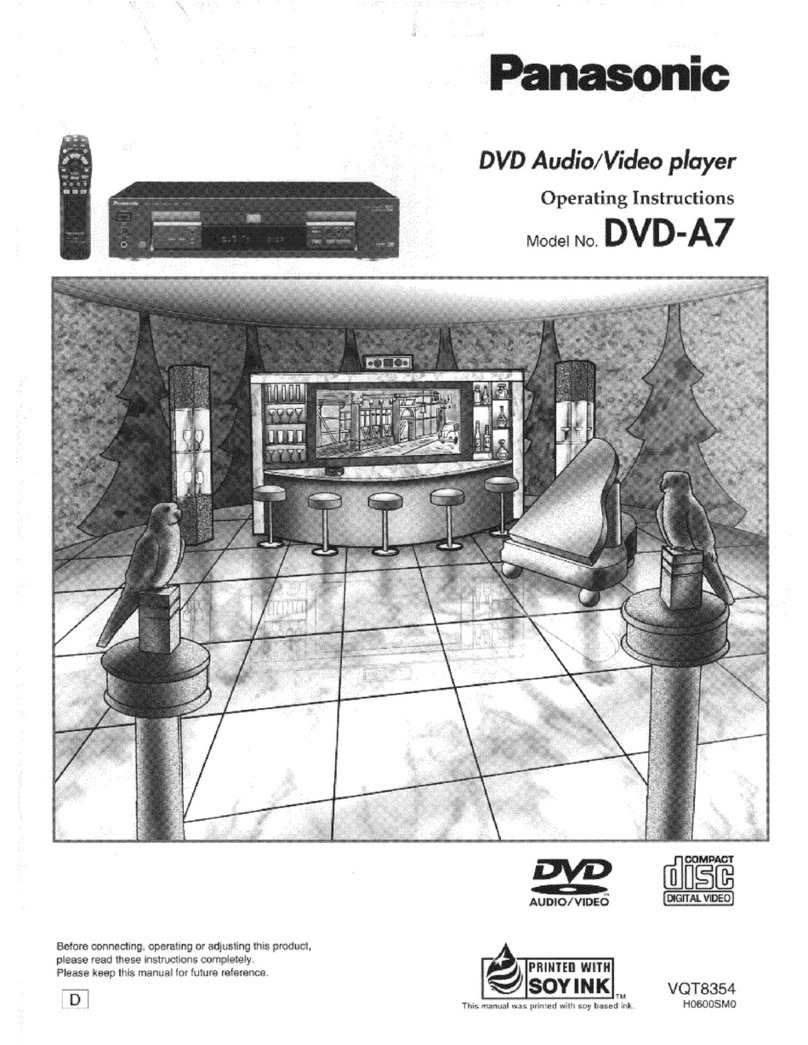
Panasonic DVD-A7 User manual

Panasonic

Panasonic DVD-A7 User manual

Popular DVD Player manuals by other brands

Toshiba SD-270EKB owner's manual

Toshiba

Toshiba SD-270EKB owner's manual

Sony DVP-SR520P Startup guide

Sony

Sony DVP-SR520P Startup guide

Daewoo DQD-6100D owner's manual

Daewoo

Daewoo DQD-6100D owner's manual

Samsung DVD-E217 user manual

Samsung

Samsung DVD-E217 user manual

Marantz DV4200 Service manual

Marantz

Marantz DV4200 Service manual

Leviton 47605-14N Instructions for use

Leviton

Leviton 47605-14N Instructions for use

Daewoo DVG-8500N Service manual

Daewoo

Daewoo DVG-8500N Service manual

Insignia IS-PDDVD7 user guide

Insignia

Insignia IS-PDDVD7 user guide

Daewoo DVG-3000N Specifications

Daewoo

Daewoo DVG-3000N Specifications

Philips DVD612/001 Service manual

Philips

Philips DVD612/001 Service manual

Philips DVP3680KX user manual

Philips

Philips DVP3680KX user manual

Zenith ABV341 Series Service manual

Zenith

Zenith ABV341 Series Service manual

McIntosh MVP841 owner's manual

McIntosh

McIntosh MVP841 owner's manual

Citizen C201DVD user manual

Citizen

Citizen C201DVD user manual

Sony DVP-NS611HP - 1080p Upconverting DVD Player Service manual

Sony

Sony DVP-NS611HP - 1080p Upconverting DVD Player Service manual

Philips dvp 320 Specifications

Philips

Philips dvp 320 Specifications

Packard Bell DVX 160 user guide

Packard Bell

Packard Bell DVX 160 user guide

Philips DVD963SA Service manual

Philips

Philips DVD963SA Service manual

manuals.online logo
manuals.online logoBrands
  • About & Mission
  • Contact us
  • Privacy Policy
  • Terms and Conditions

Copyright 2025 Manuals.Online. All Rights Reserved.