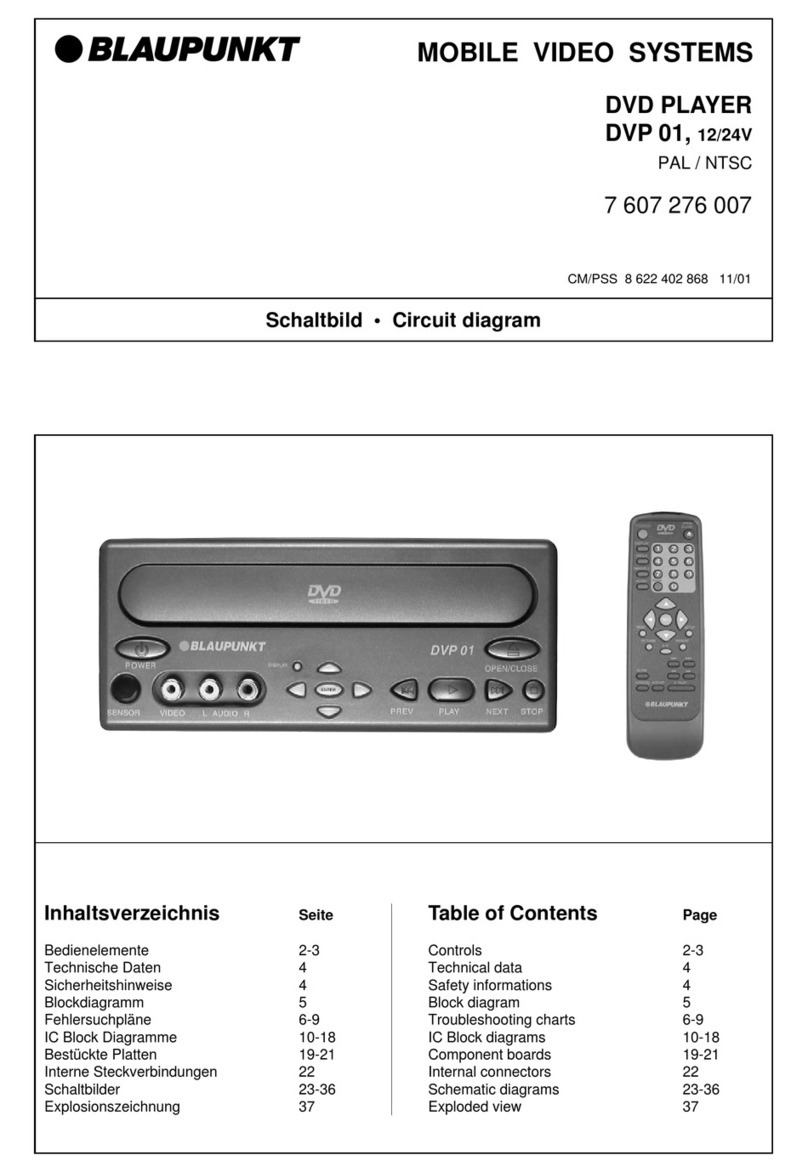
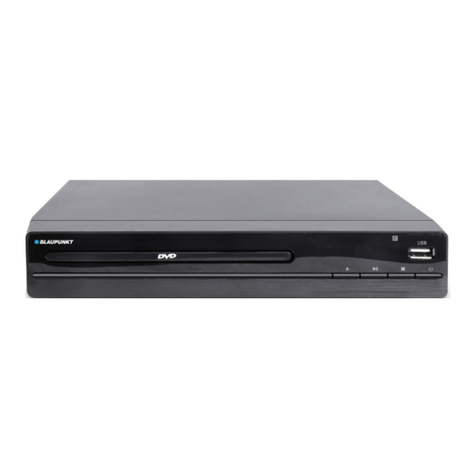
Blaupunkt MVP 01 User manual

@
BLAUPUNKT
MOBILE
VIDEO
SYSTEMS
VIDEO
PLAYER
MVP
01
PAL
7
607
900
031
(24v)
PAL/SECAM
7
607
900
082
(24v)
PAL
7
607
900
036
(12v)
IR
REMOTE
CONTROL
7
607 910
050
KH-C/VKD
3D93
420014
08/93
Kundendienstschrift
«
Service
Manual
PAL-Version
(...031,
...036)
Inhaltsverzeichnis
Seite
Table
of
Contents
Page
Technische
Daten
2
Technical
Data
2
Technische
Hinweise
2
Technical
Informations
2
Bedienungshinweise
MVP
01
3
Operating
Instructions
MVP
01
3
Erforderliche
MeBgerate,
Required
Servicing
Fixtures,
Schablonen
und
Spezialwerkzeuge
4
Jigs
and
Special
Tools
4
Service
Hinweise
5-13
Service
Notes
5-13
Mechanischer
Abgleich
14-40
Mechanical
Adjustment
Procedure
14-40
Elektrischer
Abgleich
41-44
Eiectricai
Adjustment
Procedure
41-44
Halbleiter-
AnschluBpunkte
45-47
Semi
Conductor
Connection
Points
45-47
Verdrahtungsplan
48-50
Interconnection
Schematic
Diagram
48-50
Blockschaltbilder
51-63
Block
Diagrams
51-63
Schaltbilder,
Platinen,
Oszillogramme
und
Schematic
Diagrams,
Component
Boards,
Spannungstabelle
64-94
Oscillograms
and
Voltage
Chart
64-94
Bedienungshinweise
IR-
Fernbedienung
95
Operating
Instructions
IR
Remote
Control
96
Schaltbild
und
Platine
SECAM-Teil
97-98
Schematic
Diagram
and
Board
SECAM
Section
97-98
Explosionszeichnungen
99-102
Exploded
Views
99-102
Ersatzteilliste
103-107
Spare
Parts
List
103-107

Technische
Daten
Technical
Data
ALLGEMEIN
GENERAL
Betriebsspannung:
12V
(...
036)
24
V
(...
031,
...
032)
Leistungsaufnahme:
15W
Power
consumption:
15
W
Betriebstemperatur:
0°c
~
40°C
Operating
temperature:
0°C
~
40°C
Luftfeuchtigkeit:
10
%
-
80%
Humidity:
10
%~-
80%
Abmessungen
BxHxT:
215
x
95
x
269,5
Dimensions
(WxHxD):
215
x
95
x
269.5
Masse:
ca.
3
kg
Weight:
approx.
3
kg
es
°
5
SS
f
:
CS
@®
VIDEO VIDEO
PAL-Version
(...031,
...036)
Bedienungshinweise
Operating
Instructions
Operating
voltage:
12
V
(...
036)
24V
(...031,
...
032)
Fernsehsystem
TV
system
CCIR:
625
Zeilen
CCIR:
625
lines
'
50
Halbbilder
50
fields
Hinweis:
Das
Gerat
darf
nur
mit
dem
beigelegten
Note:
The
unit_
may
only
be
connected
te
; .
Stromkabel
an
die
auf
dem
Typschild
ste-
operating
voltage
mentioned
on
the
type
labe!
PAL-Farbsignal
(...
031,
...
036)
PAL
colour
signal
(...034,
...
036)
hende
Betriebsspannung
angeschlossen
using
the
enclosed
power
cable.
PAL/SECAM-Farbsignal
(...032)
PAL/SECAM
colour
signal
(...032)
x
werden.
z
}
-
in-
hatten.
1)
POWER
—
to
switch
orvoff
Bandformat:
VHS
Band
format:
VHS
(i
POWER
zum
Ein-
und
Aussc
;
Q
;
‘
:
:
+
Hinweis:
Das
Gerat
schaitet
automatisch
*
Note:
The
unit
switches
on
automatically
Wiedergabesystem:
4
rotierende
Kopfe
Playback
system:
4
rotating
heads
ein,
wenn
eine
Cassette
eingeschoben
wird
and
starts
playback,
ifa
cassette
is
inserted.
VHS
Schragspurvertahren
VHS
helical
scan
und
geht
danach
in
die
Funktion
Wiederga-
Bandgeschwindigkeit:
B
P'
speed:
E
be.
(@}
TRACKING
+,-
—
to
eliminate
interference
patterns.
Press
Vor/Ric
aan
#
page
Lh
ti
asin
se
st
80)
(2)
TRACKING
+,-
—
zum
Ausblenden
von
Bildzittem
bei
Stand-
both
button:
Autotracking.
kspuilzeit:
.
6
Min,
ing
time:
approx.
6
min
bild.
Ausgangspegel:
1,0Vss
/
75Q
Output
level:
1.0Vpp
/
750
Beide
Tasten
driicken:
Autotracking.
3)
REW/
Ge)
~
after
STOP:
fast
rewind
Signal-Rauschabstand:
>
37
dB
SIN
ratio:
>37
dB
@Qrewe
-
al
eo
‘secciieia
iz
~
during
playback:
fast
picture
seek
tuning
-
il
4
<
Horizontalauflésung
Horizontal
(Ton
wird
sesivnpeichate?
(the
sound
will
be
muted).
ae
Farbe:
>
230
Linien
colour
resolution:
>
230
lines
*
zuriick
auf
normale
Wiedergabe:
Taste
©
seal
nied
playback:
press
button
PLA’
PLAY
emeut
driicken.
©
89am.
w
Wh
©
PLAY/x2
~
playback
(4)
PLAY/x2
Wiedergabe
£
‘
AUDIO AUDIO
~
Taste
2x
driicken,
Wiedergabe
mit
ca.
dop-
-
aie
ogc
ee
playback
with
approx.
Wiedergabesystem:
2
rotierende
Képfe
fir
HiFi
Playback
system:
2
rotating
HiFi
audio
heads
pelter
Geschwindigkeit
joubled
spee
.
u
i :
back
to
normal
playback:
press
button
PLAY
1
Kopf
far
Langsspur
1
head
for
longitudinal
track
ae
eres
ee
Epes
la
ea
Ausgangspege!:
-8
dBV
(400
mVss)
/
1
kHz
(1kQ)
Output
level:
-8
dBV
(400
mVpp)
/
t
KHz
(1kQ)
@
rr
—
nach
STOP:
schneller
Voriau
©)
GFF
—
after
STOP;
fast
forward
Ubertragungsbereich
Frequency
response
*
amBandende
automatisches
Zuriickspulen
*
automatic
rewinding
at
the
end
of
the
tape
HiFi:
20 Hz
—
20
kHz
HiFi:
20
Hz
—
20
kHz
—
bei
Wiedergabe:
schneller
Bildsuchlauf
-
during
playback:
fast
picture
seek
tuning
N
I
100
Hz
-
8
KH
No
.
(Ton
wird
stummgeschattet).
(the
sound
will
be
muted).
Oras
es
e
mal:
100
Hz
—
8
kHz
*
zurick
auf
normale
Wiedergabe:
Taste
*
backtonormal
playback:
press
button
PLAY
Signal-Rauschabstand
SIN
ratio
PLAY
emeut
drucken.
once
again.
HiFi:
>
68
dB
HiFi:
>
68
dB
€
STOP
~
Beenden
des
Bandiauts.
;
€)
STOP
—
switch
off
the
tape
winding
Normal:
>
40
dB
Normal:
>
40
dB
7)
PAUSE/STILL
-
Standbild
(Gerat
schaltet
nach
5
Min.
Stand-
PAUSE/STILL
-
still
(after
having
activated
the
still
for
5
min.
:
i
bild
aut
Stop)
;
the
unit
switches
over
to
stop)
*
zurick
auf
normale
Wiedergabe:Taste
+
backtonormal
playback:
press
button
PLAY
PLAY
nochmais
drucken.
once
again
.
.
. .
:
@)
EJECT
—
Cassettenauswurf.
‘
-
Technische
Hinweise
Technica!
Information
@
=
Cassohienschecht.
@
EJECT
-
coeeete
ee
eer
}
}
-
cassette
40:
AUDIO
OUT
=
—
Wahi
der
Tonspur:
HiFi
L+R.
HiFiL,
HIFiR,
=
: .
jaaee
‘
HiFIR
1.
Feuchtigkeitsanzeige
1.
Humidity
indicator
a
SELECT
keine
Anzeige
-
normale
Tonspur.
appeias
car
hibrre
pies
aahierta
ills
iF
Po
sich
fone
MVP
01
sete
cab
cca
rey
durch
bpd
ae
fd
in
=
MVP
01
(e.g.
condensation),
Gr
RESET
-
pa
ane
ia
des
Bandzahiwerkes
@
RESET
=
to
reset
the
tape
counter
to
"0
:
00.00"
ondensation,
so
erscheint
im
Display
ein
“d”.
isplay
will
show
“cd”.
®
SSnmannry
al
‘ .
42)
MEMORY
=
tostore
atape
position
combined
with
button
Bei
eingeschaltetem
Gerat
(POWER
ON)
wird
die
When
the
unit
is
tumed
on
(POWER
ON),
2
special
@2;
MEMORY
-
a
pret
pole
nad
.
Verbin-
V2
RESET
tia
unk
eioed
anaingtte
peal
Feuchtigkeit
an
der
Kopftrommeleinheit
durch
eine
heating
takes
charge
to
remove
the
humidity
at
the
head
sopet
ander
gespeicherten
Bandstelle
bei
the
stored
tape
position
when
fast
forwarding
parent
pseiia:
;
orem:
ae
aee
:
:
schnellem
Vor-
bzw.
Ricklauf.
or
rewinding.
aE
ad
se
nzeige
“d”
erloschen
ist
(nach
ca.
1
-
As
soon
as the
“d"
indication
goes
out
in
the
display
(after
@:
DISPLAY
-
zeigt
die
Funktionen
an.
Anzeige
.<"
@
~
indicates
the
functions.
Indication
“d"
.5
Std.),
kann
der
MVP
01
wie
gewohnt
betrieben
about
1-
1,5
hours),
the
MVP
01
can
be
put
into
operation
Feuchtigkeitsanzeige.
humidity
indication
werden.
again.
Ga:
REMOTE
—
infrarotempfanger
fiir
Fernbedienung.
Ga)
REMOTE
—
infrared
receiver
for
remote
contro!
2.
Betriebstemperatur
2.
Operation
temperature
&
oc
=
hse
sett
Betriebsspannung.
as}
DC
~
jack
for
operating
voltage
=
‘
Wird
durch
die
Umgebungstemperatur
die
Betriebs-
If
the
operating
temperature
of
the
MVP
01
becomes
too
:
7
ae
ies
Mees
tee
:
5
se
al
aeons
pinata
eer
01
zu
hoch,
so
blinken
die
Bedien-
=
ae
to
a
abucatieag
temperature,
the
display
*
Hinweis:
Die
Anschliisse
1
und
2
missen
Note:
The
connections
1
and
2
shall
both
lement-
-
,
indicators
wil
sta
ING.
beide
angeschlossen
werden.
be
connected.
oe
soeiea
ih
Cee
paths
priate
All
functions
will
be
blocked
to
protect
the
tape
and
the
a
AUTO
REPEAT—
zum
automatischen
Wiederholen.
Gé)
AUTO
REPEAT
-
to
repeat
automatically
Indi
Fail
aera
apr
cassette
will
be
ejected.
'
.
‘@.
REMOTE
~
AnschiuB
fir
Kabelfernbedienung.
47)
REMOTE
~
connection
for
cable
remote
contro!
In
diesem
Fail
das
Ger&t
ausschalten,
bis
sich
die
tn
this
case,
turn
the
unit
off
until
the
temperature
in
the
AB
+20"
—
Video
und
Audio
Ausgangsbuchsen.
x
-
(2
—
video
and
audio
output
jacks
Temperatur
im
Fahrzeuginneren
abgekishtt
hat.
car
cabin
has
cooled
down.
ao
oe

Erfordertiche
MeBgerate,
Schablonen
und
Spezialwerkzeuge
Required
Servicing
Fixtures,
Jigs
and
Special
Tools
VHS-Testkassette
VHS
alignment
tape
8
627
000
540
Einstelpiatte
Post
adjustment
plate
8619
497
806
8619
497
816
Feineinstell-Schraubendreher
Fine
adjustment
screwdriver
8619
497
814
Schmiermittel
Lubricant
8
627
000
361
Lupe
Magnifying
glass
Sechskantschlisseisatz
Hexagonal
wrench
set
8619
497
811
8619
498 006
Bandzugwaage
Back
tension
meter
Spezialzange
Retaining
ring
remover
ea
(Zum
Enttemenund
Aufsetzen
von
Sicherungsringen)
{For
removing
and
inserting
retaining
rings)
8
619 498
001
8619
498
004
Einstell-Schraubendreher
Post
adjustment
screwdriver
of
Kopfreiniger
Head
cleaning
sticks
VA
8
627
000 364
Pinzette
8619
497
813
8619
497
807
8619
498
003
8
619
499
428
8
627
000
363
8
627
000
737
Héhenmefuhr
Ree!
table
height
fixture
Spezial-Schraubendreher
H-position
screw
driver
Winkel-Kreuzschiitz
Lock
screw
wrench
Mechanikerspiege!
Mechanics
‘mirror
Winkelpinzette
Angle
tweezers
A.
Service
Hinweise
A.
Service
Notes
When
servicing,
take
notice
of
following
items.
A.
Service
Position
1.
In
the
order
described
in
the
Disassembly
Section,
remove
the
Top
Cover
and
open
the
Main
C.8.A.,
page
14.
Then
carefully
place
it
into
the
Service
Position
as
shown
in
Fig.
1-1.
Operation
I
C.B.A.
Main
C.B.A.
Operation
1
C.B.A.
VCR
Unit
Fig.
1-1
2.
When
servicing
the
bottom
portion
of
the
Mechanical
Chassis,
remove
the
Mechanical
Chassis
from
Bottom
Case
removing
3
Screw
Covers,
2
Screws
(S
-
13),
2
Screws
(S
-
14)
and
Screw
(S
-
15)
in
Fig.
D7,
page
16.
3.
Next,
place
the
Mechanical
Chassis
up
side
down
as
shown
In
Fig.
1-2.
VCR
Unit
Main
C.B.A.
Operation
I
C.B.A.
Fig.
1-2
B.
Test
Point
Information
B-1.
Actual
Board
on
VCR
With
this
model,
al!
Test
Points
use
the
foil
solder
pad
for
connection
of
the
measuring
equipment.
B-2.
Schematic
and
C.B.A.
Diagrams
in
this
i
Service
Manual
on
pages
48
-
98
©
:
Used
for
the
indication
of
Test
Point
with
No
Test
Pin
(Foll
Solder
Pad).

C.
Simplified
Fauit
Finding
Point
(TP6002)
This
model
has
the
Simplified
Self-
Diagnostic
System
to
facilitate
finding
the
cause
when
the
Unit
shuts
off
or
stops
automatically.
1.
Preparation
Connect
the
OSCILLOSCOPE
probe
to
TP6002
on
the
System
Control
Section
of
the
Main
C.B.A.
2.
Indication
The
Signal
at
TP6002
indicates
the
foliowing
causes.
Note:
In
hormal
condition,
DC
+5V
Signal
at
TP6002
is
displayed.
fe]
ween
[i
‘|
1.
|
Takeup
Reel
Lock
Low
Voltage
There
Is
no
TAKEUP
REEL
Sensor
Pulse
for
5
seconds
or
1
second
(only
SEARCH
MODE).
(Takeup
Reel
Sensor
Puise
at
pin
68
ot
1C6001)
Cylinder
Lock
0.3Hz
Pulse
(Duty
50%)
3.0Sec
f———1
Cylinder
Motor
stops
in
the
REC,
PB,CUE,
REVIEW,
SLOW
or
STILL
mode
for
1
second.
{Cylinder
Lock
(
L)
signal
is
detected
inside
1C6001)
Exceeds
Loading/Unloading
Time
0.7Hz
Pulse
(Duty
50%)
1.4Sec
b—
Loading/unloading
time
exceeds
the
normal
loading/unloading
time,
with
no
shift
to
the
next
mode.
(Position
signals
supplied
from
Mode
Select
Switch
to
pins
11-
13
of
1C6001)
Exceeds
Cassette
Loading/Unloading
Time
intermittent
Pulse
Cass
ing
ti
ssbciled-obes
ette
loading/unloading
time
ex-
ceeds
the
normal
cassetie
load-
Sr
5\
|
ing/unloading
time,
with
no
shift
to
the
next
mode.
(Cassette
Off
(H)
/
Up
(M)
/
Down(L)
ee
Plt
OV
|
signal
at
pin
71
of
1C6001)
D.
Connection
of
the
Flexible
Cable
to
Trap
Connector
ee
eee
D.D.
Cylinder
Unit-
P3501
Main
C.B.A.
For
the
Location
of
Pin
1
on
the
Trap
Connectors,
use
the
pin
1
indication
on
the
Typical
C.B.A.
D.O.
Cylinder
Unit
Flexible
Cable
Fig.
3-1
(Removal
or
installation
of
Flexible
Cable)
a.
Removal
4)
On
the
Trap
Connector,
pull
out
both
ends
of
the
Locking
Tab
surrounding
the
cable
end
to
release
the
Trap
portion
of
the
Connector.
Then
pull
Fiexible
Cable
out
to
remove
as
shown
in
Fig.
3-
2.
Flexible
Cable
Head
Amp
C.B.A.
Unit
Pull
beth
sides
of
tab
together
b.
Installation
1.
Insert
the
end
of
the
Flexible
Cable
into
the
Trap
Connec-
tor
so
it
lays
smoothly
across
the
slot.
Press
the
middie
of
the
Cable
firmly
against
the
Trap
Connector
slot,
and
hoid
it
securely.
.
Without
pinching
the
Cable,
press
the
Lacking
Tabs
in
against
the
Trap
Connector
until
both
ends
snap
into
their
locked
position.
_
Pull
lightly
on
the
Cable
to
check
for
positive
connection.
Le)
wo
b
Note:
Take
care
when
removing
or
installing
the
Flexible
Cable
to
prevent
Cable
damage.
E.
Cassette
Tape
for
servicing
with
Left
Side
Down
This
position
Is
used
only
when
servicing
the
Bottom
portion
of
the
Mechanical
Chassis.
If
misloading
of
the
cassette
tape
is
encountered
in
this
position,
press
the
Cassette
Tape
firmly
into
the
Cassette
Up
Unit
with
the
teft
thumb.
F.
Variable
Voltage
Isolation
Transformer
Because
a
Hot
Chassis
Ground
is
present
in
the
Power
Supply
Circuit,
an
Isolation
Transformer
must
be
used.
Also,
in
order
to
have
the
ability
to
Increase
the
input
voltage
slowly,
when
troubleshooting
this
type
Power
Supply
Circuit,
a
variable
isolation
transformer
is
required.
G.
Service
Test
Point
(TP6001)
The
detection
of
the
Supply
/
Takeup
Photo
Transisto:s,
Reel
Sensor
and
Cylinder
Lock
will
be
inhibited
when
TP6001
is
grounded
on
the
System
Control
Section
of
the
Main
C.B.A.

H.
Method
for
Manual
Loading
/
Unloading
of
VCR
Turn
the
Center
Pulley
Unit
in
Fig.
4
clockwise
(for
loading)
or
counterclockwise
(for
unloading)
while
pushing
the
change
lever
(located
on
bottom
side)
in
Fig.
§
or
pushing
the
piunger
of
the
solenoid
(located
on
top
side)
in
Fig.
6
as
indicated
by
the
arrow
mark
to
release
the
lock.
Bottom
View
ee
‘
.
\
S
Center
Pulley
b
|
Pitan
3
Fig.
4
Bottom
View
Change
t-ever
Fig.
6
|.
How
to
place
the
Cassette
Holder
in
the
Down
Condition
without
a
Cassette
Tape
In
the
Cassette
Holder
up
condition,
the
VCR
can
not
be
operated,
even
if
Service
Test
Point
(TP6001)
is
grounded.
To
place
the
Cassette
Holder
in
the
down
position
without
a
cassette
tape
use
the
following
procedure.
1.
Hold
the
Lock
Arm
with
right
thumb
until
the
Cassette
Holder
Unit
clears
the
Locking
Tab
of
the
Rear
Frame
Unit.
2.
Press
the
Sub
Holder
Unit
into
the
loading
condition
with
left
thumb
as
shown
in
Fig.7.
3.
After
clearing
the
Locking
Tab,
the
Cassette
Holder
Unit
will
move
Into
down
position
by
itself.
ee
Locking
Tab
\
Lock
Arm
Cassette
Holder
Unit
Cassette
Ulp
Unit
Fig.
7
J.
Service
of
Capstan
Rotor
Unit
The
Capstan
Rotor
Unit
is
supplied
as
a
replacement
part
In
a
complete
unit
with
a
spring
loaded
Capstan
pulley.
Do
not
remove
the
Retaining
Ring
on
the
Capstan
Pulley
of
the
Capstan
Rotor
Unit.
Capstan
Rotor
5
=
Retaining
Ring
\®)
Constan
Pulley
Fig.
8
K.
Cleaning
with
Isopropyl
Alcohol
91%
All
Isopropyl Alcohol
91%
must
be
removed
from
the
tape
path
after
cleaning
by
using
a
dry
Head
Cleaning
Stick
(8
619
497
813)
or
tape
damage
will
occur.
L.
How
to
defeat
the
Auto
Tracking
Function
To
defeat
Auto
Tracking
Function
piace
a
jumper
between
TP6003
and
GND
on
the
System
Control
Section
of
the
Main
C.8.A.
in
STOP
Mode
to
maintain
the
Neutral
Position.
M.
Black
Screws
on
the
Chassis
Black
Screws
are
used
on
the
Mechanical
Chassis
to
iden-
tify
screws
that
require
adjustment.
N.
Service
of
RF
Converter
Unit
|
Since
the
RF
Converter
Unit
has
already
been
adjusted
at
the
factory.
Do
not
try
to
adjust
the
4.5MHz
(F)
Crystal
Oscillator
Frequency
Control.
O.
Set
Tracking
to
the
Neutral
Position
Eject
and
reinsertion
of
Tape
will
access
the
Neutral
Track-
Ing
position.
ire)

P.
How
to
read
the
Disassembly
/
Assembly
Procedures
(For
Cabinet
Part)
(For
Mechanica!
Part)
ae
a
ae
®
UNHOOK/UNLOCK/
RELEASE
ADJUSTMENT
/UNPLUG/UNSOLDER
-CONENON
ee
Ses,
Alignment
Procedures
for
Mechanisa
iten
13-2
aE
SETTING
PLATE
it
(+)
Sea,
Aligrment
Procedures
tor
Mechanism
(tee
13-2
2(C-1),
24P-1),
4(P-2)
cMote
2>
|
(+)
Sea,
Setting
Condition
in
Fig
Dud
@®:
Order
of
steps
in
Procedure
When
reassembling,
perform
the
step(s)
in
the
reverse
order.
These
numbers
are also
used
as
the
identification
(location)
No.
of
parts
in
Figures.
@®:
Starting
No.
followed
by
corresponding
part
which
can
be
removed
at
this
stage.
See
example
below.
Example:
Pressure
Cam
Cap
can
be
removed
without
removing
any
other
parts
beca
Abseasiivar
thane
nadig
9
any
Pp
use
the
STEP/LOC.
No.
and
the
But
Pressure
Roller
Arm
Unit
can
be
removed
only
after
removing
Pressure
Cam
Cap
(No.@)
@:
Part
to
be
removed
or
installed.
@:
Location
of
part.
T=Top;
B=Bottom
®:
Fig.
No.
showing
Procedure
or
Part
Location.
©:
Identification of
part
to
be
removed,
unhooked,
unlocked,
released,
unplugged
d
'
.
5
,
,
unclamped
o}
P=Spring;
W=Washer
Bee
atic
C=Cut
Washer,
A=Retaining
Ring
N=Nut;
S=Screw
%
=
Unhook,
unlock,
release,
unplug
or
unsolder
2(C-
2)=2
Cut
Washers
(C-
2)
@:
Adjustment
information
for
installation.
#
=
Condition
for
adjustment
(+)
:
Refer
to
Exploded
Views
for
Lubrication
intormation.
Q.
Replacement
procedure
for
Leadiess
(Chip)
Component
The
following
procedures
are
recommended
for
the
replace-
ment
of
the
leadiess
components
used
In
this
Unit.
4.
Preparation
for
replacement
a.
Soldering
tron
Use
a
pencil-type
soldering
Iron
that
uses
less
than
30
watts.
b.
Soider
Eutectic
Solder
(Tin
63%,
Lead
37%)
is
recom-
mended.
c.
Soldering
time
Do
not
apply
heat
for
more
than
4
seconds.
d.
Preheating
Leadless
capacitor
must
be
preheated
before
Instal-
lation.
{130°C
-150°C
,
for
about
two
minutes.)
Note:
a.
Leadless
component
must
not
be
reused
after
removal.
b.
Excessive
mechanical
stress
and
rubbing
of
the
component
electrode
must
be
avoided.
2.
Removing
the
leadiess
component
Grasp
the
leadiess
component
body
with
tweezers
and
alternately
apply
heat
to
both
electrodes.
When
the
solder
on
both
electrodes
is
melted,
remove
leadless
component
with
a
twisting
motion.
Note:
a.
Do
not
attempt
to
lift
the
component
off
the
board
until
the
component
is
completely
disconnected
trom
the
board
by
a
twisting
action.
b.
Take
care
not
to
break
the
copper
foil
on
the
printed
board.
Soldering
Iron
Fig.
9
3.
installing
the
jeadiess
component
a.
Presolder
the
contact
points
of
the
circuit
board.
YA
Soldering
fron
Z_—~
Presoider
eal
ee
Fig.
10
b.
Press
the
part
downward
with
tweezers
and
solder
both
electrodes
as
shown
below.
uv
Wweezers
Glia
Soldering
tron
~——
Solder
Fig.
11
Note:
Do
not
glue
the
replacement
leadiess
component
to
the
circuit
board.
R.
How
to
remove
/
install
the
Flat
Pack
IC
1.
How
to
remove
the
Flat
Pack
IC
(with
Hot
Air
Flat
Pack
IC
Desoldering
Equipment)
(FOR
EXAMPLE)
Fig.
12
(1)
Prepare
the
Hot
Air.
Fiat
Pack
IC
DESOLDERING
EQUIPMENT.
And
then
apply
hot
air
to
Flat
Pack
IC
about
5~8
seconds,
(2)
Remove
the
Flat
Pack
IC
with
tweezers
while
applying
the
hot
air.

CAUTION
:
1.
Do
not
supply
the
hot
air
to
the
chip
parts
around
the
Fiat
Pack
IC
for
tong
time
as
damage
may
occur
to
the
chip
parts
around
the
Flat
Pack
iC.
Hot
Air
Flat
Pack
IC
C.B.A.
a
Desoldering
og
Equipment
Masking
Sa
Tape
q
Tweezers——"
Flat
Pack
IC
Fig.
13
Put
Masking
Tape
around
the
Flat
Pack
!C
to
protect
adjacent
parts.
2.
The
Flat
Pack
IC
on
the
P.C.B.
is
affixed
with
glue,
so
be
careful
so as
not
to
break
or
damage
any
foil
under
the
iC
or
at
each
pin
when
removing
it.
(with
Soldering
tron)
(1)
Use
desoldering
braid
to
remove
the
soider
from
all
pins
of
the
Flat
Pack
IC.
Use
solder
flux
applied
to
all
pins
of
the
Flat
Pack
IC
to
allow
easy
removal.
Desidering
FlatPackic
Braid
Soldering
Iron
Fig.
14
(2)
Lift
each
lead
of
the
Flat
Pack
IC
upward
one
by
one
using
a
sharp
pin
or
non
solder
wire
(iron
wire),
while
heating
the
pins
using
a
fine
tip
soldering
iron
or
a
hot
air
blower.
Soldering
tron
Fig.
15
{with
tron
Wire)
(1)
Use
desoidering
braid
to
remove
the
solider
trom
ait
pins
of
the
Flat
Pack
IC.
Use
solder
flux
applied
to
al!
pins
of
the
Flat
Pack
IC
to
allow
easy
removal.
{2)
Affix
the
wire
to
workbench
or
solid
mounting
point
as
shown
in
Fig.
16.
{3)
Pull
up
wire
as
the
solder
melts
so
as
to
lift
the
IC
lead
from
the
P.C.B.
contact
pad,
while
heating
the
pins
using
a
fine
tip
soldering
iron
or
hot
air
blower.
Hot
Air
Blower
Solid
Mounting
Point
Se
tron
Wire
~——
Of
Soldering
Iron
Pull
up
gently
to
remove
Fig.
16
Note:
When
using
a
soldering
iron
care
must
be
taken
to
ensure
that
the
Flat
Pack
IC
is
not
being
held
by
giue
or
the
P.C.B.
may
be
damaged
if
force
is
used.
If
glue
is
holding
the
IC,
then
heat
the
IC
with
hot
air
to
loosen
the
glue.
2.
How
to
install
the
Flat
Pack
IC
(1)
Use
desoldering
braid
to
remove
the
solder
from
the
foil
of
each
pin
of
the
Flat
Pack
IC
on
the
P.C.B.
so
you
can
install
a
replacement
Fiat
Pack
IC
more
easily.
(2)
The
”
@
"
mark
on
the
Flat
Pack
IC
indicates
pin
1.
(See
Fig.
17)
Make
sure
this
mark
matches
the
1
on
the
P.C.8.
when
positioning
for
installation.
Then
pre-soider
the
four
corners
of
the
Fiat
Pack
IC
(See
Fig.
18)
“Example”
Pin
1
of
the
Flat
Pack
IC
is
indicated
bya
"@"
mark.
Fig.
17
Soldering
tron
Presoider
Fiat
Pack
IC
Fig.
18
(3)
Solder
all
pins
of
the
Flat
Pack
IC.
Make
sure
that
none
of
the
pins
have
solder
bridges
between
Pins
on
the
Flat
Pack
IC.
S.
Special
Note
All
integrated
circuits
and
many
other
semiconductor
de-
vices
are
electrostatically
sensitive
and
therefore
require
special
handling
techniques
described
under
the
“ELEC-
TROSTATICALLY
SENSITIVE
(ES)
DEVICES”
section
of
this
service
manual.
T.
Voltage
Measurement
1.
Voltage
Chart
a.
Color
bar
signal
in
SP
mode.
b.
----:Unmeasurable
or
unnecessary
to
measure,
2.
Schematic
Diagram
a.
Audio
Section
monoscope
signal
in
PB
mode.
b.
Other
Sections
color
bar
signal
in
PB
mode.
Note:
Voltage
Indications
for
PB
mode
on
Schematic
are
as
shown
below.
2.5
PB
mode
-13-
U.
How
to
Read
Waveform
=,
©
Connecting
Font
“~@
D
vons/Niv
@
Volis/Ow
@
Connecting
Paint
©
Tine/Div
@
Trigger
Channel
of
ine
scope
(1:
UPPER,
2:
LOWER,
@
Operation
Moge
of
VCR
@
Wavetorm
Paint
on
Schematic
m—®
@
AV}:
Peak
to
Peak.
V.
Indication
for
Zener
Voltage
of
Zener
Diodes
The
Zener
Voltage
of
Zener
Diodes
are
indicated
as
such
on
schematic
Diagrams.
Example:
(6.2V)...Zener
Voltage
W.
“©”
Marks
on
C.B.A.
layout
indicate
“©”
indicates
the
connection
gaint
between
the
Foil
Side
and
the
Component
Side
the
C.B.A.
X.
How
to
identify
Connectors
on
Schematic
Diagram
Each
connector
is
labeled
with
a
connector
No.
and
Pin
Nc.
indicating
what
it
is
connected
to,
in
other
words,
its
counter
part.
Connections
between
large
P.C.B.’s
and
small
circuit
Boards
are
illustrated
on
the
large
P.C.B.
schematics,
Use
the
interconnaction
schematic
diagram
to
find
the
connections
between
associated
connectors.
Example:
The
connections
between
C.B.A.s
are
as
shown
below.
MAIN
C.B.A.
(TO
HEAD
AMP
ASS'Y)
(P3001-1
P3501
11]
|
P3001-2§P3s01-1
|
C.B.A.
to
which
[
P3007
-
3]
1Pa501-9
|
this
connector
is
P3001-4
1P3501-4
|
connected.
|
F
|
Connector
No.
Connector
No.
and
Pin
No.
to
and
Pin
No.
on
which
connector
on
the
left
is
Main
C.B.A.
connected.

B.
Mechanischer
Abgleich
B.
Mechanical
Adjustment
Procedure
Second
Shieid
J
Sheet
1.
DISASSEMBLY
OF
CABINET
PARTS
1.
DISASSEMBLY
FLOW
CHART
2.
DISASSEMBLY
METIIOD
This
flow
chart
indicates
the
disassembly
steps
of
the
cabinet
parts
and
the
P.C.
Boards
in
order
to
gain
access
to
REMOVAL
item(s)
to
be
serviced.
When
reassembling,
perform
the
slep(s)
in
the
reverse
order.
Bend,
roule
and
dress
the
Fiat
REMOVE
Cables
as
they
were
originally.
%*
UNLOCK/RELEASE/
, .
UNPLUG/UNCLAMP/
UNSOLDER
@
Top
Cover
2(S-
1)
Clam
@
Top
Cover
@®
Front
Panel
Ass'y
@
Operation
|
and
®
Main
C.B.A
NC.B.A.s
*
P4201,
*
P6002,
(S-
2)
3(S-
3),
5(S-
4),
@
Main
C.B.A.
*
P7551
Fig.
DS
4(S-5),
Shield
Sheet,
(S-
6),
(S-7),
(W-
1),
Connectors,
Clamper
®
Power
Supply
ASS'Y
and
Jack
C.B.A.
*
P1301,
(S-
8),
2(S-8),
*
P1001
(S-
10),
(S-
11),
P.C.B.
Angle-
R,
3(S-
12),
*
(L-1)
@
Mchanism
Chassis
Screw
Covers,
2(S-
13),
2(S-
14),
{S-
15)
Mechanical
Chassis
Fig.
D1
List
of
Abbreviations
:
2(S-
1)=2
Screws
(S-
1)
(L-
1)=Locking
Tab
(L-
1)
(W-
1)=Washer
(W-
1)
G)
Jack
C.B.A.
Unit
©
Power
Supply
Ass'y
Front
Panel
Ass'y
Fig.
D4
Fig.
D6

Cassette
Up
Unit
@
Machanical
Chassis
Screw
Covers
Fig.
D7
Reference
<Note>
In
Table
2:
1.
When
reinstalling
the
Cassette
Up
Unit,
take
care
so
as
not
to
place
the
Position
Detect
Switch
of
the
Cassette
Up
Unit
onto
the
Switch
Cam
Gear.
2.1)
pase
lift
the
Mechanical
Chassis
from
the
Bottom
ase.
2)
When
handling
Mechanical
Chassis,
do
not
touch
mechanical
parts
on
it.
CAUTION
:
When
reinstalling
the
Mechanical
Chassis,
at
first,
position
the
left
and
right
rear
corners
of
the
Chassis,
then
position
other
corner.
2.
PROCEDURE
FOR
CLEANING
UPPER
CYLINDER
UNIT
1.
Position
the
Video
Head
to
permit
access
for
cleaning,
and
hold
the
Upper
Cytinder
to
keep
it
from
turning
while
cleaning.
2.
Gently
rub
the
Video
Heads
in
the
direction
of
tape
travel
with
a
Head
Cleaning
Stick
(8
619
497
813)
moistened
with
Isopropy!
Alcohol
91
%.
3.
Repeat
for
the
other
Video
Heads.
CAUTION:
All
Isopropyl
Aicohol
91%
must
be
removed
from
the
tape
path
after
cleaning
by
using
a
dry
Head
Cleaning
Stick
or
tape
damage
will
occur.
fi
Lae
Cylinder
SJ
ideo
Head
Cleaning
Stick
(8
619
497
813)
Fig.
M1
Note:
1.
Do
not
rub
vertically.
2.
Do
not
apply
any
pressure
to
the
head.
If
contaminant
Is
not
easily
removed,
continued
gentle
wiping
will
usually
remove
it.
3.
Clean
the
Cylinder
surface
with
Isopropyl
Atcoho!
91%
if
fingerprints
are
present
after
cleaning
the
Video
Head.
See
Caution
above.
3.
ADJUSTMENT
PROCEDURES
1.
REPLACEMENT
OF
UPPER
CYLINDER
UNIT
1-1.
REMOVAL
OF
UPPER
CYLINDER
UNIT
Work
with
extreme
care
when
removing
or
replacing
the
Upper
Cylinder
Unit.
Do
not
touch
Video
Heads
during
servicing.
1.
Unsolder
only
the
Lead
Pins
which
are
Indicated
by
*t
t
’
marks
as
shown
in
Fig.
M2.
2.
Remove
2
Screws
with
Washers
(A)
and
gentty
lift
the
Upper
Cylinder
Unit
from
the
shaft.
oe
ae
Screws
with
Washers
{A}
6
Lead
Pins
(AR.
2L,
6R)}
6
Lead
Pins
(6L.
2R,
AL)
Fig.
M2
1-2.
CLEANING
OF
D.D.
CYLINDER
SHAFT
AND
THE
SURFACE
.
Before
reinstalling
a
new
unit,
clean
the
D.D.
Cylinder
Shaft
and
the
surface
that
engages
with
the
Upper
Cylinder
with
a
soft
cloth
dampened
with
isopropyl
Alcohol
91%
in
Fig.
M3.
See
Caution
under
2.
Procedure
tor
Cleaning
Upper
Cylinder
Unit.

1-3.
REPLACEMENT
OF
UPPER
CYLINDER
UNIT
1.
Install
the
new
Upper
Cylinder
Unit
carefully
so
that
the
Lead
Pins
are
properly
matched
on
the
Head
Relay
Board.
For
details
on
the
installation
position,
reter
to
Fig.
M4.
Note:
1.
install
the
Lead
Pins
with
extreme
care
so as
not
to
damage
them.
install
the
Upper
Cylinder
so
that
the
color
of
the
P.C.B.
on
the
Upper
Cylinder
matches
the
color
of
the
P.C.B.
on
the
D.D.
Cylinder
(White
to
White,
Green
to
Green)
(indicated
by
‘+
T°
Marks)
Holes
for
6
Lead
Pins
(AR,
2L.
6R)
Upper
Cylinder
Holes
for
6 Lead
Pins
(6L,
2R.
AL)
(Indicated
by
‘ft
T°
Marks)
6
Lead
Pins
D.D.
Cylinder
Fig.
M4
2.
Tighten
2
Screws
with
Washers
(A)
shown
in
Fig.
M2
and
resolder
the
Lead
Pins
to
the
Head
Relay
Board.
3.Clean
the
Upper
Cylinder
with
a
deerskin
swab
(Cleaning
Stick)
saturated
with
Isopropyl
Alcohol
91%.
See
Caution
under
2.
Procedure
for
Cleaning
Upper
Cylinder
Unit.
Note:
Upon
completion
of
reptacement,
confirm
performance.
'f
required,
perform
“TAPE
INTERCHANGEABILITY
ADJUSTMENT",
especially
“HORIZONTAL
POSITION
ADJUSTMENT
OF
AYC
HEAD”.
=48:-
2.REPLACEMENT
OF
D.D.
CYLINDER
UNIT
Work
with
extreme
care
when
removing
or
feplacing
the
D.D.
Cylinder
Unit.
Do
not
toucn
Video
Head
during
servicing.
1.
Remove
the
Mechanical
Chassis
tram
the
Bottom
Case.
2.
Place
the
Unit
up
side
down.
3.
Remove
Black
Screw
(A)
and
the
Grounding
Plate.
4.
Disconnect
Connectors
P3501
on
the
Main
C.B.A.
and
P1502
on
the
D.D.
Cylinder
Unit.
5.
Remove
3
Screws
(B)
and
then
iitt
the
D.0.
Cylinder
Unit
stowly
from
the
top
side.
Black
Screw
{A}
Grounding
Plate
Bottom
View
Bottom
View
Fig.
M5
~
2
Note
:
Since
there
is
very
jittle
clearance
between
D.0D.
Cylinder
Unit
and
chassis,
remove
the
D.D.
Cylinder
Unit
gently
and
carefully.
8.
Reinstall
the
new
D.D.
Cylinder
Unit
on
the
chassis
by
reversing
the
procedure
previously
described.
Note:
1.
Reinstall
the
new
0.D.
Cylinder
Unit
so
that
the
2
projections
on
the
chassis
meet
the
2
holes
on
lower
surface
of
the
D.D.
Cylinder.
Then
fit
the
new
D.D.
Cylinder
Unit
to
the
chassis
by
turning
it,
refer
to
Fig.
M5
-~
3.
Hoid
the
D.D.
Cylinder
with
extreme
care
so
as
not
to
touch
the
Heads
or
the
tape
path
on
the
Cylinder.
If
they
are
touched
then
clean
it
with
a
deerskin
swab
(Cleaning
Stick)
saturated
with
Isopro-
pyl
Alcohol
91%.
See
Caution
under
2.
Procedure
for
Cleaning
Upper
Cylinder
Unit.
Turn
clockwise
while
looking
at
it
from
the
Bottom
Side
Fig.
MS
-
3
2.
Upon
completion
of
replacement
procedure,
confirm
pertormance.
ff
any
further
maintance
is
required,
perform
"TAPE
INTERCHANGEASILITY”
with
the
alignment
tape
(8
627
000
540).
3.
Adjustment
of
the
Grounding
Plate
Is
required
after
installation.
Refer
to
tem
3.
3.
CONFIRMATION
OF
GROUNDING
PLATE
INSTALLATION
POSITION
Purpose
:
To
optimize
the
position
of
Grounding
Piate.
Symptom
of
Misadjustment
:
May
cause
Cylinder
rotating
buzz.
4.
Remove
the
Mechanical
Chassis
from
the
Bottom
Case.
2.
Stand
the
Mechanical
Chassis
with
left
side
down.
3.
Check
to
see
If
the
Grounding
Piate
is
properly
set
in
a
position
just
less
than
imm
(but
not
more
than
1mm)
as
measured
from
the
center
of
the
plate
to
the
center
of
the
Cylinder
Shaft
as
shown
in
Fig.
M6.
If
required,
adjust
the
Grounding
Plate
position
by
loosening
Black
Screw
(A).
Note:
Never
install
the
Grounding
Plate
in
the
opposite
position
{on
the
front
side
of
the
center
of
the
Cylinder
Shaft),
but
always
within
a
maximum
of
1mm
to
the
rear
side
of
the
center
of
this
shaft.
Black
Screw
(A}—,
Grounding
Plate
Rotating
Direction
Center
4.
POSITION
ADJUSTMENT
OF
TENSION
POST
(PRELIMINARY)
Purpose
:
To
feed
a
constant
tension
to
the
tape
so
that
tape
runs
with
stability,
by
performing
a
preliminary
adjustment.
Symptom
of
Misadjustment
:
1)
If
the
adjusted
value
is
below
the
specification,
the
tape
tension
is
not
sufficient,
thus
causing
a
tape
slack
to
occur.
2)
if
the
adjusted
value
is
above
the
specification,
the
tape
tension
is
too
high,
thus
causing
tape
damage
to
occur,
*
Equipment
Required
:
2MM
Hex.
Wrench
--rerseersserereeeeeeeees
(Purchase
Locally)
1,
Remove
the
Cassette
Up
Unit.
2.Connect
TP6001
and
GND
on
the
System
Control
Section
of
the
Main
C.B.A.
through
a
jumper
wire.
3.
Push
the
PLAY
button
to
complete
foading
operation
sequence.
4.
As
soon
as
loading
is
completed,
disconnect
the
AC
plug.
5.
Insert
the
Hex.
Wrench
(2mm)
into
the
nut
on
the
Tension
Band
Fastener
and
adjust
it
(only
counter-
clockwise)
as
indicated
by
the
arrow
so
that
the
outside
edge
of
the
Tension
Post
lines
up
with
the
outside
of
the
P1
Post
as
shown
in
Fig.
M7
(as
viewed
looking
down
the
+
edge
of
the
Cassette
Side
Plate
(L)
Unit).
6.
Remove
the
Hex.
Wrench
(2mm),
and
the
jumper
{TP6001
-—
GND),
plug
in
AC
Cord,
then
complete
unloading
operation
sequence,
-19-

Outside
of
the
Tension
Post
Qutside
edge
of
the
Tension
Post
5.
MEASUREMENT
AND
ADJUSTMENT
OF
BACK
TENSION
Purpose
:
To
fine
adjust
the
Back
Tension
so
that
the
tape
runs
stable
with
a
constant
tension.
Symptom
of
Misadjustment
:
1)
If
the
tape
tension
is
less
than
the
specified
value,
the
tape
can
not
come
Into
proper
contact
with
the
Video
Heads,
resulting
In
poor
picture
playback.
2)
if
the
tape
tension
is
too
high,
the
tape
will
soon
be
damaged.
A:
Measurement
Procedure
*
Equipment
Required
:
Back
Tension
Meter
(Made
in
U.S.A.,
Purchase
Locally)
VHS
Cassette
Tape
(120
Minute
Tape)
*
Specification
:
23~27g
_
.
Remove
the
Top
Cover.
2.
Play
back
a
cassette
tape
from
its
beginning
for
approx.
10
to
20
seconds,
until
the
tape's
movement
has
stabilized.
.
Insert
Tension
Meter
in
tape
path
and
confirm
reading.
If
the
reading
Is
out
of
specification,
perform
the
adjustment
procedure.
aw
Full
Erase
Head
Fig.
M8
Note:
1.
Make
sure
that
the
three
probes
of
the
meter
are
ali
in
solid
contact
with
tape,
but
out
of
contact
with
any
other
parts
while
measuring.
2.
It
is
recommended
that
measurements
be
taken
three
times
because
the
tension
meter
is
very
sensitive
to
external
vibrations.
B
:
Adjustment
Procedure
1.
Remove
the
cassette
tape.
Then
re-position
Tension
Spring
on
the
Tension
Arm
Sase
Teeth
in
either
direction
as
indicated
by
the
arrow
to
obtain
the
specified
tension.
2.
Re-position
Tension
Spring
toward
front
side
to
increase
tension,
toward
rear
side
to
decrease
tension.
3.
Reinstall
a
cassette
tape
and
verify
tension
with
the
meter
once
again.
4.
Reinstall
the
Top
Cover,
Note
:
If
the
specified
tension
is
not
obtained
even
if
the
Tension
Spring
is
re-positioned,
replace
the
Tension
Spring,
replace
the
Tension
Band,
clean
the
Reet
Table
or
make
sure
if
there
is
no
dust
between
Tension
Band
and
Reel
Table.
“96-2
Fig.
M9
6.
HEIGHT
ADJUSTMENT
OF
REEL
TABLES
Purpose
:
To
properly
align
the
height
of
the
tape
wound
on
the
Supply
and
Take-
Up
Reels.
Symptom
of
Misadjustment
:
If
the
height
of
the
tape
is
not
properly
aligned,
the
tape
will
eventually
be
damaged.
*
Equipment
Required
:
Post
Adjustment
Plate
0.0...
Reel
Table
Height
Fixture
#
Specification
---+-+-:sseesecseeeesececseeceeceseeeesenees
1.
Remove
the
Cassette
Up
Unit.
2.Place
the
Post
Adjustment
Plate
over
the
reels,
and
put
the
fixture
on
it.
Set
the
fixture
to
zero
"0*
and
ensure
that
the
foot
of
the
fixture
touches
the
cut-
out
portion
of
the
plate.
8
619
497
807
8
619
497
806
Fig.
M10-1
3.
Then
measure
the
top
portion
of
the
Reei
Table
and
compare
the
difference
against
the
result
of
the
measure-
ment
taken
in
the
above
step.
Do
the
same
for
the
other
reel
table.
=D
4e=
8
619
497
807
8
619
497
806
Reel
Table
Fig.
M10-2
4.
If
the
difference
is
more
than
0.1mm(higher
or
tower),
adjust
the
heignt
of
reel
table
to
obtain
the
specified
height.
5.
For
adjustment,
change
the
poly
washer
located
under
the
reel
table.
(The
washer
is
available
in
only
one
size
of
0.13mm
thick)
6.
Reinstall
the
Cassette
Up
Unit
and
the
cabinet
parts.
7.
CONFIRMATION
OF
TAKEUP
SHAFT
HOLOER
ASS'Y
INSTALLATION
POSITION
Purpose
:
To
properly
set
the
Takeup
Shaft
Holder
ASS'Y
position.
Symptom
of
Misadjustment
:
The
tape
will
be
damaged.
1.
Lift
the
Mechanical
Chassis
slightly
from
the
Bottom
Case.
Turn
Center
Pulley
Unit
clockwise
until
post
2
and
3
are
partially
loaded
(Refer
to
SERVICE
NOTES
AND
CAUTIONS
Item
H).
2,
Check
to
see
if
the
Takeup
Shaft
Holder
ASS'Y
is
properly
set
in
a
position
just
fess
than
or
equal
to
0.2mm
as
measured
from
the
right
side
to
the
center
of
the
Shaft
Holder
Plate
as
shown
in
Fig.
M11.
If
requirea,
adjust
the
Takeup
Shaft
Holder
ASS‘Y
position
by
loosening
Biack
Screw
with
Washer(A).
Note:
Never
install
the
Takeup
Shaft
Holder
ASS'Y
in
the
Opposite
position(on
the
left
side
of
the
center
of
tne
Shaft
Holder
Plate),
but
always
within
a
maximum
of
0.2mm
to
the
right
side
of
the
center
of
this
plate.
|
f\
Cd
7
Takeup
Shaft
®)
>
Right
Sie
Holder
ASS'Y
Black
Screw
with
Washer
{A)
Shaft
Halder
Plate
Loaded.
oF
(Approx.
20mm)
wae————Center
of
eas
3
pial
2mm
=
Takaup
Shaft
elder
Flate
—
ae
Hoider
assy
oy
Fig.
M11

8.
HEIGHT
AOJUSTMENT
OF
TAPE
GUIDE
POSTS
(PRELIMINARY
ADJUSTMENT)
*
Equipment
Required
:
Lock
Screw
Wrench
..
Post
Adjustment
Piate
..
Reel
Table
Height
Fixture
Post
Adjustment
Screwdriver...
8-A.
HEIGHT
ADJUSTMENT
OF
P2
AND
P3
Purpose
:
To
properly
align
the
position
of
the
tape
with
the
Cylinder
Lead
so
that
the
tape
runs
with
stability.
ww.
(8
619
499
428)
....(8
619
497
806)
....
(8
619
497
807)
...
(8
619
498
004)
Symptom
of
Misadjustment
:
1)
Since
the
Envelope
Waveform
Signal
cannot
be
tracked
properly,
the
Playback
picture
will
be
poor.
2)
Since
the
tape
will
not
run
stable,
the
tape
will
_.
eventually
be
damaged.
3)
Tape
interchangeability
is
poor.
1.
Remove
the
Cassette
Up
Unit.
Then
install
the
Adjust-
ment
Plate.
8
619 497
806
Fig.
M12-1
2.
First,
Jower
all
posts
to
match
the
height
condition
as
shown
in
Fig.
M12-
2.
The
upper
edge
of
the
jower
tape
guide
on
each
post
should
be
below
the
bottom
of
the
foot.
Loosen
Black
Lock
Screws
located
at
lower
portion
of
posts
(P2
&
P3)
using
Lock
Screw
Wrench,
then
turn
the
posts
with
Post
Adjustment
Screwdriver,
290
a
8619
497
807
(Fixture)
(Adjustment
Plate)
8
619
497
806
X
First
Lower
i
then
raise
post
Upper
edge
of
Lower
Tape
Guide
Black
Lock
Screw
Fig.
M12-2
3.
Place
the
fixture
on
the
Adjustment
Plate
and
fit
the
foot
to
the
Adjustment
Plate
as
shown
in
Fig.
M12-
2.
(The
foot
of
the
fixture
should
be
fully
lowered
until
it
touches
the
plate.)
4.
Set
the
fixture
to
zero
“0”
and
slowly
raise
the
post
until
it
just
touches
the
foot.
When
the
foot
touches
the
post,
it
should
fit
as
shown
in
Fig.
M12-
3
(b).
For
adjustment
of
P2
and
P3,
use
the
Post
Adjustment
Screwdriver.
Back
View
ty
Fig.
M12-3
Post Side
View
Foot
(a)
NO
GOOD
Note:
Upon
completion
of
adjustment,
tighten
the
Black
Lock
Screws
on
P2
and
P3
using
the
Lock
Screw
Wrench.
8-B.
HEIGHT
ADJUSTMENT
OF
P5
ARM
UNIT
Purpose
:
To
properly
align
the
Phase
and
Speed
Controls
during
the
CUE/REVIEW
Modes
and
perform
the
CUE/REVIEW
operations
without
any
small
additional
noise
in
the
picture.
Symptom
of
Misadjustment
:
1)
Noticeable
noise
appears
in
the
picture.
2)
The
tape
will
eventually
be
damaged.
*
Equipment
Required
:
Post
Adjustment
Plate
...
Reel
Table
Height
Focur
Nut
Driver
(5.5
mm)
...(8
619
497
806)
(8
619
497
807)
.
Purchase
Locally
*
Specification
:
0
{+0,
—
0.08)
mm
PS
Arm
Unit
§.5
mm
Nut
8
619
497
807
8
619
497
806
O(+0.
-0.08)
mm
Fig.
M12-4
1.
Place
the
Post
Adjustment
Plate
over
the
Reels,
and
put
the
Fixture
on
it.
Set the
Fixture
to
Zero
“0”
when
the
foot
just
touches
the
Post
Height
Adjustment
Piate.
2.
Slightly
raise
the
P5
post
above
the
piate
by
turning
the
5.5mm
Nut
counterclockwise.
Place
the
foot
on
the
post
as
shown
In
Fig.
Mi2-
4.
3.
Then
stowly
turn
the
5.5mm
Nut
clockwise
until
the
fixture
reads
the
specified
height.
4.
Remove
the
Post
Adjustment
Plate.
Reinstall
the
Cassette
Up
Unit.
Note:
Upon
completion
of
above
procedure,
play
back
the
tape
and
confirm
that
the
tape
runs
properly
without
curling
between
lower
and
upper
limits
of
P5
Post.
Also
confirm
that
the
tape
is
running
smoothly.
Hf
adjustment
Is
required,
slightly
turn
the
5.5mm
Nut
until
the
curling
smoothes
out.
9.
TAPE
INTERCHANGEABILITY
ADJUSTMENT(FINAL
ADJUSTMENT)
Note:
.
To
perform
these
adjustment/confirmation
procedures,
make
sure
that
the
Tracking
Control
is
set
in
the
Neutral
position.
*
Equipment
Required
:
Dual
Trace
Oscilloscope
PAL
VHS
Alignment
Tape
(8
627
000
540)
Post
Adjustment
Screwdriver
(8
619
498
004)
H-Position
Adjustment
Fixture
.
(8
619
498
003)
Lock
Screw
Wrench
...(8
619 499
428)
Nut
Driver
(7
Mm)
......sscscccssscessereseseneeereee
Purchase
Locally
9-A.
CONFIRMATION
OF
TAPE
TRAVEL
Purpose
:
To
make
sure
that
the
tape
run
is
well
stabilized,
Symptom
of
Misadjustment
:
lf
the
tape
travels
with
instability,
the
tape
wii
be
damaged.
1.
Play
back
a
cassette
tape
and
confirm
that
the
tape
travels
without
curling
at
the
upper
and
lower
guides
on
posts
P2
and
P3.
-23-
Fig.
M13
2.
if
curling
is
apparent,
adjust
the
height
of
posts
by
turning
the
top
of
post
with
the
Post
Adjustment
Screwdriver.
(for
P2
&
P3)
Note:
Before
turning
P2
and
P3,
slightly
loosen
the
Black
Lock
Screw
using
the
Lock
Screw
Wrench.
9-B.
CONFIRMATION
OF
A/C
HEAD
HEIGHT
Purpose
:
To
make
sure
the
tape
runs
properly
along
the
Control
Head.
Symptom
of
Misadjustment
:
If
the
control
signal
is
not
properly
picked
up,
Servo
Operation
can
not
be
achieved.
This
confirmation
is
required
when
the
A/C
Head
is
replaced
and
for
a
preliminary
height
adjustment.
For
final
adjust-
ments,
perform
items
9-C
and
9-
D.
1,
Looking
at
the
lower
edge
of
the
Control
Head
with
the
7120
tape
in
motion,
ensure
that
the
lower
edge
of
the
tape
runs
0.25mm
above
the
lower
edge
of
the
control
head.
If
it
doesn't,
turn
7mm
Nut
(A)
slightly
in
either
direction
as
necessary
to
correct
it.
Turn
clockwise
to
lower
the
head
and
counterclockwise
to
raise
it.

Black
7mm
Nut
(A)
Screw
(C)
Control!
Head
Lower
Edge
of
Tape
Black
Line
bower
Edge
Screw
(B)
of
Control
Head
Fig.
M14
9-C.
CONFIRMATION
OF
TILT
OF
A/C
HEAD
Purpose
:
To
confirm
that
the
tape
run
is
well
stabilized.
in
particular,
confirm
that
the
tape
properly
picks
up
the
Audio
Signal
at
the
upper
part
and
the
Controt
Signal
at
the
jower
part.
Symptom
of
Misadjustment
:
If
the
tilt
of
the
A/C
Head
is
poorly
adjusted,
the
tape
will
be
eventually
damaged.
1.
Play
back
a
T120
Cassette
tape
and
confirm
that
the
tape
runs
properly
between
lower
and
upper
Iimits
of
P4
post.
Also
confirm
that
the
tape
is
running
smoothly.
2.1f
adjustment
Is
required,
turn
Black
Screw
(C),
in
Fig.
M14,
clockwise
until
curling
Is
apparent
at
lower
edge
of
P4.
Then
turn
Black
Screw
(C)
counterclockwise
until
the
curling
smoothes
out.
Tape
Running
A/C
Head
in
Oirection
Condition
ae
tilted
Condition
turn
for
correction
9-D.
HEIGHT
AND
AZIMUTH
ADJUSTMENT
OF
AIC
HEAD
Purpose
:
To
adjust
the
position
and
height
of
the
A/C
Head
so
that
it
meets
the
tape
tracks
properly,
Symptom
of
Misadjustment
:
If
the
position
of
the
A/C
Head
is
not
properly
adjusted,
the
Audio
S/N
Ratio
Is
also
poor.
1,
Connect
the
oscilloscope
to
the
audio
output
jack
on
the
rear
of
the
deck.
2.
Play
back
the
monoscope
portion
(6
kHz,
Mono}
of
the
alignment
tape
(8
627
000
540).
3.
Adjust
Black
Screw
(B)
on
the
head
base
in
Fig.
M14
so
that
the
output
level
is
at
a
maximum.
6kHz-Audio
Maximum
Fig.
M16
4.
Readjust
7mm
Nut
(A)
shown
in
Fig.
M14
for
maximum
output.
5.
Disconnect
the
oscilloscope.
9-E£.
HORIZONTAL
POSITION
ADJUSTMENT
OF
A/C
HEAD
Purpose
:
To
adjust
the
Horizontal
Position
of
the
A/C
Head.
Symptom
of
Misadjustment
:
If
the
Horizontal
Position
of
the
A/C
Head
is
not
Properly
adjusted,
maximum
envelope
can
not
be
obtained
at
the
Neutral
Position
of
the
Tracking
Control
Circuit.
Piace
a
jumper
between
TP6003
and
GND
on
the
System
Control
Section
of
the
Main
C.B.A.
to
defeat
Auto
Tracking.
1.
Eject
the
tape
and
reinsert
it
again,
this
will
access
the
Neutral
Tracking
position.
Connect
the
oscilloscope
to
TP3002
on
the
Video
Signal
Process
Section
of
the
Main
C.B.A,
Use
TP6205
as
a
trigger.
2.
Play
back
the
monoscope
portion
of
the
alignment
tape
(8
627
000
540)
and
confirm
that
the
RF
envelope
appears,
as
in
Fig.
M
18
-
1.
3.
If
adjustment
is
requiréd,
set
the
H
-
Position
ADJ.
Fixture
into
the
slot
of
the
Adjustment
Nut
and
slowly
turn
either
right
or
left
so
that
the
envelope
is
at
a
maximum.
-24-
4.
Before
finding
the
center
of
the
maximum
period
of
the
envelope,
rotate
the
Adjustment
Nut
back
and
forth
slightly
to
confirm
the
limits
on
either
side
of
the
maximum
period.
5.
Push
the
Tracking
Control
UP
Button
(on
the
Front
Panel
Ass‘y)
several
times
(count
the
number
of
timas
pushed)
until
the
maximum
envelope
is
reduced
to
1/2.
6.
Re
-
set
the
tracking
to
the
neutral
position
by
ejecting
the
tape
and
reinserting
it.
Push
the
Tracking
Control
DOWN
Button
{on
the
Front
Panel
Ass'y)
several
times
(count
the
number
of
times
pushed)
until
the
maximum
envelope
is
reduced
to
1/2.
7.
if
the
number
of
pushes
Is
not
the
same,
then
rotate
the
adjustment
nut
back
and
forth
stightly
to
find
the
center
point.
Then
repeat
the
above
procedure
until
the
center
point
is
determined.
Adjustment
Nut
\
Fig.
M17
9-F.
CONFIRMATION/ADJUSTMENT
OF
ENVELOPE
OUTPUT
Purpose
:
To
achieve
a
satisfactory
picture
and
secure
precise
tracking.
Symptom
of
Misadjustment
:
if
the
envelope
is
output
poorly,
much
noise
will
appear
in
the
picture.
Then
the
tracking
will
lose
precision
and
the
Playback
picture
will
be
distorted
by
any
slight
variation
of
the
tracking
control
circuit.
Place
a
jumper
between
TP6003
and
GND
on
the
System
Control Section
of
the
Main
C.B.A.
to
defeat
Auto
Tracking.
1.
Eject
the
tape
and
reinsert
it
again,
this
will
access
the
Neutral
Tracking
position.
Connect
the
oscilloscope
to
TP3002
on
the
Video
Signal
Process
Section
of
the
Main
C.B.A.
Use
TP6205
as
a
trigger.
2,
Play
back
the
monoscope
portion
of
the
alignment
tape
(8
627
000
540)
and
adjust
the
height
of
posts
P2
and
P3
watching
the
scope
display
so
that
the
envelope
becomes
as
flat
as
possible.
(VIAN
-
max
2
0.7,
V2/V
-
max
2
0.8)
If
adjustment
Is
required,
turn
top
of
post
with
Post
Adjustment
Screwdriver.
For
adjustment
of
P2
and
PS,
refer
to
Item
9-
A
and
It's
Note.
-25-
Theoretical
Waveform
ef
fe
i
Viv
~
max
0.7
V2/V
~
max
2
0.8
Fig.
M18-1
3.
When
the
scope
display
is
as
shown
in
Fig.
M18
-
2,
adjust
the
height
of
P2
so
that
the
waveform
looks
like
Fig.
M18-
4.
Dropping
envelope
level
at
the
beginning
of
track
(P2)
Fig.
M18-2
4,
When
the
scope
display
is
as
shown
in
Fig.
M18~
3,
adjust
the
height
of
P3
so
that
the
waveform
looks
like
Fig.
M18~
4,
Dropping
envelope
level
at
the
end
of
track
(P3)
Fig.
M18-3
5.
When
P2
and
P3
are
adjusted
properly,
there
is
no
Envelope
Drop
at
the
beginning
or
end
of
the
track
as
shown
in
Fig.
M18~-
4.
Remove
the
jumper
wire.
Envelope
is
adjusted
properly
{No
Envelope
Orop)
en
Fig.
Mi8-4

Note:
Upon
completion
of
adjusiment
of
P2
and
P3,
tighten
the
Black
Lock
Screws
on
P2
and
P3
using
the
Lock
Screw
Wrench.
Then
confirm
the
Horizontal
Position
of
A/C
Head
by
pushing
the
Tracking
Contro!
Up
or
Down
Buttons
(on
the
Front
Panei
Ass’y)
alternately
to
check
the
symmetry
of
the
envelope.
And
if
required,
perform
“Horizontal
Position
Adjustment
of
A/C
Head”.
10.
ADJUSTMENT
OF
FG
HEAD
GAP
Purpose
:
To
properly
pick
up
the
FG
Signal.
Symptom
of
Misadjustment
:
lf
the
FG
Signal
is
not
properly
picked
up,
Servo
Operation
can
not
be
achieved.
*
Equipment
Required
:
Oscilloscope
Fine
Adjustment
Screwdriver
..............0
(8
619
497
816)
*
Specification
:
0.1
~
0.13
mm
1.
Remove
the
Mechanical
Chassis
from
Bottom
Case.
And
then
piace
the
Mechanical
Chassis
up
side
down
(Refer
to
Service
Notes
and
Cautions
Item
A).
2.
Slightly
loosen
2
Black
Screws
(A)
and
set
the
Fine
Adjustment
Screwdriver
Into
Hole
(B)
as
shown
in
Fig.
M19.
Turn
screwdriver
clockwise
until
the
FG
Head
touches
the
rotor.
Then
turn
it
slightly
counterclockwise
to
the
clearance
as
specified.
3.
Tighten
2
Black
Screws
(A)
in
Fig.
M19.
Screw
(C)
0.1
-
0.i3m
Capstan
Stator
a
Capstan
Rotor
Capstan
Belt
Unit
Fig.
M19
Note:
1.
Do
not
touch
the
outside
circumference
of
the
rotor
surface
with
any
tool
and
keep
magnetic
material
away
from
the
rotor
magnet
(especially
metal
particles).
2.
Upon
completion
of
above
procedure,
confirm
that
the
FG
Head
output
level
is
more
than
10mVp-
p,
see
preparation
below.
If
the
level
is
not
more
than
10mVp
-
p,
re-
adjust
the
FG
Head
Gap
so
that
the
FG
Head
output
ievel
is
more
than
10MVp
-
p.
(Preparation)
1)
Supply
a
Video
Signal
to
the
Video
Input
Jack
on
the
rear
of
the
deck.
2)
Insert
a
cassette
tape
and
place
the
unit
in
SLP
recording
Mode.
3)
Connect
the
oscilloscope
to
the
terminals
of
the
FG
Head.
11.
REPLACEMENT
OF
CAPSTAN
ROTOR
OR
STATOR
UNIT
1.
Remove
the
Capstan
Belt
(Fig.
M19).
2.
Remove
Screw
(C)
and
the
Capstan
Stator
Stopper
in
Fig.
M19.
3.
Carefully
pull
out
the
Capstan
Rotor
Unit,
taking
care
so
as
not
to
lose
the
2
Dust
Seals
as
shown
in
Fig.
M20.
Thrust
Adjust
Screw
Dust
Seals
CAPSTAN
STATOR
Coil
CAPSTAN
ROTOR
Magnet
Capstan
&
Stator
Unit
Capstan
Holder
Boss
Centered
Black
Screws
(D)
Fig.
M20
4.
Unplug
Connector
P1503
on
the
Capstan
Stator
Unit.
Remove
3
Black
Screws
(D)
and
then
itt
the
Capstan
Stator
Unit.
5.
Replace
the
new
Capstan
Stator
Unit
and
then
tighten
3
Black
Screws
(D).
Plug
Connector
P1503
on
the
Capstan
Stator
Unit.
Note:
When
reinstalling
the
Capstan
Stator
Unit,
the
Capstan
Holder
Boss
must
be
centered
within
the
hole
in
the
Capstan
Stator
Unit.
6.
Before
replacement
of
new
Capstan
Rotor
Unit,
loosen
the
Thrust
Adjust
Screw
completely.
7.
Replace
the
new
Capstan
Rotor,
carefully
inserting
the
2
Dust
Seais
as
shown
in
Fig.
M20.
Note:
1)
The
Capstan
Rotor
Unit
ts
supplled
as
a
replace-
ment
part
in
a
complete
unit
with a
spring
loaded
Capstan
Pulley.
Do
not
remove
the
Retaining
Ring
on
the
Capstan
Pulley
of
the
Capstan
Rotor
Unit.
2)
Hold
the
new
Capstan
Rotor
Unit
firmly,
when
replacing
It,
so
the
rotor
will
not
be
pulled
toward
the
stator
too
quickly
(due
to
magnetic
force),
Placing
some
paper
on
the
coils
before
rotor
installation
may
prevent
accidental
damage
to
the
coils
if
the
above
caution
is
not
observed.
3)
During
replacement,
do
not
touch
the
Capstan
Shaft
with
any
hard
material
like
drivers
or
tweezers.
8.
Re-
instal!
the
Capstan
Stator
Stopper
with
Screw
(C),
in
Fig.
M19.
+++sADJUSTMENT
OF
THRUST
ADJUST
SCREW
AND
DUST
SEALS:
---
9.
Re-
install
the
Capstan
Belt
and
while
exerting
pressure
to
turn
the
Center
Pulley
Unit,
tighten
the
Thrust
Adjust
Screw
slowly
until
the
Capstan
Rotor
just
starts
turning.
10.
At
the
point
where
the
Capstan
Rotor
starts
turning,
tighten
the
Thrust
Adjust
Screw
another
180°
CW.
11.
Upon
completion
of
above
procedure,
confirm
that
these
2
Dust
Seals
are
positioned
as
shown
in
Fig.
M21.
And
then,
wipe
off
the
Capstan
Shatt
to
remove
oil,
grease
and
dust.
Fig.
M21
OF

12.
DISASSEMBLY/ASSEMBLY
PROCEDURES
OF
MECHANISM
This
procedure
starts
with
the
condition
that
the
cabinet
parts,
Cassette
Up
Unit
and
Mechanical
Chassis
have
been
removed.
Also,
all
the
following
procedures
for
adjustment
and
part
replacement
should
be
performed
in
STOP
Mode.
When
reassembling,
perform
the
step(s)
in
the
reverse
order.
STEP
{STAR
REMOVE
ILOC.
{-!NG
PART
No.
=
|No.
*
UNHOOK/UNLOCK
|
|
PINCH
CAM
CAP
ea
[RELEASE
/UNPLUG
PRESSURE
ROLLER
:
ARM
UNIT
t
JUNSOLDER
PRESSURE
ROLLER
:
LIFT
CAM
:
PRESSURE
H
See,
Alignment
Procedures
for
Mechanism
ltem
13-8.
(+)
See,Alignment
Procedures
for
Mechanism
REDUCTION
GEAR:
tem
13-2.
See,
Fig.
A2.
(+}
See,
Alignment
Procedures
for
Mechanism
item
13-6.
2(C-2),82(P-1).#(P-2)
|
1.)
See,
Setting
Condition
in
Fig.
OMS.
<
Note
2
>
$(P~3),¢(L-2),(R-1)
{+}
See,
Position
Adjustment
of
Tension
Post.
ADJUSTMENT
#CONDITION
=
ea
4
!
SETTING
PLATE
;
SWITCH
CAM
GEAR
T
TENSION
BAND
ig
ASS'Y
:
}@|
2
|
PSSECTORGEAR
:T
PS
ARM
UNIT
tT
[®@
|
4
|
TAKEUP
REEL
TABLE!
See,
Alignment
Procedures
lor
Mechanism
ltem
13-7.
(+)
STOP
<
Note
3
>
See.Height
Adjustment
of
PS
Arm
Unit.
t(L-3}
<Note2>
ovolcolo’g
|
22
[23]
2
[2/2
(82/82
|22
A=[|32[la=
(N-1),(W-
1),
#(P-4)
4
(R-2)
(+)
<Note
5
>
See,Height
Adjustment
of
Reel
4
SUPPLY
REEL
TABLE:
fel
lime
ie
Oa
ee
See,
Setting
Condition
in
Fig.
OMB.
fof
«
CENTER
PULLEY
Capaeabek
(+)
See,
Fig.
DMO.
<
Note
2
>
ls
|
aT
See
a
ne
Aves
Procedures
for
Mechanism
SPAN
LIMITER
:B
SUN
GEAR
8B
12.1
|
MAINCAMGEAR
=:
B
DETENT
ARM
;
(S~
2},3(R-5),(W-
2)
[en
Dee
ee
(+)
See,
Alignmant
Procedures
for
Mechanism
W-3)
tem
13-4.
(+)
See,
Alignment
Procedures
for
Mechanism
tems
13-2
and
13-3.
(+}
See,
Alignment
Procedures
for
Mechanism
tem
13-1,
ce)
|
eagles
it
SUB
CAM
GEAR
i
RETAINER
GEAA
:
B
{+)
See,
Alignment
Procedures
tor
Mechanism
ASS'Y
:
tem
13-3.
:
(+)
See,
Alignment
Procedures
for
Mechanism
17
|
SECTOR
GEAR
UNIT
8
ltem
13-5
.<
Note
6
>
og
=e
2
-28-
REMOVAL
INSTALLATION
STAR
REMOVE
LOC.
|-ING
PART
*
UNHOOK
ADJUSTMENT
No.
JUNLOCK/RELEASE
#CONDITION
JUNPLUG
/UNSOLDER
@
|
OADING
CAM
GEAR:
8
{+)
See,
Alignment
Procedures
for
ui
i
RING
GEAR
:
B
(+)
See,
Alignment
Procedures
for
:
Mechanism
Item
13-4.
RELEASE
LEVER
i
UNIT
4
|
@
|
(+}
See,
Setting
Condition
in
Fig.
OM12.
INTERMEDIATE
Hy
|
|
GEAR
i8
B(L—
4),
(WHA)
<
Note
2
>]
cee
ecseesseeeeeercerenee
|
@
|
27
fonveoisk
==
|
DISK
8
TEP
jo.
LOADING
ARM
—
S
B
UNIT
S$
Ne
®
#{L-5)
H
(+)
See,
Alignment
Procedures
for
LOADING
ARM-T
Mechanism
Item
13-5.
UNIT
:
8
#(L-6)
#(C-5)
<Note2>
+(C-8)
<
Note
2>
®@
SUPPLY
REEL
GEAR
:
UNIT
H
TAKEUP
REEL
GEAR
:
,
UNIT
:
PLAY
ARM
UNIT
8
|
@
|
15
|
STOPPER
BASE
:
ASSY
i
|
@
|
2
|
TENSION
ARM
BASE
i
T
(8-5),
(+)
See,
Measurement
and
Adjustment
of
UNIT
:8
#(L-8)
Back
Tension.
|@|
>
|
peda
HOLDER
;
Tt
Jom
[as
(+)
See,
Replacement
of
Capstan
Rotor
or
:
Stator
Unit.
MODE
SELECT
:
(S-7)
See.
Ali
>
it
.
Alignment
Procedures
for
@
|
2
|
AIC
HEAD
UNIT
i
T
Ea
(N-2).(W-
3),
#(P-5)
(+)
See,
Confirmation
of
A/C
Head
Height.
ele
larc
ite
|
———
—|
:
*
Connections
$
*
Connections
PLAY
SET
ARM
B
SOLENOIDLEVER
:
@
|
an
[SCLENOIDUEVER
Ty
Tomson
|e)
enn
LOADING
POST
BASE:
[a
SRE
POTESE
+
[ou
[sere
woe
LOADING
POST
BASE:
Spee
a
ier
|
@
| +
|
D.0
CYLINDER
UNIT
;
8
ome
|
as-1)
See,
Replacement
of
D.0.
Cylinder
Unit.
SUB
LOADING
ARM:
UNIT
iT
|
ome
$(P=7),
C(L=10}
|
cee
teeeessssssseeneree
List
of
Abbreviations:
T=
Top;
B=
Bottom
(R-
1)=Retaining
Ring
(R-1);
2(P-1)=2
Springs
(P-1);
(S-1)=Screw
(S-
1);
(W~
1)=Washer
(W-
1);
3(S-5)=3
Screws
(S-5);
(C-
1)=Cut
Washer(C-
1);
(N-1)=Nut
(N-
1);
(L-
1)=Locking
Tab
(L=1)
(+)
:
Refer
to
Exploded
Views
for
Lubrication
information.
-29-

A/C
Head
Spring
Hooking
Position
N~2)
@)
@)
G7)
(2)
(N-2)
(P-5)
1}
(HeS)
Ansicht
von
oben
Top
view
(L-2)
(R-1)
Projection
on
Side
View
the
Chassis
<
Mode
Select
Switch
Projection
of
the
PS
Arm
Unit
Fig.
OM4
Main
Brake
Springs
Hooking
Position
Ansicht
von
unten
Bottom
view
Capstan
Belt
Projection
on
the
Chassis
(C-1)
ey
(P=8)
Bottom
View
Z
Setting
Condition
Setting
Condition
Pins
of
Main
Stopper
Base
ASS'Y
Setting
Condition
Fig.
OMB
Fig.
DMS
-
30-
ac

Fig.
OM9
(L-6)
(L-5)
Tab
(A)
Tab
(A}
le
Chassis
Solenoid
(0/7/77
Lever
Unit
30%
Unsolder
{S-8)
Unsolder
Unsolder
Fig.
OMI4
(S-91—_F
Fig.
DMI5
Unsolder
Unsolder
ae
Fig.
DM16
Reference
<Notes>
in
Table
12:
1,
Wiggle
it
sideways
to
property
seat
the
Pressure
Roller
Arm
Unit.
2.
This
cut
washer
is
not
reusable.
If
removed,
install
a
new
one.
3.
Install
the
P5
Arm
Unit
so
that
the
projection
of
the
PS
Arm
Unit
is
positioned
in
back
of
the
projection
on
the
chassis,
as
shown
in
Fig.
DM7.
4.
Install
the
Cam
Follower
Arm
Unit
so
that
the
pin
on
the
Cam
Follower
Arm
Unit
meets
the
Inner
slot
of
the
Main
Cam
Gear.
5.
When
reinstalling
the
Supply
and
Takeup
Reel
Tables,
clean
the
rotating
surface
of
them
with
a
soft
cloth,
6.
Ensure
the
Tape
Tension
Arm
is
positioned
as
shown
in
Fig.
DM1
for
STOP
Mode.

13.
ALIGNMENT
PROCEDURES
OF
MECHANISM
The
mechanism
of
this
model
is
mostly
engaged
to
the
System
Control
Circuit,
through
the
mode
select
switch.
Therefore
the
relation
between
the
mode
select
swilch
and
the
cam
gear
decides
all
further
mechanical
movement
of
the
mechanical
paris
such
as
levers,
gears,
rollers
and
so
on.
For
specific
removal
and
instailation
procedures,
refer
to
the
Disassembly/Assembly
Procedures
on
page
28.
Through
Pressure
Reduction
Gear
lf
these
parts
are
nol
propertly
aligned
and
only
off
by
one
tooth,
the
«rit
will
be
unloaded
or
stopped.It
may
result
in
damage
to
the
mechanical
or
electiical
parts.
The
overall
mechanical
condition
of
the
bottom
and
top
views
are
shown
in
Fig.
At
and
Fig.
A2.
This
mechanical
adjustment
is
performed
in
the
Half
Load
Stop
(FF/REW)
Mode.
The
detail
of
mechanical
condition
will
be
described
later.
Clutch
Disk
ASS‘Y
<ADJUSTMENT
MODE
>
STOP_MODE
Sector
Gear
Unit
Loading
Arm-T
Unit
Loading
Cam
Gear
Loading
Arm-S
Unit
Retainer
Gear
ASS'Y
Main
Cam
Gear
Detent
Arm
Through
tloles
Ring
Gear
Sub
Cam
Gear
Fig.
Al
Bottom
View
of
Overall
Mechanical
Condition
Mode
Select
Switch
Pressure
Roller
Lift
Cam
Pressure
Reduction
Gear
Sub
Cam
Gear
Fig.
A2
Top
View
of
Overall
Mechanical
Condition
Important
Note
:
All
through
hole
alignments
must
be
made
precisely
so
that
the
complete
procedure
will
exactly
align
the
gear
teeth.
If
the
alignment
is
off
by
only
one
tooth
then
the
mechanism
will
not
operate
properly.
13-1.
ALIGNMENT
PROCEDURES
OF
SUB
CAM
GEAR,
RING
GEAR
AND
DETENT
ARM
1.
Install
the
Ring
Gear
so
that
the
holes
on
Ring
Gear
are
exacily
in
line
with
the
holes
on
chassis
as
shown
Fig.
A3.
2.
Install
the
Sub
Cam
Gear
so
that
the
hole
on
Sub
Cam
Gear
is
exactly
In
fine
with
the
hole
on
chassis,
at
the
same
time,
the
small
hole
(located
just
outside
of
large
hole)
on
Sub
Cam
Gear
is
exactly
in
line
with
the
hoie
on
Ring
Gear.
3.
Instatl
the
Detent
Arm.
-34-
13-3.
ALIGNMENT
PROCEDURES
OF
MAIN
CAM
GEAR,
RETAINER
GEAR
Capstan’
Through
*
Hele
She
ton
‘
Si
(Large
Hole}—~
small
tlole
ey
fe
ASS’Y
AND
LOADING
CAM
GEAR
Holes
Through
“4
ee
1.
Install
the
Retainer
Gear
ASS'Y
so
that
the
Holes
on
the
i
Retainer
Gear
ASS'Y
aligns
with
Holes
on
the
Ring
Gear
aN
i
oe
and
Holes
on
the
Chassis.
To
lacititate
aligning
the
three
Tale
holes
use
a
smai!
hex.
wrench
or
a
metal
pin.
2.
Install
the
Loading
Cam
Gear
so
that
the
Hole
on
the
Loading
Cam
Gear
aligns
with
the
Hole
on
the
Retainer
oe
Gkar
Gear
ASS'Y.
|
3.
Confirm
that
the
Hole
on
the
Main
Cam
Gear
aligns
with
Da
|
Arm
FB
Cie
the
Hole
on
the
Retainer
Gear
ASS'Y.
Tab
Position
Chassis
Retainer
Gear
ASS‘Y
Through
~~
zal
joles
Ring
Gear
‘o
ZZZZZE
,
WHE,
_
ANE
Fig.
A3
Chassi
13-2,
ALIGNMENT
PROCEDURES
OF
MAIN
CAM
GEAR
AND
Capstan
PRESSURE
REDUCTION
GEAR
Through
Holes
1.
install
the
Pressure
Reduction
Gear
from
top
side
of
chassis.
2.
Install
the
Main
Cam
Gear
onto
the
Sub
Cam
Gear
so
inat
the
smail
hole
on
Main
Cam
Gear
Is
exactly
In
line
with
the
small
hole
on
Pressure
Reduction
Gear.
And
the
large
hole
on
Main
Cam
Gear
is
tn
line
with
the
large
hole
on
Sub
Cam
Gear
as
shown
in
Fig.
A4.
Pressure
Reduction
Gear
Loading
13-4.
ALIGNMENT
PROCEDURES
OF
SUN
GEAR
AND
CLUTCH
DISK
ASS’Y
1.
install
the
Sun
Gear
so
that
the
Holes
on
the
Sun
Gear
aligns
with
the
through
Holes
on
the
Retainer
Gear
ASS'Y,
Ring
Gear
and
chassis.
To
facilitate
aligning
the
four
holes
use
a
small
hex.
wrench
or
a
metal
pin.
Cam
Gear
2.
Install
the
Clutch
Disk
ASS'Y
so
that
the
small
Hole
on
the
Clutch
Disk
ASS'Y
aligns
with
Hole
on
the
Sun
Gear.
Through
Holes
(Large
Hole)
Fig.
A4
-35-

13-5.
ALIGNMENT
PROCEDURES
OF
Capstan
LOADING
ARM-T
UNIT,
Se
SupsGear
LOADING
ARM-
S
UNIT
AND
SECTOR
GEAR
UNIT
Cut
Washer
1.
Set
the
P2
and
P3
posts
to
unloading
position,
then
install
the
Loading
Arm-
T
Unit
and
S$
Unit
so
that
the
hole
on
Loading
Arm-
T
Unit
is
exactly
in
fine
with
the
hole
on
Loading
Arm-
S
Unit.
ah
tole
2.
Install
the
Sector
Gear
Unit
so
that
the
hole
on
Sector
Small
Gear
Unit
is
exactly
In
fine
with
the
projection
mark
on
Hole
Loading
Arm-
T
Unit.
3.
Install
the
Span
Limiter
using
Retaining
Rings
and
Screw,
Fig.
A7.
Through
Holes
Sua
Gaar
wma
|
me
CD
zm
|\aeaz
@———-
Retainer
Gear
ASS'Y
ee
“Ring
Gear
ZANE.
|
™
Chassis
Fig.
A6
Capstan
Belt
Sector
Gear
Loading
Loading
Arm-T
Unit
Arm-S
Unit
Projection
Retaining
Ring
Span
Limiter
-36-
13-6.
ALIGNMENT
PROCEDURES
OF
LINK
GEAR
Note:
Before
this
alignment,
Sub
Cam
Gear
position
(and
positions
of
all
bottom
side
gears)
must
be
in
their
correct
alignment
position
for
Half
Load
Stop
(FF/REW)
Mode
as
previously
described.
Push
down
to
seat
the
Sector
Gear
Unit,
refer
to
13-5.
Instalf
the
Link
Gear
so
that
the
Line
on
the
Link
Gear
|s
parallel
to
the
side
line
of
Mechanical
Chassis,
as
shown
in
Fig.
A8.
Link
Gear
Sub
Cam
Gear
Smali
Hole
Fig.
A8
13-7.
ALIGNMENT
PROCEDURES
OF
13-8.
ALIGNMENT
PROCEDURES
OF
P5
SECTOR
GEAR
AND
P5
ARM
UNIT
PRESSURE
ROLLER
LIFT
CAM,
MODE
SELECT
SWITCH
AND
1.
install
the
P5
Sector
Gear
so
that
the
hole
of
P5
Sector
PRESSURE
REDUCTION
GEAR
Gear
aligns
with
the
last
tooth
on
the
PS
Arny
Unit,
refer
to
Fig.
AQ.
1,
Push
P5
Arm
Unit
clockwise
until
it
stops
and
hoid
it
in
this
position.
Then
install
the
Pressure
Aoller
Litt
Cam
so
Mode
Select
PS
that
Hole
on
the
Mode
Select
Switch
aligns
with
Hole
on
Switch
the
Pressure
Roller
Lift
Cam
and
Projection
on
Pressure
Rolier
Lit
Cam
aligns
with
Smali
Indentation
on
Pressure
Reduction
Gear
when
pushing
tne
P5
Arm
Unit
com-
pletely
as
indicated
by
the
arrow.
Pressure
Roller
Arm
Unit
Pressure
Roller
Lift
Cam
PS
Arm
Unit
Pressure
Roller
Litt
Cam
Fig.
AQ
Pressure
Reduction
Gear
Projection
Fig.
A10
$37

14,
DISASSEMBLY/ASSEMBLY
AND
ADJUSTMENT
OF
CASSETTE
UP
UNIT
foc,
|
-
ING
PART
REMOVE
No.
|
No.
*
UNHOOKUNLOCK
CIDE
Fig.
No.
SUB
FRAME
UNIT
IR
|
om
|
Cee
(+)
See,
Adjustment
of
Cassette
Up
Unit
Cassette
Holder
Unit
rot]
CO
[+
[atenneoure
ast
PO
Joemrouee
a
TO
[=
[tosonaweronowr
8
[ow
|
FO [e
[emeroneien
a
|
ow
|
Po
[7
[woe
rf
owe
|
ro
|
|
owe
|
a
fone
remeron
Po [+
[aenowoenassy
7]
ee
Tar
[oe
reanet
or
rf
oe
List
of
Abbreviations:
R
=
Right,
L
=
Left
;
3
(L-
1)
=
3
Locking
Clips
(L~
1)
(+):
Refer
to
Exploded
Views
for
Lubrication
information.
Rear
Frame
Ass'y
®Loading
Motor
Unit
aS
(S-
2)
nw
eae
Loading
Belt
@Gear
Pulley
@
Intermediate
Gear
@®
Side
Frame
R
Unit
(S-4)
<<
vy
j
E
~
oo.
~sg(c-
2
és,
vill
a
@Wiper
Arm
s,
Panel
Opener
@Sub
Frame
Unit
Fig.
DA1
Fig.
DA2
-
38-
:
-39-
Table of contents
Other Blaupunkt DVD Player manuals

Blaupunkt
Blaupunkt DVD-ME1 User manual

Blaupunkt
Blaupunkt DVP 01 User manual

Blaupunkt
Blaupunkt TEV-501 User manual

Blaupunkt
Blaupunkt DVD-ME1 User manual

Blaupunkt
Blaupunkt DVP 01 User manual

Blaupunkt
Blaupunkt DVP 01 User manual

Blaupunkt
Blaupunkt BDVD20H User manual

Blaupunkt
Blaupunkt BDVD5200H User manual