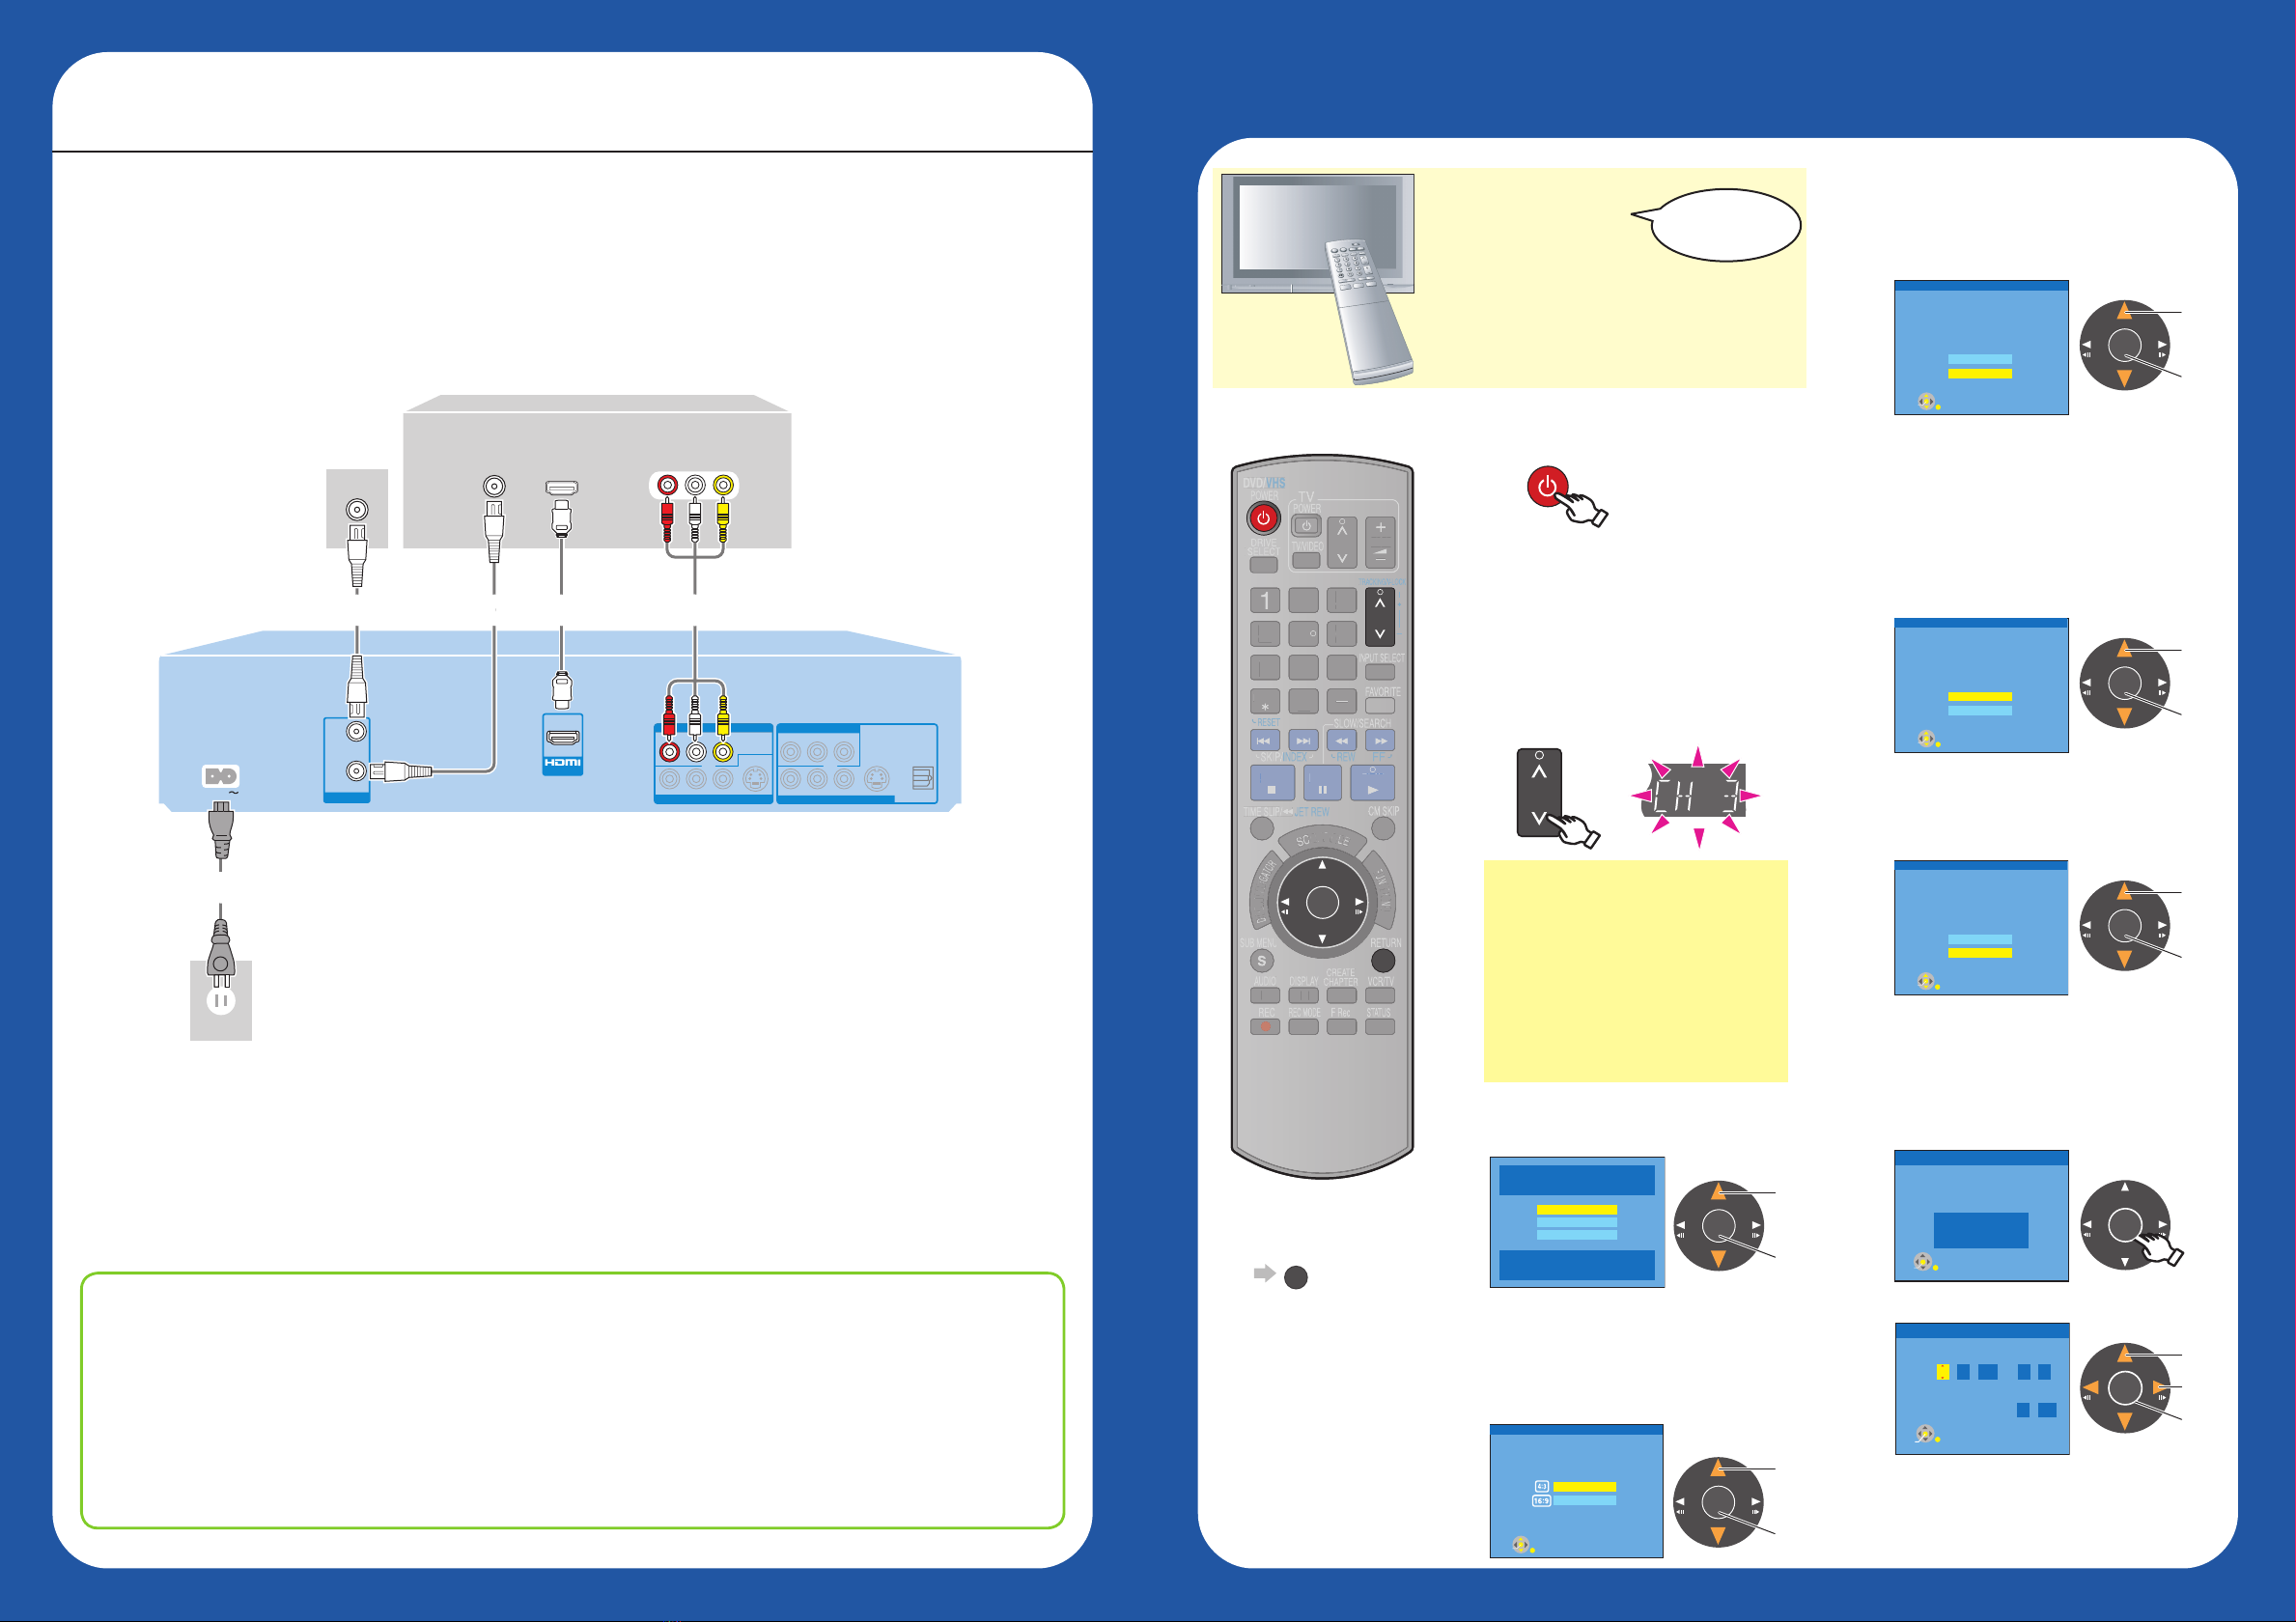
Initial Settings
Preparing the TV
1 Turn the TV on.
2 Switch input to “AV input”etc.
Using your TV’s
remote control
• To return to the
previous screen
RETURN
3Turn this unit on.
5Select the language.
6Select the type of TV
you are using.
• If you make a mistake, press [RETURN].
7Set Quick Start to
“On” or “Off”.
10
Complete the settings.
• If the clock setting screen appears.
POWER
DVD/VHS
4Select an RF output
channel number.
CH
Select,
Set
Select,
Set
Select,
Set
OK
Select,
Set
Next,
POWER
POWER
SLOW/SEARCH
S
C
H
E
D
U
L
E
F
U
N
C
T
I
O
N
S
TV/VIDEO
PAU S ESTOP
3
2
1
6
54
9
8
7
0
REC MODE
RETURN
SUB MENU
CM SKIP
D
I
R
E
C
T
N
A
V
I
G
A
T
O
R
DISPLAYAUDIO
REC
DRIVE
SELECT
F Rec
STATUS
CHAPTER
CREATE
INPUT SELECT
DELETE
FAVORITE
CH
CH
PLAY
VOL
VCR/TV
SKIP/
INDEX
REW
FF
TRACKING/V-LOCK
DVD/VHS
RESET
TIME SLIP
/
JET REW
PA
T
CH
V
L
POWER
DVD/VHS
CH
RETURN
OK
8Select whether to receive
TV signal from the unit’s
RF IN terminal or not.
Select,
Set
Select Language
Seleccione el idioma
Sélection de langue
Press OK
Pulse OK
Appuyer sur OK
English
Français
Español
Set Clock Automatically
Clock Setting completed successfully.
4/4/2008 12:15 AM
DST............. On
Time Zone.... EST
OK
Set Clock Manually
/ :
/
SAT AM
Month Day Year Hour Minute
1112
00
2000
DST Time Zone
Off EST
OK
Select TV type and press OK.
(Please refer to Operation Instruction
for details)
4:3 TV
16:9 Widescreen TV
OK
Aspect Ratio Selection
The unit can be turned on faster, in about
1 second. Please note that Quick Start
mode slightly increases power
consumption when the unit is off.
(See Operation Instructions for details)
Turn Quick Start on ?
On
Off
OK
Quick Start Setting
Does this unit get its TV signal via RF IN?
Example:Antenna,Cable TV or Cable Box connected to the
unit’s RF IN.
Yes
No
OK
Automatic Clock and Channel Settings
9Select “Antenna” or
“Cable”.
Select,
Set
Please select the wire connected to RF IN.
Antenna
Cable
OK
Automatic Clock and Channel Settings
Connecting with an HDMI (High Definition Multimedia Interface)
Cable
• If you select “No”‚ you can proceed to
“Set Clock Manually” (step 10‚ below).
• If the correct time is displayed
• Please refer to “Basic Operations”
(pages 15 to 22) in the operating
instructions.
Press [OK] to start automatic
clock and channel setting.
What is VIERA Link “HDAVI Control”?
VIERA LinkTM is a new name for EZ SyncTM.
VIERA Link “HDAVI Control” is a convenient function that offers linked operations of this unit, and a
Panasonic TV (VIERA) or receiver under “HDAVI Control”. You can use this function by connecting the
equipment with the HDMI cable.
For details on the benefits of “
HDAVI Control
”, please refer to pages
40 to 41
in the Operating
Instructions.
VIERA LinkTM “HDAVI ControlTM”
RF IN HDMI IN
HDMI
AV OUT
VHF / UHF
COMPONENT VIDEO OUT
DVD/VHS COMMON OUT
DVD PRIORITY OUT
IN1
RF
IN
RF
OUT
AV OU T
AC IN
AUDIO IN
R L
INPUT 1
VIDEO
IN
Set “HDMI Priority” and “HDMI Audio Output” to “On” (The default setting is “On”.)
(
page 65, 66 in the operating instructions).
For details on the benefits and limitations of different types of connections, please refer to pages
8 to
11, 70 to 72
in the Operating Instructions.
Connection (with Audio/
Video cable)
Select “OFF”.
Connection (without HDMI
cable or Audio/Video cable)
Select “CH3” or “CH4”. If the
selection is appropriate, then the
step 5 screen will appear.
• When this unit is connected to a Panasonic
TV (VIERA) supporting HDAVI Control 3
and initially set up, it automatically acquires
the TV setting information. For details,
please refer to page 14 in the Operating
Instructions.
When connected to an HDMI compatible unit, an uncompressed digital audio and video signal is transmitted,
enabling you to enjoy high quality, digital video and audio with just one cable. When connecting to an HDMI-
compatible HDTV (High Definition Television), the output can be switched to 1080p, 1080i or 720p HD video.
•
Please use HIGH SPEED HDMI cables that have the HDMI logo (as shown on the cover of the operating
instructions). It is recommended that you use Panasonic’s HDMI cable.
•
We recommend connecting to the TV with the DVD/VHS COMMON OUT terminals as well.
This unit
Cable from the wall/
antenna signal
(Included)
(Included)
TV
(Included)
EZ48V.indd3-4EZ48V.indd3-4 2007/12/1320:32:062007/12/1320:32:06


