Specifications
YFM284C618CA PTW1206-1106 Printed in China
Accessories
Operating Instructions
(English : YFM284C618CA)
(êÛÒÒÍËÈ : YFM284C619CA)
(:YFM284C620CA)
(Arabic : YFM284C498CA)
Q'ty: 1 set
Installation Instructions
(YFM294C075CA)
Q'ty: 1
Installation kit (ZZBISC1101U-J)
Lock Cancel Plate
(FX0214C385ZA)
Q'ty: 2
Mounting Bolt
(YEJV014C002N)
Q'ty: 1
Rubber Bushing
(YFS014C095ZA)
Q'ty: 1
Mounting Collar
(FX0214C384ZB)
Q'ty: 1
Trim Plate
(YFC054C081ZA)
Q'ty: 1
Power Connector
(YGAJ021009)
Q'ty: 1
Removable Face Plate
Case
(YFC054C061ZB)
Q'ty: 1
Notes:
¡The number in parentheses underneath each accessory part
name is the part number for maintenance and service.
¡Accessories and their part numbers are subject to modifica-
tion without prior notice due to improvements.
¡Mounting Collar and Trim Plate are mounted on the main unit
at shipment.
General
Power supply :DC 12 V (11 – 16 V), test voltage
14.4 V, negative ground
Current consumption :Less than 2.2 A (CD mode; 0.5 W x
4 channels)
Maximum power output :50 W x 4 channels (at 1 kHz), vol-
ume control maximum
Power output : 18 W x 4 channels (1 kHz, 1 %, 4 Ω)
Tone adjustment range :Bass: ±12 dB at 100 Hz, Treble: ±12
dB at 10 kHz
Speaker impedance :4 – 8 Ω
Pre-amp output voltage :2.5 V (CD mode, 1 kHz, 0 dB)
Pre-amp output impedance :200 Ω
Dimensions (W x H x D) :178 x 50 x 155 mm
Weight :1.3 kg
Front AUX input
Input impedance :10 kΩ
Allowable external input : 2.0 V
Connector :3.5 mm østereo mini-pin
Disc Player
Sampling frequency :8 times oversampling
DA converter :1 bit DAC System
Pick-up type :Astigma 3-beam
Light source :Semiconductor laser
Wave length : 790 nm
Frequency response :20 Hz – 20 kHz (±1 dB)
Signal to noise ratio :96 dB
Total harmonic distortion :0.01 % (1 kHz)
Wow and flutter :Below measurable limits
Channel separation :75 dB
FM Stereo Radio
Frequency range : 87.50 MHz – 108.00 MHz
Usable sensitivity :6 dB/µV (S/N 30 dB)
Frequency response :30 Hz – 15 kHz (±3 dB)
Alternate channel selectivity : 75 dB
Stereo separation :35 dB (1 kHz)
Image rejection ratio :75 dB
IF rejection ratio :100 dB
Signal to noise ratio :62 dB
AM Radio
Frequency range : 531 kHz – 1 602 kHz
Usable sensitivity :28 dB/µV (S/N 20 dB)
Notes:
¡Specifications and design are subject to modification without
notice due to improvements.
¡Some figures and illustrations in this manual may be different
from your product.
Matsushita Electric Industrial Co., Ltd.
Web Site: http://panasonic.net
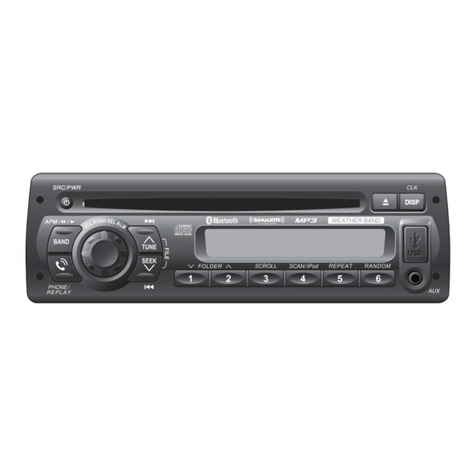
MP3 CD Player/Receiver
Model: CQ-C1405W
Operating Instructions
V
O
L
SRC
/
PWR
123456
CQ-C1405W
T
U
N
E
/
T
R
A
C
K
F
O
L
D
E
R
S
C
R
O
L
L
R
A
N
D
O
M
S
C
A
N
R
E
P
E
A
T
AUX
P
U
S
H
S
E
L
SQ
¡Please read these instructions carefully before using this product and keep this manual for future reference.
English
Safety Information
Warning
Observe the following warnings when using this
unit.
❑The driver should neither watch the display nor operate
the system while driving.
Watching the display or operating the system will distract the driv-
er from looking ahead of the vehicle and can cause accidents.
Always stop the vehicle in a safe location and use the parking
brake before watching the display or operating the system.
❑Use the proper power supply.
This product is designed for operation with a negative grounded
12 V DC battery system. Never operate this product with other bat-
tery systems, especially a 24 V DC battery system.
❑Protect the Deck Mechanism.
Do not insert any foreign objects into the slot of this unit.
❑Do not disassemble or modify the unit.
Do not disassemble, modify the unit or attempt to repair the prod-
uct yourself. If the product needs to be repaired, consult your
dealer or an authorized Panasonic Servicenter.
❑Do not use the unit when it is out of order.
If the unit is out of order (no power, no sound) or in an abnormal
state (has foreign objects in it, is exposed to water, is smoking, or
smells), turn it off immediately and consult your dealer.
❑Refer fuse replacement to qualified service personnel.
When the fuse blows out, eliminate the cause and have it replaced
with the fuse prescribed for this unit by a qualified service engi-
neer. Incorrect replacement of the fuse may lead to smoke, fire,
and damage to the product.
Observe the following warnings when installing.
❑Disconnect the lead from the negative (–) battery termi-
nal before installation.
Wiring and installation with the negative (–) battery terminal con-
nected may cause electrical shock and injury due to a short circuit.
Some cars equipped with the electrical safety system have specific
procedures of battery terminal disconnection.
FAILURE TO FOLLOW THE PROCEDURE MAY LEAD TO THE
UNINTENDED ACTIVATION OF THE ELECTRICAL SAFETY SYSTEM
RESULTING IN DAMAGE TO THE VEHICLE AND PERSONAL
INJURY OR DEATH.
❑Never use safety-related components for installation,
grounding, and other such functions.
Do not use safety-related vehicle components (fuel tank, brake,
suspension, steering wheel, pedals, airbag, etc.) for wiring or fix-
ing the product or its accessories.
❑Installing the product on the air bag cover or in a location
where it interferes with airbag operation is prohibited.
❑Check for piping, gasoline tank, electric wiring, and other
items before installing the product.
If you need to open a hole in the vehicle chassis to attach or wire
the product, first check where the wire harness, gasoline tank, and
electric wiring are located. Then open the hole from outside if pos-
sible.
❑
Never install the product in a location where it interferes
with your field of vision.
❑Never have the power cord branched to supply other
equipment with power.
❑After installation and wiring, you should check the nor-
mal operation of other electrical equipment.
The continuation of their using in abnormal conditions may cause
fire, electrical shock or a traffic accident.
❑In the case of installation to an airbag equipped car, con-
firm warnings and cautions of the vehicle manufacturer
before installation.
❑Make sure the leads do not interfere with driving or get-
ting in and out of the vehicle.
❑Insulate all exposed wires to prevent short circuiting.
This pictograph intends to alert you to the presence of
important operating instructions and installation
instructions. Failure to heed the instructions may
result in severe injury or death.
■Read the operating instructions for the unit and all other compo-
nents of your car audio system carefully before using the system.
They contain instructions about how to use the system in a safe and
effective manner. Panasonic assumes no responsibility for any prob-
lems resulting from failure to observe the instructions given in this
manual.
■This manual uses pictographs to show you how to use the product
safely and to alert you to potential dangers resulting from improper
connections and operations. The meanings of the pictographs are
explained below. It is important that you fully understand the mean-
ings of the pictographs in order to use this manual and the system
properly.
Warning
This pictograph intends to alert you to the presence of
important operating instructions and installation instruc-
tions. Failure to heed the instructions may result in
injury or material damage.
Caution
Caution
Observe the following cautions when using this
unit.
❑Keep the sound volume at an appropriate level.
Keep the volume level low enough to be aware of road and traffic
conditions while driving.
❑This unit is designed for use exclusively in automo-
biles.
❑Do not operate the unit for a prolonged period with the
engine turned off.
Operating the audio system for a long period of time with the
engine turned off will drain the battery.
❑Do not expose the unit to direct sunlight or excessive
heat.
Otherwise these will raise the interior temperature of the unit,
and it may lead to smoke, fire, or other damage to the unit.
❑Do not use the product where it is exposed to water,
moisture, or dust.
Exposure of the unit to water, moisture, or dust may lead to
smoke, fire, or other damage to the unit. Make especially sure
that the unit does not get wet in car washes or on rainy days.
❑Set the volume level to low enough before the AUX con-
nection is completed.
Failure to observe this, the loud noise may come out and dam-
age your speakers and your hearing. Direct connection of the
speaker/headphone output of an external device without any
attenuator may distort sound or damage the connected external
device.
Observe the following cautions when installing.
❑Refer wiring and installation to qualified service per-
sonnel.
Installation of this unit requires special skills and experience. For
maximum safety, have it installed by your dealer. Panasonic is
not liable for any problems resulting from your own installation
of the unit.
❑Follow the instructions to install and wire the product.
Not following the instructions to properly install and wire the
product could cause an accident or fire.
❑Take care not to damage the leads.
When wiring, take care not to damage the leads. Prevent them
from getting caught in the vehicle chassis, screws, and moving
parts such as seat rails. Do not scratch, pull, bend or twist the
leads. Do not run them near heat sources or place heavy objects
on them. If leads must be run over sharp metal edges, protect
the leads by winding them with vinyl tape or similar protection.
❑Use the designated parts and tools for installation.
Use the supplied or designated parts and appropriate tools to
install the product. The use of parts other than those supplied or
designated may result in internal damage to the unit. Faulty
installation may lead to an accident, a malfunction or fire.
❑Do not block the air vent or the cooling plate of the unit.
Blocking these parts will cause the interior of the unit to over-
heat and will result in fire or other damage.
❑Do not install the product where it is exposed to strong
vibrations or is unstable.
Avoid slanted or strongly curved surfaces for installation. If the
installation is not stable, the unit may fall down while driving and
this can lead to an accident or injury.
❑Installation Angle
The product should be installed in a horizontal position with the
front end up at a convenient angle, but not more than 30˚.
The user should bear in mind that in some areas there may be
restrictions on how and where this unit must be installed.
Consult your dealer for further details.
❑Wear gloves for safety. Make sure that wiring is com-
pleted before installation.
❑To prevent damage to the unit, do not connect the
power connector until the whole wiring is completed.
❑Do not connect more than one speaker to one set of
speaker leads. (except for connecting to a tweeter)
Caution
THIS PRODUCT IS A CLASS ILASER PRODUCT.
USE OF CONTROLS OR ADJUSTMENTS OR PERFORMANCE OF
PROCEDURES OTHER THAN THOSE SPECIFIED HEREIN MAY
RESULT IN HAZARDOUS RADIATION EXPOSURE.
DO NOT OPEN COVERS AND DO NOT REPAIR BY YOURSELF.
REFER SERVICING TO QUALIFIED PERSONNEL.
The 24-hour system is used for the clock.
1Press [DISP] (CLOCK).
(clock display)
2Hold down [DISP] (CLOCK) for more than
2 seconds.
Hours blinks
3Adjust the hour.
Hours set
[[]: sets the hour ahead.
[]]: sets the hour back.
4Press [DISP] (CLOCK).
Minutes blinks
5Adjust the minute.
Minutes set
[[]: sets the minute ahead.
[]]: sets the minute back.
6Press [DISP] (CLOCK).
Complete
Notes:
¡“ADJUST” is displayed before adjusting the clock.
¡Hold down []]or [[]to change numbers rapidly.
Clock Display at Power Off
Press [DISP] to change the display.
Clock Setting
Display off
Clock display
First Time Power On
1Set your car's ignition switch to the ACC or
ON position.
2Press [SRC] (PWR: Power).
Before Reading These Instructions
Panasonic welcomes you to our constantly growing family of electronic products owners.
We endeavor to give you the advantages of precise electronic and mechanical engineering, manufactured with carefully selected components,
and assembled by people who are proud of the reputation their work has built for our company. We know this product will bring you many hours
of enjoyment, and after you discover the quality, value and reliability we have built into it, you too will be proud to be a member of our family.
This unit is designed and manufactured to ensure the minimum of maintenance. Use a dry, soft cloth for routine exteri-
or cleaning. Never use benzine, thinner, or other solvents.
Cleaning the
Unit
Fuse
Anti-Theft System
This unit is equipped with a removable face plate. Removing this face plate makes the unit totally inoperable.
Removing
1Turn off the power.
2Press [ ]. The face plate will open.
3Pull it out toward you.
4Put the face plate in the case.
Mounting
1Slide the left side of the face plate in place.
2Press the right end of face plate until a
“click” is heard.
Caution
¡This face plate is not waterproof. Do not expose it to
water or excessive moisture.
¡Do not remove the face plate while driving your car.
¡Do not place the face plate on the dashboard or nearby
areas where the temperature rises high.
¡Do not touch the contacts on the face plate and the main
unit, since this may result in poor electrical contact.
¡If dirt or other foreign substances get on the contacts,
wipe them off with a clean and dry cloth.
Face Plate Removing/Mounting
(Anti-Theft System)
If the replaced fuse fails, contact your nearest authorized Panasonic Service Center.
Warning
¡Use fuses of the same specified rating (15 A). Using substitutes or fuses with higher ratings, or connecting the unit
directly without a fuse could cause fire or damage to the unit. If the replaced fuse fails, contact your nearest
authorized Panasonic Service Center.
[ ]
Notes on CD/CD Media (CD-ROM, CD-R, CD-RW)
Notes on CD-Rs/RWs
¡You may have trouble playing back some CD-R/RW discs
recorded using CD recorders (CD-R/RW drives), either due
to their recording characteristics or dirt, fingerprints,
scratches, etc. on the disc surface.
¡CD-R/RW discs are less resistant to high temperatures and
high humidity than ordinary music CDs. Leaving them
inside a car for extended periods may damage them and
make playback impossible.
¡Some CD-R/RWs cannot be played back successfully due
to incompatibility among writing software, a CD recorder
(CD-R/RW drive) and the discs.
¡This player cannot play the CD-R/RW discs if the session is
not closed.
¡This player cannot play the CD-R/RW discs which contain
other than CD-DA or MP3 data .
¡Be sure to observe the instructions of the CD-R/RW disc
for handling it.
Recording MP3 files on a CD-media
¡You are recommended to minimize the chances of mak-
ing a disc that contains both CD-DA files and MP3 files.
¡If CD-DA files are on the same disc as MP3 files, the
songs may not play in the intended order, or some songs
may not play at all.
¡Do not record files other than MP3 files and unnecessary
folder on a disc.
¡The name of MP3 file should be added by rules as shown in
the following descriptions and also comply with the rules of
each file system.
¡You may encounter trouble in playing MP3 files or display-
ing the information of MP3 files recorded with certain writ-
ing software or CD recorders.
¡The file extension “.mp3“ should be assigned to each file
depending on the file format.
¡This unit does not have the play list function.
¡Although Multi-session recording is supported, the use of
Disc-at-Once is recommended.
Supported file systems
ISO 9660 Level 1/Level 2, Apple Extension to ISO 9660, Joliet,
Romeo
Note: Apple HFS, UDF 1.50, MIX mode CD, CD Extra is not
supported.
Compression formats
(Recommendation: “Points to remember when making
MP3 files” on the right.)
¡MPEG 1 audio layer 3
Bit rate: 32 k – 320 kbps
VBR: Yes
Sampling frequency:
32, 44.1, 48 kHz
¡MPEG 2 audio layer 3
Bit rate: 8 k – 160 kbps
VBR: Yes
Sampling frequency:
16, 22.05, 24 kHz
How to hold the disc
¡Do not touch the underside of the disc.
¡Do not scratch on the disc.
¡Do not bend the disc.
¡When not in use, keep the disc in a case.
Do not leave discs in the following places:
¡In direct sunlight
¡Near car heaters
¡Dirty, dusty and damp areas
¡On seats and dashboards
Disc cleaning
Use a dry, soft cloth to wipe from the center outward.
Do not write on the disc label with a ballpoint
pen or other hard-point pens.
If you use commercial CDs, they must have
either of these labels shown at right.
Some copy-protected music CDs are not
playable.
<Wrong><Correct>
Labels created by a printer,
Protective films or sheets
Irregularly shaped discs
Printed side
Disc with adhered
stickers or tape
Discs with cracks,
scratches or parts missing
Note: MP3 encoding and writing software is not supplied
with this unit.
Points to remember when making MP3 files
MP3
¡High bit rate and high sampling frequency are recom-
mended for high quality sounds.
¡Selecting VBR (Variable Bit Rate) is not recommended
because playing time is not displayed properly and sound
may be skipped.
¡The playback sound quality differs depending on the
encoding circumstances. For details, refer to the user
manual of your own encoding software and writing soft-
ware.
¡It is recommended to set the bit rate to “128 kbps or
more” and “fixed”.
Display Information
Displayed items
¡CD-TEXT ¡MP3 (ID3 tag)
Disc title Album name
Track title Title name/Artist name
¡MP3
Folder name
File name
Displayable characters
¡Displayable length of file name/folder name: within 32
characters. (Unicoded file and folder names are reduced
by half in the number of displayable characters.)
¡Name files and folders in accordance with the standard of
each file system. Refer to the instructions of writing soft-
ware for details.
¡ASCII character set and special characters in each lan-
guage can be displayed.
Notes:
¡With some software in which MP3 format files have been
encoded, the character information may not be displayed
properly.
¡Undisplayable characters and symbols will be converted
into an asterisk ( ).
Folder selection order/file playback order
Maximum number of files/folders
¡Maximum number of files: 999
¡Maximum number of files in one folder: 255
¡Maximum depth of trees: 8
¡Maximum number of folders: 255 (Root folder is includ-
ed.)
Notes:
¡This unit counts the number of folders irrespective of the
presence or absence of an MP3 file.
¡If the selected folder does not contain any MP3 files, the
nearest MP3 files in the order of playback will be played.
¡Playback order may be different from other MP3 players
even if the same disc is used.
¡“ROOT” appears when displaying the root folder name.
Caution
Never assign the “.mp3”, file name extension to
a file that is not in the MP3 format. This may
not only produce noise from the speaker dam-
age, but also damage your hearing.
Copyright
It is prohibited by copyright laws to copy, distribute and
deliver copyrighted materials such as music without the
approval of copyright holder except enjoying yourself per-
sonally.
No warranty
Above description complies with our investigations as of
September 2006. It has no warranty for reproducibility and
displayability of MP3.
Notes on MP3
MPEG Layer-3 audio coding technology licensed from
Fraunhofer IIS and Thomson.
CQ-C1405WOIEng(90%) 11/06/2006 03:05 PM ›¶›– 1
