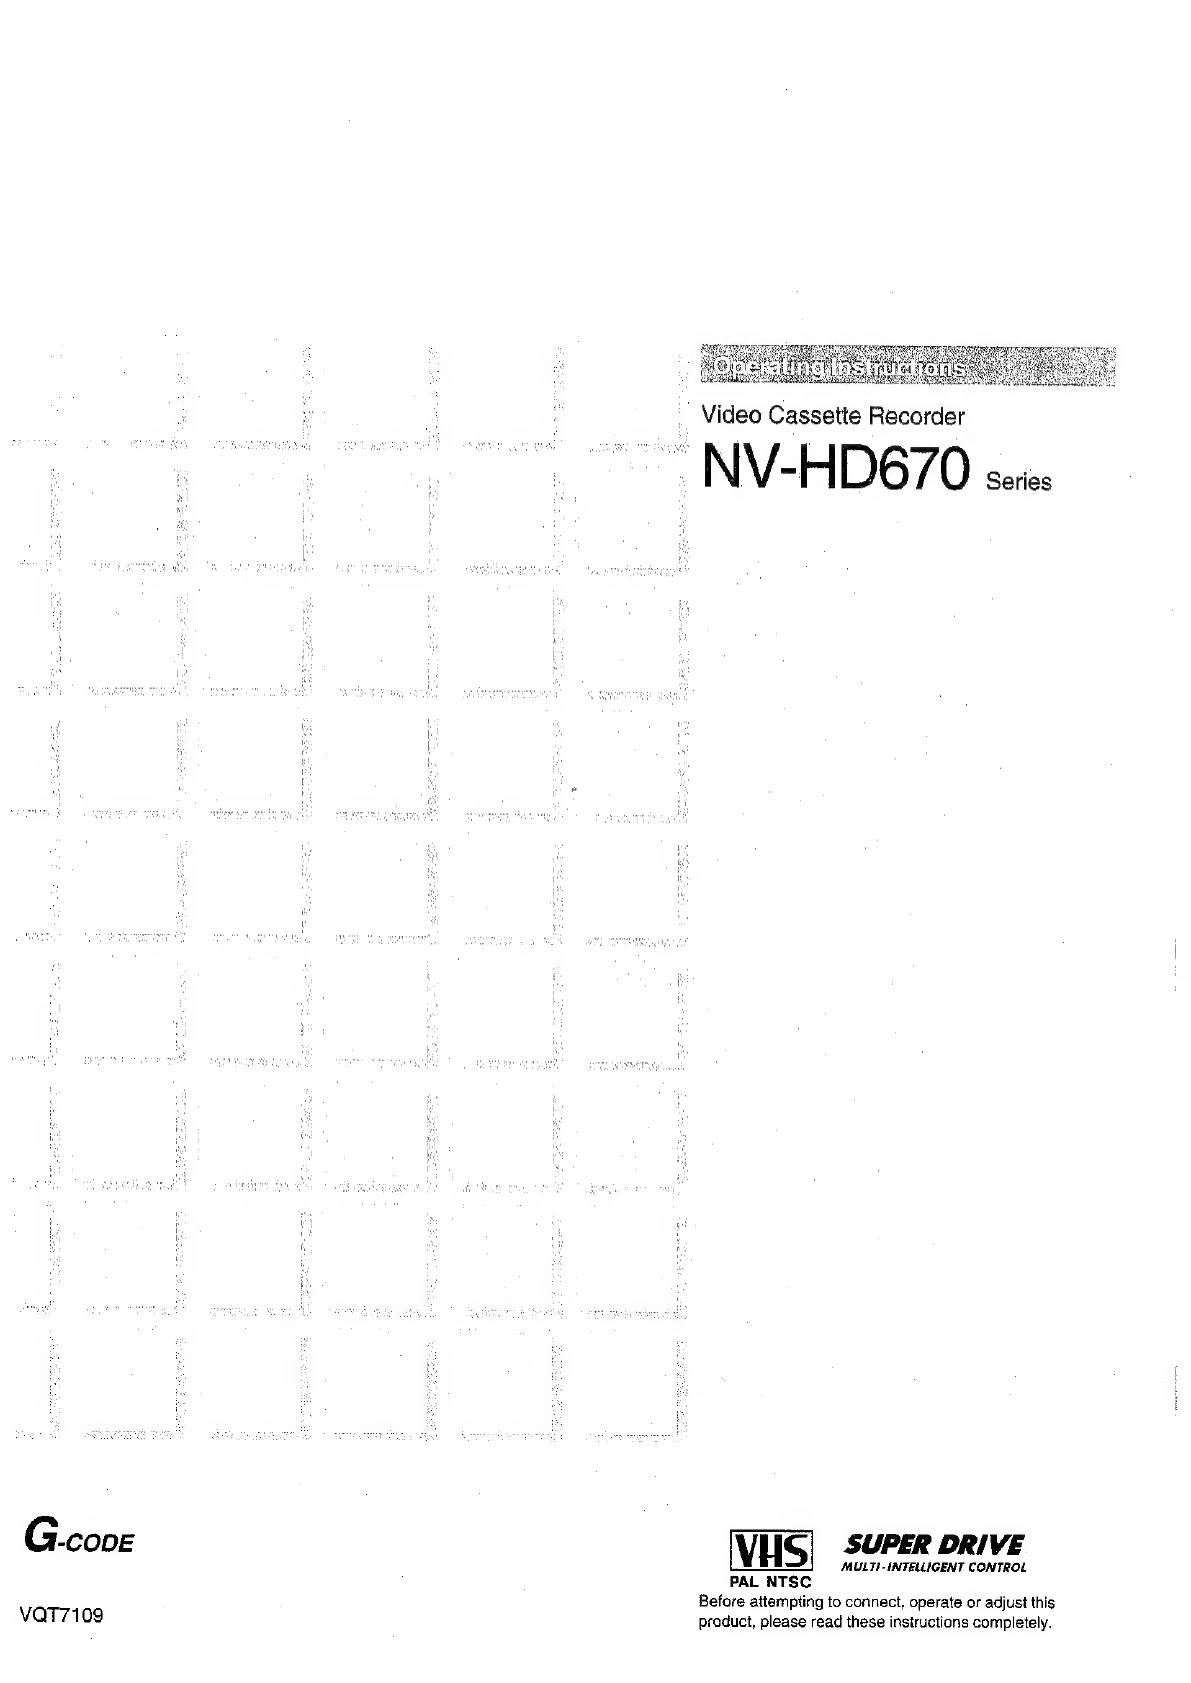
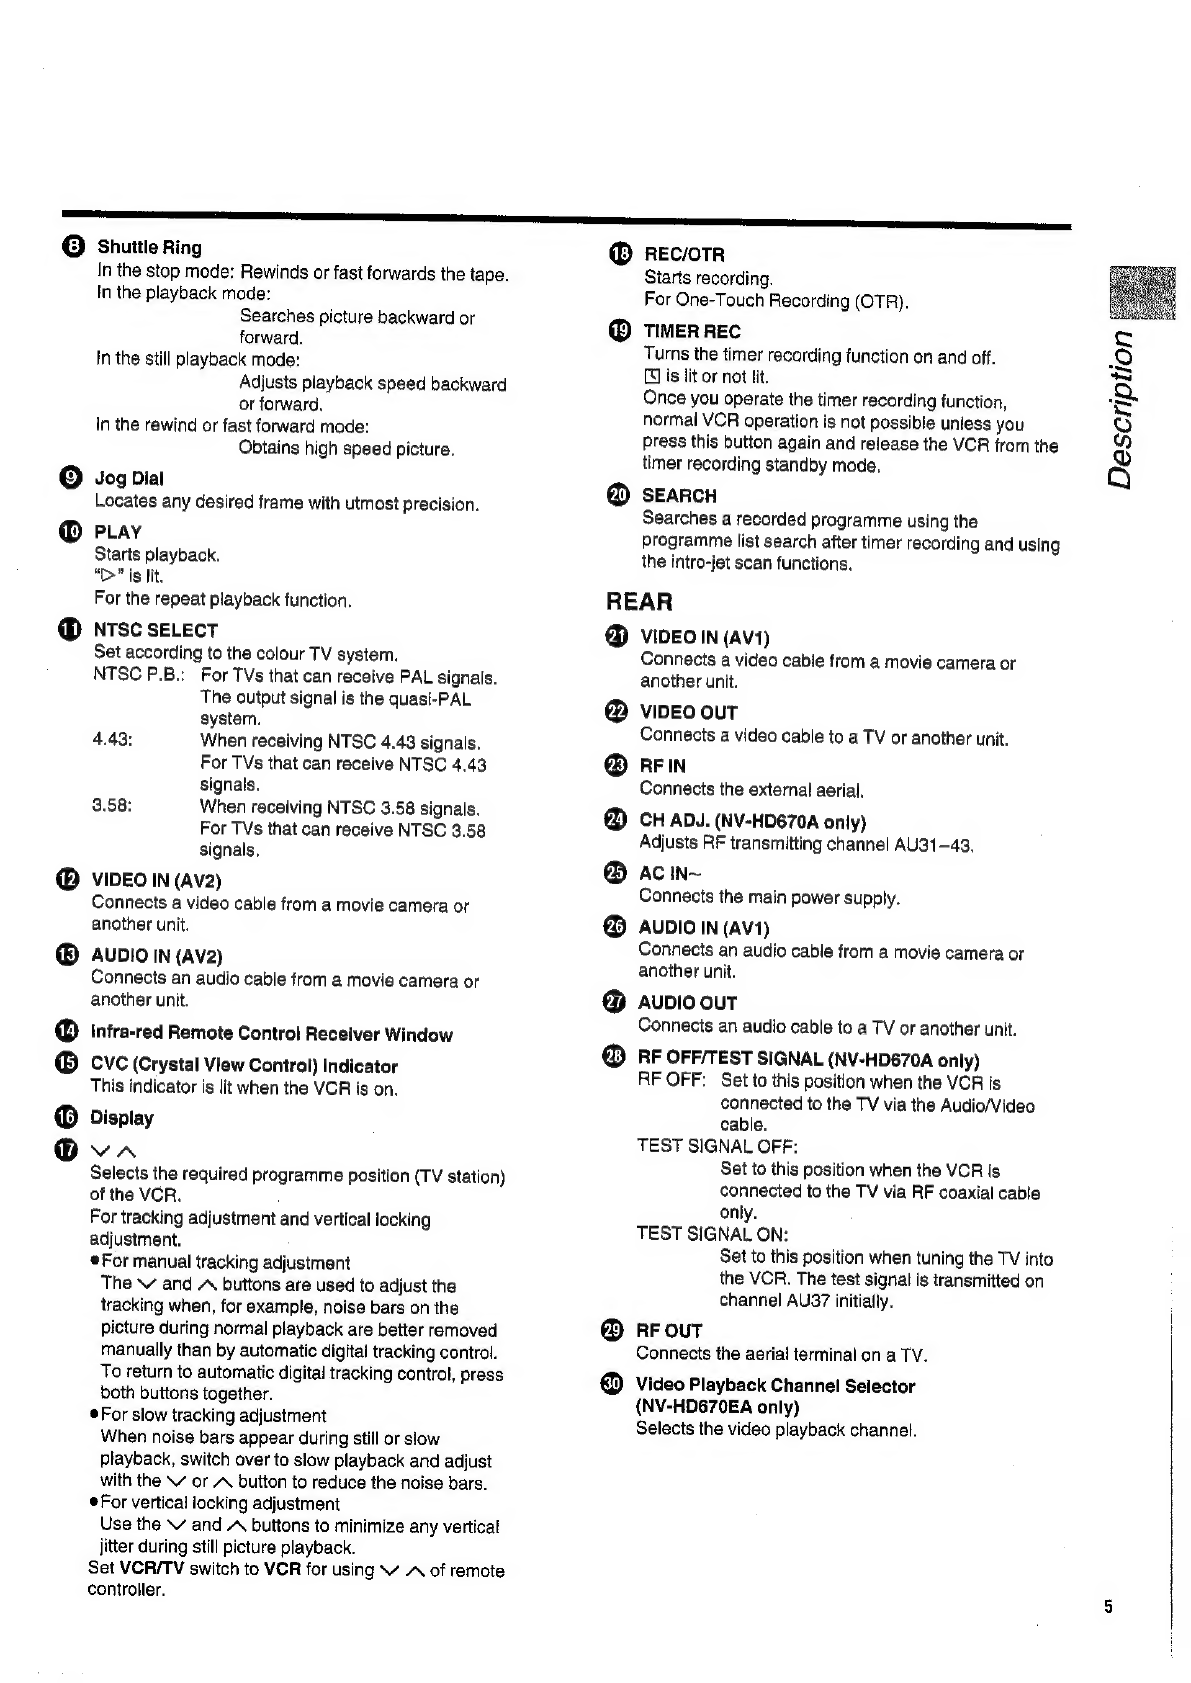
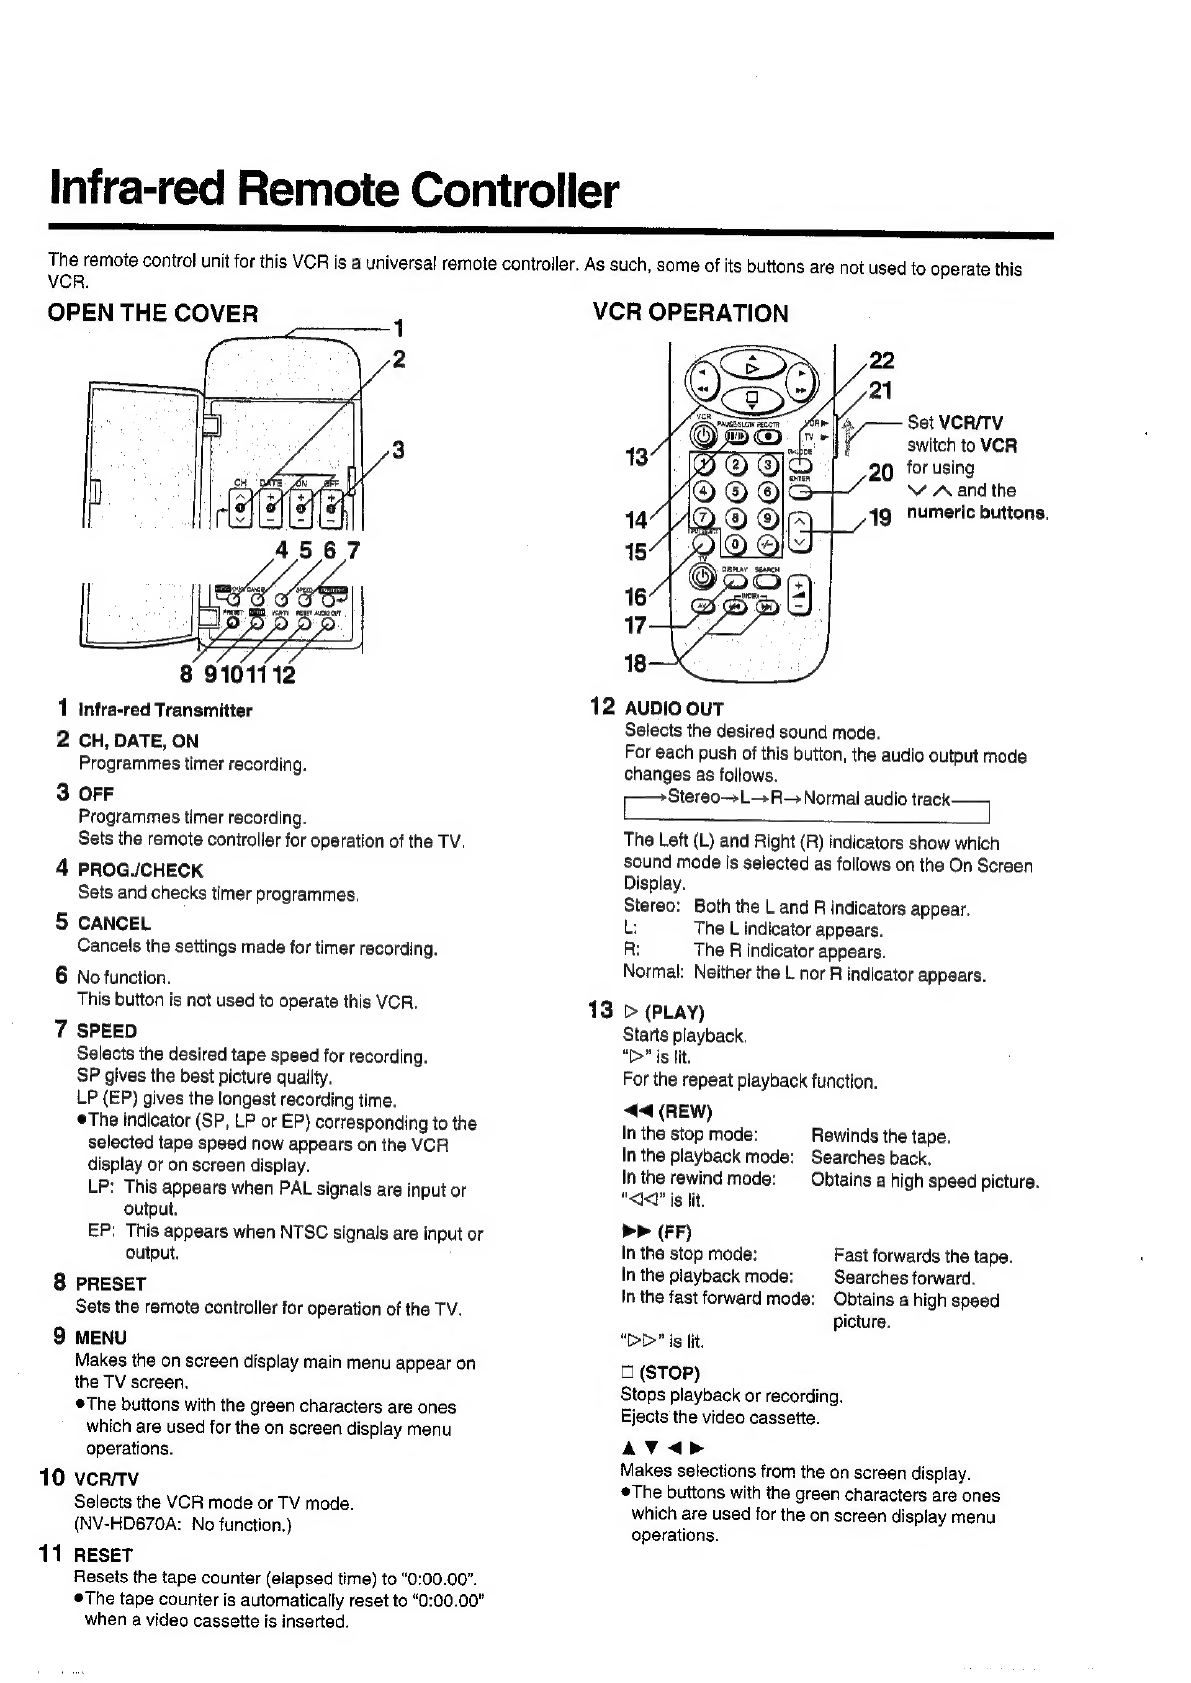
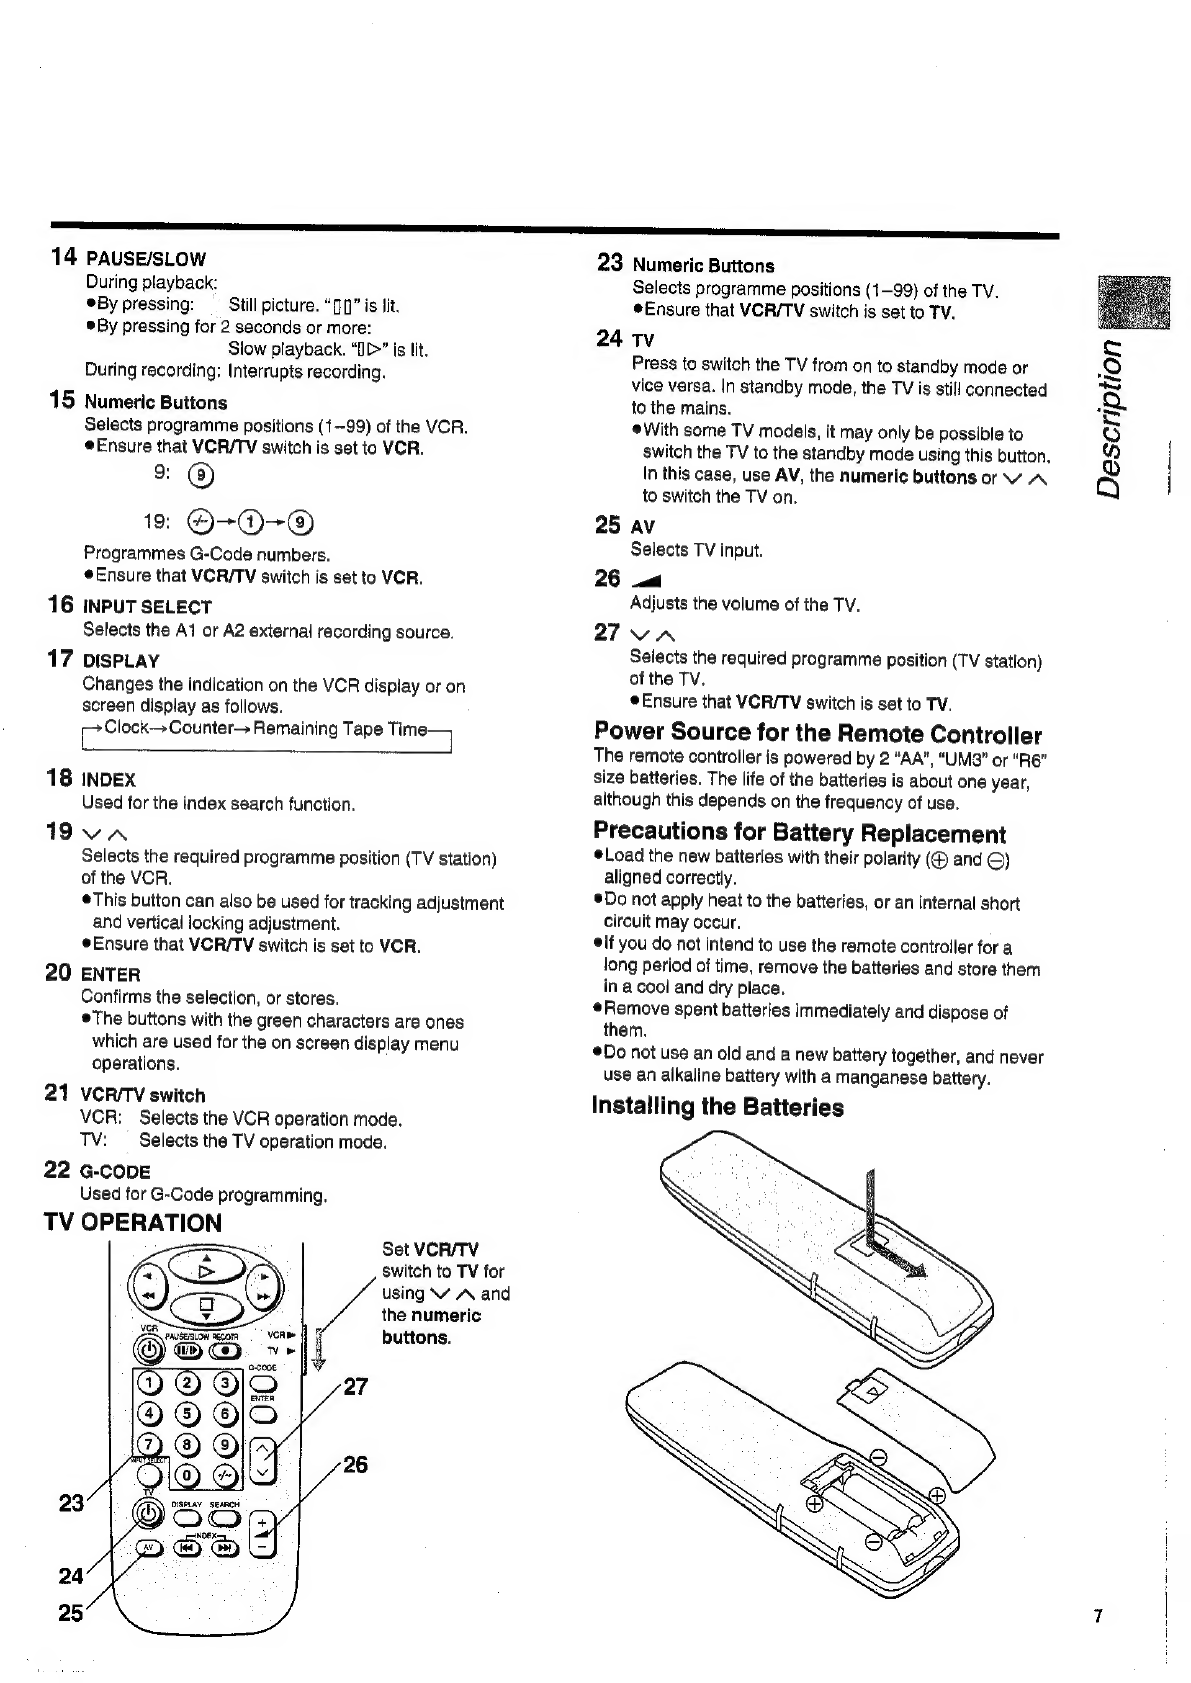
Panasonic NV-HD670 Series User manual
Other Panasonic VCR System manuals

Panasonic
Panasonic PV-V4612 User manual

Panasonic
Panasonic AGTL950 - TIME LAPSE VCR User manual

Panasonic
Panasonic DVCPRO AJ-D640P User manual

Panasonic
Panasonic Omnivision PV-9400 User manual

Panasonic
Panasonic Quasar W-1301 User manual

Panasonic
Panasonic NV-SJ200AM User manual

Panasonic
Panasonic ProLine AG-1980P User manual

Panasonic
Panasonic NV-P05REE User manual

Panasonic
Panasonic Omnivision PV-VS4821 User manual

Panasonic
Panasonic AJ-HD150FE User manual

Panasonic
Panasonic Omnivision VHS PV-V4022 User manual

Panasonic
Panasonic Omnivision PV-V4601 User manual

Panasonic
Panasonic NV-MV21EB User manual

Panasonic
Panasonic AG-DS850P User manual

Panasonic
Panasonic Omnivision PV-S4680 User manual

Panasonic
Panasonic NV-F70EA User manual

Panasonic
Panasonic Omnivision PV-7661 User manual

Panasonic
Panasonic AJ-D230H User manual

Panasonic
Panasonic Omnivision PV-V4540 User manual

Panasonic
Panasonic AJ-YA120AG User manual