manuals.online logo
Brands
  1. Home
  2. •
  3. Brands
  4. •
  5. Panasonic
  6. •
  7. VCR System
  8. •
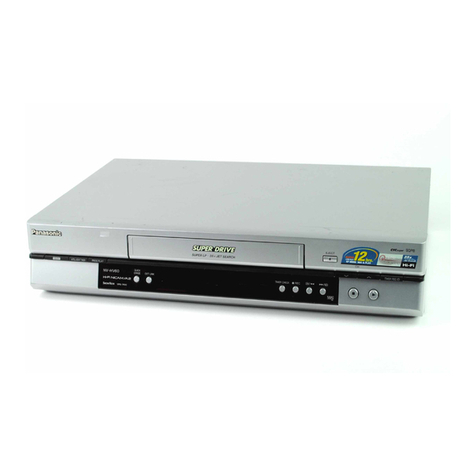
  9. Panasonic Omnivision PV-VS4821 User manual

Panasonic Omnivision PV-VS4821 User manual

Other manuals for Omnivision PV-VS4821

1

Other Panasonic VCR System manuals

Panasonic NV-F65EA User manual

Panasonic

Panasonic NV-F65EA User manual

Panasonic Omnivision PV-V4540 User manual

Panasonic

Panasonic Omnivision PV-V4540 User manual

Panasonic AG5700K - SVHS User manual

Panasonic

Panasonic AG5700K - SVHS User manual

Panasonic Omnivision PV-V4601 User manual

Panasonic

Panasonic Omnivision PV-V4601 User manual

Panasonic AG-7500 User manual

Panasonic

Panasonic AG-7500 User manual

Panasonic AG-W3 User manual

Panasonic

Panasonic AG-W3 User manual

Panasonic Omnivision VHS PV-7664 User manual

Panasonic

Panasonic Omnivision VHS PV-7664 User manual

Panasonic NV-G15EM User manual

Panasonic

Panasonic NV-G15EM User manual

Panasonic NV-HV62GCS User manual

Panasonic

Panasonic NV-HV62GCS User manual

Panasonic AJ-D950 User manual

Panasonic

Panasonic AJ-D950 User manual

Panasonic Omnivision VHS PV-4415S User manual

Panasonic

Panasonic Omnivision VHS PV-4415S User manual

Panasonic NV-FJ617EE User manual

Panasonic

Panasonic NV-FJ617EE User manual

Panasonic Omnivision PV-4651 User manual

Panasonic

Panasonic Omnivision PV-4651 User manual

Panasonic PV-V4603S User manual

Panasonic

Panasonic PV-V4603S User manual

Panasonic NV-FJ620 User manual

Panasonic

Panasonic NV-FJ620 User manual

Panasonic NV-FJ600 Series User manual

Panasonic

Panasonic NV-FJ600 Series User manual

Panasonic Omnivision PV-7664 User manual

Panasonic

Panasonic Omnivision PV-7664 User manual

Panasonic NV-F55EG User manual

Panasonic

Panasonic NV-F55EG User manual

Panasonic Omnivision PV-V4620 User manual

Panasonic

Panasonic Omnivision PV-V4620 User manual

Panasonic Omnivision PV-V4530S User manual

Panasonic

Panasonic Omnivision PV-V4530S User manual

Panasonic NV-SD200BA User manual

Panasonic

Panasonic NV-SD200BA User manual

Panasonic NV-HD650 Series User manual

Panasonic

Panasonic NV-HD650 Series User manual

Panasonic NV-FJ631EG User manual

Panasonic

Panasonic NV-FJ631EG User manual

Panasonic NV-J45 Series User manual

Panasonic

Panasonic NV-J45 Series User manual

Popular VCR System manuals by other brands

RCA VR678HF user guide

RCA

RCA VR678HF user guide

Zenith VRL4270HF Operating guide & warranty

Zenith

Zenith VRL4270HF Operating guide & warranty

Akai VS-606EA Operator's manual

Akai

Akai VS-606EA Operator's manual

FUNAI 27C-450 Service manual

FUNAI

FUNAI 27C-450 Service manual

Sanyo VHR-M262EV Service manual

Sanyo

Sanyo VHR-M262EV Service manual

Sony SLV-X37 operating instructions

Sony

Sony SLV-X37 operating instructions

JVC SR-VS20U - Dual Format S-vhs/minidv Recorder instructions

JVC

JVC SR-VS20U - Dual Format S-vhs/minidv Recorder instructions

Grundig GV 7400 EURO Service manual

Grundig

Grundig GV 7400 EURO Service manual

Zenith VCM321 Installation and operating guide

Zenith

Zenith VCM321 Installation and operating guide

JVC HR-A43U, HR-A63U instructions

JVC

JVC HR-A43U, HR-A63U instructions

Aiwa VX-S135U operating instructions

Aiwa

Aiwa VX-S135U operating instructions

RCA VR725HF user guide

RCA

RCA VR725HF user guide

JVC 0703-AH-PJ-BJ instruction manual

JVC

JVC 0703-AH-PJ-BJ instruction manual

TruTech ZV450TT8 owner's manual

TruTech

TruTech ZV450TT8 owner's manual

JVC HR-DVS1EK instructions

JVC

JVC HR-DVS1EK instructions

Sensory Science DDV2120 user guide

Sensory Science

Sensory Science DDV2120 user guide

JVC HR-VP78U instructions

JVC

JVC HR-VP78U instructions

RCA VR611HF user guide

RCA

RCA VR611HF user guide

manuals.online logo
manuals.online logoBrands
  • About & Mission
  • Contact us
  • Privacy Policy
  • Terms and Conditions

Copyright 2025 Manuals.Online. All Rights Reserved.

Video Cassette Recorder
OmnM_mSY_l Operating Instructions
PV-VS4821
ENERt<__'y_T:4R_: ,{;,_,,_de?_,':,e_to,,e_:,e,'gyeffic,:_,,_;v.
Pie856' read these ids_[!(:;t_ioss os.rehjHy before attempting to oonnect:,,
operate or adjust this product, Ptease save this mar_ual.
Spanish Qui_k Use Guide is included, (Guia para rapida ¢ons_lta en
espaSo_ esta incluida:} L.S®_O_7_:)_,
ImportantSafeguardsandPrecautions
FOR YOUR SAFETY, READ AND RETNN1
ALL SAFETY AND OPERATING I
INSTRUCTIONS. HEEO ALL WARNINGS /
It N THE MANUAL AND ON,THE UNIT /
IINSTALLATION _
1 POWER SOURCE CAUTION
Operate only from a power source indicated on
the unit or in this manual. If necessary, have
your Electric Utility Service Company or Video
Products Dealer verify the power source in your
home,
2 POLARIZED OR GROUNDING PLUG
AS a safety feature, this Video product comes
with either a polarized power cord plug (one
blade is wider than the other), or a three-wire
grounding type plug,
POLARfZED PLUG CAUTION:
This plug will only fit into an outlet one way. If
cannot fully inset; the plug, try reversing it. If it°u
Y
still will not fit, have an electrician install the
roper wall outlet. Do not defeat the safety feature
y tampering with the plug.
GROUNDING PLUG CAUTION:
This plug will only fit into athree-hole grounding
outleL If necessary, have an electrician install the
proper outlet. Do not defeat the safety feature by
tampering with the plug.
3 POWER CORD
Make sure power cords are routed so that they
are not likely to have anything rest on them, roll
over them, or be in the way of walking traffic,
II an extension cord is used, make sure it also
has either a polarized or grounded plug and that
the cords can be securely connected. Frayed
cords, damaged plugs, and damaged or cracked
wire insulation are hazardous and should be
replaced by a qualified service technician.
Overloaded outlets and extension cords are fire
hazards and should be avoided.
4 DO NOT BLOCKVENTILATION HOLES
Ventilation openings in the cabinet release heat
generated dudng operation, ff they are btocked,
heat build-up inside the unit can cause failures
that may result in a fire hazard or heat damage
to cassettes. For protection, follow these rules:
a, Never cover ventilation slots or the unit
while in use, or operate the unit when placed
on a bed, sofa, rug, or other soft surlace.
b. Avoid built-in installation, such as a book case
or rack, untess proper ventilation is provided.
5 AVOID EXTREMELY HOT LOCATIONS OR
SUDDENTEMPERATURE CHANGES
Do not place the unit over or near any kind of
heater or radiator, in direct sunlight, inside a
closed vehicle, etc,. Do not move the unit
suddenly between areas of extreme temperature
variation. If the unit is suddenly moved from a
coJd place to a warm place, moisture may
condense in the unit and on the tape.
6 TO AVOID PERSONAL INJURY
•Do not place unsecured equipment on a
sloping sudace.
•Do not place this uniton any support
that is _ fin'n, teve], and adaquatety ,.,_....
str0ng. 1tie unitcould fall CaL_ng
sodous iniury to a chitd or adult _"IL.
and damage to the unit,
oAn appliance and cad c_'nbinat_n
should be moved with care,
Quick slops, excessive force, and
uneven surfaces may cause the
appliance and cart combinatiOnto overturn.
• Carefully follow all operating instructions and
use the manufacturer's recommended
aocessodes when operating this unit or
connecting it to any other equipment.
2
'1 OU_OOR A,NTENNA INSTALLATION t
1 SAFE ANTENNA AND CABLE CONNECTION
It an outside antenna or cable system isconnected to t_e
equipment be sure the antenna or cable system is grounded so as
to provk:le some protection against built up sta_ Charges
and voltage surges. Section -_
810 of the National Electrical ._jr_:.
Code, ANSL/NFPA 70 (in Canada, J _.A_
part Iot theCar_dian Electdca] _ J',_=J _, _
Code) provick_infom'_aben _)_[:::_-'_-.1..
with respectto propergrounding L._ _"_.,zT_-*-_=_r"
of the mast and supporting _ i_1_:_,-._
structure, grounding of the teed-in wire _"_----=_--=-_,_'=,_=_.'_'-
to an antenna discharge unit,size of grounding cond_ors,
locationof antenna discharge unit, con;.'_,ctionto grounding
electrodes and requirements for the grounding electrode.
2 KEEPANTENNACLF.AROFH_GHVOLTAGEPOWERLINESORC_RCUITS
An outside antenna system should be located well away from
power lines, electric light or power drouits and where itwignever
come {ritecontact with these power sources ifit should happen to
fail. When installingan outside antenna, extreme care should be
taken to avoid touching power lines,clrcu_s o_other power
sources as this could be fatal. Because of the hazards invek_l,d,
antenna installationshould be left to aprofessional,
IUSING THE VID,,E,O,,,UNIT I
If the unit has been in storage or moved to a new location,
refer first to the INSTALLATION section of these safeguards.
1 KEEP THIS VIDEO UNITAWAY FROM WATER OR
MOISTURE OF ANY KIND.
2 IF EQUIPMENT IS EXPOSED TO RAIN, MOISTURE, OR
STRONG IMPACT, unplug the unit and have it inspected by
aqualified service technician before use.
3 DURING AN ELECTRICAL STORM
During a lightning storm, whether indoors or outdoors, or
before tearing the unit unused for extended periods of time,
disconnect el/equipment from the power source as wsll as
the antenna and cable system.
4 WHENTHE UNITIS PLUGGEDIN
• Never expose the unit to rain or water. DO NOT OPERATE
if liquid has been spilled into the unit, Immediately unplug
the unit, and have it inspected by a service technician.
Fire and shock hazards can result from electrical shorts
caused by liquid contact inside,
•Never drop orpush any object through openings in the unit.
Some internal parts carry hazardous voltages and contact
Can cause electdc shock or rite hazard,
• Avoid placing the unit directly above or below your TV set
as this may cause etectricat mlefference. Keep sll magnets
away from electronic equipment.
5 USING ACCESSORIES
Use onty accessories recommended by the manufacturer to
avoid risk of fire, shock, or other hazards.
6 CLEANING THE UN1T
Unplug the unit. Then. use a dean, dry,chemically untreated ck_th
to gent_!"emove dust or deb=is.DO NOT USE cleaningflui,ds,
aerosols, or forced air that o_uld over-spray, or seep into _ unit
and cause electrical shock. Any sut_tence such as wax, adhesive
tape, elc. may mar thecabir_ surface. Exposure to greasy, humid,
or d_/areas may adversely affect internal parts.
I s_-_wlce I
1 DO NOTSERVICETHIS PRODUCT YOURSELF
If, after carefully following the detailed operating
instructions, this Video product does not operate properly,
do net attempl to open or remove covers, or make any
adjustments not described in the manual. Unplug the unit
and contact a qualified service technician.
2 IF REPLACEMENTPARTS ARE REQUIRED
Make sure the service technician uses only parts specified by
the manufacturer, or those having the same safety
characteristics as the odginal partS. The use of unauthorized
substitutes may result in fire, electric shock, or other hazards.
3 HAVETH E SERVICE TECHNICIAN PERFORM ASAFETY CHECK
After any service or repairs to the unit, request the service
technician to conduct a thorough safety check as
described in the manufacture's service literature to ensure
that the video unit is in safe operating condition.
Safety Precautions/Mesures de securitd
WARNING: To prevent fire or shock hazard, do not expose
this equipment to rain or moisture.
CAUTION: To prevent electric shock, match wide blade of
plug to wide slot, fully insert.
Avertissement: Afin de prevenir tout risque d'incendie ou de
chocs dlectriques, ne pas exposer cet appareil
t_la pluie ou &une humiditd excessive.
Attention: Pour eviter les chocs dlectriques, introduire la lame
la plus large de la fiche dans la borne
correspondante de la prise et pousser jusqu'au fond.
I
CAUTION: TO REDUCETHE RISK OF ELECTRIC SHOCK
DO NOT REMOVE COVER IOR BACK]
NO 'USER-SERVICEABI.'EPARTS INSIDE
REFERSERVIC=NGTO QUALIFIED SERVICE PERSONNE
This symbol warns the user that uninsulated
voltage within the unit may have sufficient
magnLtude to cause electric shock. Therefore,
it is dangerous to make any kind of contact
with any inside part of this unit.
This symbol alerts the user that important
literature concerning the operation and
maintenance of this unit has been included.
Therefore, it should be read carefully in order
to avoid any problems.
Note to CABLE system installer:
This reminder is provided to call the CABLE system installer's attention to
Article 820-40 of the NEC in USA (and to the Canadian Electrical Code in
Canada) that provides guidelines for proper grounding and, in particular,
specifies that the cable ground shall be connected to the grounding system
of the building, as close to the point of cable entry as practical.
FCC Warning: Any unauthorized changes or modifications to this
equipment would void the user's authority to operate.
3
Congratulations
on your purchase of one of the most
sophisticated and reliable products on the market
today. Used properly, it witl bring you years of
enjoyment. Please fill in the information below.
The serial number is on the tag located on the
back of your VCR.
° " " Z e- . ._*.,]
•Date of Purchase
•Dealer Purchased From
•Dealer Address
• Dealer Phone No.
• Model No. pVoV._,4821
• Serial No,
Break off the tab to
prevent recording.
Record Tab
[] Remote Control
LSSQ0299
_G®
[] Batteries 2 "AA"
[] RF Coaxial
Cable
VJAS0196
_' S-VHS
Connecting Cable
VJAS0200
To order accessories, call toll free
1-800-332-5368.
1) Open cover.
2) Insert
. batteries as
marked.
3) Close cover.
[] Battery replacement caution
•Do not mix otd and new batteries,
•Do not mix alkaline with manganese
batteries,
4
Screw driver
To record again
Only use tapes with the _ or _ mark
in this unit.
Tape Speed Type oi Video Casse_e
Settlng 'T60 T120 T160
SP 1 Hour 2 Hours 2 Hours
Slandard Play) 40 Minutes
LP 2 Hours 4 Hours
(Long Play)
SLP 3 Hours 6 Hours
(SuperLong Play)
5Hours
20 Minutes
8 Hours
•LP recording is not possible
in S-VHS/S-VHS ET mode.
L__IIIBJL_ LWJII L_LWJIIll_ II1,_,-]
Important Safeguards and Precautions .................................. i... 2, 3
Accessories ....................................................................................... 4
Loading the Batteries ....................................................................... 4
Prevent Accidental Tape Erasure .................................................... 4
Record/Playback Time ..................................................................... 4
Location of Controls ..................................................................... 6, 7
Initial setup for DSS/.Cable Box Channel Control .................... 8, 9
Initial Setup for ANTJ Cable-VCR-TV Connection .... ............. 10, 11
Initial Setup for DSS/Cable Box-VCR-TV Connection ........ 12 ~ 15
Reset Language, Channels, Clock, VCR's Output Channel ....... 16, 17
Playback a Tape .............................................................................. 18
Record on a Tape ............................................................................ 19
Timer Recording ....................................................................... 20, 21
Timer Recording Using VCR Plus+ ®System ........................ 22 - 25
Multi-Brand Control Feature .................................................... 26, 27
Advanced Connections .................................................................. 28
MTS Broadcast/VHS Hi-Fi Stereo System ................................... 29
Tape Operation ( CO_E_..,U_,r_m_ MOVTE",Amr,U_E') ........ 30 ~ 35
Special VCR Features ............................................................. 36 - 41
Super (S) VHS System ................................................... 42, 43
Copying Your Tapes (Dubbing) ...................................................... 44
VCR & Cassette Information .................................................... 45, 46
On-Screen Displays (OSD) ...................................................... 47, 48
Before Requesting Service ............................................................ 49
Service Center List ......................................................................... 50
Limited Warranty ............................................................................. 51
Spanish (Espafiol) Quick Use Guide ..................................... 52 ~ 55
Index ................................................................................. Back Cover
5
EJECT LIGHT
POWER
VCR mode
TVmode
DSS/CABLE mode
VCR/TV
PLAY
SELECT UP
REWIND,SEARCH
SET
ACTION
NUMBER KEYS
COUNTER RESET
PAUSE/SLOW
COMMERCIAL ADVANCE
ZERO SEARCH
SAP/Hi-Fi J
VOLUME UP/DOWN F
Light Tower Universal Remote Control
Light button: When LIGHT is pressed, available buttons in the selected mode light up and the
selected mode button (TV, VCR or DSS/CABLE) flashes for 5 seconds. If no button
is pressed, light goes out in 5seconds to conserve batteries. Also, by holding down
a button, you can confirm the selected mode (mode button witl flash) in the dark.
EJECT button: Press to eject tape from VCR. If EJECT is pressed during record,
VCR will not respond.
VCFI[rv Selector Cassette Compartment PLAY
\
S-VHS S-VHS ET
LED LED Remote
Sensor
"
Audio Input
Con nector (IJR)
6
FAST
FORWARD/
SEARCH
REWIND/
SEARCH
RECORD
CHANNEL UP/DOWN STOP_JECT
TRACKING/V-LOCK
,_I I
PowerIndicator
Lighls up when
power is on.
Clock/Status/Channel/Speed Display
Displays the current time. Briefly displays VCR
status when a function button is pressed. Briefly
displays the channel number, or "L1_or "1_2"
when a channel or line input is serected. Briefly
displays the recording speed when SPEED is
pressed.
Timer Indicator
Lights up when the VCR is set for Timer
Recording, or when One Touch Recording
(OTR) is used. Flashes when Timer Recording
is set, but a tape has not been inserted into the
VCR and when apower interruption occurs
during Timer Programming.
T=!ili_- VCR Indicator
Lights up when the
VCR/rv selector is
set to VCR.
Hi-Fi Indicator
Lights up when Hi-Fi audio
is monitored in Playback
Mode.
AC Power Plug Audio Input
Connector (L/R)
Video Input
Connector S-VideoOutput
Connector
AUDIO I* Ar_m *,_'r
I® _® ._
Video Output Audio Output
Connector Connector (L/R)
VHFiUHF Antenna
InputTerminal
VHF/UH tenna
OutputTerminal
S-Video Input
Connector
• While plugged into an AC outlet, the VCR consumes 3.7 W of electrical power in off
mode.
?
The setup on pages 10 through 15 is vital for proper VCR operation.
Please read the instructions carefully and in the order presented.
NOTE: These first two pages contain reference material needed for setup on pages 10 ~ 15.
Please look over the information before you begin selup procedure.
Setup Overview
You will be performing the following tasks:
• Setting the language you want on-screen displays to appear in (English, Spanish, French).
•Telling ihe VCR the kind of equipment you use to receive channels and how it is connected.
•Entering pertinent Cable Box orDSS Receiver information if used.
•Entering your local PBS (Public Broadcasting Station) channel so ihat the VCR can receive aulo
clock set data. (Not available in all areas.)
• Placing channels in memory and setting the clock.
Please Note Which.Connection Type You are Using.
Make sure all equipment is hooked up as described on pages 10 -15.
The diagrams below illustrate some of the basic connection types.
Confirm which type you used for tater reference.
Connection Type A
(Go to "Initial Setup"on page t0.)
1 / Connection Type B
(Go to "Initial Setup" on page 12.) ]
<VCR -_TV connection> <Cable Box-_ VCR-_ TV connection>
ioAoD,o..v,oEo,, o,ill
/ULt._ It
IOL O s.v,oEov.F,u,rIt
/ VIDEO IN OUT TO T",/ |
oo0 © '.'
l.,ouT ;[
VCR
IN OUT
ORO
OLO AUDIO
00,,,_Eo
i ::Dv"E'u"'
TV
CABLE
BOX
i , 1i--. -
rAUDIO S-VIDEO INEROM
O OUT ANT.
o
|VIDEO IN OUTTOTV I'.
oo0 ©..'-
I OUT J
VCR
IN OUT
O.O
0LO 'up'°
• 0 O_DEO
i ::Dv"F'0"F
TV
<DSS Receiver-WCR-pTV connection>
6" '1
ONAIR orCA'IV ANT
D88 0 LO UD'O
i ..... AI_II; IVIDEO IN OUT=_TOI"VIII/ _-" "" v
VCR IV
INITIAL SETUP IMPORTANT NOTES:
•For detailed DSS Receiver connection instruction, please see your DSS operating manual.
• A DSS Receiver must be turned off to view programs from the Cabte Box or anlenna.
• Also, the a DSS Receiver must be turned off for auto clock set.
• If your Cable Box is not remote controllable, it must be tuned to your PBS channel.
•If you use Audio/Video Jack connection between the VCR and Cable Box cr DSS Receiver, you
must also connect the RF coaxial cable in order to use auto clock set and channel auto set
features.
ii?
Cable B_ox/DSS Receiver Code Number List
IfyourCable Boxor DSS Receiverisremotecontrollable,relerto this listduringsetupon page13.
Cable Box
_r_[nd Code Number Brand Code Number
Archer .................................................. 44, 06, 01 RCA ........................................................... 17, 16, 08
Cableview ....................................... 29, 09, 0t, 63
Citizen .................................................. 44, 52, 30
Curtis ....................................... 08, 09, 25, 61, 53
Century .......................................... 44, 51, 75, 59
Cabletenna ..................................... 29, 09, 01, 63
CableCinema ................................. 29, 09, 01, 63
Diamond ......................................... 29, 09, 01,63
Eagle ................................. 62, 40, 22, 13, 58, 20
Eastern ...................................................... 28, 29
Explorer .................................... 08, 09, 25, 61,53
Gemini ........................................................ 30, 04
General Electric ......................................... 01,57
General Instruments .. 01, 84, 83, 34, 03, 02, 04,
55, 65, 66, 67, 68
Gerrard ........................................... 44, 51, 75, 59
GC Electronics .............................. 44, 42, 63, 29
Hamlin ............................................ 41, 14, 15, 28
Hitachi ............................................................... 31
Jerrold ........................ 0t, 84, 83, 34, 03, 02, 04,
5.5, 65, 66, 67, 68
' Jasco ......................................................... 30, 04
Maoorn ............................................................... 31
Magnavox .......................................................... 26
Matsushita ........................................... 17. 16, 08
Movietime ................................................... 32, 39
Maestro ...................................................... 74, 35
NEC ................................................ 40, tg, 38, 32
NSC ................................................ 40, 19, 38, 32
Novavision ............................... 08, 09, 25, 61, 53
Next Level ........... 01, 84, 83, 34, 03, 02, 04, 55,
65, 66, 67, 68
Oak ............................................................. 46, 11
Oak Sigma ................................................. 46, 11
Panasonic ............................................ 17, 16, 08
Philips ............................................ 23, 24, 20, 13
Pioneer ................................................. 06, 05, 12
Pulsar ......................................................... 04, 42
Quest ................................................... 06.05, 12
Radio Shack ................................... 44, 51, 75. 59
Realistic ............................................. 44, 51, 75, 59
Recoton ......:....................................... 44, .51, 75, 59
Regal .................................................. 41, 14, 15, ;'8
Regency .......................................................... 28, 29
Rembrandt .......................................... 44, 42, 63. 29
Samsung ................................................... 42, 06, 32
Scientific Atlanta ......................... 08, 09, 25, 61, 53
Sheritech ............................................................... 27
Signal .................................................................... 26
SL Marx ..................................................... 42, 06, 32
Sprucer ._; ................................................. 17, 16, 08
Standard Components .................................... 32, 39
Stargate ................................... _...................... 04, 42
Sylvania .......................................................... 19, 18
Teknika ........................................................... 74, 35
Telecaption ............................................................ 77
Teleview ............................................. 40, 19, 38, 32
Texscan .......................................................... 19, 18
Tocom ........................................... 34, 33, 0t, 42, 66
Toshiba ................................................................. 36
Unika .................................................. 44, 42, 63, 2g
Universal ............................................ 52, 43, 44, 63
Viewstar ................................. 62, 40, 22, 13, 58, 20
Videoway ................................................... 07, 23, 50
Vidtek .................................................................... 64
Zenith ........................................................ 07, 23, 50
DSS (Digital Satellite System) Receiver
Toshiba .................................................................. gO
HitachLtHughes ............................................... 91,99
Pdmestar ............................................................... 92
Drake ..................................................................... 93
Magnavox ........................................................ 94, 95
Uniden ............................................................. 94.95
Optimus ........................................................... g4, 95
Panasonic .............................................................. 96
ProScan ................................................................. 97
BOA ....................................................................... 97
SONY ............................................................ 98, 105
• Some brands list several codes, so you may need
to try different codes to attain proper results.
These codes are used Ior Cable Box or DSS Receiver
setup for Auto Clock and VCR Plus+ recording only.
For TVf Cable Box Multi-Brand _.ontrol operation,
please see page 26.
Posltionin _aYourCable Box orDSS Receiver
If your Cable Box or DSS Receiver is remote conlrollable,
place it on or near the VCR as shown in the example at
right, The VCR transmits an infrared signal from two
locations. Be sure not to cover the transmitter windows.
•Wall
CabJe BOxt
DSS _ta_..eiwr
9
For Connection Type A [VCR-TV].
(_Con nect the Cable from Antenna/Cable tothe IN FROM ANT. terminal on VCR.
(_Con nect the OUT TO TV terminal on the rear of VCR tothe ANT. INterminal on
your TV using the RF Cable (included accessory).
TV VCR IN FROM ANT.
_IN from
ANTJCABLE
VHF/UHF
Press VCR button* on the remote for VCR mode.
Turn your TV on and set it to channel 3.
Press POWER to turn VCR on.
I SE'"CT_U_E ----] Press CH & for English.
I=RESS CH A: ENGLISH or
PRIMIR CH V:ESPANC)L
PP. vc_, : _,_^,s Press CH Y for Spanish.
or
ItToc,_G_ vc,,sou_.rr LI Press VCR/TV for French.
JIGS, PRES_ ACTION KEY , II to select language.
*When VCR is turned on for the first time, SELECT
LANGUAGE screen appears.
° If wrong language is set, or there is not Language
Display, do "Reset All VCR Memory Functions"
steps on page 11.
•If screen does not appear, check connection between
VCR and TV and, if TV is tuned to channel 3, try
switching it to channel 4.
• When you want Io change the output channel of VCR,
please refer to VCR's Output Channel on page 17,
rARNING I
When using "Nut type" RF coaxial cables, tighten with
fingers only. Overtightening may damage terrninals.
]0
_T
POWER
VCR
VCR/TV
SELECT/
SET
& :PLAY
'IF:STOP
<1:REW
1_:FF
-- ACTION
CH&fV