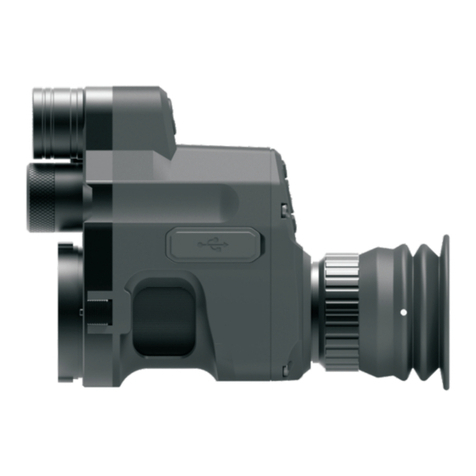
Pard NV007S User manual

Digital night vision
PARD
NV007S
Operation Manual
Important note
1.Don't look at the IR infrared light directly, or it will damage your eyes!
2.Massive power will be gathered when the infrared light is turned on.
Don't aim at flammable items at a close range, otherwise it may cause fire.
Please turn the infrared light off or enter sleep mode after use.
3.This product needs to be adapted with an optics scope(with AO focus or side
focus) , otherwise it may not be available!
4.A few optics scope may not be able to match this product because of the
design of the optical path.
—3—
—1—
3.Indicator adjustment
holes
4.Red dot indicator
1.Stretchable fill light
2.Battery cap
5.Adapter base
—2—

7.IR / mode switch
6.Sleep/Power
8.Red dot
9.Menu / Playback
10.OK/Photo/Recording
11.Zoom± / WiFi
14.Eyepiece dioptric adjustment ring
12.Adapter clip
13.Focusing knob
1.Connect the adapter with the end of eyepiece of the optics scope, make sure to get
a full image from the display of the unit, tighten the screws by a hex-nut wrench.
3.Adapter installation
—4—
Unpacking
This box contains:
Installation
Please use 3.7V Lithium rechargeable flat battery 18650.Remove battery
cap and make sure setting the positive polar towards to the direction inward.
Put the cap back and screw it until tight. ( Fail to do so may result in restarting!).
1.Battery installation
2.Adjustments
—5—
—7—
1 NV007S; 1 Micro USB cable;
2 Hex-nut wrenches; 1 Adapter;
Micro SD card is not included. Please prepare a micro SD card (128G maximum)
for data storage. If the Micro SD card is bigger than 16G, the Micro SD card should
be formatted inside the unit.
—6—
Instructions
1.Turn On/Off:
2.Sleep / Wake-up mode:
3 Spacer rings;
1 Electrical tape.
A simple test can be taken to check the functions of the device after
the installation of battery.
First, rotate and adjust the eyepiece dioptre adjustment ring until you see
the character icons on the screen (there's no need to see a clear image ).
Second, rotate the objective lens adjustment ring until you can see your target
clearly.
Third, connect the adapter with the optics scope by following instructions.
At last, adjust the focus ring of the optics scope to get a sharp view.
(Two sizes of adapters are available and optional: 45mm and 48mm. The
adapter can be applied to the optics scope with 38-48mm diameter of
eyepiece.The spacer rings and electrical tape in the package can help to install
the adapter).
2.Make the unit clip-on with the adapter. The installation is finished after
hearing a sound of click.
3.Press and hold the adapter clip, twist the unit in a counter-clockwise
direction to take off the unit.
Turn on the device with a short press of Power button. Turn off the device
with a long press of Power button. Power indicator will keep light when the
device is turned on.
Enter into the sleep mode with a short press of Power/Sleep button
when the device is turned on.
Power indicator will keep light when the device is under the sleep mode.

—8—
—11—
—10—
—9—
3.The eyepiece adjustment
4.The objective lens focusing
5.IR fill light brilliance control
In general, set the position of AO to the point of infinity.
6.Red dot Adjustment
7.Menu operation
2>Prerecord
4>Brightness Of IR
5>Brightness
6>Auto Recording
ReticleC enterP ositionA djustment
Default Color
Brightness Of IR
Brightness
Autorecording
Looprecording
Date Stamp
Prerecord
1>Reticle Center Position Adjustment
The purpose of dioptre adjustment is to get a clear image for users with
different vision. Rotate and adjust the dioptre adjustment ring until getting a
clear view of icons on the screen. One adjustment only for each eye.
(Please note it's possible that the image is not clear without the adjustment
of objective lens.)
Make sure the eyepiece dioptre adjustment is finished. Aiming at your
target, rotate and adjust the Focusing knob until getting a clear and well-
focused image.
fill light is stretchable which can be pull out or push back to make a quick
adjustment.
Turn on the device, then turn the red dot on/off with a short press of Red
dot/+ button. The position of laser can be adjusted on the laser adjustment
holes by a hex-nut wrench.
Turn on the device, enter into the black and white mode with a long press
of IR button. Switch to IR1-3 or off with a short press of IR button. The part of
Press Menu button to call out menu. Press +/- button to select options.
Enter a submenu with a short press of OK button. Exit the menu with a short
press of Menu button.
Enter the submenu Reticle Center Position Adjustment with a short press
of OK button. Press "+" or "-" to adjust the Y value; Press the IR / menu button
to adjust the X value. Make sure that the crosshair coincide with the reticle in
the optics scope to the center of the display. Press "OK" to save and exit.
" "
Enter the submenu 'Prerecord' with a short press of OK button.
Select 'Off' or 'On' with a short press of +/- button. Confirm your selection
with a short press of OK button.
Enter the submenu “Brightness” of IR with a short press of OK button.
Select “Off” ,“1”, “2”, or “3” with a short press of +/- button. Confirm
your selection with a short press of OK button.
Please note this setting is for the default brightness of IR. Pressing
IRbutton under Black & White mode for instant setting of IR brightness.
Enter the submenu “Brightness” with a short press of OK button. Select
“LEVEL 0”, “LEVEL 1”, “LEVEL 2”, “LEVEL 3” or “LEVEL 4” with a short
press of +/- button. Confirm your selection with a short press of OK button.
Enter the submenu “Auto Recording” with a short press of OK button.
Select “Off” or “ On” with a short press of +/- button. Confirm your
selection with a short press of OK button.
3>Default Color
Enter the submenu “Default Color with a short press of OK button.
Select “Color” or “Black & White” mode with a short press of +/- button.
Confirm your selection with a short press of OK button.
”

—12——13—
10>Beep sound
11>WiFi
14>Date/ Time
—14——15—
9>Record Audio
13>Language
12>Exposure
15>Format
Beep Sound
WiFi
Exposure
Language
Date/Time
Format
Default Setting
Record Audio
8>Date Stamp
Enter the submenu “Date Stamp” with a short press of OK button. Select
“Off" or "On"with a short press of +/- button. Confirm your selection with a
short press of OK button.
Enter the submenu "Record Audio" with a short press of OK button. Select
"Off"or "On" with a short press of +/- button. Confirm your selection with a
short press of OK button. This setting is to realize an audio or a silent video.
Enter the submenu "Beep sound"with a short press of OK button. Select
"Off"or"On"with a short press of +/- button. Confirm your selection with a short
press of OK button. This setting is to choose whether the keyboard press sound
will be recorded into the video or not.
Enter the submenu"WiFi"with a short press of OK button. Select "Off"or
"On" with a short press of +/- button. Confirm your selection with a short press
of OK button. Press and hold the WiFi button to turn on/off the WiFi without
opening the menu interface. (The Menu page can not be opened while WiFi is
turned on)
Enter the submenu “Exposure” with a short press of OK button. Select one
of the options with a short press of +/- button. Confirm your selection with a
short press of OK button.
Enter the submenu “Language” with a short press of OK button. Select
one of the options with a short press of +/- button. Confirm your selection with
a short press of OK button. Options include "English", "Francais", "Espanol"
"Portugurs", "Deutsch", "Italino", "Pyccknn" and "Cesky".
date with a short press of +/- button. Select "YY/MM/DD”, “MM/DD/YY”
or “DD/MM/YY” as your date format with a short press of +/- button. Save
selected date and exit the submenu with a short press of Menu button.
Select "Cancel"or "OK"with a short press of +/- button. Please take extreme
caution to perform this operation. All data could not be recovered if formatted.
Enter the submenu “Format” with a short press of OK button.
16>Default Setting
Enter the submenu "Default Setting" with a short press of OK button. Select
“Cancel"or "OK" with a short press of +/- button.
Confirm your selection with a short press of OK button.
17>Version
Enter the submenu “Version” with a short press of OK button to check the
unit's firmware version.
Enter the submenu “Date/Time” with a short press of OK button. Select
one of the options with OK button. Select a correct value for year, month and
The default user name and password of WiFi are PARD and 12345678.
7>Loop Recording
Enter the submenu “Loop Recording” with a short press of OK button.
Select “Off” , “3 minutes”, “5 minutes” or “10 minutes” with a short
press of +/- button. Confirm your selection with a short press of OK button.

Model No.
Magnification IR power
IR wave length
IR illuminate
distance
Adapter size
Video
resolution
Eyepiece
resolution
Voltage
Output type
Battery Dimension
Weight
NV007S
4x-14x 5w
850/940nm
45 / 48mm
18650x1
1920*1080
>8h
Battery life
Storage type T F Card
Focusing
1024*768
250m
102*75*118
Specifications
Warranty
—17—
Frame rate 30fps
Transmission
method WiFi
mp4
3.7V
—18—
265g
Notice:
Photo
resolution 2592*1944
3cm-∞
—16—
Warranty card
—18—
Product model:
Product code:
Date of purchase:
Warranty period:
User Name:
User's phone:
User address:
Warranty records:
Product specifications are subject to change without notice.
The right to interpret this manual is owned by PARD.
Press and hold “Menu/playback” button to playback video clips stored in
SD card;
Press “OK/photo/recording” button to take photos; Press and hold
OK/photo/recording button to make/save video recording;
Press “-”button to zoom in/out;
Press “+”button to turn on/off Red dot indicator.
—19—
8.Shortcuts
Under the user interface:
Press and hold”IR fill light brilliance control /Color or BW mode” button to
make switch between color / BW mode;
Press and hold “-/WiFi” button to turn on/off WiFi;
This product is warranted against defects in materials and workmanship
for a period of two year from the date of purchase.
This warranty is for the original purchaser only!
Operate this device in daylight or view any strong radiation source like the Sun,
electric welding and Laser directly may cause permanent damage to internal parts
of this device and this is not covered by the Warranty.

Telephone:+86-0755-29484438
Address:No. 328 Baoshi East Road, Shiyan, Baoan District, Shenzhen, China
Website:www.pard-tech.com
Table of contents
Other Pard Camera Accessories manuals