3
Setup
)LOOVROXWLRQWDQNZLWKZDWHURUDSSURYHGFOHDQLQJDJHQW)RUEHVWUHVXOWVÀOOZLWK
warm water (140°). Replace vacuum tank.
)ODPPDEOHPDWHULDOVFDQFDXVHDQH[SORVLRQRUÀUH'RQRWXVHÁDPPDEOHVROXWLRQV
or materials in tank(s).
FOR SAFETY: When using machine, follow mixing and handling instructions on
chemical containers.
ATTENTION: If using powdered cleaning chemicals, mix prior to adding.
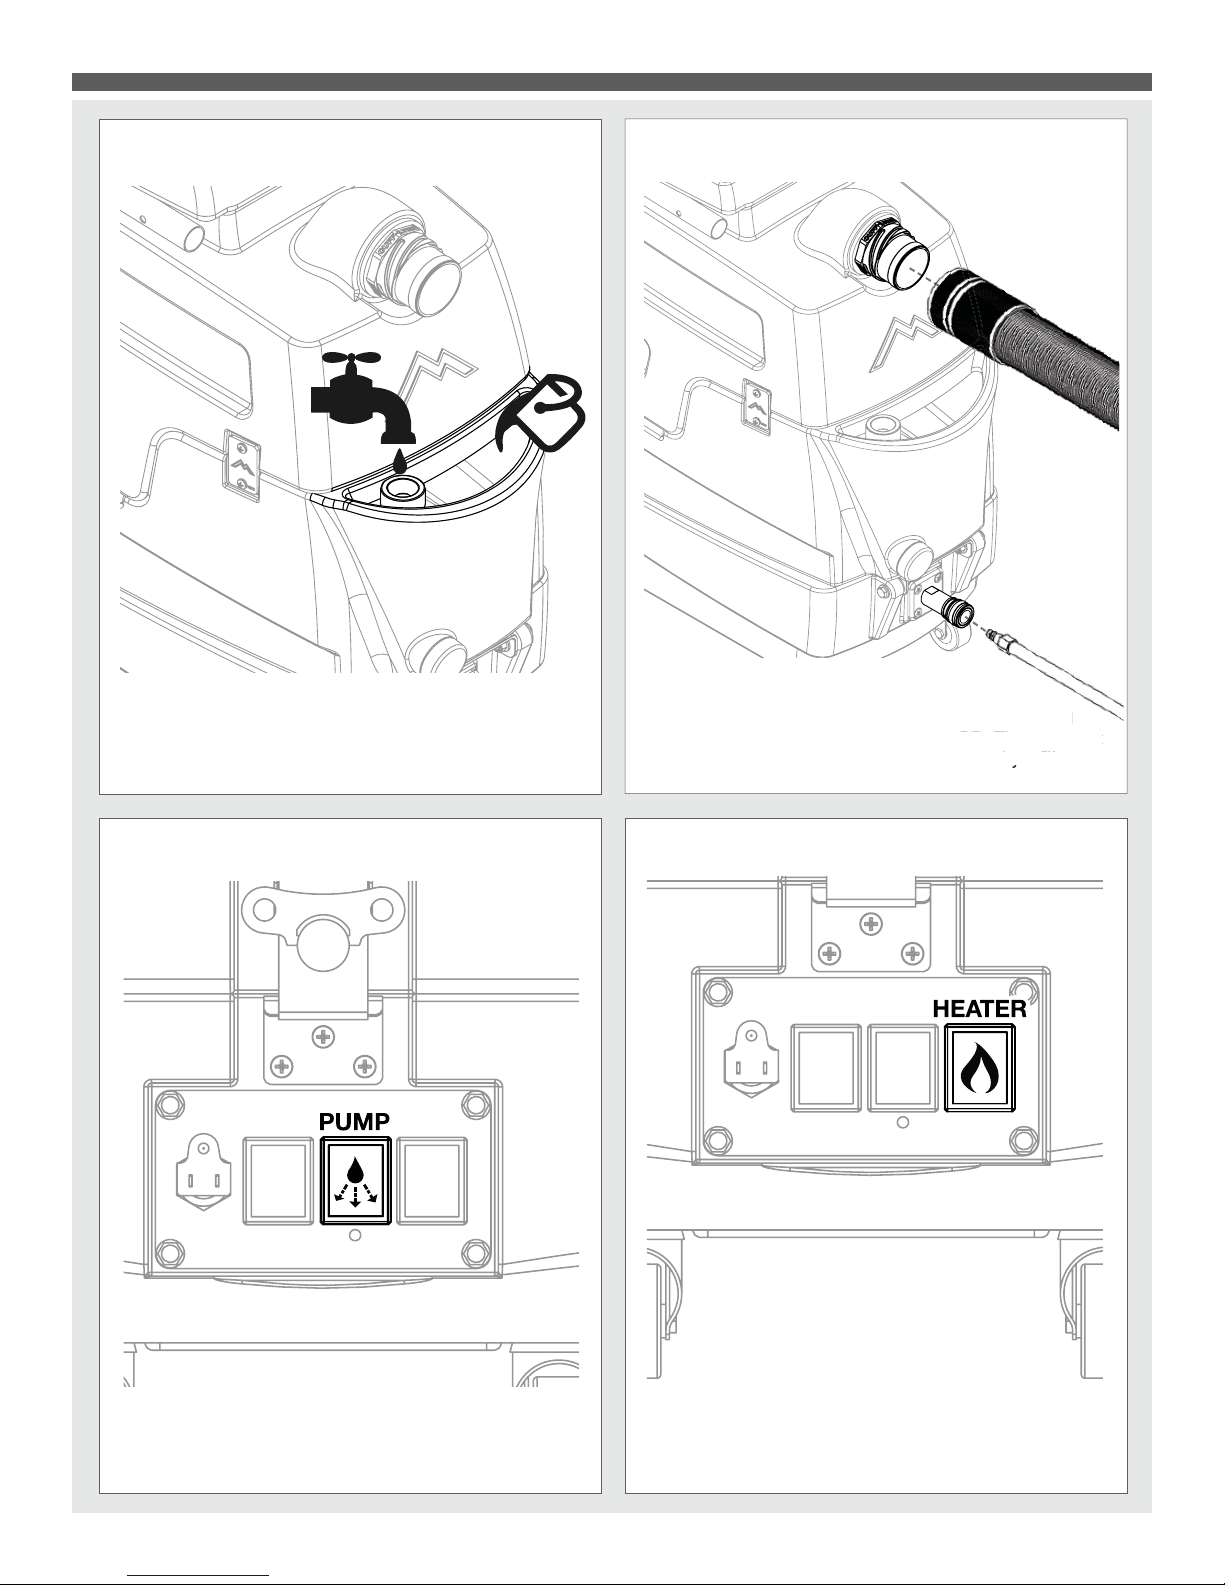
2. Attach solution hose (located front of machine). NOTE: Make sure the quick
GLVFRQQHFWVQDSWRJHWKHUÀUPO\$V\RXGRWKLVDOZD\VLQVSHFWKRVHVIRUFUDFNVRU
fraying. Do not use if hoses are damaged.
3. Attach other end of solution hose to cleaning tool.
4. Attach vacuum hose to recovery tank.
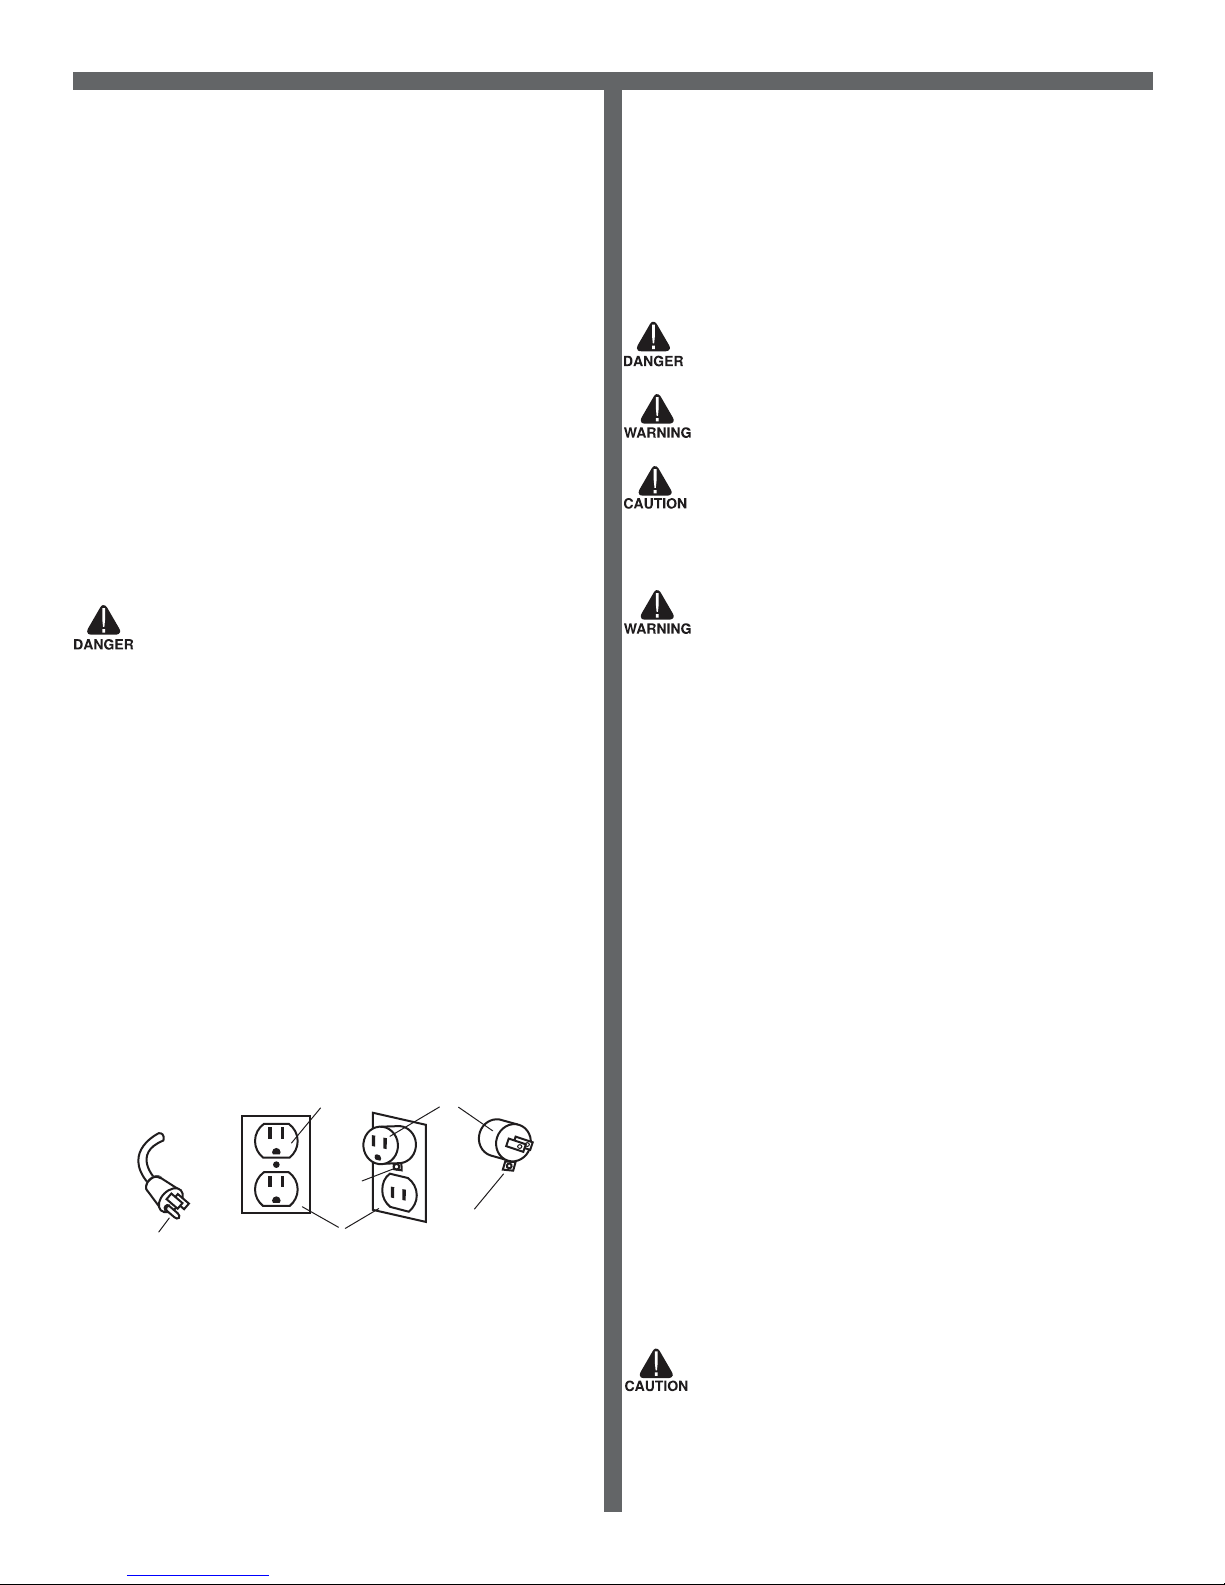
3OXJPDFKLQH·VFRUGLQWRDJURXQGHGZDOORXWOHW)256$)(7<'RQRWRSHUDWH
machine unless cord is properly grounded. FOR SAFETY: Do not operate machine
with the use of an extension cord.
7XUQRQSXPS3XOOWULJJHURQWRROXQWLO\RXKDYHDVWHDG\ÁRZ
7. Release tool trigger. Turn on heater.
8. Wait 5–7 minutes for unit to pre-heat.
3XOOWULJJHURQWRROXQWLOKRWZDWHUEHJLQVÁRZLQJ
10. Turn on vacuum motor.
11. Begin cleaning. Make two dry passes to every wet pass.
)RUÁRRUFOHDQLQJXQSOXJWRRODQGDWWDFKÁRRUZDQG
13. Work away from cords to avoid damage.
14. Use a defoamer in your recovery tank.
15. To clean heavily soiled areas, repeat cleaning from different directions.
16. When vacuum tank is full, empty tanks.
17. When work is complete, unplug cords and hoses.
18. Wrap and clean hoses. Clean all tanks.
Pre-Operation
1. Vacuum carpet and upholstery and remove other debris.
2. Perform machine setup procedures.
3. Inspect power cord for damage.
Operation
1. Turn pump switch on.
3XOOXSRQWRROOHYHUWRUHOHDVHDLULQWKHOLQH+ROGOHYHUXQWLODVWHDG\ÁRZRIZDWHU
comes out of the wand.
3. Once pump is primed and there is pressure in the solution line, turn on heater switch
(if model is equipped with heater) and wait a few minutes for water to heat up.
4. Once water is heated, turn on vacuum and begin cleaning.
1RWH:KHQFOHDQLQJXSKROVWHU\DOZD\VFKHFNPDQXIDFWXUHU·VFOHDQLQJLQVWUXFWLRQV
1. Work away from outlet and power cord to prevent cord damage.
2. Use a recommended foam control solution in the recovery tank to prevent vacuum
motor damage. Periodically check for excessive foam buildup in solution tank, and
recovery tank.
3. To clean heavily soiled areas, repeat cleaning path from different direction.
4. 0DNHVXUHWRHPSW\WKHUHFRYHU\WDQN%()25(UHÀOOLQJWKHVROXWLRQWDQN)DLOXUH
to drain the recovery tank appropriately will result in damage to the vacuum motor.
5. After cleaning, relieve water pressure from tool before disconnecting hose.
6TXHH]HWULJJHUIRUÀYHVHFRQGVDIWHUWXUQLQJPDLQSRZHUVZLWFKRII
After Use
1. Unplug.
2. Empty solution tank and rinse it with clean water.
3. Inspect hoses and replace if damaged.
4. Attach 45°drain elbow to dump valve and lift up drain valve lever to empty
recovery tank.
,QVSHFWVROXWLRQÀOWHU&OHDQRUUHSODFHLIGDPDJHG
6. Store the machine in a clean, dry place.
7. Open recovery tank cover to promote air circulation.
8. Do not expose to rain. Store indoors.
Maintenance Schedule
Maintenance item Daily Once a week
Clean and inspect Tanks
Clean and inspect Hoses
Check power supply cable
Clean machine with all purpose cleaner and cloth
Check spray nozzles
Flush solution system with Mytee system maintainer
5HPRYHDQGFOHDQÁRDWVKXWRIIVFUHHQIURPWDQN
Inspect vacuum hoses for holes and loose cuffs
Inspect machine for water leaks and loose hardware
x
x
x
x
x
x
x
x
x
Troubleshooting
There is no power.
• Plug the machine into proper outlets.
• Check the circuit breaker. Other devices should not run on the same circuit as the
extractor. Use a 20 amp outlet.
Pump does not work properly.
• Make sure solution line quick disconnects are properly connected.
• Check Solution tank. May be empty.
• -HWVPD\EHFORJJHG5HPRYHMHWDQGÁXVKFOHDQ
• )LOWHUVFORJJHG5HPRYHÀOWHUVFOHDQDQGÁXVKZLWKZDWHU
• Heater may be partially blocked. Flush system with System Maintainer.
• Inspect the heater check valve. Replace if necessary.
• Check pump wire(s). Reconnect or replace when necessary.
• Check panel actuation switch. Replace if faulty.
• Worn pump motor brushes (if equipped). Replace pump motor.
• 5HIHUWRUHOHYDQWLQGHSWKWURXEOHVKRRWLQJLQIRUPDWLRQLQ´7HFKQLFDO6XSSRUWµVHFWLRQ
RI0\WHHZHEVLWHIRUVSHFLÀFSXPSW\SHKWWSZZZP\WHHFRPVXSSRUW
Heater does not function.
• Check manual sensor on heater (reset by pressing button on sensor). Replace if
non-functional.
• Check automatic sensor. Check for continuity when cool. Replace if found faulty.
• Heating element may have failed. Replace. Check using ammeter when heater is
engaged independently.
• Reconnect heater wire, if disconnected.
• 5HIHUWRUHOHYDQWLQGHSWKWURXEOHVKRRWLQJLQIRUPDWLRQLQ´7HFKQLFDO6XSSRUWµVHFWLRQ
of Mytee website. http://www.mytee.com/support/.
Vacuum motor does not function properly.
• Check that all vacuum hoses are tightly connected.
• Close recovery tank drain valve completely.
• Hose/tool blockage or leakage. Repair or unblock the tool or hose.
• Secure the vacuum tank lid tightly.
• Grinding noise from blower indicates impeller failure from debris, dry vacuuming,
DQGRYHUÀOOLQJIRDPLQJ5HSODFHYDFXXPPRWRU
• Worn motor brushes. Replace vacuum motor.
THE FOLLOWING APPLIES TO BRAND NEW MACHINES:
3XPSV\VWHPZLOOQRWÁRZZDWHU
• The system could be vapor locked, which results from activating the heater before
the pump. Release pent-up pressure by removing extractor outlet disconnect, or by
depressing the disconnect inner poppet valve using a dull plastic object (such as a
pen). Resume operation, using proper technique outlined beginning on page 6.
• Check outlet disconnect. Remove to test. Replace if necessary.
• Hanging heater check valve. Remove hose to heater check valve, and manually
manipulate the internal valve poppet ball with straightened paper clip. Replace hose
to test. Replace faulty check valve (B108).
Unit is tripping circuit breaker(s).
• Ensure that only a 20 amp circuit is being used.
• Use only a cord approved for the machine.
• Do not add any extension cords to those cords supplied for use with extractor.
• Faulty component may be drawing excessive amperage. Check each component
separately.
• Faulty circuit breaker at site. Use another outlet.
Accessories (optional)
3601 System Maintainer
8400DX Mytee Dry™ Upholstry Tool
8390-EZ-C Cleaning Wand
8700 Crevice Tool
GENERAL INFORMATION