Parish Supply LBH18 User manual

Bucketless Handle
LBH18 Instruction Sheet
First Time Assembly Instructions:
1. Remove contents of carton
2. Assure all components listed above are present
3. Place threaded collar on handle
4. Insert handle stem into yoke and align holes
5. Insert locking ring
6. Tighten threaded collar
How To Load Unit With Cleaning
Fluid:
1. Remove dispensing bottle from holster
2. Remove orange fill cap
3. Fill bottle to 32 oz fill line (or desired amount if less than 32 oz)
4. Assure cleaning solution is diluted properly
5. Replace orange fill cap
6. Replace dispensing bottle firmly yet gently to holster. NOTE: Bottle is not fully
engaged and properly seated until you hear and feel a “click”.
Included:
1. Handle Assembly
2. Dispensing Bottle
3. Instruction Sheet
4. Frame (Velcro®)
5. Chemical Identification
Labels Sheet
How To Attach Mop Frame:
If using Velcro®frame:
1. Carefully place correct size and type of head
against the Velcro®strips on the bottom of frame.
This is best achieved by laying the mop head
face down on the floor then placing the frame
evenly upon the mop head.
If using a collapsing frame with pocket mops:
1. Place mop frame face down on floor.
2. Using your foot, depress the frame release
button on the collapsing frame
3. With frame in collapsed position, place each
“end” or “wing” of the frame at each opening of
the mop head pockets.
4. Apply gentle, but firm downward pressure to
the handle until the frame extends into both
mop pockets. NOTE: A “click” will signify that
the frame is locked into operating position,
assuming both ends are properly inserted to
mop pockets.
Frame Style Dusting Damp Mopping Deeper Cleaning Disposable Heads Floor Finish
Application
Staining Application
Concrete Floor
Hook & Loop
18”
3177-Mop wet looped
microfiber white
LFFD18 – Mop dust
fringe microfiber Velcro®
gray blue
LF0011 – Mop wet
looped microfiber pad
blue
LF0012 – Mop wet
looped microfiber pad
blue
3177 – Mop wet looped
microfiber white
LWBS18 – Mop wet
microfiber scrubber blue
LWGS18 – Mop wet
microfiber scrubber
green
LWRS18 – Mop wet
microfiber scrubber red
LWYS18 – Mop wet
microfiber scrubber
yellow
DISP18 – Pad
microfiber disposable
white
(needs to be modified
and does not stick to
molded Velcro®)
LFFV18 – Mop finish
microfiber trapezoid
white
3189 – Mop microfiber
18” finish white blue
stripes blue band
LFFV18 – Mop finish
microfiber trapezoid
white
3189 – Mop microfiber
18” finish white blue
stripes blue band
Collapsing Frame
16”
LFPB16 – Mop wet
scrubber microfiber
pocket style fringe blue
LLPY16 – Mop wet
looped microfiber style
pocket style yellow
LFPB16 – Mop wet
scrubber microfiber
pocket style fringe blue
LLPY16 – Mop wet
looped microfiber style
pocket style yellow
LFPB16 – Mop wet
scrubber microfiber
pocket style fringe blue
N/A - pocket backing
rules out inexpensive
pads
N/A N/A
How To Choose The Correct Mop Head
200 ml
400 ml
600 ml
800 ml
1000 ml
1
2
3
4
5
Bucketless Handle
LBH18 Instruction Sheet
FirstTime Assembly Instructions:
1. Removecontents of carton
2. Assureall components listed above are present
3. Placethreaded collar on handle
4. Inserthandle stem into yoke and align holes
5. Insertlocking ring
6. Tightenthreadedcollar
HowTo Load Unit With Cleaning
Fluid:
1. Removedispensing bottle from holster
2. Removeorange fill cap
3. Fillbottle to 32 oz fill line (or desired amount if less than 32 oz)
4. Assurecleaning solution is diluted properly
5. Replaceorange fill cap
6. Replacedispensing bottle firmly yet gently to holster.NOTE: Bottle is not fully
engagedand properly seated until you hear and feel a “click”.
Included:
1. HandleAssembly
2. Dispensing Bottle
3. Instruction Sheet
4. Frame (Velcro®)
5. Chemical Identification
LabelsSheet
HowTo Attach Mop Frame:
Ifusing Velcro®frame:
1. Carefullyplace correct size and type of head
againstthe Velcro®stripson the bottom of frame.
Thisis best achieved by laying the mop head
facedown on the floor then placing the frame
evenlyupon the mop head.
Ifusing a collapsing frame with pocket mops:
1. Placemop frame face down on floor.
2. Usingyour foot, depress the frame release
buttonon the collapsing frame
3. Withframe in collapsed position, place each
“end”or “wing” of the frame at each opening of
themop head pockets.
4. Applygentle, but firm downward pressure to
thehandle until the frame extends into both
moppockets. NOTE:A “click” will signify that
theframe is locked into operating position,
assumingboth ends are properly inserted to
moppockets.
FrameStyle Dusting DampMopping DeeperCleaning DisposableHeads Floor Finish
Application
StainingApplication
ConcreteFloor
Hook& Loop
18”
3177-Mopwetlooped
microfiberwhite
LFFD18–Mop dust
fringemicrofiberVelcro®
grayblue
LF0011–Mop wet
loopedmicrofiberpad
blue
LF0012–Mop wet
loopedmicrofiberpad
blue
3177–Mop wet looped
microfiberwhite
LWBS18–Mop wet
microfiberscrubberblue
LWGS18–Mop wet
microfiberscrubber
green
LWRS18–Mop wet
microfiberscrubberred
LWYS18–Mop wet
microfiberscrubber
yellow
DISP18–Pad
microfiberdisposable
white
(needstobe modified
anddoesnot stick to
moldedVelcro®)
LFFV18–Mop finish
microfibertrapezoid
white
3189–Mop microfiber
18”finishwhite blue
stripesblueband
LFFV18–Mop finish
microfibertrapezoid
white
3189–Mop microfiber
18”finishwhite blue
stripesblueband
CollapsingFrame
16”
LSPFB16–Mop wet
scrubbermicrofiber
pockstylefringe blue
LWPY16–Mop wet
loopedmicrofiberstyle
pocketstyleyellow
LSPFB16–Mop wet
scrubbermicrofiber
pockstylefringe blue
LWPY16–Mop wet
loopedmicrofiberstyle
pocketstyleyellow
LSPFB16–Mop wet
scrubbermicrofiber
pockstylefringe blue
N/A-pocket backing
rulesoutinexpensive
pads
N/A N/A
HowTo Choose The Correct Mop Head
200ml
400ml
600ml
800ml
1000ml
1
2
3
4
5

How To Operate
1. Assure the correct cleaning solution is properly loaded into dispensing
bottle and that dispensing bottle is correctly loaded into the holster. NOTE:
Consult your MSDS Right to Know Center before using chemicals. Affix the
corresponding Chemical Identification Label to the dispensing bottle. (Be sure
to consult full label copy and MSDS prior to use.)
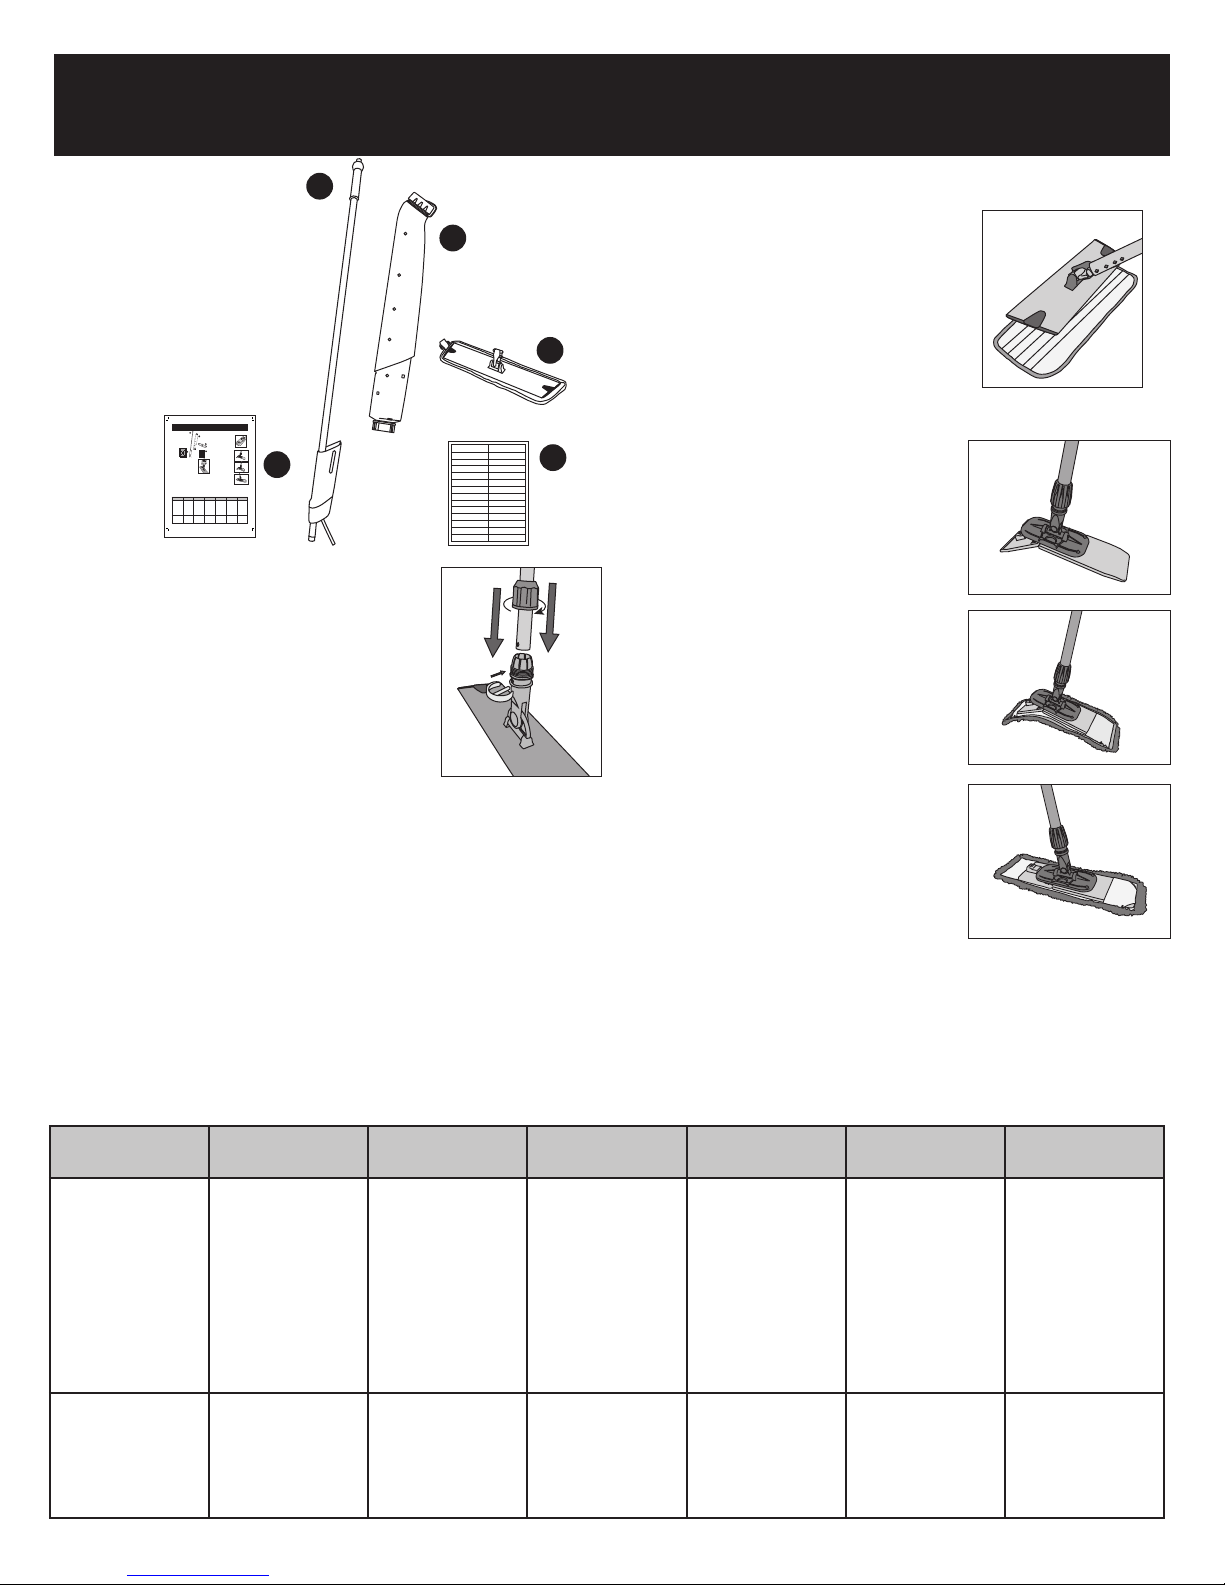
2. Assure proper mop head has been chosen and that it is correctly attached to
a properly installed frame. (see chart)
3. Be sure to have your room prepared by removing all furnishings, posting a
Wet Floor sign, and properly dust mopping the floor to be cleaned.
4. Use proper PPE’s (Personal Protective Equipment).
5. Choose a spot in the room that is furthest from the door you will be exiting.
With frame and mop head on the floor, depress the orange valve button once
to turn the solution flow valve on until enough fluid is discharged to provide an
initial “wetting” of your mop head. Push button again to turn the solution
flow valve off. Flow will stop when button is pressed a second time.
Operation is similar to a ball point pen.
NOTE: The click-on, click-off feature is designed to reduce user fatigue when
a constant flow of fluid is desired.
6. Frame the area you wish to clean, return to the starting point and work your
way toward the intended exit door working the frame in a figure 8 motion,
being certain to effectively overlap each pass to ensure an even clean.
7. Reapply fluid to the floor and subsequently to the mop head by depressing
the orange valve button as needed.
8. Return unit to storage area. See How To Clean, Maintain and Store After Use
instructions below.
How To Clean, Maintain and Store After Use
1. Remove mop head and place in laundry bag (if launderable) or in trash if
disposable.
2. Remove dispensing bottle from holster by pulling upward firmly, yet gently.
3. Dispensing bottle is sealed and may be stored in dedicated storage area.
NOTE: Always read and follow chemical label instructions.
4. If dispensing bottle is empty, rinse out dispensing bottle by removing both top
(orange) and bottom caps and allow clean water to flow. Most chemistries call
for a triple rinse.
5. Bring handle to water source and with orange valve button locked “on” rinse
water through the holster/valve assembly.
6. Using a clean, dry microfiber towel, wipe down the entire unit.
7. If dispensing bottle is clean and empty, replace to holster. NOTE: We
recommend purchasing extra dispensing bottles to allow for more efficient
cleaning programs and multiple cleaning chemical changes.
8. Store handle on wall via our GateMate Plus® Holder or the integrated
handle hook. NOTE: Do not hang unit by bottle tether. Bottle may become
disengaged and cause damage to unit.
9. Extra dispensing bottles may be stored by hanging them by their integrated
storage hook onto a properly anchored edge / shelf / lip.
Trouble Shooting Guide
Symptom Solution
Frame falls off handle Ensure swivel connector tabs on mop
frame have “clicked” into the receiving
holes on the handle.
Valve will not dispense Confirm that dispensing bottle is firmly
“clicked” into holster.
Is dispensing bottle filled with chemistry?
Is orange valve button fully depressed?
Is dispensing tube kinked or clogged?
Valve will not turn off Ensure that orange valve button is not in
locked-on position.
Dispensing bottle will not properly Is there any debris inside holster?
seat or “click” into place Is dispensing bottle button cap installed?
Is dispensing bottle button cap tight?
Is dispensing bottle in holster backward?
Frame does not swivel 360° Is swivel locked engaged?
Is frame properly mounted to handle?
Replacement Parts
LBH18VK Valve Kit
LBH18H Tether without Cap
LBH18HC Tether and Large Bottle cap
LBH18N Bottom Bottle Cap Valve
LBH18B Bottle with Tether and Caps
Table of contents
Other Parish Supply Floor Machine manuals