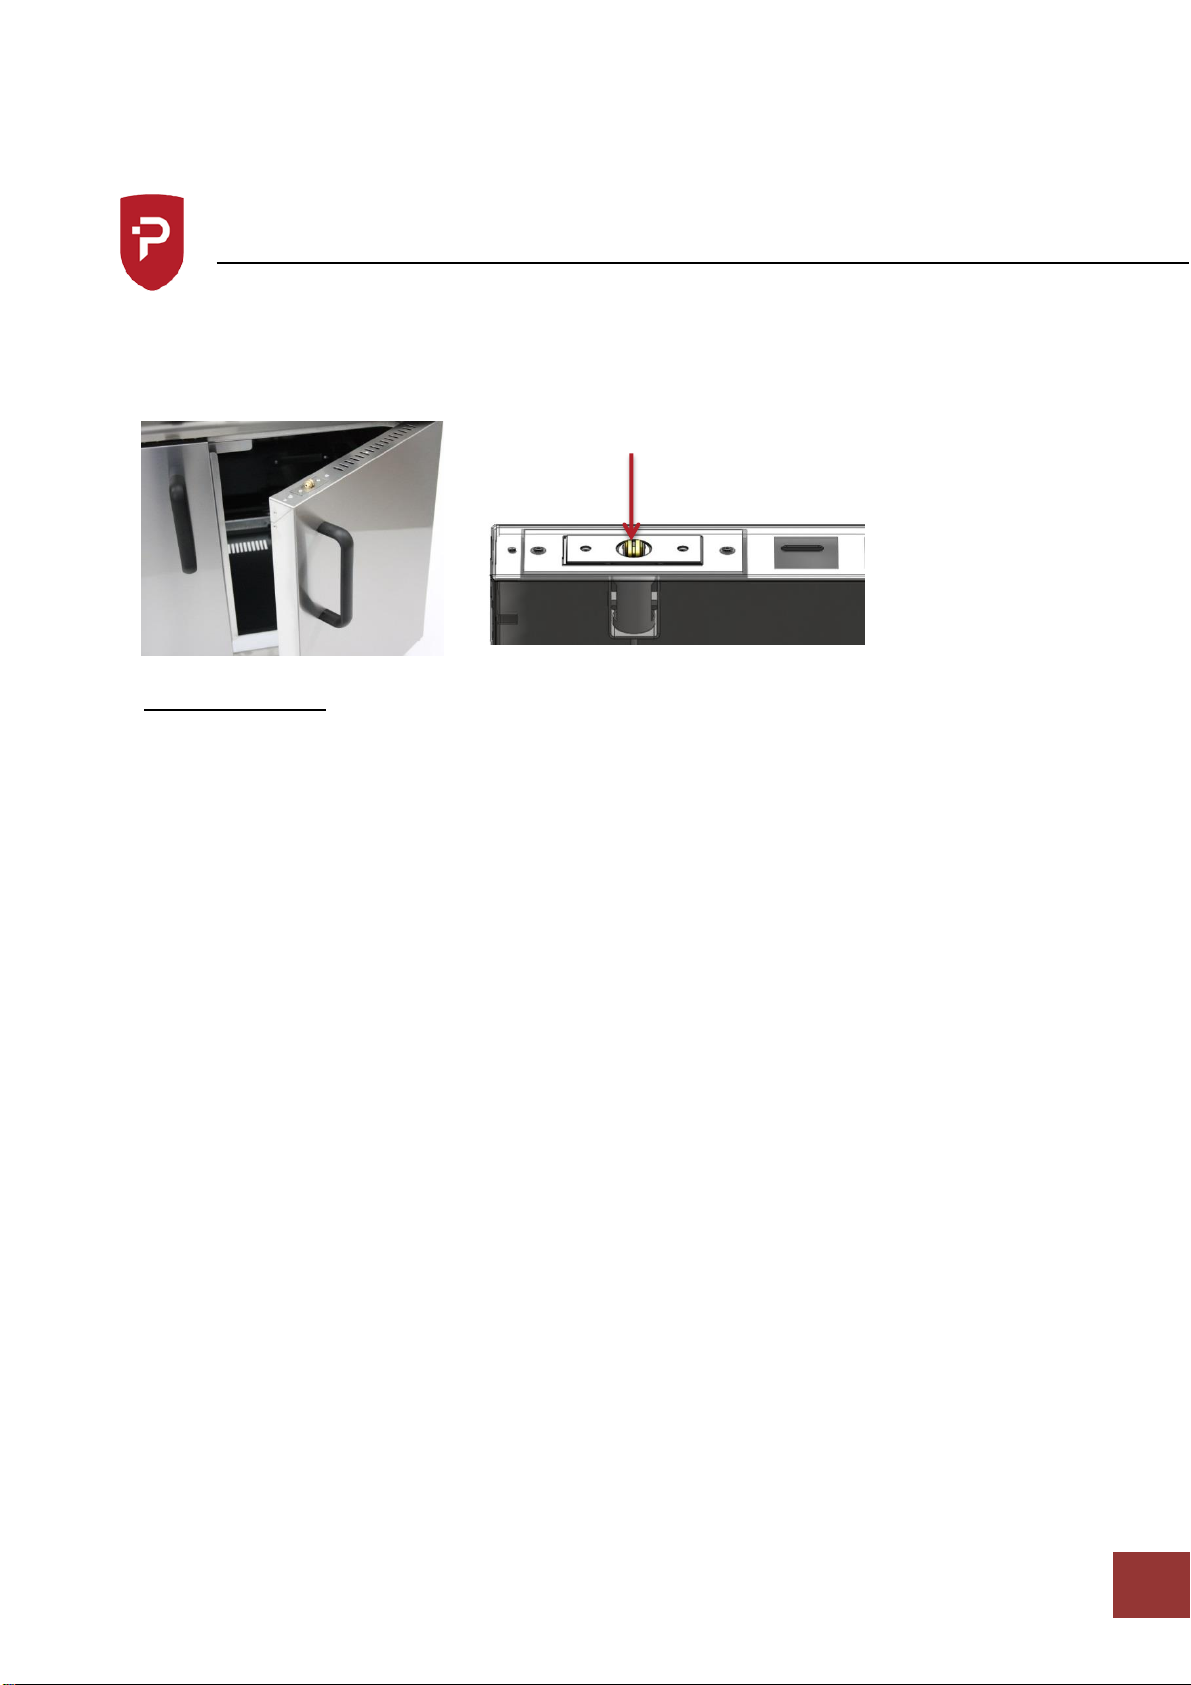
Installation Instructions
Where a quick release coupling is used for horizontal travel such as in commercial catering
appliances it is advisable that the coupling is facing downwards to prevent the ingress of
debris and ensure the hose is formed in to a smooth curve.
All units should have a restraining cable fitted preventing the unit from being pulled away
from the wall and causing the gas hose to become disconnected accidentally.
Operating Instructions
Operating the hob
All burners are fitted with flame failure devices.
1. To light hob unit turn knob to
2. Press in and ignite gas with a match, keep knob held in for 15-20 seconds.
3. Release knob, gas should stay lit, if gas goes out repeat stage 2
4. The burner is now on full gas, to turn gas down, turn knob anti-clockwise, this is the
lowest setting, which is factory set.
5. To turn burners off, turn knob clockwise all the way round.
Parry recommends that the hob is used only with pans that have a minimum diameter of
120mm, and up to a maximum of 295mm diameter. This ensures that there is satisfactory
combustion, and the pan is stable as it sits on the finger of the pan support.
Operating the oven
1. To light oven, open doors, turn oven knob to approximate gas mark 5 and hold tap
knob in, at the same time press the piezo ignitor button on bottom of the oven.
2. After pressing button 2-3 times burner should light.
3. Keep oven knob depressed for 15-20 seconds.
4. Release knob and flame should remain lit, if not repeat above sequence.
5. If burner goes out refer to fault finding chart.
6. When burner stays on oven is ready for use, select gas mark required, turn knob to
setting, oven flame will decrease when desired temperature is reached.