Pauli + Sohn WALK-IN 8888E0-BW User manual

WALK-IN Systemprofil/ WALK-IN system profile – 8888E0-BW
Montageanleitung/ assembly instructions

40
40
Profillänge = Lichtes Maß - 10 mm
length of profile = clearance dimension - 10 mm
Lichtes Maß
clearance dimension
40
40
90°
2800
8
32
32
Montageanleitung – 8888E0-BW
Variante mit einem Glas – Befestigung an der Wand
assembly instructions – 8888E0-BW
version with one glass panel - wall mounted

1
Eckverbinder
corner connector
U-Profil (oberhalb Glas)
mit Silikon fixieren
U profile (above glass)
secure with silicone
Bodenbefestigung
(Schraubvariante*)
floor mount
(screw version*)
Bodenbefestigung
(Klebevariante)
floor mount
(glue version)
Wandbefestigung
wall mount
Überwurfmuffe
coupling sleeve
an dieser Seite kürzen
shorten on this side
an dieser Seite kürzen
shorten on this side
Kürzen Sie die Profile auf die benötigte Länge mit einer Metallsäge.
Befestigungsschrauben für die Bodenbefestigung (Schraubvariante) und
die Wandbefestigung sind nicht im Set enthalten.
* Damit die Wassersperre im Bad durch das nachträgliche Anbohren der unteren
Befestigungsplatte nicht verletzt wird, sollte der Fliesenleger den Befestigungsadapter
vorher in den Bodenaufbau einarbeiten und entsprechend der Beanspruchungsklasse
die richtige Feuchtraumabdichtung nach den anerkannten Richtlinien ausführen.
Shorten the profiles to the required length with a metal saw.
Fastening screws for floor mount (screw variant) and wall mount are not
included in the set.
* To ensure that the water barrier in the bathroom is not damaged by subsequent drilling
of the lower mounting plate, the tiler should work the mounting adapter into the floor
structure beforehand and carry out the correct waterproofing according to the load
class and in accordance with the recognized guidelines.
Verglasungsprofil
glazing profile

2
8888E0-BW
Trennwandstütze Boden-Wand
1 Nut für 8mm Glas
Länge 2800mm
U-Profil als Füllung oberhalb Glaskante zur Decke hin
Oberfläche:
E3/50
E6/C35
E123
Bodenbefestigung (Schraubvariante)
Bodenbefestigung (Klebevariante)
U-Profil (oberhalb Glas)
Wandbefestigung
Eckverbinder
40
40
40
40
90°
2800
8
32
32
1400
32
16
32
8,5
Ø 4,5
1
1
2
2
Montieren Sie die Bodenbefestigung an der Stelle, wo Sie die Trenndwandstütze
positionieren wollen. Können Sie den Boden nicht anbohren, verwenden Sie die
Adapterplatte und den Klebestreifen zum Aufkleben. Die Adapterplatte wird mit
dem Profil verschraubt und der Klebestreifen dann auf die Adapterplatte geklebt.
Fasten the floor mount in the location where you want to position the partition
wall support. If you cannot drill into the floor, use the adapter plate and the
adhesive strip for fastening. The adapter plate is screwed to the profile and the
adhesive strip is then glued to the adapter plate.
Adapterplatte
adapter plate
Schrauben zur Befestigung der Adapterplatte sind im Set enhalten.
screws for fastening the adapter plate are included in the set.
Bodenbefestigung
Bodenbefestigung
Bodenbefestigung (Schraubvariante)
floor mount (screw version)
Bodenbefestigung (Klebevariante):
floor mount (glue version):
Klebestreifen
adhesive strip

3
1 2
Verbinden Sie die beiden Profile an der oberen Ecke indem Sie den Eck-
verbinder mit den Profilen verschrauben.
Connect the two profiles at the upper corner by screwing the corner connector
to the profiles.

4
1 2
Stellen Sie nun das Profil über die Bodenbefestigung oder stellen Sie das Profil
auf die gewünschte Position. Richten Sie das Profil mit einer Wasserwaage aus
und markieren Sie die Position zur Befestigung der Wandbefestigung.
Now place the profile over the floor mount or set the profile to the desired
position. Align the profile with a spirit level and mark the position for fastening
the wall mounting.

5
6
1
1
2
2
Montieren Sie die Wandbefestigung an die markierte Position. Schrauben und
Dübel müssen an die jeweilige bauliche Situation angepasst werden.
Mount the wall mount to the marked position. Screws and dowels must be
adapted to the respective structural situation.
Schieben Sie die Überwurfmuffe auf das Profil. Stellen Sie nun das Profil über
die Bodenbefestigung oder kleben Sie das Profil auf die gewünschte Position.
Der Untergrund muss trocken und frei von Schmutz und Fetten sein. Verschrauben
Sie dann das Anschlussstück mit dem Profil. Schieben Sie die Überwurfmuffe über die
Wandbefestigung und schrauben diese mit dem Gewindestift fest.
Slide the coupling sleeve onto the profile. Now place the profile over the floor
mount or glue the profile to the desired position. The substrate must be dry and
free from dirt and grease. Then screw the connection piece to the profile. Slide
the coupling sleeve over the wall mounting and screw it tight with the set screw.

7
12
Legen Sie die Festverglasungsdichtung in das U-Profil ein. Stellen Sie
das Glas auf Weich-PVC und schieben Sie das Glas in das U-Profil.
Mit dem Festverglasungskeil klemmen Sie das Glas. Dazu nutzen Sie
ein stumpfen Gegenstand und einen Kunststoffhammer. Fangen Sie unten am
Boden an und halten Sie den Fuß gegen das Profil um beim Einschlagen des Fest-
verglasungskeils das Profil nicht zu verschieben. Wenn die Festverglasungs-
dichtung nicht richtig sitzt kann dies noch mit dem Klotzhebel nachgesetzt werden.
Insert the glazing gasket into the U-profile. Place the glass on soft PVC and slide it
into the U-profile. Use the glazing wedge to clamp the glass into the profile. Use a
blunt object and a plastic hammer. Begin at the bottom and hold your foot against
the profile when hammering so the profile does not move. If the glazing gasket does not sit
properly, this can be readjusted with a block lever.
Klotzhebel
block lever
Glas
glass
Festverglasungskeil
fixed clamp wedge
Festverglasungsdichtung
fixed glazing gasket

8
12
Bei Verwendung von 10 oder 12 mm Glas stellen Sie das Glas auf Weich-PVC
und setzen Sie auf die Glaskante aufgeschnittene KU-Schlauchstücke. Schieben
Sie das Glas in das Profil und versiegeln Sie das Glas mit Silikon im Profil.
When using 10 or 12 mm glass, place the glass on soft PVC and place cut
pieces of plastic tubing on the edge of the glass. Slide the glass into the profile
and seal the glass with silicone in the profile.
aufgeschnittenes KU-Schlauchstück
cut plastic tube

9
12
Das U-Profil, zum verschließen der restlichen Nut, kann mit einer Metallsäge auf
das gewünschte Maß abgelängt werden. Befestigen Sie das U-Profil mit Silikon
in dem Profil.
To close the opened slot, the U-profile can be cut to the desired length with a metal
saw. Secure the U-profile in the profile with silicone.

10
12
Versiegeln Sie die Trennwandstütze am Boden mit einem für den Untergrund ge-
eigneten Silikon. Säubern Sie die zu versiegelnden Stellen von Schmutz und Fetten.
Seal the partition wall support to the floor with a silicone suitable for the substrate.
Clean the areas to be sealed from dirt and grease.

Pauli + Sohn GmbH
Industriestraße 20
51597 Morsbach
Telefon: +49(0)2294-9803-0
Eisenstraße 2 • 51545 Waldbröl
Telefon: +49(0)2291-9206-0
Stand: 09/2020
www.pauli.de
Die U-Profile dürfen nur mit warmen Wasser und einem weichen Tuch
(z.B. Microfaser) feucht abgewischt werden und gegebenfalls nachgetrocknet
werden. Scharfe, aggressive, alkalische oder chlorhaltige Reiniger, Scheuermittel
(z.B. Stahlwolle) oder Lösungsmittel dürfen nicht verwendet werden.
The U-profiles may only be cleaned with warm water and a soft cloth (e.g.
microfiber) and dried if necessary. Sharp, aggressive, alkaline or chlorine-based
cleaners, scouring agents (e.g. steel wool) or solvents may not be used.
Pflegehinweis
Care instructions
Table of contents
Popular Enclosure manuals by other brands
CommScope
CommScope FOSC-450-BS Installation instruction
Cooler Master
Cooler Master HAF Stacker 915F installation guide

Clas Ohlson
Clas Ohlson GD25604 quick start guide
Rosewill
Rosewill FBM-X1 Quick user guide
peerless-AV
peerless-AV KIP640-S manual
Macpower & Tytech
Macpower & Tytech IceCube User manual & installation guide
Vantec
Vantec NexStar-HX NST-387S3-BK installation guide
Danfoss
Danfoss VLT AutomationDrive FC 302 operating guide
SilverStone
SilverStone Kublai KL06 instruction manual
Fusion
Fusion ENCOUNTER EN-AB1120 quick start guide
SIIG
SIIG 2.5" USB 2.0/eSATA to SATA Enclosure Quick installation guide
StarTech.com
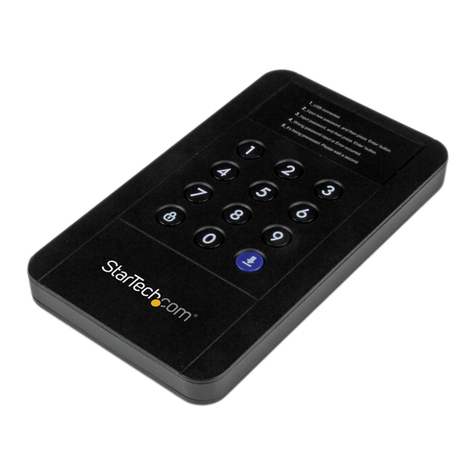
StarTech.com S2510BU3PWPS user guide
