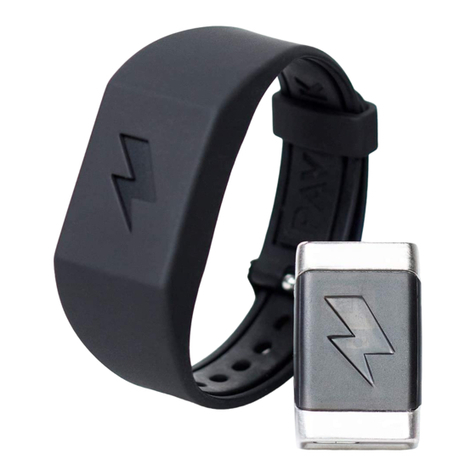
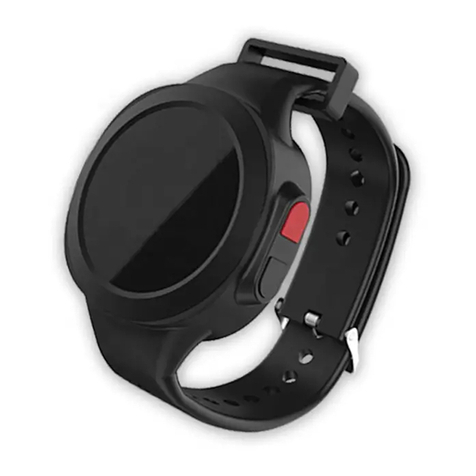
Pavlok 3 User manual

All buttons can be re-programmed to perform various other actions
When you rst receive the device, we recommend you connect the provided USB-C
cable to the Pavlok device and plug the other end into any charging source (e.g. a
computer or a charger). If done correctly, you should see a single LED pulsating,
indicating your Pavlok 3 is now charging.
The LED lights will advance from the red LED towards the green LED as the unit
charges. To quickly check the battery level, you can double-tap the face of the device
with your ngers.
Charging
The device automatically turns on when you plug it in the charger and remains active
as long as it’s charged.
Turning on the device
If you are having trouble pairing, visit pavlok.com/troublepairing
Alternatively, you can pair the device through your phone or tablet’s settings. Please
accept the pairing and notication requests to enable full app functionality.
Your Pavlok will vibrate twice when it is paired.
We recommend you pair your Pavlok through the Pavlok 3 app. You will be prompted
to do so when you install the app, or you can press the Pavlok remote button in the
upper right corner.
Bluetooth pairing
Pavlok 3 Quick Start Guide

Press button 1 for the device to vibrate
Hold button 1 to turn on/off all LED lights for 30 seconds (Candle mode)
Hold button 2
to turn off an active alarm
to snooze active Hand Detect mode for 30 minutes
Press Button 2
to feel your programmed stimulus (snap by default)
to snooze an active alarm for 5 mins
Press button 3 to hear a chime
Hold button 3 to play a short melody
Search for “Pavlok 3” in the AppStore (iOS users)
or Play Store (Android users) and install the app
to your phone or tablet.
Downloading the app
Guide to buttons
1. If a rmware update is available, you will be prompted to update your rmware
when you log into the app for the rst time.
3. You can also see if an update is available inside the Pavlok 3 app under Settings.
2. If a rmware update is available during any other time, you will see a rmware
update banner at the top of the screen in the app - simply tap the banner to
update the rmware.
Updating the firmware
Make sure you download the Pavlok 3 app and not
the original Pavlok app.
You can also nd the apps at:
pavlok.com/apps
Scan the following QR code:

LED guide
Pavlok 3 has a set of lights (LEDs) above the buttons. The lights are used to report
many dierent conditions and events, only the most important of which are listed
here.
Low battery: red light periodically ashing three times in succession means the
battery level is low and that you should recharge soon.
How long does a full charge last? Battery life should be 6-10 days, depending on actual use.
How do I turn off the alarm? To turn o an active alarm, hold down button 2 for about 2.5
seconds. If done correctly, your Pavlok should vibrate twice. You can disable this functionality in the
app, in which case only doing Jumping Jacks or scanning a QR code can turn o the alarm.
How do I snooze an alarm? You can do this by a quick press of button 2. Alarms with the snooze
functionality disabled in the app cannot be snoozed. When an alarm is snoozed, the programmed
stimulus for it will not occur for 5 minutes, and every 10 seconds the middle yellow LED will blink
quickly 3 times. After the snooze ends, the regular alarm stimulus will resume.
Is Pavlok water resistant? Pavlok 3 received IP 67 rating, designating it as “protected against the
events of temporary submersion (10 minutes) in lukewarm water up to 1 metre / 3 feet”. What this
means is that, while Pavlok 3 will survive a shower, don’t take it for a swim. Don’t worry, Pavlok 3
is fully safe to use even if wet. You can use mild soap and water (or isopropyl alcohol) to clean it.
Why do I sometimes not feel the electric snap? There are 10 dierent levels of intensity the
snap can be set to. The reason why you might not feel the lower levels is because they might not be
strong enough to pass through your skin - just keep increasing the level until you nd the intensity
that you can feel. Also, please note that you might need to adjust the intensity from time to time,
depending on factors such as room humidity and changing dryness of your skin.
Clock not set: two quick double ashes of the red light followed by a long red ash
indicates that the clock is not set - reconnect with the app to restore the clock and
alarms.
iOS pairing problem: under rare circumstances, Bluetooth pairing with iOS can stop
working. If the device starts repeating a pattern of 2 all-yellow ashes followed by 3
red ashes then you will need to go to the Bluetooth menu in the iOS Settings, tap
on the icon next to your device, and select “Forget Device” in order to be able to pair
again normally.
Snap: red light indicates snap is charging; yellow lights will animate during the actual
snap; green light will ash if the charge was successfully delivered (if you don’t see it
the bottom of the Pavlok might not have good contact with your skin - try adjusting
the position or tightening the wrist band).
FAQ

This device complies with Part 15 of the FCC Rules. Operation is subject to the following two
conditions:
(1) This device may not cause harmful interference.
(2) This device must accept any interference received, including interference that may cause
undesired operation.
This equipment has been tested and found to comply with the limits for a Class B digital device,
pursuant to part 15 of the Federal Communication Commission (FCC) rules. These limits are
designed to provide reasonable protection against harmful interference in a residential installation.
This equipment generates, uses and can radiate radio frequency energy and, if not installed and
used in accordance with the instructions, may cause harmful interference to radio communications.
However, there is no guarantee that interference will not occur in a particular installation. If this
equipment causes harmful interference to radio or television reception, which can be determined by
turning the equipment off and on, the user is encouraged to try to correct the interference by doing
one or more of the following measures:
• Reorient or relocate the receiving antenna.
• Increase the separation between the equipment and receiver.
• Connect the equipment into an outlet on a circuit different from that to which the receiver is
connected.
• Consult the dealer or an experienced radio/TV technician for help.
Any Changes or modications not expressly approved by the party responsible for compliance
could void the user’s authority to operate the equipment.
RF EXPOSURE WARNING
The device has been evaluated to meet general RF exposure requirements. The device can be used
in portable exposure conditions without restriction.
ISED Regulatory Statements
This device complies with ISED Canada license-exempt RSS standard(s). Operation is subject to
the following two conditions: (1) this device may not cause interference, and (2) this device must
accept any interference, including interference that may cause undesired operation of the device.
Déclarations réglementaires de l’ISED
Cet appareil est conforme à la (aux) norme(s) RSS exempte(s) de licence d’ISED Canada.
Son fonctionnement est soumis aux deux conditions suivantes : (1) cet appareil ne doit pas causer
d’interférences, et (2) cet appareil doit accepter toute autre interférence reçue, y compris les
interférences pouvant entraîner un fonctionnement non désiré.
USA
Canada
Japan EU
FCC ID: 2AMX803
ISED ID: 23029-3 CAN ICES-3 (B)/NMB-3(B)
Regulatory Information
Table of contents
Other Pavlok Watch manuals
