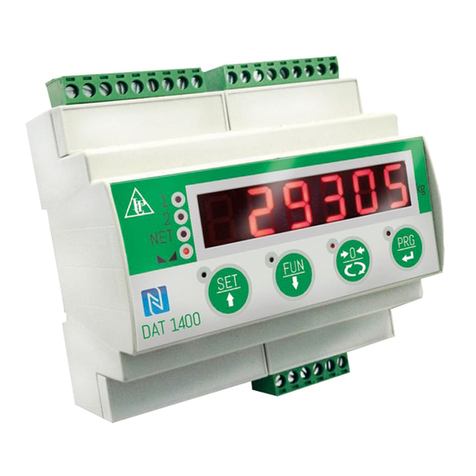
Pavone Systems DAT 200 User manual

PAVONESYSTEMS
TECHNICAL MANUAL
DAT 200 Serial and PROFINET/ETHERNET IP weighing Indicator/Trasnmitteri
Software version PW310

Page II

Rel ID 20070101 SW 0.2
Page 1
TABLE OF CONTENTS
WARNINGS.................................................................................................... Page 2
INTRODUCTION ............................................................................................. Page 3
TECHNICAL FEATURES..................................................................................... Page 4
INSTALLATION ................................................................................................ Page 5
FRONT PANEL................................................................................................. Page 8
USING THE KEYBOARD ................................................................................... Page 8
DISPLAY INDICATIONS..................................................................................... Page 9
VIEWING, ZEROING THE WEIGHT AND AUTOTARE.......................................... Page10
SET-UP ............................................................................................................ Page12
FLOW CHART MENU....................................................................................... Page13
WEIGHING SET-UP MENU ............................................................................... Page14
WEIGHT CALIBRATION MENU ......................................................................... Page15
WEIGHING PARAMETERS SET-UP MENU ........................................................... Page16
SERIAL COMMUNICATIONS PORTS MENU ....................................................... Page 18
MAPPING FUNCTION SETTING........................................................................ Pag. 21
SERIAL COMMUNICATION PROTOCOLS .......................................................... Pag. 22
FIELDBUS PROTOCOLS .................................................................................... Page 28
TROUBLESHOOTING ...................................................................................... Page40

Page 2
WARNINGS
READ this manual BEFORE operating or servicing on the instrument.
FOLLOW these instructions carefully.
SAVE this manual for future use.
CAUTION
The installation and maintenance of this instrument must be allowed
to qualified personnel only.
Be careful when you perform inspections, testing and adjustment
with the instrument swithced on.
Failure to observe these precautions may be dangerous.
DO NOT allow untrained personnel to work, clean, inspect, repair
or tamper with this instrument.

PAVONE SISTEMI
Page 3
INTRODUCTION
The DAT 200 is a weight transmitter to be matched to the load cells to detect the weight in every situation.
The module is easy to install and can be mounted on 35 mm DIN rail.
The display allows easy reading of the weight, the configuration parameters and errors.
The 3 keys located below the display and protected by the front door allow the Operator to perform
the functions of ZERO and CALIBRATION as well as datasheet and real calibration.
The DAT 200 use RS232 serial port with ASCII and Modbus RTU protocols to be connected to PC, PLC
and remote units.
The presence of the most common fieldbus, also allows interfacing the transmitter with any supervision
device currently offered by the market.
Fieldbus available:
• DAT 200/ETHERNET IP: weight transmitter with serial output RS232 and ETHERNET IP.
• DAT 200/PROFINET: weight transmitter with serial output RS232 and PROFINET.
IDENTIFICATION PLATE OF THE INSTRUMENT
WARNINGS
The following procedures must be performed by qualified personnel.
All connections must be performed when the instrument is switched
off.
It’s important to communicate this data, in the event of a request for information. The software
number and release number are shown on the cover of the manual and also displayed when
the instrument is switched on.

Page 4
TECHNICAL FEATURES
Power supply 24 Vdc ±10% protected against reverse polarity.
Protection with resettable fuse.
Max. absorption 2W
Isolation Class II
Operating temperature -10°C ÷ +50°C (max. humidity 85% non-condensing)
Storage temperature -20°C ÷ +60°C
Weight display Numerical with 5 red led digits and 7 segments (h 7
mm)
Led 2 LEDs of 3 mm
Keyboards 3 mechanical keys (behind the red front door)
Overall dimensions 112 x 119 x 35 mm (l x h x w), including terminal
boards.
Installation Brackets for DIN section or OMEGA bar
Material Self-extinguishing Blend PC/ABS
Connections Removable terminal boards with screws, pitch 5.08
mm
Input of the load cells with following features max. 4 of 350 Ω in parallel (or 8 cells of 700 Ω).
Load cell excitation 4 Vdc
Linearity <0.01% of the full scale
Temperature drift <0.001% of the full scale / °C
Internal resolution 24 bit
Measuring range -3.9 ÷ +3.9 mV/V
Digital filter To be selected from 0.2 Hz to 25 Hz
Number of decimals weight 0 ÷ 4 decimal places
Calibration of zero and full scale From the buttons.
Check of load cell cable interruption Always present
Serial ports RS232 half duplex
Baud rate 2400 ÷ 115200 baud
Maximum cable length 15m
Fieldbus PROFINET / ETHERNET IP
Connection RJ45 connector
Buffer size 128 byte IN - 128 byte OUT
In compliance with the standards EN61000-6-2, EN61000-6-3, EN61326-1 for EMC
EN61010-1 for Electrical Safety
UL: FILE NO E474362

35
101
112
119
2423222120191817
-
+
0 V
+24 Vdc
GND
+ Vdc
Page 5
INSTALLATION
GENERAL INFORMATION
The DAT 200 consists of a motherboard, to which are added the options available, accommo-
dated in a plastic enclosure for DIN rail 35mm.
The DAT 200 should not be immersed in water, subjected to jets of water and cleaned
or washed with solvents.
Do not expose to heat or direct sunlight.
OVERALL DIMENSIONS
ELECTRICAL INSTALLATION
DAT 200 is equipped with removable screw, pitch 5.08 mm.
The load cell cable must be shielded and channeled away from power cables to pre-
vent electromagnetic interferences.
INSTRUMENT POWER SUPPLY
The instrument is powered through the terminals 23 and 24. The
power supply cable must be channeled separately from other cables.
The internal circuit is galvanically isolated from the supply voltage.
Power supply voltage: 24 Vdc± 10%, max. 2W

12345678910111213141516
EXC-
EXC+
SENSE+
SENSE-
SIG-
SIG+
SHIELD
123456
78910111213141516
2423222120191817
TXD
RXD
S.GND
SHIELD
2+SGN
3-EXC
6+EXC
1-SGN
5+SNS
4-SNS
7SHD
+EXC
-EXC
+SGN
-SGN
SHD
1
2
3
4
5
+EXC
-EXC
+SGN
-SGN
SHD
1
2
3
4
5
+EXC
-EXC
+SGN
-SGN
SHD
1
2
3
4
5
+EXC
-EXC
+SGN
-SGN
SHD
1
2
3
4
5
J-BOX CGS4/C
+EXC
-EXC
+SGN
-SGN
SHD
+EXC
-EXC
+SGN
-SGN
SHD
+EXC
-EXC
+SGN
-SGN
SHD
+EXC
-EXC
+SGN
-SGN
SHD
24 VDC 2W
DAT 200
SENSE+
SENSE-
S.GND
SIGN+
SIGN-
EXC+
EXC-
+VDC
RXD
TXD
GND
SHD
10
23
24
5
2
7
4
3
6
9
8
1
+24V
FIELDBUS
25 PIN CONNECTOR
Page 6
LOAD CELL CONNECTIONS
The cable of the load cell (or load cells) should not be channeled
with other cables, but has to follow its own path.
The instrument can be connected up to maximum 4 load cells of 350
ohm in parallel. The supply voltage of the load cells is 4 Vdc and is
protected by temporary short circuit.
The measuring range of the instrument involves the use of load cells
with a sensitivity of up to 3.9 mV/V.
The cable of the load cells must be connected to terminals 2-7 of
the 7-pin removable terminal board. In the case of 4-wire load cell
cable, jump terminals 2 with 5 and 3 with 4.
Connect the cell cable shield to the terminal 1.
In the case of the usage of two or more load cells, use special jun-
ction boxes (CEM4/C or CSG4/C).
SERIAL COMMUNICATION
RS232:
The RS232 serial port is always present and can handle several
protocols.
To achieve the serial connection use a suitable shielded cable and
make sure to ground the screen at one of the two ends: to pin 13,
if attached on the side of the instrument, to the ground, if connected
on the other side.
The cable must not be channeled with power cables, maximum length
of 15 meters (EIA RS-232-C).

1 TX+
2 TX-
3 RX+
6 RX-
1 8
Crossover ETHERNET cable
Direct ETHERNET cable Direct ETHERNET cable
Router/Switch/Hub
Page 7
FIELDBUS CONNECTION
Pin Description
1 TX+
2 TX-
3 RX+
4
5
6 RX-
7
8
To connect to the MASTER Profinet /Ethernet IP, use a standard twisted
pair Ethernet cable with RJ45 connector.

Page 8
FRONT PANEL
The DAT 200 transmitter has a front door that protects the 5 digits display, the 2 status LEDs and the
three front keys.
In operating mode the display shows the weight and the LEDs indicate the status of weight (net-gross).
The set-up parameters are easily accessible and can be changed through the use of the three front keys
used to select, edit, confirm and save the new settings.
DISPLAY
On the 5 digits display the lowest digit indicates the least significant digit.
Normally, the display shows the measured weight. During set-up procedure,
the display shows the sequence of the parameters and theyr values, that allow
the operator to set the instrument.
LED INDICATORS
In the upper part of the display there are two LED indicators:
LED 1 (on = net weight, off = gross weight, flashing = peak)
LED 2 (on = tare entered, off = no tare)
In bar-graph view, both LEDs are flashing.
USING THE KEYBOARD
The instrument is programmed and controlled through the 3 keys keyboard, with the following functions:
KEY FUNCTIONS IN WEIGHT INDICATION CONDITIONS
sShort press: Display switches from Gross to Net weight.
Long press: Display switches from Weight to Peak
uShort press: Display switches from Numerical to Bar-graph of to gross weight.
Long press: Zeroing of the weight/peak displayed.
tShort press: Sending the data to the serial line (if the manual protocol was selected)
Long press: Set point programming (DAT 200/A)
t u Pressed at the same time: Accessing the Main Menu
KEY FUNCTION IN THE MANAGEMENT OF THE set up MENU
sExits the set up menu or returns to the higher level.
uAccess its submenu, or access the set up or confirms the selected parameter.
tGoes to the next menu item.
KEY FUNCTION IN THE MANAGEMENT OF THE SET UP SUBMENU
sIncreases the blinking digit / select the higher value.
uSelect the next digit. If the flashing digit is the last one, confirm the value and end the set
up / selection.
tDecrease the blinking digit / select the lower value.

P
J
3
1
0
r
E
J
0
1
-
0
-
L
n
o
C
A
L
E
f
b
U
S
N
-
C
O
N
E
r
N
E
N
E
t
h
1
P
Page 9
DISPLAY INFO
When the instrument is switched ON the test-display is performed. In sequence there are: software
code, software version and hardware version.
profb Profibus DP hardware module
It’s important to communicate these data in the event of a request for assistance.
ERRORS NOTIFICATION
In the operating mode, the display can report the following error codes.
-Overload: The weight applied to the load cell exceeds by more than 9 divisions the maximum
capacity of the weighing system.
O-L O-L : No signal from the load cells or outside of the field of measurement mV/V.
noCAL NOCAL: Transmitter not calibrated. Recalibration needed.
Efbus EFBUS: Fieldbus interface absent or not working.
n-coN N-COM: Fieldbus interface of the instrument is not connected to the network.
E-CrC E-CRC: CRC error during communication with the fieldbus interface of the instrument.
ErNEN ERMEM: Error in E2PROM. You can reprogram the instrument to the factory settings, erasing
any calibration by pressing ukey.
profn Profinet hardware module

8
3
6
5
3
5
2
0
☞
▼
◆
▲
▼
◆
▲
8
3
6
5
☞
✹
✹
▼
◆
▲
▼
◆
▲
-
-
-
-
-
-
-
-
-
-
-
☞
3 sec.
▼
◆
▲
▼
◆
▲
1
6
2
5
0
☞
3 sec.
▼
◆
▲
▼
◆
▲
Page 10
VIEWING, ZEROING THE WEIGHT AND AUTO TARE
When the instrument is switched ON, the display shows the current net weight.
VIEWING THE NET WEIGHT/GROSS WEIGHT
Press the key sto toggle between the net weight to gross weight
and vice versa. The value displayed is reported by the LED 1 (lit:
net weight). If you have not entered the tare, the net weight is equal
to the gross weight.
In case of negative weight, it is displayed the minus sign before the
most significant digit. In case of negative weight greater than 9999,
the minus sign is displayed alternatively with the most significant digit.
NUMERICAL VIEWING/BAR-GRAPH OF THE GROSS WEIGHT
Press the key uto toggle from numerical display of the weight to
the graphical representation of the gross weight and vice versa.
The resolution is limited to 15 divisions and therefore each segment
represents 1/15 of full scale.
The bar-graph display is indicated by both LEDs flashing.
ZEROING THE WEIGHT
This operation is performed to correct small movements of the zero
of the scale. To perform the reset function, it is necessary to switch
the display to gross weight.
Press ukey for 3 seconds to zeroing gross weight.
The gross weight reset command does not run under the following
conditions:
Unstable weight.
Gross weight greater (positive or negative) than the 0BAND value set.
If you previously performed the autotare function, this is automatically
delayed. When the instrument is switched off, it is restored the value
of Zero made during calibration.
AUTOMATIC TARE
To perform the auto-tare function, it is necessary to switch the display
to Net weight (LED 1 on).
Press ukey for 3 seconds to to perform Autotare function. Led 2
switched on. The automatic tare command does not run under the
following conditions:
Unstable weight.
Negative gross weight.
Gross weight greater than the maximum capacity.
If the automatic tare is performed with gross weight = 0, the display
shows again gross weight (Led 1 switched off).

3
7
4
6
3
7
4
6
3 sec.
3 sec. Reset Peack
☞
▼
◆
▲
▼
◆
▲
✹
3 sec. Back
Page 11
PEAK FUNCTION
The peak is related to the gross weight and is always calculated,
even when it is not displayed. When you see the peak, the top LED
flashes.
To store the value press skey for 3 seconds. To go back to weight
display press skey for 3 seconds. To reset the peak value press u
key for 3 seconds.
The calculated peak is not retained at power off.

Page 12
SET UP
GENETAL INFO
All functions of the DAT 200 can be and amended through a simple setup menu, shown on the next
page. All the settings activated or selected are stored even after switching off the transmitter.
The DAT 200 is factory set. See the “default” parameters on the following pages.
At the first installation in the field some parameters need to be amended to obtain a correct indication
of the displayed weight (datasheet adjustment).
This procedure may be required when you purchase the DAT 200.
The settings of the setup menu can be changed using the three front buttons.
CHANGING AND ENTERING THE PARAMETERS:
The setup parameters are grouped into a number of main menus.
To access the setup menu press simultaneously for 3 seconds uand t keys.
The display shows the message ConfG which is the first of the main menus
Use the tand skeys to select the menu to edit
Press the ukey to enter the selected menu.
KEY PROGRAMMING FUNCTION DURING THE MAIN MENU
sExits the programming menu or returns to the higher level.
uAccess the relevant menu or programming or confirm the selected parameter.
tSkip to the next menu.
KEY FUNCTION DURING PARAMETERS PROGRAMMING
sIncreases the blinking digit / select the higher value.
uSelect the next digit. If the flashing digit is the last, confirms the value and ends the pro-
gramming / selection.
tDecreases the blinking digit / select the lower.
The parameters of the menu can take selectable values and numerical value.
s key. Increment the flashing digit, select the next alternative value, goes back to the higher level
or exits the setup menu.
u key. Select the next digit, confirm the setting of the selected parameter, access the set up para-
meters and access the set up submenu.
tkey. Decrement the flashing digit, select the previous alternative value.
NB. To exit and save the changed data, press the sbutton until the indicator returns to the operating
mode.

ConFG
CAL1b
PAraN
SEr
Nap
▼▼ ▼ ▼ ▼
3 sec.
☞▼
◆
◆◆◆ ◆ ◆
▼▼ ▼ ▼
CapaC
CAL
F1Lt
CoN1
▼▼ ▼ ▼
sEnst
StAb
baud1
t-Nap
▼▼ ▼ ▼
dspdJ
Aut-O
FrN-1
r-Nap
▼ ▼
s1GnL
OtraC
Addr1
dELEt
▼ ▼
Oband
NodE
▼
dELta
dELay
▲
▲
▲
▲
◆▲
▲
▲
▲
▲
▲
▲
▲
▲
▲
▲
▲▲
▲ ▲
▼
▲ ▲ ▲ ▲ ▲
Normal View
▼
ConFG
▼
▲
Used
to
Perform
Calibration
▼
IP
▼
SubNt
▲
▲
Page 13
FLOW CHART MENU

ConFG
◆
▼
CapaC
▼
sEnst
▼
dspdJ
▼
s1GnL
▲
▲
▲
▲
▲
▼
CaL1b
AnaLG
▲
▼
◆Enter Value ◆
◆
◆Enter Value ◆
◆Select Value ◆
▲
0378
◆
.
Page 14
CONFIGURATION PARAMETERS
Through the setting of the parameters listed below, the DAT 200 Full Scale datasheet calibration is
performed. You must complete these steps with the zero calibration described on the next page. The
procedure ensures, in the absence of mechanical problems, a good accuracy of the system (maximum
error <1% FS).
CapaC CAPACITY OF THE WEIGHING SYSTEM
It defines the value corresponding to the sum of the rated capacity of the
load cells. In case of single load cell systems and “N” fixed supports,
enter the capacity value of the load cell for the total number of sup-
ports. This figure represents the full scale value of the weighing system.
Following the change of the parameter value, the datasheet calibra-
tion of the weight is recalculated.
Values: from 1 to 99999
Unit: the same of that displayed
Default: 10000
SEnst LOAD CELLS SENSITIVITY
Set the value corresponding to the sensitivity average of the load
cells, in mV/V. The instrument accepts values between 0.5 and 4
mV/V. If no values are entered, the unit assumes it is 2 mV/V.
Following the change of the sensitivity value, the datasheet calibra-
tion is recalculated.
Values: from 0.5000 to 4.0000 mV/V
Default: 2.0000
dspdJ DIVISION VALUE
The ratio between the maximum capacity of the system and the
division value is the resolution of the system (number of divisions).
Following the change of the capacity of the system, it is automatically
selected the division value to the best of 5000 divisions.
Following the change of the division value, if the maximum capa-
city does not change, the calibration of the weight is automatically
corrected.
Selectable Values:
0.0001 - 0.0002 - 0.0005
0.001 - 0,002 - 0,005
0.01 - 0.02 - 0.05
0.1 - 0.2 - 0.5
1 -2 - 5
10 - 20 - 50
Default: 1
s1GnL TESTING THE LOAD CELLS SIGNAL
It’s displayed the signal acquired from the load cells expressed in
mV / V.

ConFG
CALIb
PAraN
▼▼
◆
CAL
◆
▲ ▲ ▲
▼
▲
35
2-oh
CAL
0
CAL
19982
00000
CAL
30000
30000
◆
◆
◆
Load Weight
Enter Value
◆
With
unload
scale
Page 15
CALIB - CALIBRATION
The calibration method below, is used to correct or reduce the linearity error of the weighing system.
The calibration should be performed with the use of sample weight or pre-weighed product on a sample
weighing system.
Before proceeding with the calibration of the full scale, always perform the zero calibration.
During the calibration phase, the display shows the weight intermittently with the inscription CAL.
ATTENTION: at power off without exiting the set-up menu, the programming executed are not stored.
NB In the event that after calibration the system has linearity errors, verify that the structure weighed is
completely free from mechanical constraints.
ZERO CALIBRATION
Perform the operation when the system is empty (including the fixed
tare) and the weight is stable. The zero of the system is done by pres-
sing the tkey. The display shows 2-Ok confirming the operation.
The weight displayed resets and the display shows CAL alternated
by 0. It is possible to repeat this operation more times.
CALIBRATION OF FULL SCALE
Prior F.S. calibration load the sample weight on the system and wait
for the stabilization; the display shows a weight value.
Press the skey to adjust the weight. The display shows 00000 with
the first digit flashing.
Use the sor tkeys, enter the weight value starting with the first
digit flashing. Switch to the next digit by pressing u. The confir-
mation of the last digit performs the correction of the weight. The
display shows CAL alternated to the weight entered.
If the weight value is higher than the resolution, it is not accepted
and the display shows an error message for a few seconds.
You can always repeat the F.S. calibration.
EXIT FROM CALIBRATION MENU
The exit from the menu CALIb is done by pressing ukey.
The display shows CALIb. To store the new setting and exit the setup
menu, press the skey.

dELta
▲▼
PAraN
◆
▼
F1Lt
▼
StAb
▼
Aut-O
▼
OtraC
Oband
▲
▲
▲
▲
▲
▲
▼
▼
SEr
CAL1b
▲
▼
◆Select Value ◆
◆Select Value ◆
◆Select Value ◆
◆Enter Value ◆
◆Enter Value ◆
◆Enter Value ◆
▲
Page 16
PARAM - WEIGHING PARAMETERS
The parameters in this menu allow to adjust the timing of the acquisition and updating of the display
and the manual or automatic zeroing that the transmitter performs.
f1Lt WEIGHT FILTER
This parameter adjusts the refresh speed of the display and the
analog output.
Low values of the filter speed up the display refresh.
High values of the filter slow down the display refresh.
Value Updated Response
0 123 Hz 25 Hz
1 62 Hz 16 Hz
2 50 Hz 8 Hz
3 33 Hz 5 Hz
4 16 Hz 2.5 Hz
5 12 Hz 1.5 Hz
6 10 Hz 1 Hz
7 8 Hz 0.7 Hz
8 6 Hz 0.4 Hz
9 4 Hz 0.2 Hz
Default: 5
stab WEIGHT STABILITY
This parameter defines the divisions number needed to deem the
weight stable.
A large number of divisions allows the transmitter to detect quickly
the weight stability, which is needed when executing tare and print
commands.
Value Change
0 Always stable weight
1 Stability reached quickly
2 Stability reached with medium parameters
3 Stability reached accurately
4 Stability reached with the highest accuracy
Default: 2
aut-O AUTOZERO AT POWER ON
This parameter defines the maximum resettable weight upon power
on.
This operation corresponds to a zero calibration of the system and
is executed only if the weight is stable and below the set value.
Value from 0 to the value of the CAPAC parameter.
Default: 0

dELta
▲▼
PAraN
◆
▼
F1Lt
▼
StAb
▼
Aut-
O
▼
OtraC
Oband
▲
▲
▲
▲
▲
▲
▼
▼
SEr
CAL1b
▲
▼
◆Select Value ◆
◆Select Value ◆
◆Select Value ◆
◆Enter Value ◆
◆Enter Value ◆
◆Enter Value ◆
▲
Page 17
Otrac TRACKING THE ZERO
This function allows a momentary zero calibration compensating the
eventual temperature drift of the weight.
At power off it automatically returns to the previous calibration.
The maximum weight resettable by this parameter is 2% of the range
of the system.
To disable this feature, use the value 0.
Value Change
0 Control OFF
1 0.5 div/sec
2 1 div/sec
3 2 div/sec
4 3 div/sec
Default: 0
Oband ZERO BAND
This parameter defines the number of divisions resettable by pressing
the zero front button or Input 1.
Values: from 0 to 200
Default: 100
dELta WEIGHT DELTA
It defines the minimum number of divisions needed to discriminate
two consecutive weighing in serial transmissions of the weight.
Values: from 0 to 200
Default: 20

PAraN
SEr
ConFG
▼ ▼
◆
▼
CON1
▼
bAud1
▼
FrN-1
▼
Addr
▼
NodE
d
ELay
▲
▲
▲
▲
▲
▲
▲ ▲ ▲
▼
◆Select Value ◆
◆
Select Value
◆
◆Select Value ◆
◆Enter Value ◆
◆Select Value ◆
◆Enter Value ◆
▼
IP
▼
Subnt
▲
▲
◆
Enter
Value
◆
IP
1
◆
Enter
Value
IP255
From IP 1 to IP 4
◆
Enter
Value
◆
sub
1
◆
Enter
Value
sub255
From Sub 1 to Sub 4
Page 18
SER - SETTING THE SERIAL COMMUNICATION PORTS
CON1 COM1: It defines the use of the COM1 serial port.
None: Serial communication OFF
Contn: Continuous transmission of the weight string. It can be used,
for example, to drive a remote display. See details in the relevant
paragraph.
Deman: When the Operator presses the front button or through Input
2, a string of weight is transmitted. The command is accepted if the
weight is stable. Between two consecutive transmissions the weight
must have a variation of at least the parameter “Weight delta”.
Autom: It’s automatically transferred to a string of weight when the
weight stabilizes at a value higher than the minimum weight (20 divi-
sions). Between two consecutive transmissions the weight must have
a variation of at least the value set in the parameter “Delta Weight”.
Slave: ASCII protocol. See details in the relevant paragraph.
Modbs: MODBUS RTU (slave) protocol. See details in the relevant
paragraph.
Selectable Values:
None
Contn
Deman
Autom
Slave
Modbs
Default: Modbs
baud1 BAUD RATE COM1
It defines the RS232 serial port baudrate.
The value must be set to the same value of the PC / PLC or remote
display.
Selectable Values:
2400
4800
9600
19200
38400
57600
115200
Default: 9600
Table of contents
Other Pavone Systems Transmitter manuals
