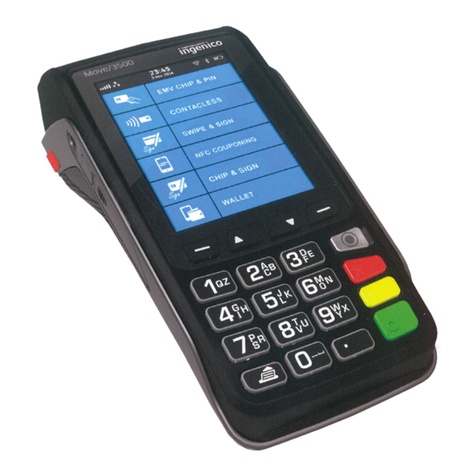
PayFacto PAX A77 User manual

PAX A77
Configuration and Setup Guide
April, 2023

PAX A77 .......................................................................................................................................................................................... 1
Configuration and Setup Guide ................................................................................................................................... 1
......................................................................................................................................................................................................1
Introduction................................................................................................................................................................................ 3
A77 Terminal Overview......................................................................................................................................................... 4
Terminal Hardware ................................................................................................................................................................ 4
Charging the Terminal.......................................................................................................................................................... 6
Configuring the Terminal Display Language.............................................................................................................. 7
Configuring the Terminal Network Connections ..................................................................................................... 8
Installing the SIM Card.......................................................................................................................................................... 8
Configuring the Terminal Wi-Fi Connection.............................................................................................................. 10
Terminal Activation............................................................................................................................................................... 12
Overview.............................................................................................................................................................................. 12
Activate Terminal................................................................................................................................................................... 12
Email.......................................................................................................................................................................... 13
Phone Number ..................................................................................................................................................... 13
Set Passwords.......................................................................................................................................................................... 15
Powering the Terminal On or Off.................................................................................................................................... 16
Terminal Input Options........................................................................................................................................................ 16
Card Payment Options ........................................................................................................................................................ 17

•
•
•
•
•
Introduction
The PAX A77 mobile payment terminal is perfect for most applications, whether retail or hospi-
tality (bar/restaurant/hotel). Thissetup guide describes the following topics:
A77 Terminal Overview
Terminal Hardware
Initial terminal configuration
Charging the Terminal
Configuring the Terminal Display Language
Configuring the Terminal Network Connections
Installing the SIM Card
Configuring the Terminal Wi-Fi Connection
Activating the terminal
Terminal Activation
Activate Terminal
Set Passwords
Working with the terminal
Powering the Terminal On or Off
Terminal Input Options
Card Payment Options

A77 Terminal Overview
This document will introduce you to your payment terminal as well as guide you through the
process of preparing and configuring it in order to quickly begin processing payments.
Your PAX A77 payment processing terminal comes with the following:
Terminal Hardware
The following illustrations show the location of the main terminal features and hardware:
Payment terminal
1.
USB to USB Type-C
charging cable
2.
AC power outlet
3.

1. Speaker
2. Front camera (not used)
3. Color touchscreen
4. Contactless payment reader
5. Rear camera
6. Battery cover
7. Scan button
8. Power button
9. Volume control button
10. 3.5mm audio jack
11. Scanner
12. USBType-C charging port
13. Magnetic stripe reader
14. Chip card reader

Charging the Terminal
After you remove the terminal and accessories from the box, you need to charge the terminal
before you can use it. The pre-installed battery may have a protective cover on the contacts to
prevent the possibility of a short circuit during transport.
To charge the terminal:
Turn the terminal over.
1.
On the back of the terminal at the bottom left corner, there is a notch you can slide a coin
or fingernail into to lift the battery cover.
2.
Lift the battery cover off the terminal. You should notice a protective tab at the top of the
battery.
3.
Lift the battery from the terminal and remove the protective tab.
4.
Re-install the battery and pushon the bottom of the battery to seat it correctly.
5.
Re-install the battery cover on the terminal and push down to secure it and turn the termi-
nal over.
6.
Insert the USB cable in the AC outlet and connect the outlet to an AC plug.
7.

NOTE: The terminal’s charging port may have a pro-
tective cover; you will need to remove it before in-
serting the USB Type-C connector.
Configuring the Terminal Display Language
By default, the terminal displays all information in English. This procedure explains how to
change the terminal’s display language if necessary.
IMPORTANT! Selecting a different language changes
all text that appears on the terminal.
To change the terminal display language:
Insert the USB Type-C connector in the terminal’s charging port, located at the top. The ter-
minal begins charging.
8.
On the terminal’s main screen, touch the Settings icon.
1.
On the
Settings
screen, touch the Please Input Password field and use the keypad to type
the password: eitherpax9876@@or 9876.
2.
Touch the checkmark icon on the keypad when you are done and touch OK.
3.
On the
Settings
page, scroll to the bottom and touch System.
4.
On the
System
page, touch Languages & input.
5.
On the Languages & input page, touch Languages.
6.
On the
Language preferences
page, touch Add a language.
7.
On the
Add a language
page, scroll to and touch the desired language.
NOTE: If the language has localized variants, select
the appropriate regional option for your country.
8.

•
•
Configuring the Terminal Network Connections
The terminal requires a network connection to communicate with the payment processor server
to process transactions.
The PAX A77 is a mobile payment terminal that can connect to mobile (LTE) and wireless (Wi-Fi)
networks.
Mobile network access is required for delivery and transportation use, but it can also serve as a
backup connection if your Wi-Fi network reception is unreliable in certain areas.
Installing the SIM Card
Configuring the Terminal Wi-Fi Connection
Installing the SIM Card
If you plan to use your terminal outside of your usual wi-fi network, you need to install the mo-
bile SIM card, provided by PayFacto or your mobile communications provider. The SIM card will
connect you to a mobile network, allowing you to process payments anywhere the terminal has
reception. Mobile network access can also serve as a backup connection if your wi-fi network re-
ception is unreliable in certain areas. The terminal uses the micro-SIM card size.
If the selected language does not appear automatically, you can drag the language to the
top of the list, as shown below:
9.

NOTE: If you plan to use your terminal only on your
wi-fi network, you can skip this procedure and pro-
ceed directly to Configuring the Terminal Wi-Fi Con-
nection.
To install the mobile SIM card:
Make sure the terminal is powered off and turn the terminal over.
1.
On the back of the terminal at the bottom left corner, there is a notch you can slide a coin
or fingernail into to lift the battery cover.
2.
Lift the battery cover off the terminal.
3.
Lift the battery from the terminal to remove and set aside.
4.

The terminal should identify the SIM card and configure the mobile network settings automati-
cally.
Configuring the Terminal Wi-Fi Connection
This section explains how to turn Wi-Fi on and connect to your network.
To connect to your wireless network:
The terminal has illustrations for the different cards it can accept. Insert your SIM card in
the space identified as SIM1so the diagonal corner is facing the top left side.
IMPORTANT! The SIM card does not require much
force to insert.
5.
Re-install the battery and pushon the bottom of the battery to seat it correctly.
6.
Re-install the battery cover on the terminal and push down to secure it and turn the termi-
nal over.
7.
Power on the terminal by pressing and holding the Power button for 3 seconds.
8.
On the terminal’s main screen, touch the Settings icon.
1.
On the
Settings
screen, touch the Please Input Password field and use the keypad to type
the password: eitherpax9876@@or 9876.
2.
Touch the checkmark icon on the keypad when you are done and touch OK.
3.
On the
Settings
page, touch Network & Internet.
4.
On the
Network & Internet
page, touch Wi-Fi.
5.

On the
Wi-Fi
page, if Wi-Fi is Off, touch the toggle to turn it on. If Wi-Fi is already on, a list of
available networks appears.
6.
From the list of available networks, touch the name of the network you want to connect to.
7.
Enter the password for the selected network and touch CONNECT.
TIP: You can touch Show password before typing
to ensure you are entering the password correct-
ly.
8.
After the terminal displays Connected for the selected network, touch the Back icon to re-
turn to the
Network & Internet
page.
9.

•
•
•
•
•
1.
Terminal Activation
PayFacto uses a self-service terminal activation procedure designed to save time while also pro-
viding better security. The new activation procedure applies only to countertop and mobile PAX
payment terminals using the Android operating system. The new procedure applies to:
All new merchants activating their terminals for the first time
Any existing merchants adding new payment terminals
Any existing merchants receiving replacement terminals
Overview
After you configure the terminal's network connection(s) and power on the terminal, the proce-
dure comprises of 2 parts:
Activate the terminal with a One Time Passcode (OTP)
Set the Administrator and Merchant passwords
NOTE: If you have multiple new payment terminals,
you need to perform the activation procedure on
each terminal individually.
Activate Terminal
After configuring the terminal’s network connection, you need to start the PayFacto payment
application to complete the remaining steps. Terminal activation requires you to input a One
Time Passcode (OTP) that PayFacto sends to the email address or telephone number registered
to your account.
IMPORTANT! To receive the OTP on your phone, your
registered phone number must be able to receive
text messages (SMS). If you cannot receive text mes-
sages, select the email option to get the OTP.
To activate the payment terminal:
Touch the PAYMENT icon on the main screen. The
Welcome To Your Payment Terminal
screen appears.
NOTE: The terminal may need to download host
and security parameters; this can take a few mo-
ments.

2.
3.
4.
5.
In the top right corner of the screen, your terminal ID (TID) appears; confirm that the num-
ber on the screen matches the TID on the label on the back of your terminal. The TID will
not appear on your terminal screen after you complete the activation process.
IMPORTANT! If the TID does not match, call Pay-
Facto immediately.
Touch anywhere on the screen to begin the activation process.
Touch the desired option to receive the OTP.
Email Phone Number
Touch the Send Code button.
IMPORTANT! The OTP code is valid for 15 minutes
after you receive it. If you wait more than 15 min-
utes to enter the OTP, the terminal will display an
error and you will have to request a new OTP.

6.
7.
After you receive the 6-digit activation code, use the on-screen keypad to enter the code
on the terminal screen.

8.
9.
10.
•
•
•
•
1.
2.
3.
4.
If you enter the code incorrectly, a red exclamation appears to indicate that the code is
incorrect.
Re-enter the code, or touch Resend Code to obtain a new OTP.
After you enter the OTP correctly, the payment application displays the
Set Administra-
tive Password
screen to configure your terminal passwords.
Set Passwords
To prevent unauthorized individuals from changing the terminal’s configuration, you need to
set the Administrator and Merchant passwords. These passwords restrict access to certain func-
tions on the terminal.
When setting your passwords, you must respect the following parameters:
Passwords must be 6 characters long
The Administrator and Merchant passwords cannot be the same (can’t match)
You cannot use the same digit 6 times consecutively (for example: 111111 or 777777)
You cannot use 6 consecutive numbers, either ascending or descending (for example:
123456 or 987654)
To set your Administrator and Merchant passwords:
On the
Set Administrative Password
screen, use the on-screen keypad to enter a 6-digit
passwordin the Admin Password field and touch the Next icon on the keypad.
On the
Confirm Administrative Password
screen, re-enter the password in the Admin
Password field and touch the Next icon on the keypad.
On the
Set Merchant Password
screen, use the on-screen keypad to enter a 6-digit
passwordin the Merchant Password field and touch the Next icon on the keypad.
On the
Confirm Merchant Password
screen, re-enter the password in the Merchant Pass-
word field and touch the Next icon on the keypad.
Your payment terminal is now ready for use.

Powering the Terminal On or Off
To power the terminal on, press and hold the power key on the right side of the terminal for 2-3
seconds.
To power off the terminal:
NOTE: Avoid allowing the terminal’s battery to run
down to 0%. The terminal requires the battery to be
at least at 8% capacity to process a transaction. It is
strongly recommended that you charge the terminal
overnight or during non-business hours.
Terminal Input Options
Your terminal operators and your customers enter information and respond to prompts using
the terminal’s touch screen. The application prompts you and your customers on the next ac-
Press and hold the power key on the right side of the terminal for 2-3 seconds.
1.
Touch the Power off icon and then touch Power off again.
2.

tion to perform.
Card Payment Options
There are three (3) ways for a customer to use their payment card with the terminal:
Insert the chip card
and enter a PIN
Swipe the card’s mag-
netic strip
Tap the card for con-
tactless payment
Table of contents
Other PayFacto Touch Terminal manuals
